In this age of Artificial Intelligence (AI) driven video apps like TikTok and Instagram Reels, people are looking to create high-quality video content quickly and effortlessly. The truth is there are thousands of video editor apps on the App Store that can help you do this to an extent. But one app that takes your mobile video creation to an elevated level is VITA App: Video Editor & Maker. It is entirely free with no in-app purchases. In this full review, let us see what it offers, how to use it on the iPhone, and is it worth your attention!
Features of VITA App – Video Editor & Maker
The first thing I wanted to clear is you can use VITA App: Video Editor for much more than just short, quickly consumable clips – like YouTube Intros, Halloween themed videos, vlogs, etc. There are tons of pre-made templates so that you can instantly and comfortably start creating (more on it later). Apart from that, here are some highlights:
- You can use GIFs in your video from GIPHY.
- Use copyright-free stock video clips for your projects.
- Use your photos as stickers.
- Have Picture in Picture video effect in the clip.
- Capability to use texts in video with clean, professional pleasing fonts with various styles, shadows, and animations.
- Use various video ratios like 1:1 (square), 16:9 (widescreen for YouTube, etc.), 9:16 (for mobile consumption), 3:4 (perfect for Instagram), and many more.
In addition to the above points, here are some more that are worth mentioning briefly.
Adjust Playback Speed
This lets you change the video clips’ speed. You can either slow it down (up to 0.1x) or accelerate it up to 10x. With a combination of slow and fast clips, you can create some breathtaking animations that can match professional bloggers.
Add Background Music and Voice Effects to Your Clips
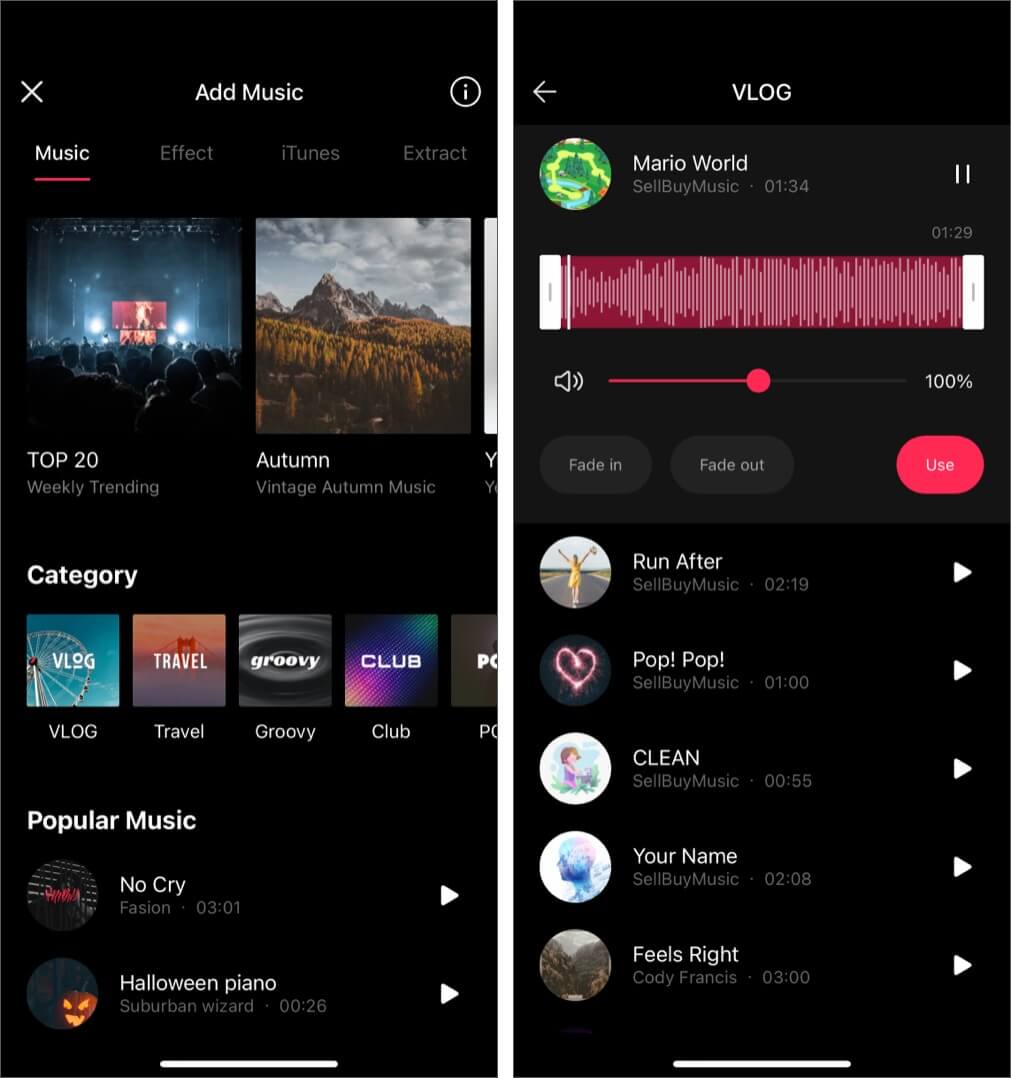
Videos say half the picture, and good music compliments the other half. Without sad, romantic, upbeat, or catchy audio, the video fails to prick the right nerve. VITA App: Video Editor has a robust ‘Add Music’ section. You can use the tones it offers (impressive library), add audio effects, use DRM free songs locally stored in your iPhone Music app, or even extract the audio from a video and use it in your ongoing project.
Video Filters
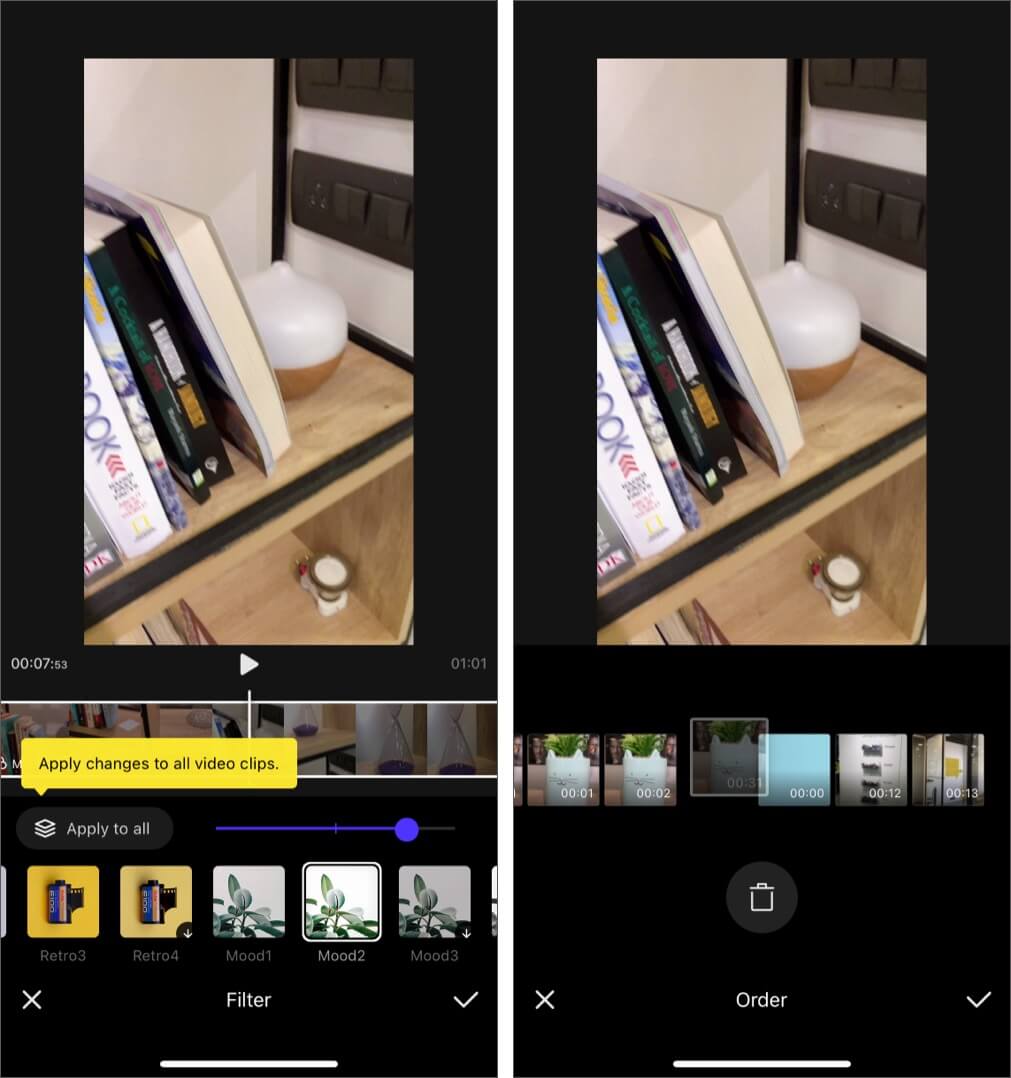
Over two dozen video effects like retro, mood, food, vlog, portrait, travel, film, and nature make your creation vivid. You can choose multiple effects if you have several clips in the timeline or tap on ‘Apply to all’ and have the same filter throughout the entire video.
Stunning Video Templates
This is one of the primary USP (unique selling point) of the VITA app. Templates are abundant in number covering various categories. They let you jumpstart your project and (to be frank) significantly minimize the efforts. You can preview multiple templates and choose the one that feels right.
Full HD Video Support
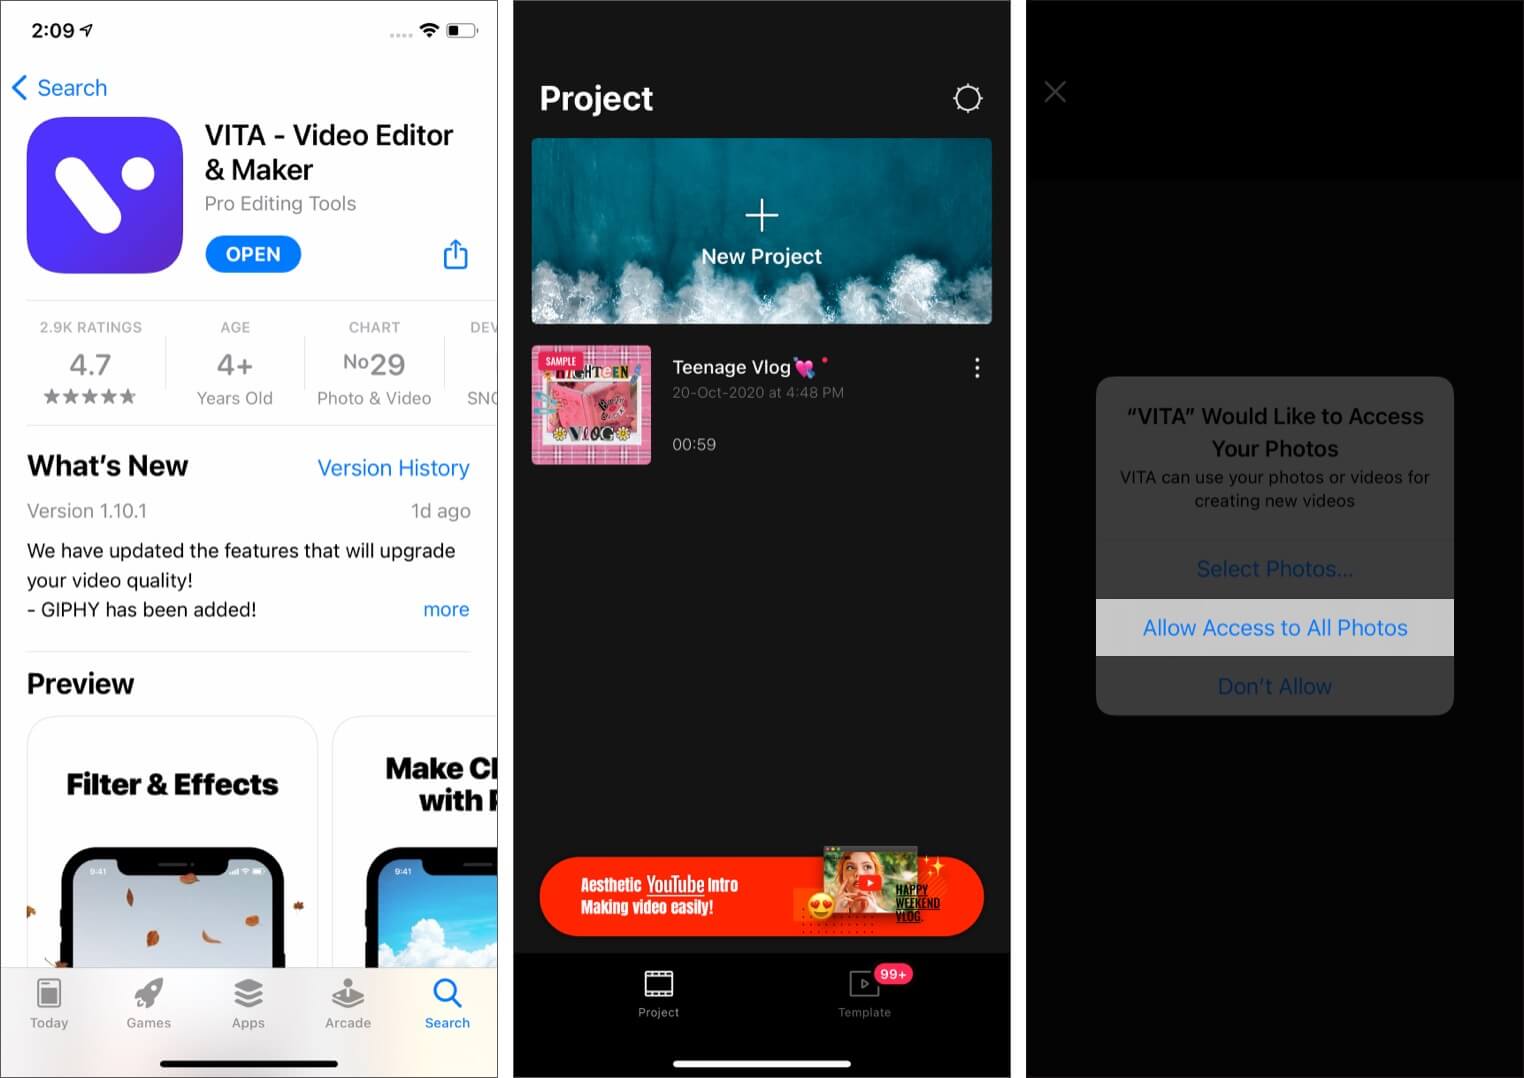
The free VITA App does not cut corners and lets you export your videos in full 1080p for crisp quality. This makes them worth uploading to YouTube, Instagram, TikTok, Twitter, Facebook, and anywhere else you wish to showcase your masterpiece. To change the resolution, tap on the Settings icon from the top right of the very first ‘Project’ screen.
Several Easy Editing Tools
The app has powerful editing tools that let you split the clip, choose start & endpoints, tweak the video speed, reverse the video clip, add animations, rotate, change the order of clips, change or blur the background, and more. VITA App packages all these features in a clean, easy to use bottom row, which makes incorporating these tools quickly to your edits.
Now that you know about the app’s major highlights, here’s is a brief rundown of steps to create a video using it.
How to Make Stunning Videos with the VITA iPhone App?
- Download the VITA app on your iPhone and launch it.
- Now, you may tap on ‘Template’ from the bottom, browse through the collection of awesome pre-made styles, and choose one. Or, tap on New Project from the top and begin from scratch. I will be doing this. Also, make sure to allow the app to access your photos and videos.
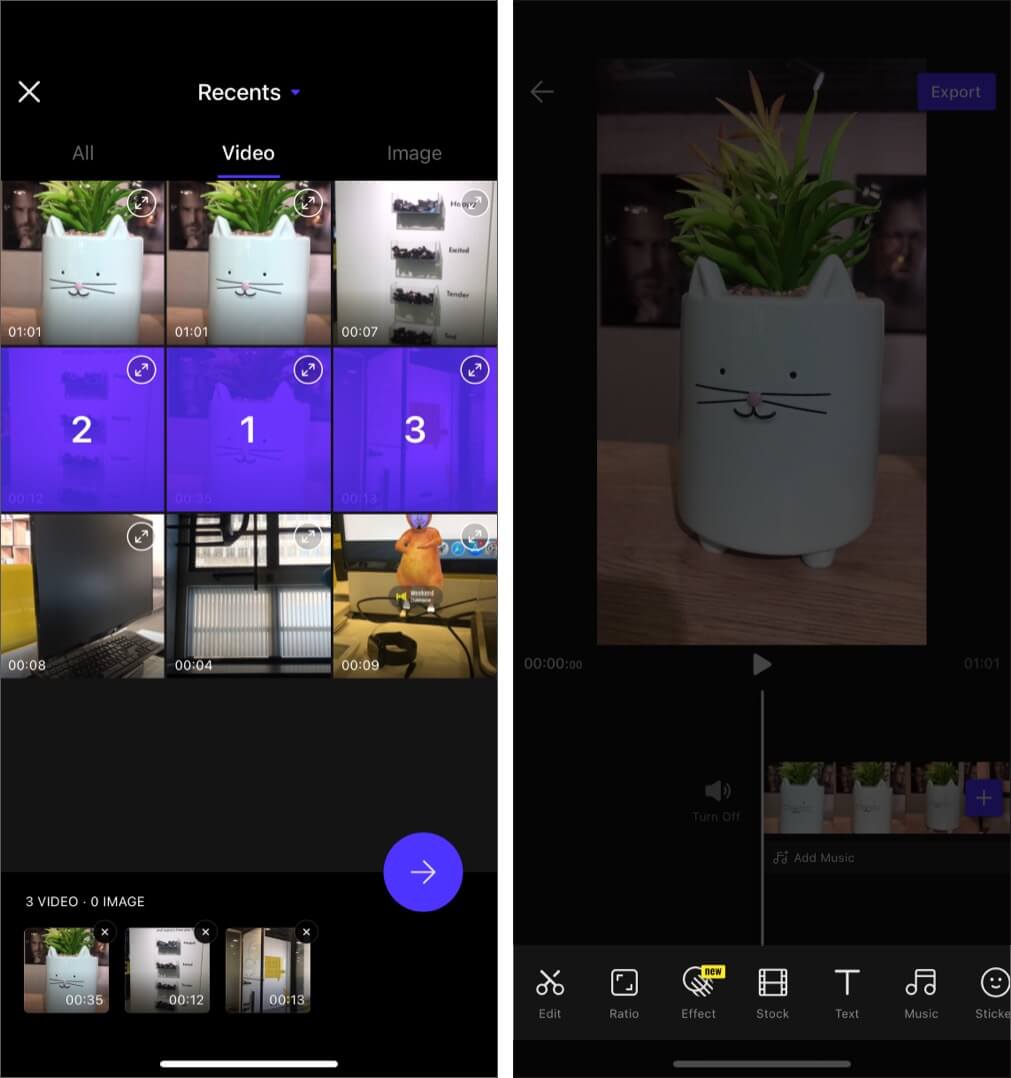
- Tap on the videos to select them. Next, tap on the arrow button.
- You are now in the editing timeline. This has the tools necessary for video editing. Most are self-explanatory and easy to use. Feel free to take them for a spin. I am concisely describing how to use some of the most important ones below.
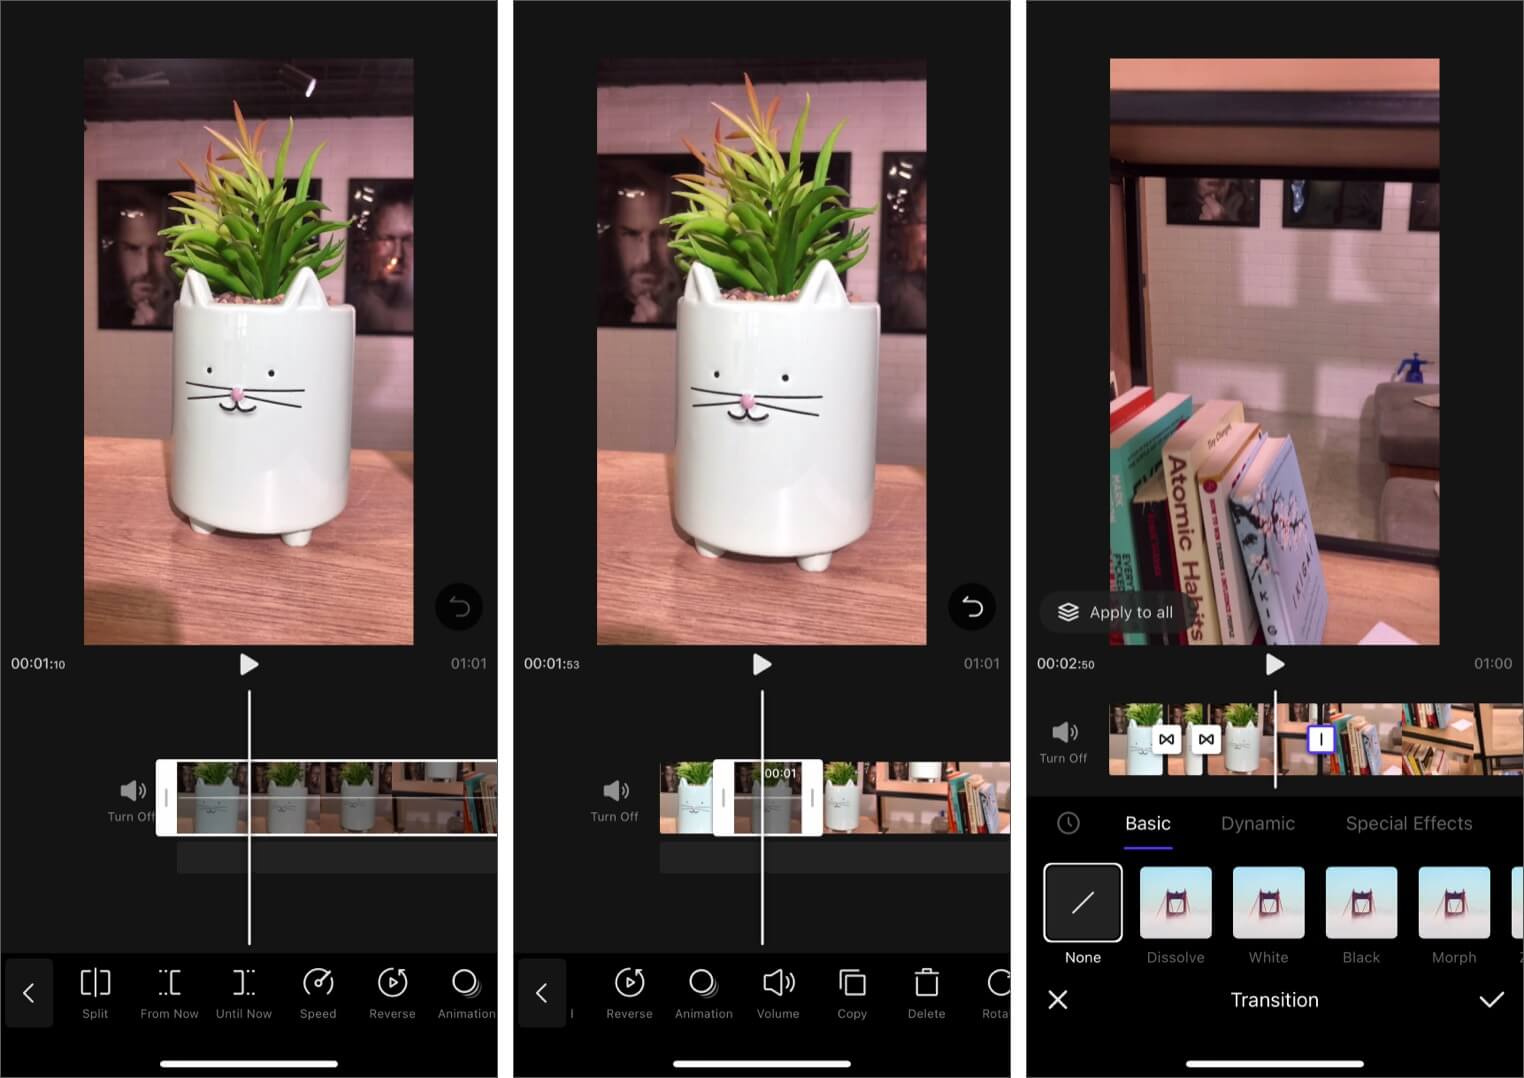
- Edit: Drag the video strip a bit. Now, you can split (divide) the clip. After that, select a clip, and make use of Speed, Reverse, Animation, Volume (use it to turn off video’s background audio, if needed), and other such options. After splitting the clip, tap on the small white squares, to add transition effects.
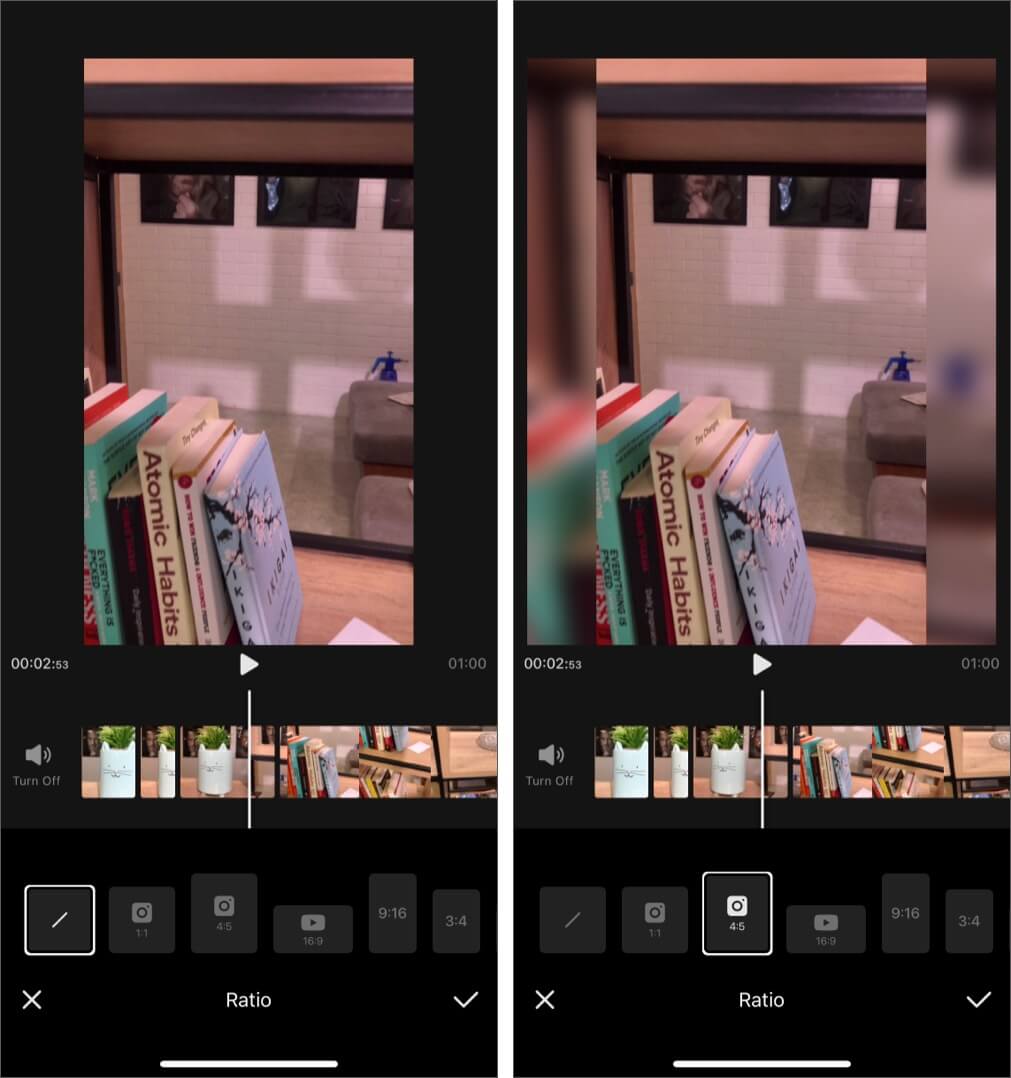
- Ratio: Use this button to make your video in square shape, wide landscape, fit for vertical mobile, etc.
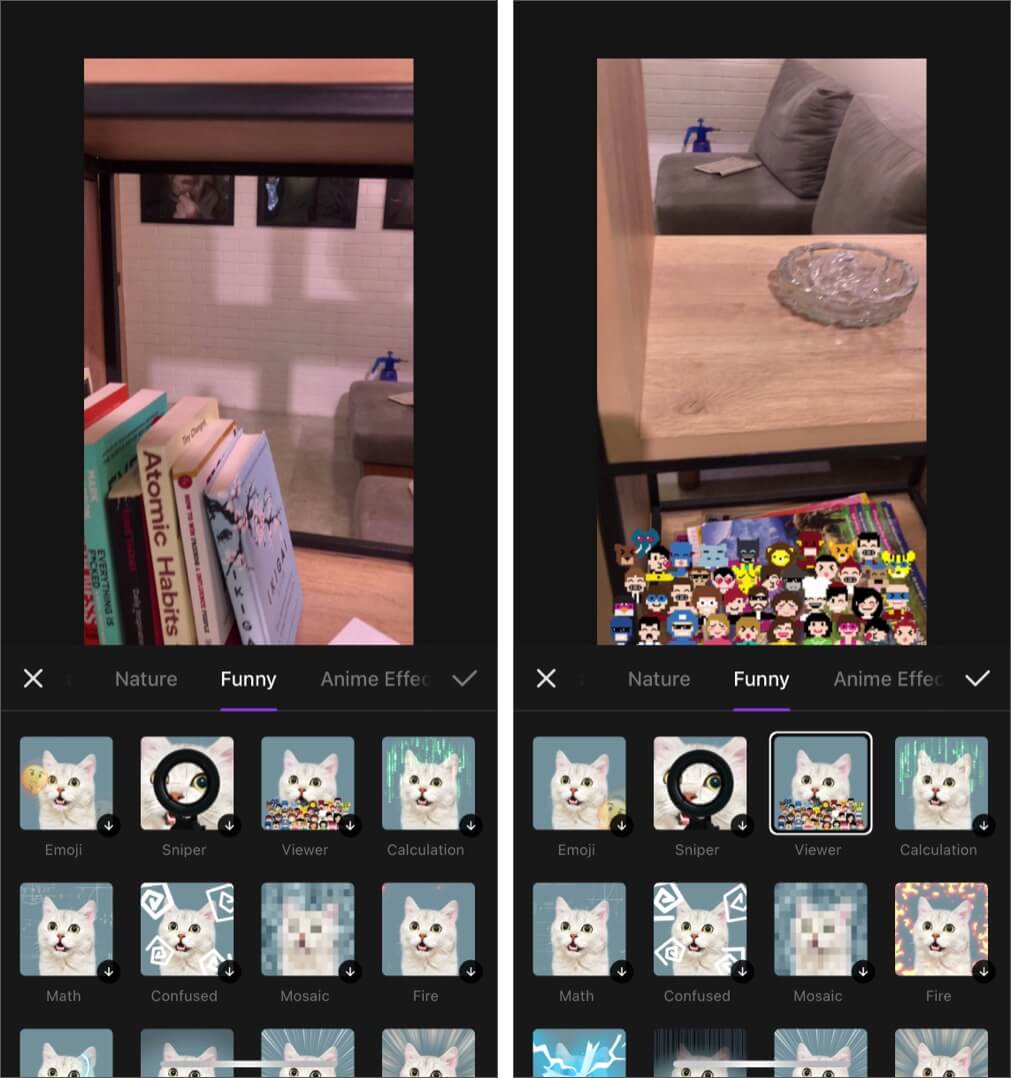
- Effects: There are tons to choose from. See which one is suitable for you and tap to add it to the video. In the timeline, touch on the ends of the effect (or video, etc.) to decrease its duration (length).
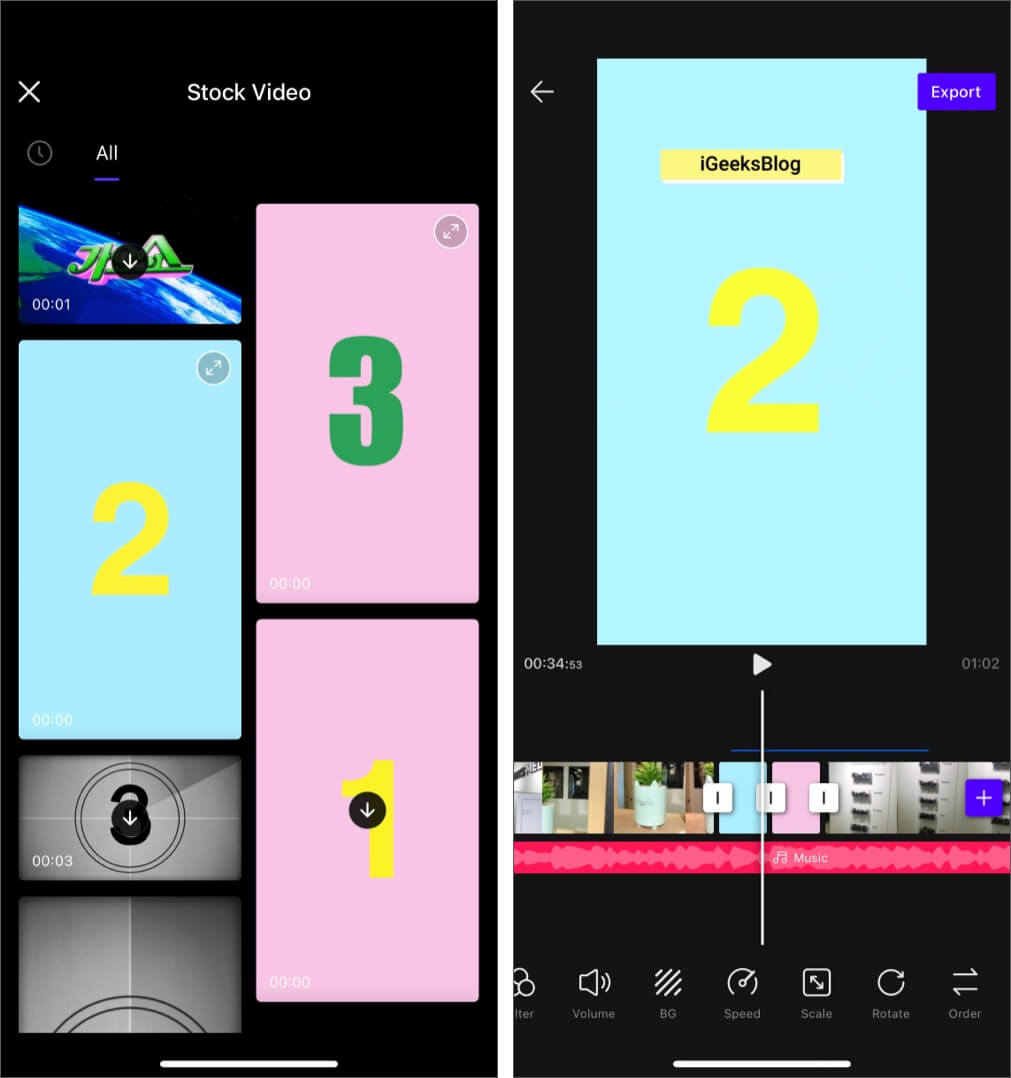
- Stock: Using this, you can download and use some free, small video clips in your project.
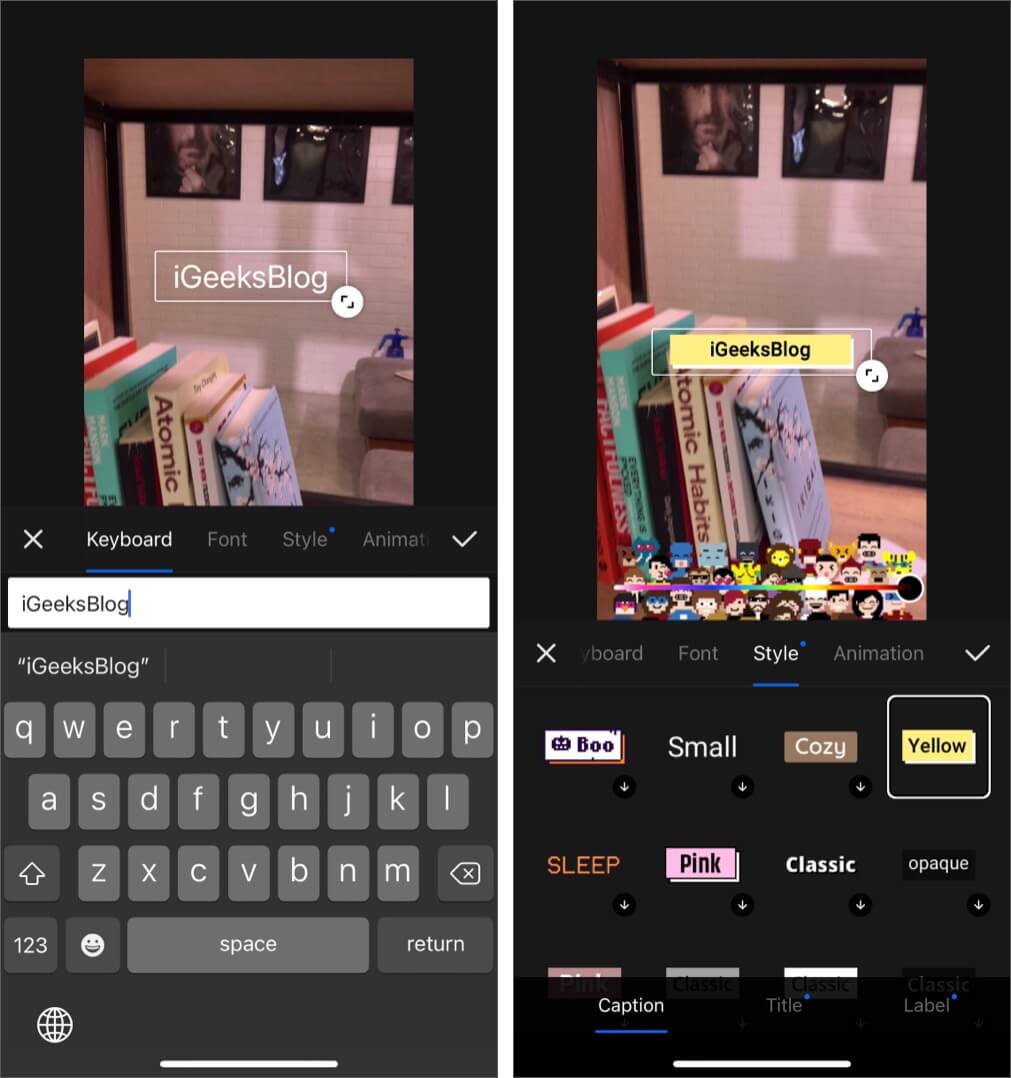
- Text: This lets you add the desired text in your videos. You can choose various fonts, styles, and animations. Feel free to increase its size, drag it anywhere, rotate, etc. You also have the helpful option to use Sticker or GIFs from GIPHY.
- Music: Tap on it to add the desired sound to your project. You have loads of options to choose from!
- Filter: This lets you add different color grades to one, some, or all the video clips in your editing timeline. (see the left image below)
- Order: Using this, you can drag and organize the position of different video clips you have added. This option is at the end of all the tools in the bottom row. (see the right image below)
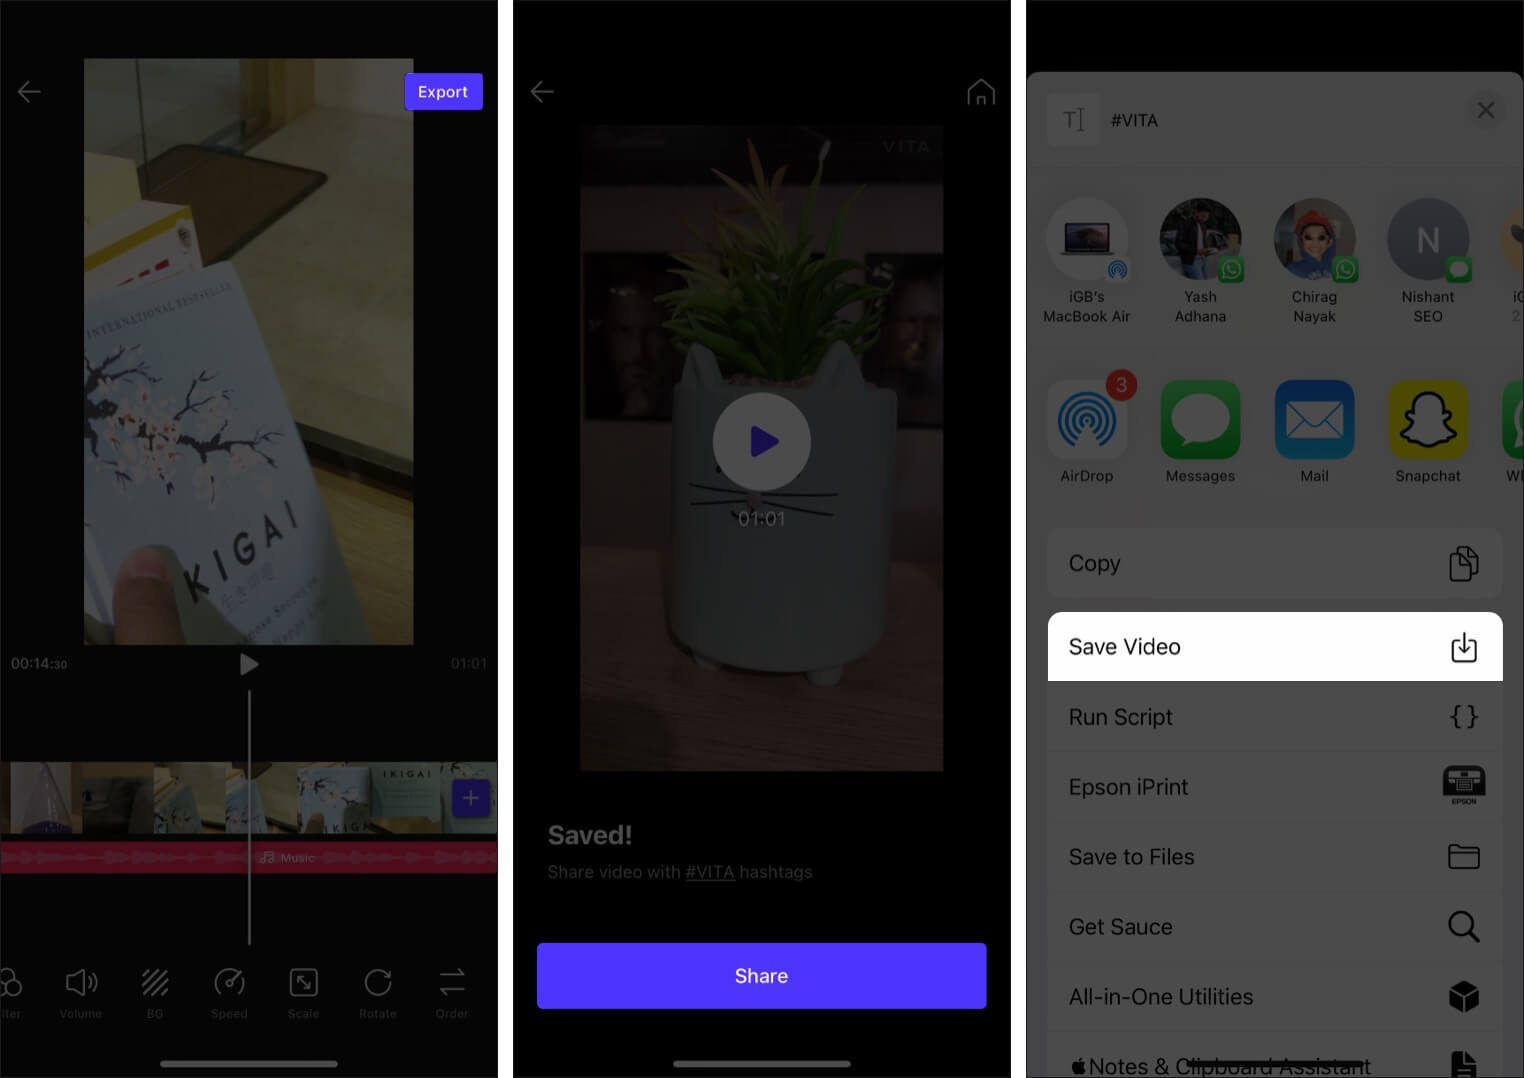
- Once you have played around with these easy tools, previewed your final video, tap on Export from the top right. After it finishes processing, tap on Share → Save Video to store it locally in the iPhone Photos app. You may also share directly to other apps like Snapchat, Instagram, etc. from the iOS Share Sheet.
Tip: You can copy, rename, or delete the video schemes from the ‘Project’ screen.
Our Belief
VITA App: Video Editor has the perfect blend of features, ease, and simplicity. The app takes a nuanced approach and makes the interface comfortable, pleasing on the eyes, and yet achieves the goal of giving you almost all the right tools you need for video editing.
New templates are regularly added. This shows that the people behind it are fully dedicated and wish that you have a fresh, rich experience as often as possible.
Also, if you have reservations about an app or product’s origin, let me state that VITA App: Video Editor is by SNOW Corp, a South Korean company (and not Chinese)! It is the same group behind the famous camera app B612.
I would conclude by saying that there is little to none to complain about VITA App: Video Editor. It is free, well designed, straightforward to use, and delivers excellent results. Take it for a test ride and start creating your next video jewel!

