Screenshots can be an asset; for me to show you how to perform certain tasks and for you to show me the exact problem you’re facing. But what if the problem is that the screenshot is not working on Mac? Well, let me help you resolve that.
You may be unable to take a screenshot on your Mac due to system glitches, misconfigured keyboard settings, low storage space, or other issues. Here are 8 simple methods to fix the screenshot not working on Mac.
1. Ensure that keyboard shortcuts are enabled
How do you take a screenshot on your Mac? If you’re trying to press command + 3, command + 4, or command + 5, and nothing is working, maybe the keyboard shortcuts are turned off.
Here’s how to enable keyboard shortcuts on your Mac:
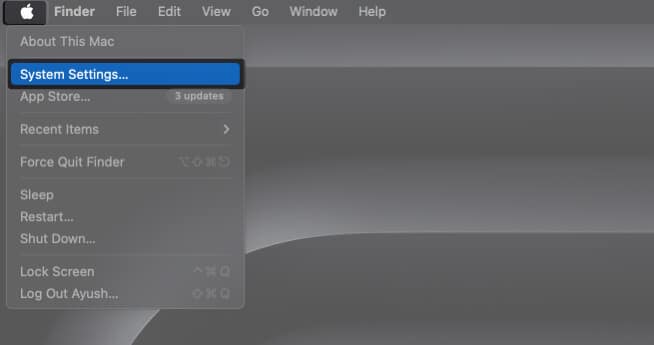
- Click the Apple icon → select System Settings.
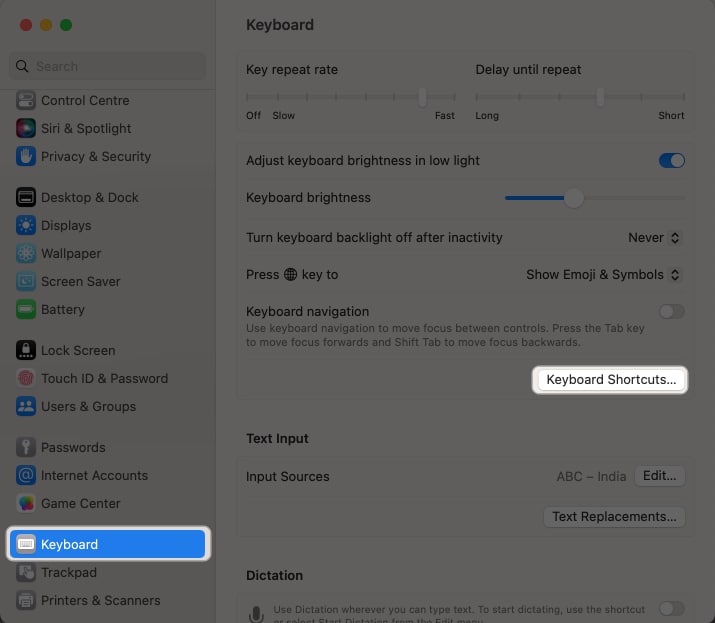
- Go to Keyboard.
- Select the Keyboard Shortcuts tab.
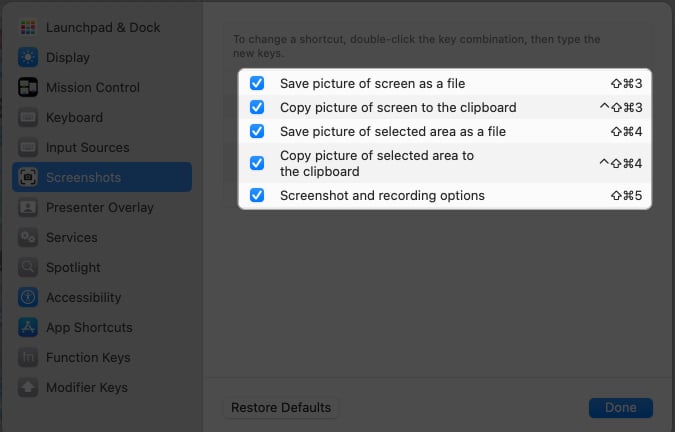
- Click Screenshots from the sidebar.
- Ensure that all keyboard shortcuts are checked.
Try taking a screenshot now. If the screenshot on Mac still does not work, move on to the next step.
2. Check the screenshot location
Supposedly, all is going well when you’re taking a screenshot, but you can’t spot it anywhere on the Desktop, Downloads, Documents folder, etc.; maybe your Mac screenshots are not saving, or the save location is different.
So, let’s check the settings and correct them if needed.
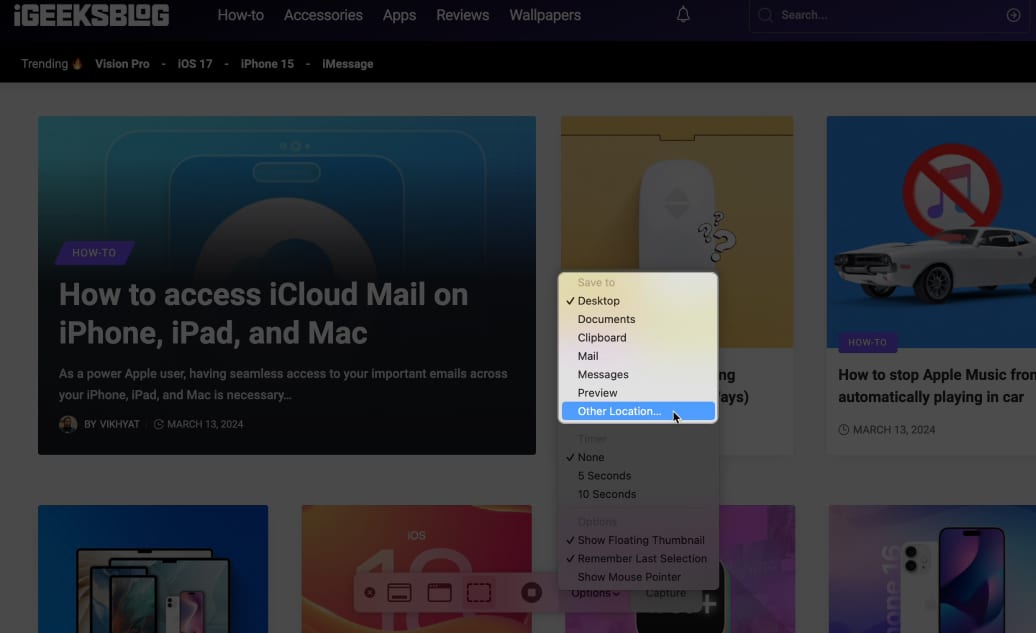
- Click Command + 5 or open the Screenshot app from Launchpad.
- Select Options from the menu bar at the bottom.
- Confirm/change the save to location.
Note: You can also change the screenshot location and file type (PNG, JPEG TIFF) via Terminal commands.
3. Restart the Mac
Restarting your Mac mostly works like a charm, especially if you haven’t shut it down in some time. It’s one of our favorite tricks at iGeeksBlog, as it usually gets rid of minor system bugs.
So, go ahead, click the Apple icon → select Restart. 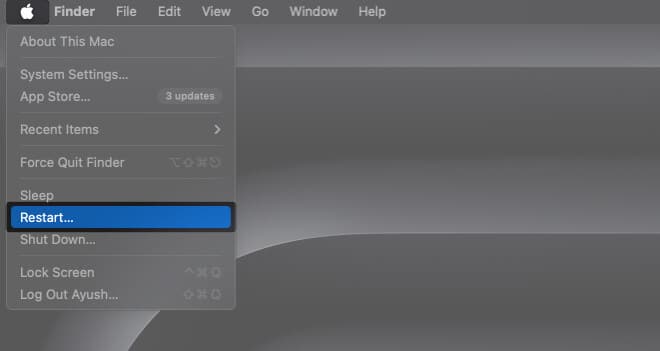
4. Update your Mac
Sometimes, the answer to why my Mac won’t take a screenshot is as simple as a software issue. And the solution lies with a bug-fixing OS update.
So, check for the latest macOS version and update your Mac. Go to the Apple icon → General → Software update → Upgrade Now (if available).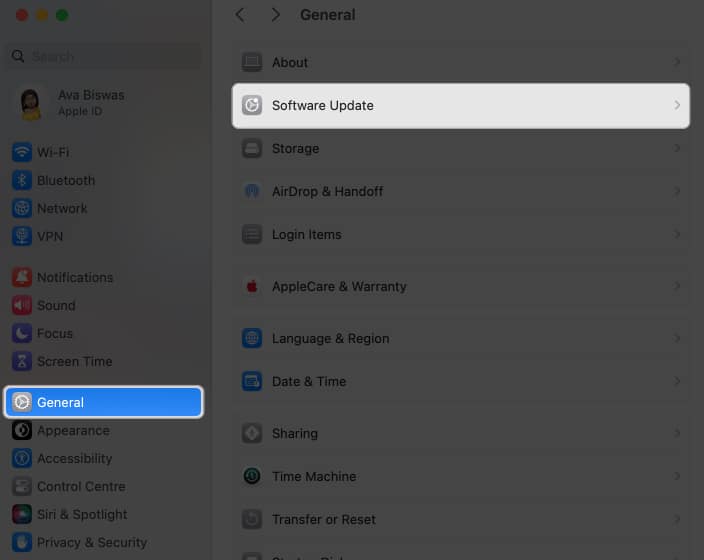
Hopefully, you’ll be able to take screenshots now; otherwise, it’s time for some stricter actions.
5. Check for malware
While malware is not so common in Macs, there is a chance some unwanted, malicious actor has slipped under the radar. Especially if your Mac stops taking screenshots after downloading any unknown software or suspicious file.
A simple way to confirm the root cause is to load your Mac in safe mode. If screenshots are working in safe mode, your culprit is an app or malware. Don’t worry; a decent antivirus app can help you fish out and clean the Mac.
6. Reset the NVRAM
NVRAM is the memory section of Macs that stores information about basic settings like time zone, screen volume, resolution, etc. A reset basically removes the custom settings you or apps make and returns to the default.
M1 Macs auto-reset the memory when they detect an issue in the settings. However, you’ll have to manually reset NVRAM on Intel Macs.
Shut down your Mac and restart it while pressing Command + Option + P + R for about 20 seconds. Leave the keys once your Mac boots twice.
Once your Mac starts again, try taking a screenshot. If you still can’t take a screenshot, here are some contingency plans.
7. Alternatives you can try
While the easiest way to take a screenshot on Mac is by using keyboard shortcuts, there are other built-in ways you can try. However, before you start taking a screenshot, I suggest you free up storage space on your Mac. Thus, the images can easily be saved without any hassle.
I. Via the screenshot app
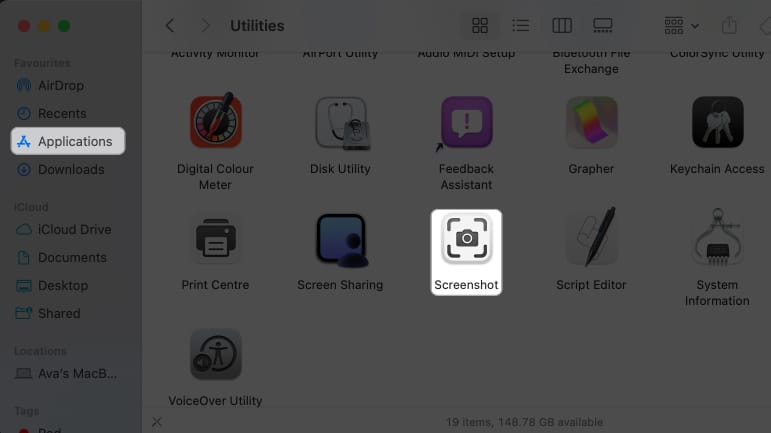
- Go to Launchpad → search the Screenshot app → launch it.
- Open Finder → Applications → Utilities → Screenshot.
Once the app is active, select a suitable option and take a screenshot.
II. Via the Preview app
- Go to Finder → Applications → Preview.
- Select any file → Click Open.
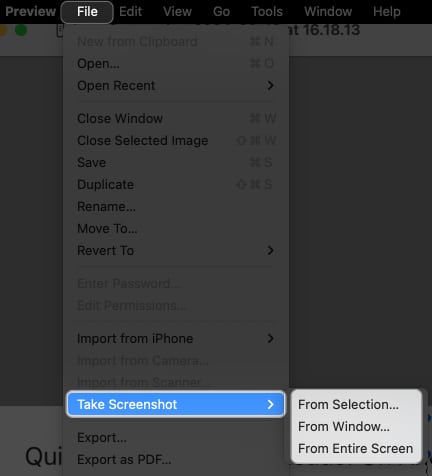
- Click File in the menu bar → Take Screenshot → select either of the options:
- From Selection
- From Window
- From Entire Screen
III. Via a third-party screenshot app
A screenshot tool would not only resolve the issue of screenshots not working on Mac but also give you extra benefits such as blurring, scrolling screenshots, editing, annotation, etc.
I suggest that you try Monosnap; its freemium version lets you easily take and edit screenshots.
8. Contact Apple Support
If nothing else has worked in your favor, the last resort is to contact Apple Support. Although chances are slim, this might be some hardware-related issue, and only they’ll be able to help you out.
Signing off…
I hope you can seamlessly take and share screenshots on your Mac now! Please share a screenshot below so my team and I know we were able to help.
Are you looking for some fun macOS hacks? Check out these links below:

