Apple’s Migration Assistant is a lifesaver for transferring data from an old Mac, Windows PC, or an existing backup to a new Mac. However, it’s prone to errors and crashes. So, in this blog, I will share why Migration Assistant stops working on Mac and provide practical solutions to fix the issue.
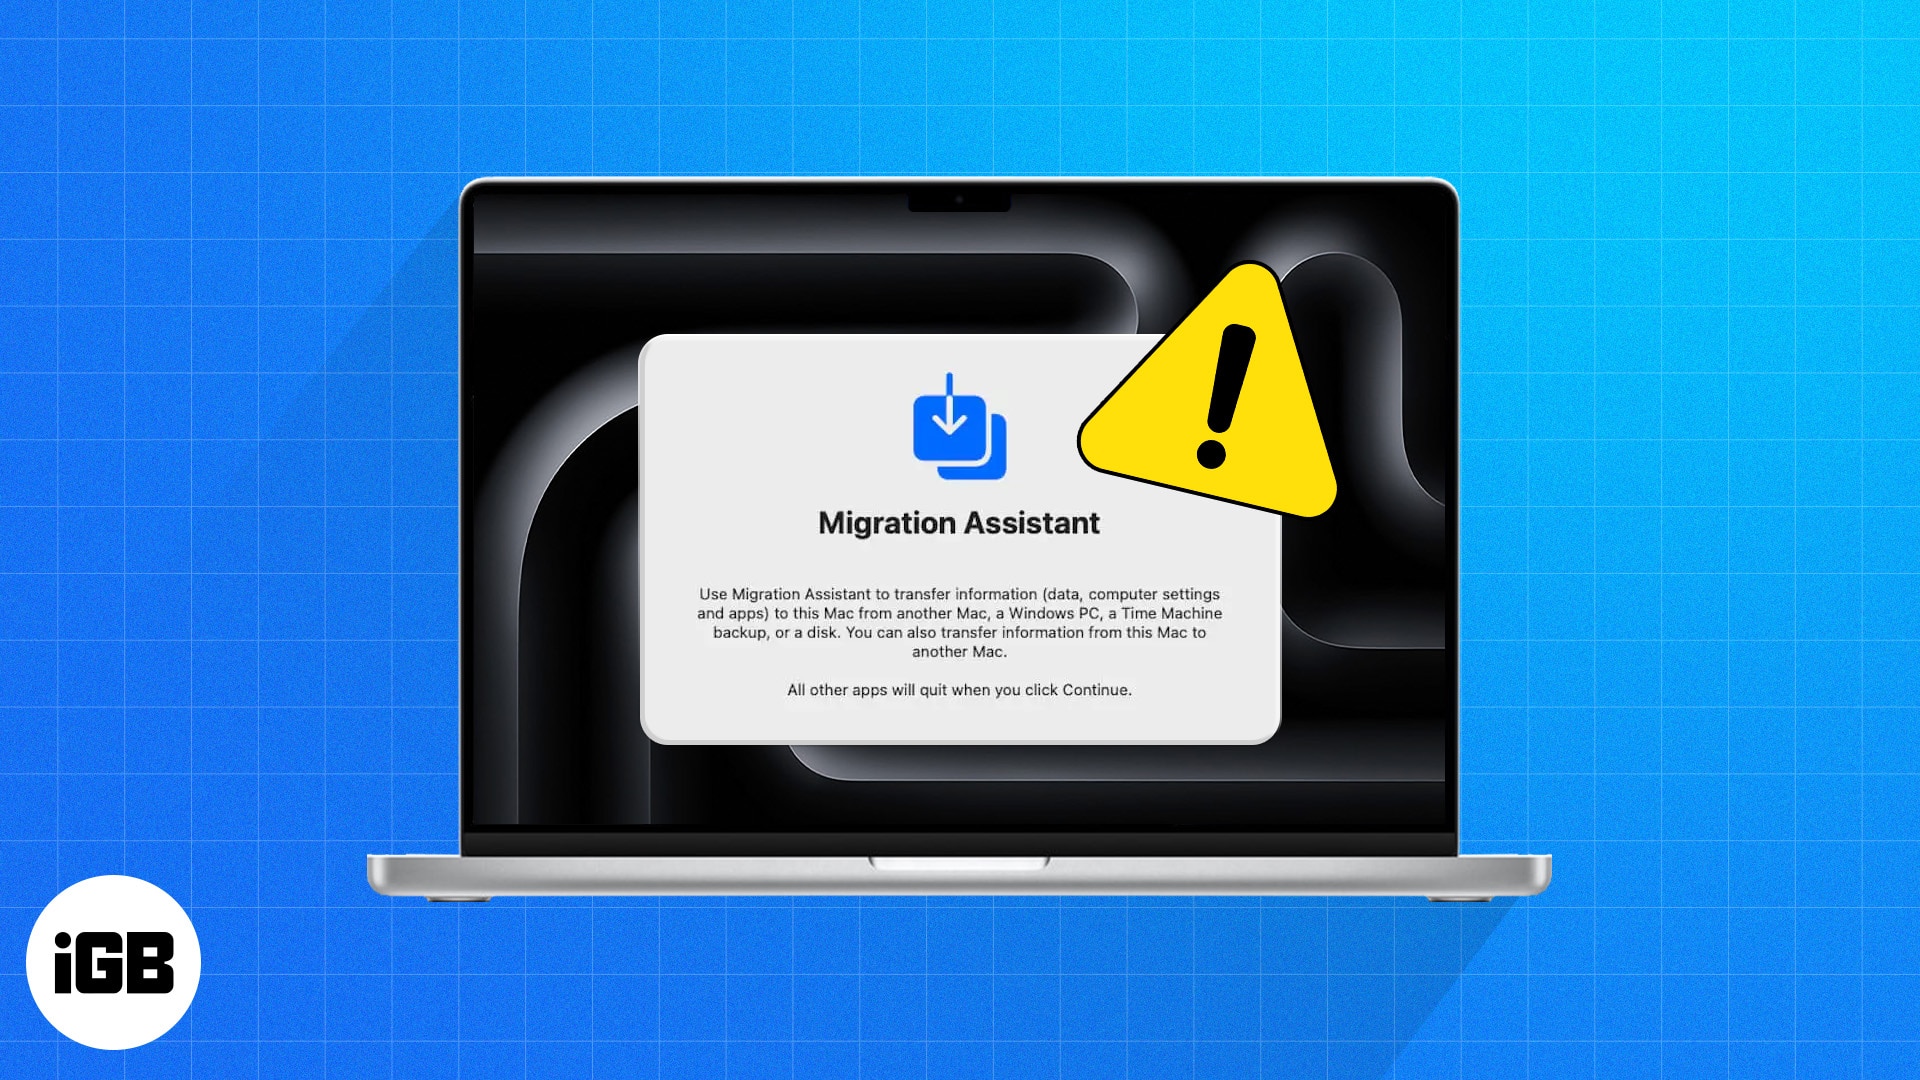
Whether you are facing authentication failures, are unable to connect, have conflicts during the transfer, or are stuck on starting up, this guide will ensure a successful data migration and save you from the hassle of manually transferring everything.
Why is Migration Assistant not working on Mac?
Apple has developed the Migration Assistant to provide a smooth data transfer experience. However, this tool is not perfect. There are times when it won’t work for you. Common reasons include:
- Misconfiguration while setting up Migration Assistant
- Poor network connectivity
- Corrupted disk drive
- Out-dated macOS
- Too many background activity
- Faulty USB/Ethernet cable
- Firewall, antivirus, or other security software enabled
- Created an account with the old Mac’s name
All the above reasons can hinder the transfer process. While running Migration Assistant, I have faced different errors and figured out specific solutions to resolve the issue.
How to fix Migration Assistant not working on Mac
Before you start troubleshooting, figure out the error you are getting and pick a solution that rightly addresses the issue.
Also, you must backup your Mac files and date to safeguard them from any consequences.
1. Check network connection
Migration Assistant depends on a good Wi-Fi connection for wireless transfer. So, if the process takes excessive time or is stuck in startup, you should first check for a connection issue.
- Ensure both devices are connected to the same Wi-Fi and placed near each other
- Restart the router to power cycle the network
- Keep the Migration Assistant open on both computers
If the transfer is still unable to connect, does not find another Mac, or shows a ‘Looking for other sources’ error, connect your computers using a USB-C or Ethernet cable. A wired connection offers quicker and more reliable data transfer.
However, if Migration Assistant stops working using a wired connection, ensure the cables are not faulty. Besides, plug out the cable, clean the ports on your devices, and connect the cables again to see if it works.
2. Configure sharing settings
You can transfer your files, apps, user accounts, and settings via Migration Assistant. However, if you select apps, the transfer size becomes huge and will take forever. This may result in the Migration Assistant being stuck on starting up the window and other problems.
Therefore, you must uncheck the Applications folder option on the Select Information to Transfer window. Then click Continue to start the transfer without apps. You may install your desired apps on the new Mac after the process is completed.
Besides, if the Migration Assistant shows an “Unable to Connect” error, the source Mac may not have a hostname in the Sharing settings. Without this, the new Mac can’t find its intended file reading location. To fix this:
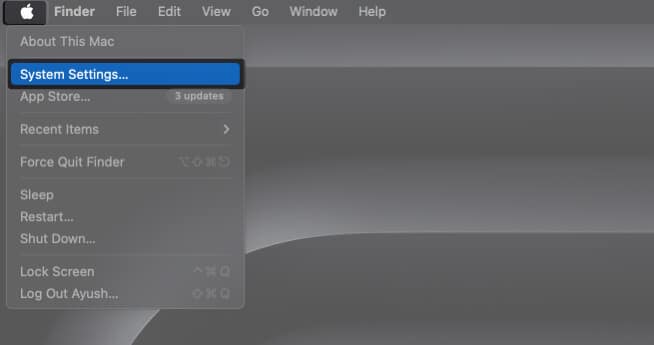
- Go to the Apple menu → System Settings in source Mac.
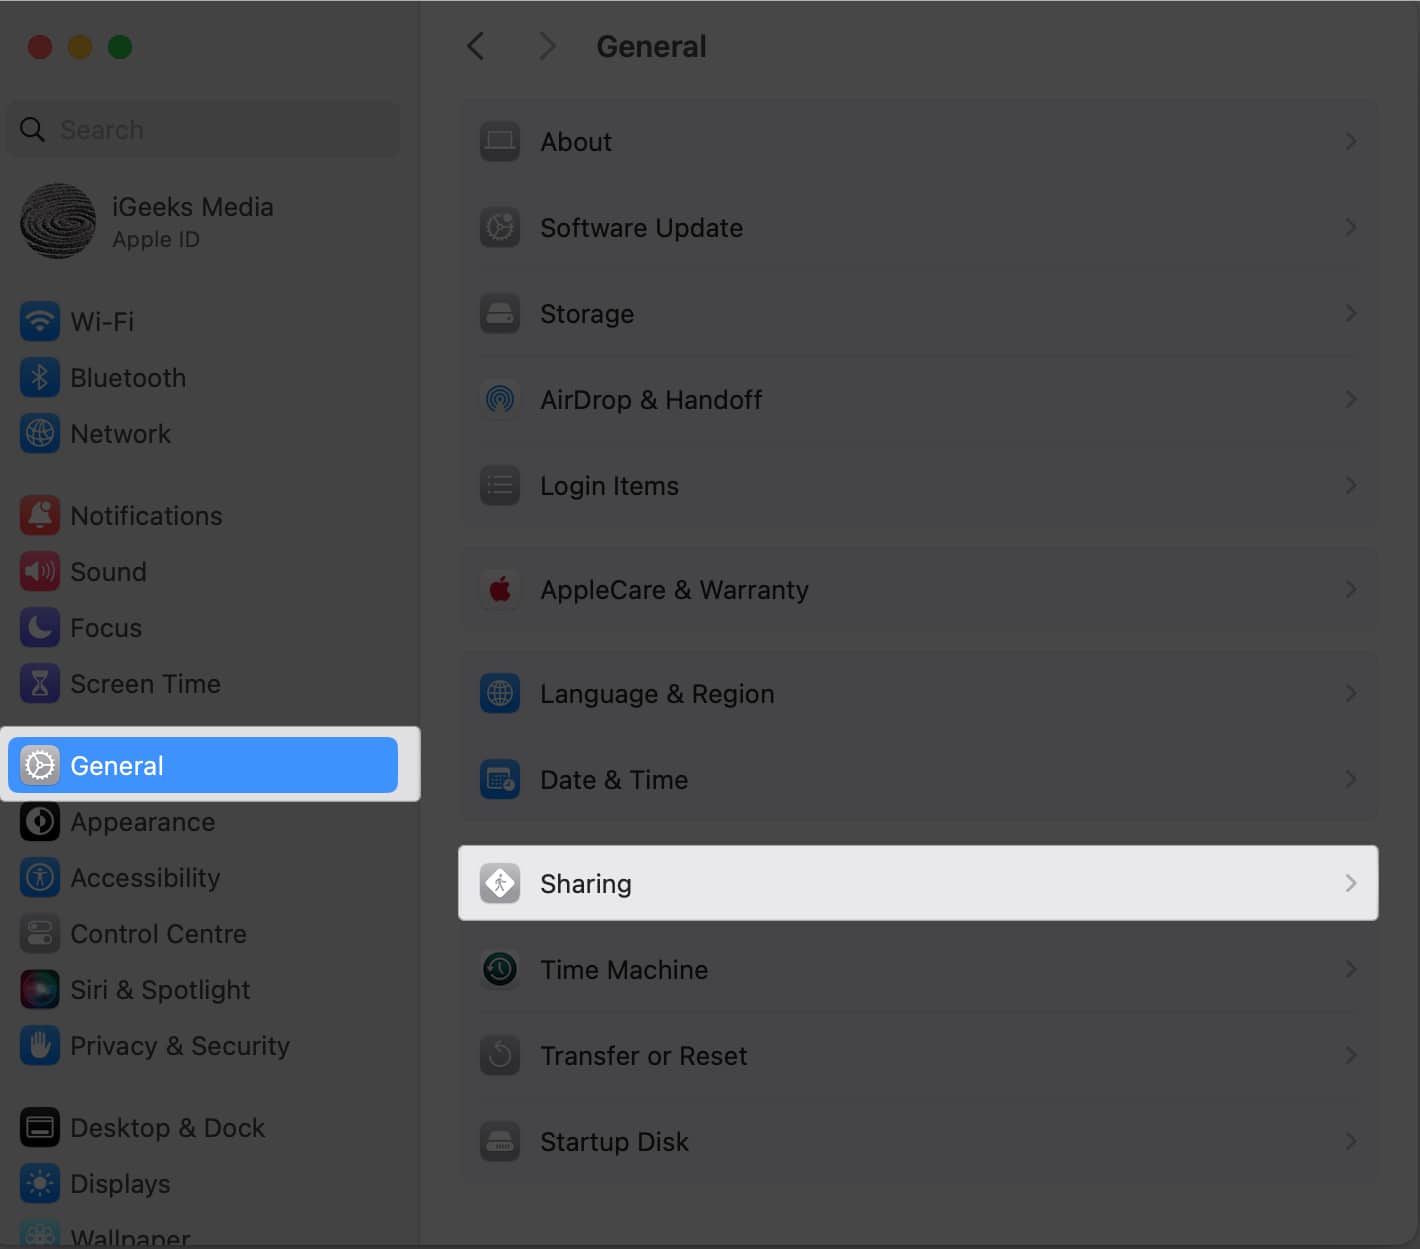
- Select General from the left → Click Sharing.
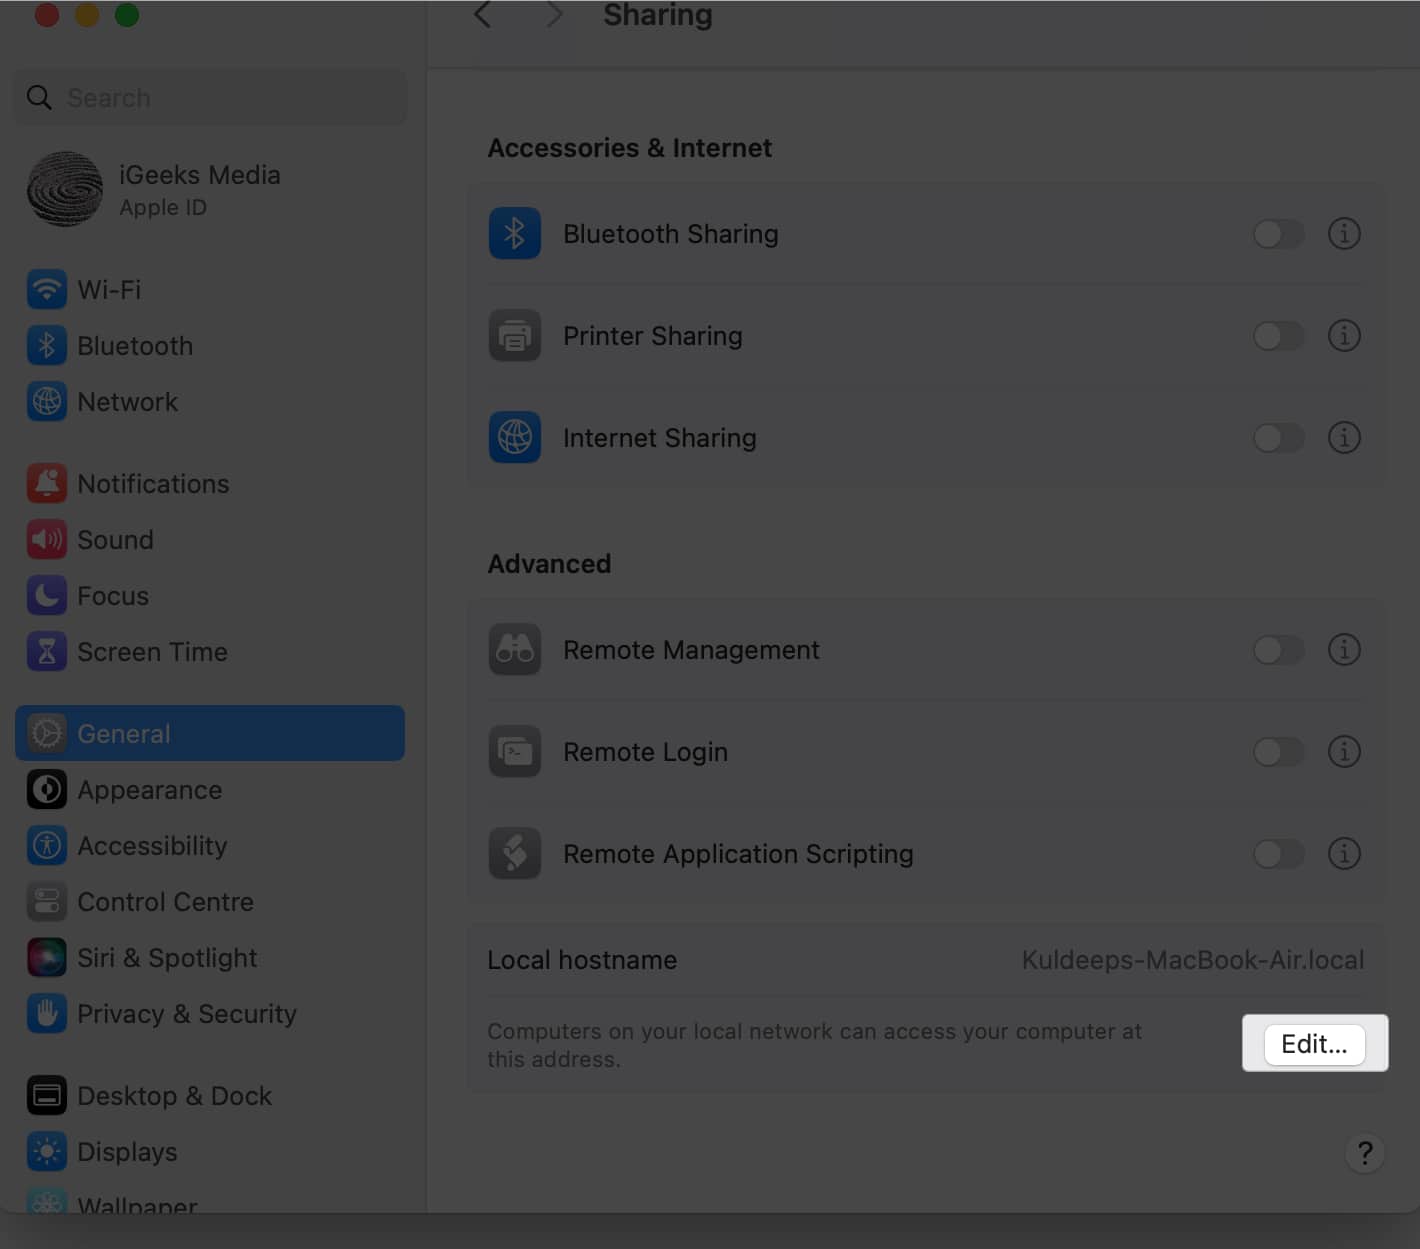
- Scroll down and click Edit.
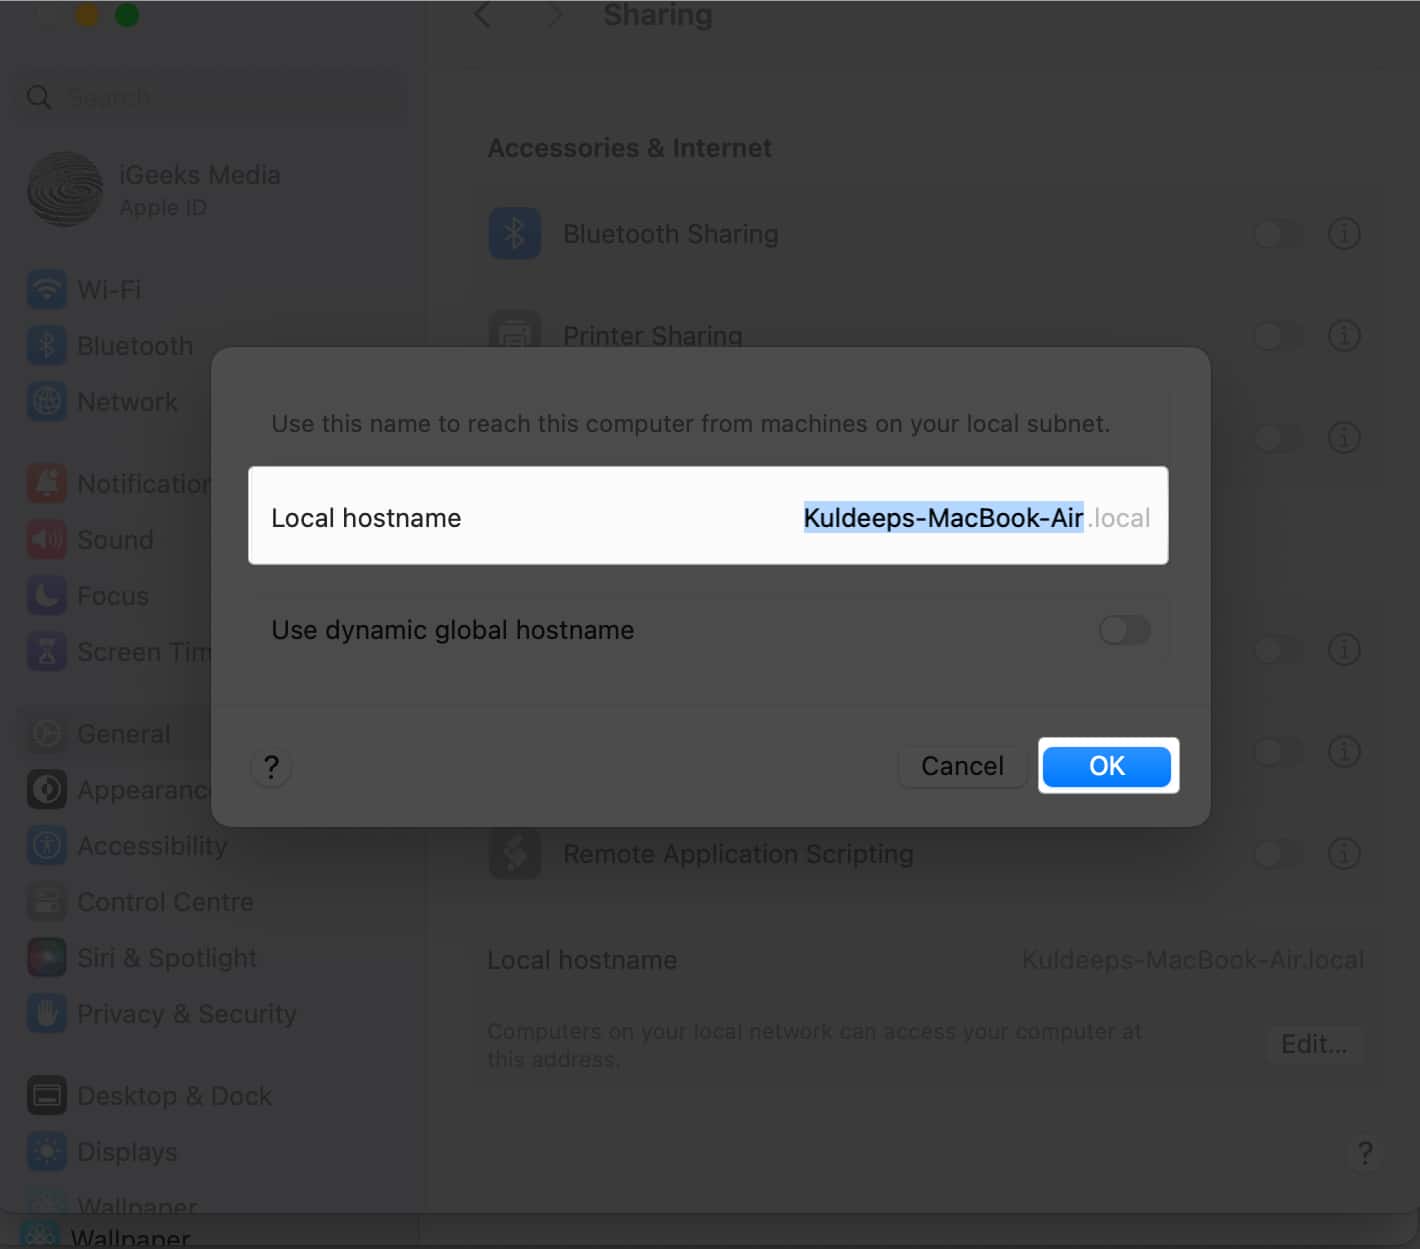
- Enter a hostname that is different from your new Mac.
- Click OK to save.
3. Set password for your user account
Apple is always concerned about user privacy and security. Hence, Migration Assistant also doesn’t approve transfers to unprotected Macs. If your new Mac doesn’t have a user account login password, you may encounter a “This Mac can’t be used to migrate data” error.
To do this, you may set up your Touch ID and create a log in password for your user profile. However, if you already have it, resetting the login password may help.
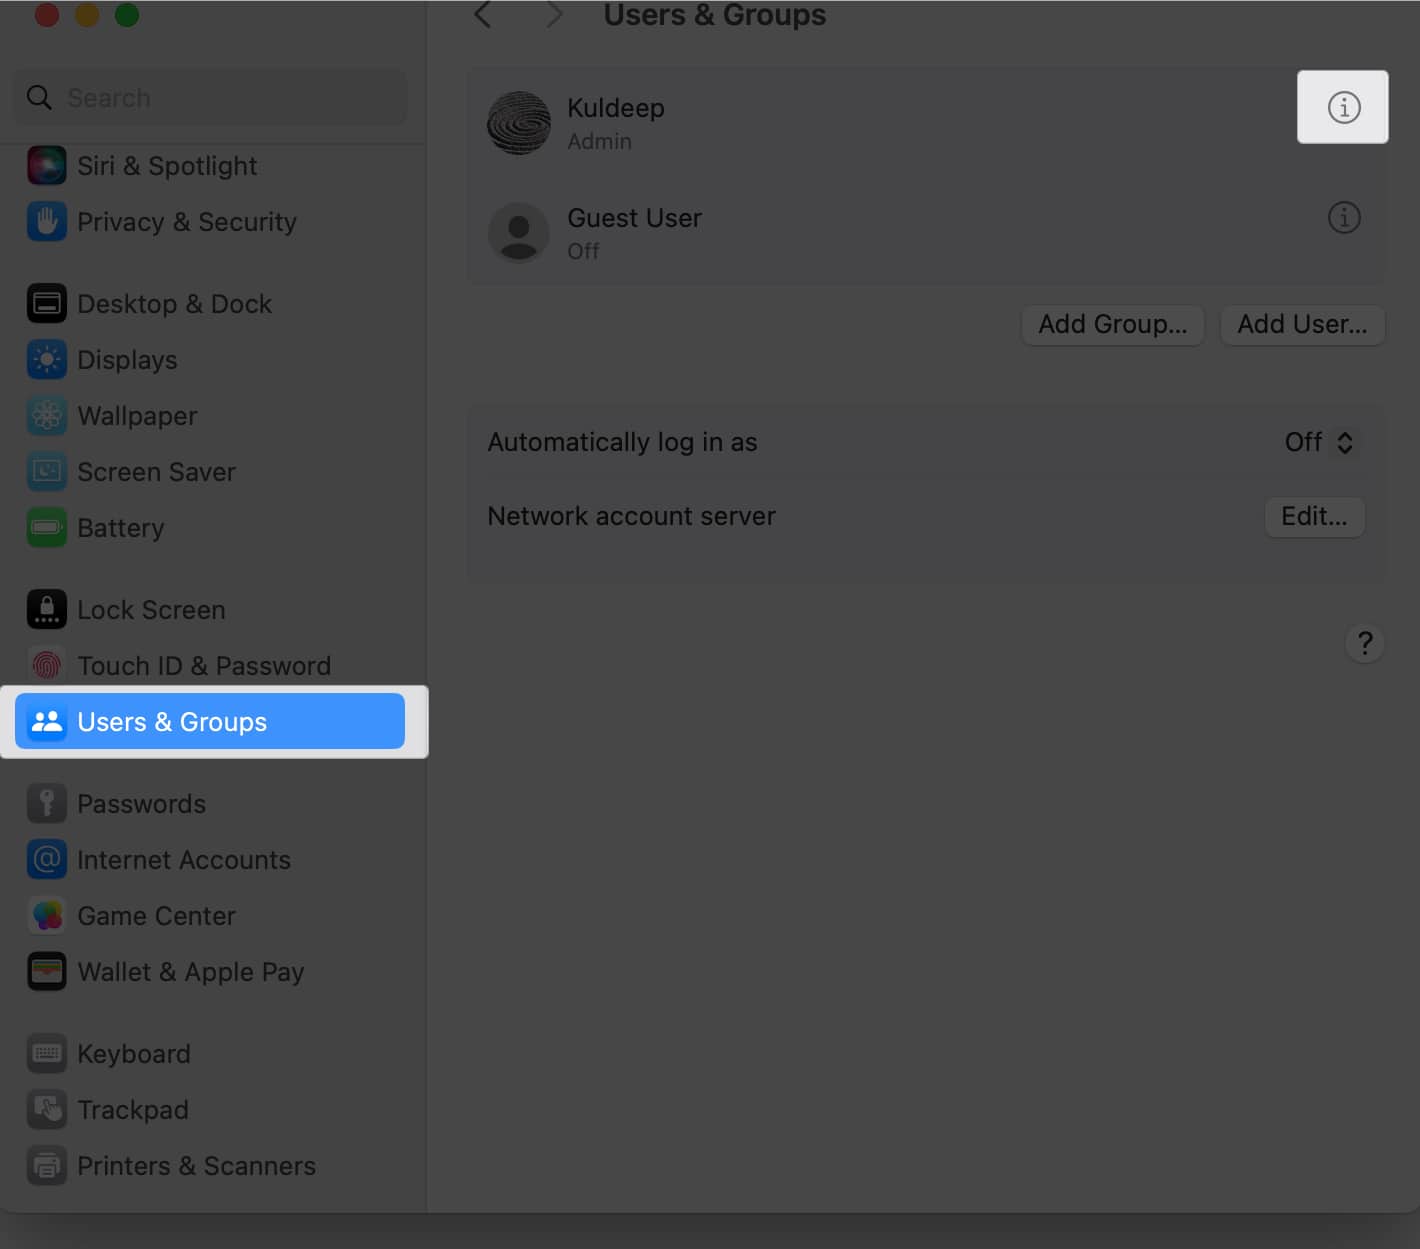
- Open System Settings on your new Mac.
- Select User & Groups from the side pan.
- Click the info icon beside your user name.
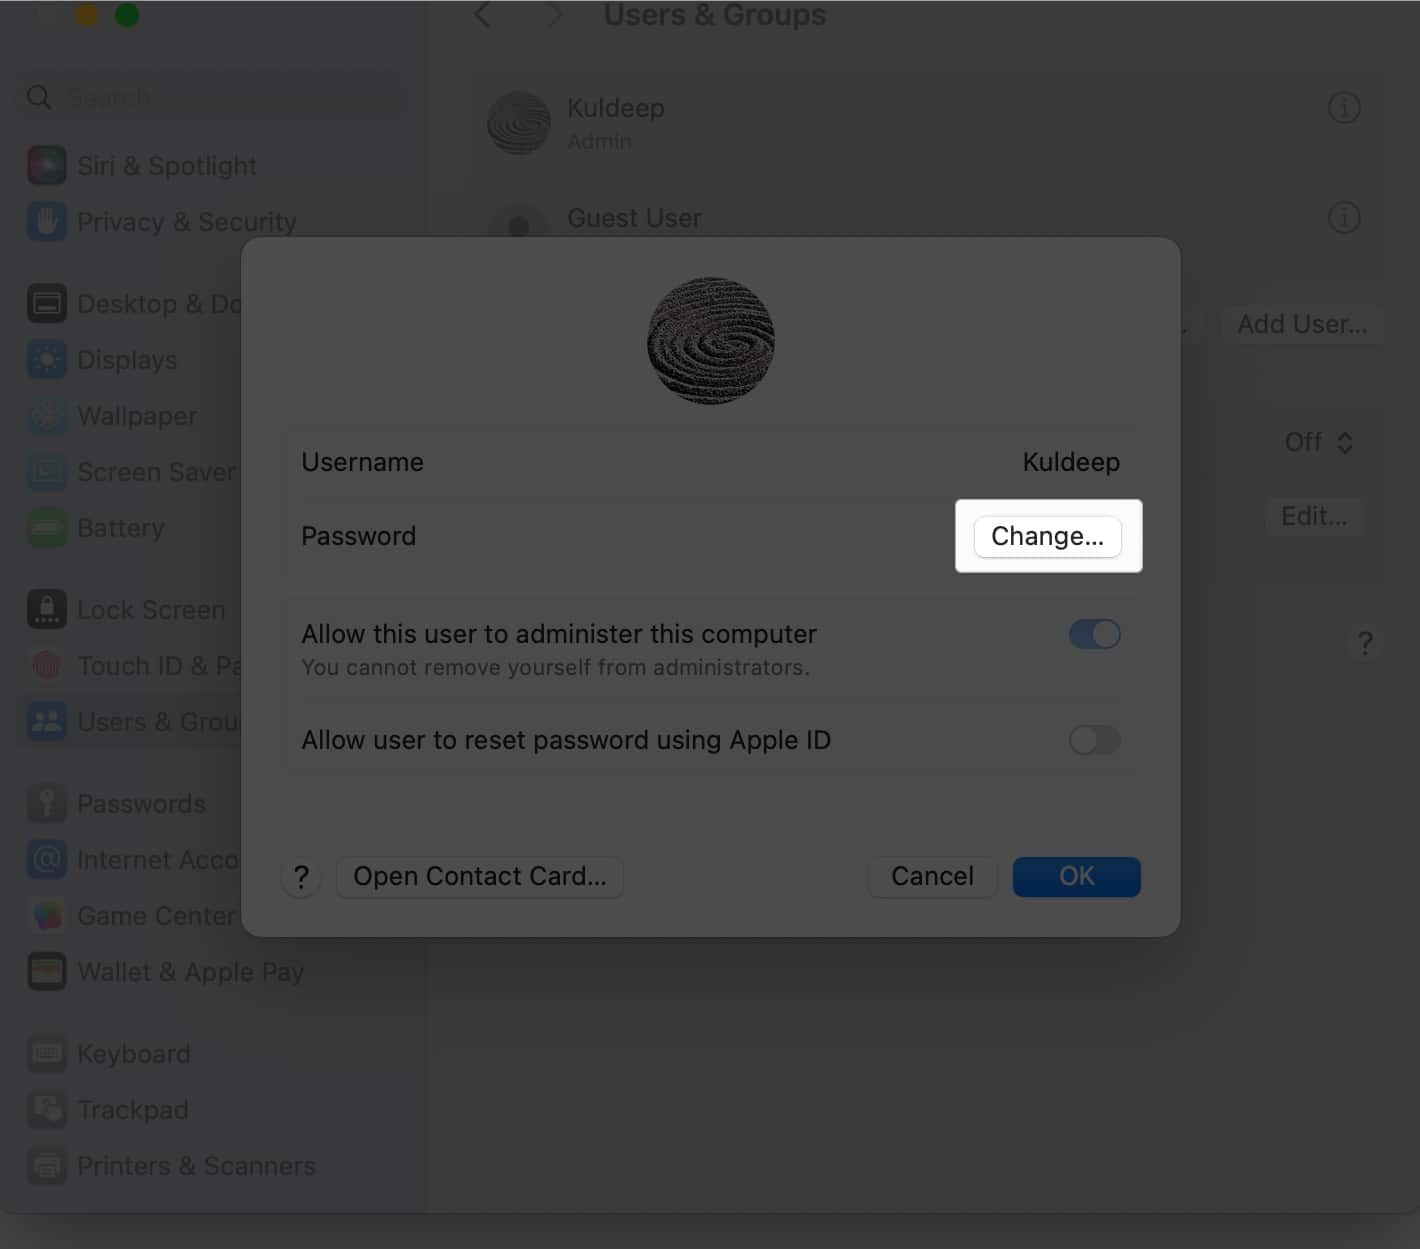
- Select the Change button in the Password field.
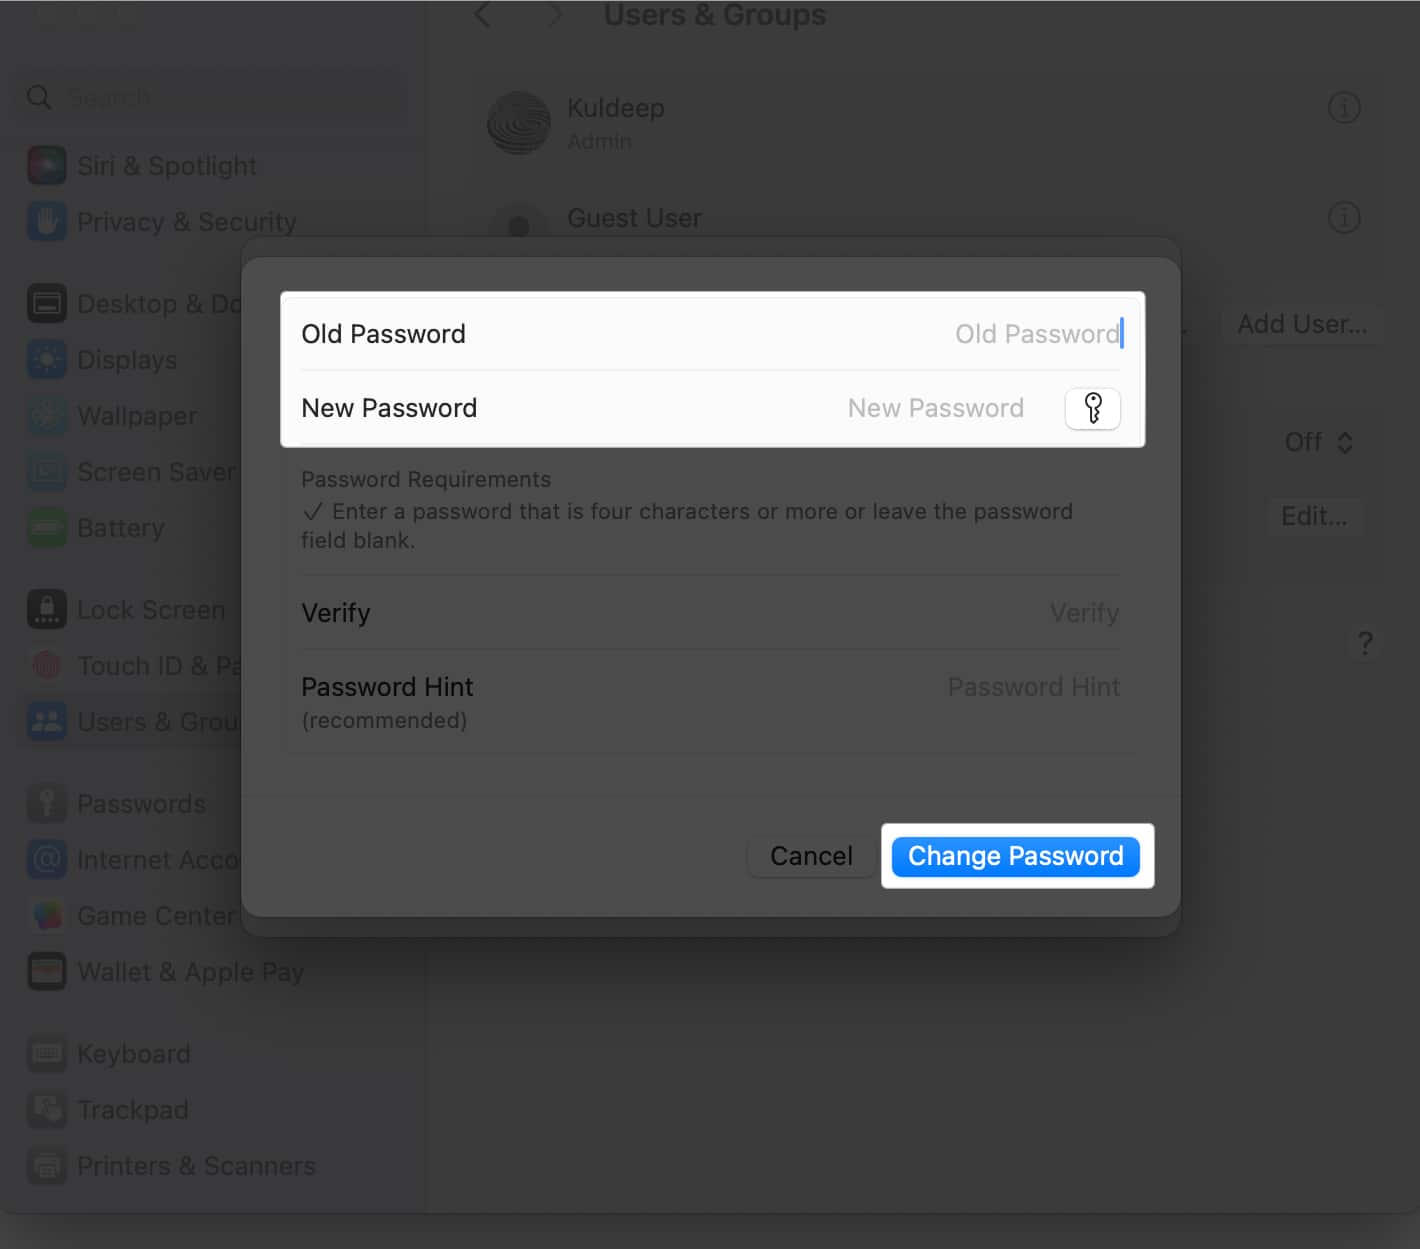
- Fill out the details and click Change Password.
After changing the login password, restart your Mac and try starting the transfer with Migration Assistant.
If the problem isn’t resolved, you must update macOS on both old and new Macs.
4. Disable Firewall, antivirus and VPN
Security tools like the built-in Firewall and third-party antivirus software help shield your Mac from unwanted access and incoming network traffic.
Therefore, to ensure a smooth transfer, disable the Firewall and antivirus installed on both your Mac or Windows PC.
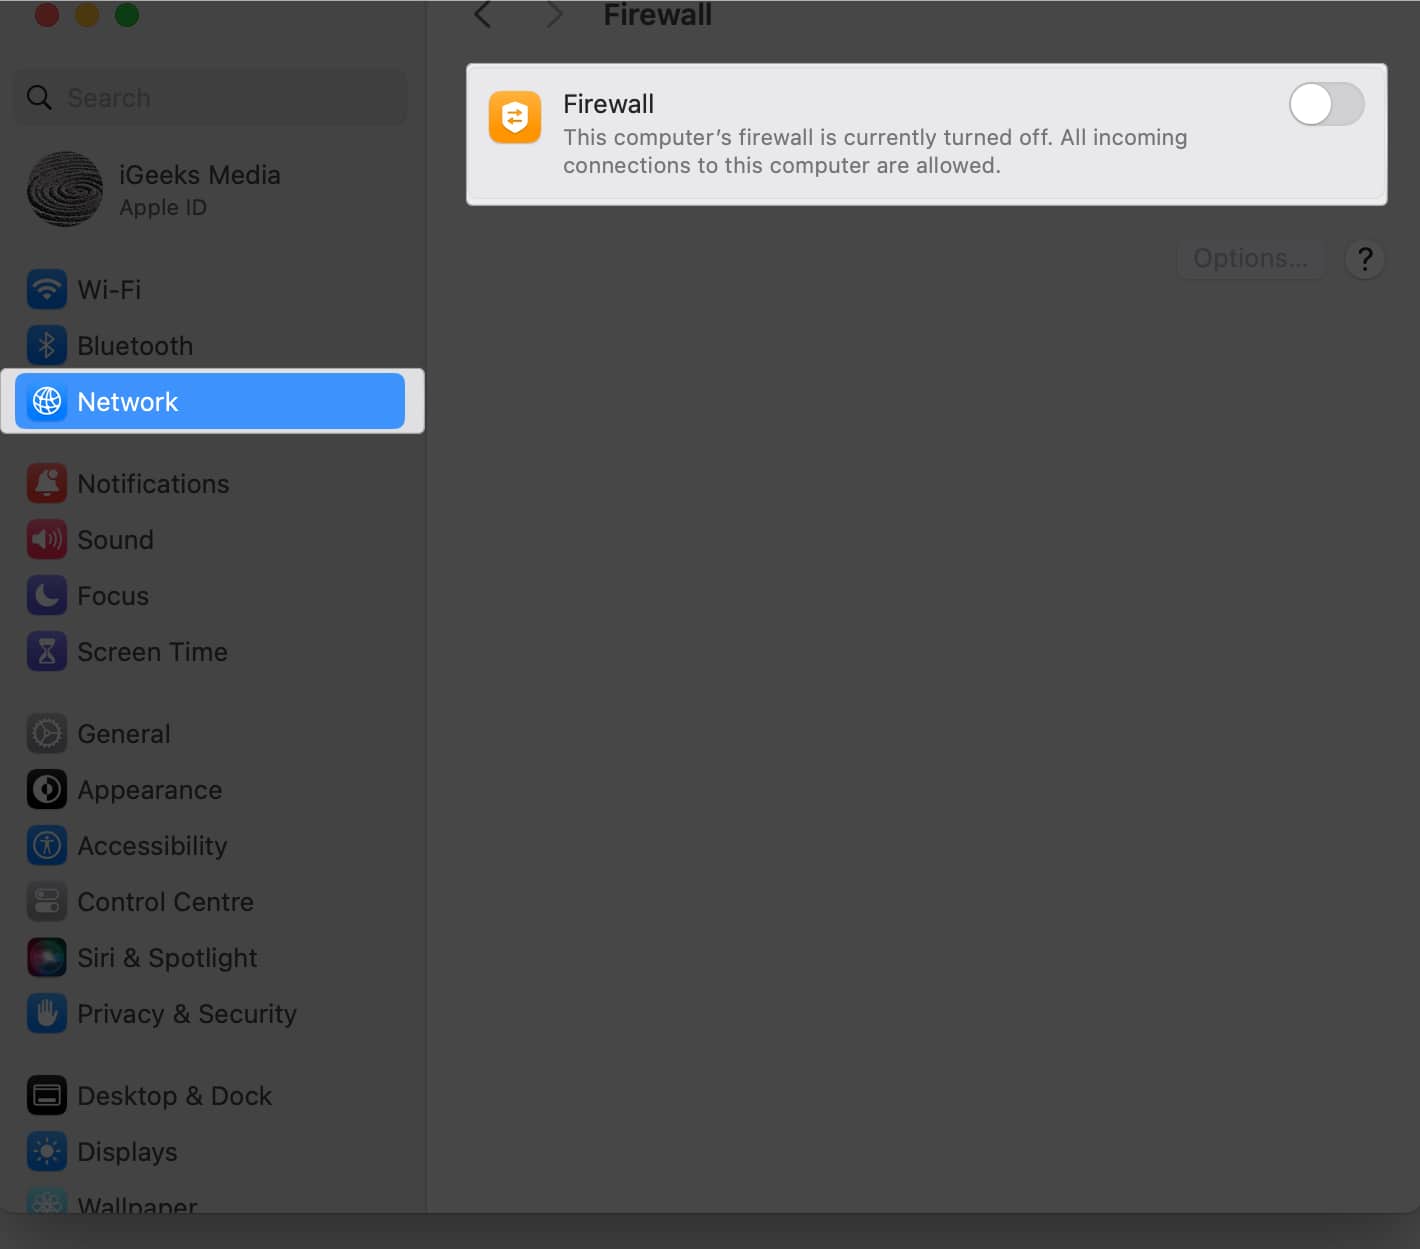
- Go to System Settings → Network → Firewall.
- Toggle off Firewall.
Once the migration is completed, you must enable Firewall on your new Mac to avoid security breaches.
Besides, if you have a VPN installed on your devices, disable it to avoid network conflicts.
5. Delete same user account
When restoring data from a Time Machine backup with Migration Assistant, you may get a “Conflicts Detected” popup. Typically, it happens when one or more identical user accounts are on both Macs.
You may rename one account or remove the conflicting user account from one Mac. To resolve this issue, click the popup and follow the prompts.
6. Run Apple Diagnostics to fix hard drive
Have you tried all the above methods, but Migration Assistant is still not working? Ensure your old Mac doesn’t have a corrupted hard drive, as Migration Assistant can’t transfer data from it. In this case, you may use Apple Diagnostics to find hardware or software problems on your Mac.
- Press and hold the power button and release them when you see the startup options window.
- Now, press and hold Command (⌘) + D on your keyboard.
- Click I agree when prompted.
- Wait until the hardware test is completed. You’ll see a report with one or more diagnostic codes.
- Note the codes and click Get Started to know more about the issue identified by Apple Diagnostics.
- Click the Restart button to restart your Mac.
Now, you may contact Apple Support or make a Genius bar appointment to troubleshoot your Mac. Give them the diagnostic codes for a speedy solution.
7. Reset SMC
Migration Assitant often shows an error “Authentication failed, unable to retrieve credentials from authorizing user” on the receiving Mac and stops the transfer process. In such cases, force quit Migration Assistant, go to the Apple menu, and click Restart. Once rebooted, start transferring.
If you are using an Intel Mac, you must reset SMC to fix the failed Migration Assistant authentication issue.
8. Reinstall macOS on your new Mac
If everything goes wrong, a clean macOS reinstall on the new Mac is your best bet. It removes everything from the Mac hard disc and fixes any logical flaws. Ensure you have a backup of your Mac before reinstalling macOS.
Once you’re ready, start your Mac in Recovery mode and select Reinstall macOS option. Then, follow the on-screen instructions. After reinstalling macOS, you can transfer files from the old Mac to the new one using Setup Assistant.
Still can’t use Migration Assistant? In this situation, you may try alternatives for transferring your data.
Alternatives to try if Migration Assistant not working on Mac
If Migration Assitant is not working or if you don’t want to go through the hassle of using it, you can try out some alternate options to complete the data transfer.
1. Migrate from a Time Machine Backup
If you are configuring a new Mac or have factory reset your current Mac, migrating from a Time Machine backup is a better choice.
- Connect your external hard drive or Time Capsule, which has the recent Time Machine backup, to your new Mac.
- Launch Migration Assistant → Select “From a Mac, Time Machine backup, or Startup disk“.
- Select the backup you want to restore → Click Continue.
You may also restore a backup on your new Mac from iCloud.
2. Use Target Disk Mode to transfer data from Intel Mac
Target Disk Mode enables you to use the older Mac as an external hard drive attached to the new Mac by connecting two Macs over a USB or Thunderbolt connection. After that, you could just transfer data from the old Mac to the new Mac.
So, you ought to attempt this if the Migrant Assistant is not working or your old Mac is experiencing internal disc issues.
- Go to the Apple menu → Startup Disk → Target Disk Mode.
- Select Restart when prompted.
Once in Target Disk Mode, connect your old Mac to the new one using a compatible cable, and then:
- Click Network → Select the Mac from which you want to transfer data.
- Click Connect in the top-right corner.
- Select Guest → Connect.
No more migration hassle!
Migration Assistant is an essential tool for transferring data from an old Mac to a new one. However, issues may be encountered during the process. By following the solutions provided in this blog, you can resolve these issues and ensure a successful data transfer.
If you face any issues, please comment below. I’ll be happy to help!

