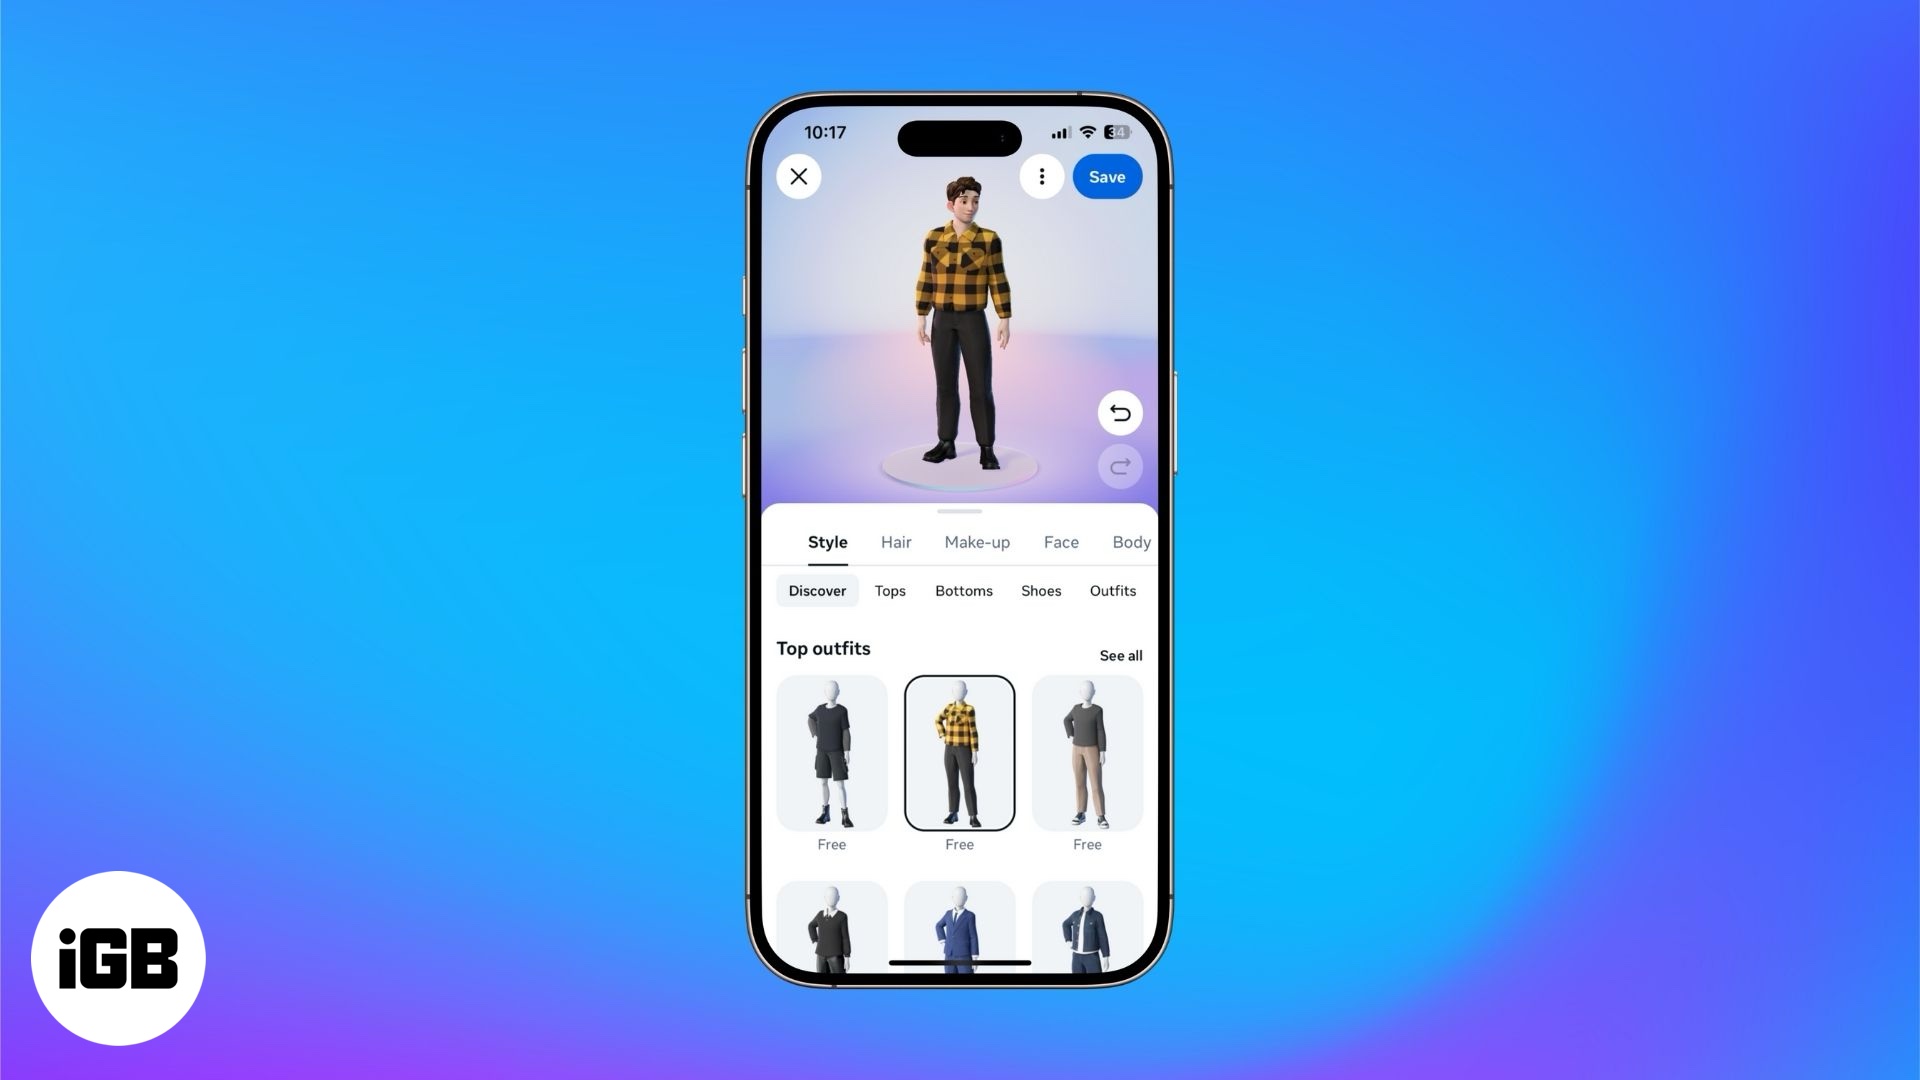
Imagine using a highly customizable sticker that looks like you without relying on third-party apps! That’s Facebook avatar for you, a feature that makes your experience more exciting and interactive on the platform. You can react to chats using your avatar or use it as your profile picture, among other things.

Keep reading to learn how to create and use your Facebook avatar using your iPhone and Mac.
How to create a Facebook avatar
Just like Bitmojis on Snapchat, Facebook lets you create avatars that look like cartoon versions of you. Let’s see how to create one on your iPhone and Mac or PC.
Creating a Facebook avatar on an iPhone
You can create your own Facebook avatar on an iPhone using the Facebook app. Here’s how:
- Open Facebook, tap Menu in the bottom-right corner and hit See More.
- Tap on Avatars. Then, choose Create from Selfie or Create Manually.
- If you select Create from Selfie, Facebook will request permission to access your camera for clicking a selfie. Tap Allow and then tap the Camera icon to click a photo.
- If you select Create Manually, you can design your avatar manually. You get options like skin tone, hairstyle, and body type to customize the appearance of your avatar. Experiment with the different options to achieve your desired look.
- Once you’re satisfied with the avatar’s appearance, tap Save and Continue.
Creating a Facebook avatar on the web
Facebook also lets you create an avatar through its website, which you can access via a browser on your Mac or Windows PC.
- Go to the Facebook website and log in to your account.
- Visit your profile by clicking your name in the left sidebar.
- Click the Edit Profile button.
- Scroll down and click on Create Avatar.
- Select a starter avatar and hit Done.
- Alternatively, click Customize to customize the avatar’s appearance per your preference. Once your avatar is created, click on Done to save it.
How to edit or update your Facebook avatar
If you don’t like the avatar you just created, you can edit it and make your desired changes. You can even delete it completely if you don’t want to use it anymore. The best part is that you can do all of it in the Facebook app on your iPhone itself, so you don’t have to rely on your Mac or PC.
- Open the Facebook app, tap Menu in the bottom-right corner, and select Avatars.
- Tap the pen icon in the top-right corner to bring up the avatar editor.
- Choose from different options like style, hair, make-up, and face to customize the appearance of your avatar.
- Tap on Save in the top-right corner to save the changes.
- To change your avatar, tap the three-dot menu to the left of Save, select Switch Avatar, and then tap the (+) icon to create a new one. You can also switch between different avatars.
- To delete your avatar, tap the three-dot menu again at the top, select Delete Avatar, and then select Delete to confirm.
How to use your Facebook avatar
There are multiple ways of using your Facebook avatar. Apart from setting it as your profile picture, you can use it for reacting to comments under your posts, share it on your Facebook stories, or use it while chatting with friends on Messenger.
Using your Facebook avatar as a profile picture
You can do away with your Facebook profile picture and replace it with your newly-created avatar. Just follow these steps:
- Open the Facebook app on your iPhone, go to your profile, and then select Edit Profile.
- Scroll to the Avatar section and enable the Show on Profile option under your Facebook avatar. This will make your avatar visible whenever someone swipes your profile picture.
Using your Facebook avatar in comments or the Messenger app
To use your avatar in comments and the Messenger app, go to the comments section and select the avatar icon. You will see lots of stickers created by Facebook based on your avatar. Tap the one that you wish to use.
Using your Facebook avatar in stories and posts
To add your avatar to your Facebook stories, tap on Create Story in the Facebook app, select the Camera icon to click your picture, tap on Stickers, and select Avatar. You can now choose from a plethora of options for stickers with different emotions. Once selected, tap on Share.
To add your avatar to a post, add a new post, select Your Avatar, choose one of the sticker options, and then tap Post.
Facebook avatar isn’t available? Try this
If you can’t use the Facebook avatar you just created, these fixes can help:
- In the Facebook app, go to Settings and Privacy, and select Settings. Then, scroll down and select Avatars under Audience and Visibility. Ensure that your avatar is set to public or visible to your Facebook friends.
- Update the Facebook app on your iPhone to get rid of any bugs or glitches that may be causing the issue.
Wrapping up
A Facebook avatar adds a personal flair to your interactions on the platform. Its versatility gives you the freedom to use it however you choose. Plus, you can even use it on other Meta platforms like Instagram and WhatsApp. So, create your avatar if you haven’t already, and make interactions with your connections more engaging.
Do you like using your Facebook avatar? Share your thoughts in the comments.
FAQs
Yes, you can. Following the same steps mentioned above, you can choose to add more than one Facebook avatar to your profile.
Yes, you can. Since Meta owns all three apps, you can sync your Facebook, Instagram, and WhatsApp accounts to use your avatar. Open the app’s Facebook settings, go to Accounts and check if Instagram is linked.
Yes, creating them and using them is absolutely free of charge.
You may also like to read these:


