When it comes to file management and navigation, Finder is where we all go. But imagine if Mac Finder didn’t respond to any of the commands you give it.

It would undoubtedly hurt your productivity as you cannot do anything without it. Thankfully, there are a few possible solutions to fix the issue. Let’s take a look!
How to fix Mac Finder not responding
Relaunch Finder
The first method to get your Finder back is to quit it forcefully and then see if it starts up normally again.
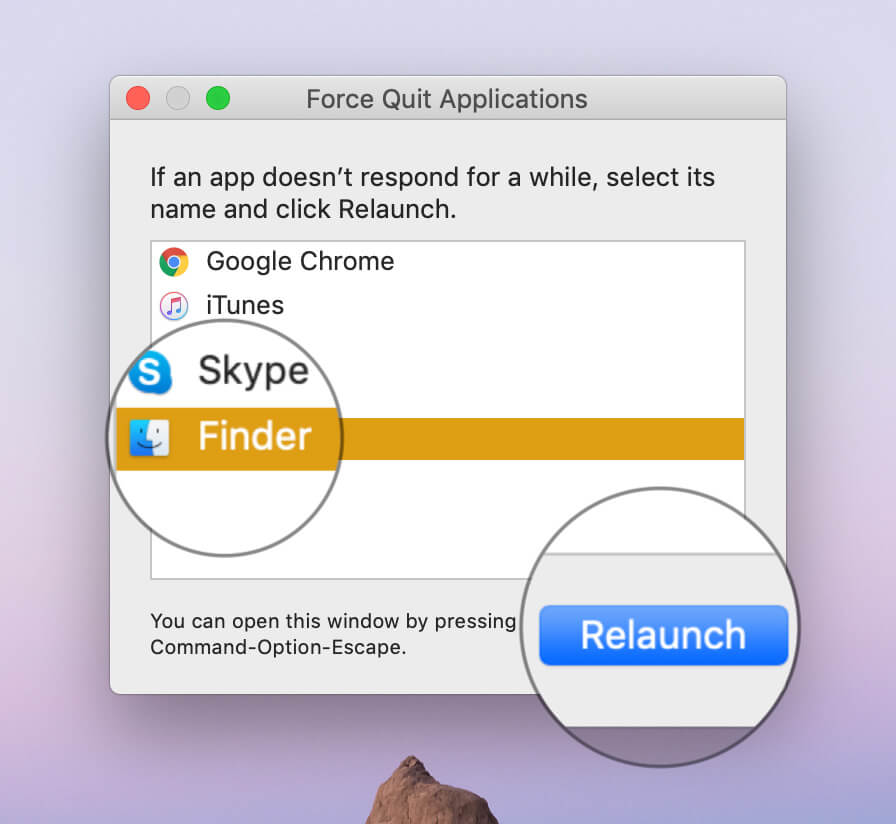
- Open Task Manager by pressing Option + Command + Esc.
- From the list of running apps, click Finder and then click Relaunch.
Doing this will force quit the Finder and then relaunch it. If things are executed as planned, you may have a fully functional Finder at your disposal. But if it doesn’t turn out as expected, keep reading.
If that method worked for you, feel free to get back to your business. Otherwise, keep reading!
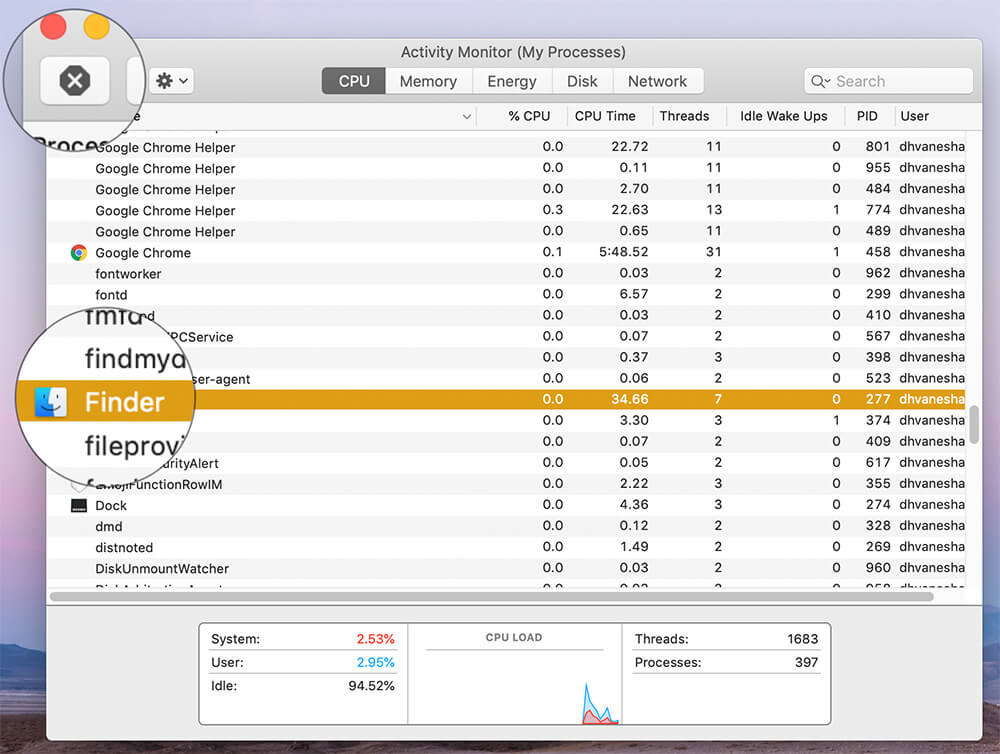
Another way to force quit Finder is by launching the Activity Monitor app on Mac.
- Launch the Activity Monitor app using the Launchpad.
- Click Finder from the list of processes running.
- Now click the X icon at the top-left.
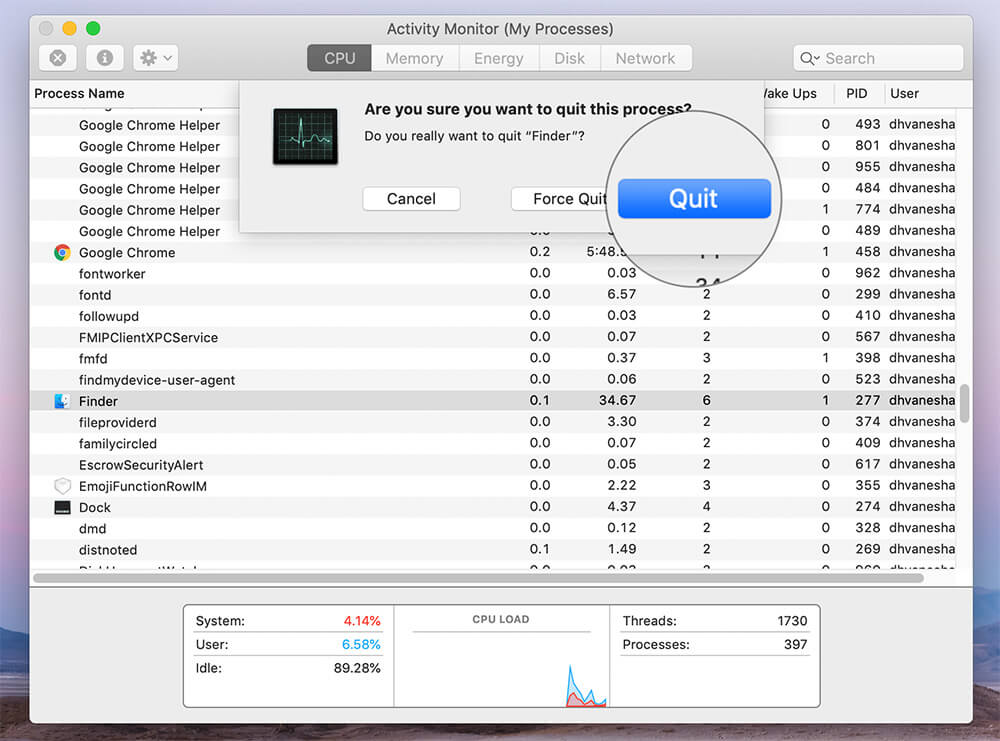
- At the pop-up, click Force Quit.
You’ll notice Finder removed from the list of running processes. Ideally, this should do the trick. But just in case it doesn’t help either, you may need to follow a more involved route.
Try logging out and in again
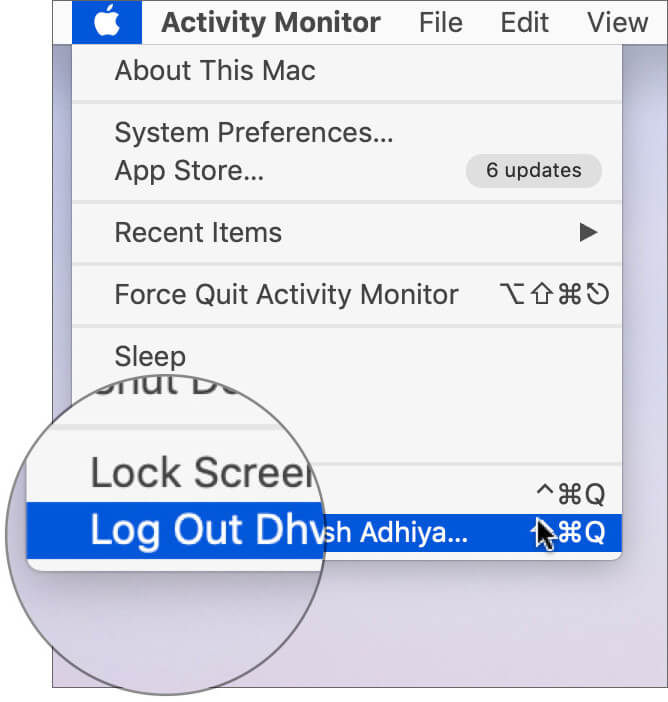
If none of the fixes above seems to help, try logging out and back into your Mac. This kills all running processes and starts them back up when you log in. Make sure you log out rather than just locking your Mac.
To log out from your Mac, click the Apple logo and then click the last option, Log Out.

If that doesn’t help, try restarting your Mac and see if you’ve got it working. If that doesn’t help, there’s one last trick that could help you out.
Delete Finder corrupted file using Terminal
The command line is a powerful tool to get things done when everything else fails. Maybe the Finder plist file is corrupted and needs to be deleted. But as Finder itself isn’t working, there’s no way we can navigate to the path and remove it using the UI. So we’ll need to use the Terminal.
- Open the Terminal from Launchpad.
- Now enter the following line:
rm ~/Library/Preferences/com.apple.finder.plist - Restart Mac to see if things are back to normal
If all else fails, you may need to reinstall Mac OS X to repair any corrupt system files.
Wrapping up…
Most of the time, a simple force quit and relaunch brings Finder back to life. If it takes more than a restart or two to get things back to normal, it’s most likely an issue of corrupted system files.
If you know of any other fix to resolve the issue, let us know in the comments and we’ll update the post.
Related articles:


