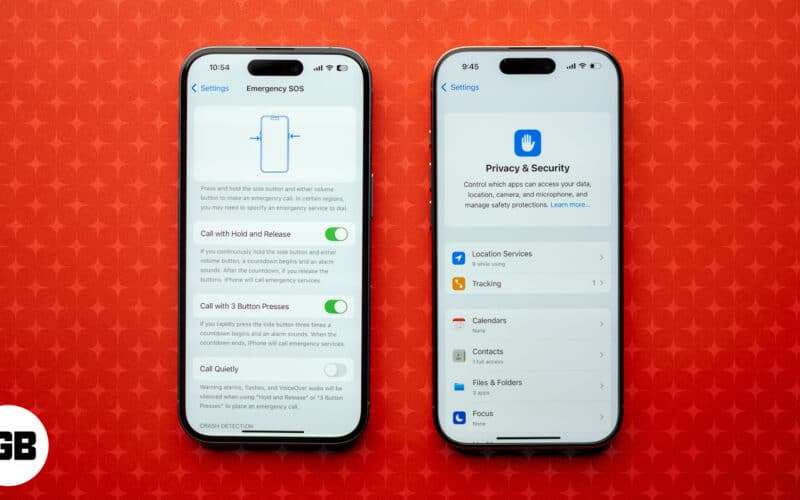
As more and more data leak reports surface regularly, evaluating your digital safety is more important than ever. Fortunately, if you use an iPhone, the various security and emergency features available onboard ensure your private and sensitive data remains secure.
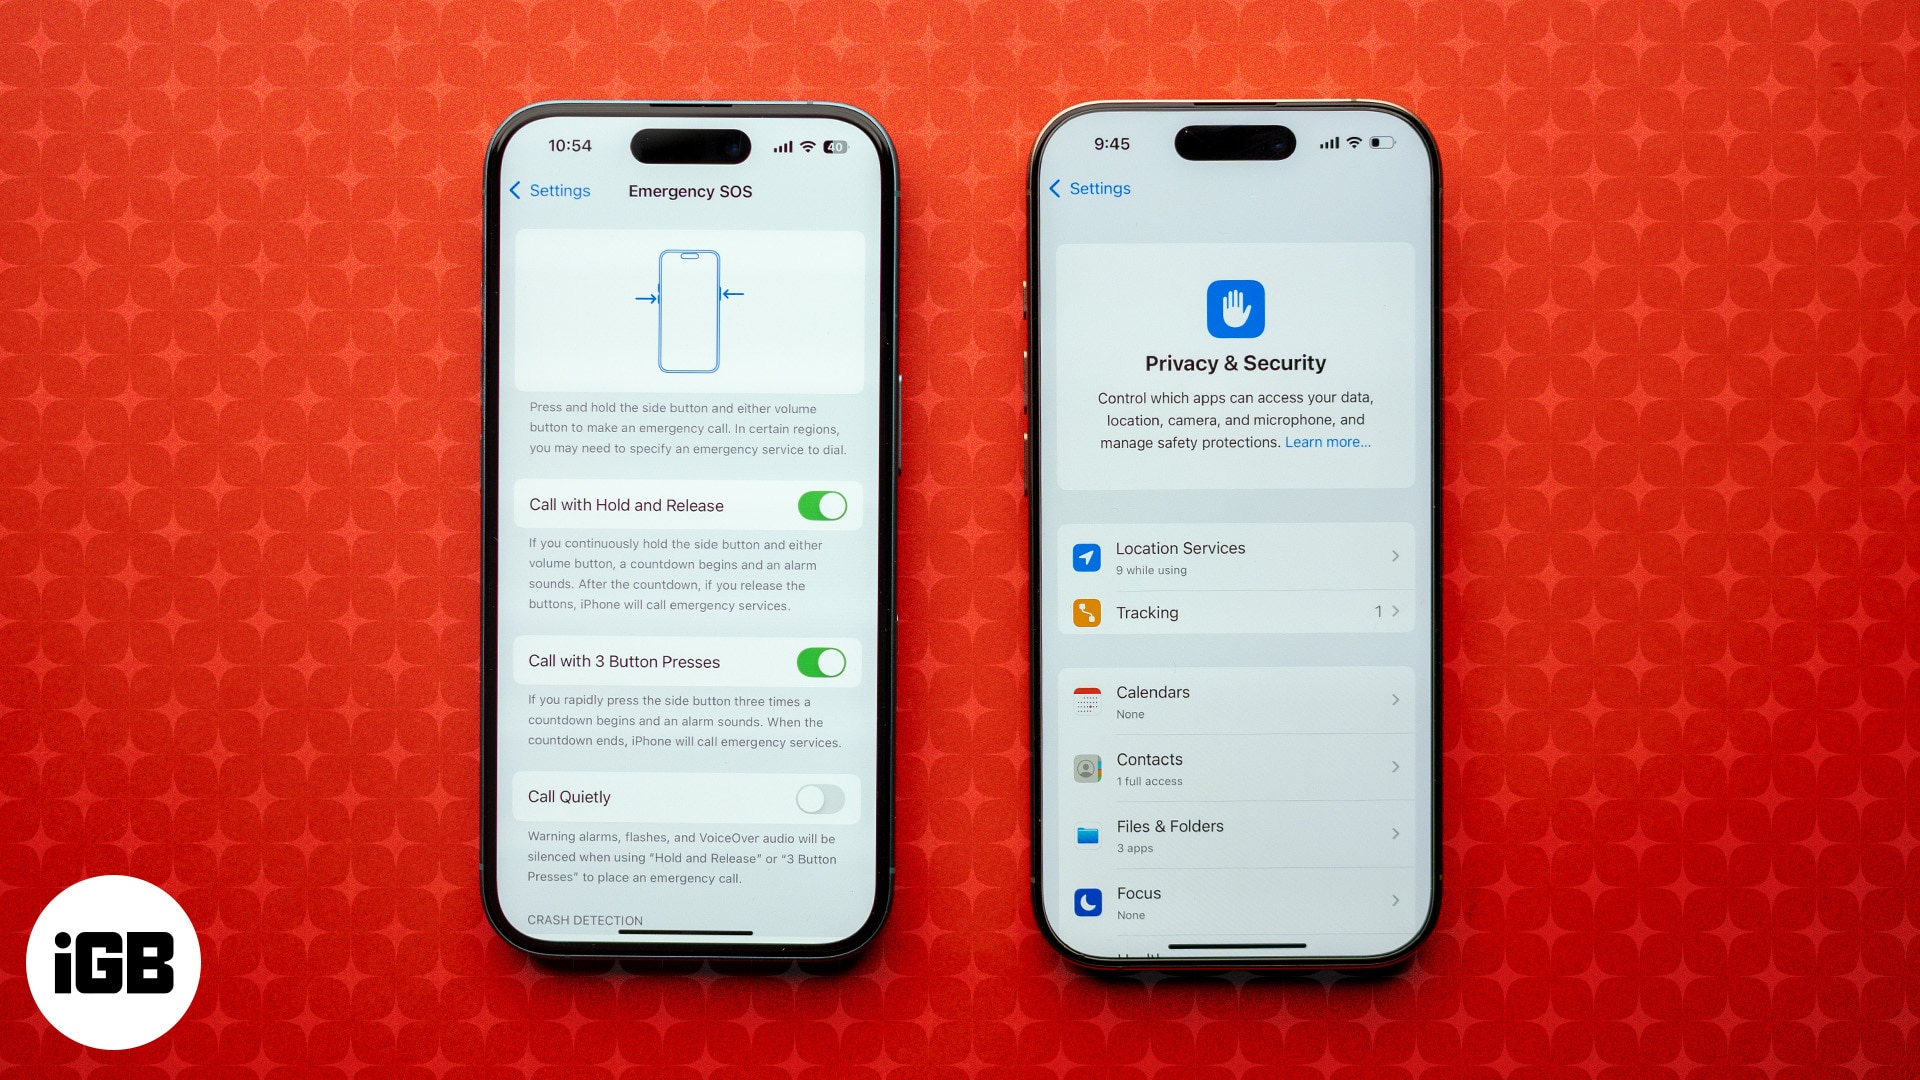
However, while some of these features come auto-enabled on the iPhone, there are quite a few that you need to enable manually to maintain privacy and keep your data secure. Keep reading for a quick rundown of all these iPhone security and emergency features.
Table of Contents
- Emergency SOS
- Medical ID
- Check In
- Find My iPhone and Device Tracking
- Two-Factor Authentication (2FA) for Apple ID
- Crash Detection
- Lockdown Mode (for Advanced Security)
- Emergency Contacts and Location Sharing
- App Privacy Permissions
- Safety Check (iOS 16 and Later)
- Turn on Stolen Device Protection
- Privacy and security settings
1. Emergency SOS
During an emergency, time is very critical. This is exactly where the Emergency SOS feature on the iPhone comes in handy. The feature is designed to let you quickly contact emergency services and alert your emergency contacts in case of an emergency. And the best part is it works even when you can’t unlock your iPhone or navigate through screens.
To activate Emergency SOS on your iPhone, simply press and hold either of the volume buttons and the Side button simultaneously, then swipe right on the Emergency SOS slider that appears. Alternatively, you can configure the Emergency SOS to activate with a triple-press of the Side button.
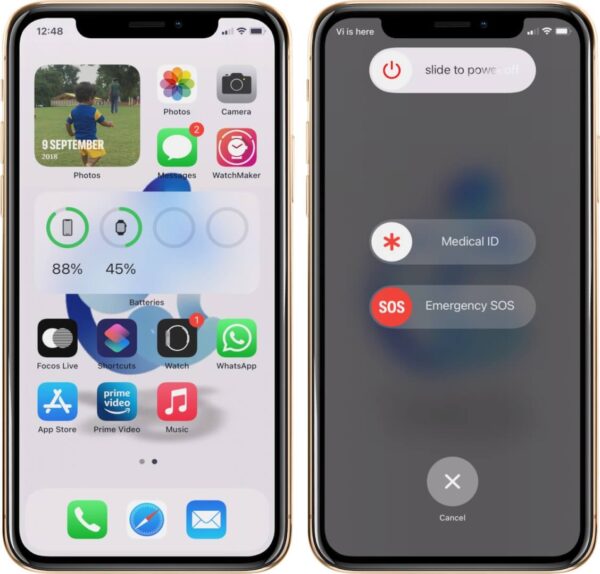
Once activated, the feature automatically calls emergency services and your specified emergency contacts and sends a message with your current location as soon as the call ends so they can use it to locate you.
2. Medical ID
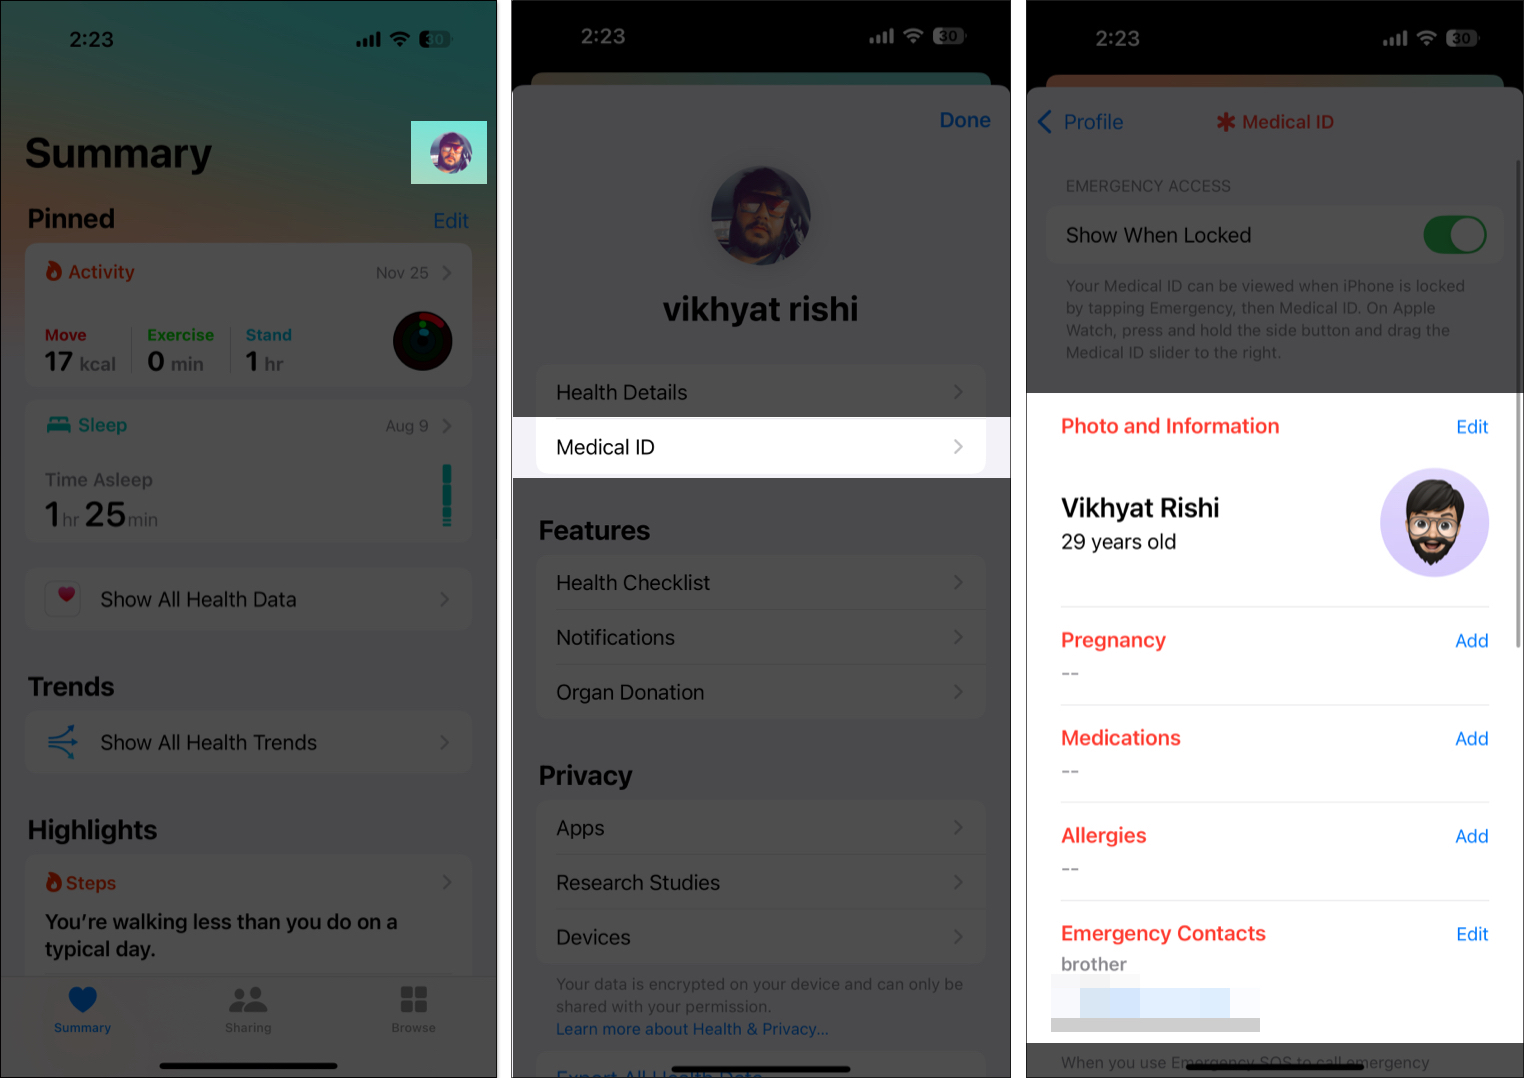
Setting up a Medical ID on your iPhone can be a lifesaver during a medical emergency. It provides the first responders with all the vital health information about you so they can assess your situation better and offer appropriate medical attention.
For instance, say you are unable to communicate during an emergency. Having a Medical ID will provide quick access to your critical medical information, such as allergies, medical conditions, medications, and emergency contacts, so the responder can look at and prescribe medicines accordingly.
3. Check In
It is easy to forget to inform our loved ones when we have reached our destination. But thanks to the Check In feature, which is available starting with iOS 17, you can automatically notify your family or friends when you safely arrive at a location so they can have peace of mind.
On the other hand, for times when you are running late or not moving, Check In will automatically send your iPhone’s location, battery life, network signal, location of the last iPhone unlock, and Apple Watch removal to your designated contacts. All this information remains end-to-end encrypted during transmission.
Check out our detailed guide on using Check In feature on iPhone to learn more.
4. Find My iPhone
Find My is Apple’s proprietary service that helps you keep track of all of your Apple devices no matter where they are. You can use Find My to locate your lost or misplaced iPhone, mark it lost, or erase all data remotely. Once the Find My service locates your iPhone, you can get directions to it using turn-by-turn navigation or force your iPhone to make a sound so you can locate it easily.
Mind you, Find My will only come in handy if you activated it on your iPhone before it got lost or misplaced. Hence, enabling Find My tracking on your iPhone is the first thing you should do when setting up a new iPhone.
5. Two-factor authentication (2FA) for Apple ID
The Apple ID (Apple Account) is the heart and soul of the Apple ecosystem. As such, keeping it protected with two-factor authentication (2FA) is paramount. This is because unauthorized access to your Apple Account can wreak havoc on your iCloud storage, allowing someone to remove the activation lock from your Apple devices or even change the password altogether.
With 2FA enabled, Apple will send a code to the trusted phone number and other Apple devices signed in with the same Apple ID every time you try to sign in to your account on a new device or web. To be able to sign in, you must enter your password and the 6-digit 2FA code sent to another connected device or phone number.
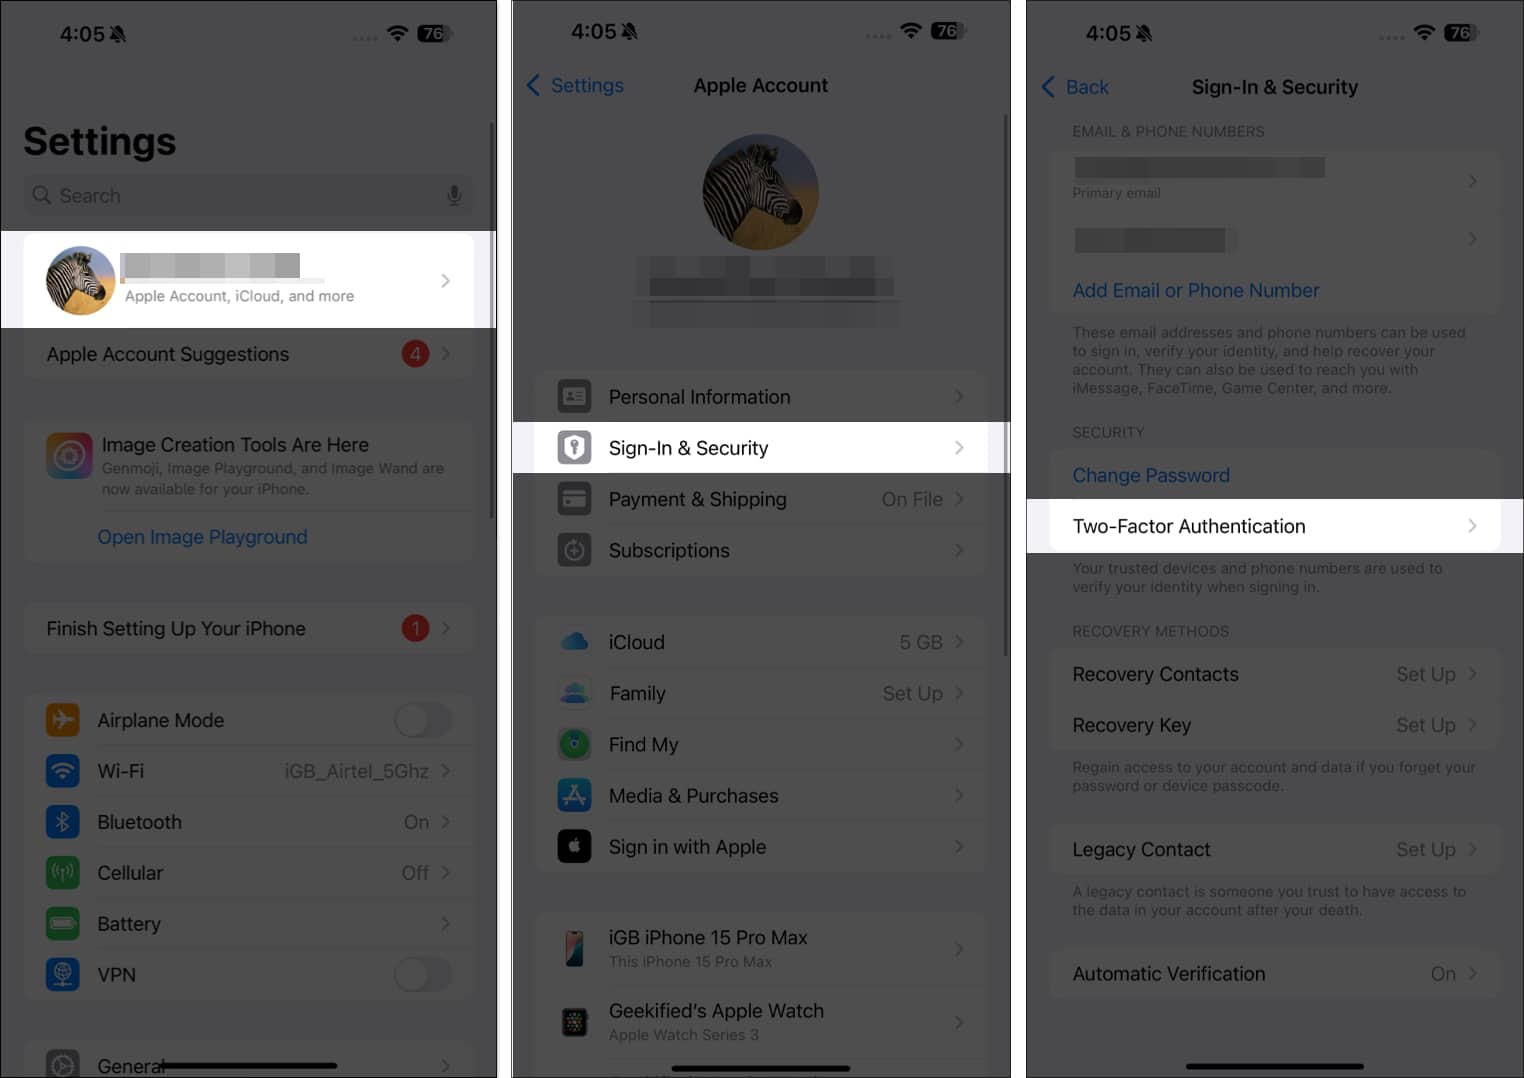
It is easy to set up two-factor authentication for your Apple ID, and you can do so by going to Settings → Apple Account → Sign-in & Security → Two-Factor Authentication.
6. Crash Detection
Crash Detection is, by far, the best emergency feature Apple has introduced in a while. While you need to set up other security and emergency features on your iPhone manually, Crash Detection comes auto-enabled on iPhone 14 and later models. Sadly, it is only available on selected iPhone and Apple Watch models.
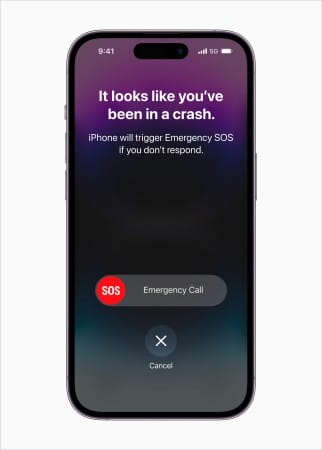
Crash Detection on your iPhone and Apple Watch automatically activates when the iPhone detects a severe car crash and sounds an alarm, and displays an alert on your iPhone screen. The iPhone then displays the emergency slider that you can use to contact emergency services or your emergency contacts.
You can dismiss the alert or use the slider to call for help. However, if you do not respond to the alert within 20 seconds, the iPhone automatically thinks your condition is serious and calls emergency services.
7. Lockdown Mode (for advanced security)
Added with iOS 16, the Lockdown Mode on the iPhone is designed to protect a specific set of users who are susceptible to sophisticated digital threats, such as those from NSO groups or mercenary spyware, because of who they are or what they do.
When enabled, Lockdown Mode restricts various apps and system functionality on your iPhone that can otherwise put your digital security at risk. However, Apple does allow you to exclude websites in Safari if they are necessary to you, while certain apps and features, such as Messages, web browsing, FaceTime, Photos, and more, stay under limited functionality.
To enable LockDown Mode on your iPhone, go to Settings → Privacy & Security → Lockdown Mode and tap Turn On Lockdown Mode.

8. Emergency contacts and location sharing
By now, you might already know how important it is to have an emergency contact on your iPhone. Your emergency contact is the person your iPhone calls in case of an emergency to notify them about your situation. It is different from emergency services, which your iPhone automatically calls to seek professional help in case of an emergency.
To add an emergency contact on your iPhone, open the Contacts app, select a contact, and tap Add to Emergency Contact.
Other than having your partner, friends, or family members as emergency contacts, you can also share your iPhone location with trusted contacts so they will always know about your whereabouts. This is particularly helpful for parents who want to keep track of their child’s location.
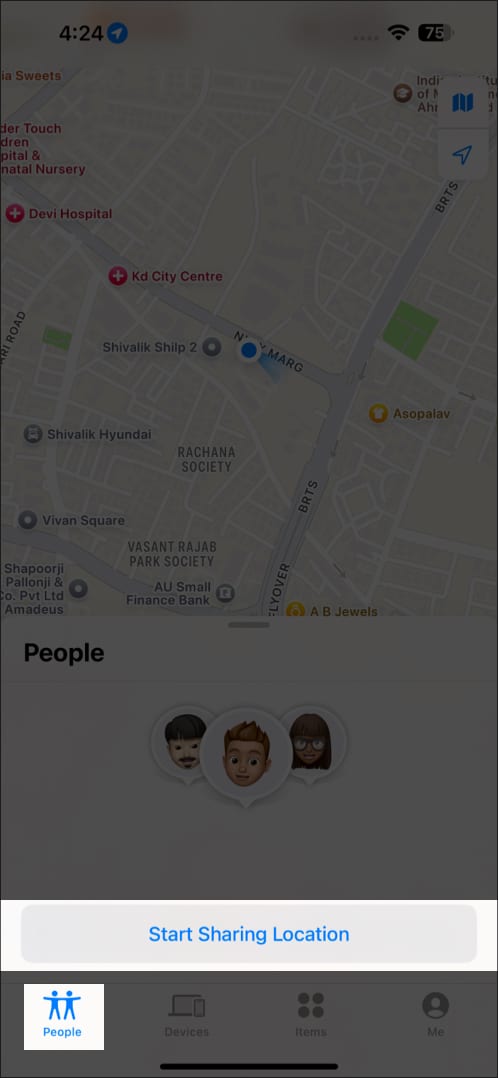
To share your location on the iPhone, open Find My, go to the People tab, and tap Start Sharing Location.
9. App permissions
While granting permissions to access your data to apps is necessary for the app to work at full capacity, Apple does allow you to control how apps on your iPhone access your personal data.
To review app permissions on your iPhone, go to Settings → Apps and select the app you want to review. Then, toggle the switches to enable or disable permissions such as Location, Camera, Microphone, Contacts, and more, as needed. Alternatively, head to Privacy & Security settings to view and manage app permissions by category.
By regularly reviewing these permissions, you can ensure the apps on your iPhone only have access to the data you’re comfortable sharing and limit apps from misusing them.
10. Safety Check (iOS 16 and Later)
Safety Check on your iPhone is a feature that protects against domestic threats. It disables Find My Network’s location sharing, resets system privacy permissions, restricts Message and FaceTime access, and logs out of your iCloud account, among other things. In addition, it also lets you perform a privacy audit and check who can see what information and change your passcode and password for your Apple ID, and more.
Safety Check offers an additional option called Emergency Reset. Using it immediately withdraws permission for anybody, any app, or any data to access your iPhone’s data. You can use this if you fear your iPhone has been hacked or your safety is in danger.
If you are more concerned about your privacy, you may use security apps for your iPhone.
11. Stolen Device Protection
While there is no way one could unlock your iPhone without knowing the passcode, many reports suggest that there are incidents where the thief somehow gets hold of the iPhone passcode and makes sensitive changes to it. To combat this issue, Apple added the Stolen Device Protection to its iPhone.
Stolen Device Protection adds an extra secure layer when enabled, preventing anyone from changing sensitive information on your iPhone. No matter if the thief has your passcode, they will still need to authenticate with the Face ID or Touch ID to access or alter your private data.
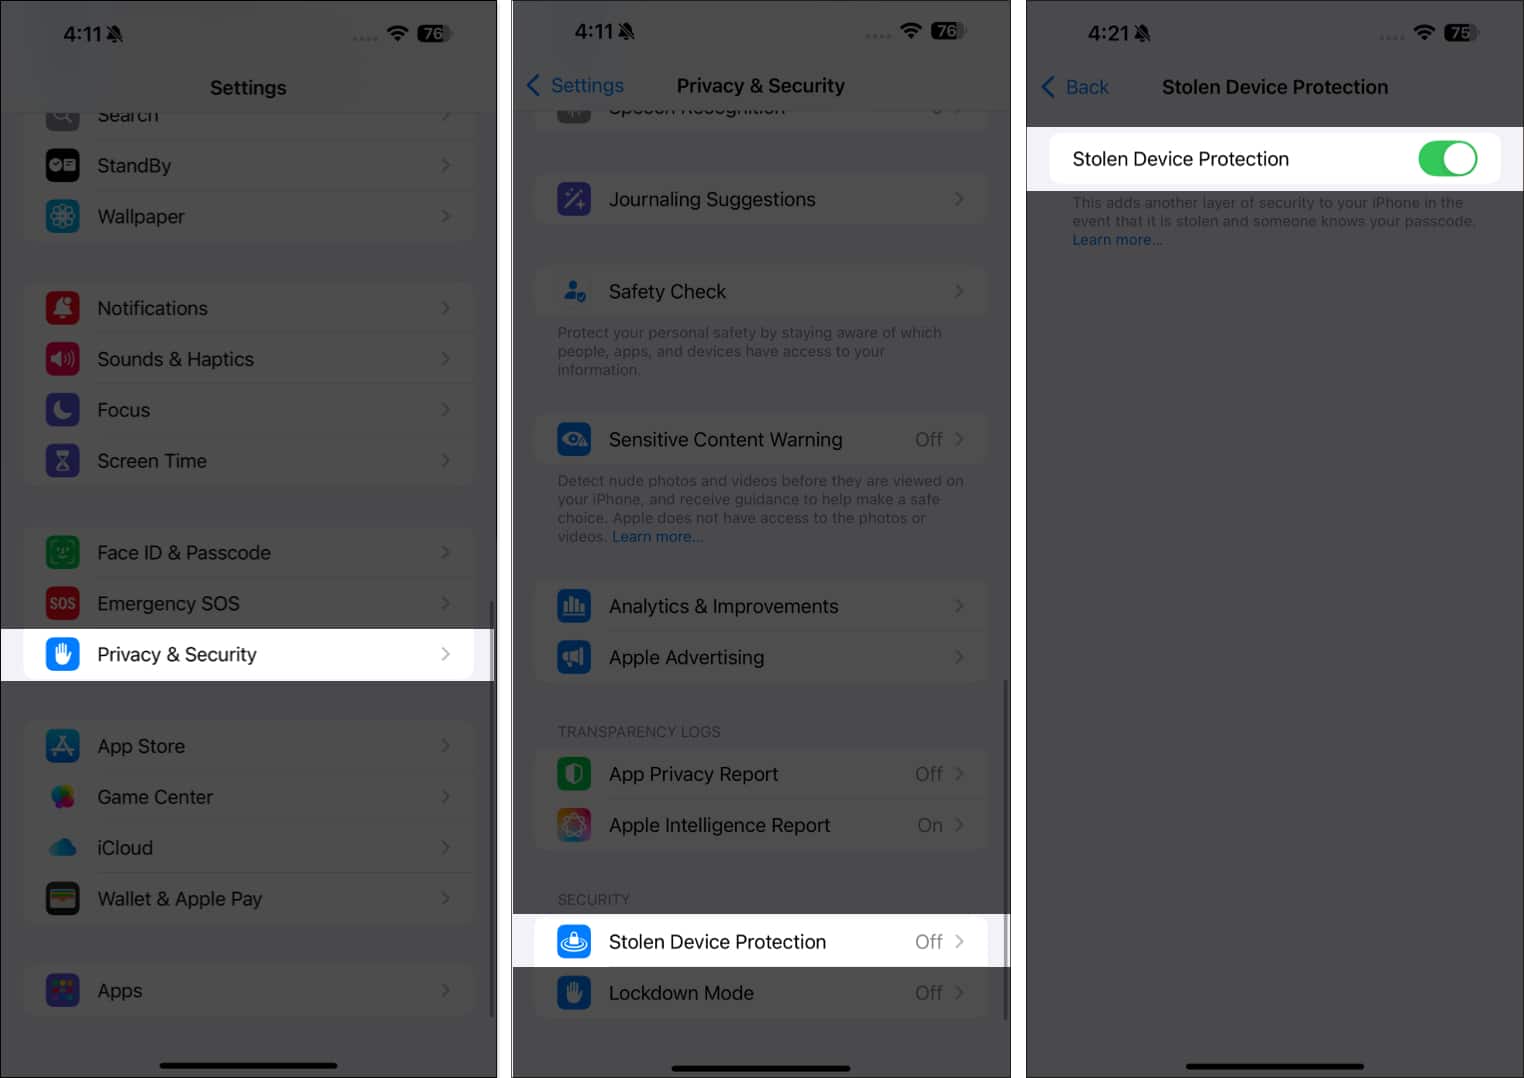
Turning on Stolen Device Protection is easy. Go to Settings → Privacy & Security and toggle on Stolen Device Protection.
12. Privacy and security settings
Every feature we have discussed so far will take you a step towards your digital safety on your iPhone. However, there are certain privacy and security settings other than app permissions that you must review regularly to keep your personal data secure and private.
These include Mail Privacy Protection, App Privacy Reports, hardware and services access to apps, cross-app tracking, and Apple Advertising. You can access them under the Privacy & Security settings menu and make the necessary changes as required.
If your iPhone is updated to iOS 18.1, you will notice your iPhone restarts automatically if not used in three days. This security feature is called Inactivity Reboot, which encrypts your device data. So, others can’t access your device until they enter the PIN or passcode. This adds a layer of additional security in case of theft or unauthorized access.
Digital security enhanced…
Using the security and emergency settings above is a great way to secure your data and get quick assistance in critical situations.
Remember, while you may already be using many of the security features in iOS, being mindful when performing trivial actions like connecting your iPhone to public Wi-Fi networks or plugging your iPhone into public charging stations will also go a long way in ensuring the privacy and security of your data on the iPhone.
Share this post with your loved ones so they can also use these features and have peace of mind.
Explore more…

