Taking screenshots has become an essential part of our lives, so it’s pretty upsetting when they stop working on your iPhone and iPad. It could be due to a software glitch, or maybe one of the buttons is stuck. Don’t worry! I have listed all the possible ways to get your screenshots up and working again.
1. Force restart your iPhone to fix the screenshot issue
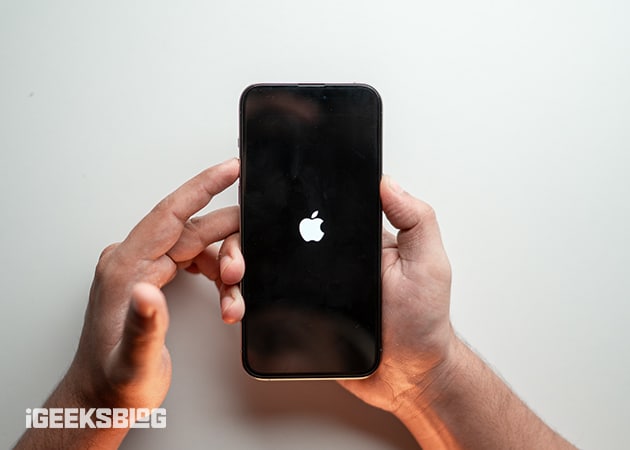
A quick way to resolve any temporary problems on iOS is to force restart your iPhone. Follow the instructions for your device, and check if the screenshots work again. If not, you can try an alternative way, as explained below.
2. Use AssistiveTouch
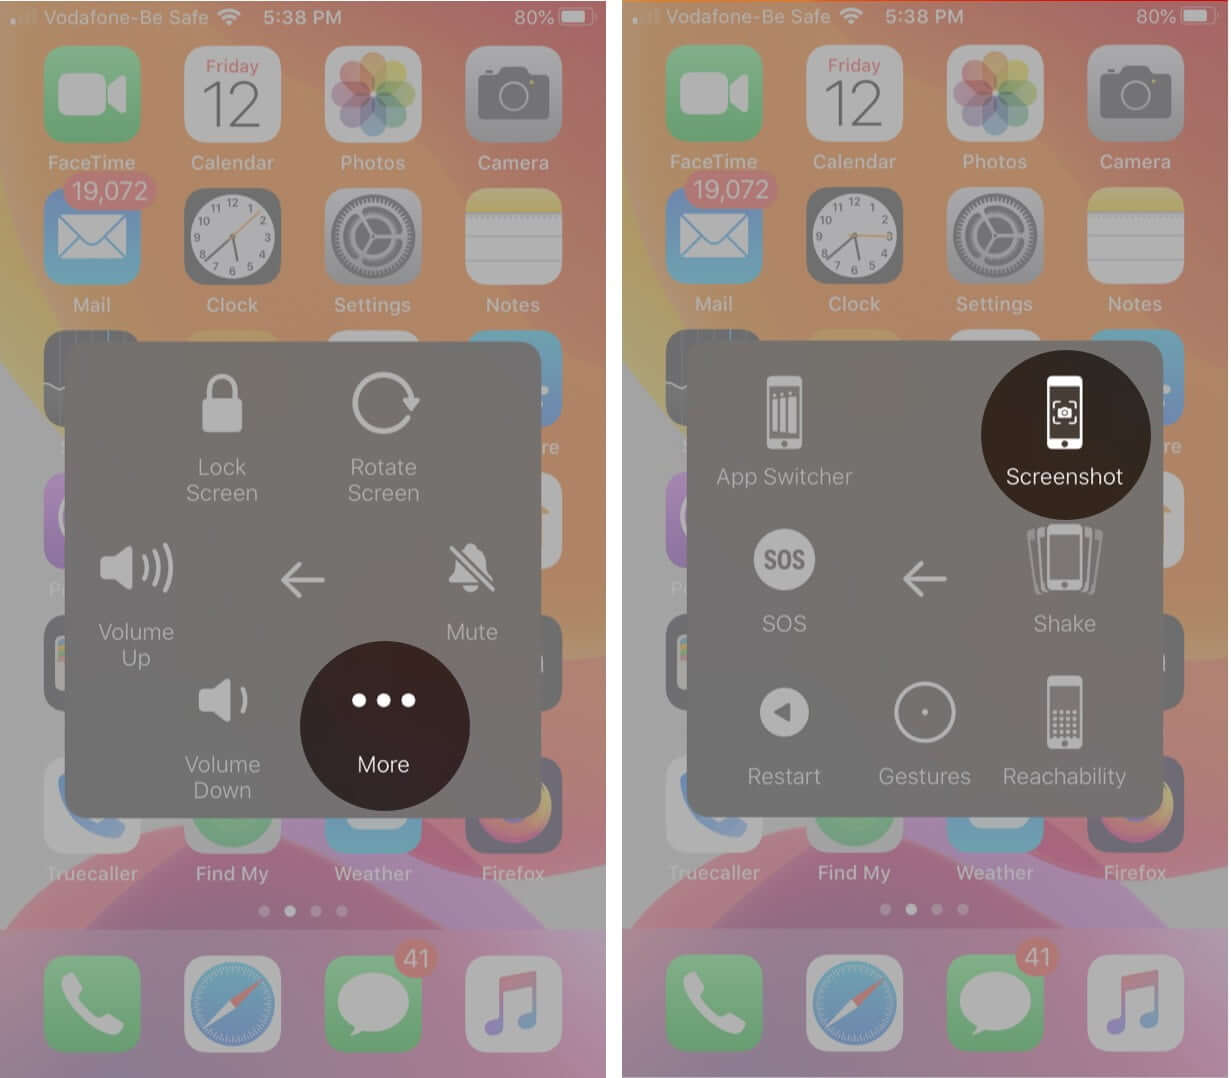
AssistiveTouch is an accessibility feature that eliminates using any physical buttons on your iPhone. You can use AssistiveTouch for various tasks, including taking a screenshot. Just follow the steps below:
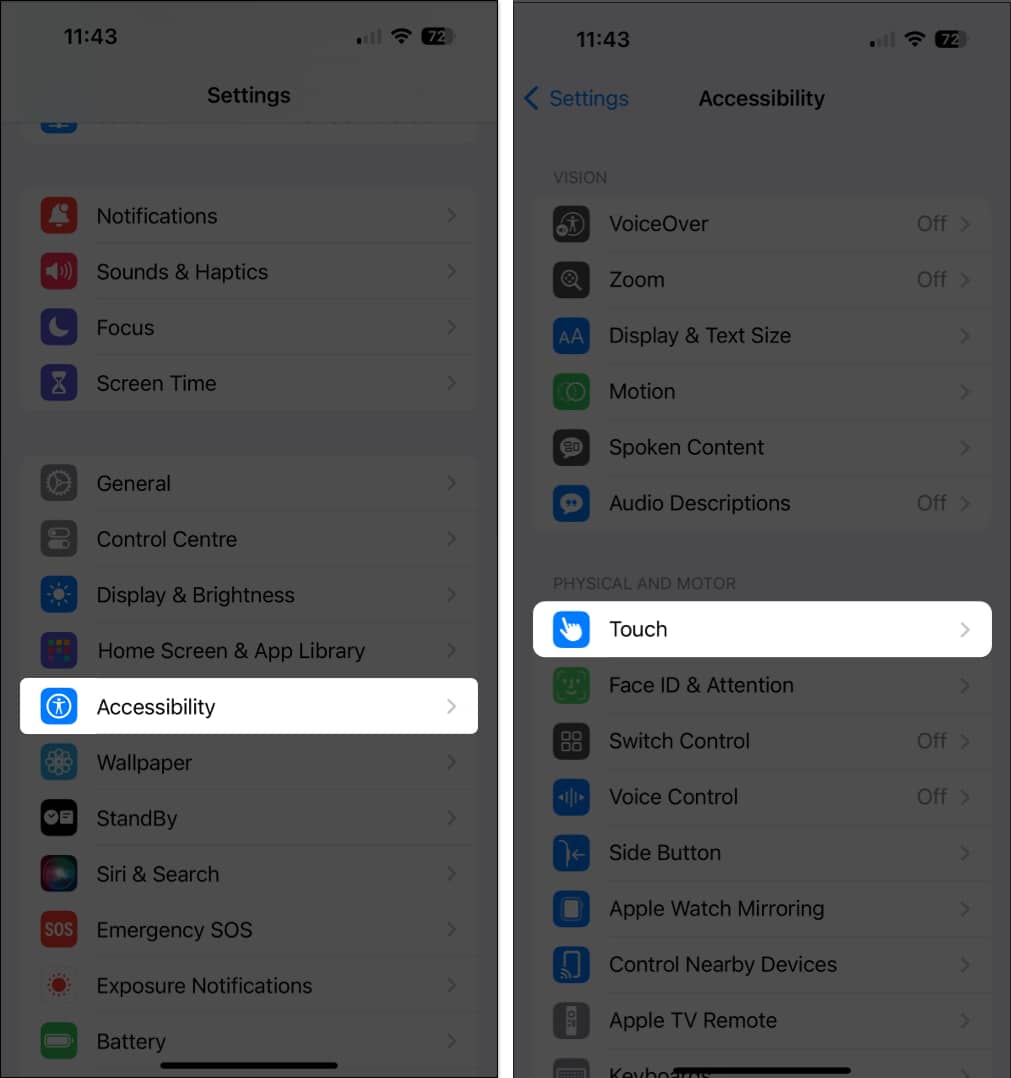
- Go to Settings → Accessibility → Touch.
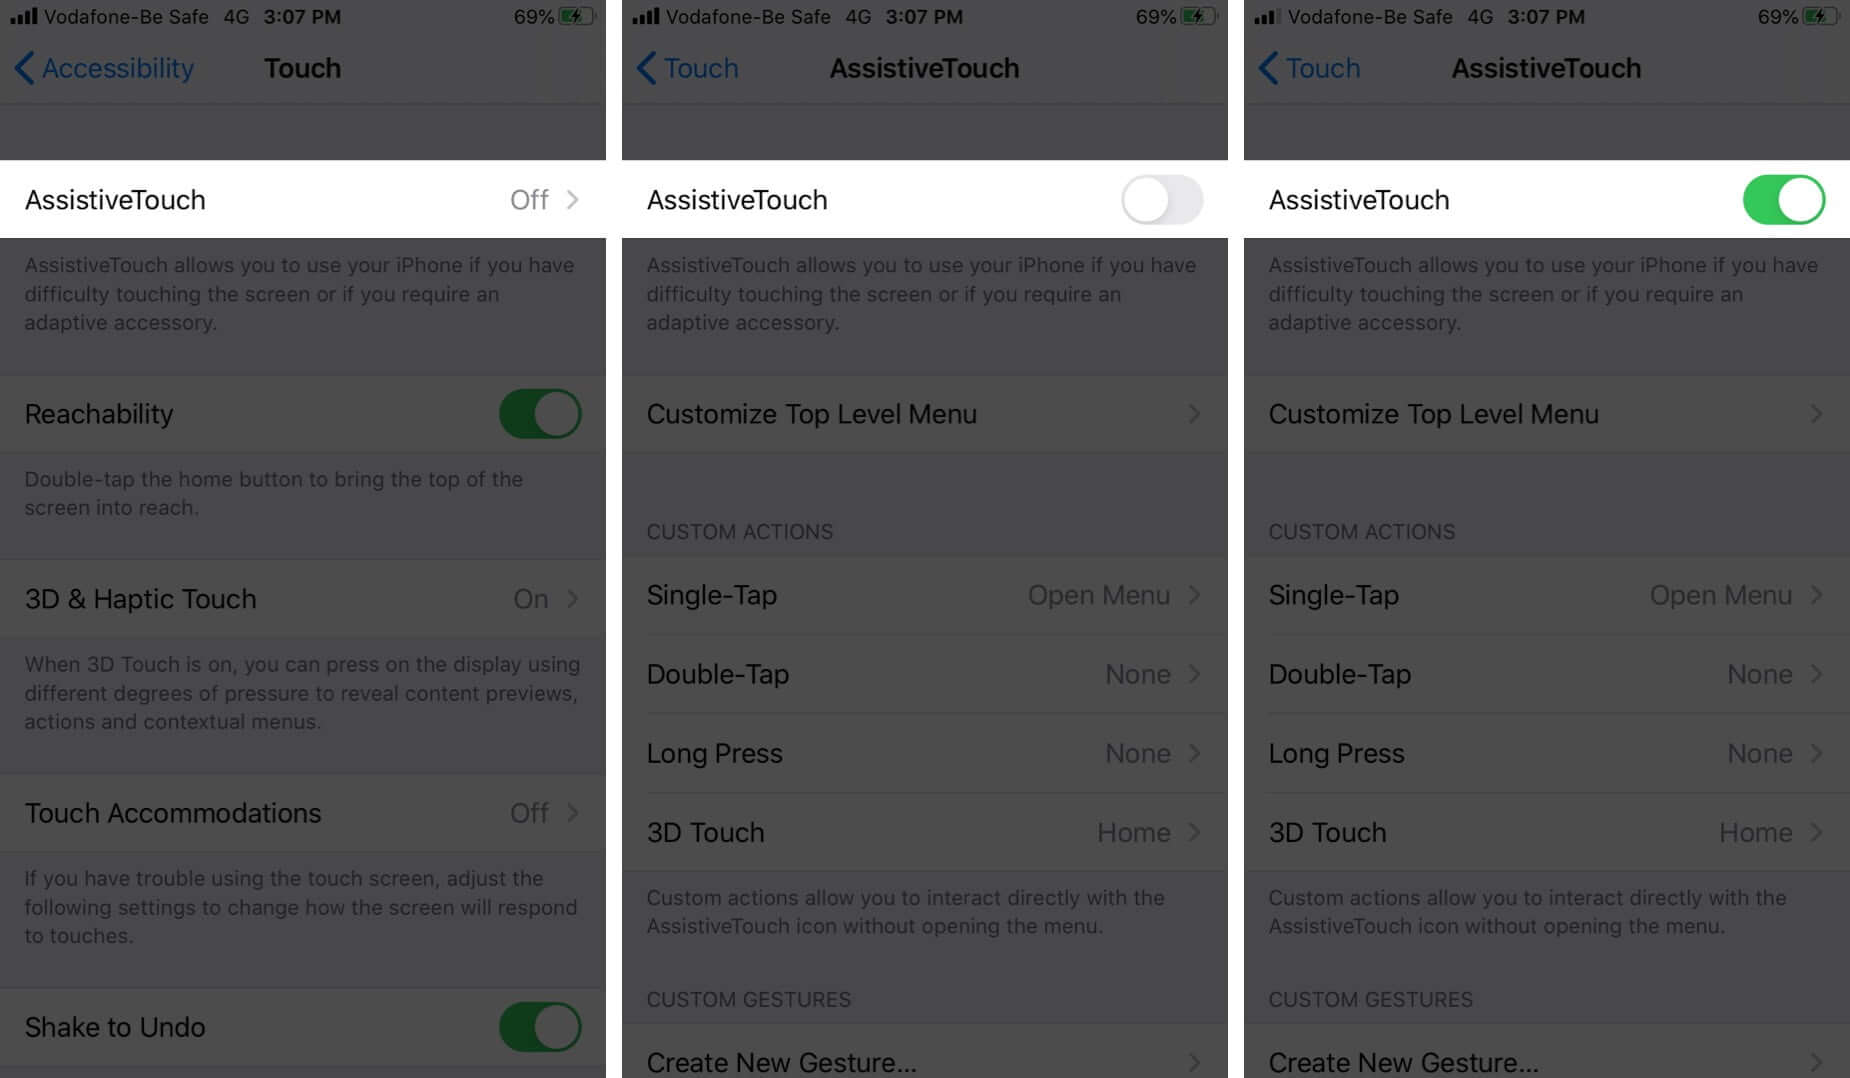
- Now, tap AssistiveTouch and toggle it on.
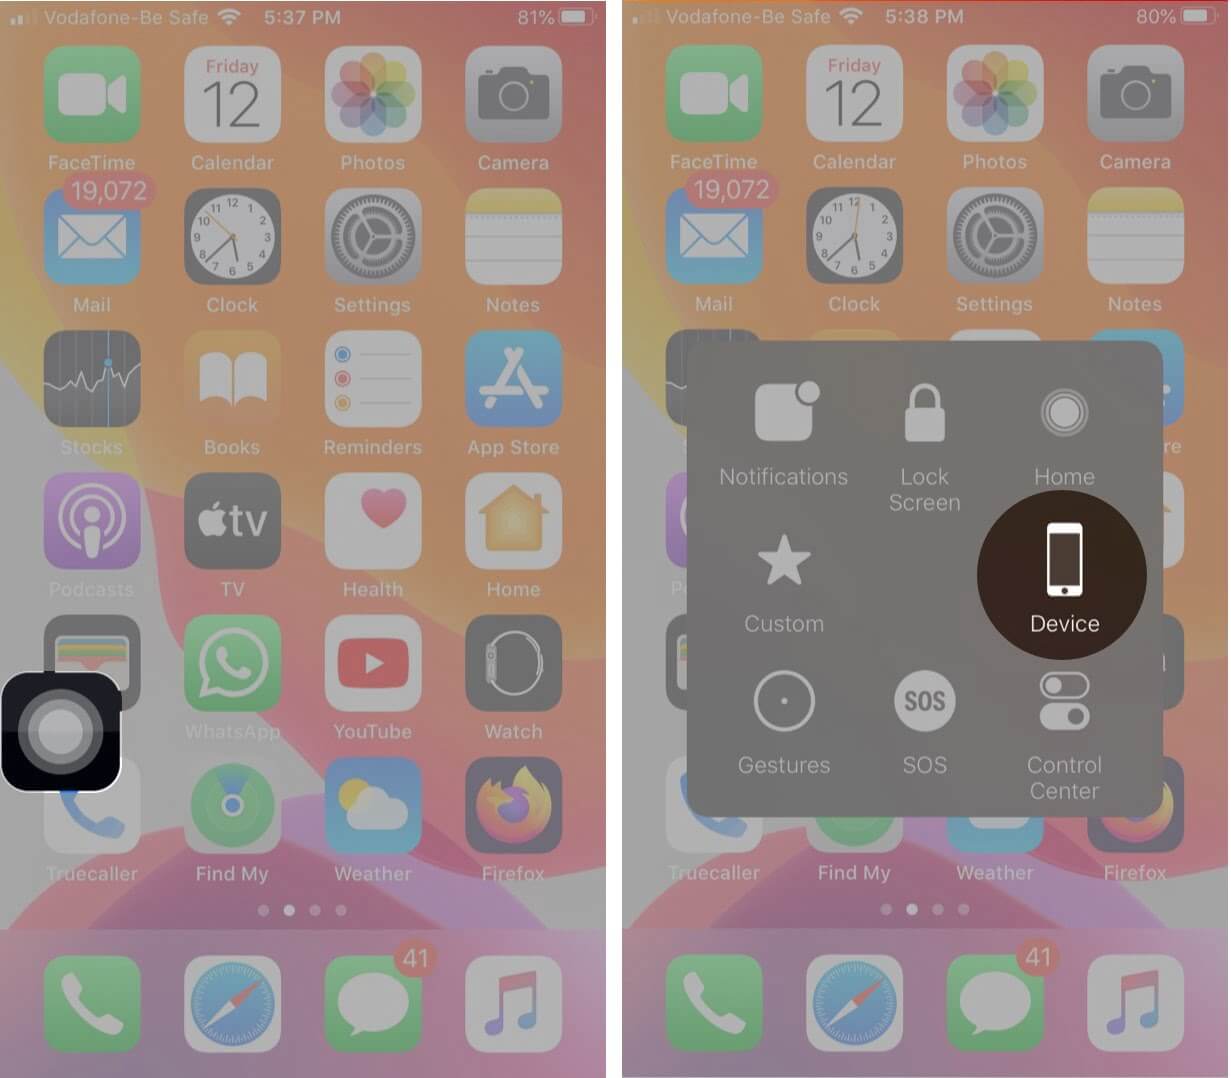
If you are using older iOS versions, go to Settings → General → Accessibility → AssistiveTouch and toggle it on. - Tap the circular button that appears on your screen and select Device.
- Now, tap More → Screenshot.
If you frequently take screenshots, you can leave AssistiveTouch on, or you can disable it at any time by following the same steps above and toggling it off.
3. Use 3D Touch
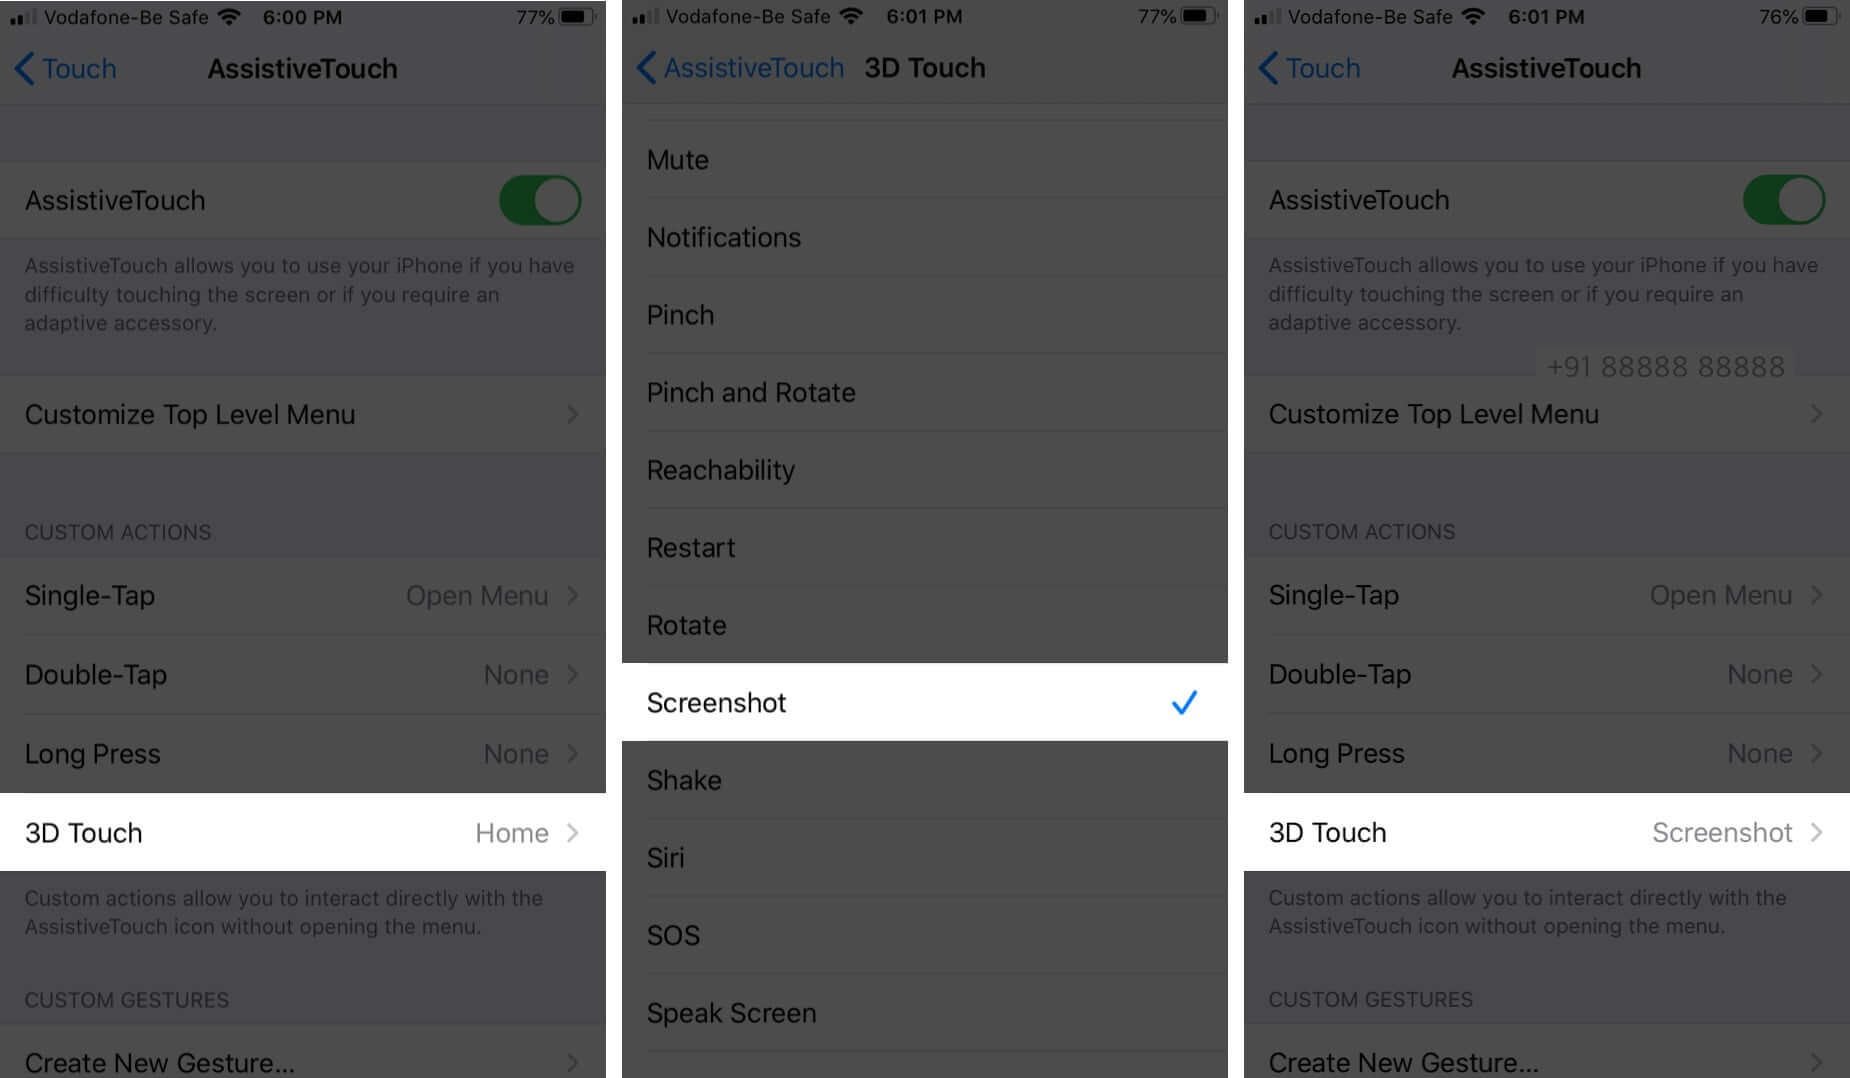
If you have an iPhone 6s or later, you can configure 3D Touch to take a screenshot, but AssistiveTouch needs to be enabled first. Just follow these steps:
- Go to Settings → Accessibility → Touch → AssistiveTouch and toggle it on.
- Next, select 3D Touch under Custom Actions and choose Screenshot.
Now, whenever you want to capture a screenshot, just 3D Touch the AssistiveTouch button. Of course, you can also assign the screenshot option to one of the other actions, such as a single-tap, double-tap, or long-press.
4. Update the iOS version
Sometimes, outdated software on your iPhone can cause unpredictable problems, like screenshots not working. So, it’s best to update iOS to the latest version.
To check for updates, go to Settings → General → Software Update. If an update is available, tap Download and Install.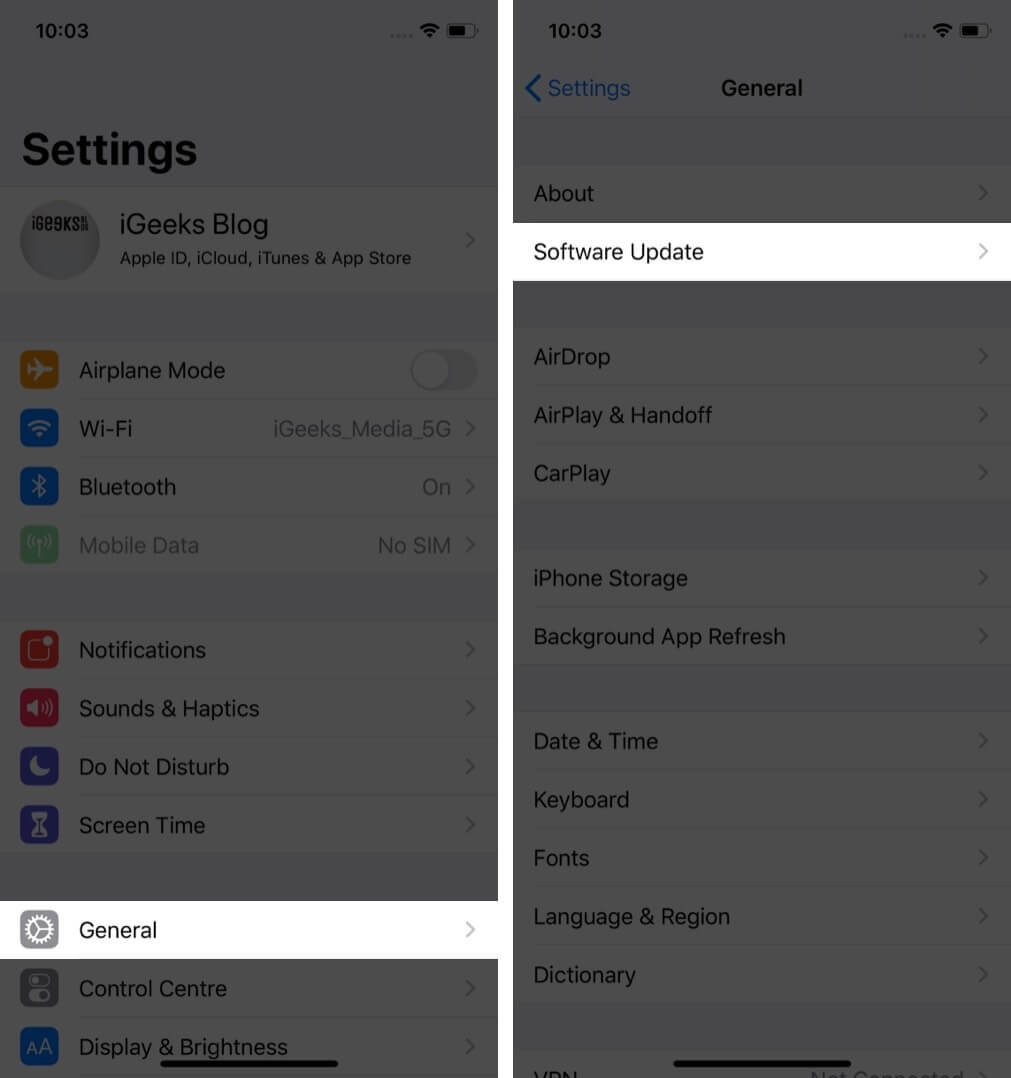
5. Factory Reset your iPhone
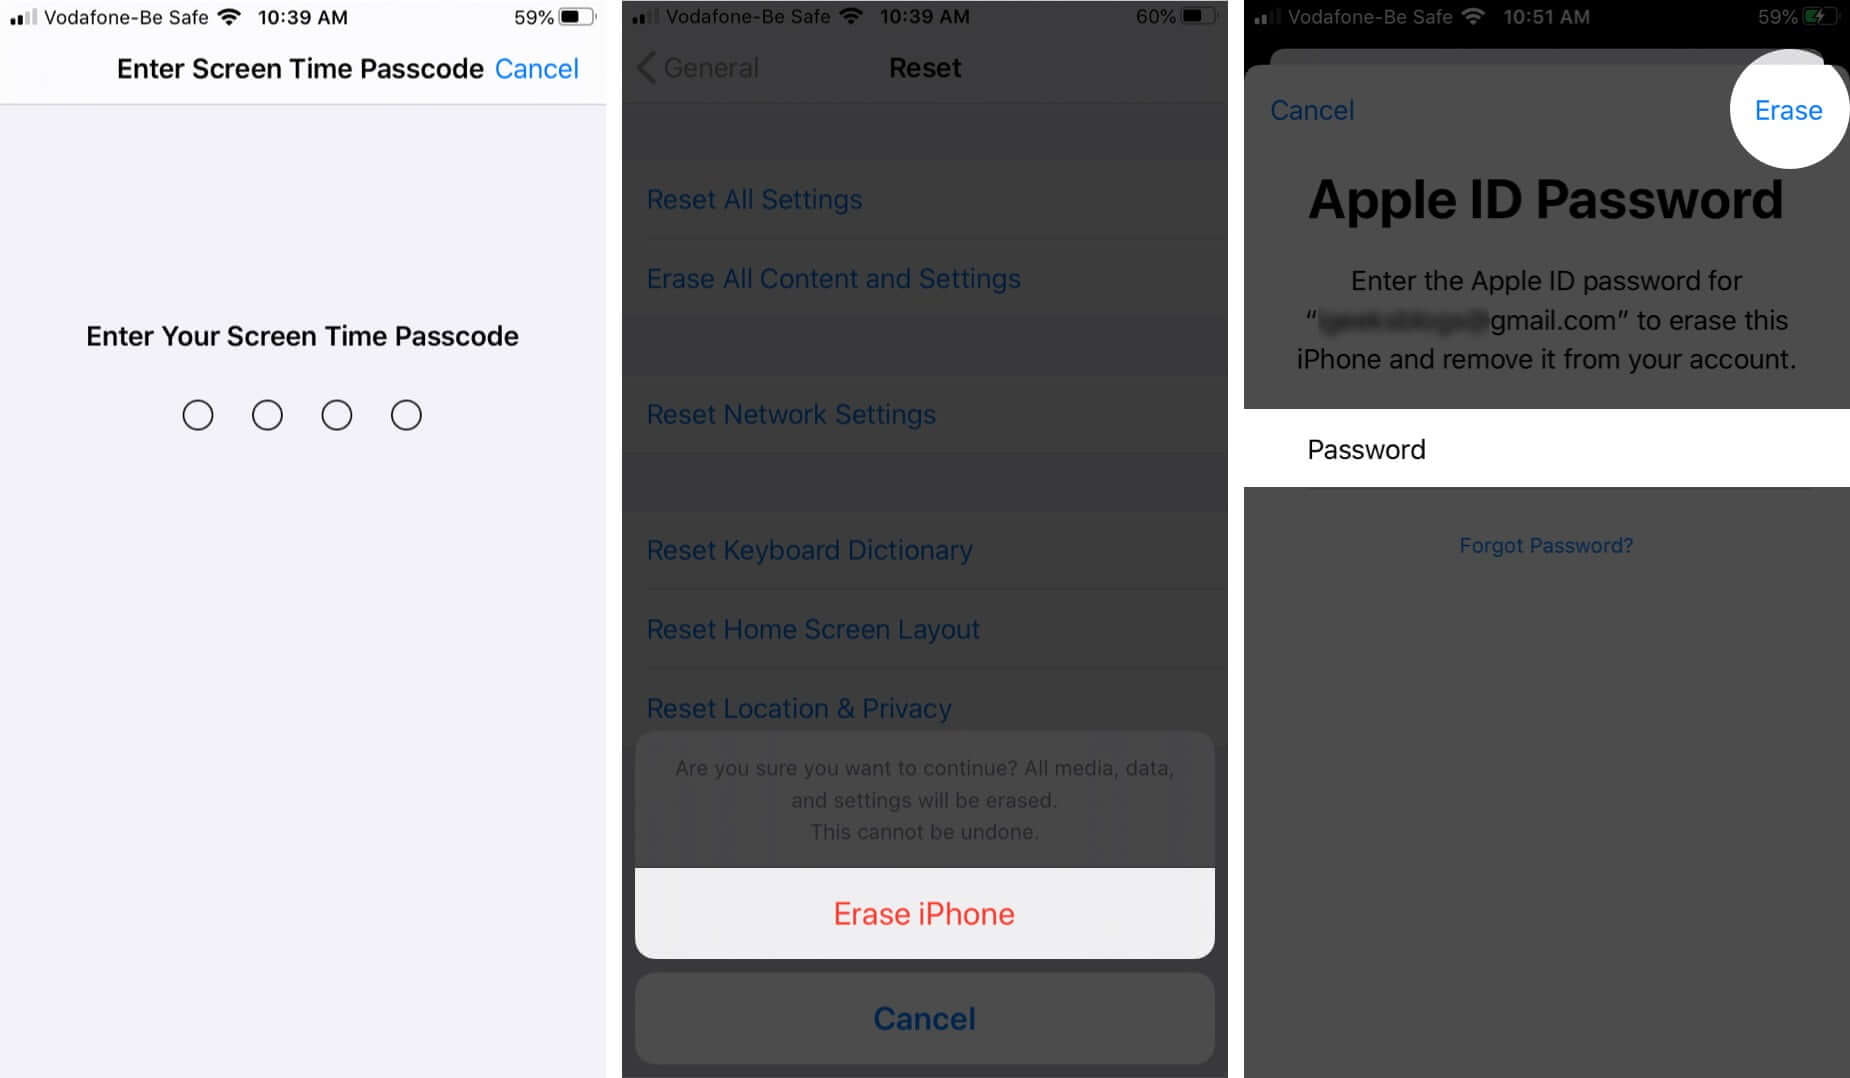
If you have tried all the above steps but the iPhone screen capture is still not working, you may choose to restore your device to factory settings. This will erase all your data and settings, so ensure you back up your iPhone.
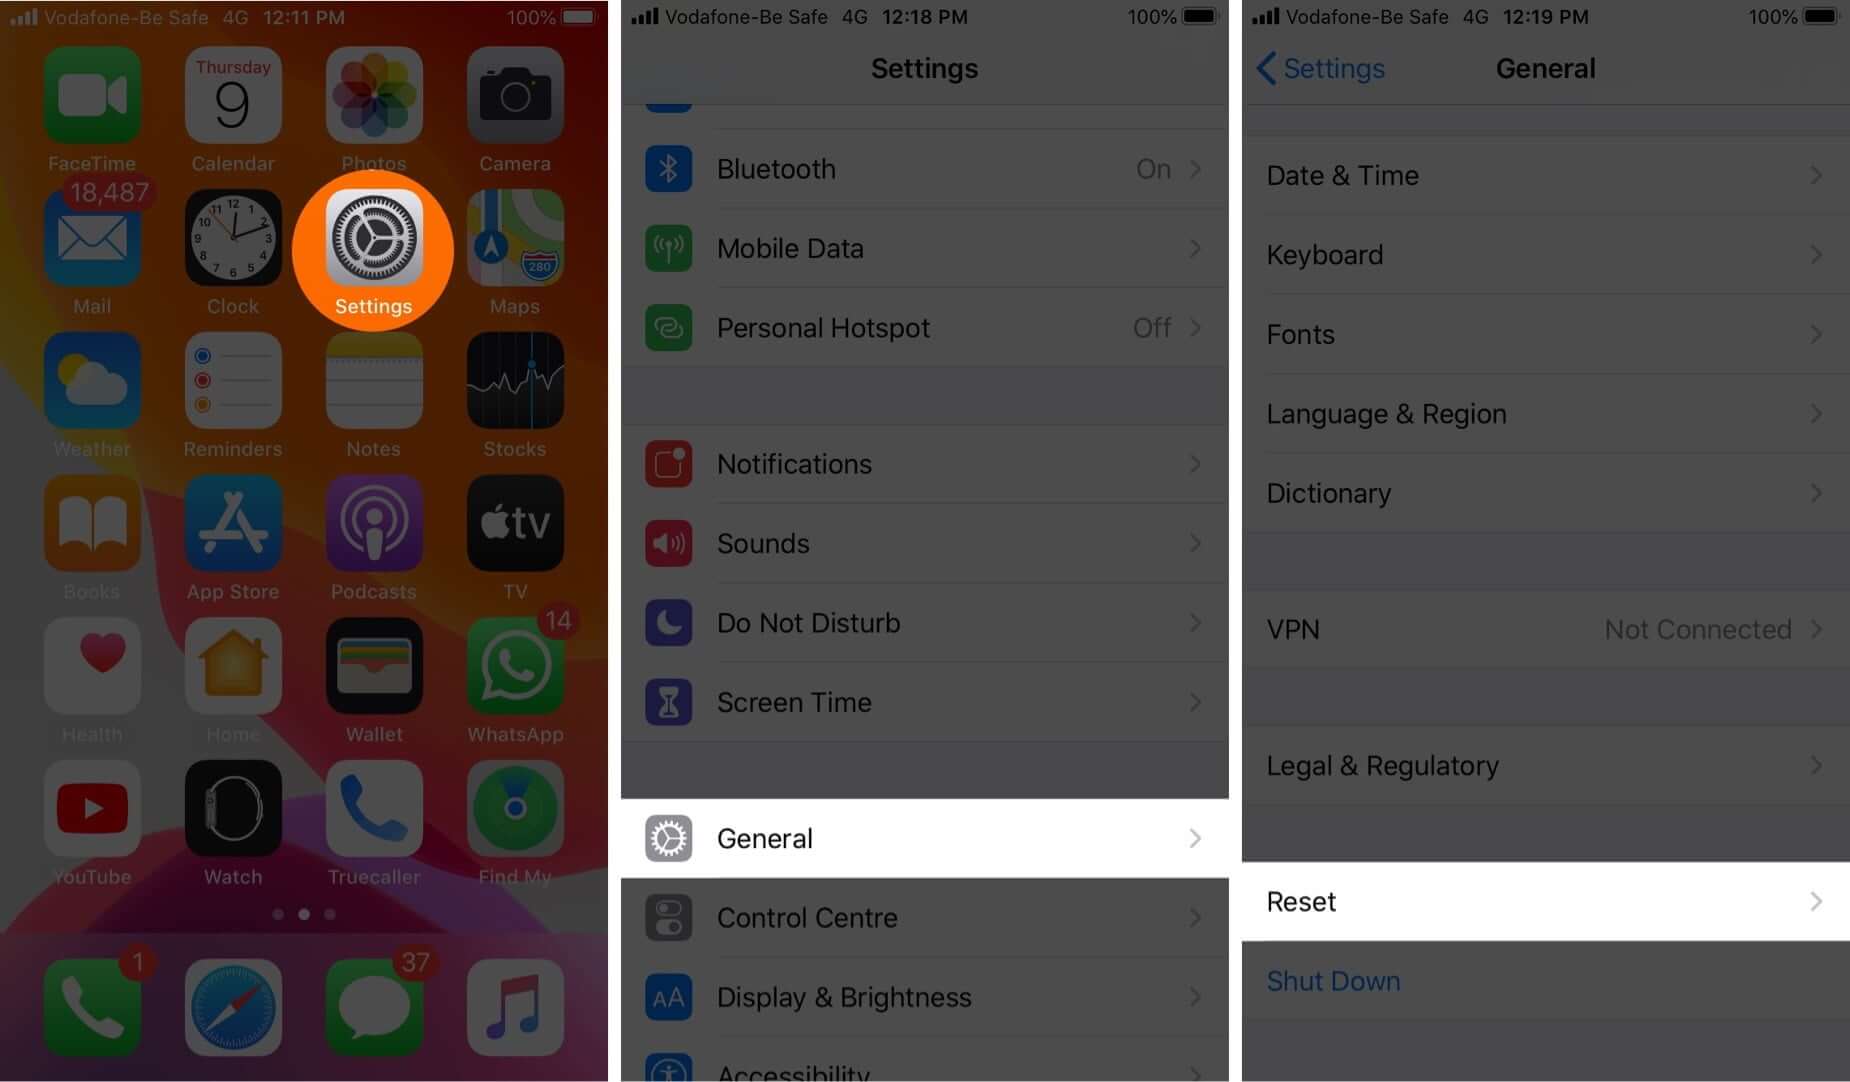
- Go to Settings → General → Reset.
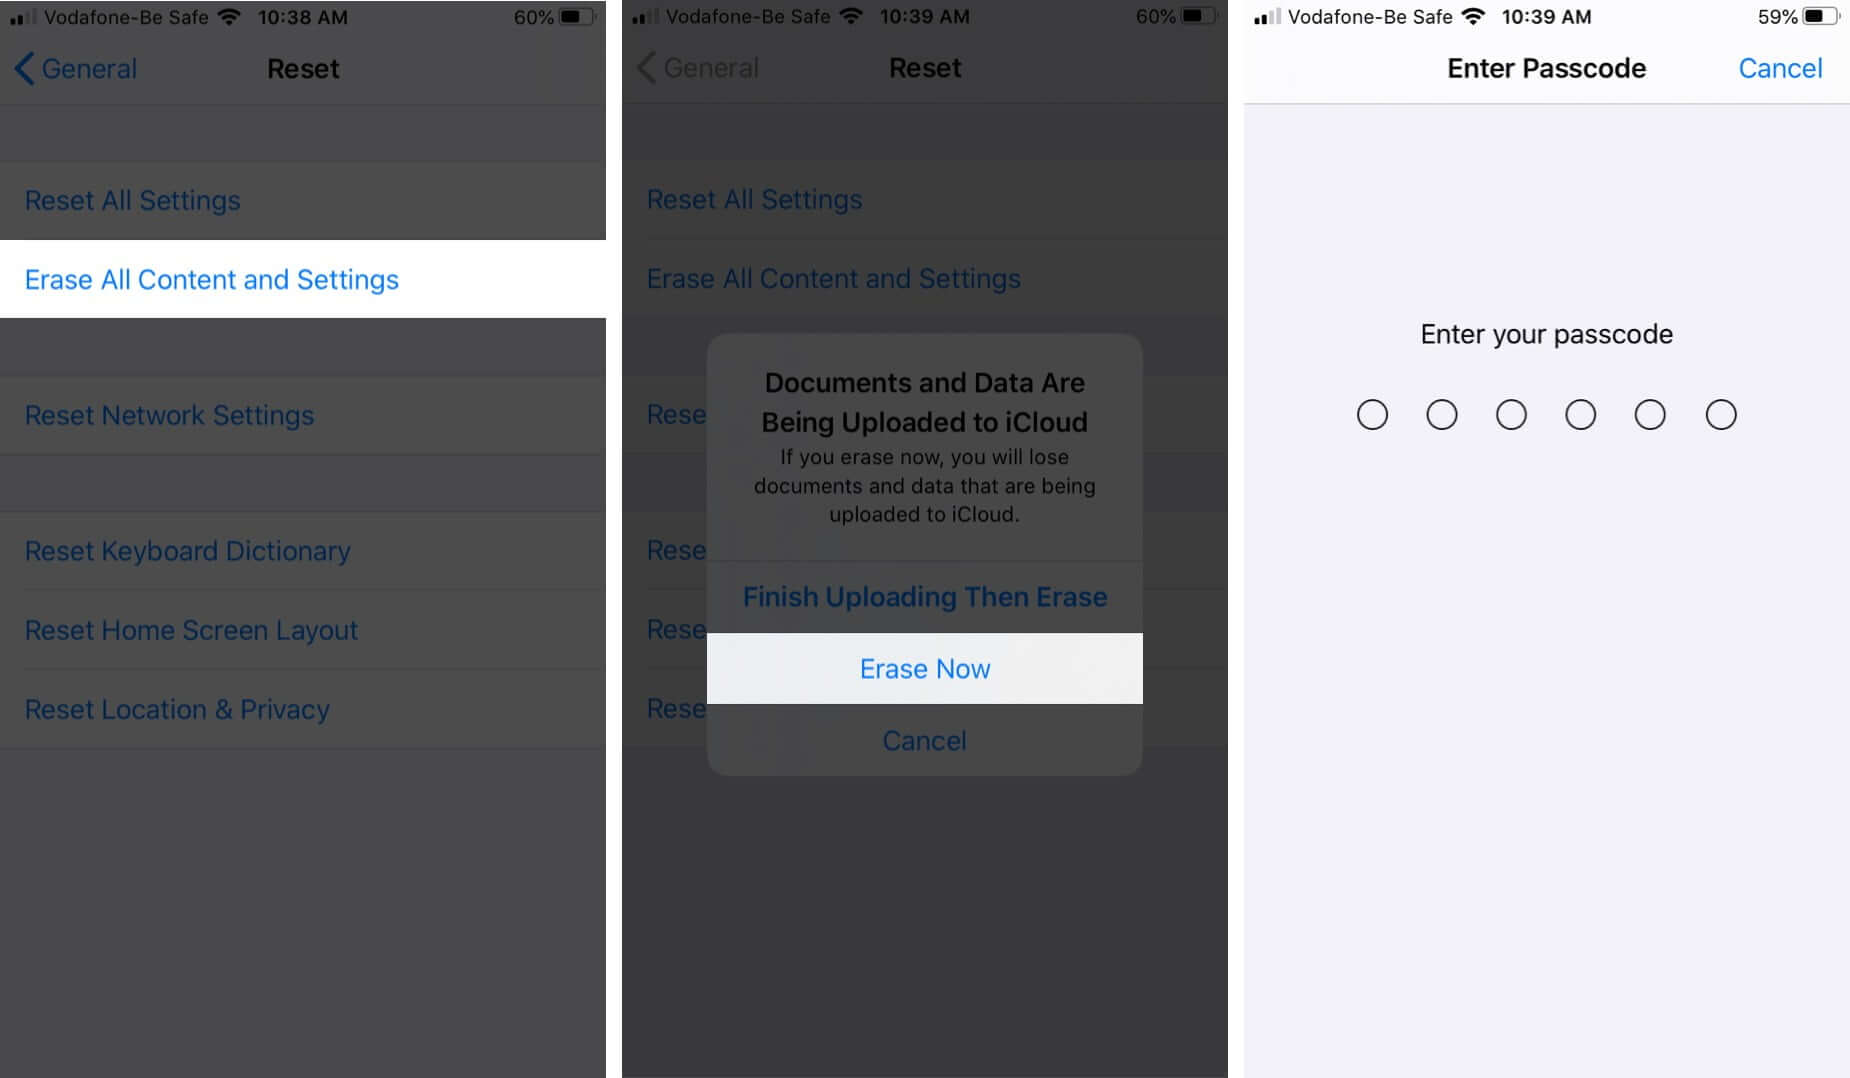
- Now, tap Erase All Content and Settings.
If you’ve not backed up your device, you’ll be prompted to do so. - Enter your passcode if you have one.
You’ll get a warning. - Tap Erase iPhone.
- To confirm, enter your Apple ID password.
Your device will take a few minutes to wipe all its settings and data. It will then revert to the setup screen you would have seen when you first used it.
You can then restore your iPhone from a backup and check if screenshots are working again.
Summing up
If none of the above solutions work for you, the best thing to do is contact Apple Support for further assistance. If any of the solutions work for you, let us know in the comments below.
You may want to take a peek at:

