Are you tired of finding yourself in the dark when you need your iPhone flashlight the most? I’ve also struggled with a malfunctioning flashlight after updating to iOS 18, which left me frustrated. So, I looked for quick and easy solutions.
In this blog, I’ll walk you through what to do when your iPhone flashlight is not working in iOS 18.
Table of Contents
- Why is my iPhone flashlight not working?
- 12 ways to fix flashlight not working on iPhone after iOS 18 update
- Ensure the flashlight isn't blocked
- Charge your iPhone
- Turn off Low Power Mode
- Avoid overheating your iPhone
- Change flashlight intensity
- Force quit Camera and similar apps
- Trigger flash in the Camera app
- Remove flashlight from the Control Center
- Remove flashlight command from Back Tap
- Check LED Flash for Alerts settings
- Uninstall third-party flashlight apps
- Disable Focus mode
- Other fixes worth trying
Why is my iPhone flashlight not working?
If you find your iPhone flashlight isn’t working all of a sudden, there are a few probable reasons to rule out first and foremost.
Did you recently get a new case or camera protector? Is your iPhone sufficiently charged and cooled enough to use all functions correctly? When was the last time you updated iOS and restarted your phone?
If you can’t figure out why your iPhone’s flashing isn’t working after going through the usual suspects, there may be a bug in the software or a third-party app you use preventing it from functioning properly.
12 ways to fix flashlight not working on iPhone after iOS 18 update
Below, I’ve provided 12 tried and tested ways to fix the iPhone flashlight and get it working again. So, let’s begin!
1. Ensure the flashlight isn’t blocked
Some cheap iPhone cases or covers don’t fit properly and block the camera module. So, whenever you enable the flashlight, it seems to be not turning on, even though it’s working perfectly. Try removing all accessories from your iPhone and using the flashlight again.
If that doesn’t work, you may need to charge your iPhone.
2. Charge your iPhone
I discovered that the flashlight icon greys out whenever my iPhone has less than 20% battery left. Continuously using the flash consumes a lot of power, so if your iPhone is running low on battery, it won’t turn on.
To fix this, connect your iPhone to a charger and juice it up to at least 50%. Similarly, you may need to disable Low Power mode.
3. Turn off Low Power Mode
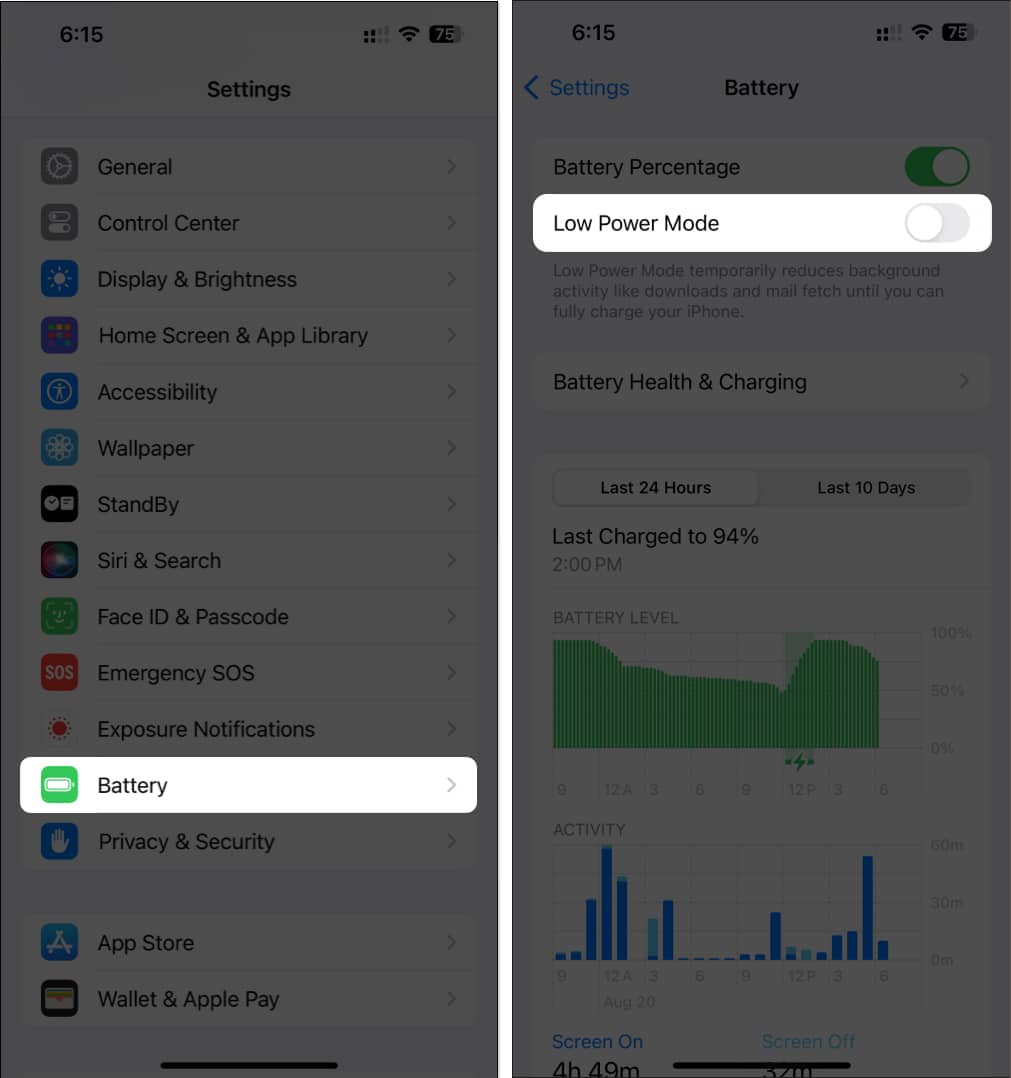
Low Power mode disables all power-consuming features, apps, and background activities to save some battery life. So, your iPhone flashlight may not work due to a glitch with this battery-saving mode. To turn this off,
- Go to Settings → Battery.
- Toggle off Low Power Mode.
Did that fix your iPhone flashlight? If not, it may be a little too hot to handle.
4. Avoid overheating your iPhone
When your iPhone is too hot, it malfunctions, and the flashlight stops working. Overheating may occur due to extreme outside temperatures, extensive sun exposure, or resource-demanding activities like playing intense games. Try to cool your iPhone down and see if that restores the flashlight function.
- Close all apps on your phone.
- Leave it idle for a few minutes.
- Place your iPhone in a cool, dry location away from strong sunlight.
However, never put your iPhone in the refrigerator since doing so may harm it.
5. Change flashlight intensity
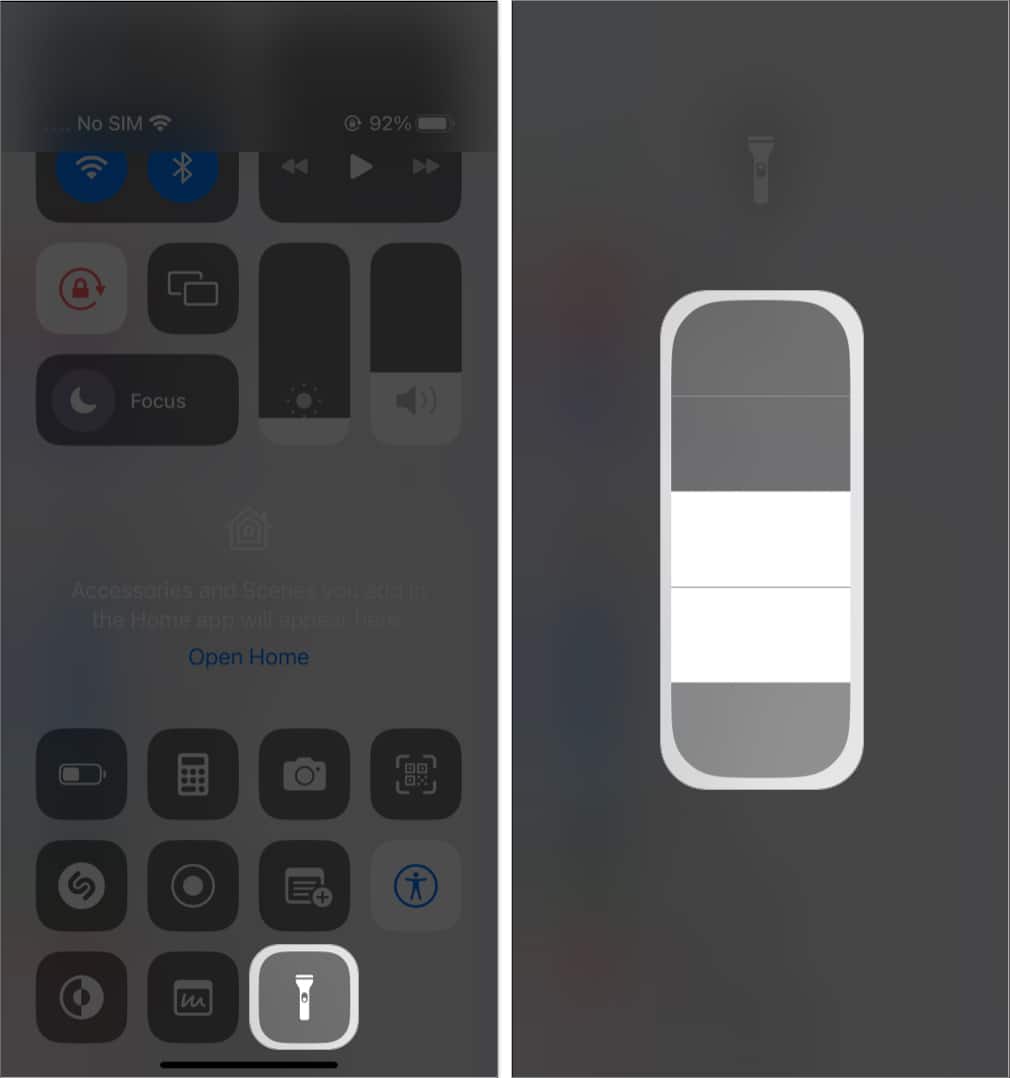
iPhones offer a useful feature to adjust the flashlight’s brightness level. If the brightness is set at the lowest level, you may not be able to detect that the flash is enabled. To increase the intensity:
- Open Control Center → Tap and hold the flashlight icon.
- Drag the slider upwards to increase brightness.
If your iPhone’s flashlight is still not working, try quitting out of the apps that regularly make use of the feature.
6. Force quit Camera and similar apps
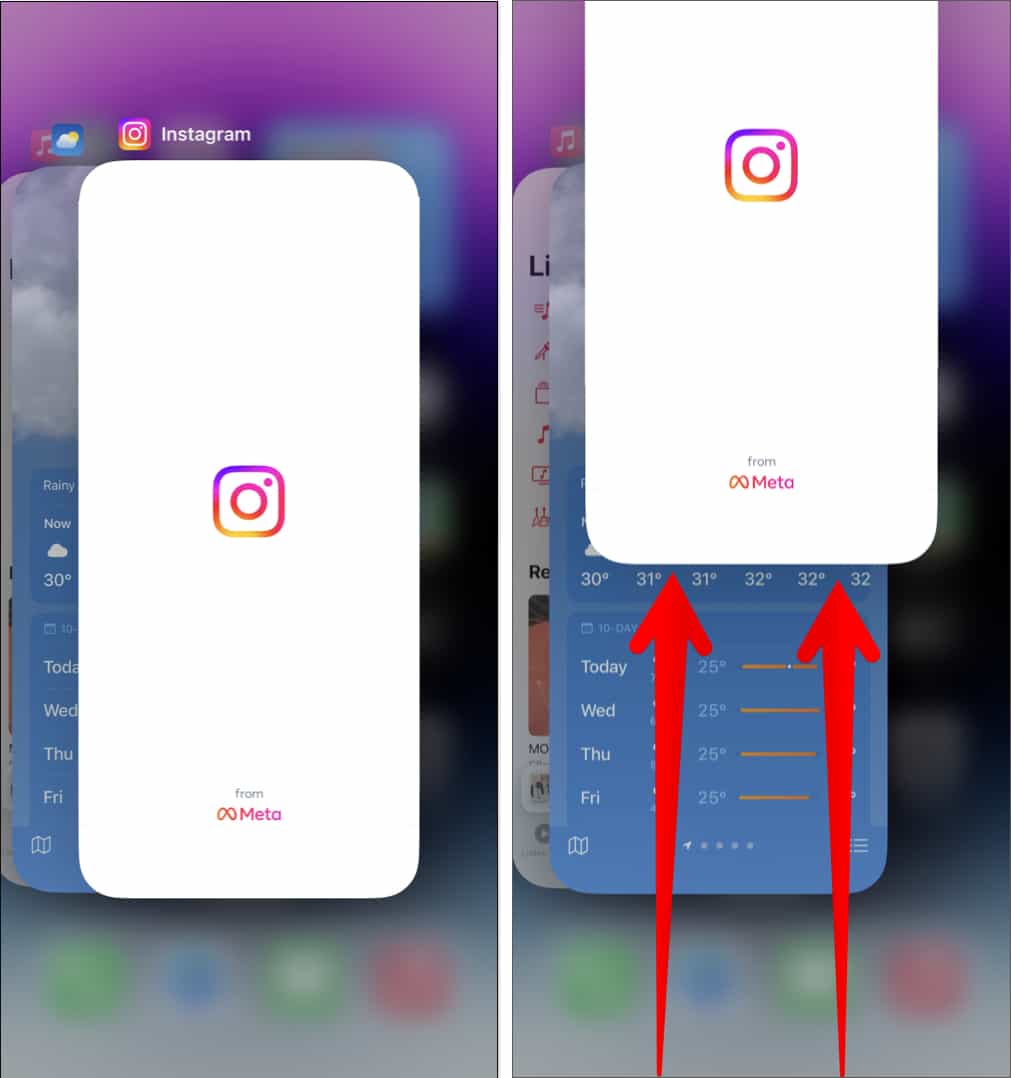
If the Camera app or camera-demanding programs like Snapchat, Instagram, FaceTime, etc. run in the background, they may hinder the flashlight. So, close all apps to avoid any potential iOS glitches.
- Swipe up from the bottom of the screen.
- Drag the apps up from the App Switcher.
7. Trigger flash in the Camera app
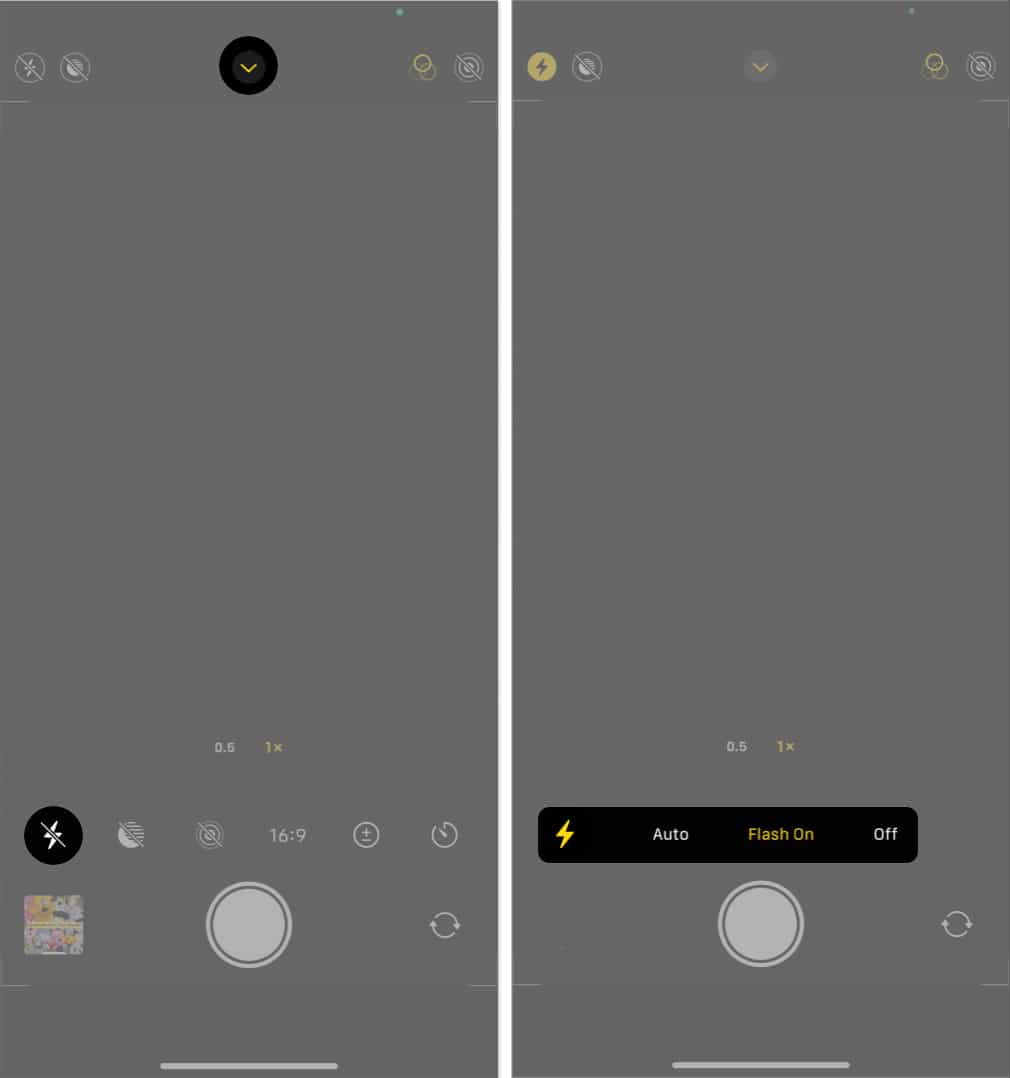
A quick solution to an iPhone flashlight that does not work from the Control Center is toggling the flashlight from the Camera app and adjusting its settings.
- Open Camera → Tap the down arrow.
- Tap the flash icon.
- Select On, Off, and again On.
You can also try snapping a photo with the flash enabled to see if the hardware LED light is intact. I also suggest keeping the flash on or off as per your requirement instead of Auto. The Auto feature triggers the flash depending on your surroundings. So, it may prevent the flashlight from turning on.
8. Remove the flashlight from the Control Center
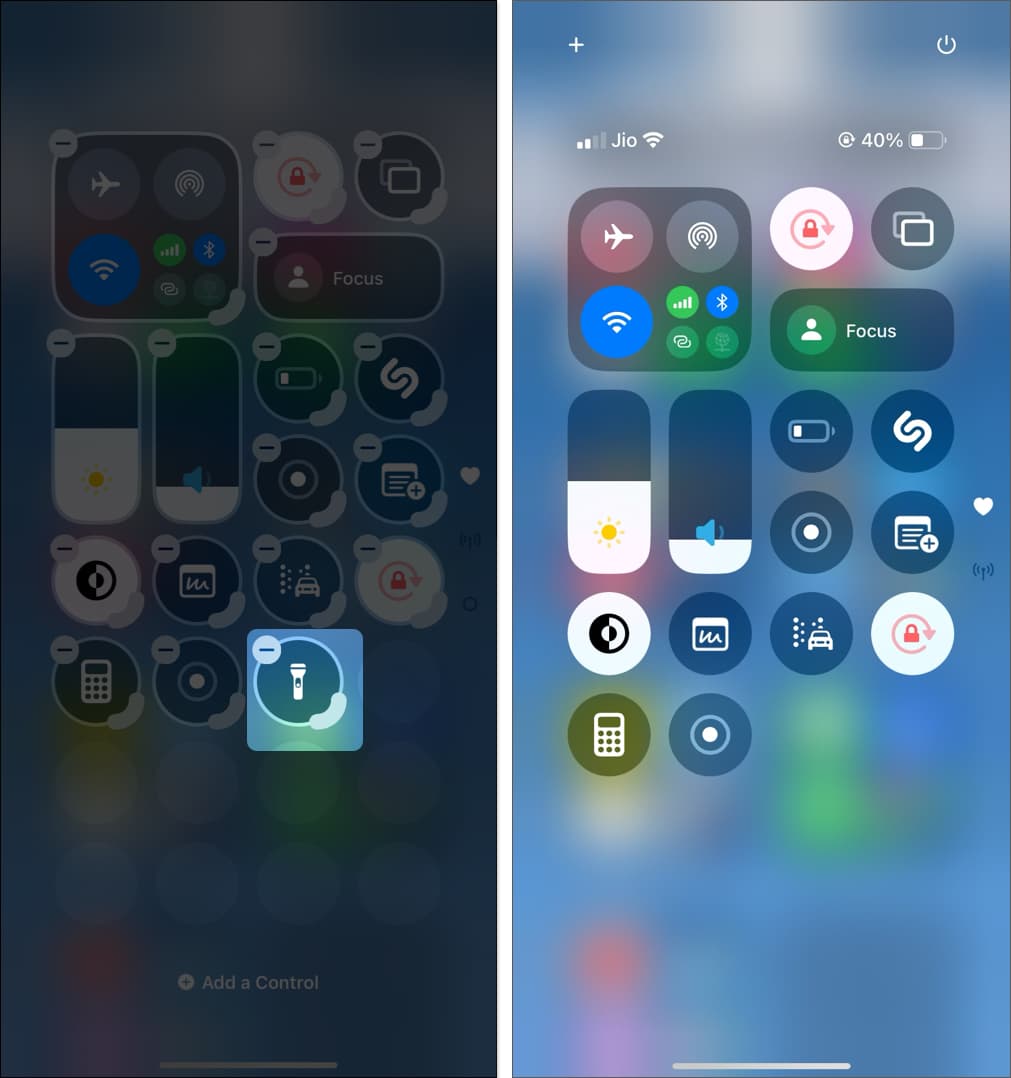
Suppose the flashlight turns on from the Camera app but does not work from the Control Center. Then, what can you do to fix it? Try removing and re-adding the flash shortcut in the Control Center.
- Open the Control Center by swiping down from the right corner of your iPhone.
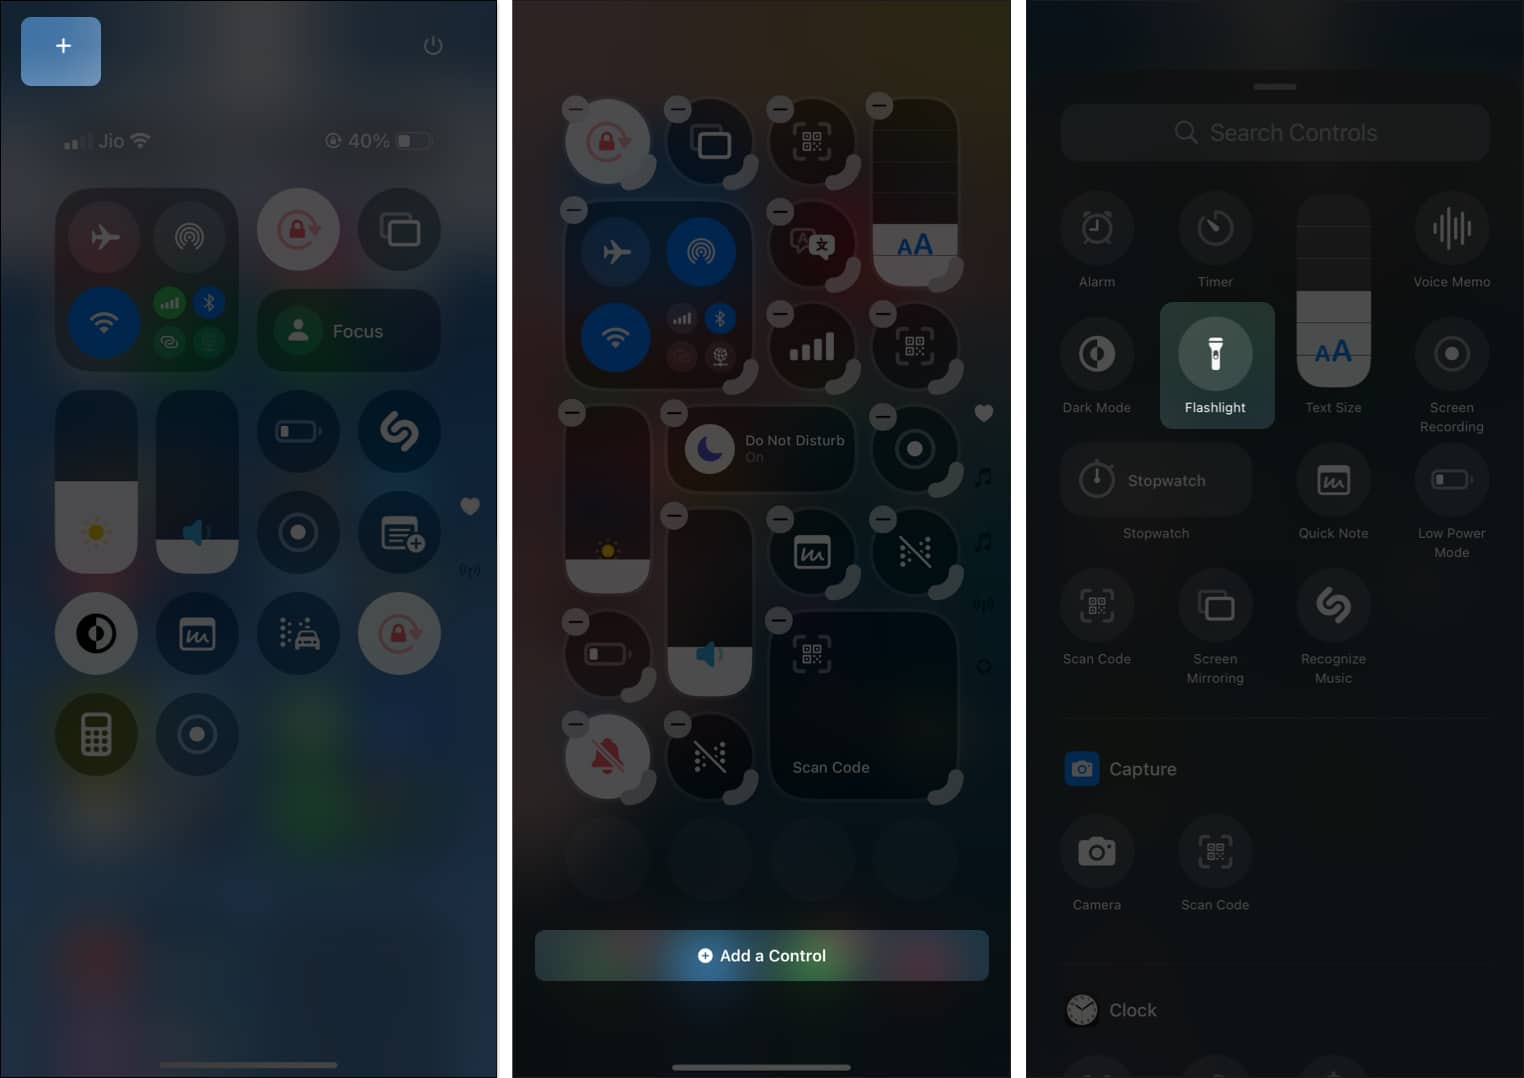
- Tap and hold on an empty place and tap the minus icon on the Flashlight tile.
- Next, tap the plus (+) icon at the top left → Select Add a Control.
- Search and tap Flashlight.
- Now, place the Flashlight control at the desired place.
Now open the Control Center and check if the flashlight is working.
9. Remove the flashlight command from Back Tap
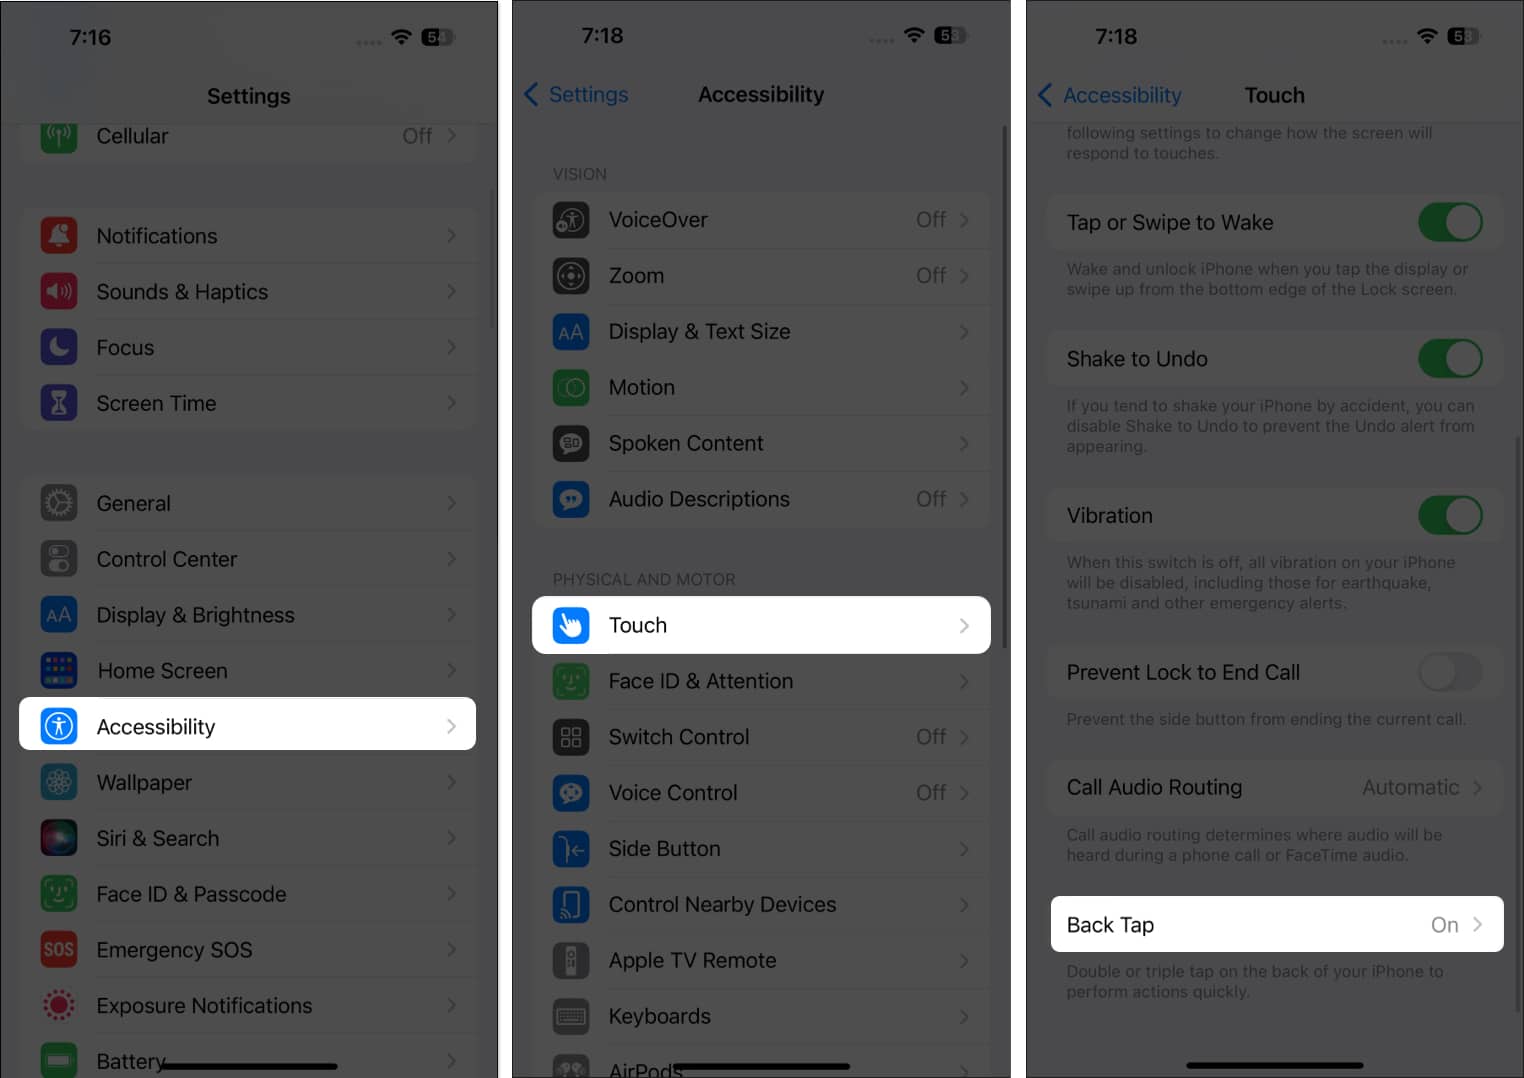
I frequently use the Back Tap feature as a handy shortcut to certain functions. If you’ve added a flashlight prompt in Back Tap accessibility, it may malfunction. So, remove this setting and access the flashlight from the Lock Screen or Control Center.
- Go to Settings → Accessibility → Touch → Back Tap.
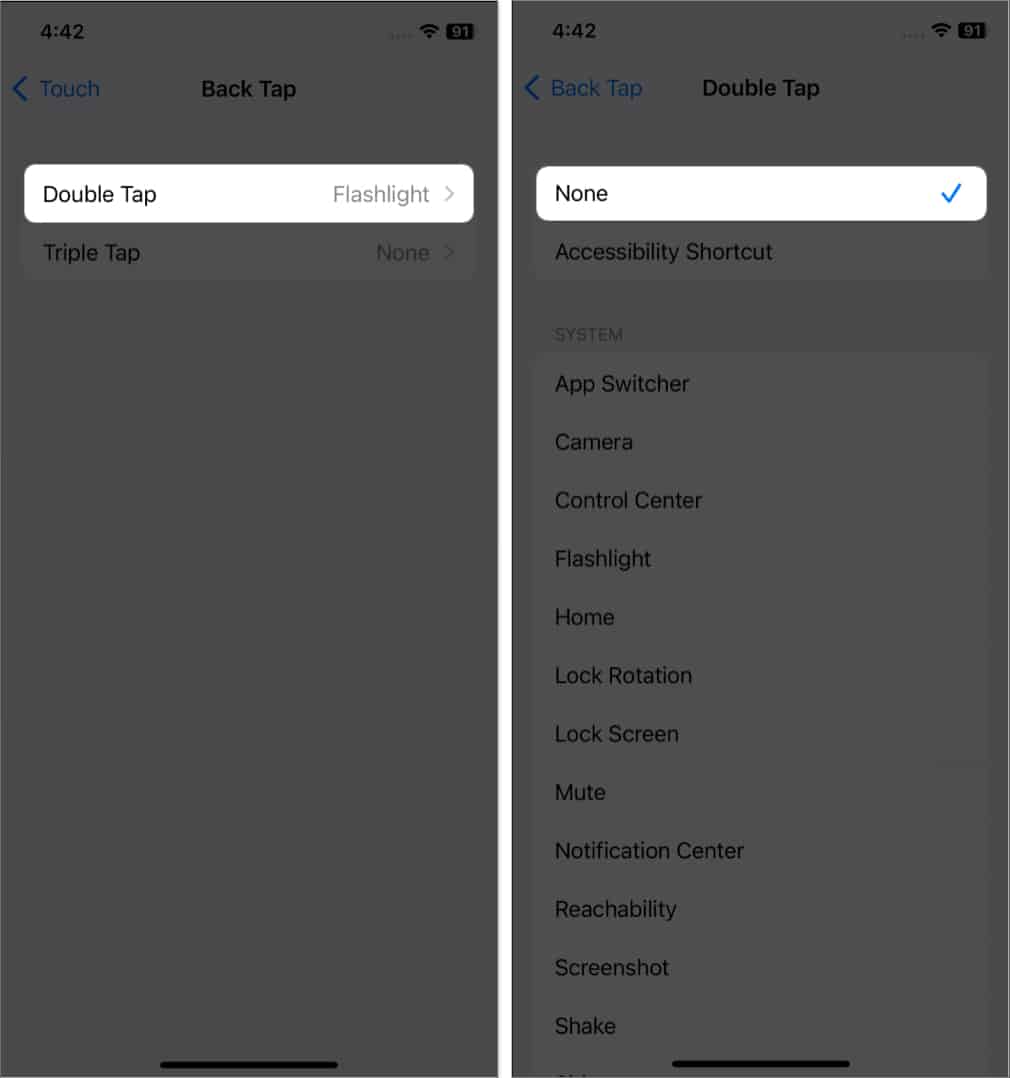
- Select Double Tap or Triple Tap in which the flashlight command is added.
- Tap None.
10. Check LED Flash for Alerts settings
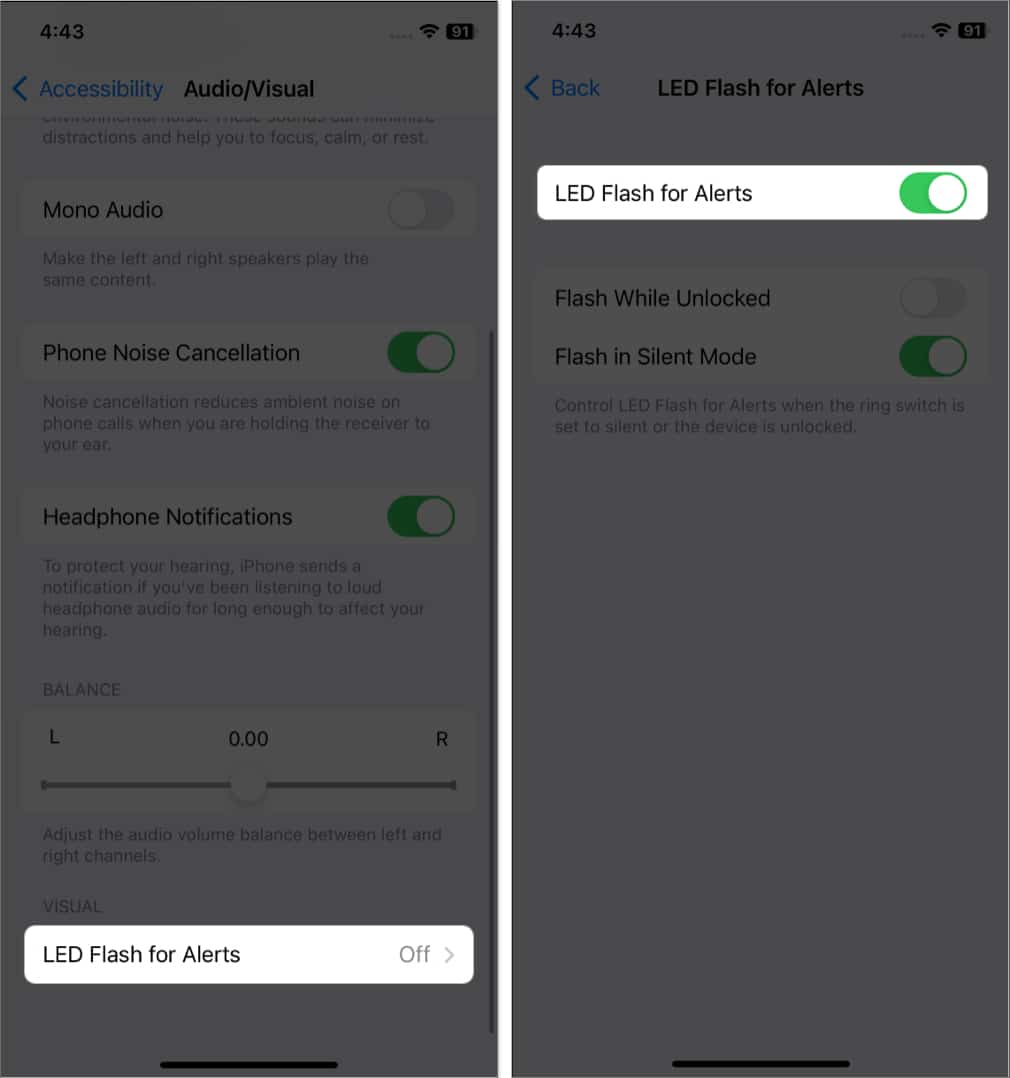
Have you enabled getting flash alerts for incoming calls while in Silent mode? It is indeed a convenient feature, but some glitches in settings can stop the flashlight from turning on.
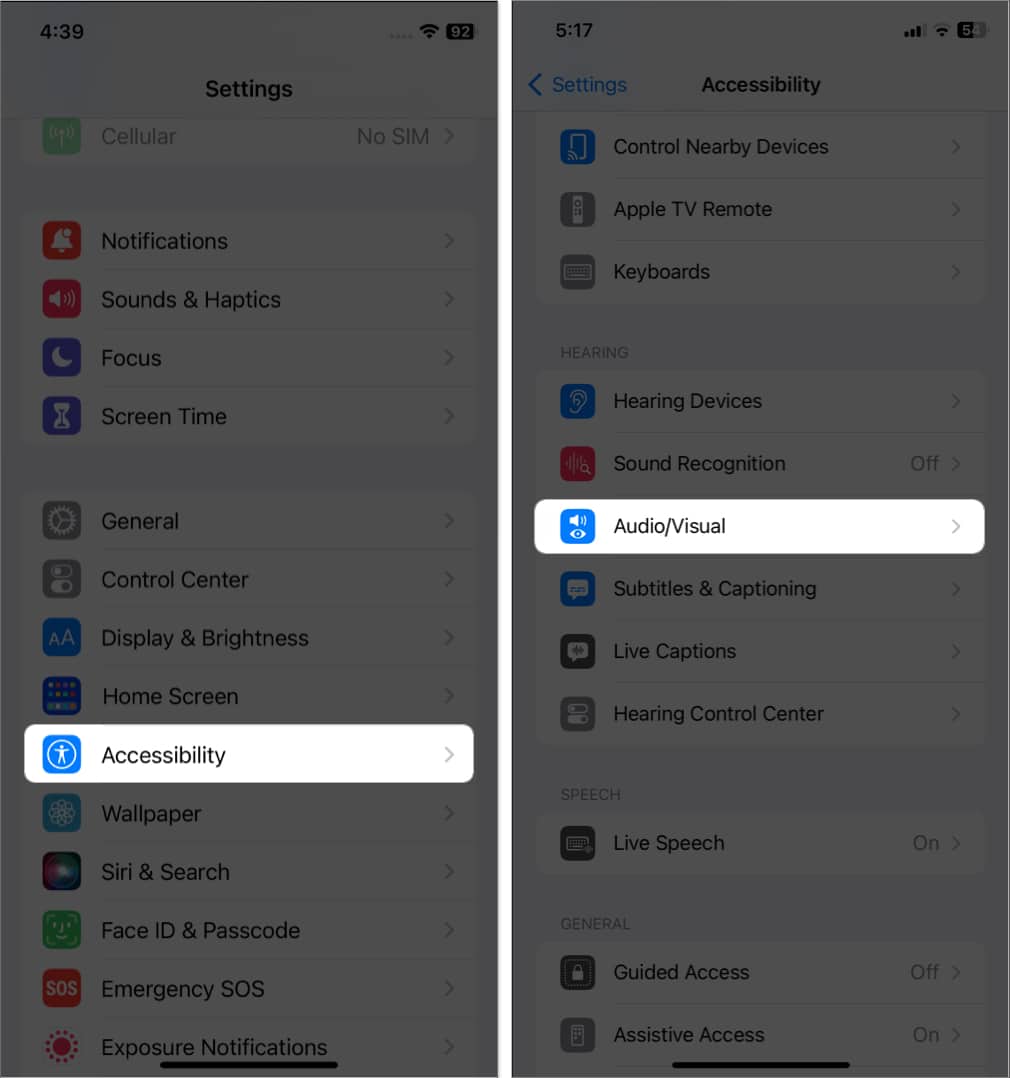
- Open Settings → Accessibility → Audio/Visual.
- Select LED Flash for Alerts.
- Toggle it off and then on.
11. Uninstall third-party flashlight apps
Using third-party apps to quickly access the flashlight may be at fault. So, delete those apps and use the default methods to turn on flashlights.
12. Disable Focus mode
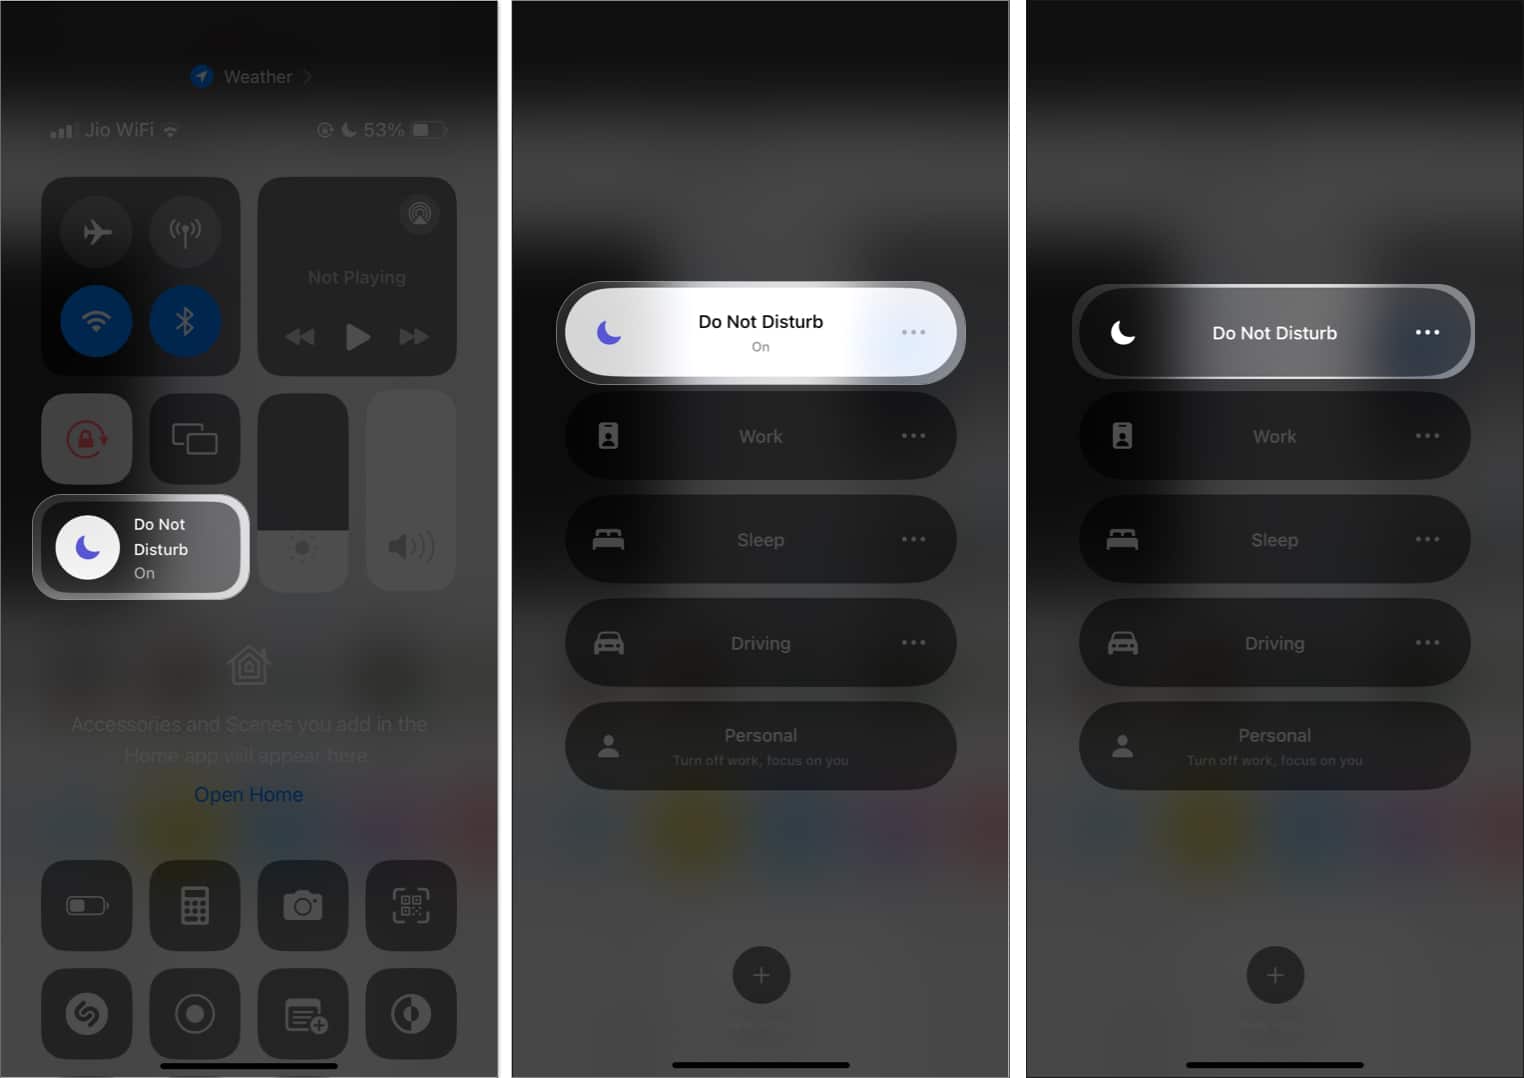
Focus mode restricts the distracting features on your iPhone. So, your configured Focus filter can prevent the flashlight from working on your iPhone.
- Open Control Center.
- Select your Focus filter name → Tap Focus again.
Other fixes worth trying
- Restart your iPhone: Temporary iOS bugs and glitches can cause trouble. So, restart your iPhone and try using the flashlight.
- Update iOS: The outdated iOS version lacks new features and starts malfunctioning. Therefore, keep your iPhone up to date. To check for updates: Open Settings → General → Software Update.
- Reset all settings: Customizing the settings of your iPhone might conflict with flashlight functionalities. So, reset to the default option. Go to Settings → General → Transfer or Reset iPhone → Reset → Reset All Settings → Enter passcode → Select Reset All Settings.
Let there be light!
Don’t let a faulty iPhone flashlight keep you in the dark any longer. By following the troubleshooting solutions above, you can fix an iPhone flashlight that isn’t working. If nothing seems to work, you may need to factory reset or restore your iPhone and contact Apple Support for professional assistance. If you’re going to reset your iPhone to factory settings, make sure to back it up to iCloud first so you don’t lose any of your photos, videos, or settings.
Do you have any other questions about your iPhone or iPad? Let us know in the comments below, and we’ll do our best to help you out.
Also Read:

