Are you facing issues with loading images in the Mail app on your Mac? If so, you’re not alone. Recently, I faced email attachment issues while using the app, too. The situation is frustrating, especially because you don’t want to deprive your email conversations of essential visuals or necessary attachments.
So, in this blog post, I will share some easy fixes to solve the issue. Keep reading to regain a seamless and hassle-free email experience!
1. Check your internet connection
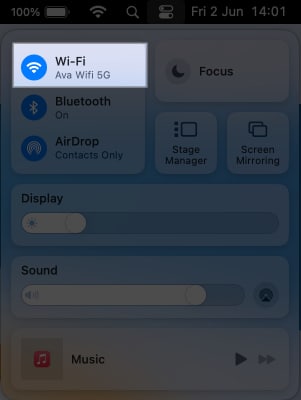
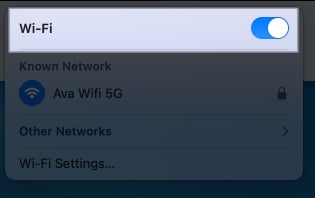
If your Mail app is not displaying images, your internet connection is to blame first. Ensure that your Mac has a stable internet connection.
- You may also click on your Wi-Fi name to disconnect from it.
- After that, restart your Mac and rejoin the Wi-Fi network.
Check out our guide to fix the issues you face when your MacBook is connected to Wi-Fi but has no Internet.
2. Force quit Mail app
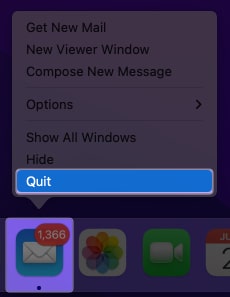
At times, temporary glitches can interfere with the Mail app’s functionality. So, you can try quitting and restarting the app. But you should note that on your Mac, even if you close an app window, it runs in the background to keep the content updated. So you need to quit the app.
- On your Mac dock, right-click on the Mail app.
- Select Quit.
If the Mail app is stuck and not responding, force quit it.
Wait for a few minutes and launch the app again.
3. Check privacy settings
The default privacy settings could be the main culprit behind images not showing in Mail. These settings prevent the app from downloading files from unidentified senders. Therefore, disable Remote Loading of Images to get the option to access mail attachment images.
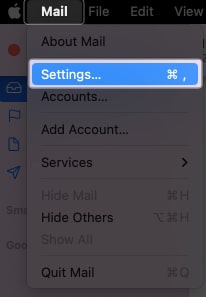
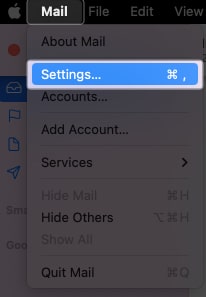
- Launch the Mail app → Click Mail from the menu bar.
- Select Settings → Choose Privacy from the title bar.
- Untick Protect Mail Activity.
- Also, ensure Block All Remote Content is unchecked.
- Close the window and open a mail with images.
- Click Load Remote Content.
You may also disable the Hide IP Address function in the same mail settings to check if it resolves your problem.
4. Disable iCloud Private Relay
With iCloud+, you will get an additional security feature called iCloud Privacy Relay. It helps to conceal your online activity from trackers, advertising, and even Apple. So, it may forbid the Mail app to load content from unknown senders.
Therefore, I tried to fix the pictures not displaying on the Mac Mail app issue by temporarily turning off iCloud Private Relay.
5. Check mail download settings
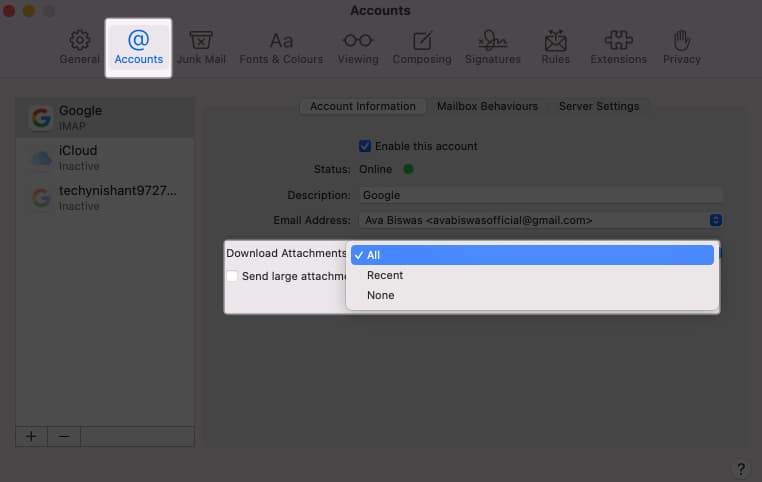
By default, the Mail app downloads the attachments automatically. However, if the settings are misplaced, you may face images not loading issue in Mail App on Mac.
- Open the Mail app → Click Mail on the menu bar → Select Settings.
- Click on Accounts and select the drop-down menu next to Download Attachments → Choose All.
6. Remove and re-add mail accounts
If you notice a particular mail ID giving trouble, remove it and set it up again.
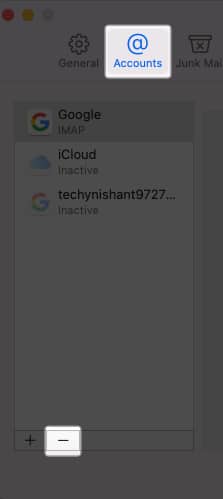
- While the Mail app window is active, click Mail on the menu bar → Settings → Accounts.
- Click the minus (-) sign.
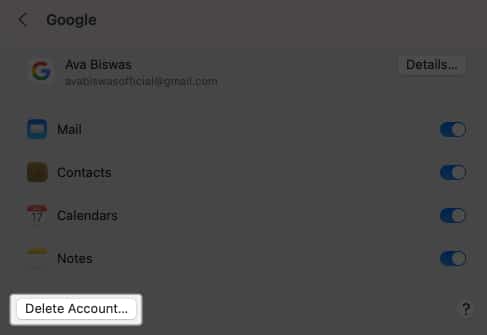
- Select Internet Accounts.
If the mail account is associated with other apps, you will get this option. It will redirect you to your Mac Settings. - Click Delete Account.
- Select OK to confirm your choice.
After removing the account, quit the Mail app. Then once again, add the email account to your Mail app.
7. Disable or uninstall anti-virus software
Third-party anti-virus apps may block images from unknown senders to protect your system. So, I suggest disabling the anti-virus and checking if you can retrieve the image on Mail.
8. Disable VPN
Using the VPN on your Mac can cause the Mail app not to display images. Your Mac may not be able to download remote content from distant servers.
So, disconnect from any active VPN connections and then try using accessing mail attachments.
If you have a VPN app installed, do the following:
- Go to System Settings → Choose VPN from the left sidebar.
- To disable the VPN service, toggle it off.
9. Update macOS
Outdated macOS can create bugs and interfere with the Mail app’s functionalities. So, update your Mac and check if the problem is resolved.
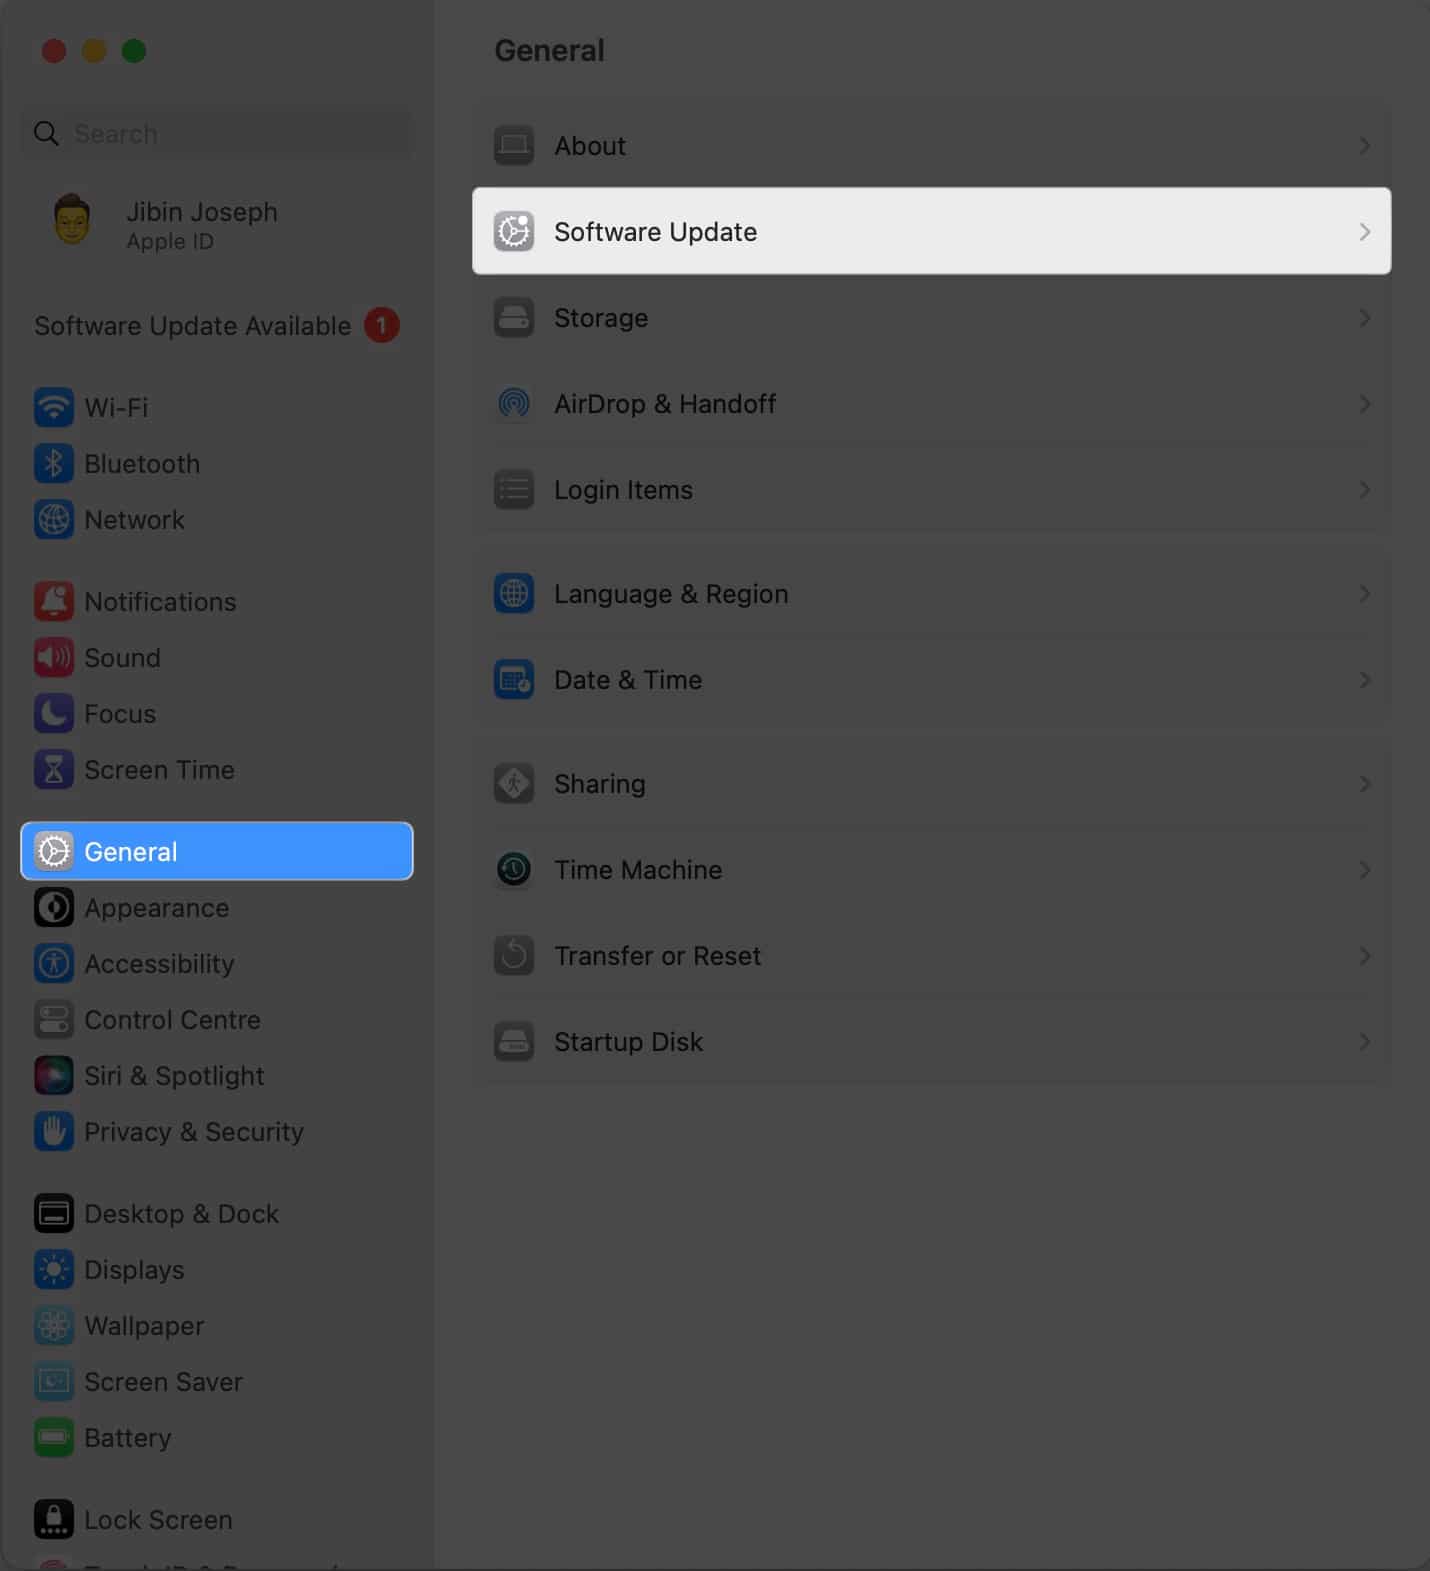
- To do that, go to Apple Menu → System Settings.
- Select General → Software Update.
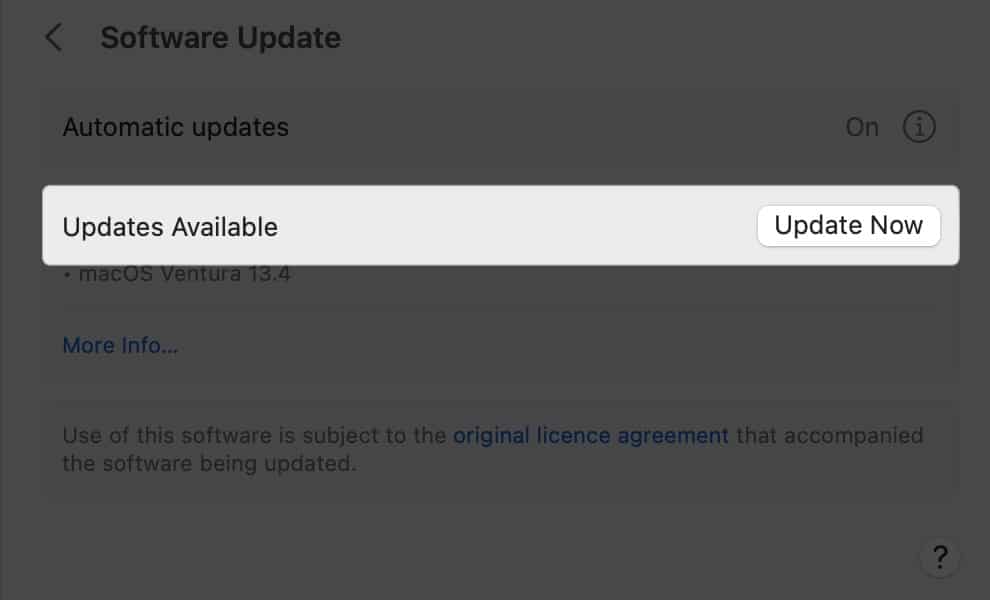
- Click Update Now if there’s an update available.
Access images on your emails again!
Experiencing images not loading in the Mail app on your Mac can be frustrating, but it doesn’t have to persist. You can effectively troubleshoot and resolve this issue by following the above-mentioned methods. If nothing seems to work, you may contact Apple Support.
Therefore, say goodbye to missing images and enjoy a seamless email experience on your Mac!
Explore more…

