Our devices contain a lot of personal and sensitive information. This makes it crucial to delete all its contents before giving your Mac away or selling it. But what if your Mac gets stolen or isn’t with you?
Need to erase data from your Mac ASAP? Let’s get on with it! Apple allows you to erase your Mac remotely with an iPhone, iPad, or another Mac using Find My. You can also access and remotely wipe the Mac from non-Apple devices via iCloud.
- What happens when you wipe out a Mac remotely?
- How to wipe your Mac using Find My app
- Remotely erase a MacBook from non-Apple devices via iCloud
- How to undo an erase request using Find My
What happens when you wipe out a Mac?
Here’s what will happen if you erase your Mac remotely using another device:
- It removes all the information in it, including all the apps you installed and all user accounts and their data.
- It signs you out of all Apple services.
- It disables Apple Pay and removes all your debit and credit card information from your device.
- You’ll receive a confirmation email on your Apple ID address.
- Activation Lock remains turned on to protect your device if you don’t remove your device from Find My. Removing the device from Find My turns of Activation Lock.
Your Mac’s data can only be wiped if it’s connected to the internet and is tied to your iCloud account. Note that even if you erase your Mac, your iCloud will not be removed.
But before you attempt to wipe out your Mac completely, here are some crucial things to keep in mind:
- You can only wipe your MacBook if you had previously set up Find My Mac.
- You should routinely Backup your Mac so that you can recover your data if your device gets lost or stolen.
- It’s also highly recommended that you set up File Vault on your Mac to protect your files from unauthorized access in case it gets lost.
Note: If you can track your device and retrieving it is possible, you may want to lock your Mac instead of wiping it out. This prevents others from logging in. You can also display a recovery message and play a sound to let you track where it is or alert people nearby.
How to wipe your Mac remotely using Find My app
From an iPhone or iPad
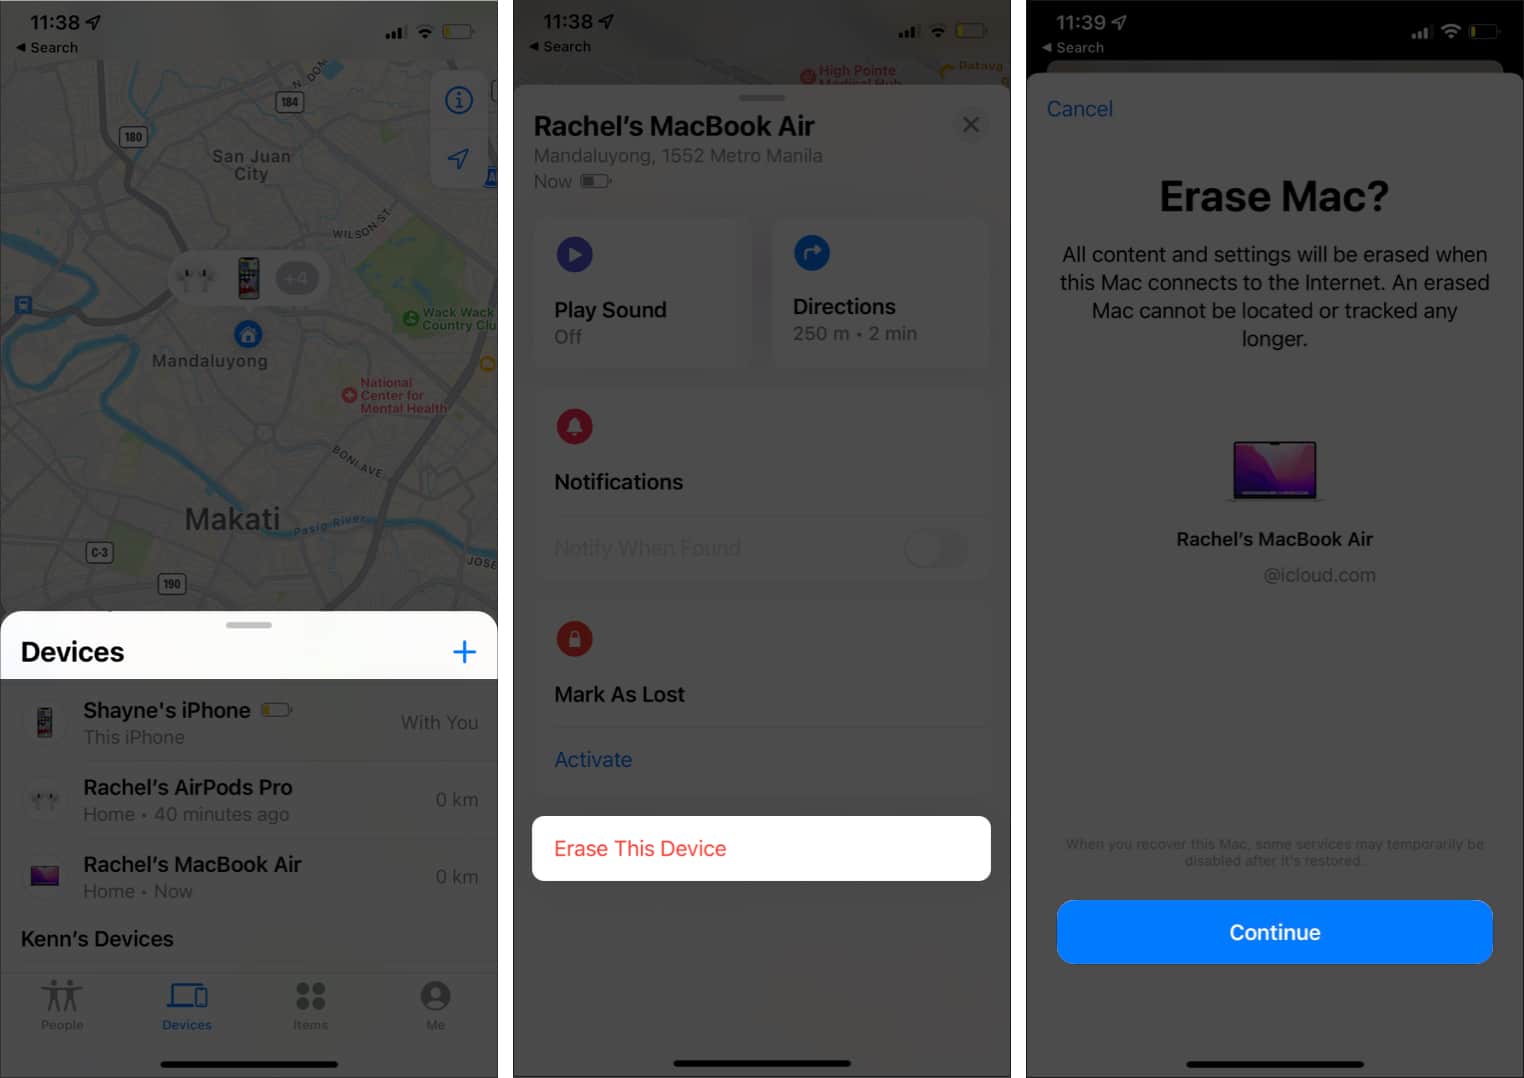
You can remotely erase your MacBook using your iPhone or iPad. However, your iPhone or iPad should be connected to the same iCloud account as your Mac to be able to perform the remote erase. To do so:
- Open the Find My app.
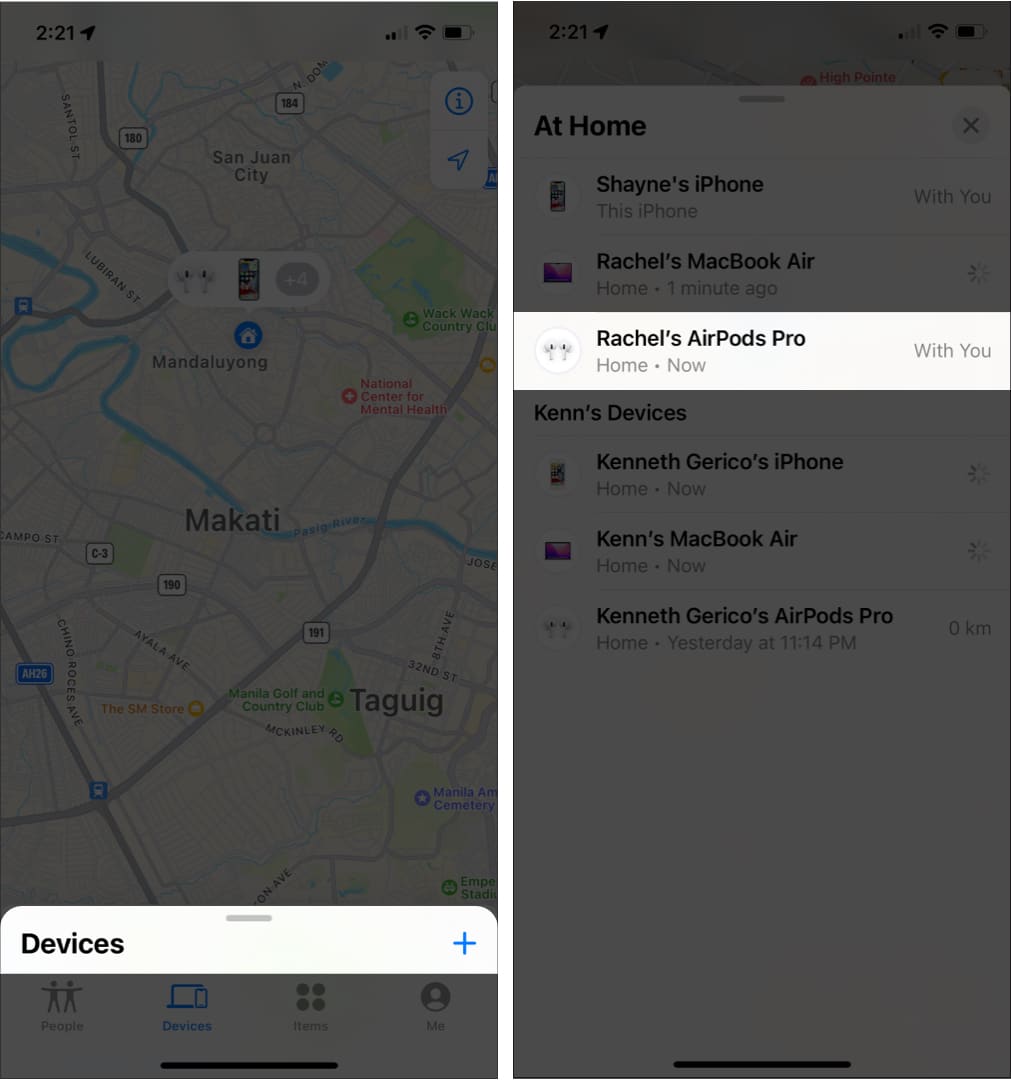
- You’ll see a map and a list of all your devices below. Tap on your Mac. Scroll down and choose to Erase This Device.
- Tap Continue once a prompt appears to confirm your decision.
- The next screen lets you input a recovery message that will appear on your Mac’s screen.
- Tap Erase.
- Enter your Apple ID password → Erase. The erase request is now pending. The app will notify your once the erase begins. If your Mac is offline, the remote erase request will start once it connects to a mobile network or Wi-Fi.
Note: If the device is with you and you plan to sell it or give it away, you should reset your Mac using Disk Utility instead so that you can disable the Activation Lock. You can also remove the Activation Lock by removing your Mac from Find My. If you want to learn more, check our list of things to do before selling your Mac.
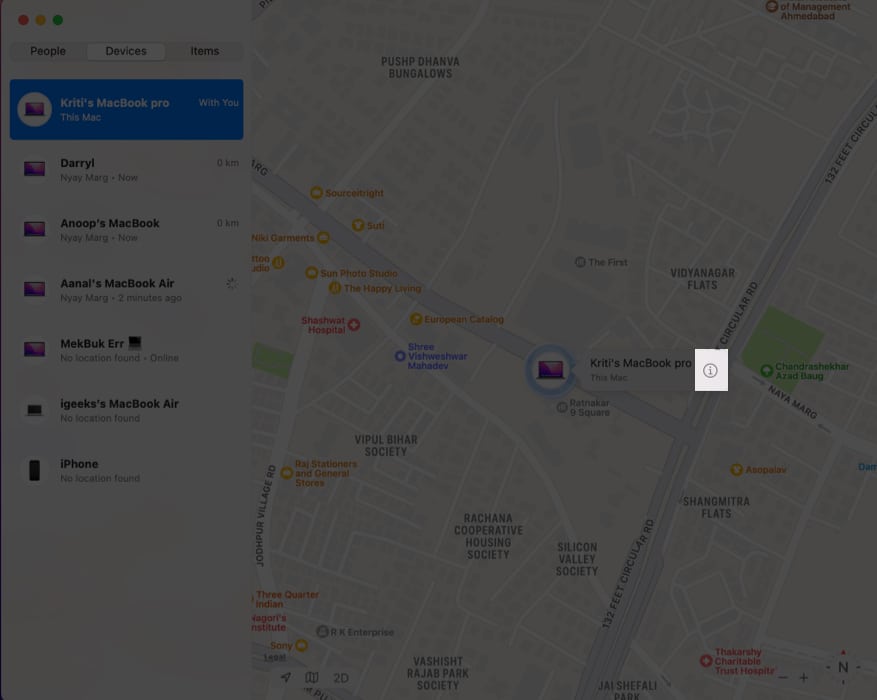
You can also use Find My on another Mac to remotely erase all the data on your Mac. However, the other Mac must also be tied to your iCloud account.
From another Mac
- Open Find My on the other Mac.
- Click the Devices tab.
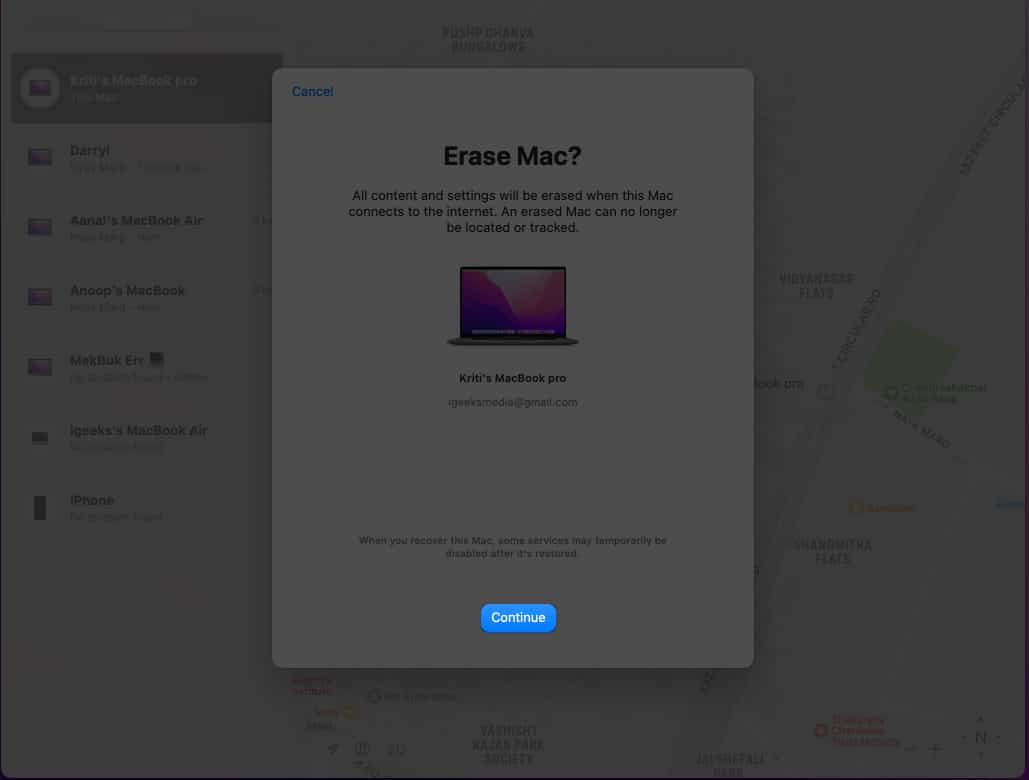
- Control-click your Mac or click the info (i) button → Erase This Device.
- Click Continue. The prompt will ask you to create a numeric passcode distinct from your Mac password. This will only be used when you want to erase your device or mark it as lost.
- The next screen allows you to enter a message and a phone number so that anyone who recovers your device has a way to contact you. This message will appear on your Mac’s Lock screen.
- Click Erase → enter your Apple ID password → click Erase again.
Remotely erase a MacBook from non-Apple devices via iCloud
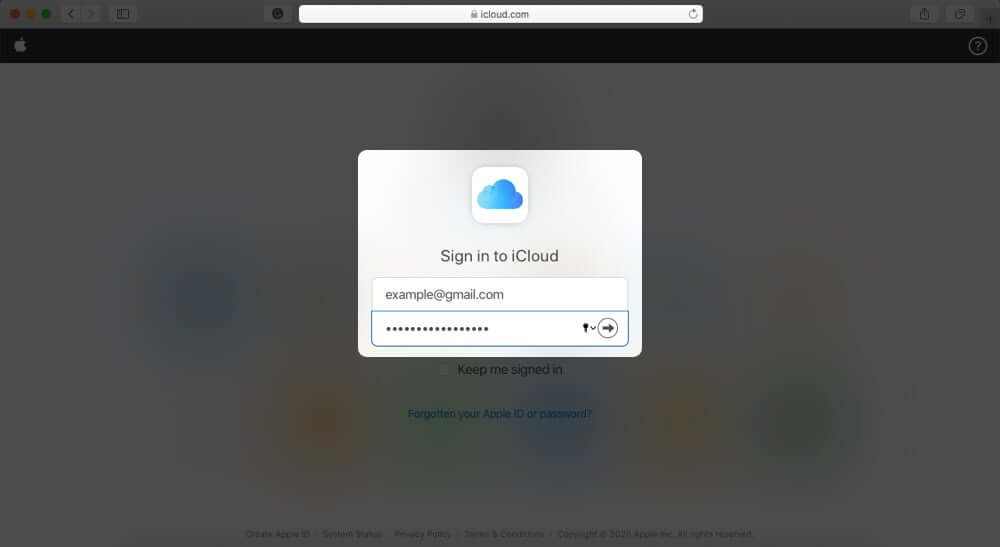
If you don’t have an Apple device handy or your other Apple devices aren’t nearby, or you simply don’t own another iPhone, iPad, iPod, or Mac, you can still erase your Mac remotely using iCloud in a web browser.
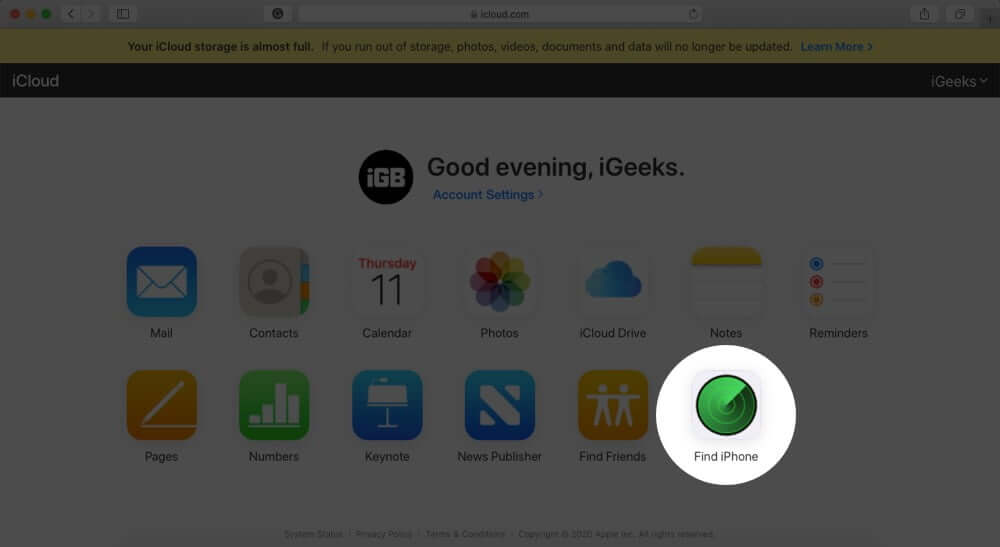
- Open iCloud.com from any web browser.
- Log in to your iCloud account.
- Open Find iPhone.
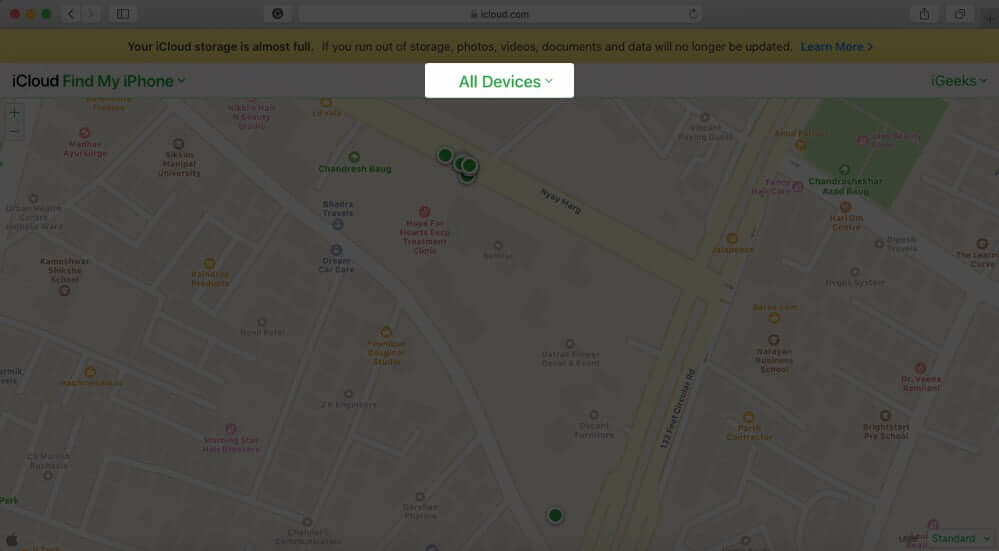
- Click or tap All Devices.
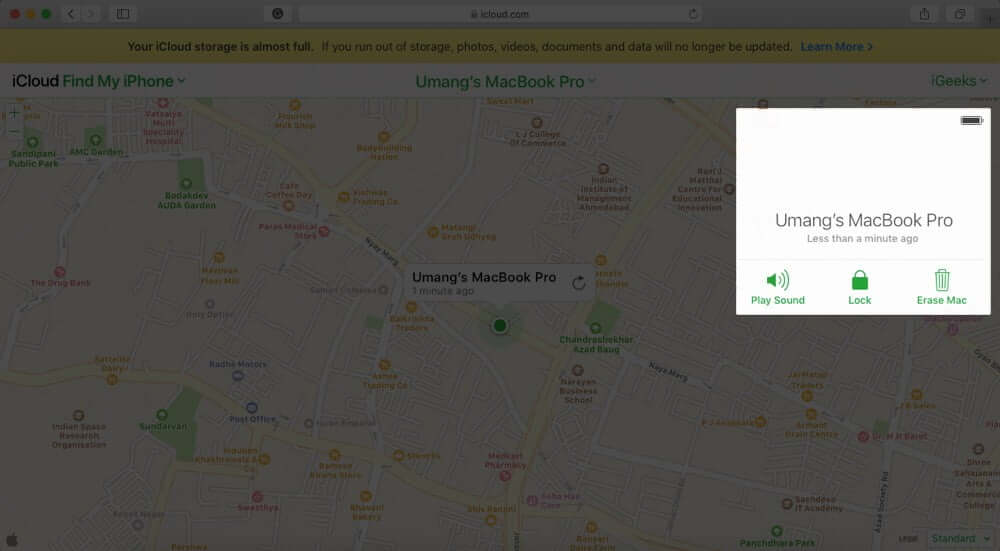
- Select your Mac → Erase Mac.
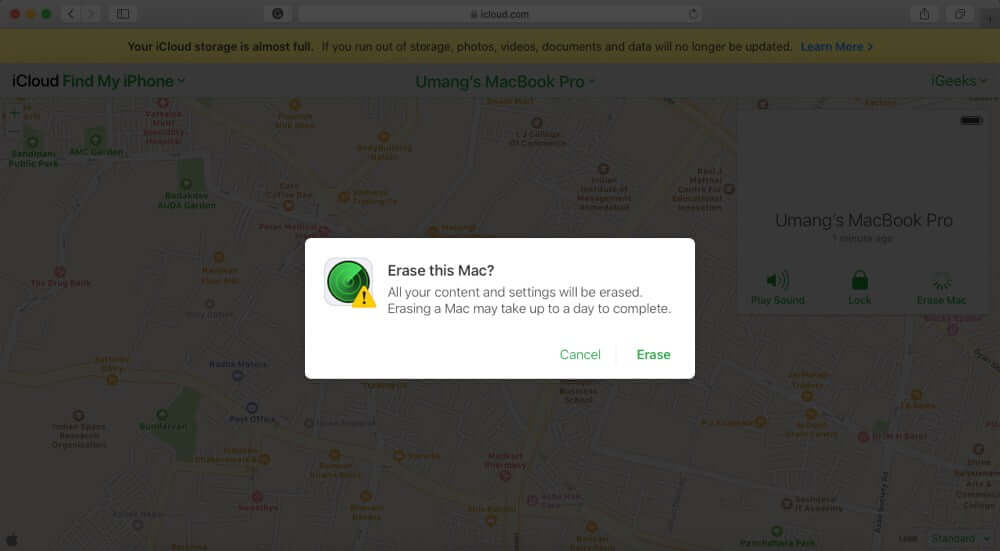
- A prompt will appear → choose Erase.
- You’ll be prompted to enter your iCloud password again. Then, enter a six-digit code for the Mac you want to erase.
- Enter a recovery message that you want to be displayed on your Mac’s Lock screen. You may wish to provide your contact information so that the person who recovers your device can quickly contact you.
How to undo an erase request using Find My app
If you erased your device remotely and found it just in time while your Mac was offline, you can still cancel the erase request and prevent your Mac from getting wiped out.
- Go to Find My → choose Devices.
- In the list, select the device whose erase request you want to cancel → click the info (i) button on the map.
- Click Cancel Erase → enter your Apple ID password → press Return.
Wrapping up…
Nothing is more frustrating than losing a personal device. But it is more important to ensure that losing it doesn’t cause further harm. Erasing your Mac remotely can help prevent further losses in terms of unwanted access and data theft.
Have you tried erasing your device in the past? Which method did you use? Share it down below!
Read more:


