Apple just dropped a game-changing feature for cyclists. You can now view the Apple Watch’s live cycling metrics – heart rate, speed, distance, elevation, and more – directly from the iPhone’s Live Activities. To unlock this native feature, you need to ensure your iPhone runs iOS 17 or later and is paired with an Apple Watch running watchOS 10 or later.
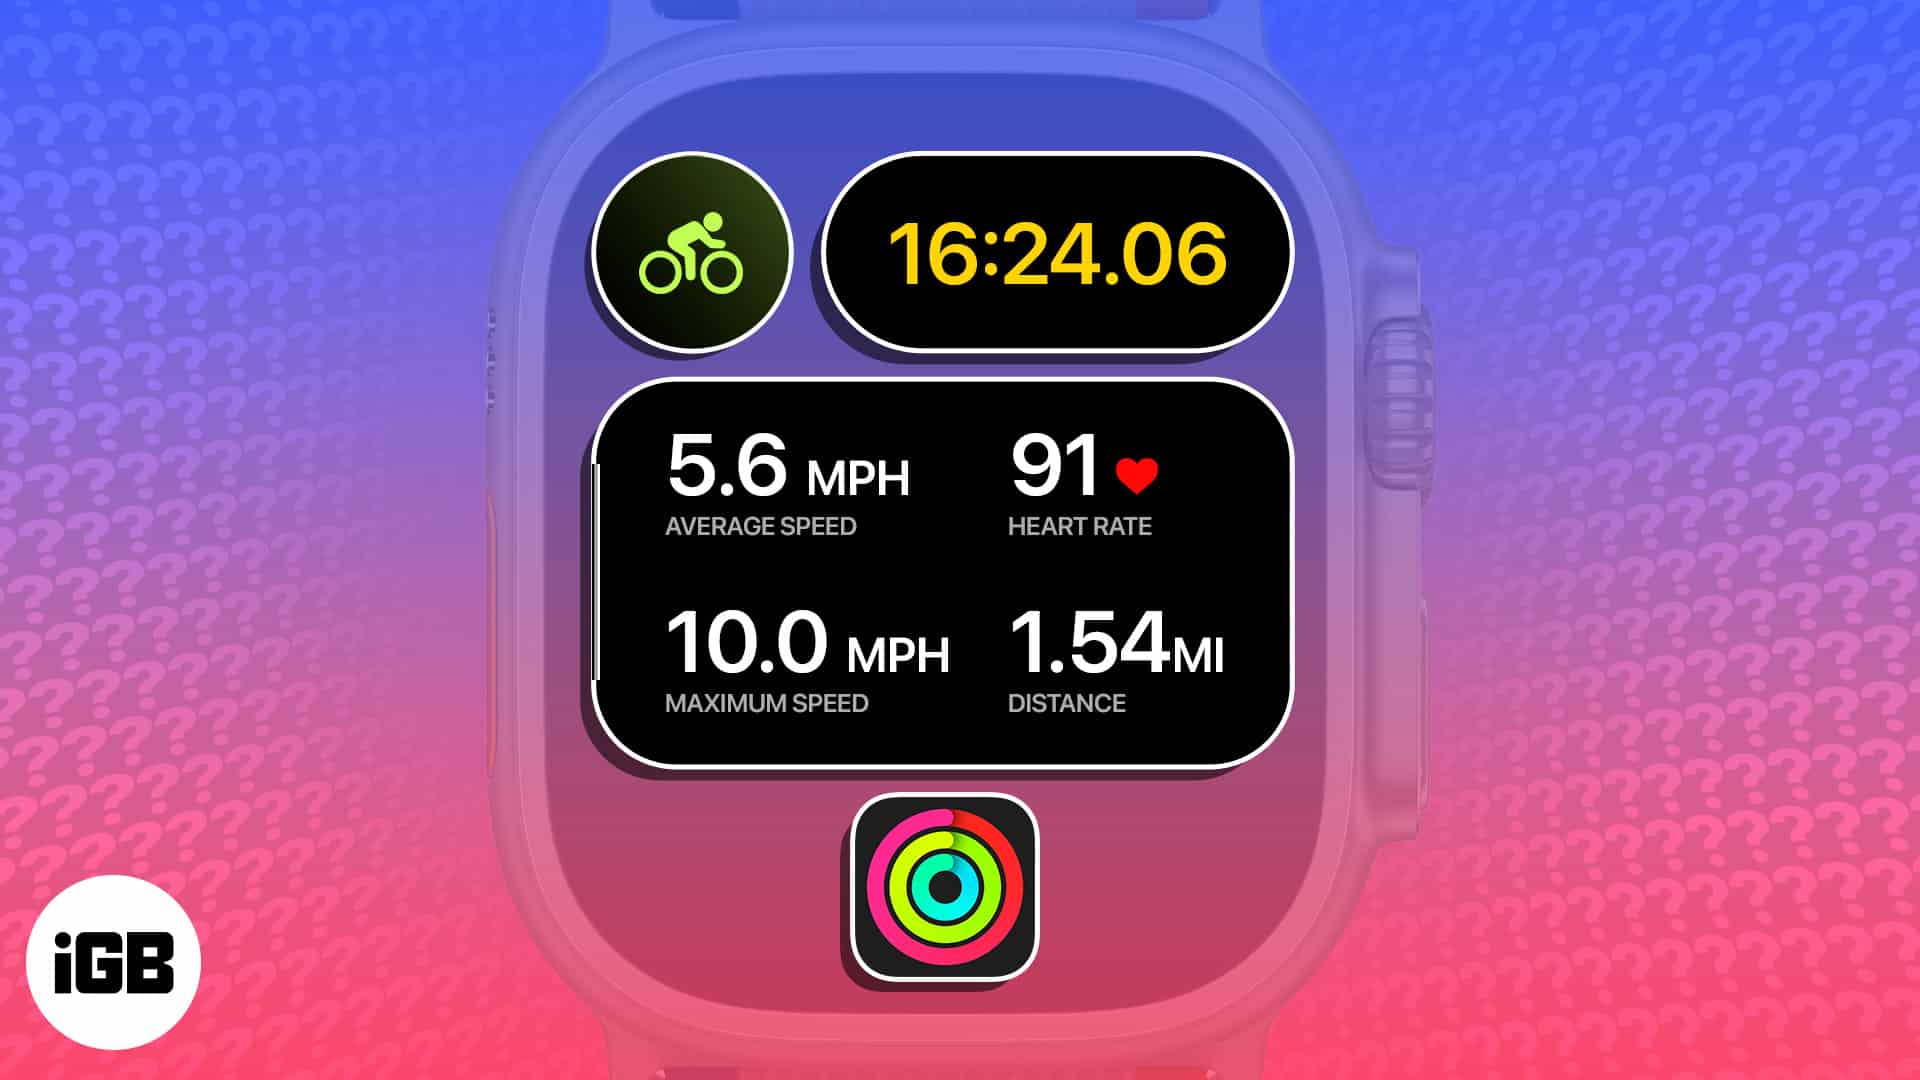
Wondering how you can enable this feature? Well, you don’t have to. Once you start a cycling workout from your Apple Watch, the live cycling metrics will automatically appear as a Live Activity on your iPhone. Here’s everything else you need to know about accessing Apple Watch live cycling metrics on iPhone.
- How to view Apple Watch live cycling metrics in iOS 17
- Understanding the cycling metrics on iPhone
- How to set up Cycling Power Zones on watchOS 10
How to view Apple Watch live cycling metrics in iOS 17
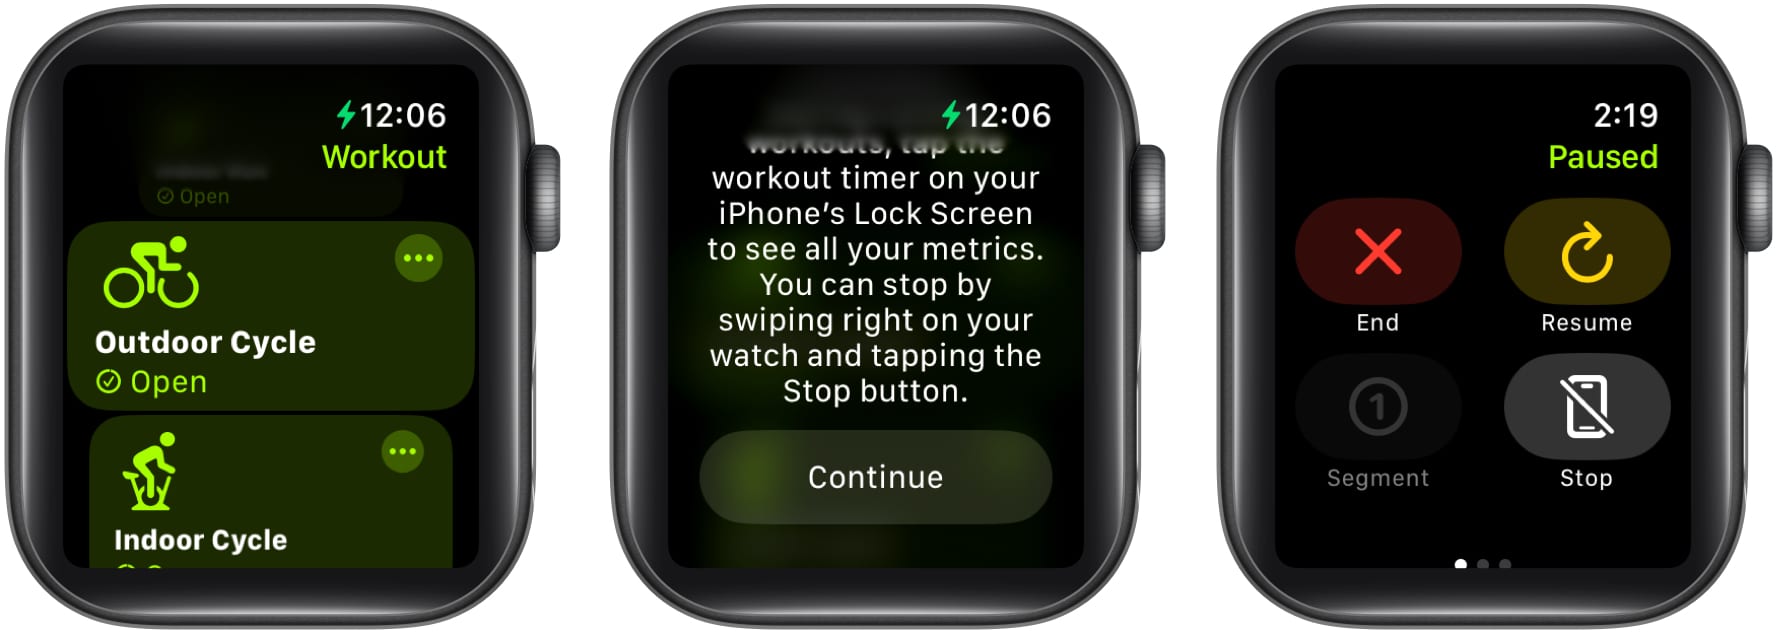
- To start a cycling workout, launch the Fitness app on your Apple Watch.
- Choose between the Outdoor Cycle and the Indoor Cycle.
- Hit Continue if prompted.
Your workout cycling session will start. - Swipe left on the current interface if you wish to end or pause your session.
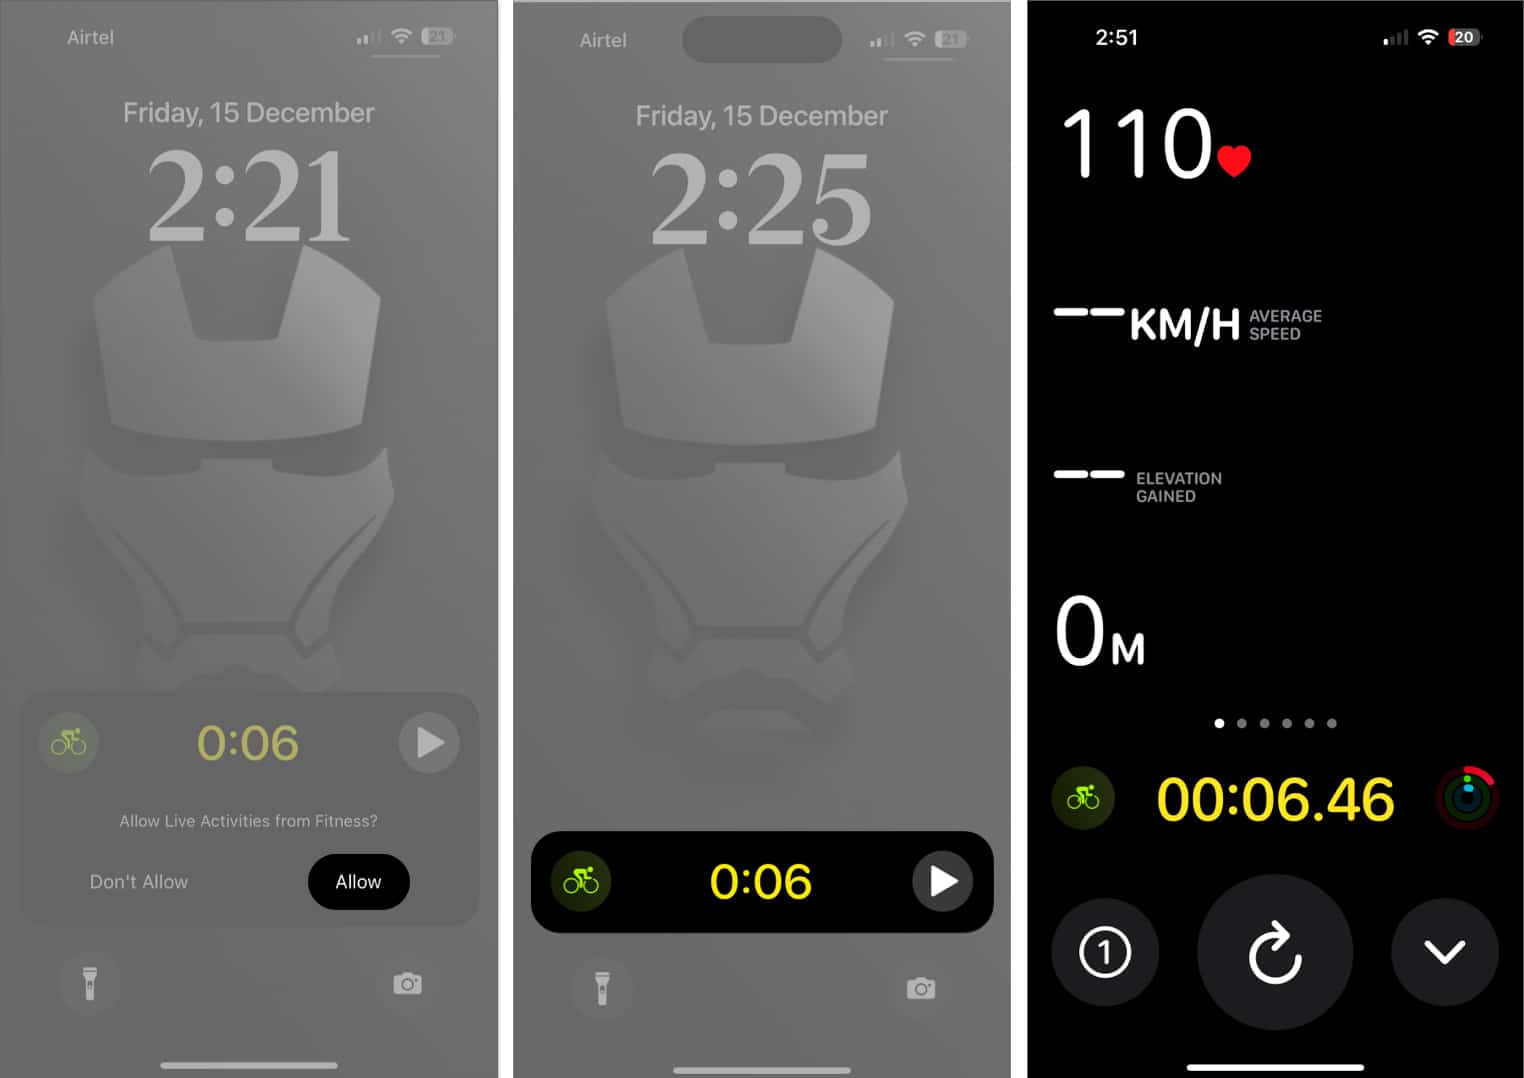
You can control these variables with the Side Button and Action Button as well. - On your iPhone’s Lock Screen, you’ll see an alert for Live Activities → Tap Allow to enjoy a full-screen experience.
- Then tap the notification → Following this, you will be able to view all the live metrics in detail.
Understanding the cycling metrics on iPhone
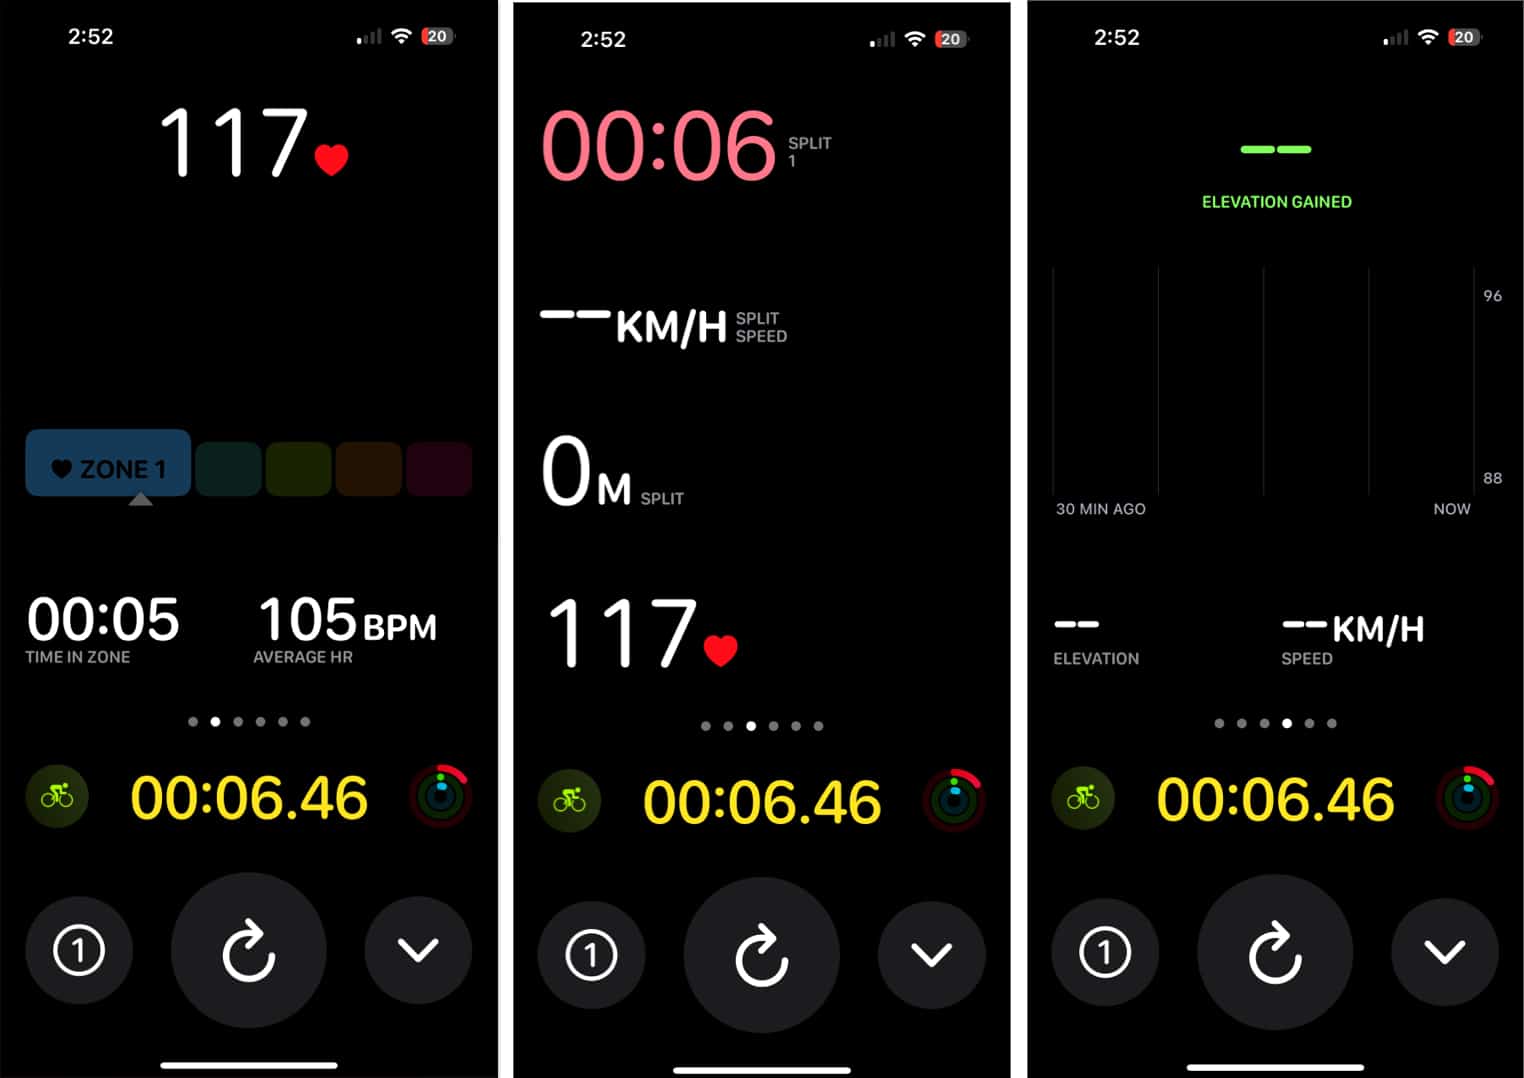
By swiping left to right on the workout interface of your iPhone, you can get a detailed analysis of your performance so far.
- The second slide will indicate the heart rate zones, time, and average heart rate.
- The third frame highlights the number of splits, split speed, and heart rate.
- The fourth slide will show the elevation.
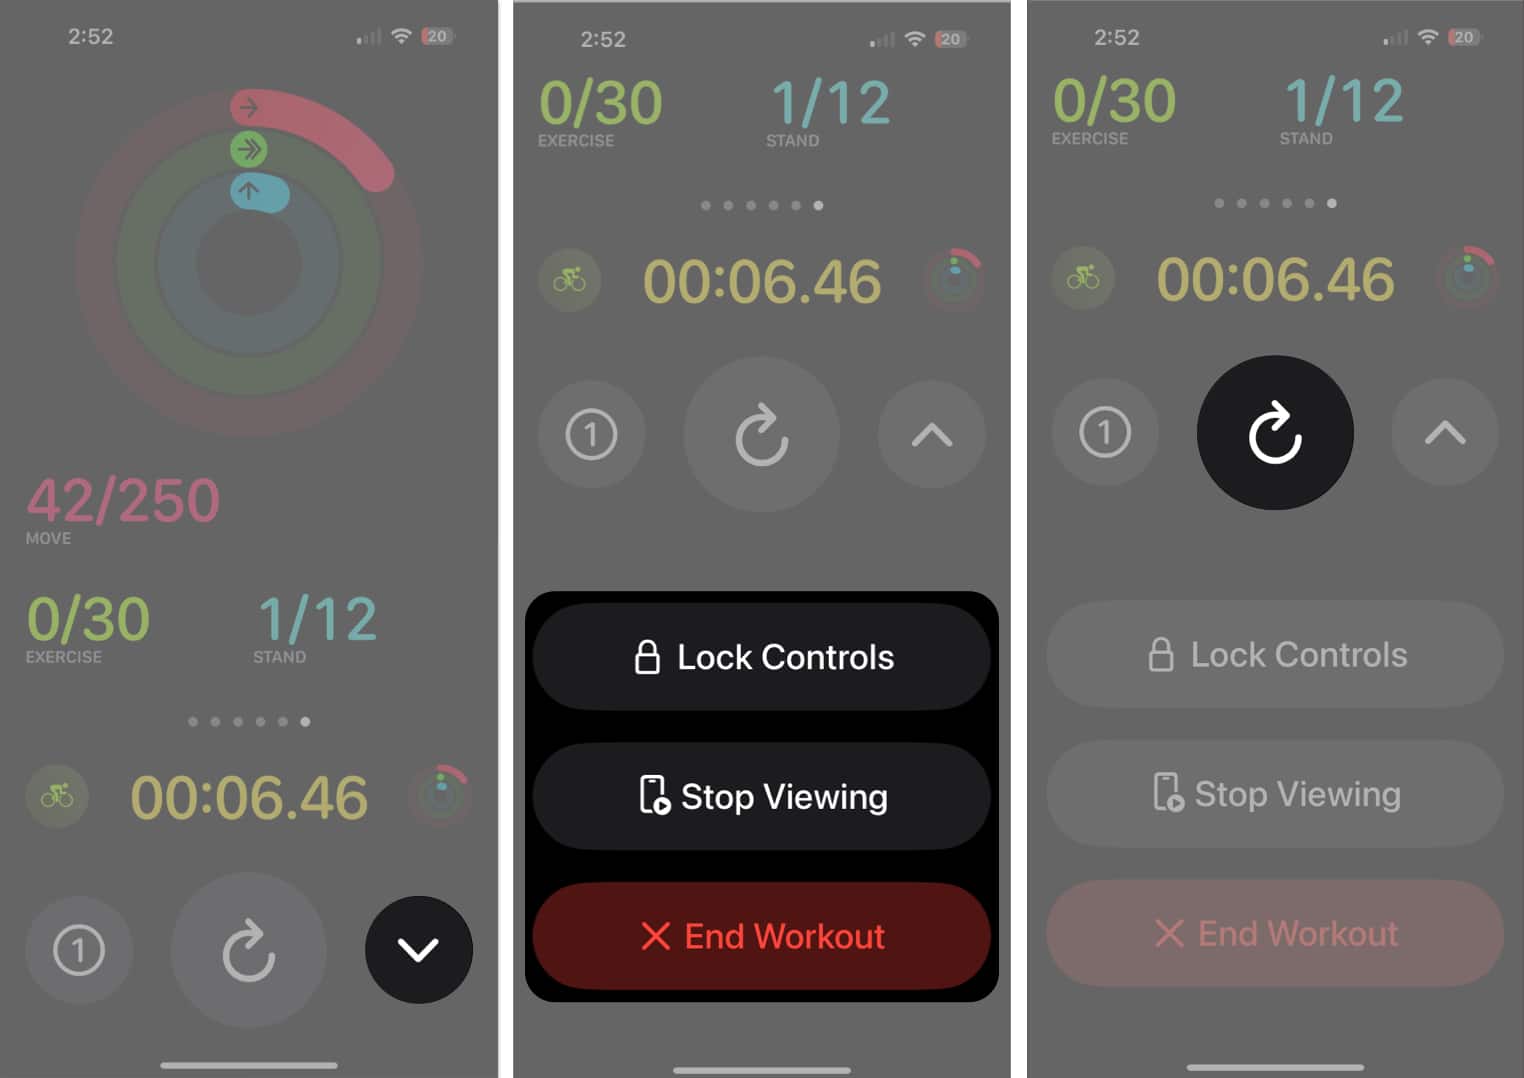
- The fifth slide displays your speed statistics, while the final view shows your Activity rings.
From every slide, you can access the following options:
- Lock Controls
- Stop Viewing
- End Workout
- You can also restart the session by tapping the Refresh icon.
How to set up Cycling Power Zones on watchOS 10
Power Zone on Apple Watch allows you to measure the effectiveness of your cycling workout. It analyzes your training based on your Functional Threshold Power (FTP), which is easily estimated by connecting your Watch to Bluetooth-compatible cycling gear.
Power Zones can help you get more out of your cycling workouts and are represented in 5-8 segments on your Watch, indicating varying levels of effort.
If you wish to utilize the same, follow the steps discussed below:
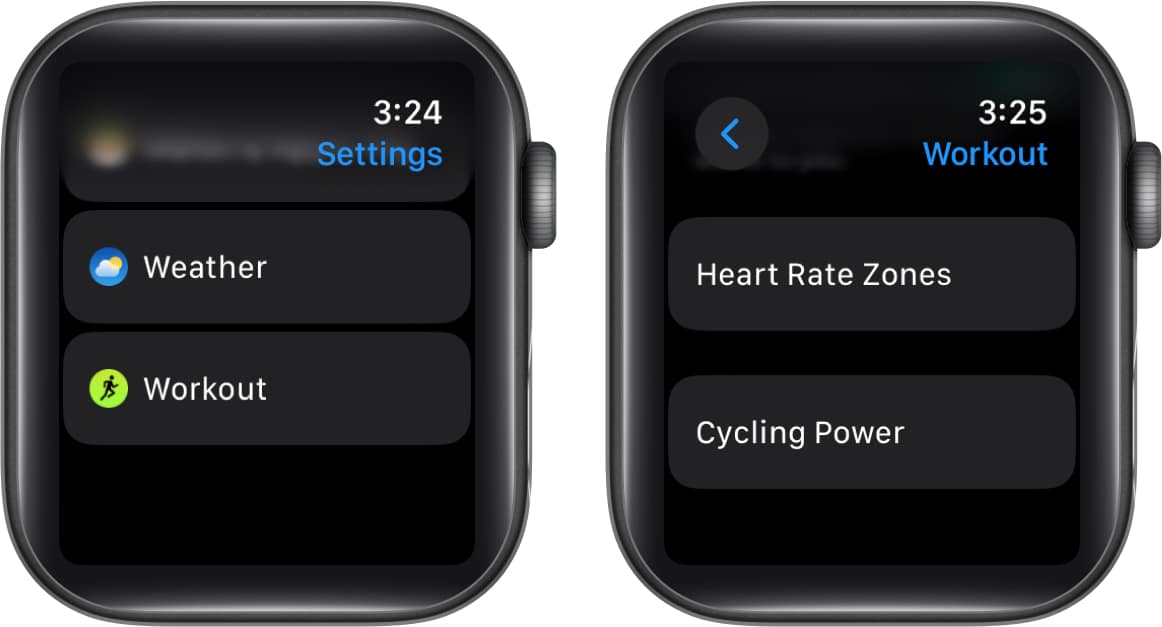
- Launch the Settings app on your Apple Watch.
- Scroll to the bottom and select Workout.
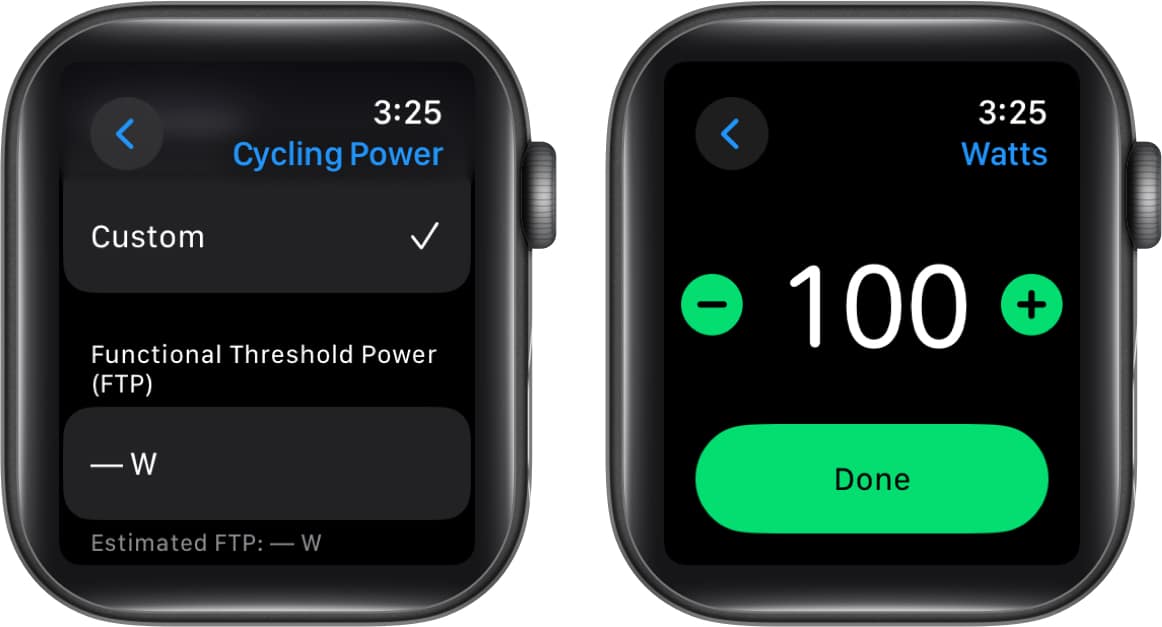
- Now, choose Cycling Power from the menu.
- Select the Custom option and set the desired FTP.
- Hit Done to save your preferences.
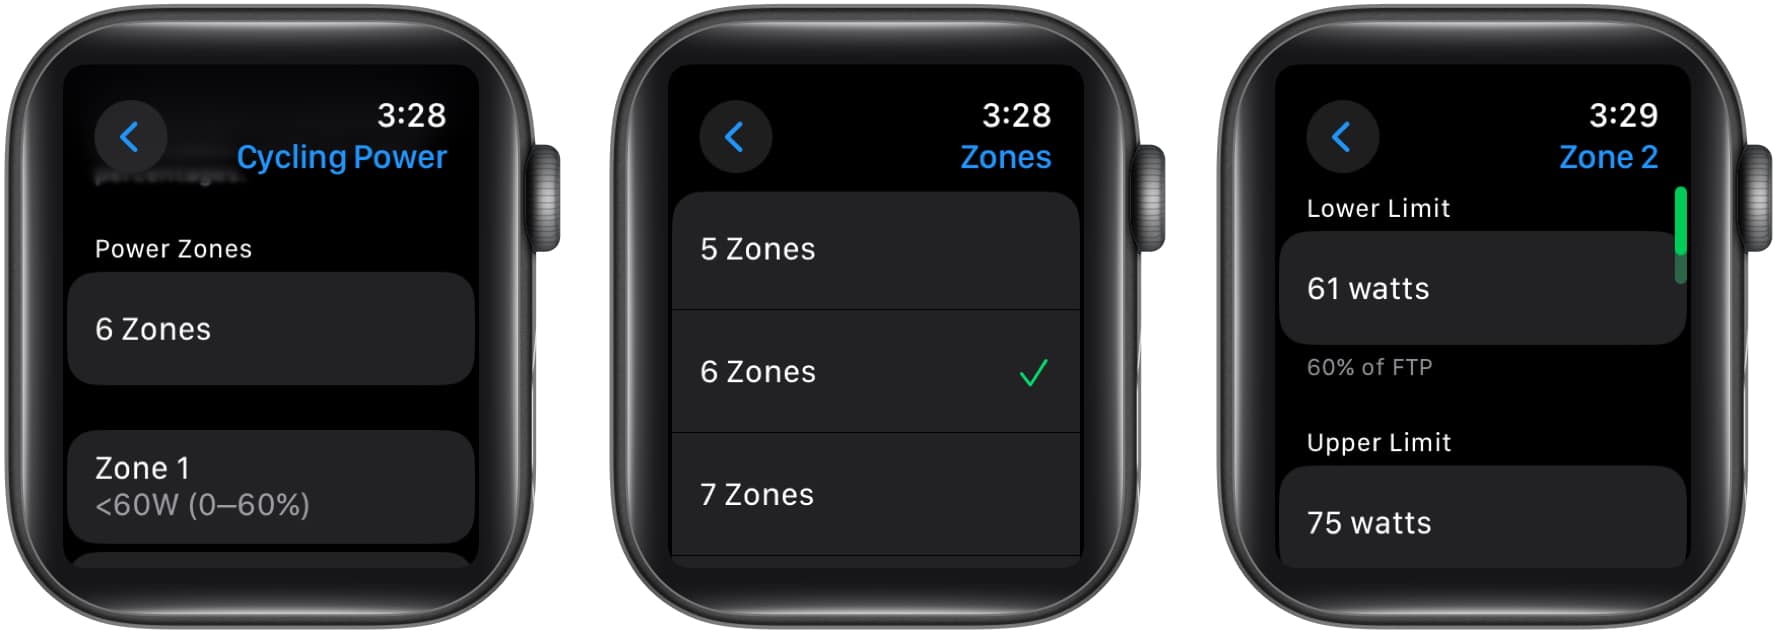
- Tap the 6 Zones option under Power Zones.
6 Zones is set by default. - Select a desired number of zones.
- Head back and tap any of the zones listed below to assign an upper limit and lower limit.
You can do the same via the Watch app on your iPhone.
Go to the Workout option → Select Cycling Power. Exactly as discussed above, you can easily set a custom power zone for your cycling session.
Note: Power Zones can be calculated only if you have provided your date of birth, height, and weight in the Fitness app on your iPhone.
Using live cycling metrics may have a slight impact on battery life, as it involves continuous monitoring.
Yes, you can! After completing a cycling workout, open the Fitness app → Select the specific activity → Tap the Share icon → Select your preferred app/contact.
Fusion of tech and fitness!
Cycling is a good habit, and tracking your metrics is even better! I am sure you found this guide helpful. If you have any other questions regarding cycling metrics, do share them in the comments below.
Read more:

