AutoFill feature on Safari saves you time by streamlining your input in various fields. So, you don’t need to manually input your passwords each time you check in to your favorite websites. Interesting, right? In this guide, I’ll show you how to use Touch ID to autofill passwords in Safari on Mac.
How to save or remove username and password in Safari on Mac
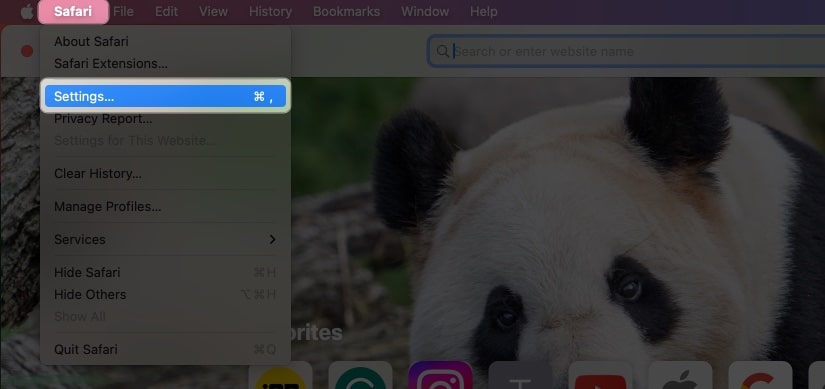
- Open Safari → Click Safari on the menu bar → Select Settings.
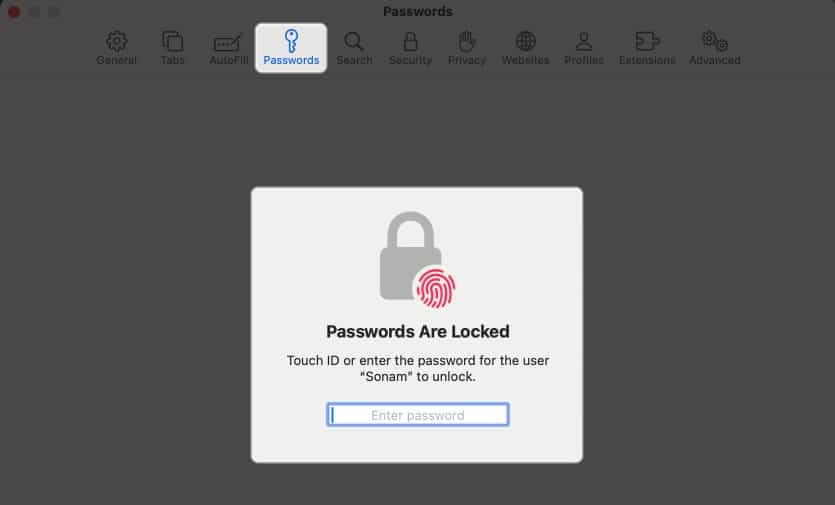
Select Preferences if you’re running macOS Monterey or earlier. - Select Passwords → Use your Touch ID or enter your Mac’s password.
- Click the plus (+) icon.
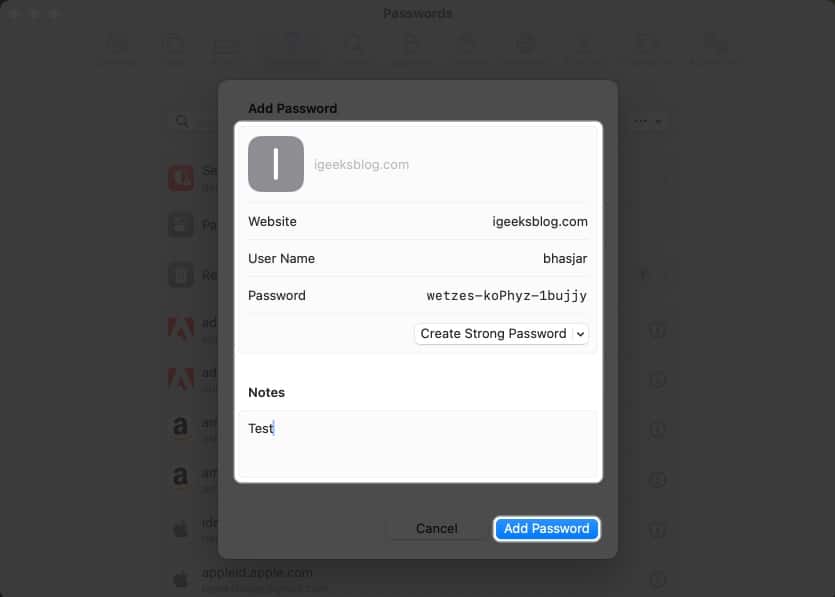
- Fill in the following details: Title, Website, Username, and Password.
You can also add Notes if you want. - Click Add Password.
To remove the username and password in Safari on Mac, follow these steps:
- Head to the Passwords tab → Enter Mac’s password.
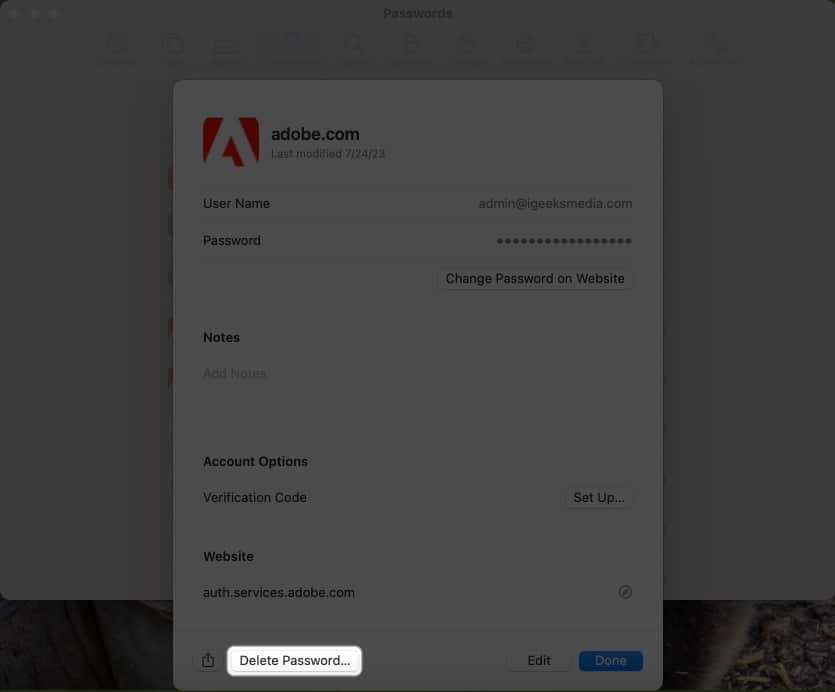
- Click the info icon beside the password.
- Select Delete Password.
- Confirm by clicking Delete Password.
How to use Touch ID to AutoFill passwords in Safari
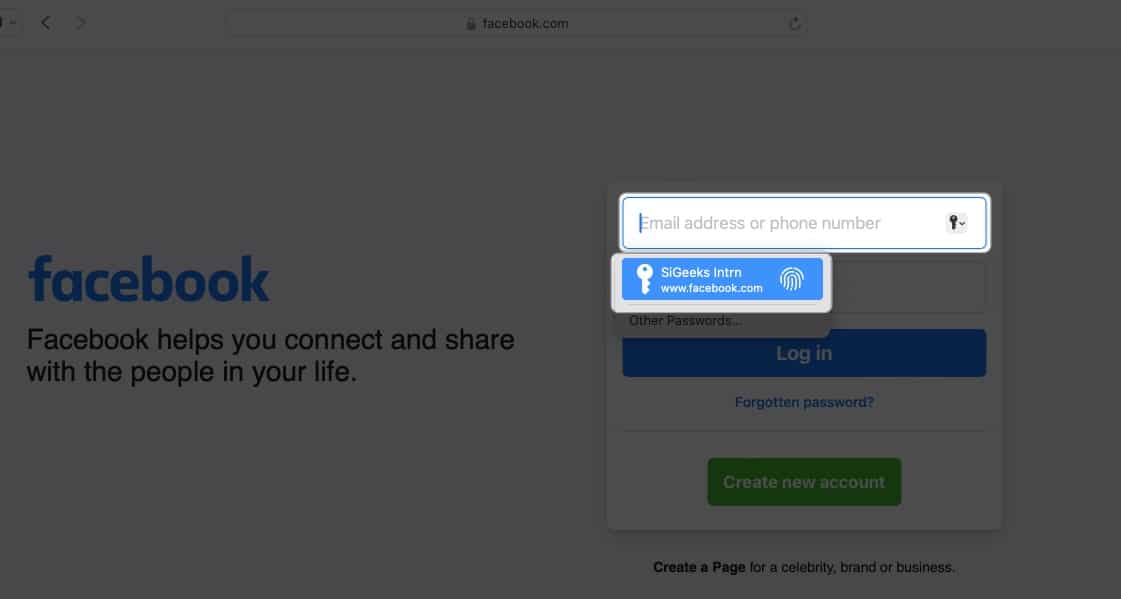
- Open Safari → Go to the Sign in section of a website.
I’m using Facebook for illustrations. - Click the username box → Select the AutoFill box.
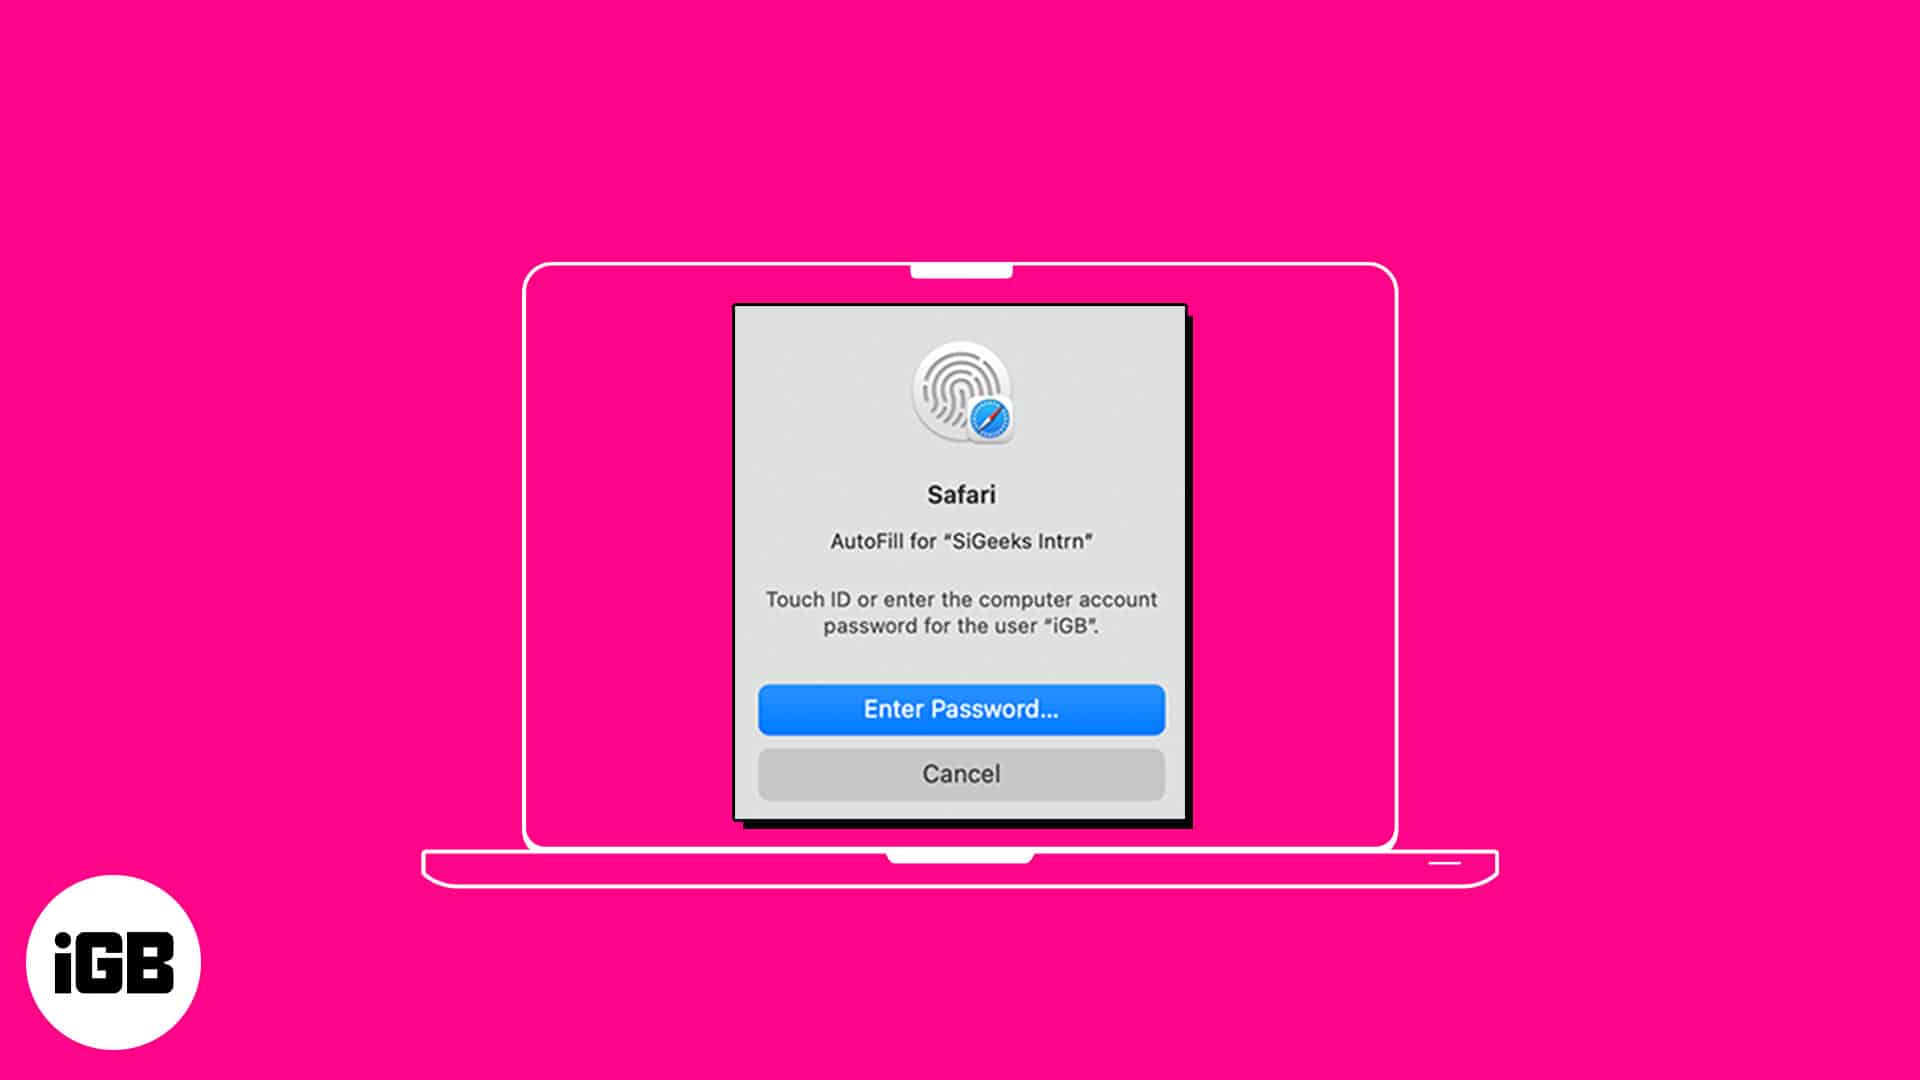
- Scan your finger with the Touch ID button.
Voila! You’ve successfully avoided the hassle of typing your username and password.
How to change AutoFill settings in Safari on Mac
You can autofill various information depending on the form you are filling. If you don’t want to save your private information or want to remove any saved details, you can change your Mac’s AutoFill settings.
- Go to Safari Settings.
- Head to AutoFill.
- Here, you will find the below-mentioned options:
- Using information from my contacts: Enabling lets you fill in the basic information on any website using your Contact card. To update your information on the contact card, click the Edit button.
- Usernames and passwords: You may save your usernames and passwords on websites to access them later quickly. Saved passwords will be pre-filled in subsequent fields.
- Credit Cards: You can AutoFill your Credit Card details while purchasing on Safari. Furthermore, manage your saved credit cards by clicking the Edit button beside it.
- Other forms: This feature saves the data you enter in online forms and reuse it to fill out the same form fields quickly. To know websites that have saved AutoFill information, click the Edit button. From there, you can view or delete the saved information.
What to do if AutoFill is not showing the saved password on Mac?
Several things can prevent AutoFill from filling in a saved password on a website. Follow the instructions below to ensure your saved passwords are correctly auto-filled.
- Select AutoFill passwords: The first step is to verify that your browser’s AutoFill passwords feature is enabled.
- Open Safari Settings.
- Select AutoFill → Ensure the User names and passwords box is checked.
- Re-add never saved passwords: Your AutoFill may be unable to fill in a remembered password if it was never saved.
- Go to Safari Settings→ Select Passwords → Enter your Mac’s password.
- Locate the website’s password labeled never saved → Click the info icon.
- Select Delete Password → Confirm by selecting Delete Password.
- Afterward, click the Add button to save the website, username, and password.
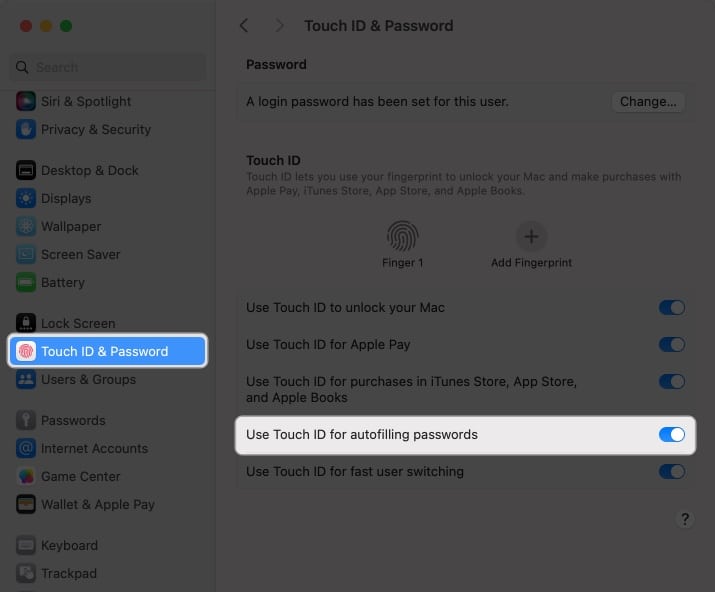
- Enable Touch ID for passwords: You must enable Touch ID to automatically fill in usernames and passwords on your Mac.
- Go to the Apple logo () → Select System Settings.
- Choose Touch ID & Password → Toggle on Use Touch ID for autofilling passwords.
Is AutoFill different from iCloud Keychain?
AutoFill is a handy feature that quickly fills in your saved usernames and passwords for websites and apps in Safari. It eliminates the need for manually entering login credentials every time.
However, Keychain is a password management tool that is a safe repository for all your login and other private information such as credit card details, Wi-Fi network passwords, etc. It uses robust encryption algorithms and a master password to encrypt sensitive data.
Wrapping up…
Using Touch ID on a Mac to automatically fill in passwords in Safari saves you time and increases your online security. So why not give it a shot and see how convenient it is for you. Do you use any third-party password manager on your Mac? Let me know in the comments below!
FAQs
You can disable Touch ID for your Mac’s Safari AutoFill feature. To do so, go to Safari → Settings → AutoFill → uncheck Usernames and passwords.
Unfortunately, you cannot use the AutoFill feature outside the Safari browser on your Mac. However, Chrome offers its own password manager. Besides, you may use password manager apps that support Touch ID to AutoFill passwords across different apps and websites.
Read more:

