From creating grocery lists to brainstorming creative ideas, Apple’s native Notes app can be helpful in several situations. However, did you know that you can also create tables in the Notes app to organize the things you’ve written?

Here’s a step-by-step guide explaining how to create, use, and modify tables in the Notes app on your iPhone, iPad, and Mac.
How to add table in Notes app
For iPhone and iPad
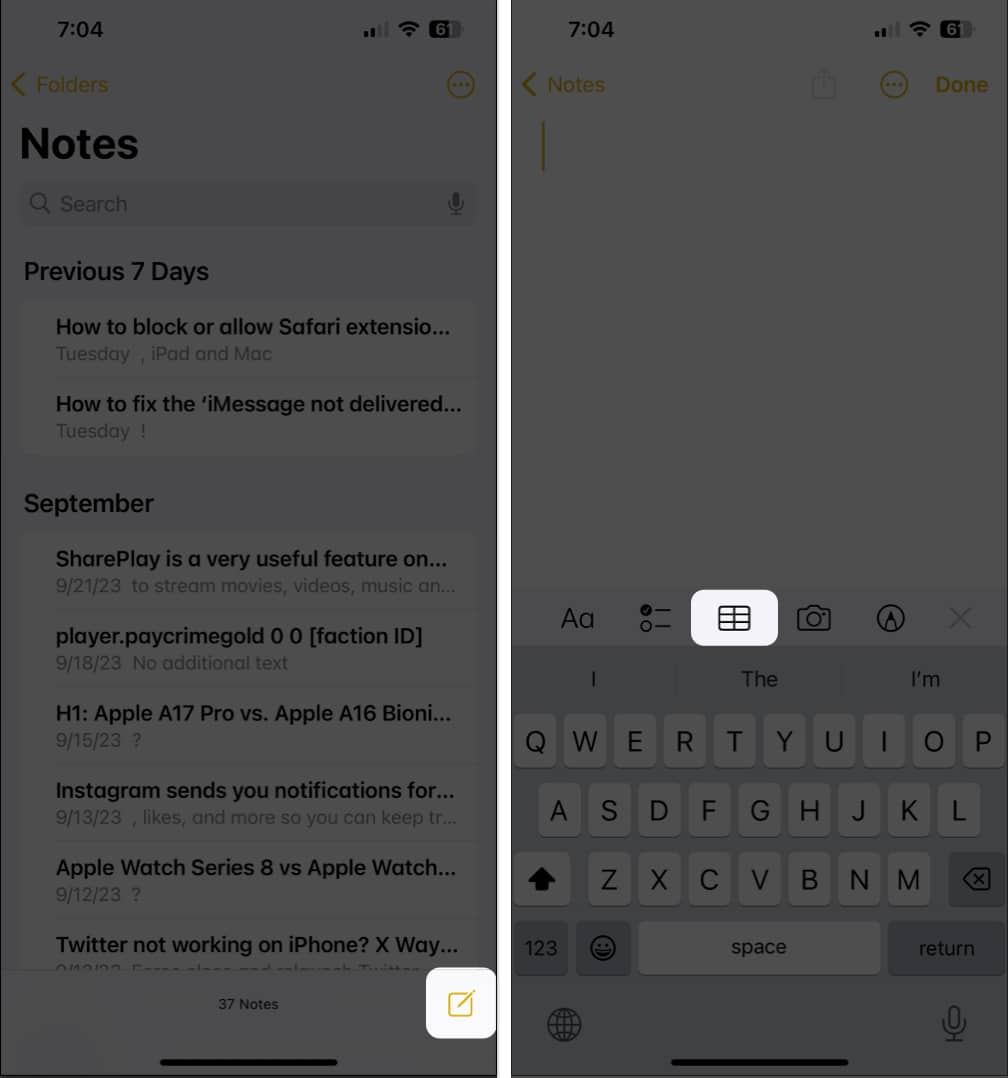
- Launch the Notes app → Open an existing note or tap the Create Note button to create a new one.
- Select the table button.
For Mac
- Open the Notes app → Select an existing note or click the Create note button to start a new one.
- Click the table button from the toolbar.
How to add columns or rows to table in Notes app
For iPhone and iPad
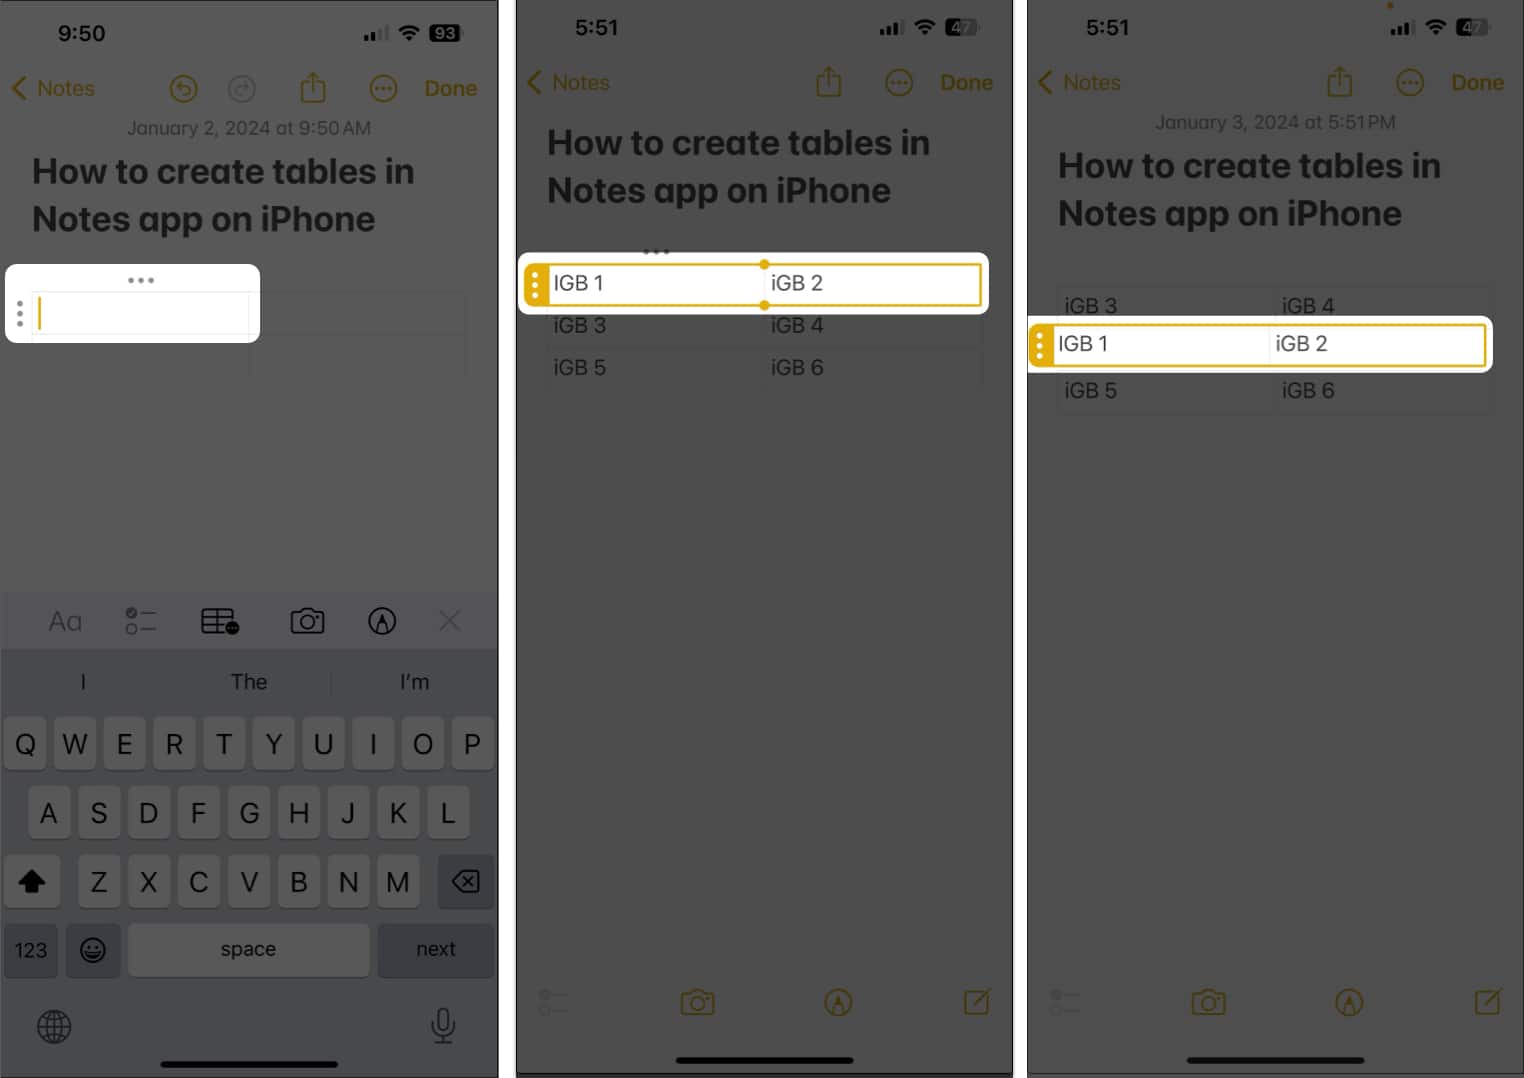
- Launch the Notes app → Open an existing note with a table or create a new one.
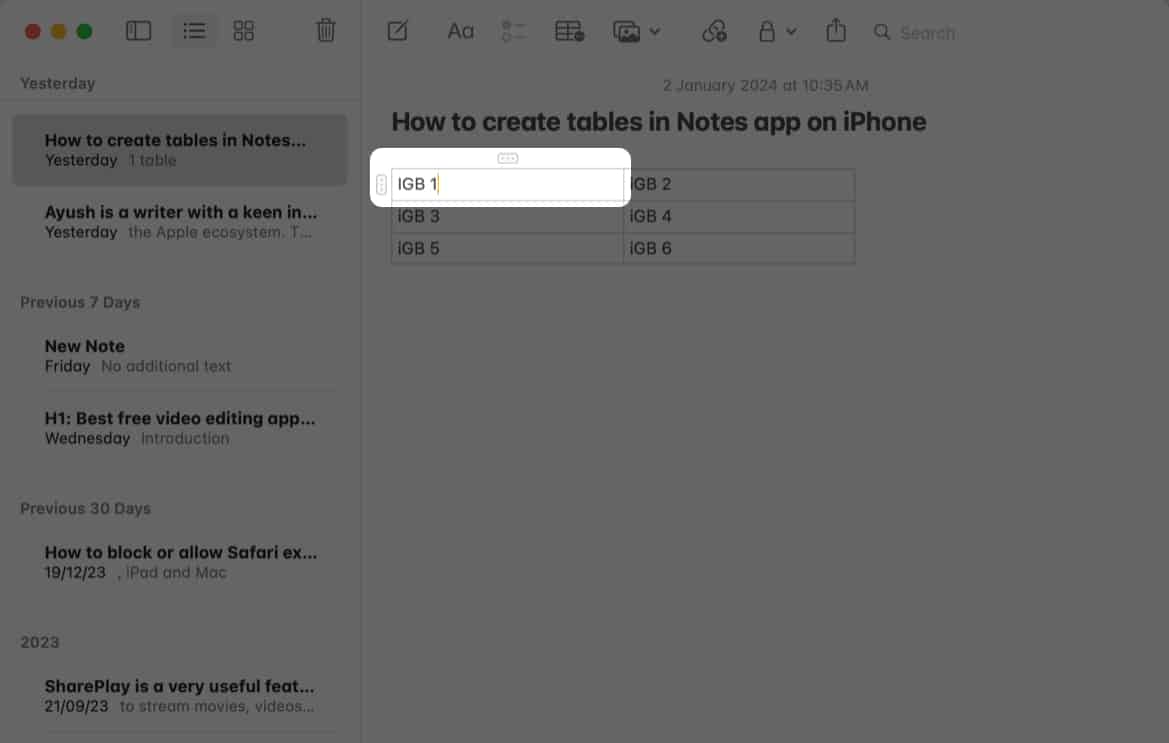
- Tap a cell in the table to edit it.
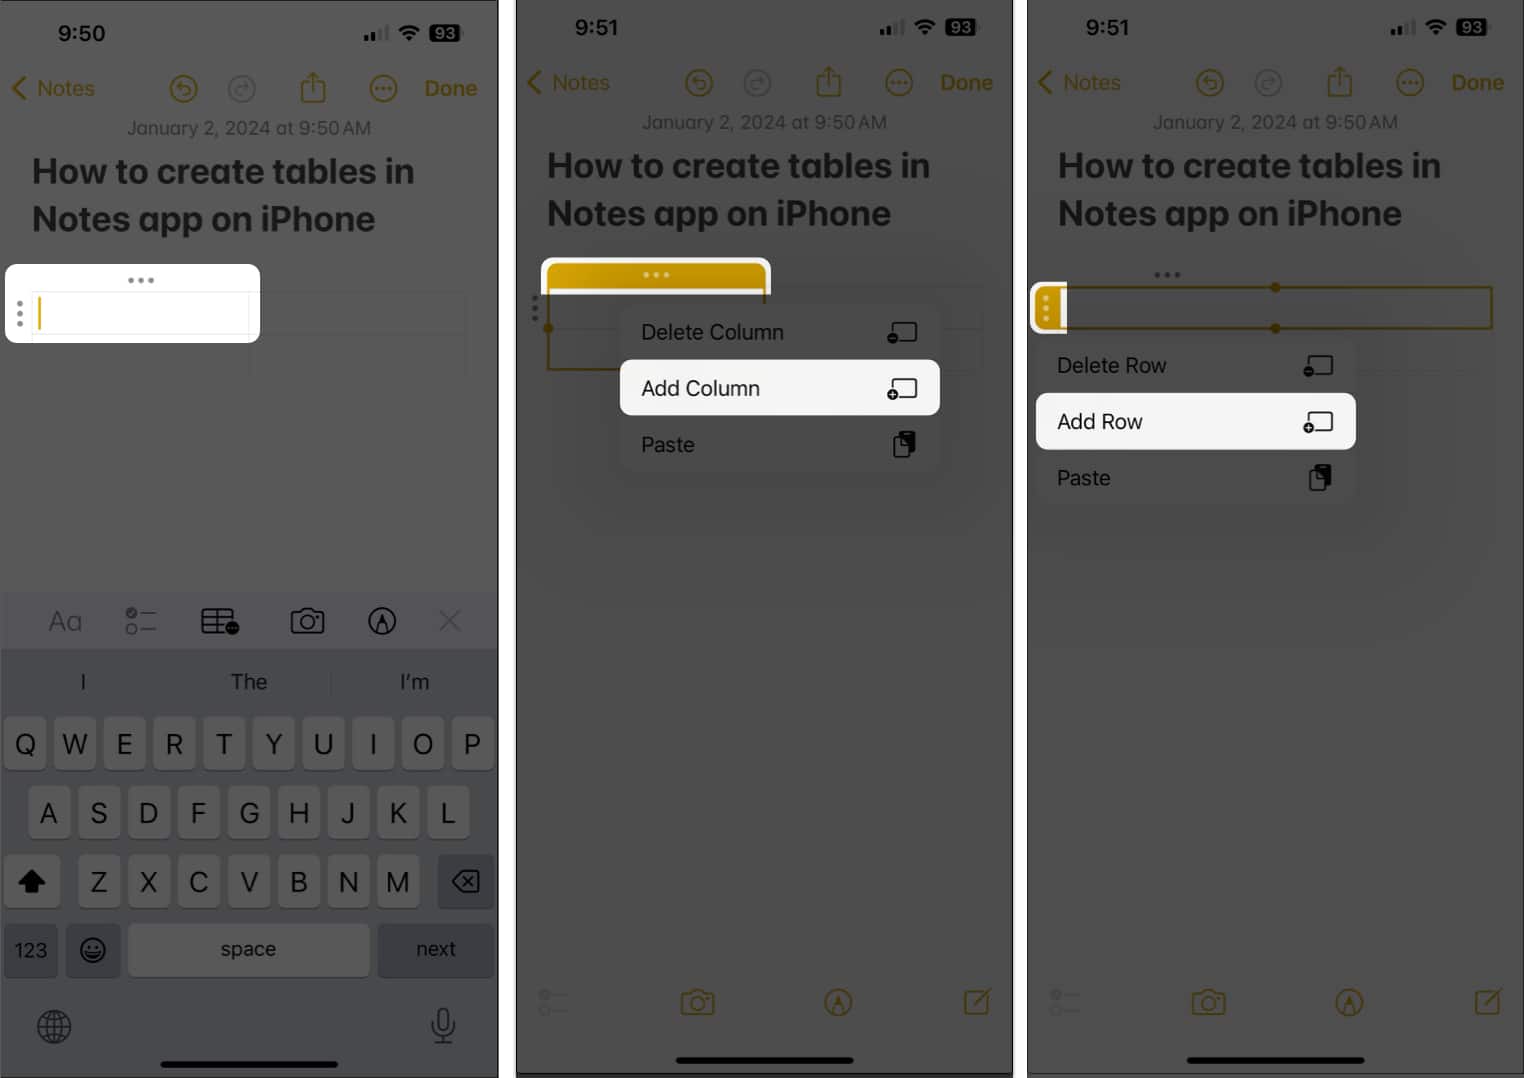
- To add a new column: Tap the three-dot icon above a column → Add column.
- To add a new row: Tap the three-dot icon next to a row → Add row.
For Mac
- Go to the Notes app → Open an existing note with a table or create a new one.
- Click a cell in the table you want to edit.
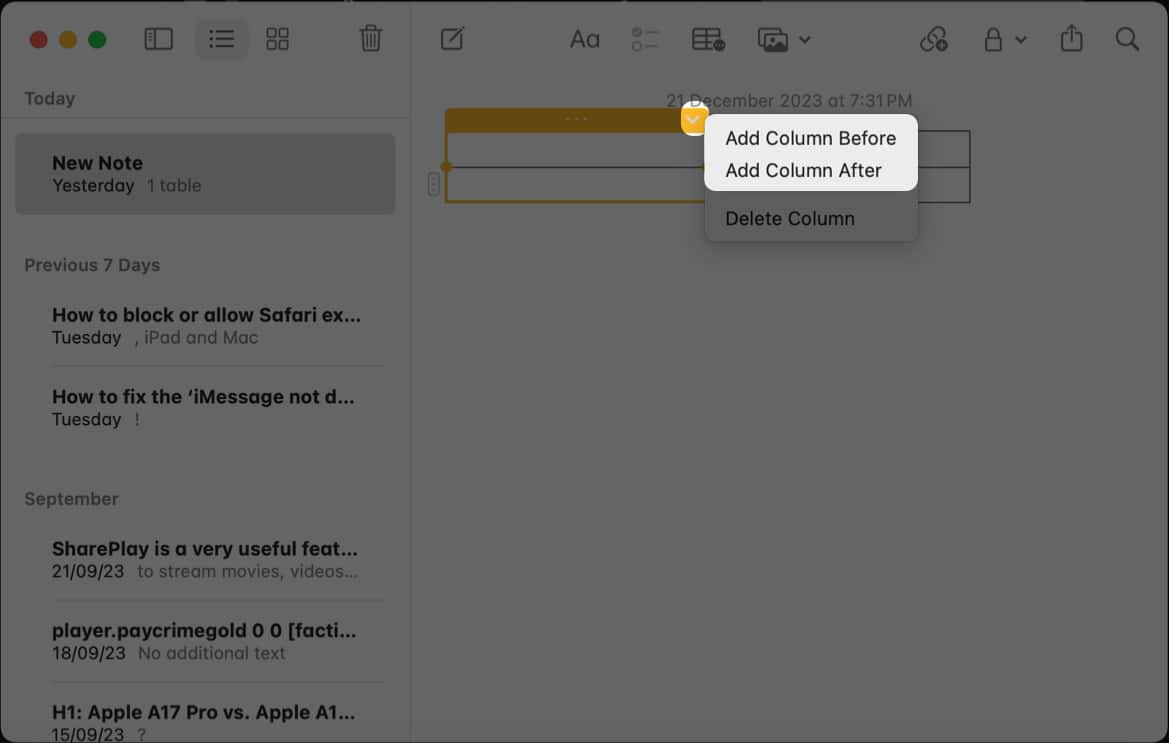
- To add a column: Click the three-dot icon above the column → Hit the dropdown → Select Add column before/after.
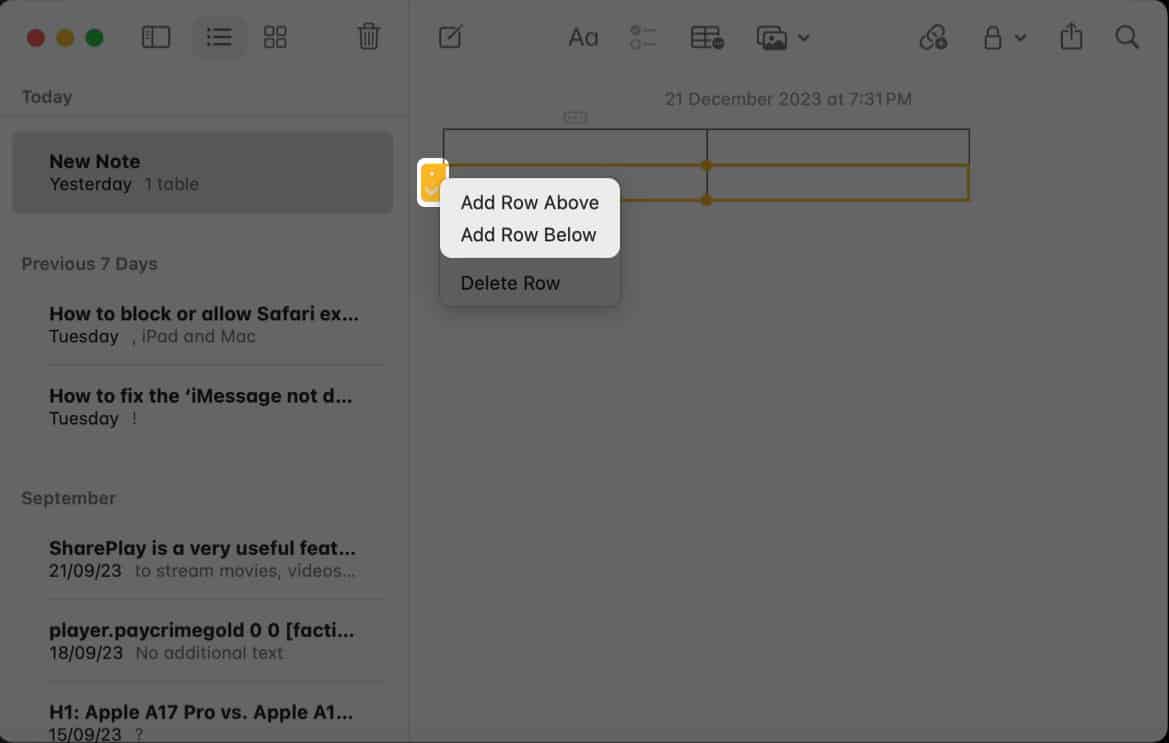
- To add a new row: Click the three-dot icon beside a row → Select the dropdown menu → Choose Add row below/above.
- To add a column: Click the three-dot icon above the column → Hit the dropdown → Select Add column before/after.
Rearrange rows or columns of table in Notes app
For iPhone and iPad
- Tap a cell in the column or row to rearrange it.
- Tap the three-dot icon located above the column or beside a row.
Now, the corresponding column or row will turn yellow. - Drag and drop the column or row wherever you want it in the table.
For Mac
- Click a cell in the column or row that you want to rearrange.
- Click the three-dot icon located above the column or beside a row.
Once you do this, the corresponding cell or row will turn yellow. - Click and drag the column or row wherever you want to rearrange it.
How to delete rows or columns from table in Notes app
For iPhone and iPad
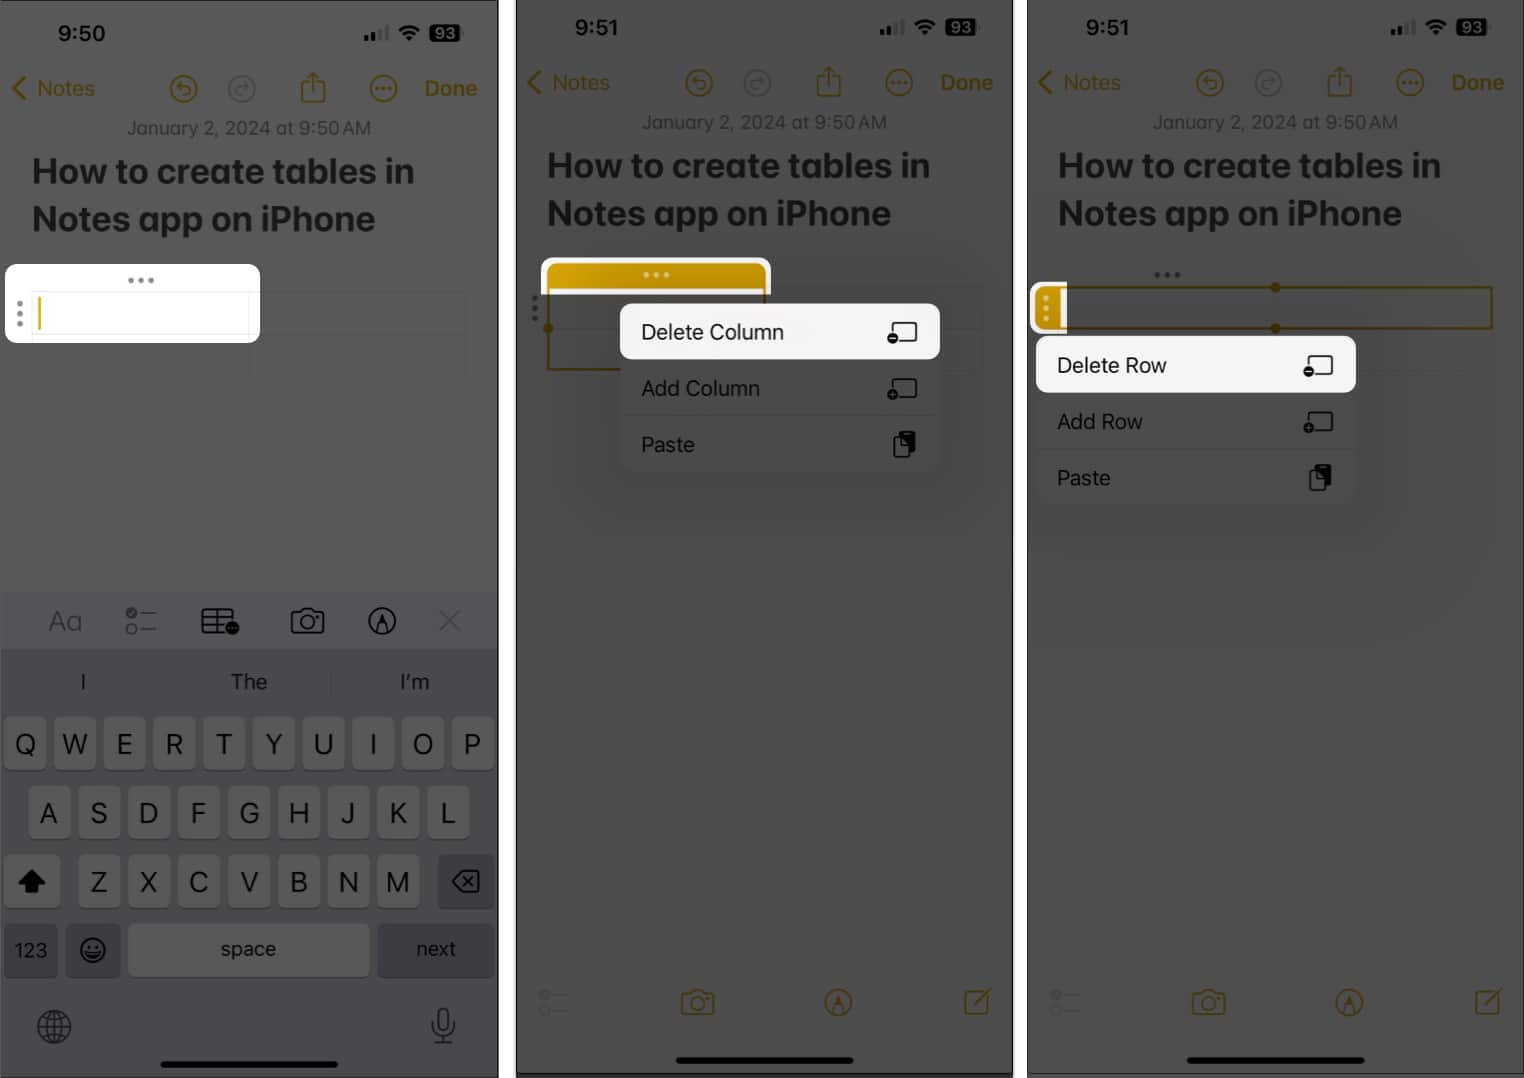
- Tap a cell in the rows or columns that you want to delete.
- To delete a column from table: Tap the three-dot icon above the column → Select Delete column.
- To delete a row from table: Tap the three-dot icon next to a row → Select Delete row.
For Mac
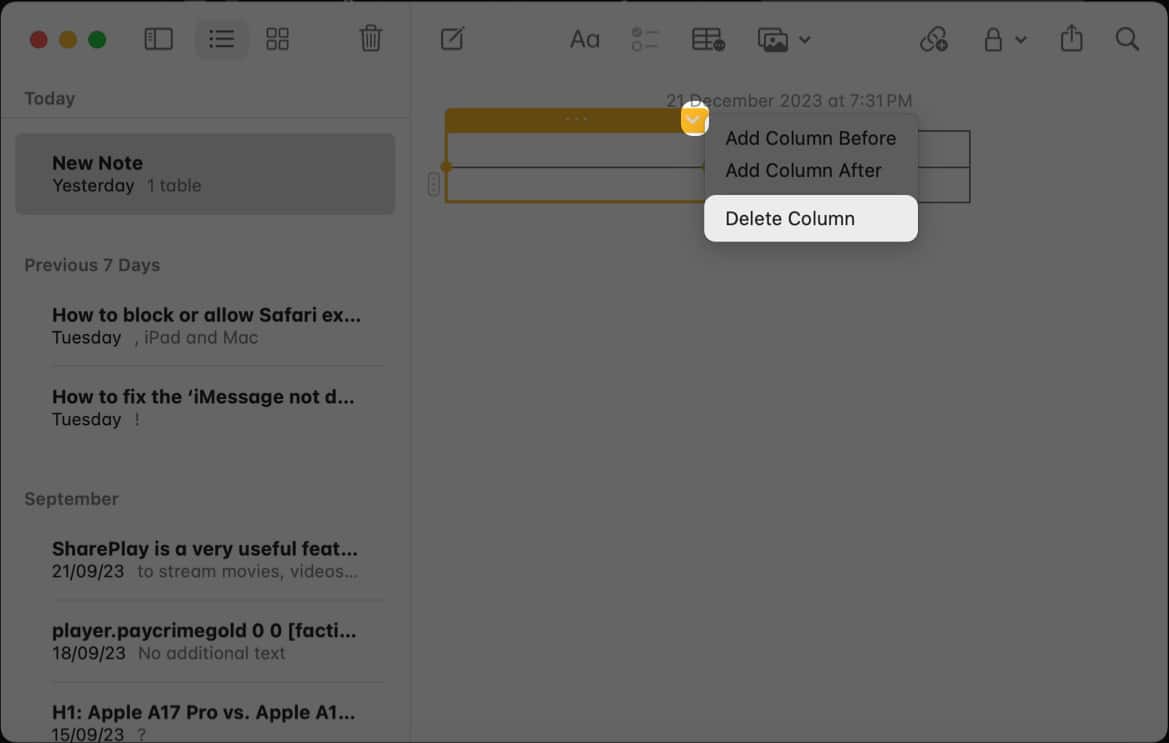
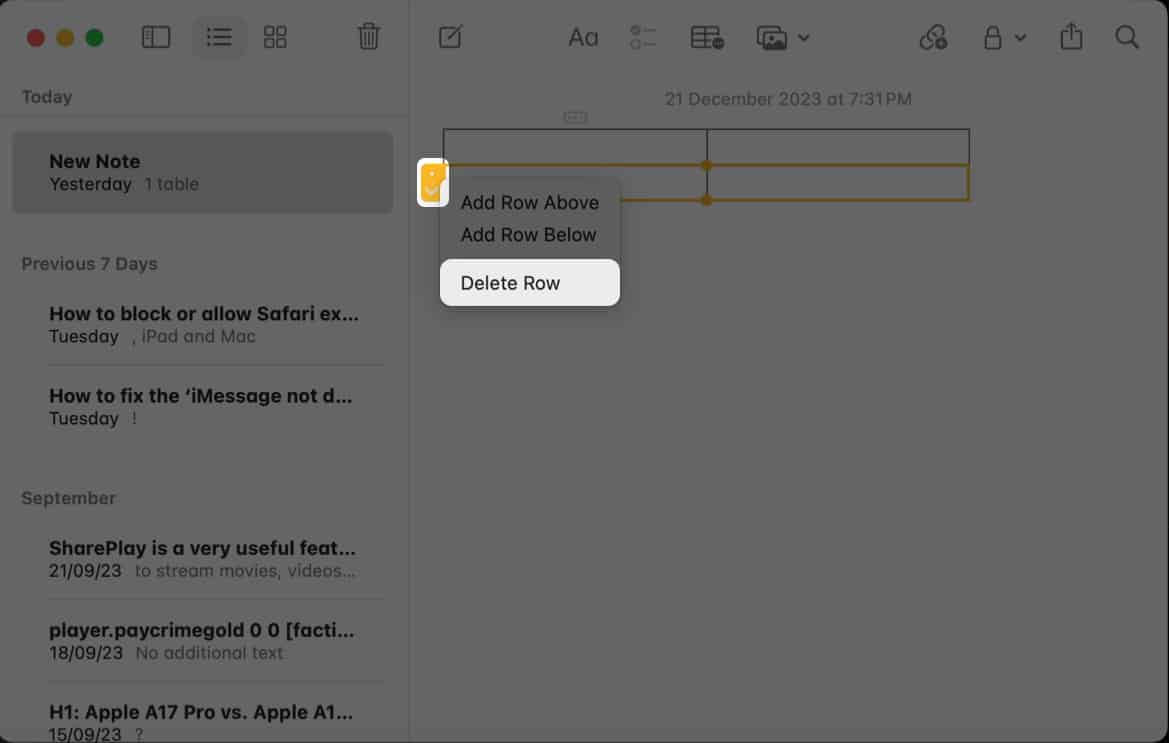
- Open an existing note with a table → Click a cell of the row or column you want to delete.
- To delete a column: Click the three-dot icon above the column → Select the dropdown menu → Click Delete column.
- To delete a row: Click the three-dot icon next to a row → Select the dropdown menu → Select Delete row.
- To delete a column: Click the three-dot icon above the column → Select the dropdown menu → Click Delete column.
Format text inside table cell in Notes app
For iPhone and iPad
- Double-tap a cell with text in it to select the text.
- Swipe right to left through the menu → Tap Format.
- Select bold, italics, underline, or the Strikethrough option.
For Mac
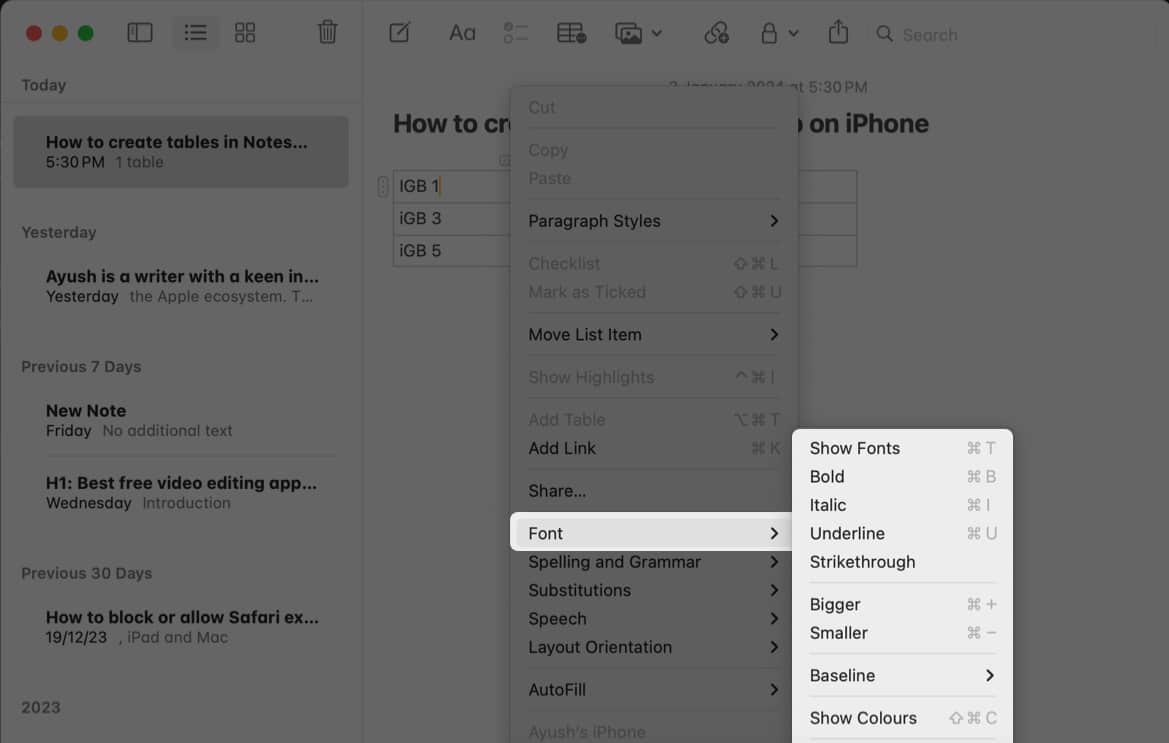
- Click a cell to place the cursor in it → Then, right-click the cell.
- Click Font → Select any format option.
You may change the font style and add font color.
How to convert text into table in Notes app
For iPhone and iPad
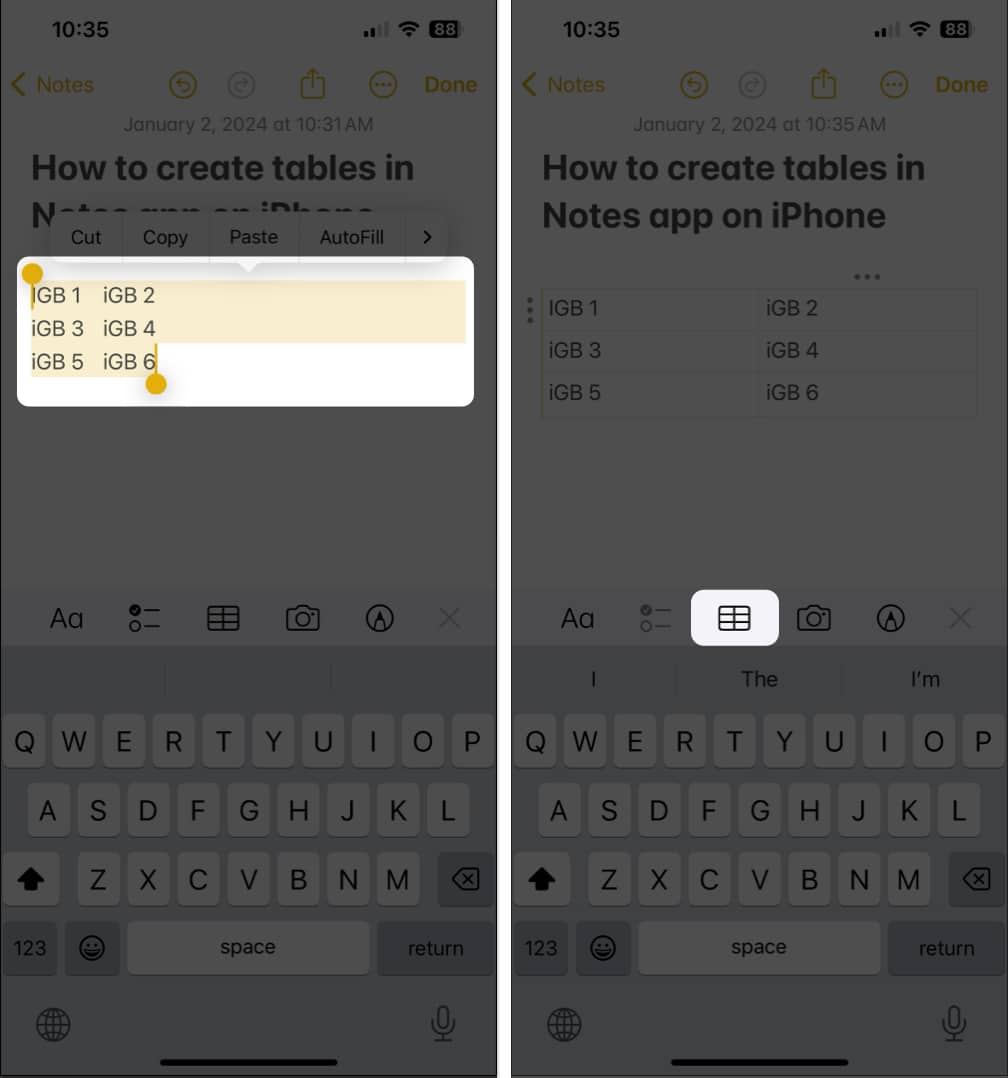
- Open a note with text → select the text you want to make the table from.
- Tap the table button.
Each sentence will become a cell.
For Mac
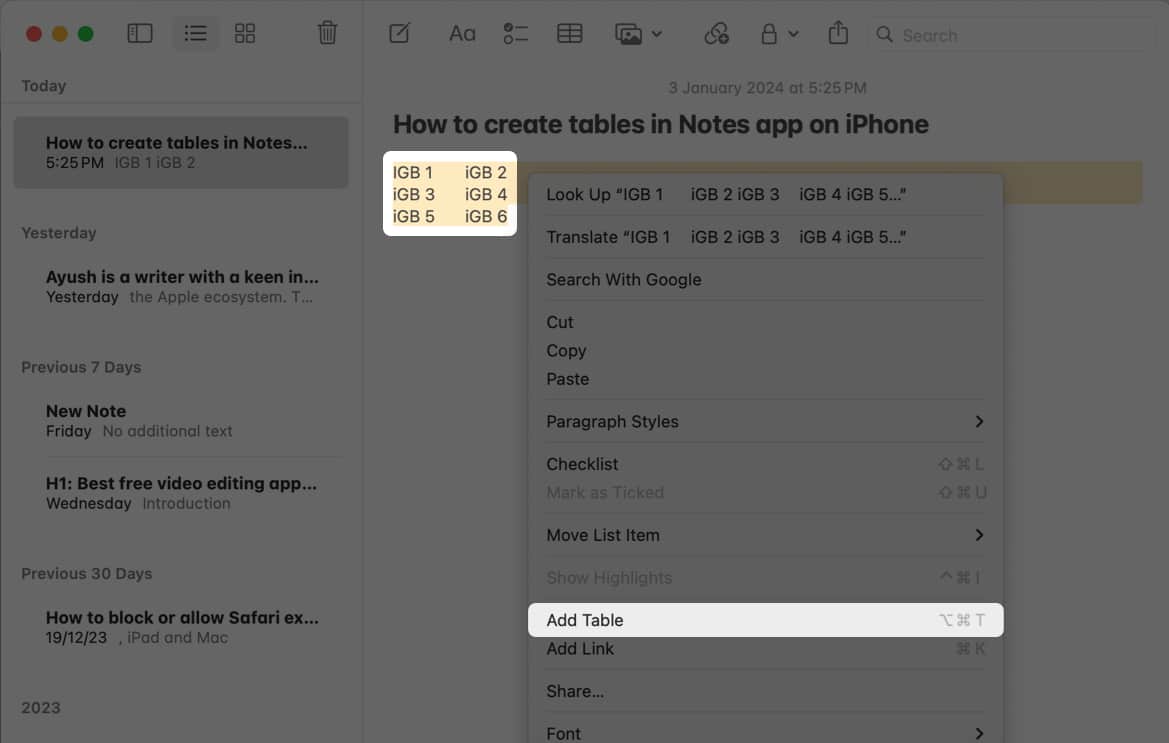
- Select the text you want to create the table from.
- Right-click the text → Select Add table.
How to convert table into text in Notes app
For iPhone and iPad
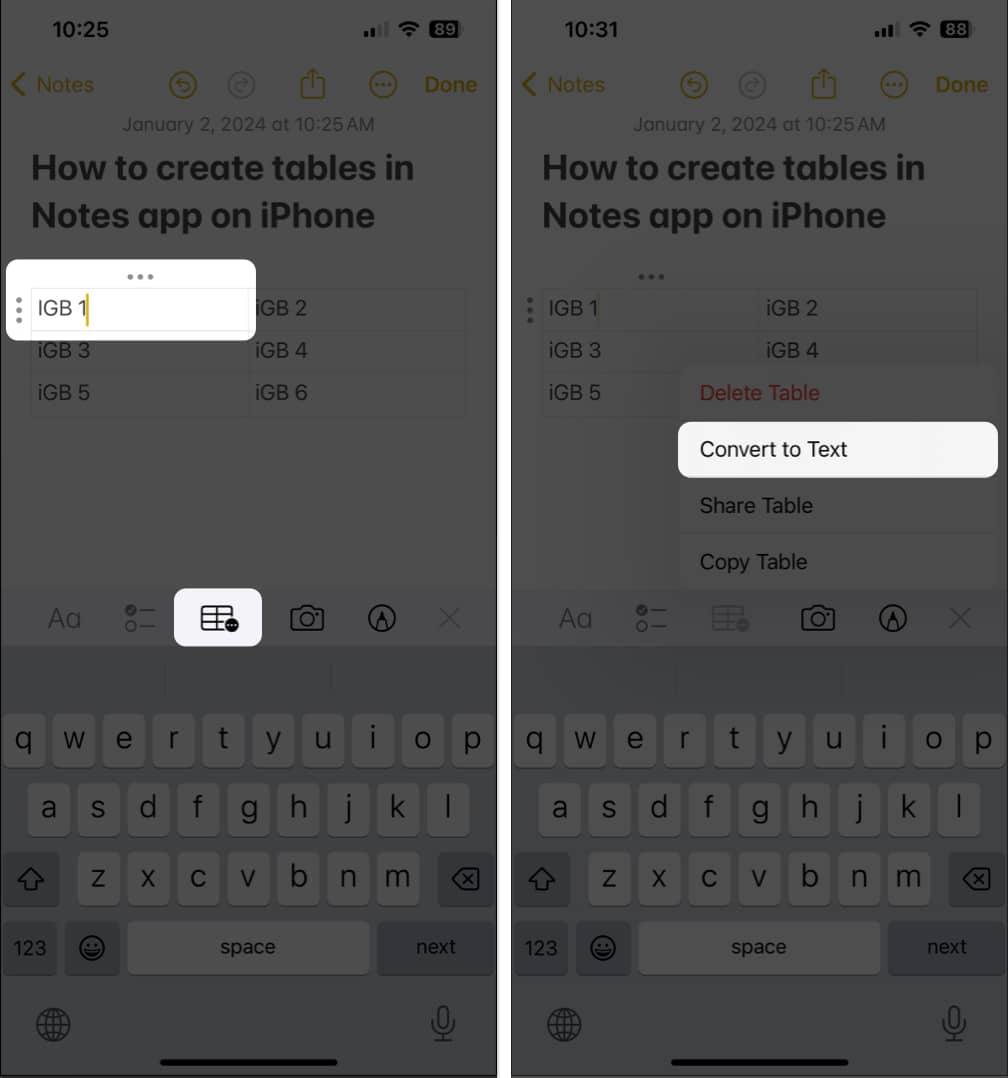
- Open a note with table → Tap any cell.
- Tap the table menu in the toolbar → Select Convert to text.
For Mac
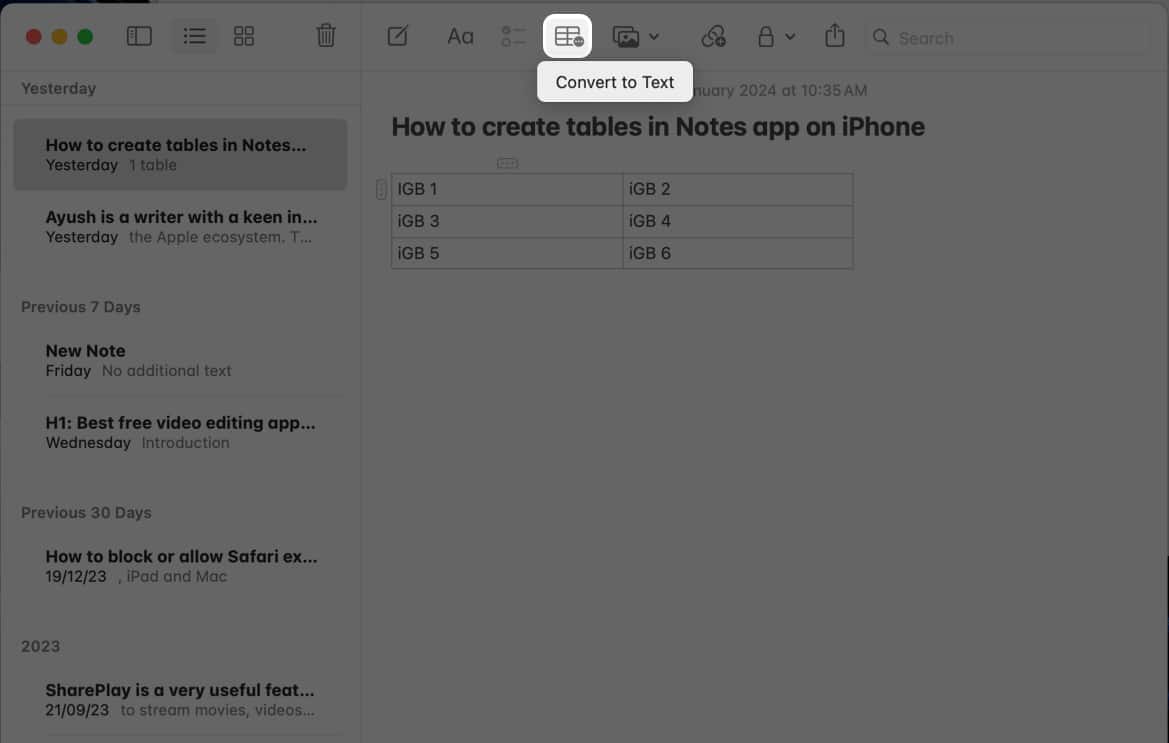
- Open a note with a table → Click a cell inside the table.
- Click the table button in the toolbar → Select Convert to text.
How to select multiple cells inside table in Notes app
For iPhone and iPad
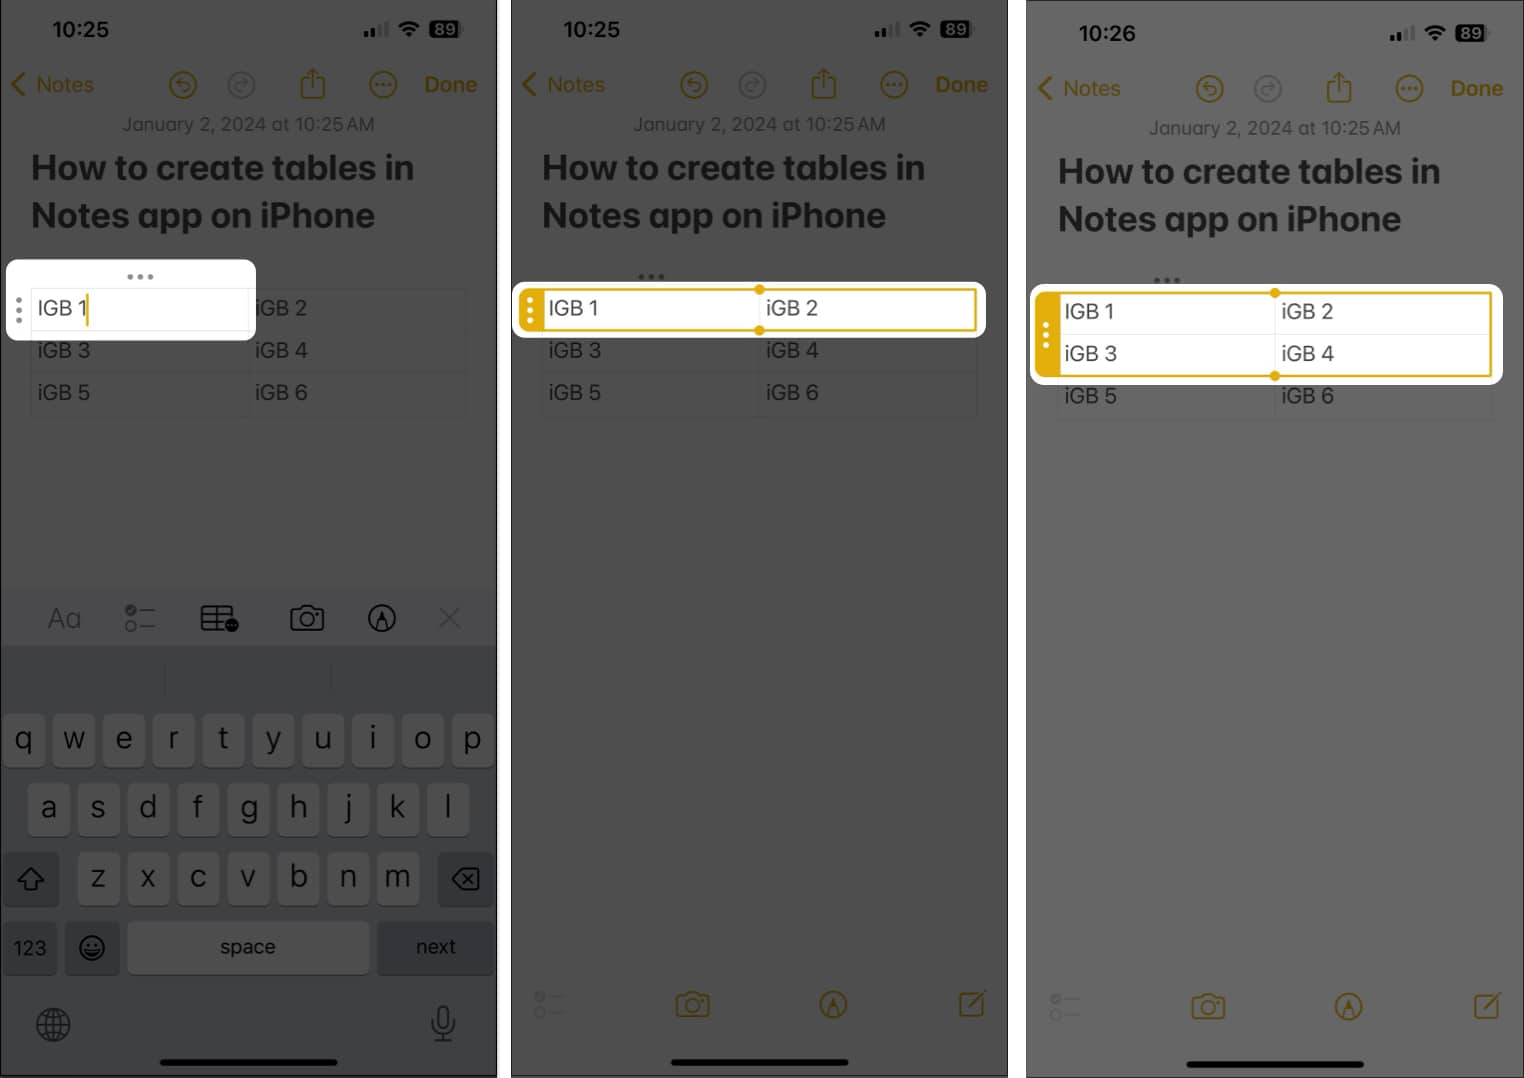
- Tap the cell you want to select → Tap the three-dot icon.
- Tap the little yellow dot and drag it to select rows and columns.
For Mac
- Head to an existing note with a table.
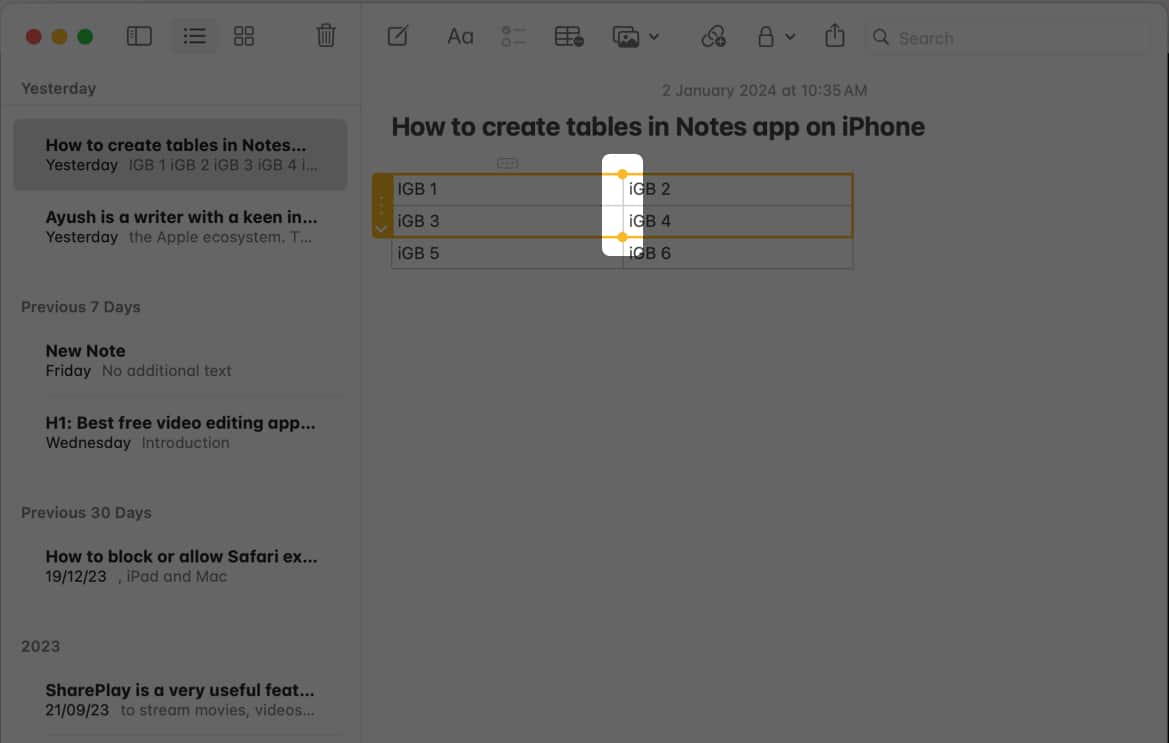
- Click any cell you want to select → Select the three-dot icon.
- Place your cursor on the little yellow dot and drag it to select cells.
How to cut, copy, and paste table rows or columns in Notes app
For iPhone and iPad
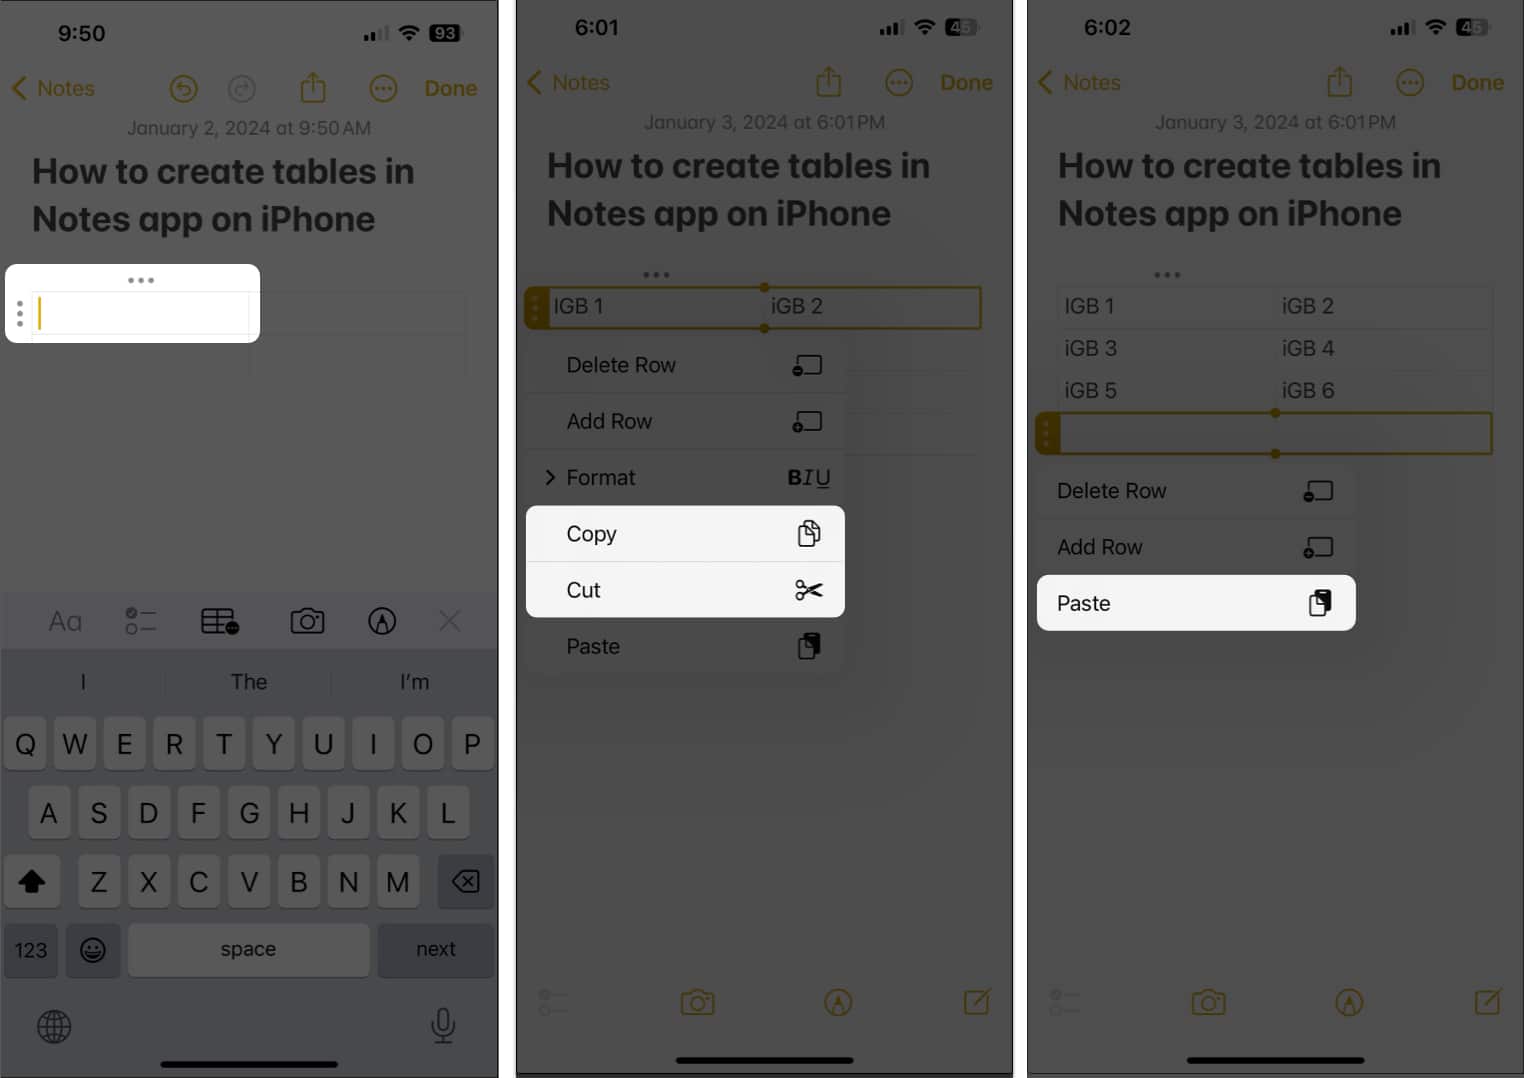
- Access a note with text → Tap a cell from the row or column you want to copy or cut.
- Double-tap the three-dot icon next to a row or above a column.
- Select Copy or Cut → Follow steps 1 to 4 again and tap Paste.
Tip: To copy the entire table, tap any cell → Select the table menu icon → Tap Copy Table. Now tap an empty space in the note → Tap the cursor → Select Paste.
For Mac
- Click a cell from the row or column that you want to copy/cut.
- Click the three-dot icon next to a row or above a column to select it.
- Press the Command + C key to copy or press the Command + X key to cut.
- Select any empty row or column → Press the Command + V key to paste.
How to share created table in Notes app
For iPhone and iPad
- Access a note with a table → Tap any cell → Select the table menu icon.
- Tap Share Table → Choose how you want to share the table.
For Mac
- Open the note with a table you want to share.
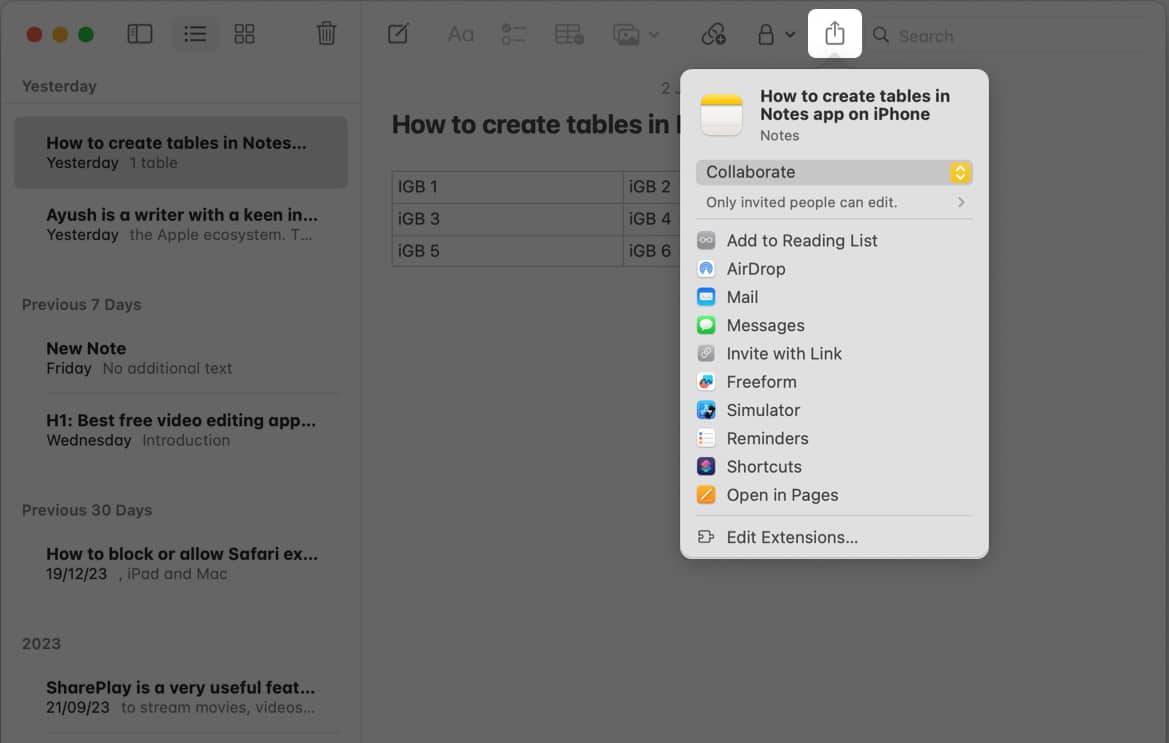
- Click the Share icon beside the search bar.
- Choose how you want to share the note.
How to delete tables in Notes app
For iPhone and iPad
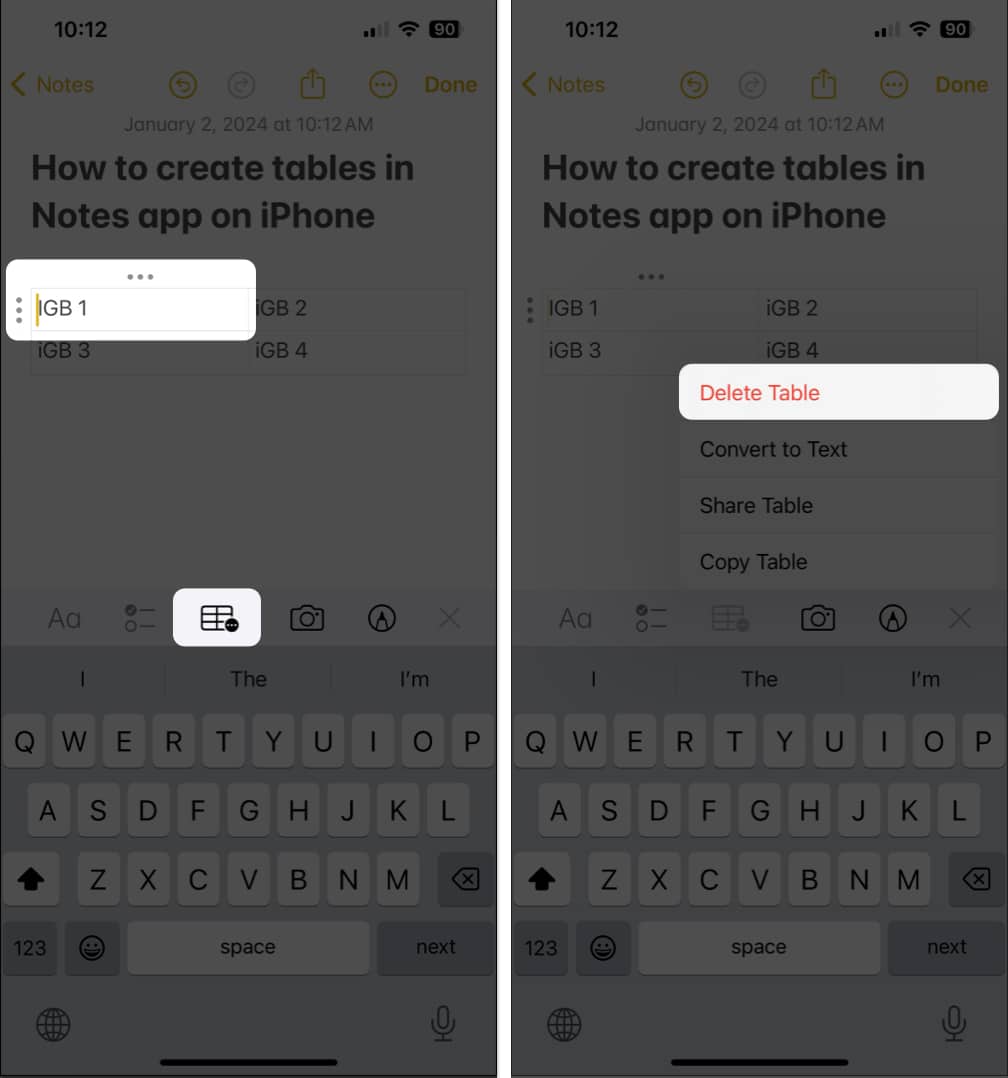
- Open a note with a table in it → Select any cell.
- Tap the table menu icon → Select Delete Table.
For Mac
- Open a note with a table in it → Select any cell.
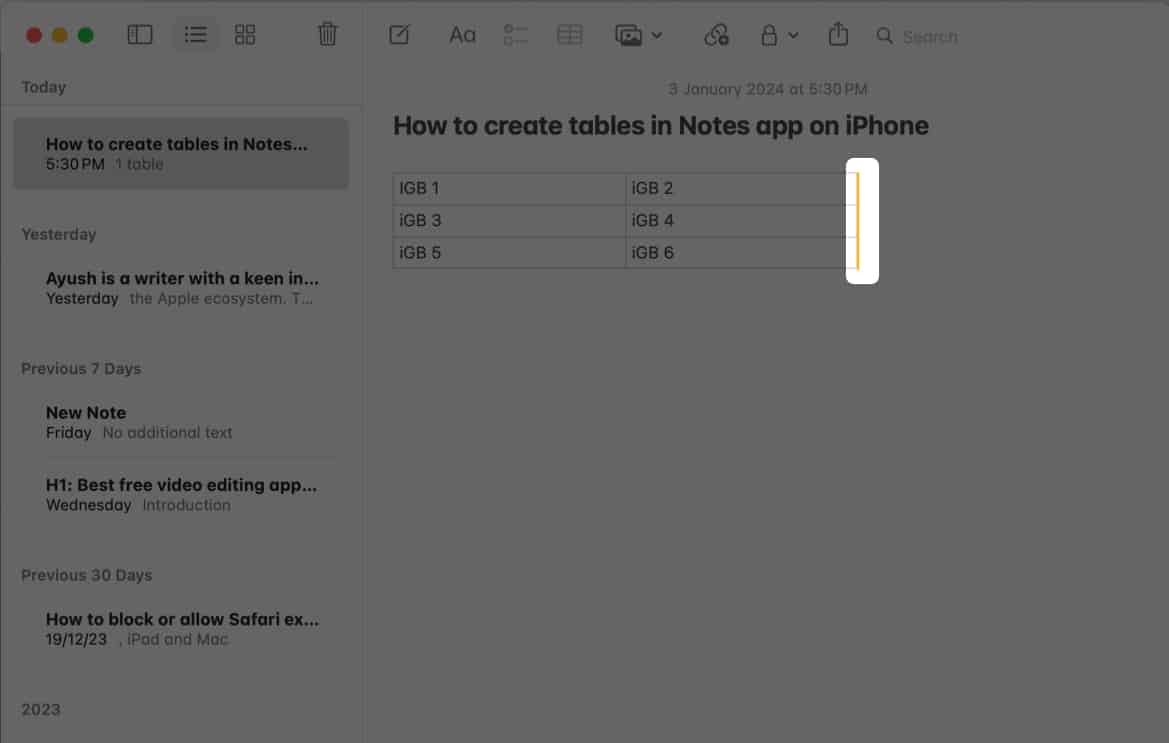
- Place the cursor at the outer left of the table.
- Then, press the delete key to remove the table.
Wrapping up…
What’s your take on the Notes app and how much impressed are you with it? Share your feedback in the comments below.
Also read:

