QuickTime Player is a multimedia player introduced back in 1991. Since then, it has been holding up as the go-to media player for many Mac users. Every new macOS update adds new features to the application, which is consistent with macOS Ventura.
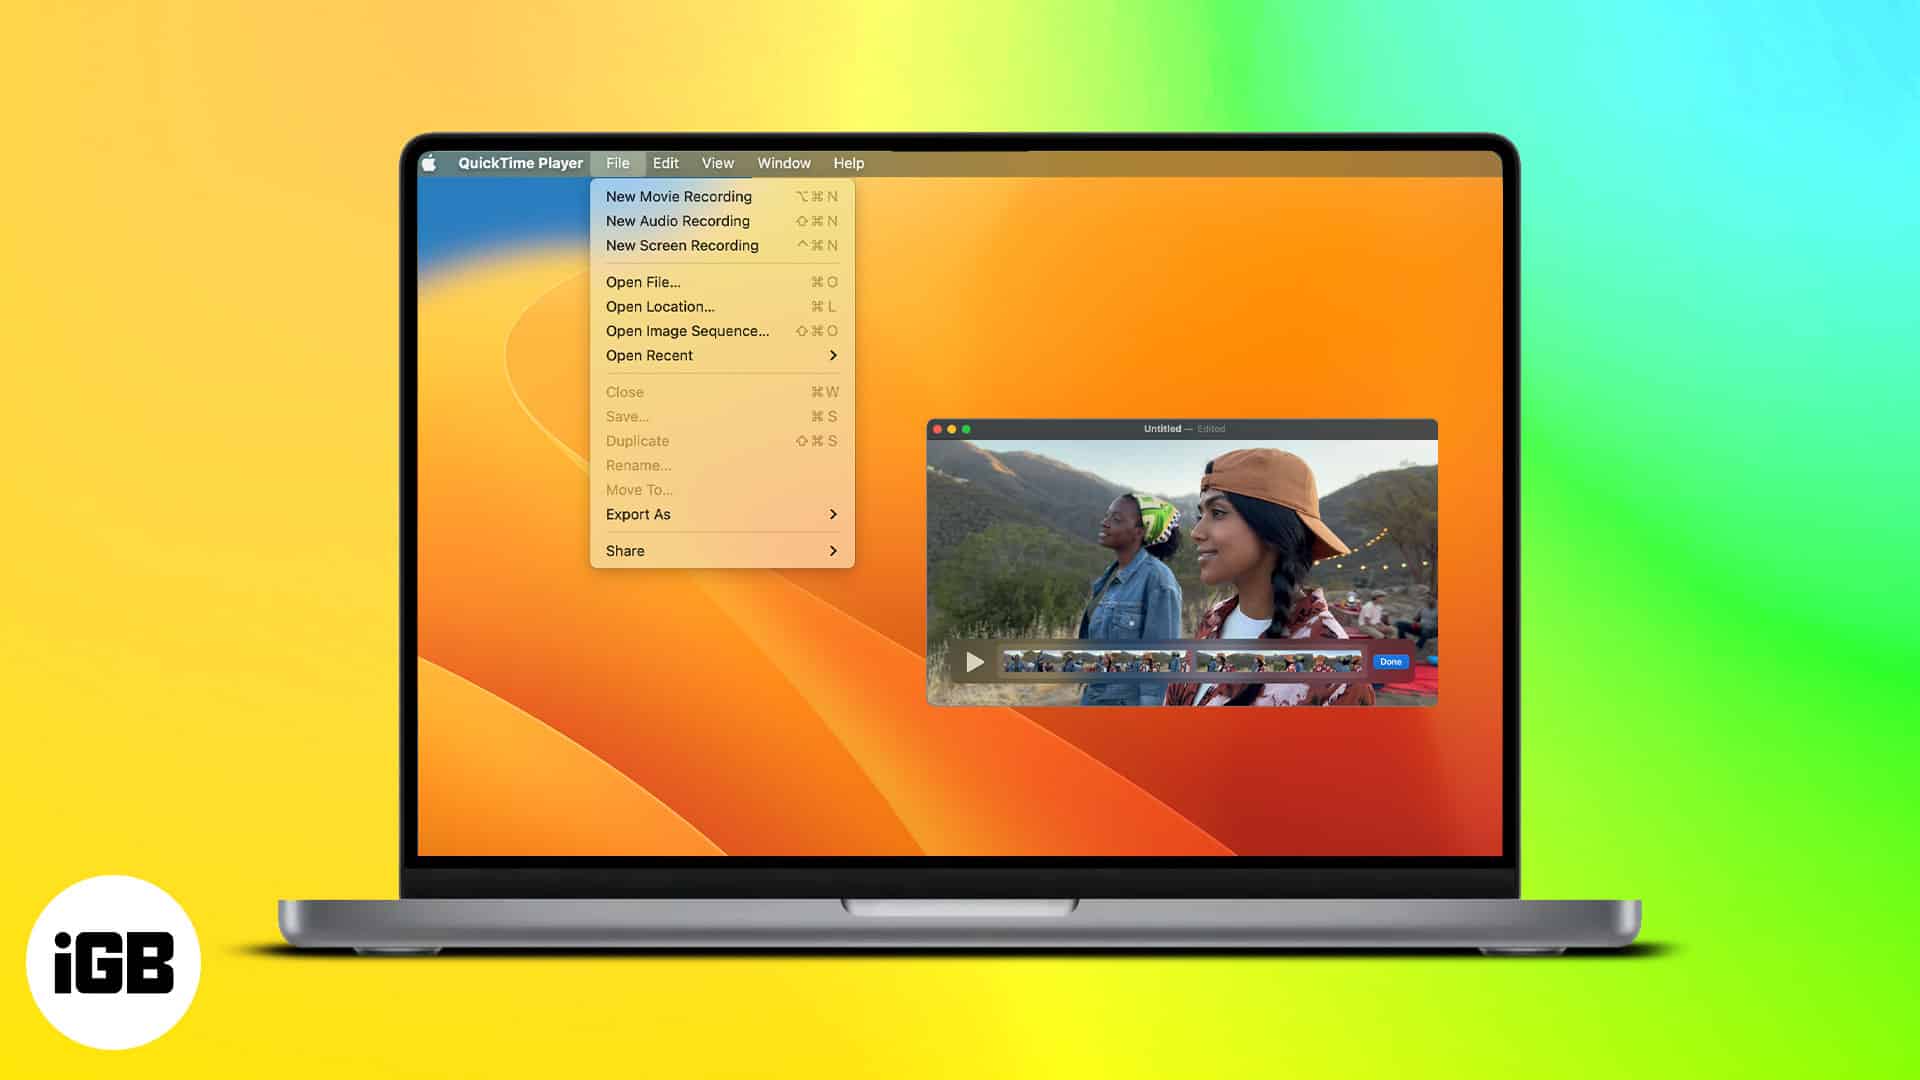
Unfortunately, many still don’t know the things they can do with this application. In this article, I’ll take you through everything you need to know about QuickTime Player and how you can use it on your Mac in your everyday life.
- How to open and play a file in QuickTime Player on Mac
- How to use QuickTime to record screen on Mac
- How to edit a video in QuickTime Player on Mac
- How to delete video or audio from a movie in QuickTime Player on Mac
- Clear QuickTime viewing history on Mac
How to open and play a file in QuickTime Player on Mac
Since QuickTime is a media player, let’s start by looking at how. Here, we will look at how to open and play a file or multiple files in Quick Time player.
Open a file
There are three main ways to open a file in QuickTime Player.
1st method:
- Visit the location where the file is stored.
- Double-click on the file.
2nd method:
- Visit the location of the file.
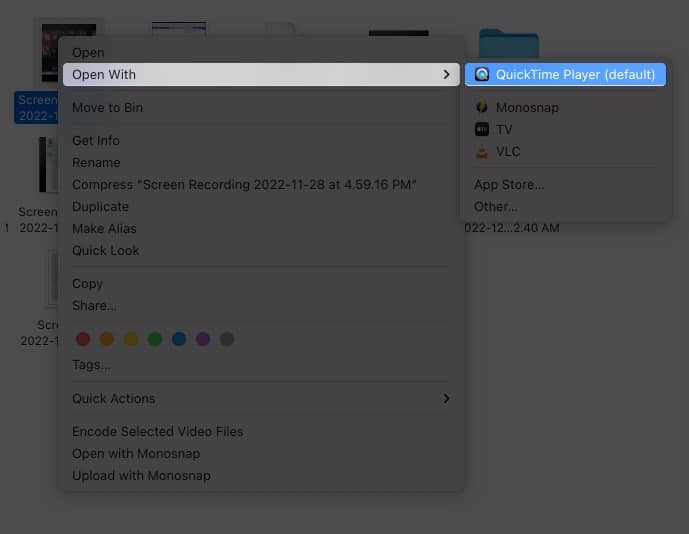
- Right-click and choose Open with.
3rd method:
- Launch QuickTime Player.
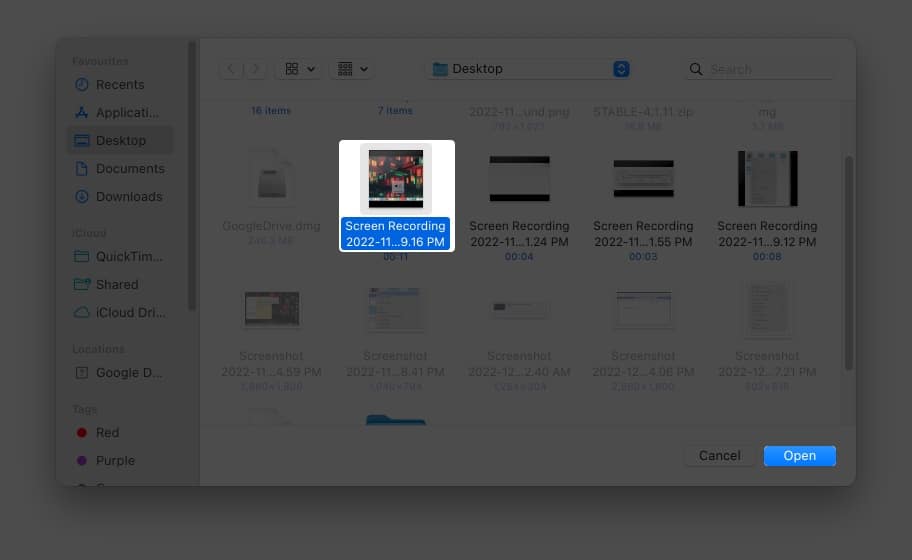
- Select the file from the Finder.
- Click Open.
Play and control the playback of a file
- Open a file in QuickTime Player on your Mac.
- To open the playback controls, move the pointer anywhere.
For audio files, the playback will already be visible. - You can use the playback controls to control the playback.
Also, you can adjust the playback speed using the forward and backward buttons. Playback speeds range between 2x, 5x, 10x, 30x and 60x. Hold the option key and select the playback speed icon to control the playback speed in increments.
Navigate a video using timecode
Other than navigation using the playback control, you can also navigate using the timecode of a video. Here’s how:
- After opening QuickTime Player, select View from the menu bar.
- Select Time Display.
- Choose Go To Timecode.
- Now, enter the timecode you want.
This feature will be mainly available for lengthy videos.
Play a video with picture-in-picture
- Open a file in QuickTime Player.
- Move the cursor to open playback controls.
- From here, select the picture-in-picture mode icon.
That’s it! From here, you can drag the picture-in-picture window to the place of your choice. To close the window, click the x icon.
Change screen size in QuickTime Player
You can adjust how the video appears in QuickTime Player. There are many options to play around with the dimensions.
- Open a video or audio file in QuickTime Player.
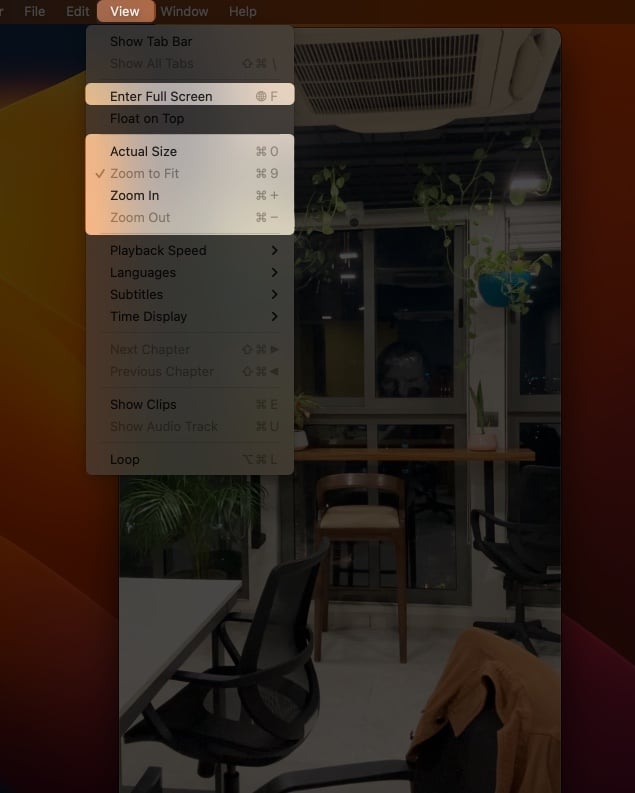
- Click View and select the following options:
- Enter Full Screen: The movie will be displayed on full screen and hide the menu bars. To exit, press Esc or click the green button in the window’s top-left corner. You can also use the green button to view it on full screen.
- Actual Size: The movie will be displayed at its original size.
- Zoom to Fit: Adjusts the video to the screen by zooming it accordingly.
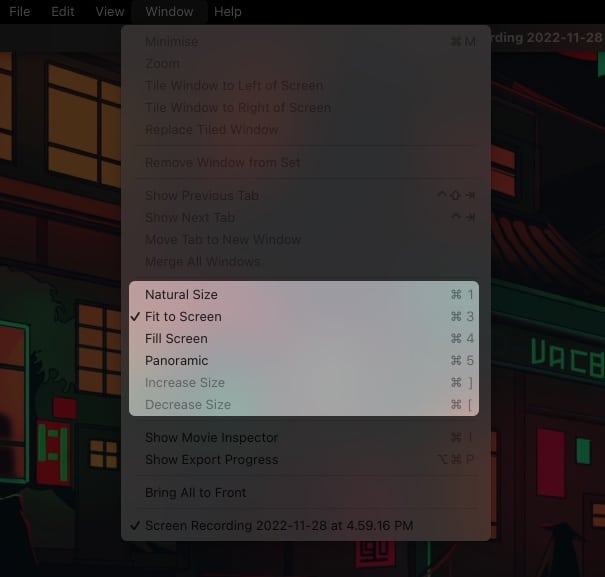
- You can also change the screen size from Window and select the following:
- Natural size: Fills the entire screen with the current playback screen.
- Fit to screen: The movie is scaled to fit your screen.
- Fill screen: The movie will be scaled and cropped to fill your screen, eliminating black areas on the top or side, but it may hide or distort the content.
- Panoramic: After entering full-screen mode, selecting this option will stretch the playback to crop out the black borders from the sides.
- Increase size/ Decrease size: Change the size of the window accordingly.
How to use QuickTime to record screen on Mac
Other than playing the content, you can also use QuickTime Player to make content. You can screen record in QuickTime Player on Mac.
Record audio in QuickTime Player on Mac
Besides recording the screen with audio, you can also use QuickTime Player to only record audio.
- Open QuickTime Player.
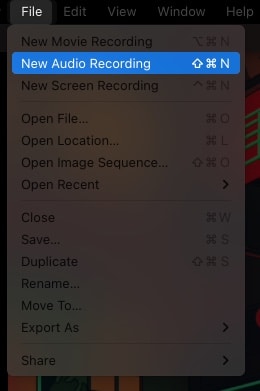
- Click File and select New Audio Recording.
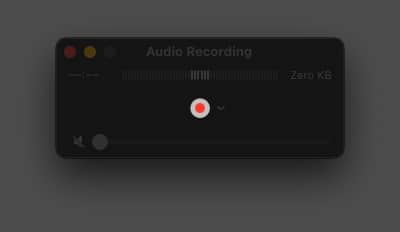
- Click the red button to start recording.
You can also use the red button to pause the recording. - Click the grey square to stop recording.
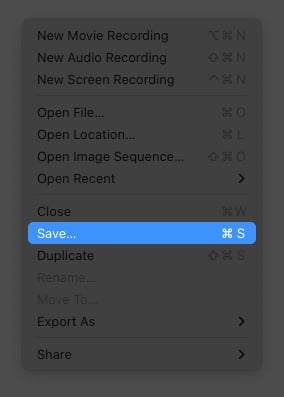
- Click File and select Save.
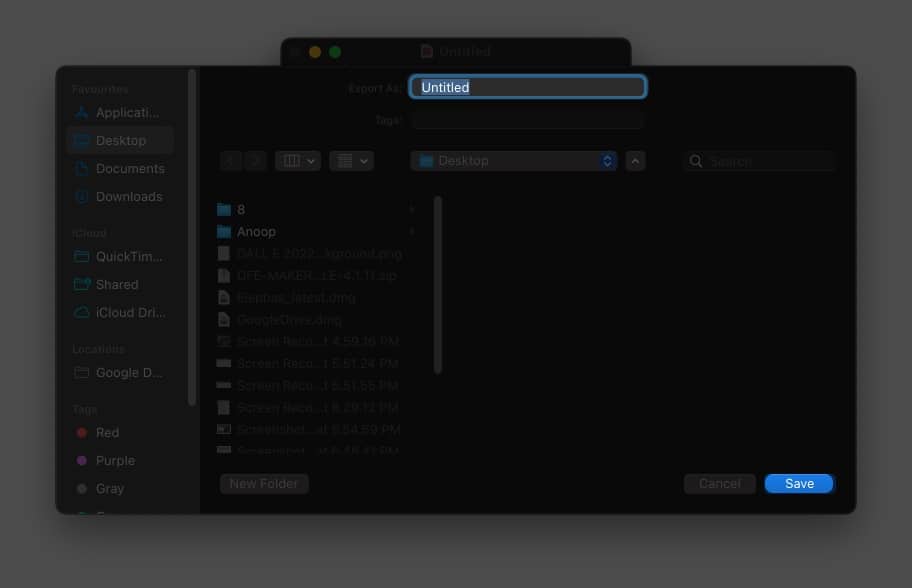
You can also use the shortcut Command + S. - Choose the location and click Save.
You can also click the x button to reveal a save window.
The best part about audio recording using QuickTime player is that you can hear the live recording if a headphone is connected to your Mac. Other than that, there is an option to customize. You can choose from which mic you want to hear and what quality the audio recording should be.
Create a movie with image sequence in QuickTime Player on Mac
Besides recording your screen, you can also use QuickTime player to create a movie (video/slideshow) with images. Here’s how:
- Open QuickTime Player.
- Click File → Open Image Sequence.
- Select the images and click Choose media.
- Select Resolution, Frame rate, Encode for, and click Open.
- You can save it from File → Save.
How to edit a video in QuickTime Player on Mac
By now, you already know that QuickTime Player is not just a media player but is also capable of making media. Then it won’t be surprising that it is also capable of editing videos, not as great as those dedicated video editors for Mac, but it has what it takes to do some simple editing. Let’s look at them.
To edit a file or multiple files in QuickTime Player, you must select them first and then press the Space bar.
- Rotate an item: Click the Rotate icon to rotate left. Holding the Option key will rotate it to the right. Keep clicking the button until it’s in the position of your choice.
- Mark up an item: If you open an image, you will see a pen icon. Upon clicking the icon, you will be taken to the Markup page to add signs, draw, or crop the image.
- Trip audio or video: For multimedia options such as audio and video, you can select the trim icon and drag the yellow handles to trim the video accordingly. There is even the option to revert if you mess things up. Once making the necessary results, you can click Done.
- Browse items: If you have selected multiple items, you can jump between them using arrow keys.
- Show items in a grid: For those who have selected multiple files, you can organize and show them in a grid. All you have to do is click the four boxes.
- Share an item: Click the Share button and choose where you want to share.
Rearrange a movie clip on QuickTime Player
- Select a media file and press the Space bar.
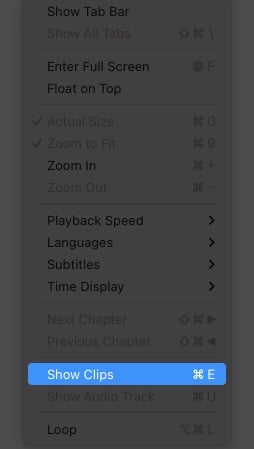
- Click View and select Show Clips.
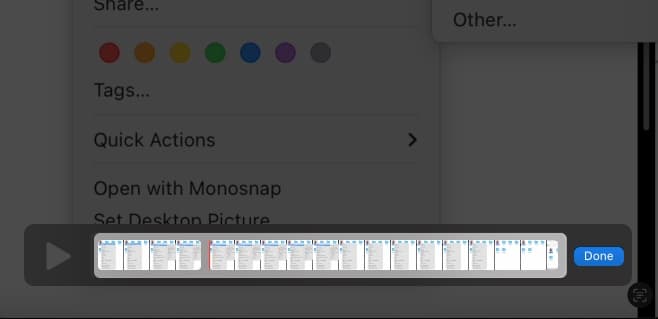
- Move the playhead (the red vertical line) to where you want to split.
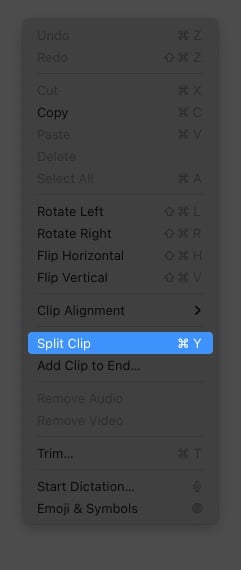
- Now, choose Edit → Split Clip.
- To rearrange, click and drag the file to where you want to place it.
- Once making the necessary changes, tap Done.
Note: You can use the left and right arrow keys to move the playhead incrementally. Using these keys along with Option will help you go to the beginning or end of the clip.
How to delete video or audio from a movie in QuickTime Player on Mac
Open the file by selecting it and then pressing the Space bar. After that, do the following:
To remove sound from a movie
- Click Edit.
- Select Remove Audio.
To remove the video from the movie
- Click Edit.
- Choose Remove Video.
Once any option is selected, the result will be instant.
Clear QuickTime viewing history on Mac
The QuickTime Player also stores the recent history of your opened files. If you are a privacy-concerned person and want to remove them, then here’s how:
- Click File.
- Select Open Recents.
- Now, click Clear Menu.
With its existence for more than 30 years, QuickTime Player can now support almost all media formats available today.
The best way is to restart your Mac and try to open the app. If not solved, you can check out our detailed guide.
After opening the app, Click QuickTime Player and select Update Existing Software.
That’s it!
Despite being one of the oldest media players, QuickTime Player stays in the game by providing great features. I think It was my responsibility to let you know what all these features are, especially when many are using this app to open media files. Got any queries? Drop them in the comments.
Read more:

