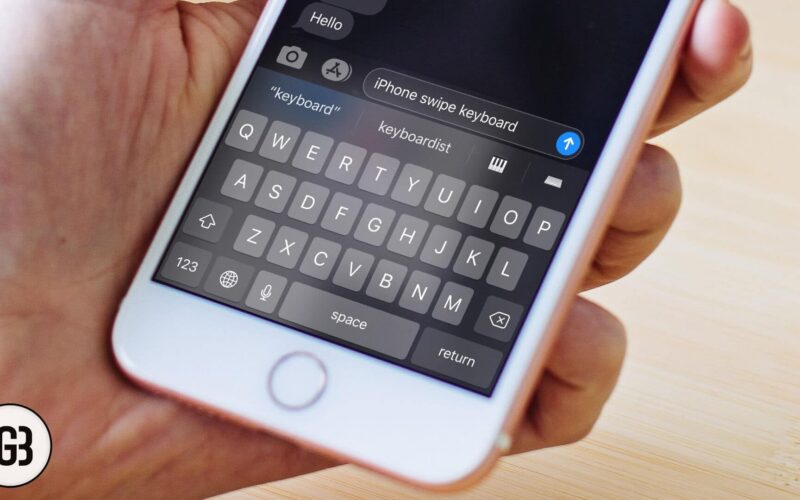
Android users have been enjoying the swipe keyboard for years now. And it’s now time for iOS users to use it on their devices. Yes, you heard that right! The latest update of iOS 13 and iPadOS has now got swipe keyboard with a feature named as QuickPath. It works on gestures provided by you on the keyboard.
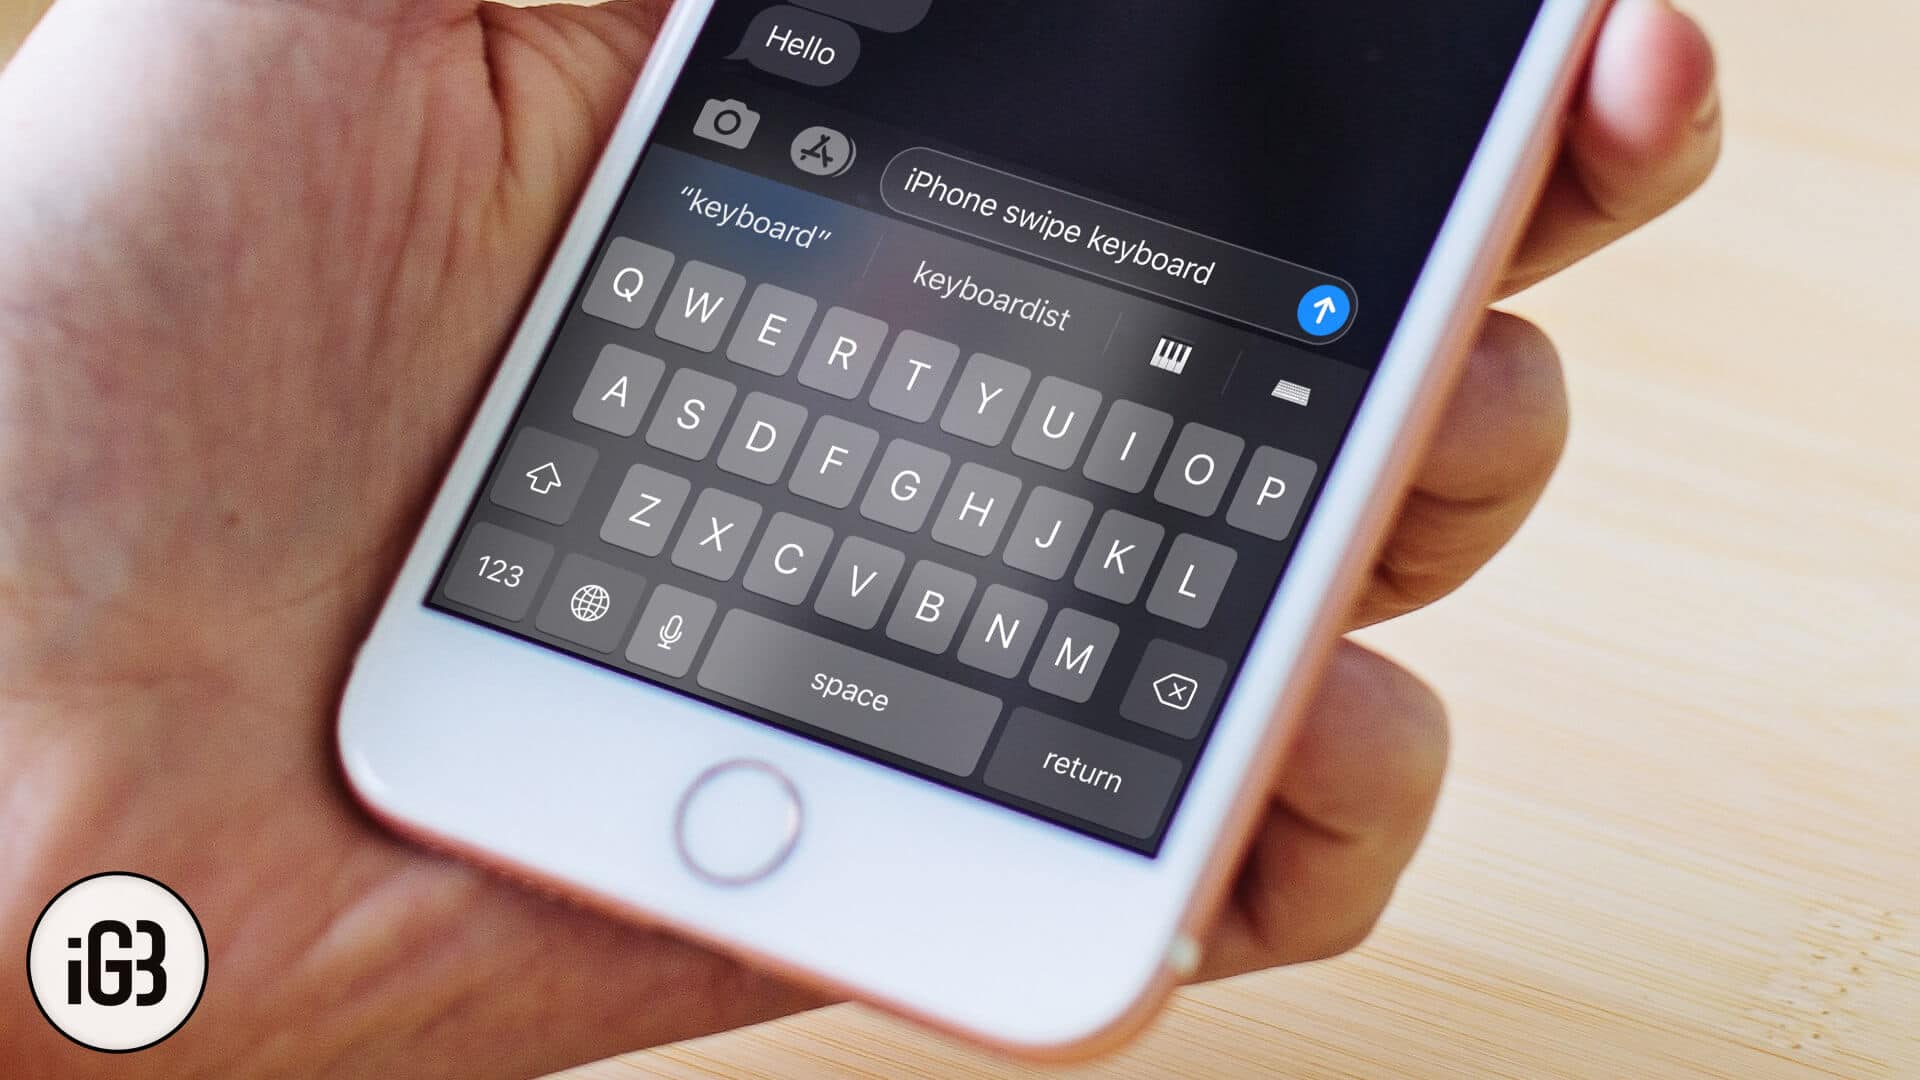
Of course, it was possible to use swipe keyboard feature on iOS devices but it was only possible with third-party keyboard apps. But now, the feature is built-in in the latest version of iOS 13 and iPadOS as well. In this post, I will guide you on how to enable and use QuickPath keyboard on your iPhone and iPad running on iOS 13 and iPadOS respectively.
How to Use QuickPath Keyboard on iPhone and iPad
Let me breakdown this guide into two parts. One for those who are using the iPhone and the other one who is using an iPad. But before if you aren’t aware how this swipe keyboard works, you’re missing out something important. Here’s how it works.
How Does QuickPath Swipe Keyboard Work
Usually, you type by placing your finger on each letter on the keyboard to complete a work or a text. But when swipe keyboard is enabled and if you want to type a word, say igeeksblog, you must start from ‘i’ and then swipe towards g,e,e and so on to complete the word.
Once you complete typing a word, lift your finger, it will give a space automatically and then you can start typing the next word and so on to continue. This will surely improve your typing speed, in fact, it’s swiping speed now after the addition of QuickPath.
This is how simple it is to use the swipe keyboard on your devices. Now let’s see how you can set up and use it on your iPhone and iPad both.
Quick Links:
- How to Enable and Use iPhone Swipe Keyboard in iOS 13
- How to Enable and Use iPad Swipe Keyboard in iPadOS
- How to Disable QuickPath Swipe Keyboard on iPhone and iPad
How to Enable and Use iPhone Swipe Keyboard in iOS 13
With the release of iOS 13, there are a plethora of features that makes me impressed and one of them is QuickPath swipe keyboard. Here’s how to use it on your iPhone.
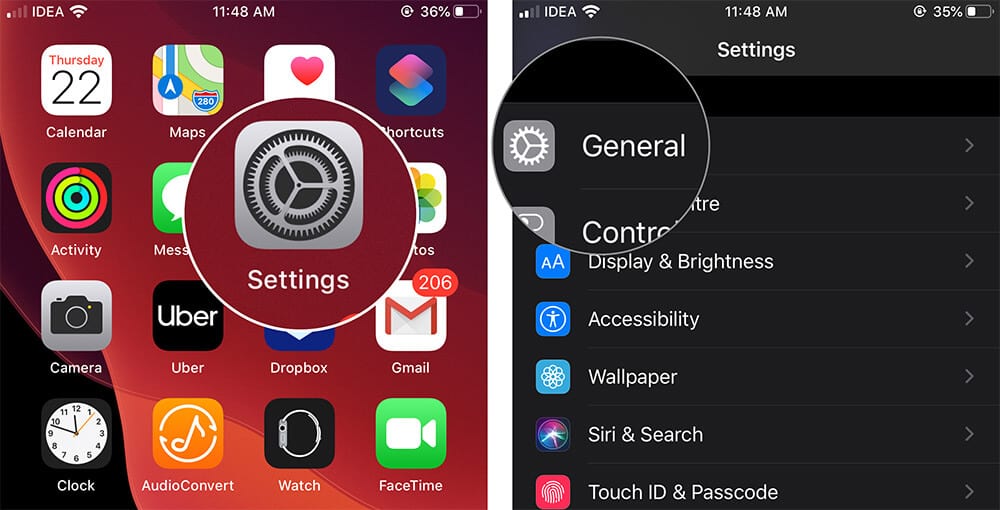
Step #1. Launch Settings app and head over to General from the list.
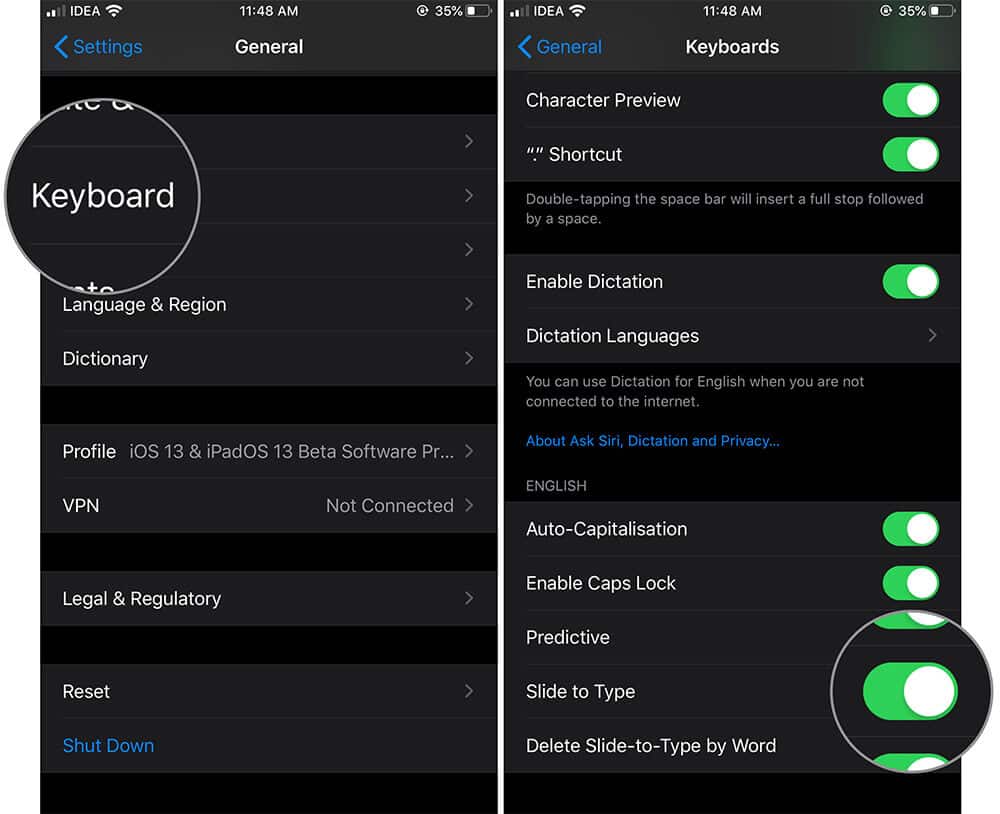
Step #2. Now tap on Keyboard and look for Slide to Type option from the list. Toggle Slide to Type to ON.
Step #3. Now open any app that pops up the keyboard and type by swiping on the keyboard at a glance.
That’s how simple it is to set up the swipe keyboard function on your iPhone running on iOS 13. Let’s now see how to enable QuickPath in iPadOS.
How to Enable and Use iPad Swipe Keyboard in iPadOS
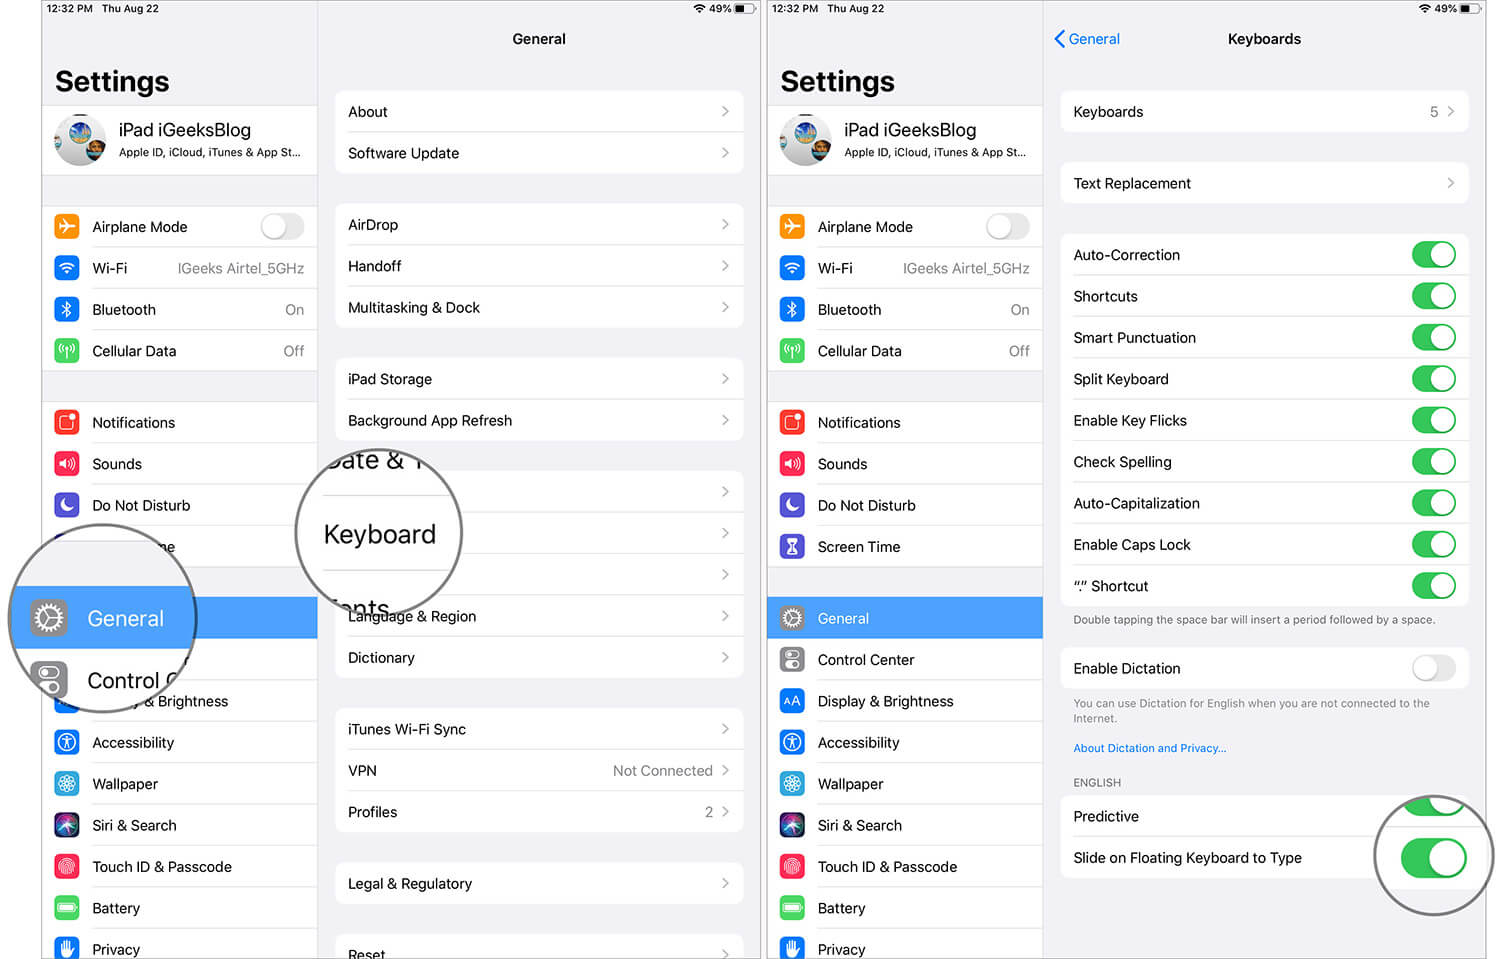
Step #1. Open Settings app on your iPad.
Step #2. Next, tap on General → tap on Keyboard and toggle Slide on Floating Keyboard to Type to ON.
Step #3. The swipe keyboard is ready to use but the laptop-sized keyboard isn’t comfortable for swiping. In order to solve this issue, simply pinch the iPad keyboard to make it as small as possible.
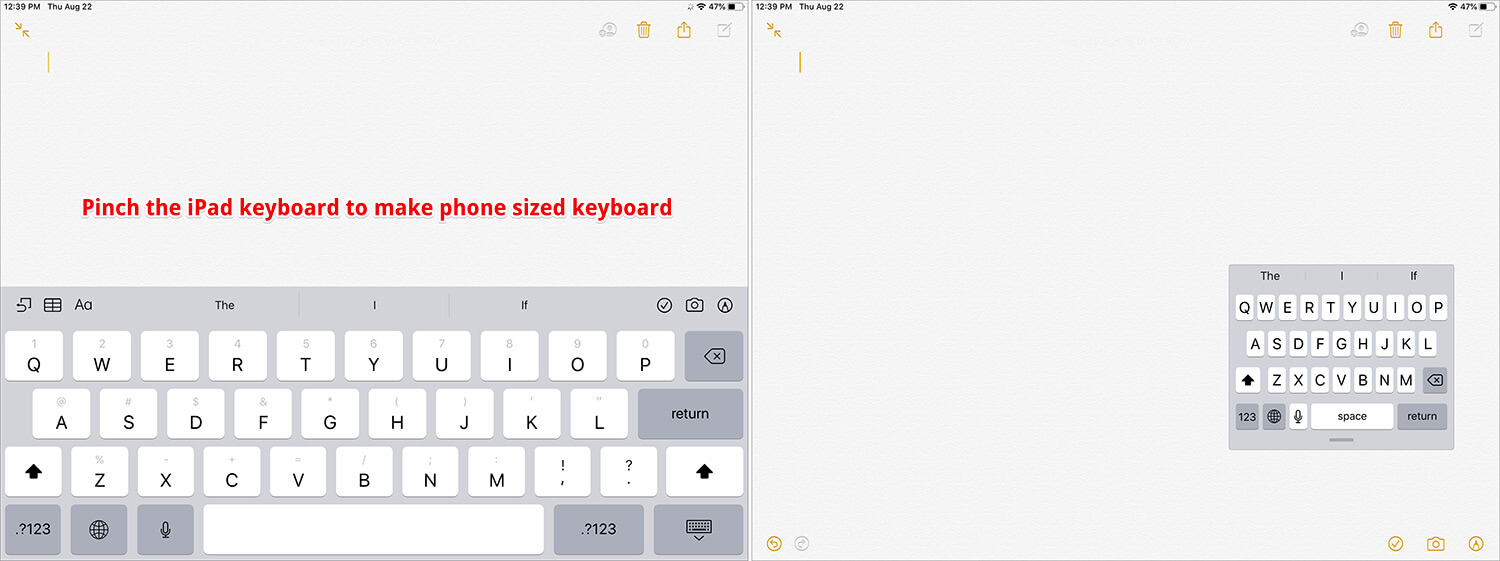
Step #4. You can now start swiping once the keyboard is small just like your iPhone. The best thing is, you can float the minimized keyboard to any corner of iPad’s screen so that you can choose a comfortable part to start swiping on the keyboard.
Step #5. Once you’ve used the keyboard, pinch out the mini keyboard to make things normal on your iPad.
If you ask me, I would love to use QuickPath swipe keyboard on my iPad rather than my iPhone as it gives the floating keyboard option. This gives me a chance to pick my comfortable spot to start typing (swiping) on the keyboard.
How to Disable QuickPath Swipe Keyboard in iOS 13 and iPadOS
Not many would like to disable the QuickPath feature looking at the speed it gives you while typing on the iPhone and iPad but a few might prefer the traditional way to use the keyboard. So here’s how to disable QuickPath in iOS 13.
Step #1. Launch Settings app on iPhone or iPad → Head over to the General settings.

Step #2. Tap on Keyboard and toggle Slide to Type to OFF on iPhone and toggle Slide on Floating Keyboard to Type to OFF on iPad.
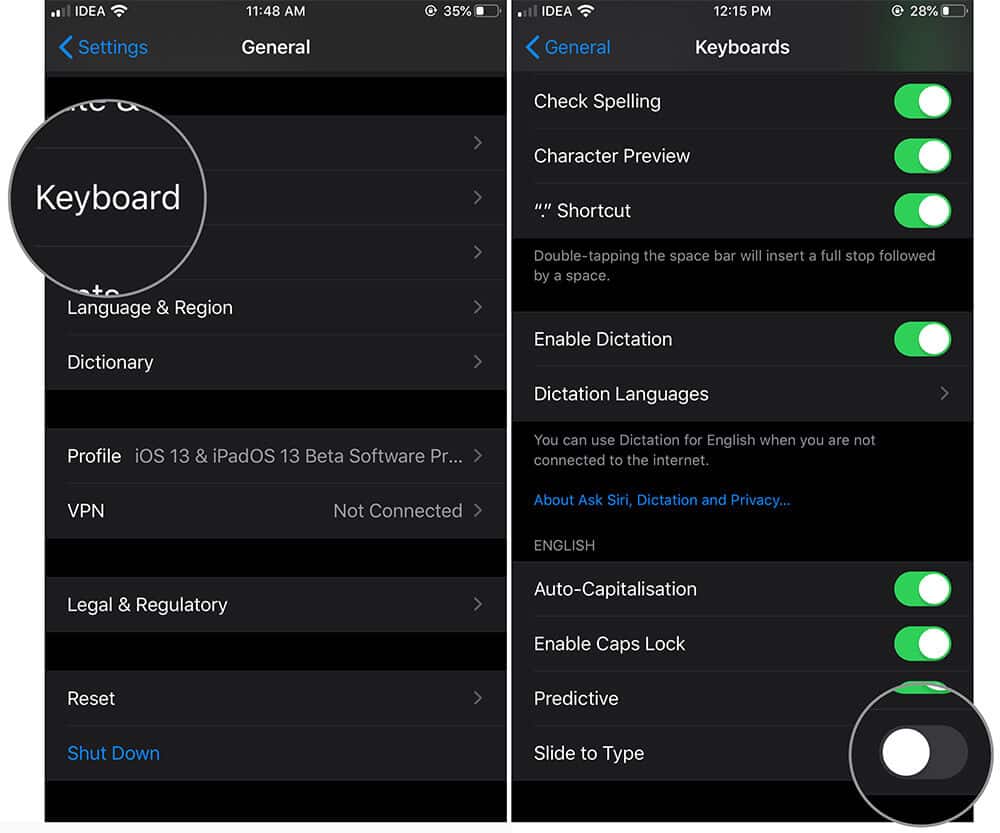
That’s how simple it is to disable QuickPath swipe keyboard on your iPhone and iPad running on iOS 13 and iPadOS respectively.
QuickPath Supported Languages
Often, the features are released keeping English native users in mind. But that’s the case with QuickPath. It supports multiple languages as well. Here are the languages that are supported on QuickPath both for iOS 13 and iPadOS.
- English
- German
- Portuguese
- Simplified Chinese
- Italian
- Spanish
- French
Summing Up…
Sometimes QuickPath may not work as iOS is still in beta version. Once the full version is launched, we can expect it to work at its best! Do let us know in comments if you face any issues while using QuickPath swipe keyboard on iPhone or iPad.
Recommended Posts to Read!

