Are you looking for a way to get things done on your Mac faster? Maybe it’s converting images, compressing and emailing files, or editing screenshots. Thanks to Quick Actions on macOS, you can automate and speed up many of your tasks on your Mac.
This guide explains what Quick Actions are and demonstrates how to add and use a Quick Action in Finder on a Mac. So, think about a task you’d like to perform faster or try out one of our examples.
What is a Quick Action on a Mac?
Quick Actions are automated workflows that help you perform various tasks on your Mac without requiring you to open apps or go through a series of steps.
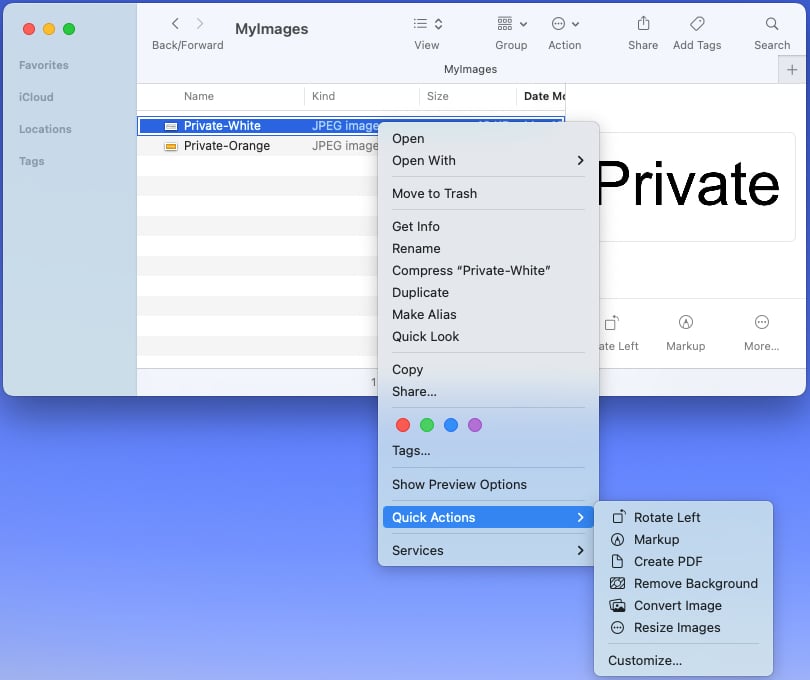
For instance, using Quick Actions, you can quickly create a PDF, markup an image, or rotate a photo with a few simple clicks. You can access these Quick Actions in the Finder window, the Services menu, or using the Touch Bar on your MacBook Pro.
When you select an item and access the Quick Actions menu, you’ll see only those actions that are compatible with the selected input. For example, if you select a video, you’ll see the rotate and trim Quick Actions, but not the action to create a PDF.
In addition to the built-in Quick Actions that Apple offers, you can choose to create your own, too. This lets you set up workflows for tedious tasks or those you need to perform repeatedly.
How to create a Quick Action using Automator on Mac
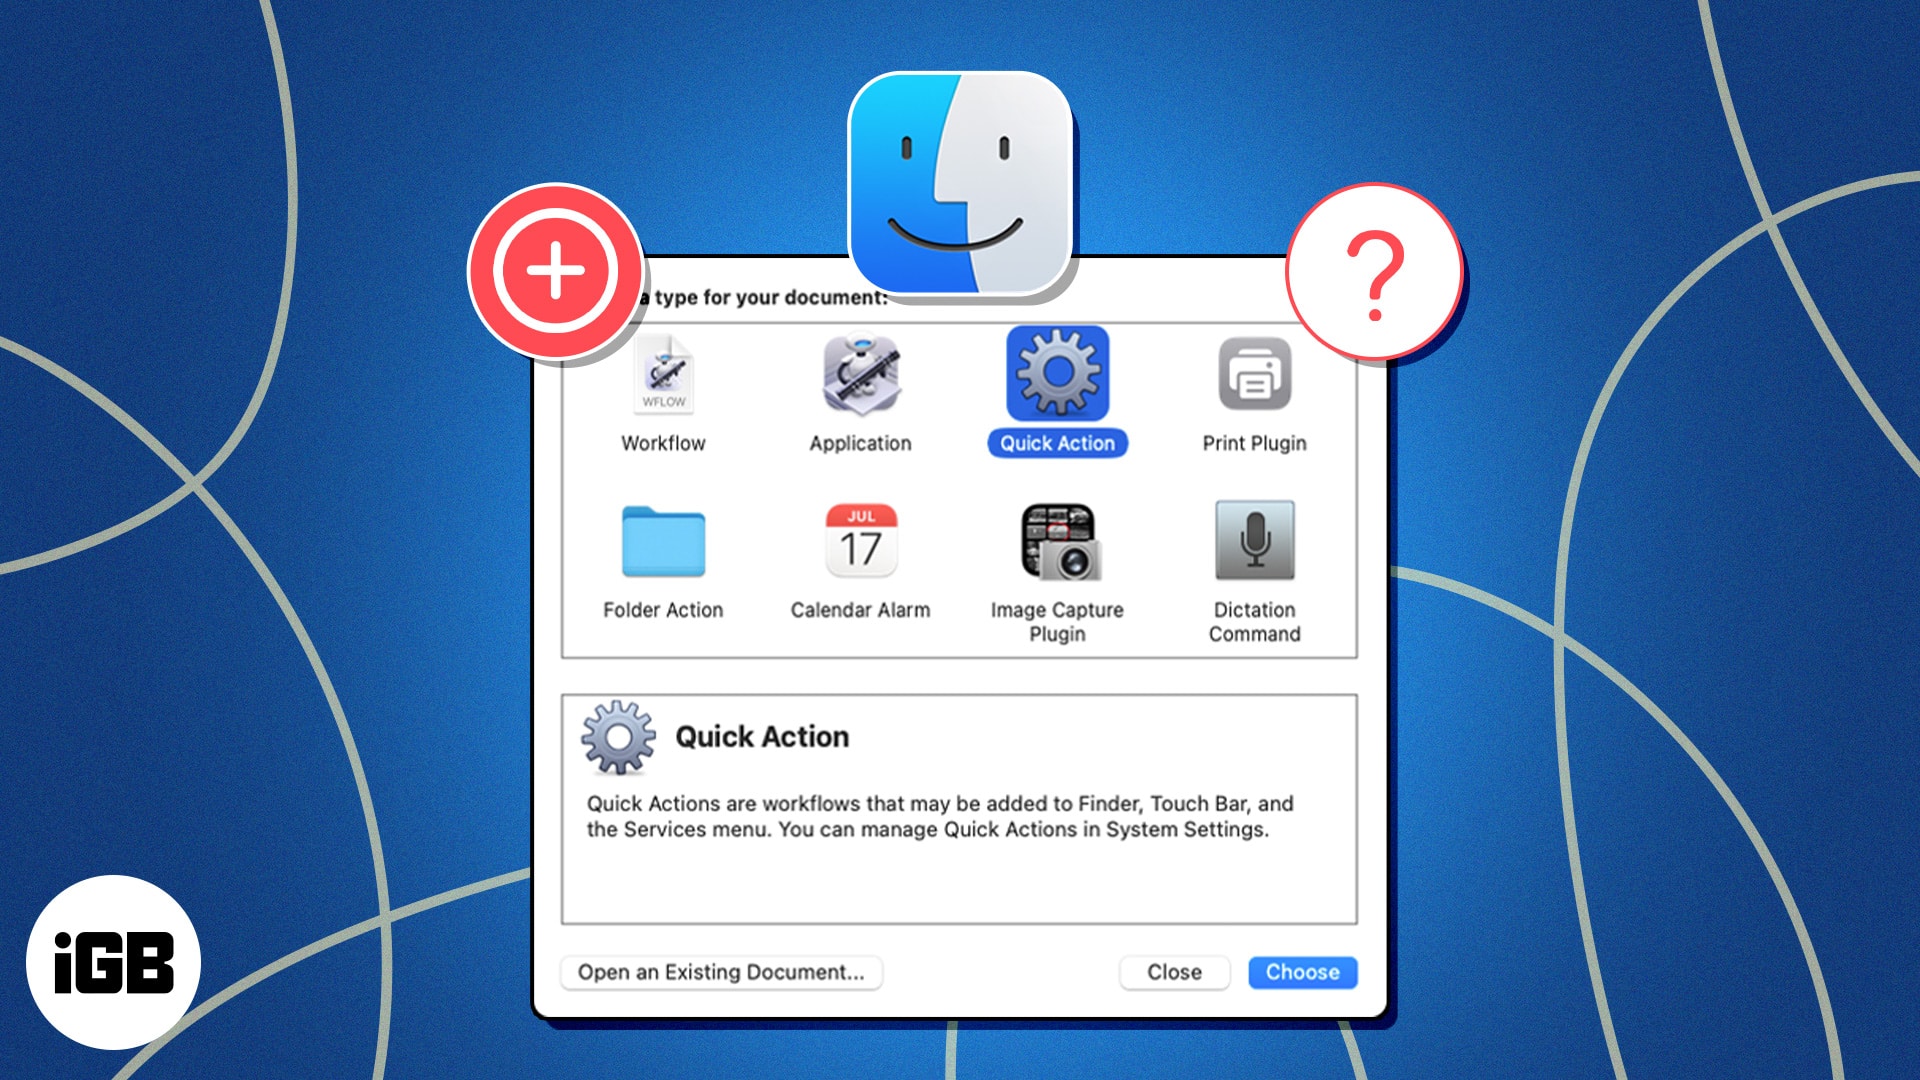
Automator is a built-in macOS app that lets you create workflows, applications, and Quick Actions. It’s easy to use, and you can simply drag and drop actions to create a Quick Action. If required, you can even customize it to suit your needs.
We’ll show you how to create a Quick Action to change the format of images to PNG to give you an idea of how Automator works.
- Launch Automator on your Mac.
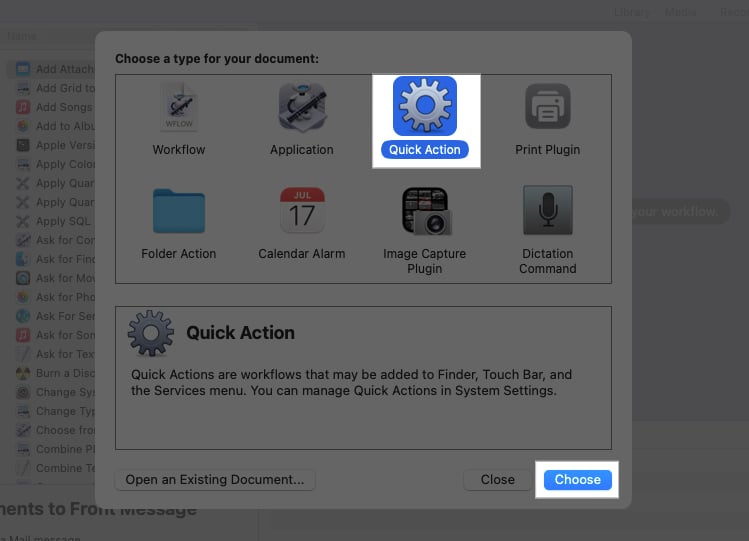
- Click on New Document.
- Select Quick Action and click Choose.
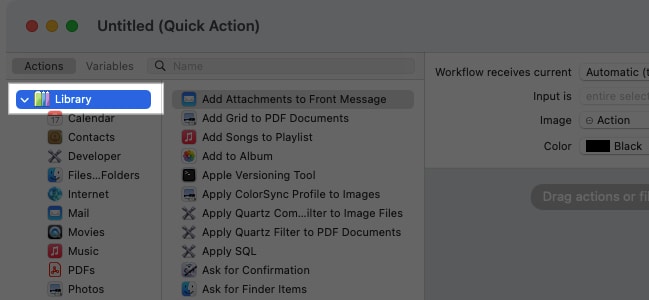
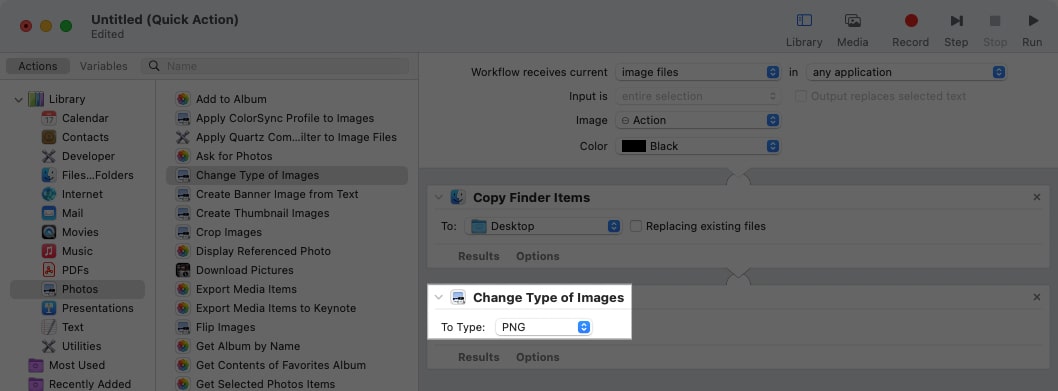
- In the leftmost pane, make sure Actions is selected and then expand Library if necessary to view all the action categories.
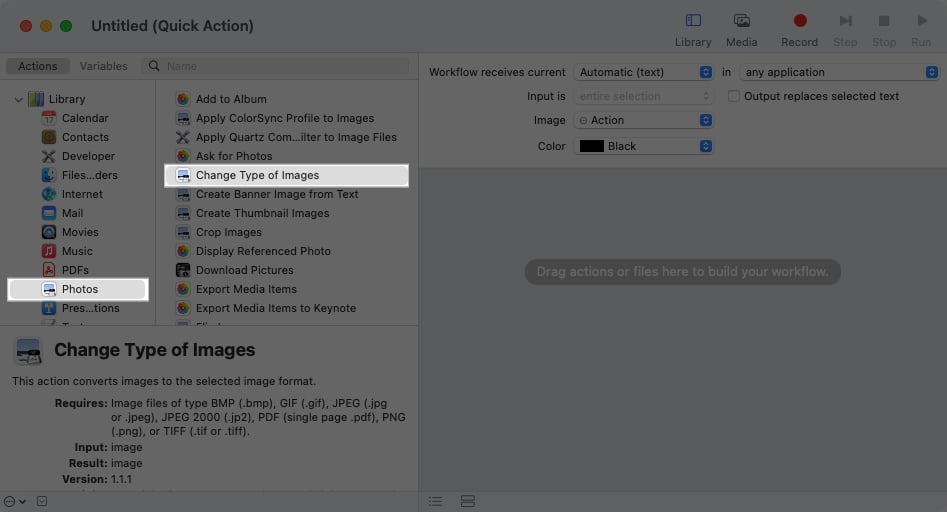
- Choose the category for the action you want to use in your workflow. For our example, we’ve picked Photos.
- In the middle pane, you’ll see available actions for the action category you just picked. Choose the action and drag it to the workspace on the right. In our case, we’ve chosen Change Type of Images.
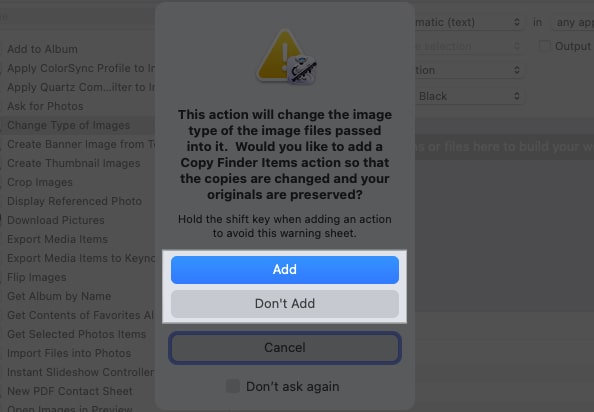
- Depending on the action you select, you may see a message asking if you want to add an action to copy the items you’re changing. This allows you to hold onto the originals and take action on the copies. Pick either Add or Don’t Add per your preference.
- At the top of the workspace, you can optionally adjust the input elements. For instance, we’ve selected Image Files next to Workflow Receives Current because our action only applies to images. We’ve left the rest as-is.
- In the action you add to the workspace, adjust any required elements. For our example, we’ve chosen PNG in the To Type drop-down box since we’re converting images to that format.
- When you finish, select File and pick Save in the menu bar.
- Finally, give your Quick Action a name and click Save.
Once saved, you can close the Automator window and use your new Quick Action as shown later in the guide.
How to edit a Quick Action in Automator on Mac
At any point, if you feel the need to make changes to your Quick Action, you can edit it as shown below:
- Open Automator.
- Find and select the Quick Action file and click Open.
- Make your changes to the workflow and then select File > Save in the menu bar to save the changes.
After you do this, the edited file replaces the original Quick Action file, and the Quick Action is ready for use immediately.
How to set up a Quick Action using macOS Shortcuts
If you aren’t comfortable using Automator or want a simpler process for setting up Quick Actions, use the Shortcuts app.
Apple brought the Shortcuts app to the Mac with macOS Monterey, allowing users to create shortcuts for their Macs. The Shortcuts app on the Mac comes with a ton of actions. This lets you create a Quick Action in minutes by stitching different actions together based on your needs.
As an example, we’ll use the Zip and Email shortcut which allows us to compress (zip) several files and email them with a single click.
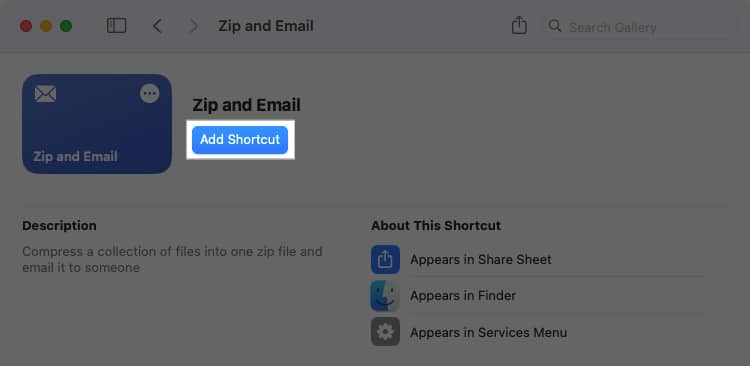
- Go to this link to open the Zip and Email shortcut in the Shortcuts app. Or launch Shortcuts and search for Zip and Email.
- When you find the shortcut, click Add Shortcut to add it to your library.
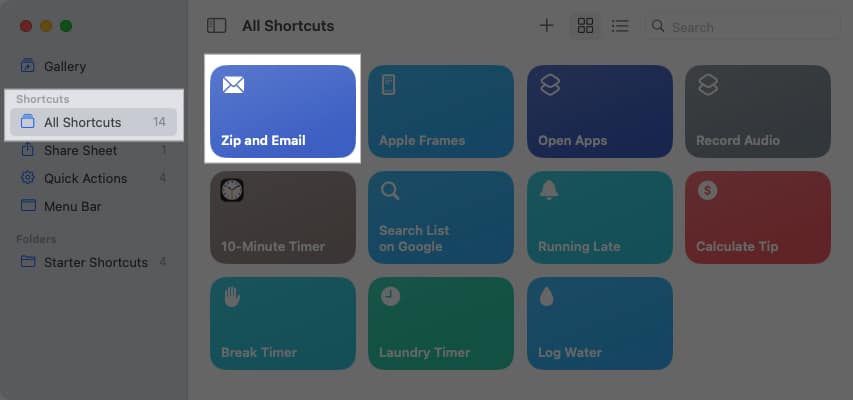
- Select the All Shortcuts tab in the sidebar and double-click Zip and Email to open it for editing.
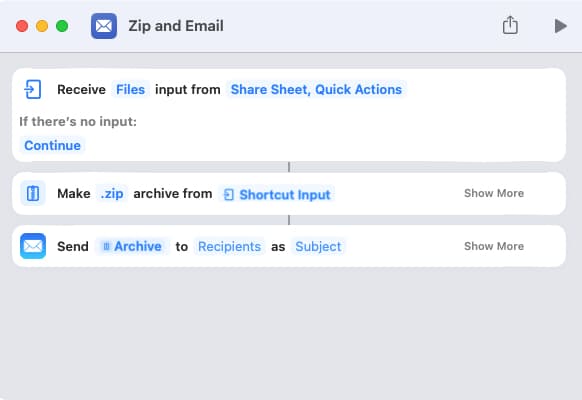
- Use the items in blue to add your items or edit the shortcut.
- Files: By default, the shortcut compresses files, but you can select this option to choose something else like Images, Folders, or PDFs.
- Continue: If the action doesn’t receive input, you can select Continue to pick an action like Stop and Respond or Ask For.
- Zip: You can choose a different type of compressed file if you like. Select .Zip and choose the file type.
- Recipients: Select this element to add your recipient(s).
- Subject: Use it to set the subject line for your email.
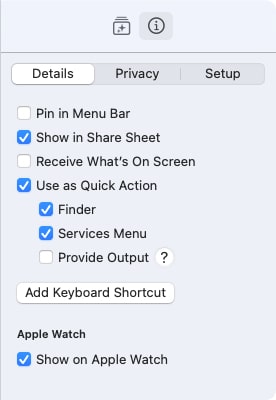
- When you finish setting up the shortcut, click the Shortcut Details icon (i) at the top. Check the boxes for Use as Quick Action along with Finder and Services Menu beneath. Optionally, you can mark other checkboxes per your preference.
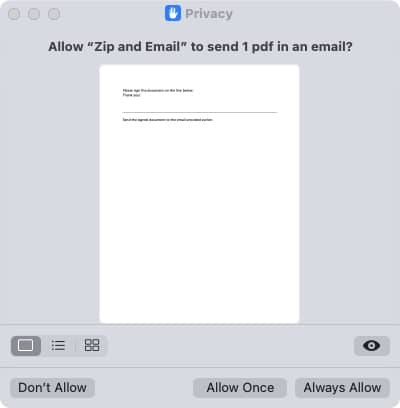
- You can then test the shortcut using the Play button at the top. Select a file (the test only uses a single file), click Open, and grant the shortcut access to insert the file into an email by choosing Allow Once or Always Allow. (Pick Always Allow if you don’t want to see the pop-up message each time you use the shortcut.)
- You should now see an email open with your recipient(s), subject line, and attached ZIP file. Optionally add a message to the email and send it on its way or simply close it since this is a test.
You can then close the shortcut template window and return to the Shortcuts app main screen. Your changes are saved automatically.
How to edit a Quick Action in macOS Shortcuts
If you want to make changes to a Quick Action you’ve set up in Shortcuts, you can do so easily.
- Open the Shortcuts app.
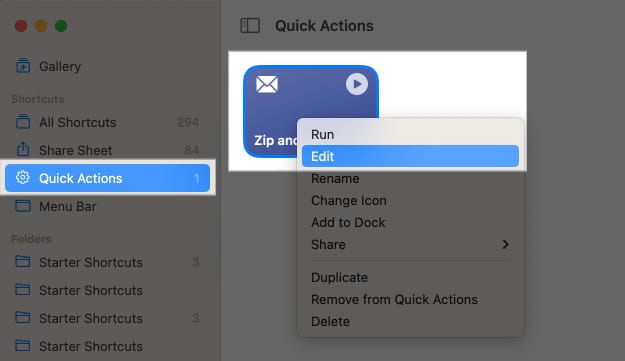
- Select Quick Actions in the sidebar and either double-click the shortcut or right-click and select Edit.
- Then, simply make your changes in the template that appears.
You can retest the shortcut using your edits or close the window. Again, any changes you make are saved automatically.
How to use Quick Actions on a Mac
When it comes to using a Quick Action in Finder, you can do it in a few different ways.
- Open Finder.
- Select the file, folder, image, or other item on which you want to perform an operation.
- Then, do one of the following to run the Quick Action:
- Right-click, move to Quick Actions, and choose the action from the pop-out menu.
- Select the Quick Action below the Finder Preview on the right or choose More and pick the action.
- Go to Finder in the menu bar, move to Services, and choose Quick Action from the menu.
- Tap the Quick Actions button on your Mac’s Touch Bar.
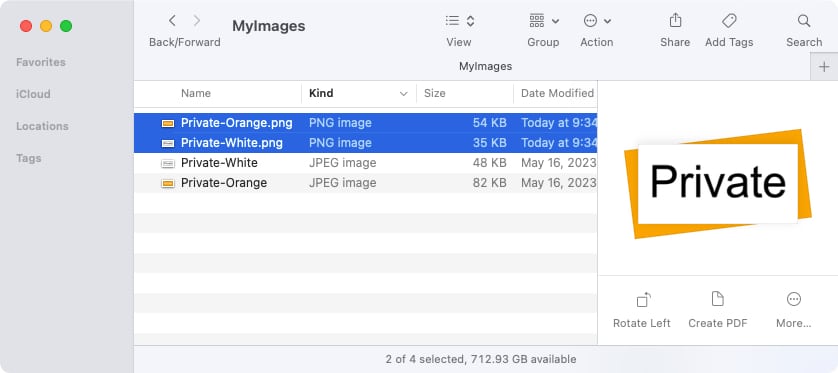
Using our Automator Quick Action to convert images to PNGs, we now have those formats copied from our originals.
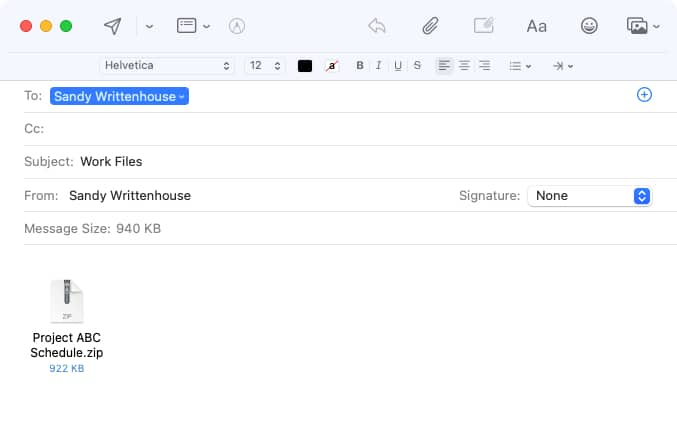
Using our Shortcuts Quick Action to compress and email files, we have our message with the ZIP file attachment.
How to customize the Quick Actions menu on your Mac
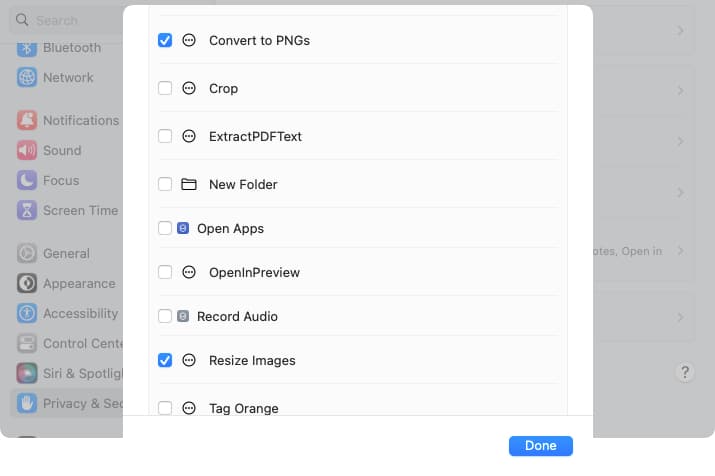
Once you start creating your Quick Actions, that list can grow to contain a large number. You can customize the Quick Actions menu in Finder to hide those you don’t use often or rearrange the order to put those you use regularly at the top of the list.
- Do one of the following to open the Quick Actions menu:
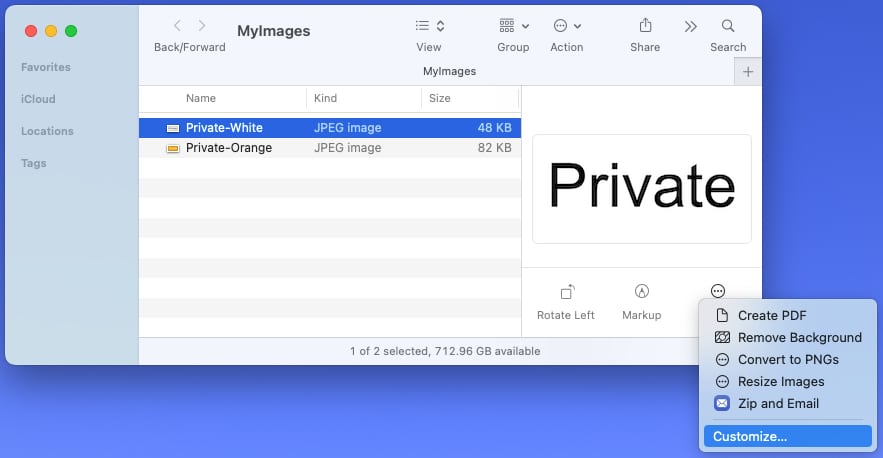
- Open Finder, select More below the Preview on the right, and pick Customize.
- Open Finder, right-click an item, move to Quick Actions, and pick Customize.
- Open System Settings, select Privacy & Security, pick Extensions on the right, and click Finder.
- Open Finder, select More below the Preview on the right, and pick Customize.
- When the small window opens, you’ll see all available Quick Actions. Check the boxes for those you want to see in the menu and uncheck the boxes for the ones you want to hide.
- To rearrange the order, drag an action up or down and release when you see the blue line.
- Click Done to save.
Take care of your tedious tasks with Quick Actions
Quick Actions can simplify many of your day-to-day tasks on the Mac. While you do get some built-in Quick Actions, you can always create your own Quick Actions to speed up the tiresome tasks you need to perform every day. That way, you can pay better attention to tasks that matter more.
Over to you! Are you going to set up a Quick Action on your Mac? Let us know what you plan to automate!
New to macOS? Check out these Dock shortcuts for the Mac to boost your productivity even more.
Also Read:


