Magnifier on iPhone and iPad is an accessibility feature that lets you read small text or see something close by turning your phone into a magnifying glass. With iOS 14, the utility got the much-needed upgrade, and for the first time, the app is not hidden inside the settings.
Though primarily aimed at people with low visibility to read tiny medicine box labels, newspapers, restaurant menus, signboards, etc., everyone can use it. Let me show you how to use the Magnifier to zoom in to things.
- How to turn on Magnifier on iPhone and iPad
- How to access the Magnifier quickly
- How to use iPhone and iPad as a magnifying glass
- Save a magnified object as an image on iOS device
- How to customize Magnifier options
How to turn on Magnifier on iPhone and iPad
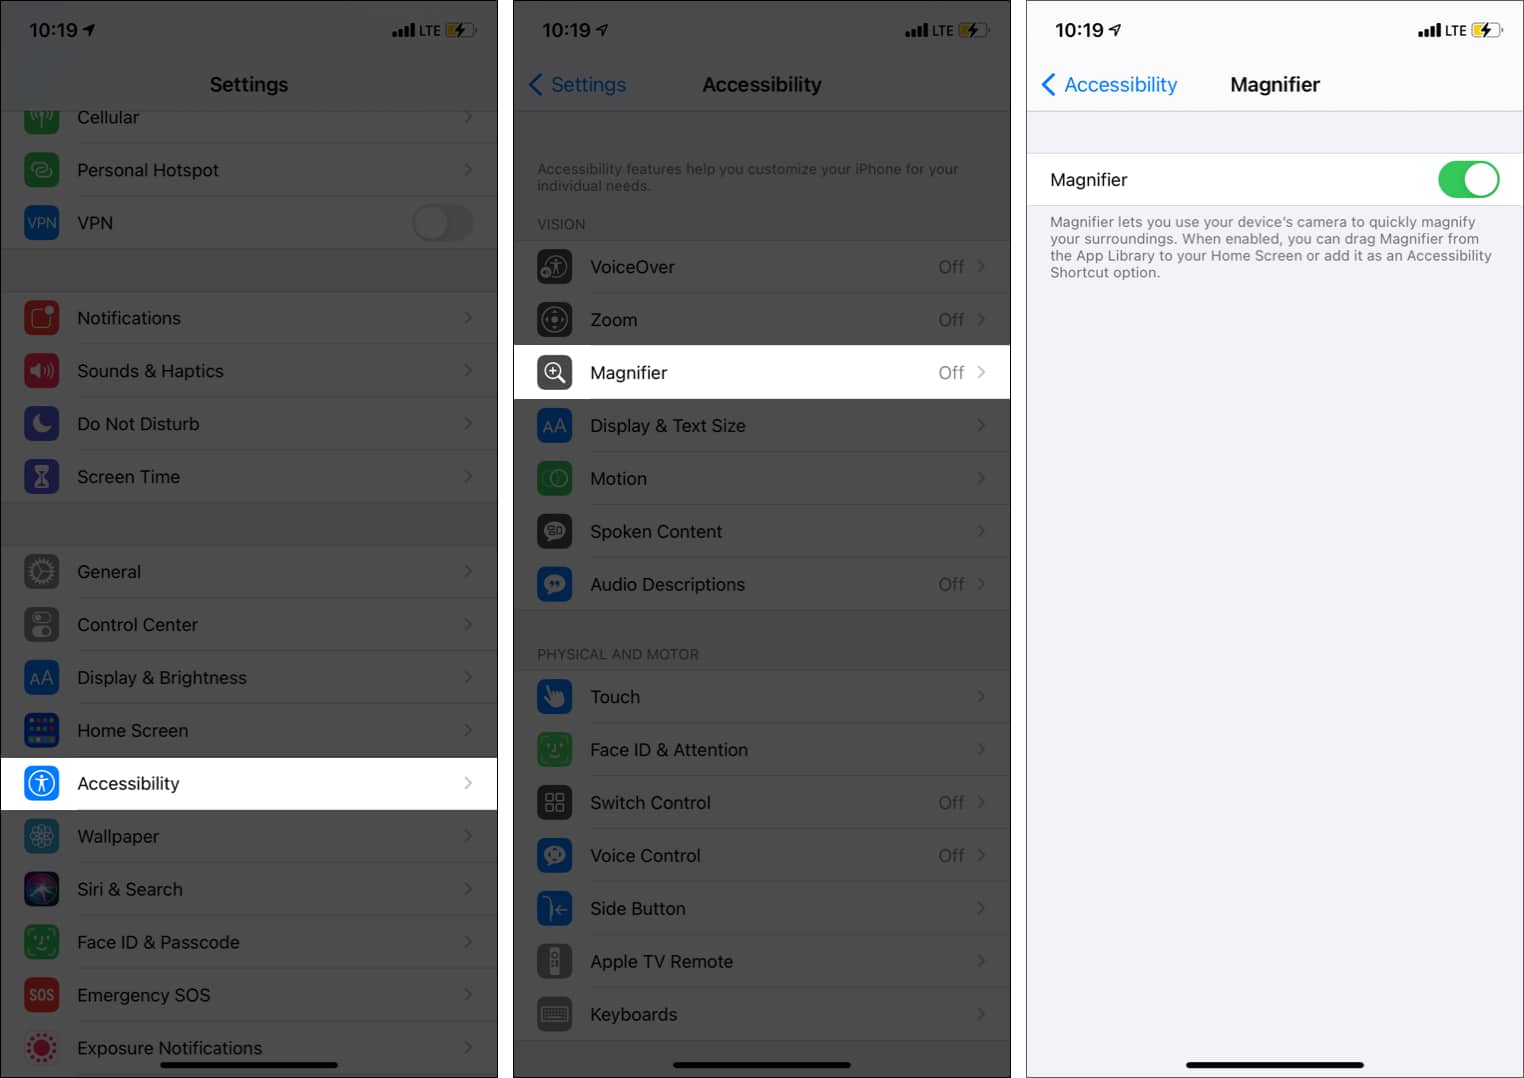
- Go to Settings and tap Accessibility.
- Tap Magnifier.
- Switch on Magnifier.
Read the popup and tap Continue.
You have successfully enabled the Magnifier option on your iPhone. Now, let us see how to access and use it.
How to access the Magnifier quickly
- Via its icon
- From the Control Center
- By triple-clicking the Side or Home button
- Via Accessibility Shortcut
1. Via its icon
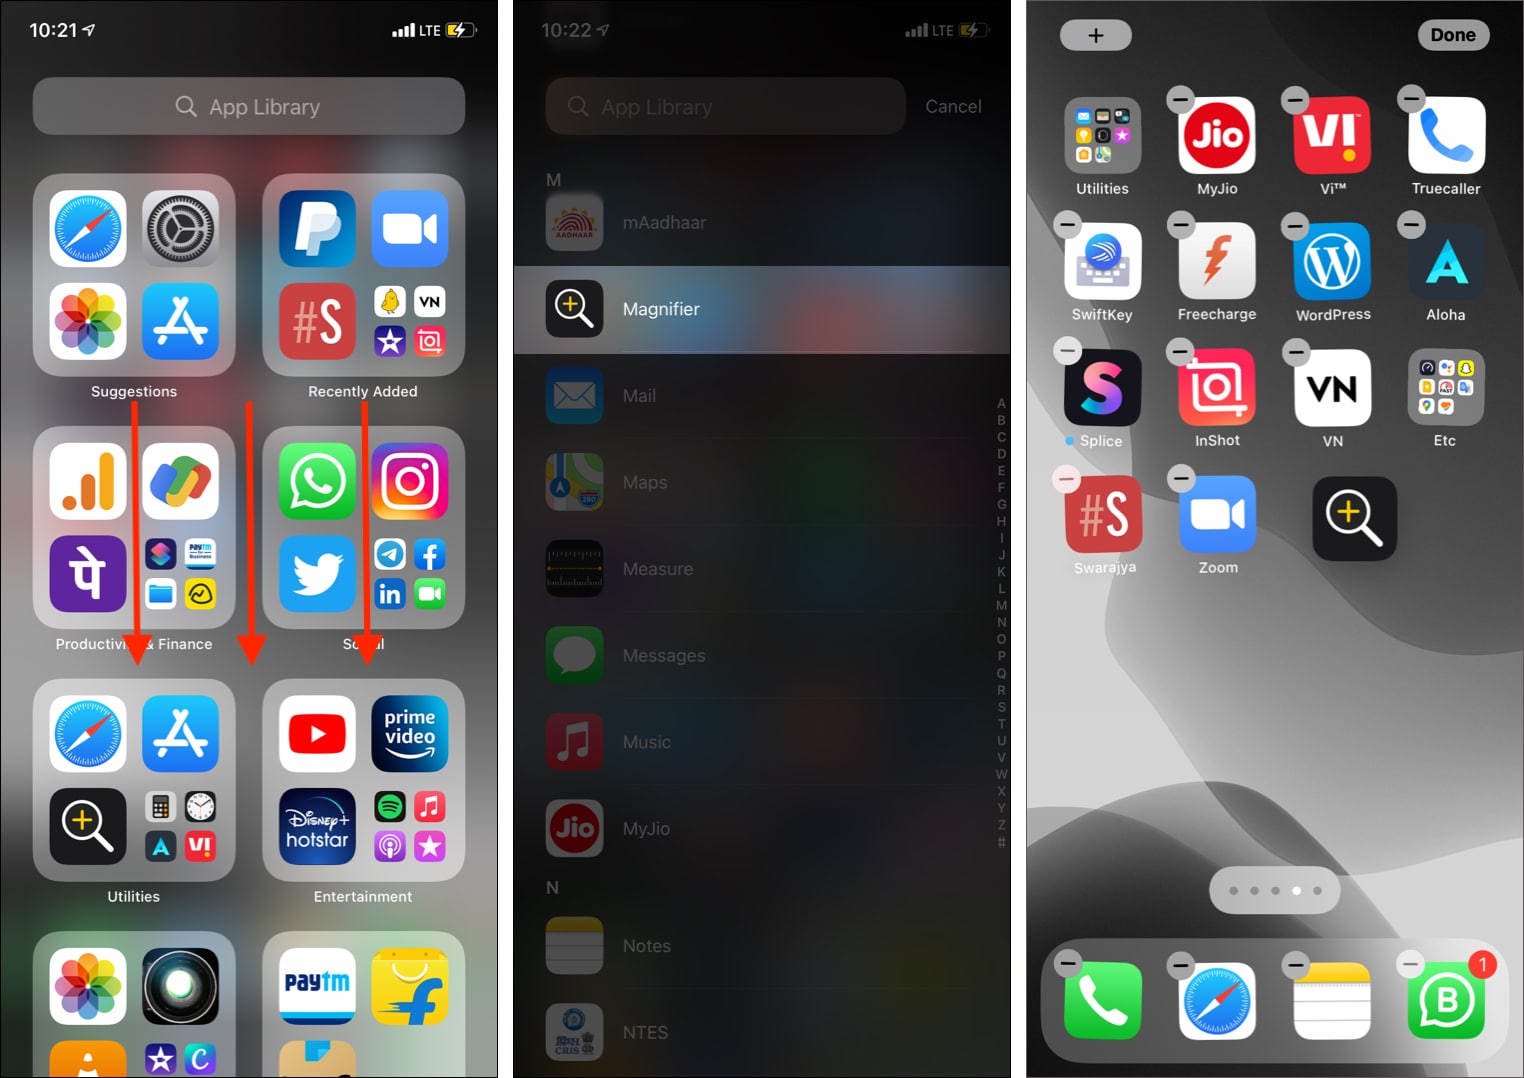
After you enable Magnifier, its icon that resembles a standard app icon is added to the App Library (in the Utilities folder). You can use it from here or drag the Magnifier icon from the App Library to the iPhone Home screen.

- Swipe right to left on the iPhone Home screen until you reach the App Library.
- Swipe down to see all apps in alphabetical order.
- Scroll down to Magnifier. Touch its icon and drag it left onto the iPhone Home screen.
- Tap this icon to open the Magnifier and use it.
2. From the Control Center
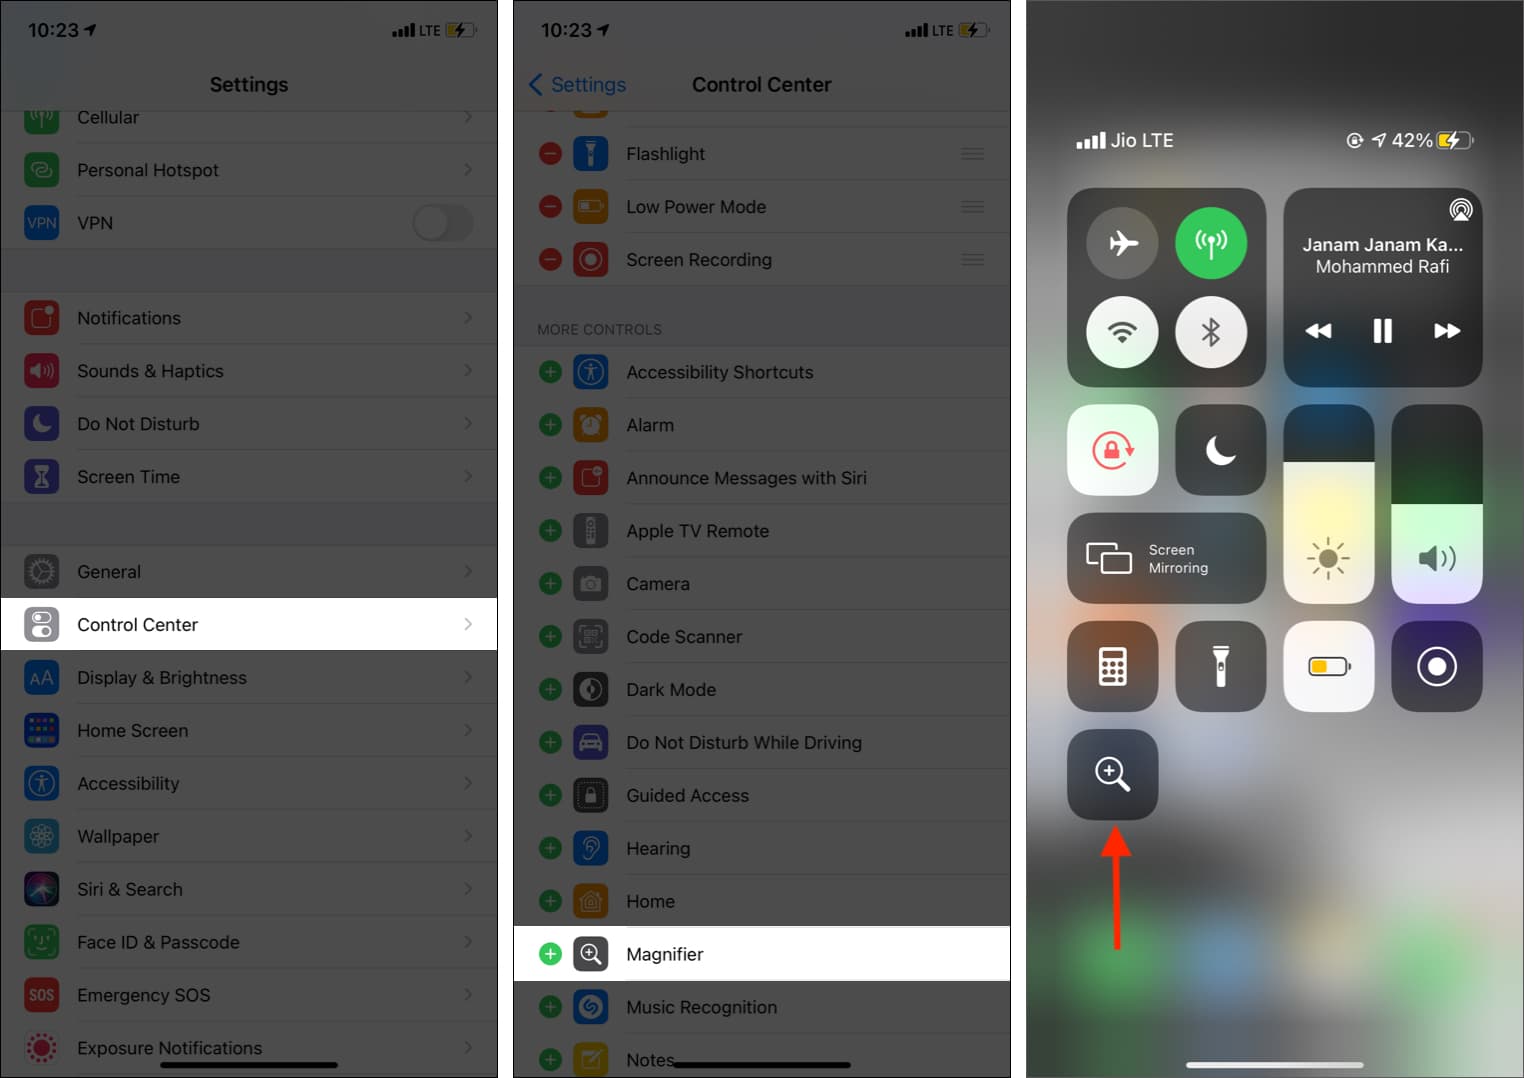
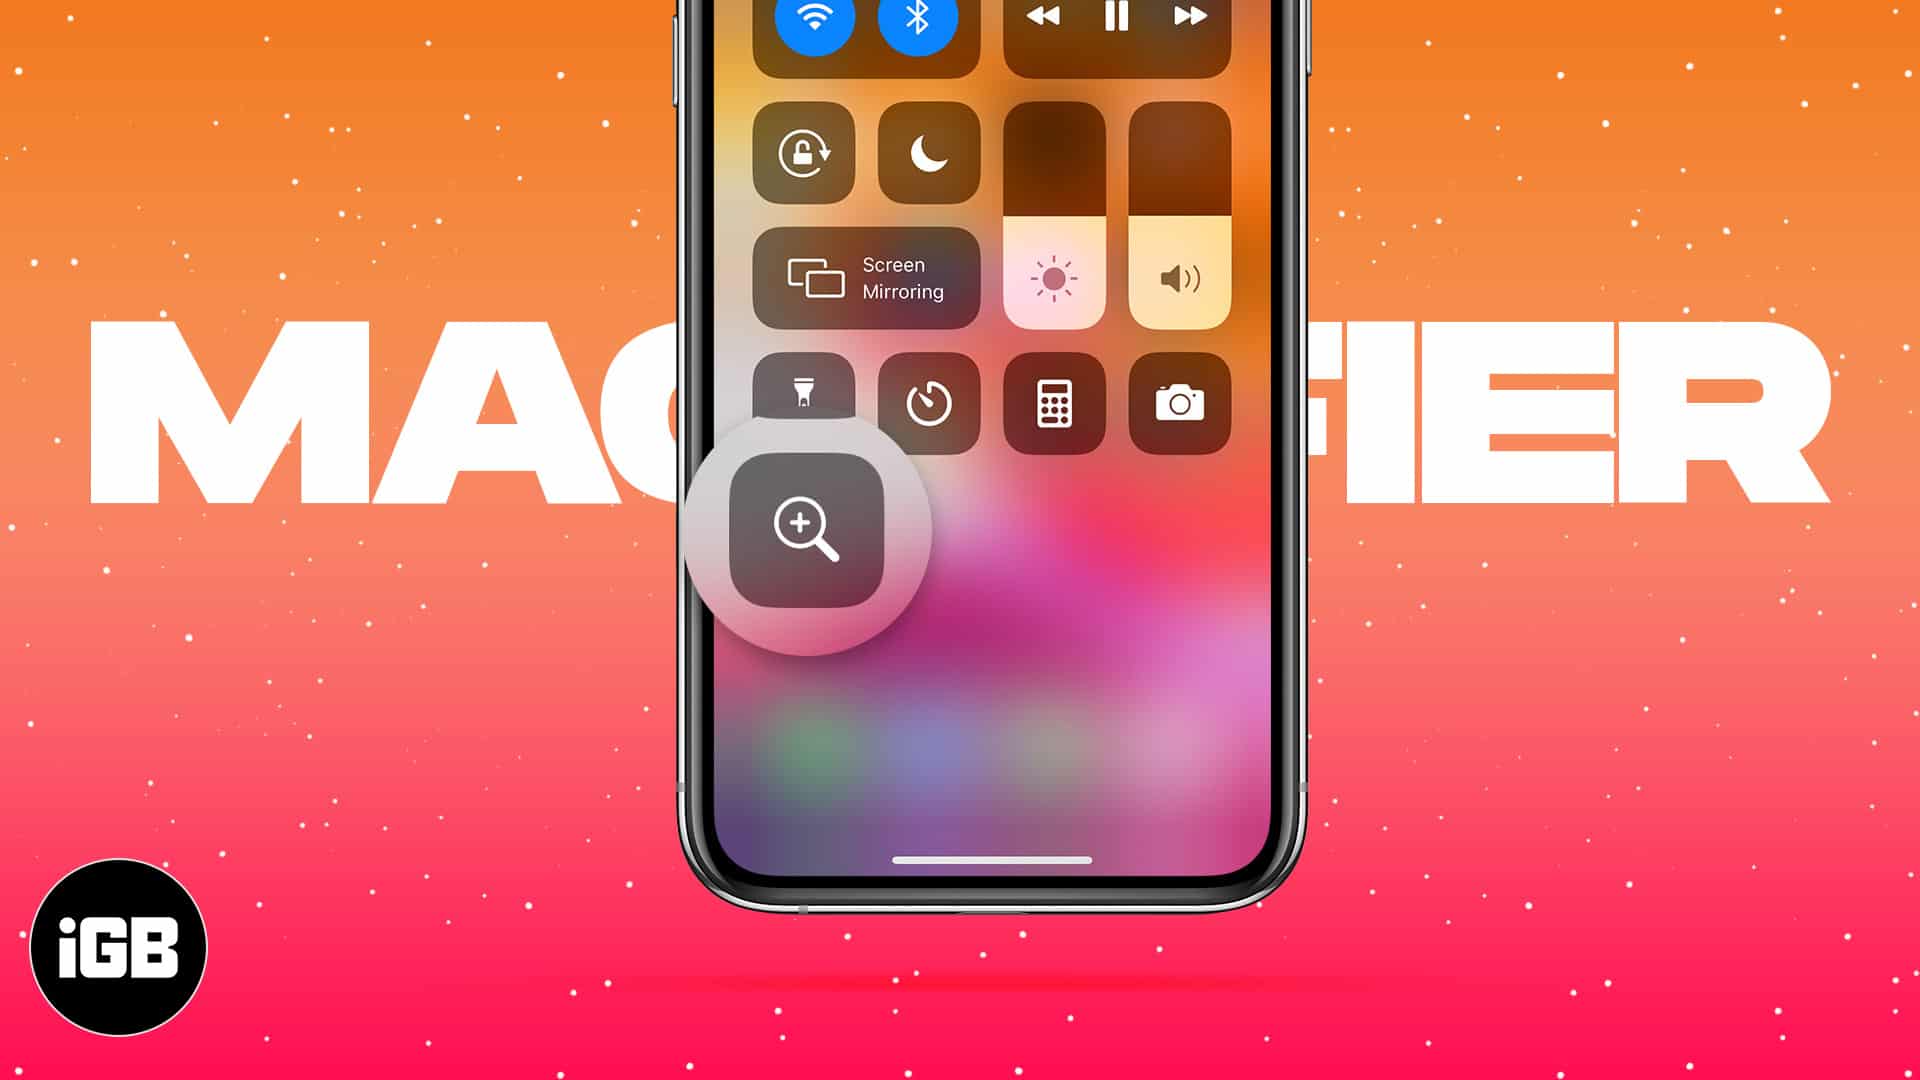
You can also add the Magnifier icon to the iPhone Control Center by following these steps.
- Open iPhone Settings and tap Control Center.
- Tap the green plus button for Magnifier.
- Its icon will be added to the Control Center.
- To access it on iPhone with Face ID, swipe down from the screen’s top right.
- On iPhone with a Home button, swipe up from the bottom of the screen.
- Tap the Magnifier icon to open and use it.
3. By triple-clicking the Side or Home button
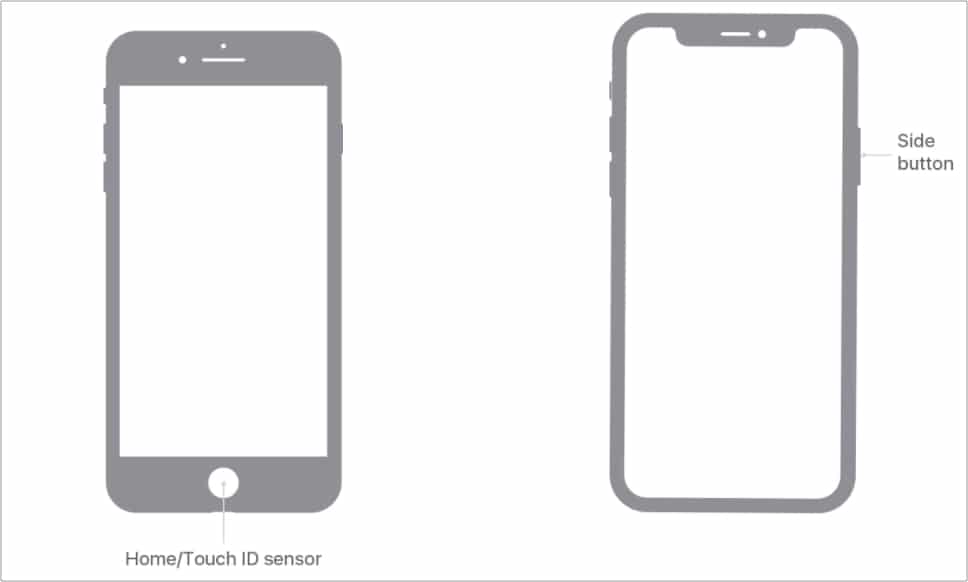
- On iPhone with Face ID, quickly press the right Side button three times to open the Magnifier.
- On iPhone with a Home button, quickly press the Home button three times to open the Magnifier.
- In case the Magnifier does not open, see the next heading.
4. Via Accessibility Shortcut
When you triple press the Side or Home button, you trigger Accessibility Shortcut. Now, if only one feature is assigned to the Accessibility Shortcut, that will open when you triple-click. But when multiple accessibility features are configured, you see a popup from where you can choose the desired accessibility feature.
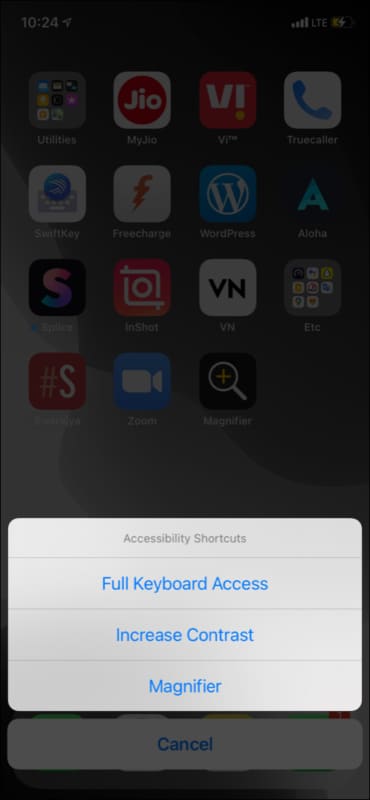
If you wish to edit accessibility shortcuts, we have a separate guide that tells you all about it. But let me briefly recap here as well.
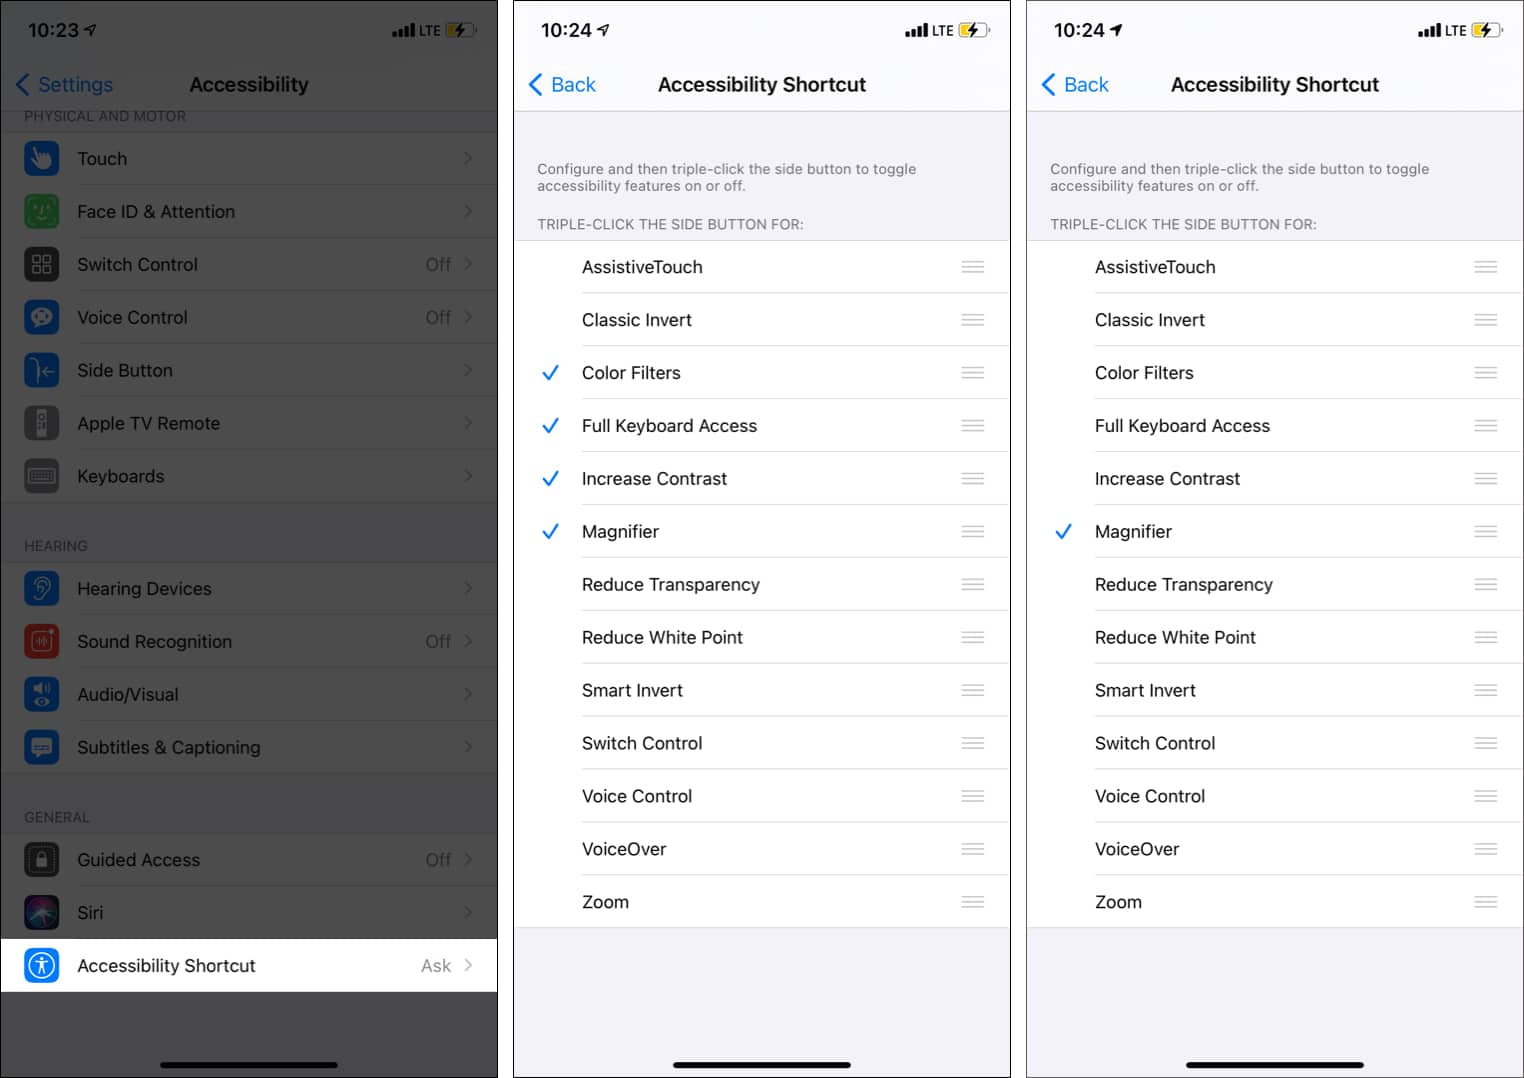
- Open iPhone Settings and tap Accessibility.
- Scroll to the bottom and tap Accessibility Shortcut.
- From here, uncheck the features you do not want to show up when you triple press the Side/Home button.
- If you leave only Magnifier checked, it will open when you triple-click the Side/Home button. If two or more features are selected, you get the option to choose which one you want to use.
How to use iPhone and iPad as a magnifying glass
Once you know how to enable and launch the Magnifier (both explained above), using it is a piece of cake. The quality of magnification and clarity depends on your iPhone Camera. Newer iPhone models will offer better results (obviously).
- Launch the Magnifier using its icon, Control Center, or Accessibility Shortcut.
- Point your iPhone to the small text you want to magnify or the object you want to see up close.
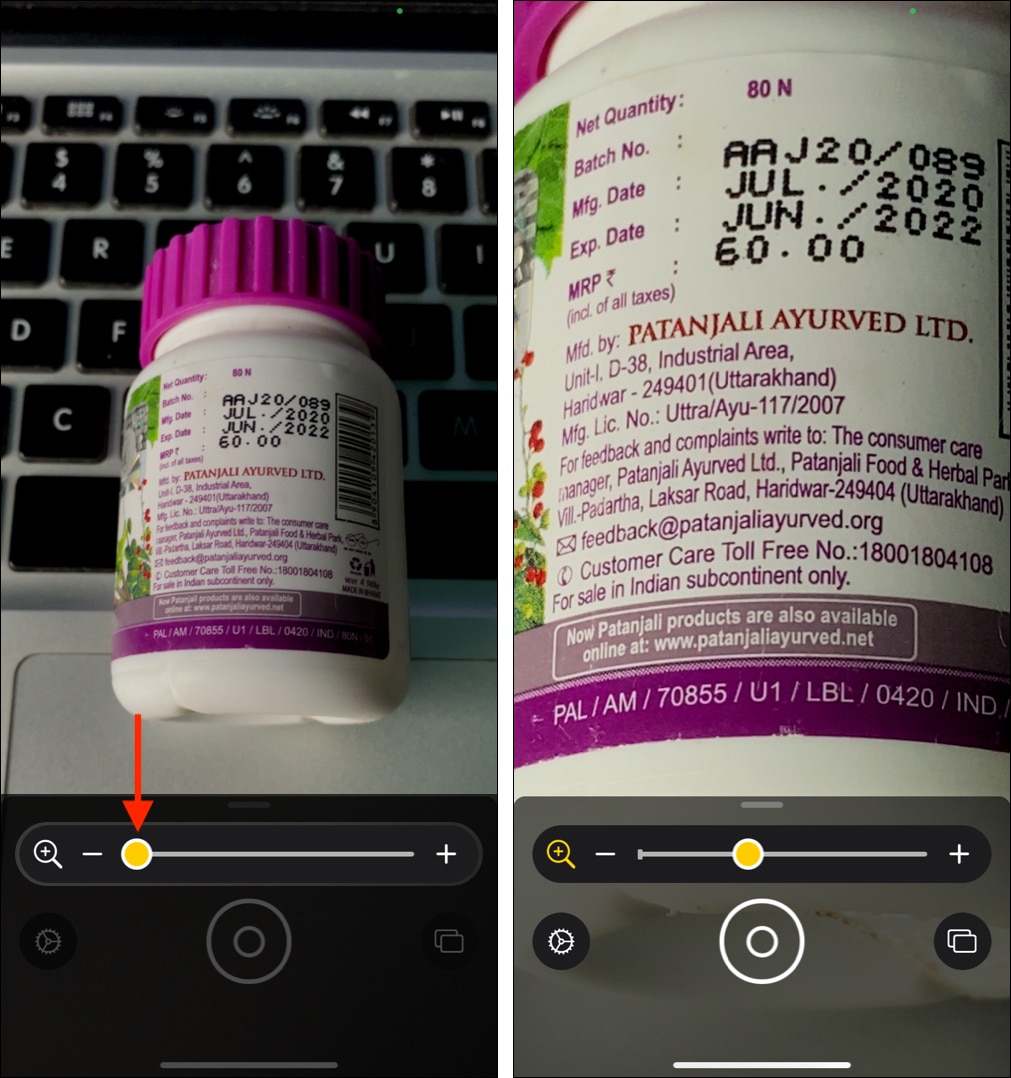
- Drag the slider to the right to magnify (zoom into) the text or object.
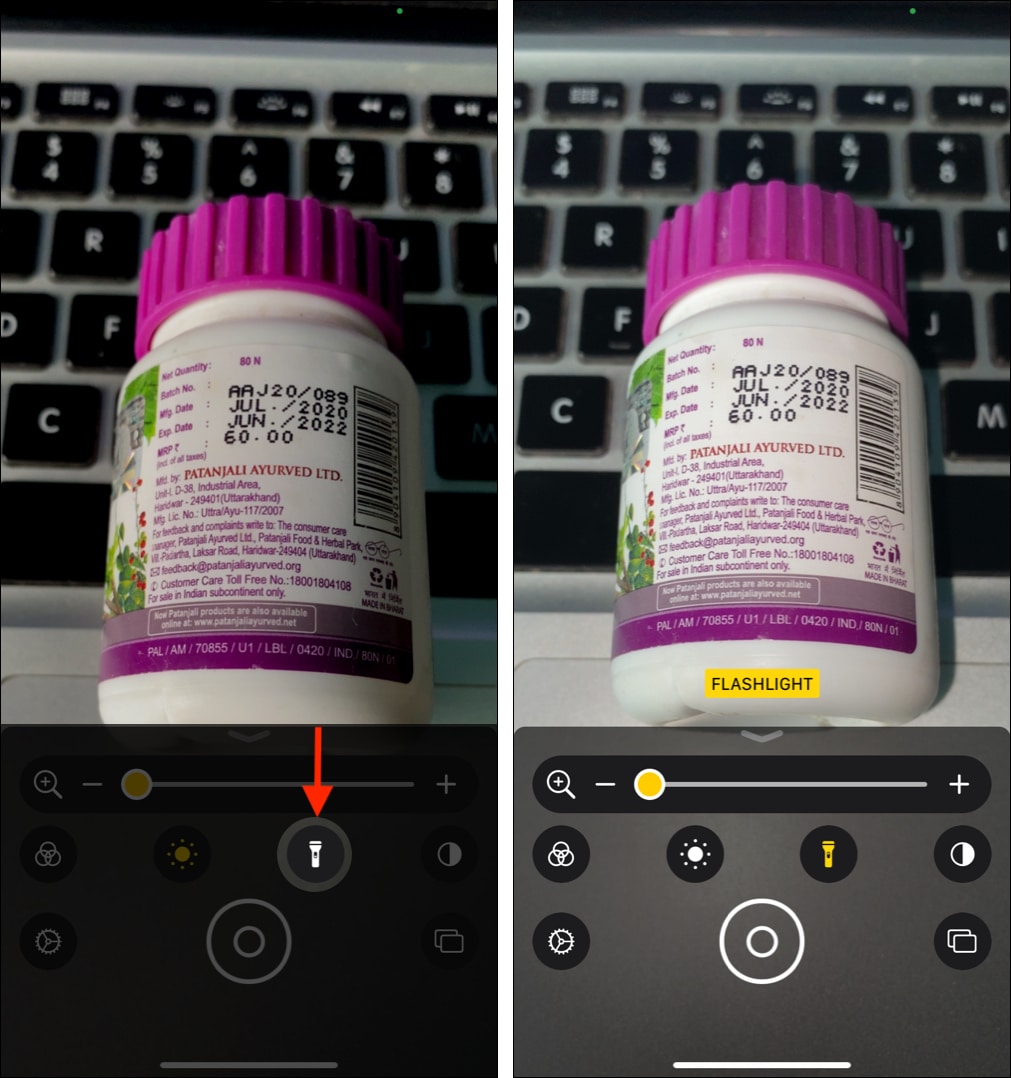
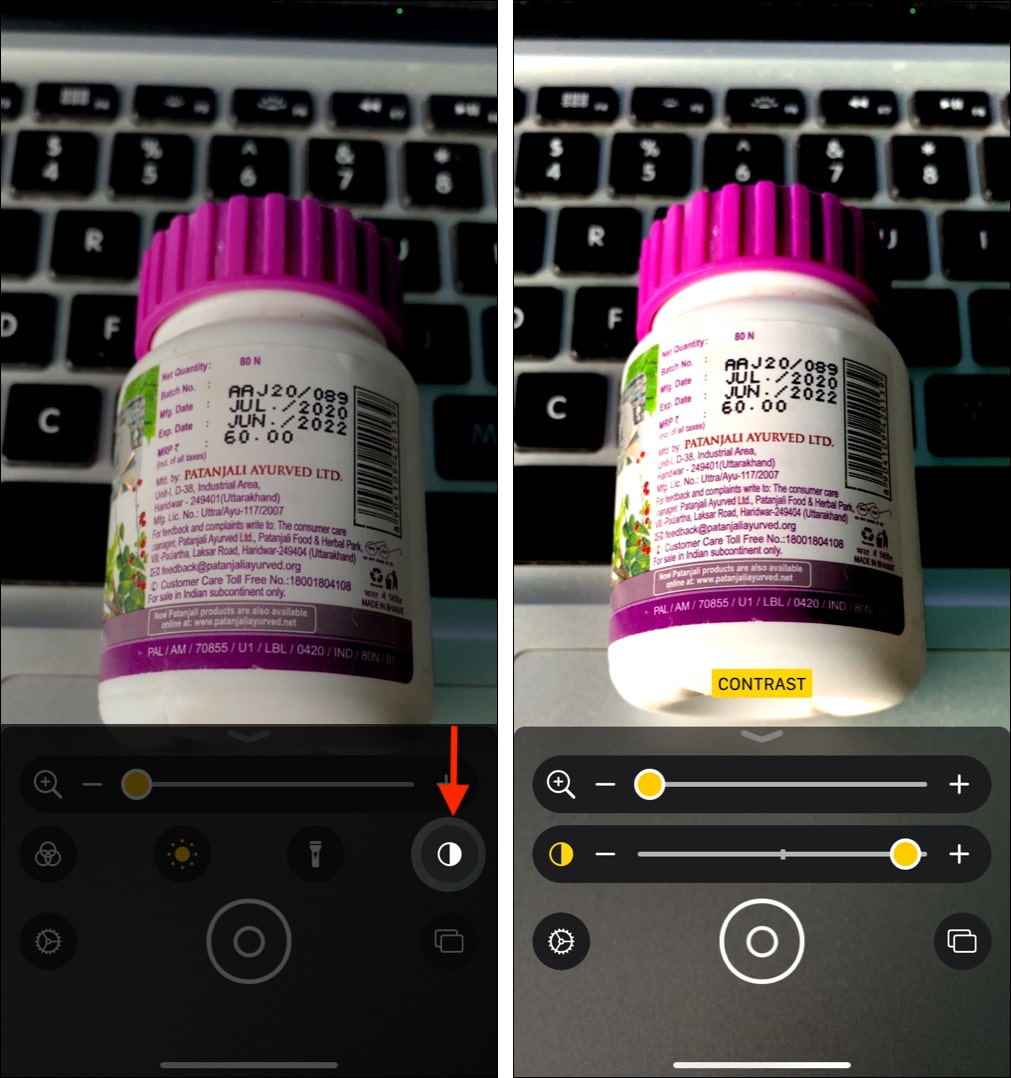
- Wondering what the other options are? Let me tell you about them:
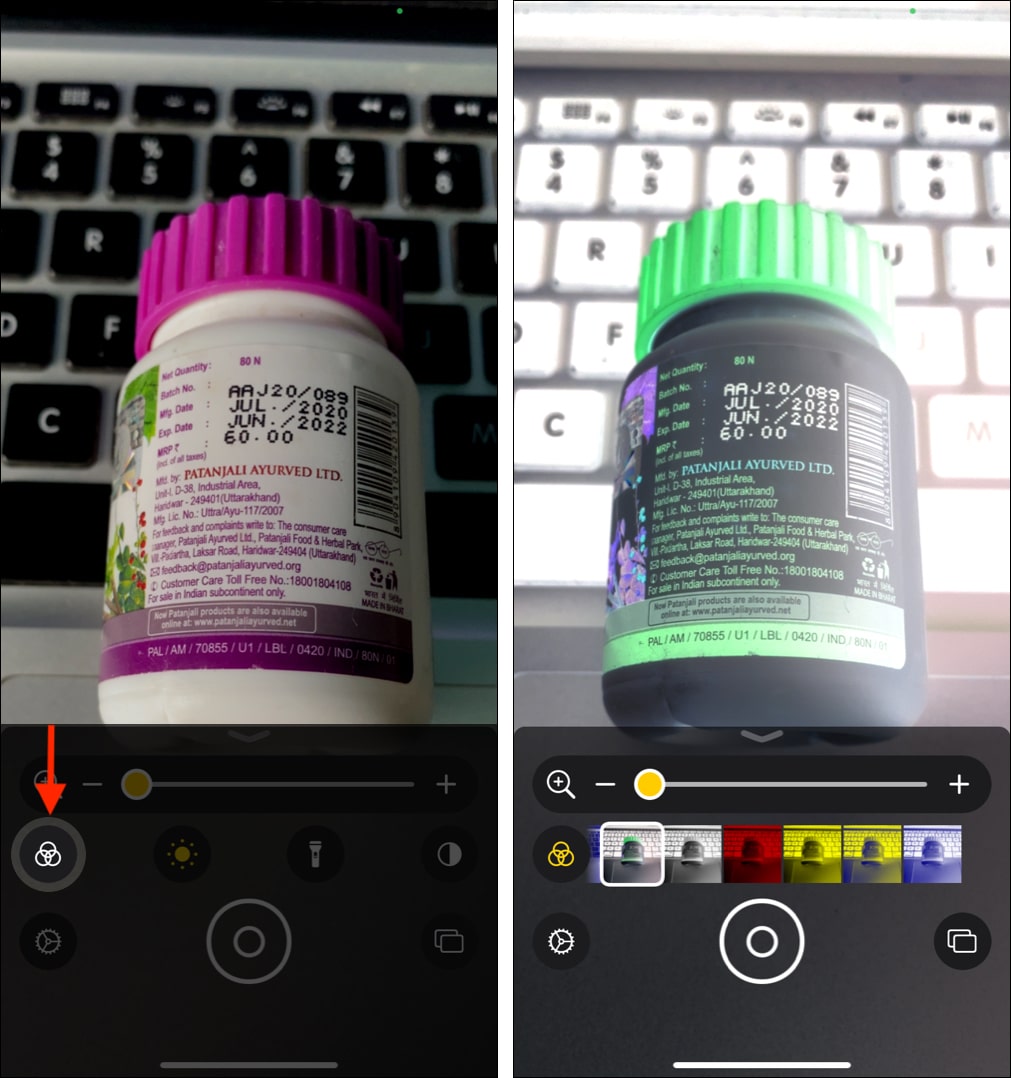
- Filters: This allows you to change the colors. If you have difficulty seeing normal colors or certain hues, swipe and choose a filter that’s suitable for you.
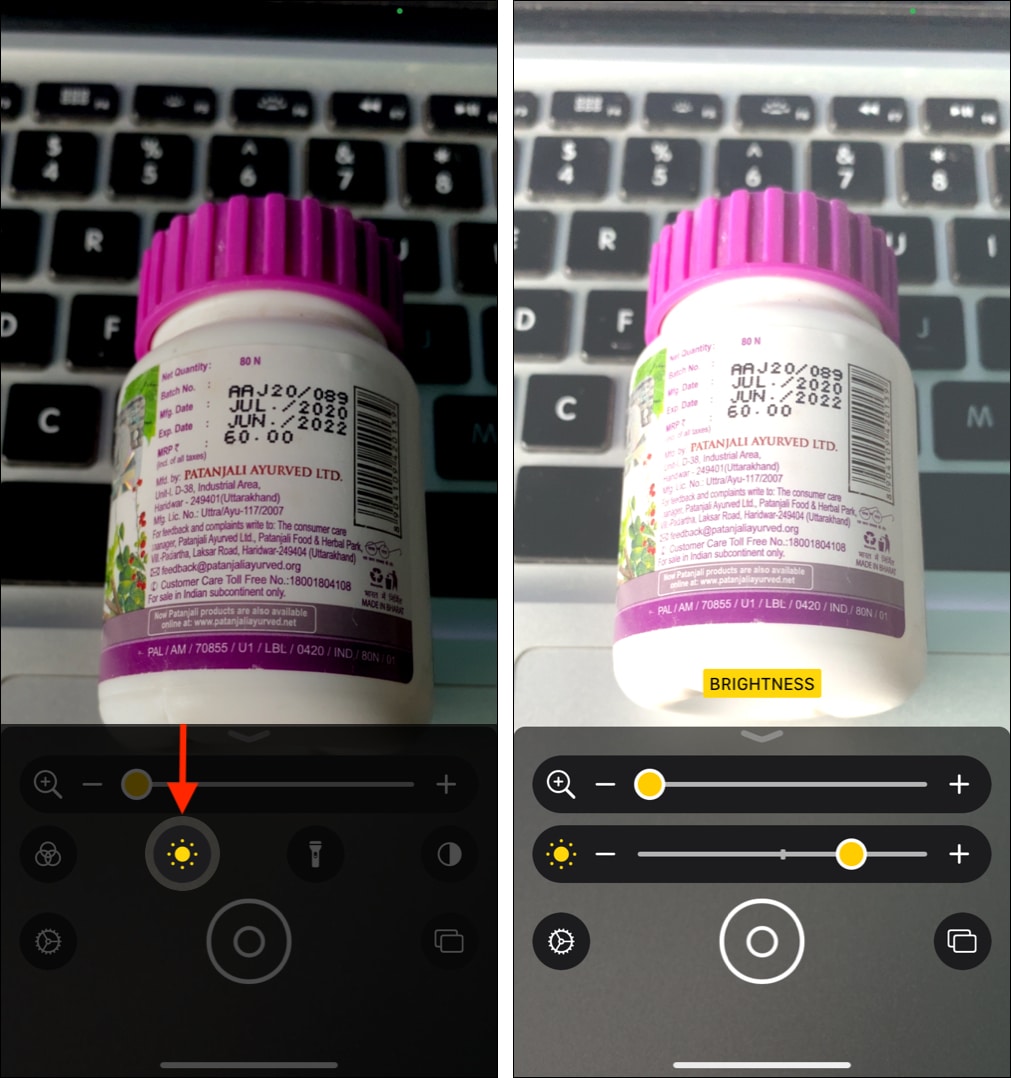
- Brightness: This icon lets you decrease or increase the brightness making it easier on the eyes.
- Flashlight: In a dark environment? Tap this icon to turn on the camera flash.
- Contrast: Use it to change how things look. Adjust it to a position suitable for you.
- Filters: This allows you to change the colors. If you have difficulty seeing normal colors or certain hues, swipe and choose a filter that’s suitable for you.
- To close any control, tap its icon.
Until now, we saw how to enable, access, and use the Magnifier. We also discussed all the options except two – Multi-photo mode (shown by two rectangles) and Settings. Let us now learn about these.
Save a magnified object as an image on iOS device
When using the Magnifier to zoom in and read the text, you might have noticed that it shakes if your hands are not stable.
If you are young, that’s not much of an issue. But if you are an older person or have trouble keeping your hands steady, you can snap a picture and then magnify and read it comfortably. Here is how.
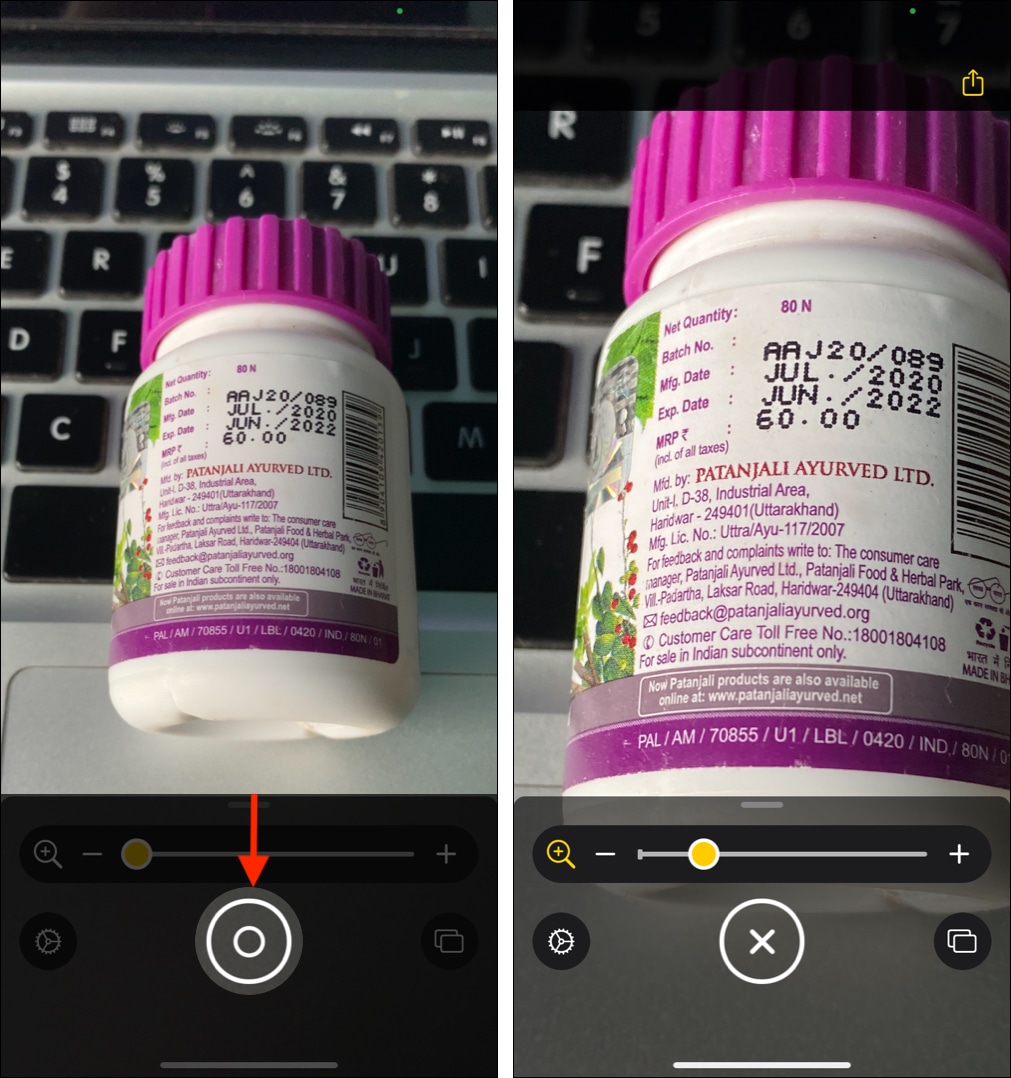
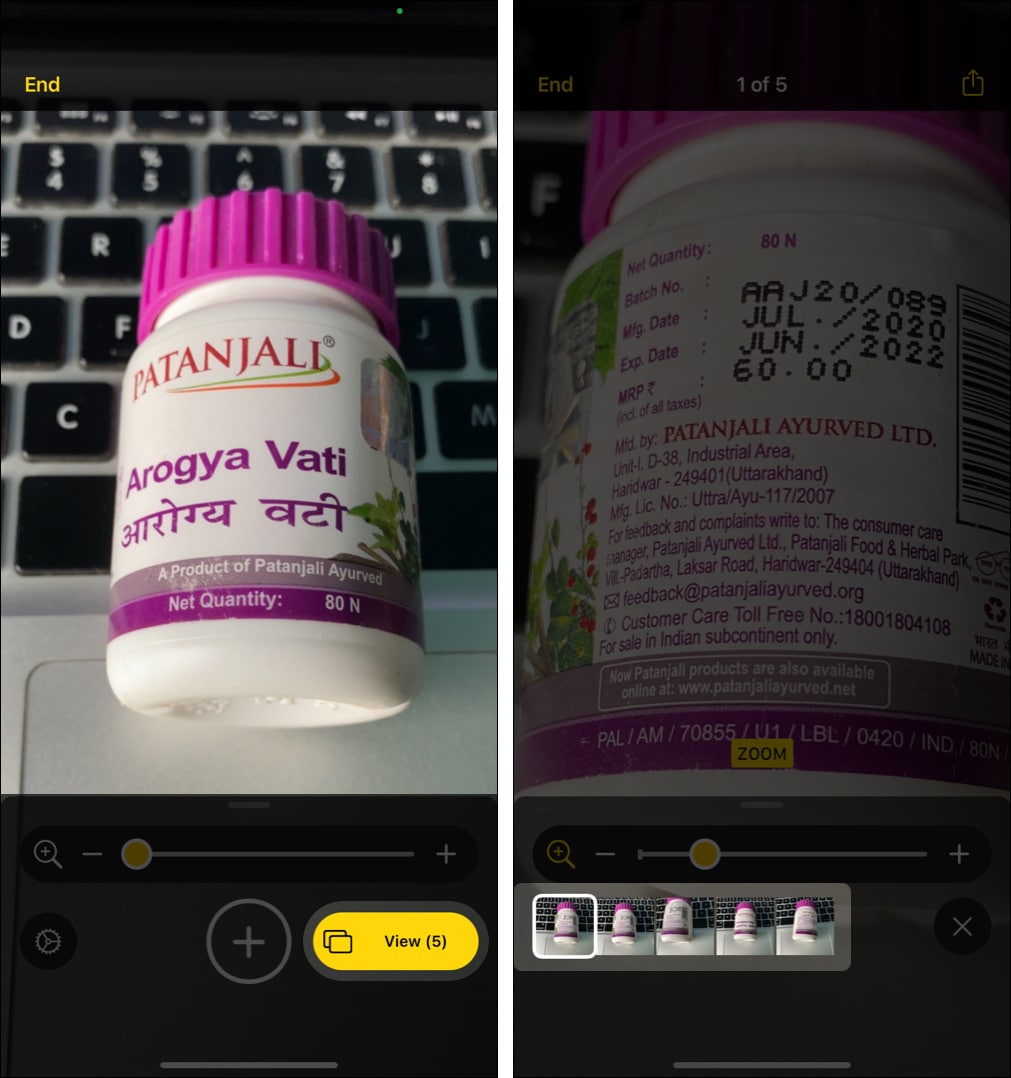
- Open Magnifier and point it to the text or object.
- Tap the round shutter button to snap a picture.
- Drag the slider to zoom and read without it being all shaky.
- Tap the screen with one finger to hide the on-screen controls and see everything in full screen.
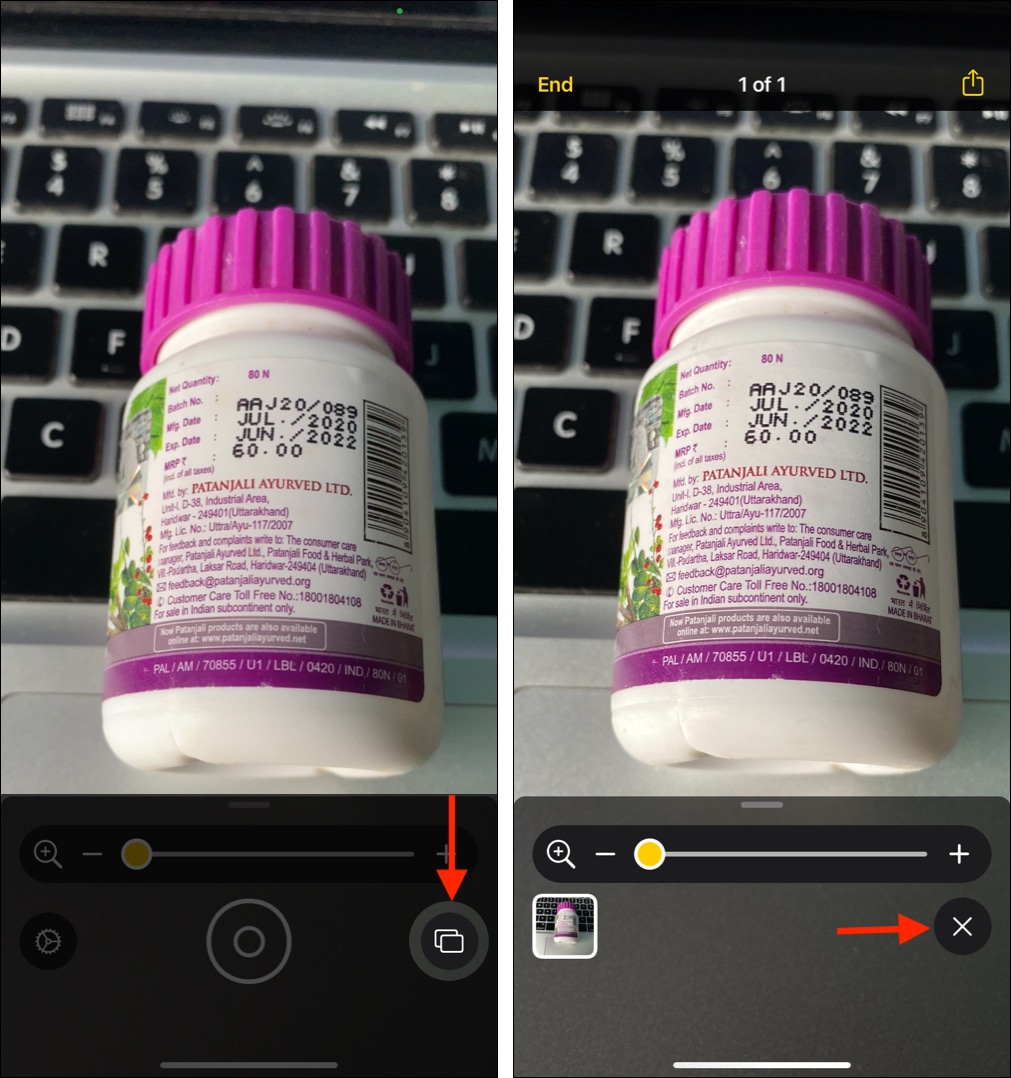
- MULTI-PHOTO MODE:
- Tap the two rectangle icon to snap more pictures. Or, if you are already viewing an image, tap X at the bottom right and tap the + shutter button to click more pictures.
- After that, tap View (number). Swipe on the image thumbnail from the bottom left to see the other images. Or, you may also swipe on the screen.
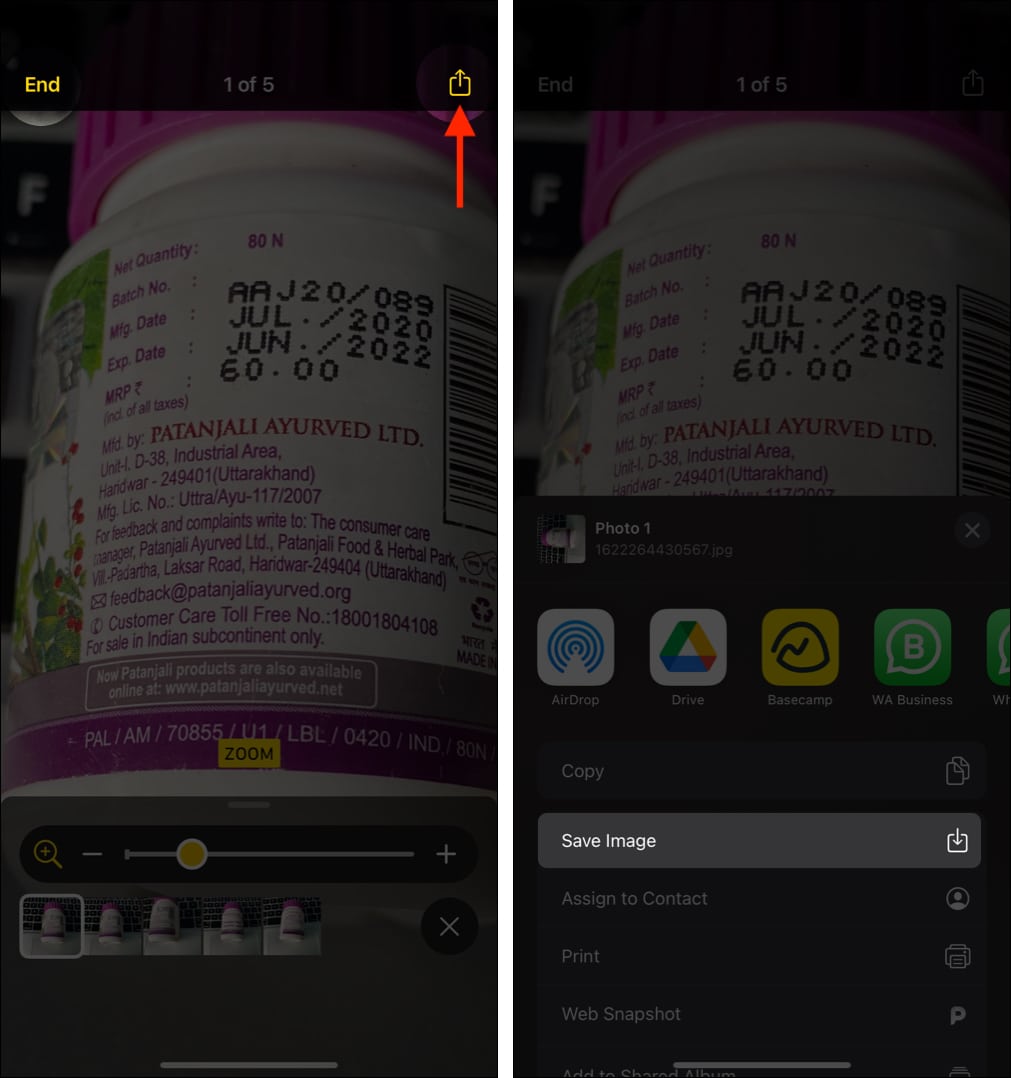
- These images are not saved to the iPhone Photos app and get deleted after you tap End or close the app for some time. But if the image is important, tap the share icon from the top-right and tap Save Image. Now, it is saved to the Photos app.
- Tap the two rectangle icon to snap more pictures. Or, if you are already viewing an image, tap X at the bottom right and tap the + shutter button to click more pictures.
Now, let us see how to customize it to make things even more accessible and suitable.
How to customize Magnifier options
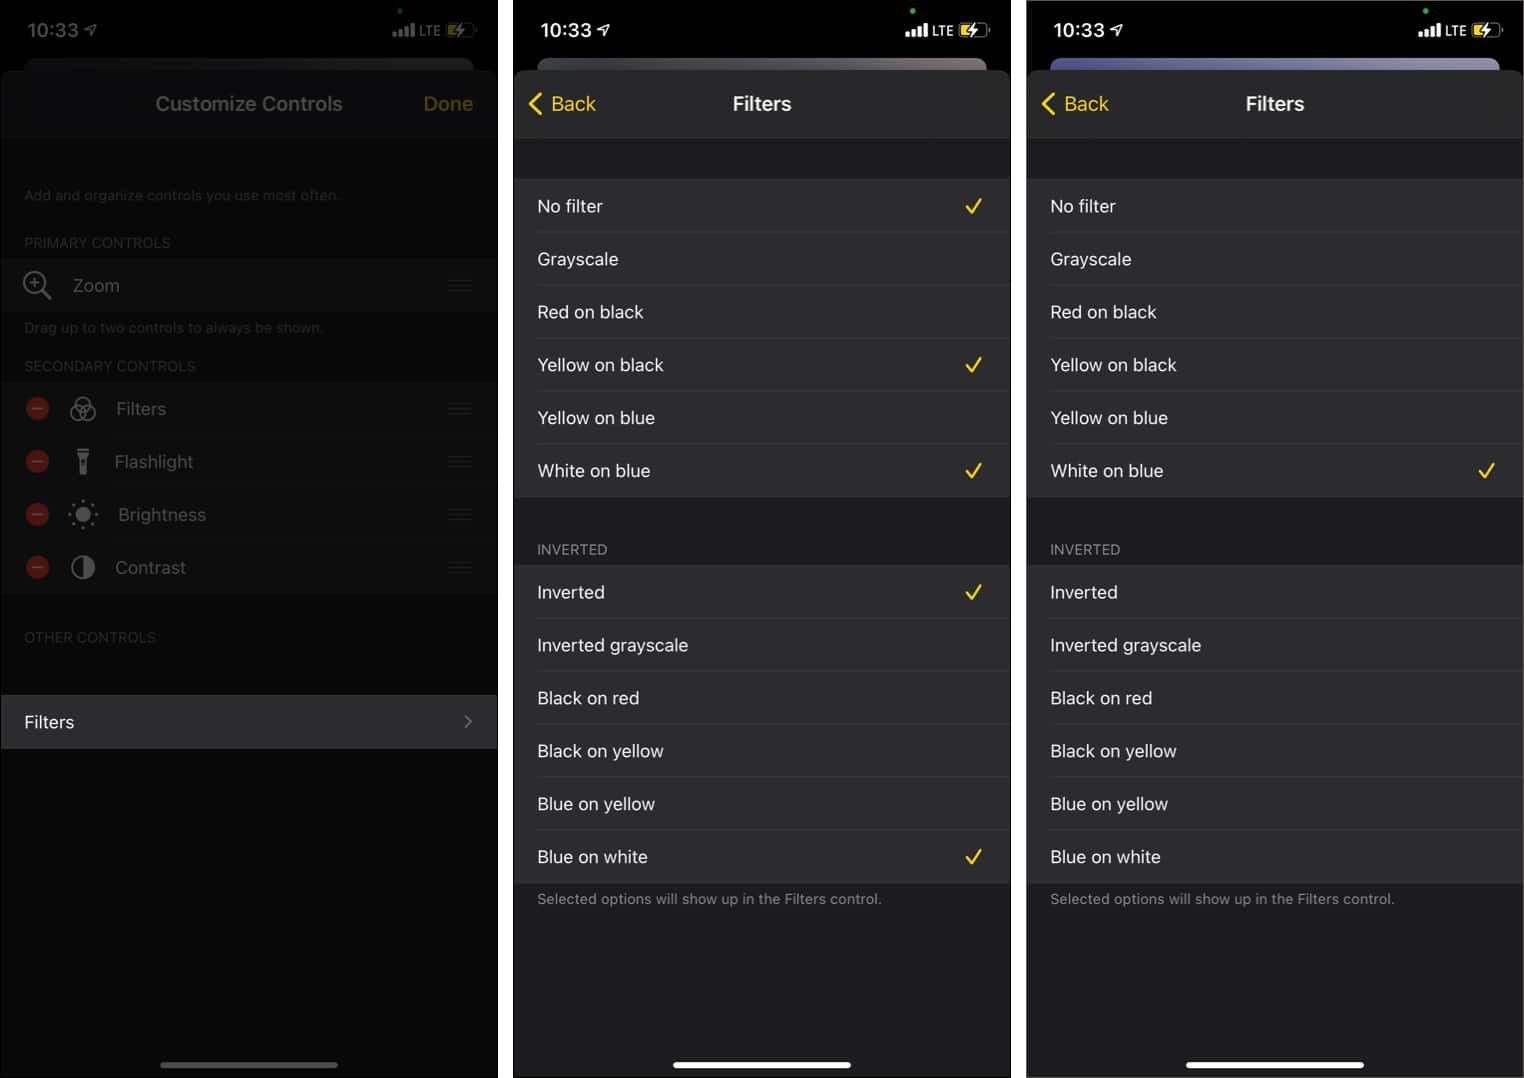
Customize the controls
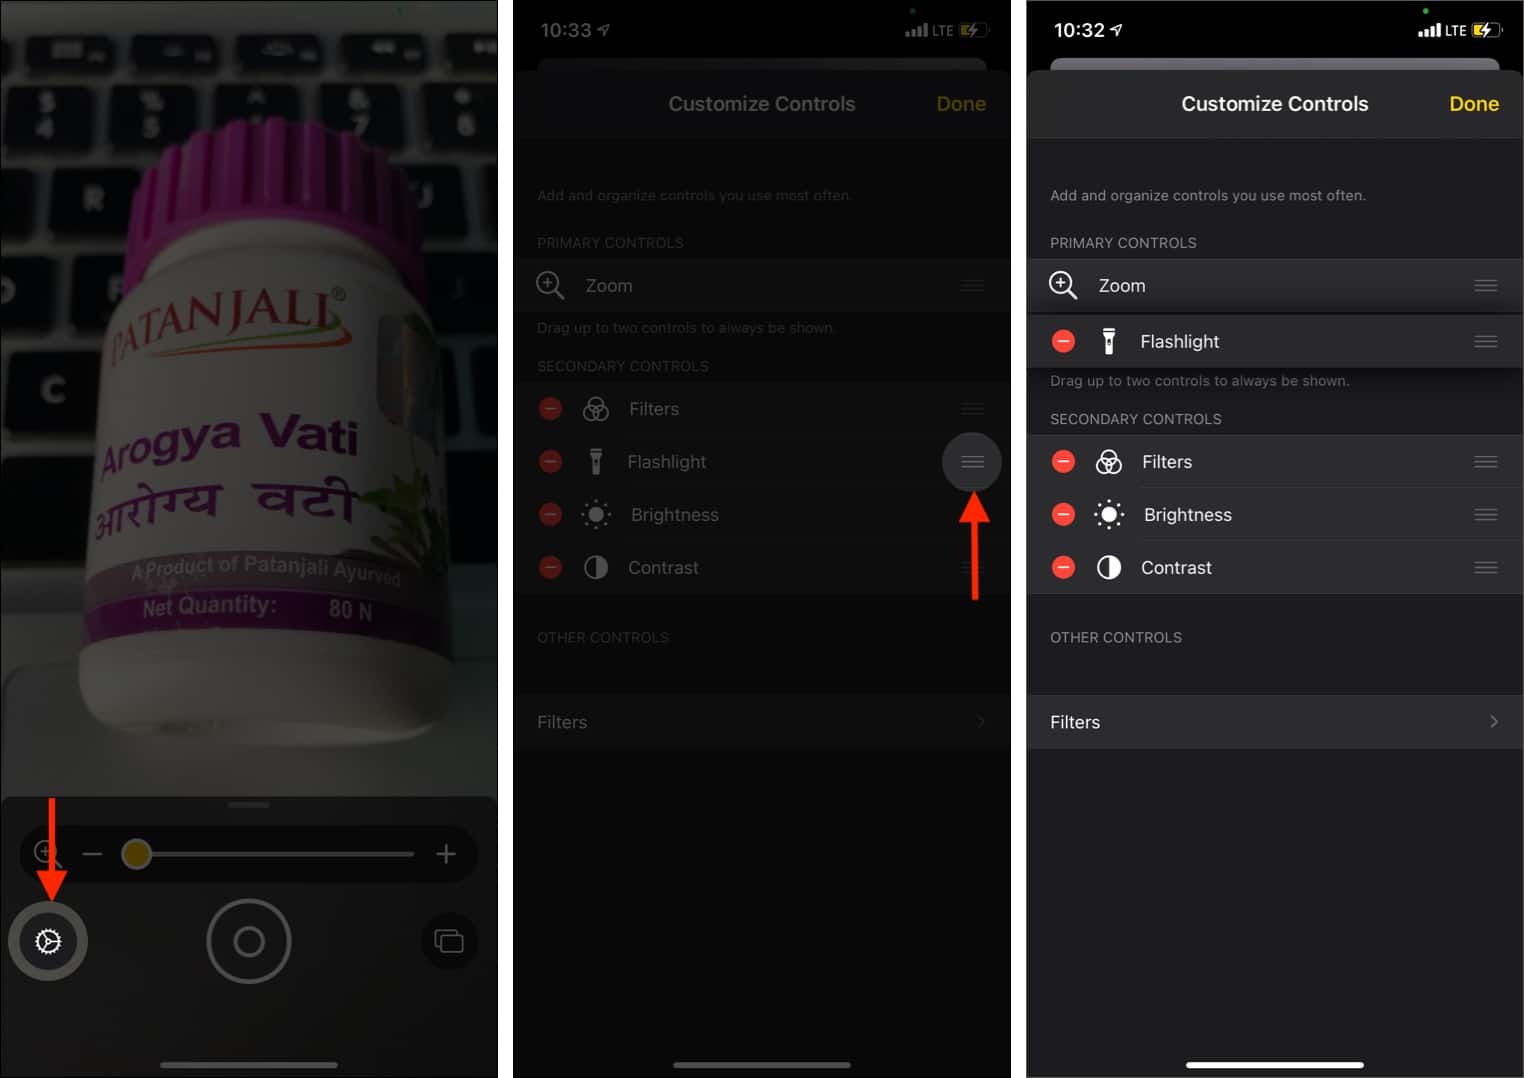
- Open the Magnifier and tap the Settings icon at the bottom left.
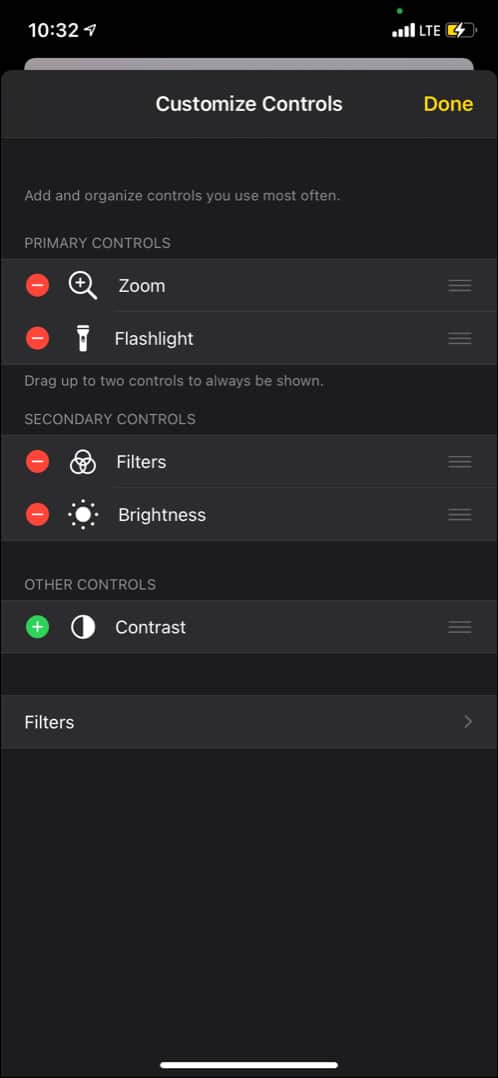
- Under PRIMARY CONTROLS, Zoom is added by default. But you can add one more control. For this, touch the three-line icon next to an option under SECONDARY CONTROLS and drag it under PRIMARY CONTROLS.
- To rearrange, touch the three-line icon and drag it up or down.
- To remove a control, tap the red minus icon. Want it back? Tap the green plus icon.
Customize filters
- Tap Filters.
- Now, you can deselect the ones you do not need. These won’t show up when you tap the Filter icon while using the Magnifier.
- Always use one filter: If you deselect No filter and keep only one filter selected, this filter will automatically apply every time you launch and use the Magnifier.
This is how you can use the new Magnifier accessibility tool on iPhone and iPad. I hope this quick guide was helpful. If you have any more questions, please ask using the comments section below.
You may also find these helpful:

