Ever wished you could transcribe a meeting or lecture on the fly? With iOS 18 and macOS Sequoia, you can finally do it. The Notes and Voice Memos apps now feature live audio transcriptions, which allow you to effortlessly record and get automatic transcripts for your notes or meetings. You can also search through the transcripts later and include them in your documents.
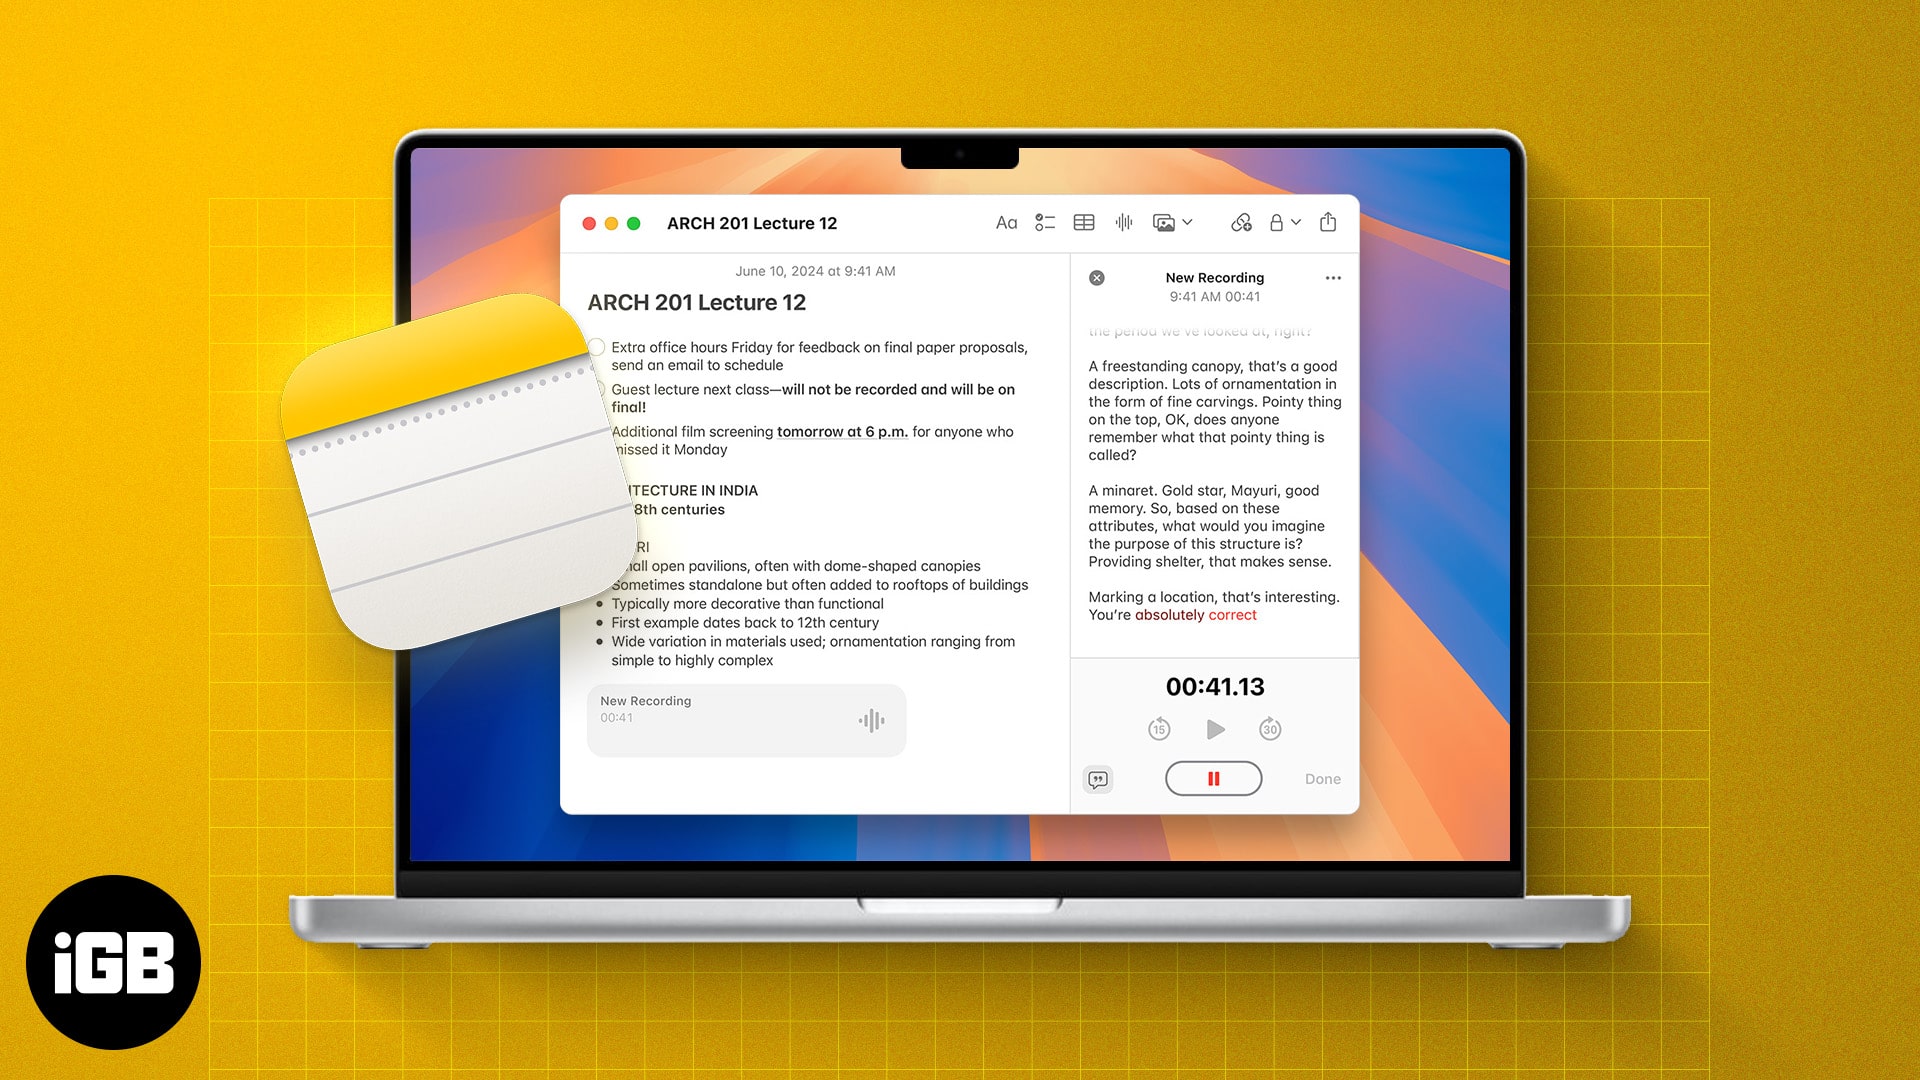
Stick around, and we’ll demonstrate how to use live transcriptions in the Notes app on your iPhone and Mac running iOS 18 and macOS Sequoia, respectively.
How to generate live transcriptions in Notes in iOS 18 and iPadOS 18
Let’s start with the Notes app on your iPhone or iPad. This is where I’ve found the live transcription feature to be a game-changer, especially when attending meetings or lectures.
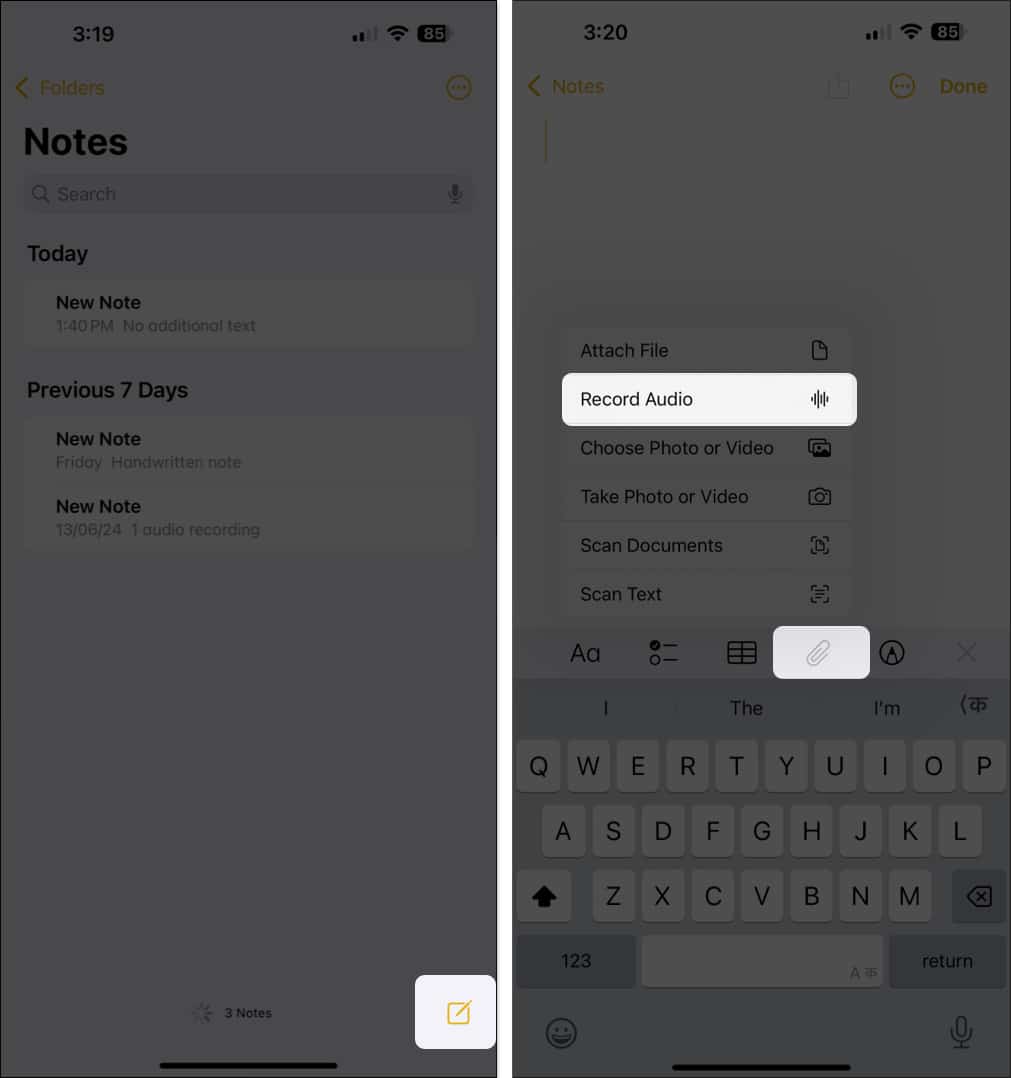
- Open the Notes app on your iPhone or iPad.
- Tap the pen icon in the bottom-right corner of the screen to create a new note, or tap on an existing note to open it.
- Select the attachment button (paperclip icon) in the toolbar to bring up the attachment menu.
- Select the Record Audio option.
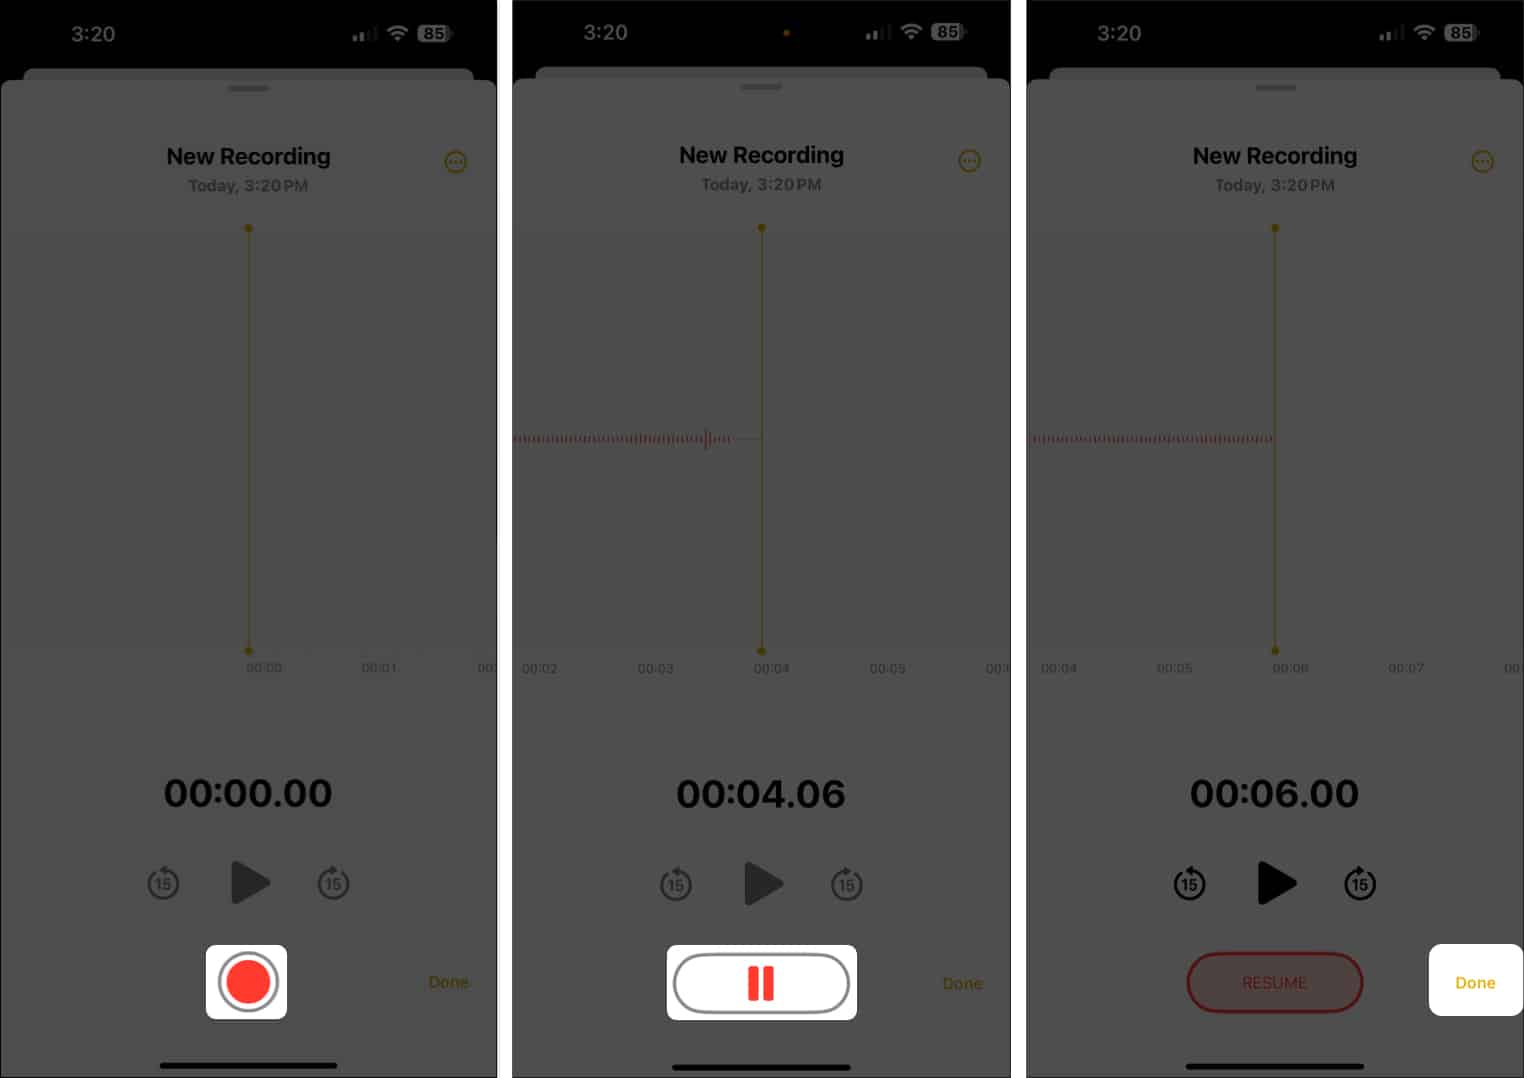
- Now, you’ll see the recording interface, like in the Voice Memo app. Tap the red circular button to start audio recording.
- Speak your message into your device directly or record external audio, like a meeting or a lecture.
- If you want to pause the recording, hit the red pause button (with two vertical lines).
- Once you’re done recording, tap Done.
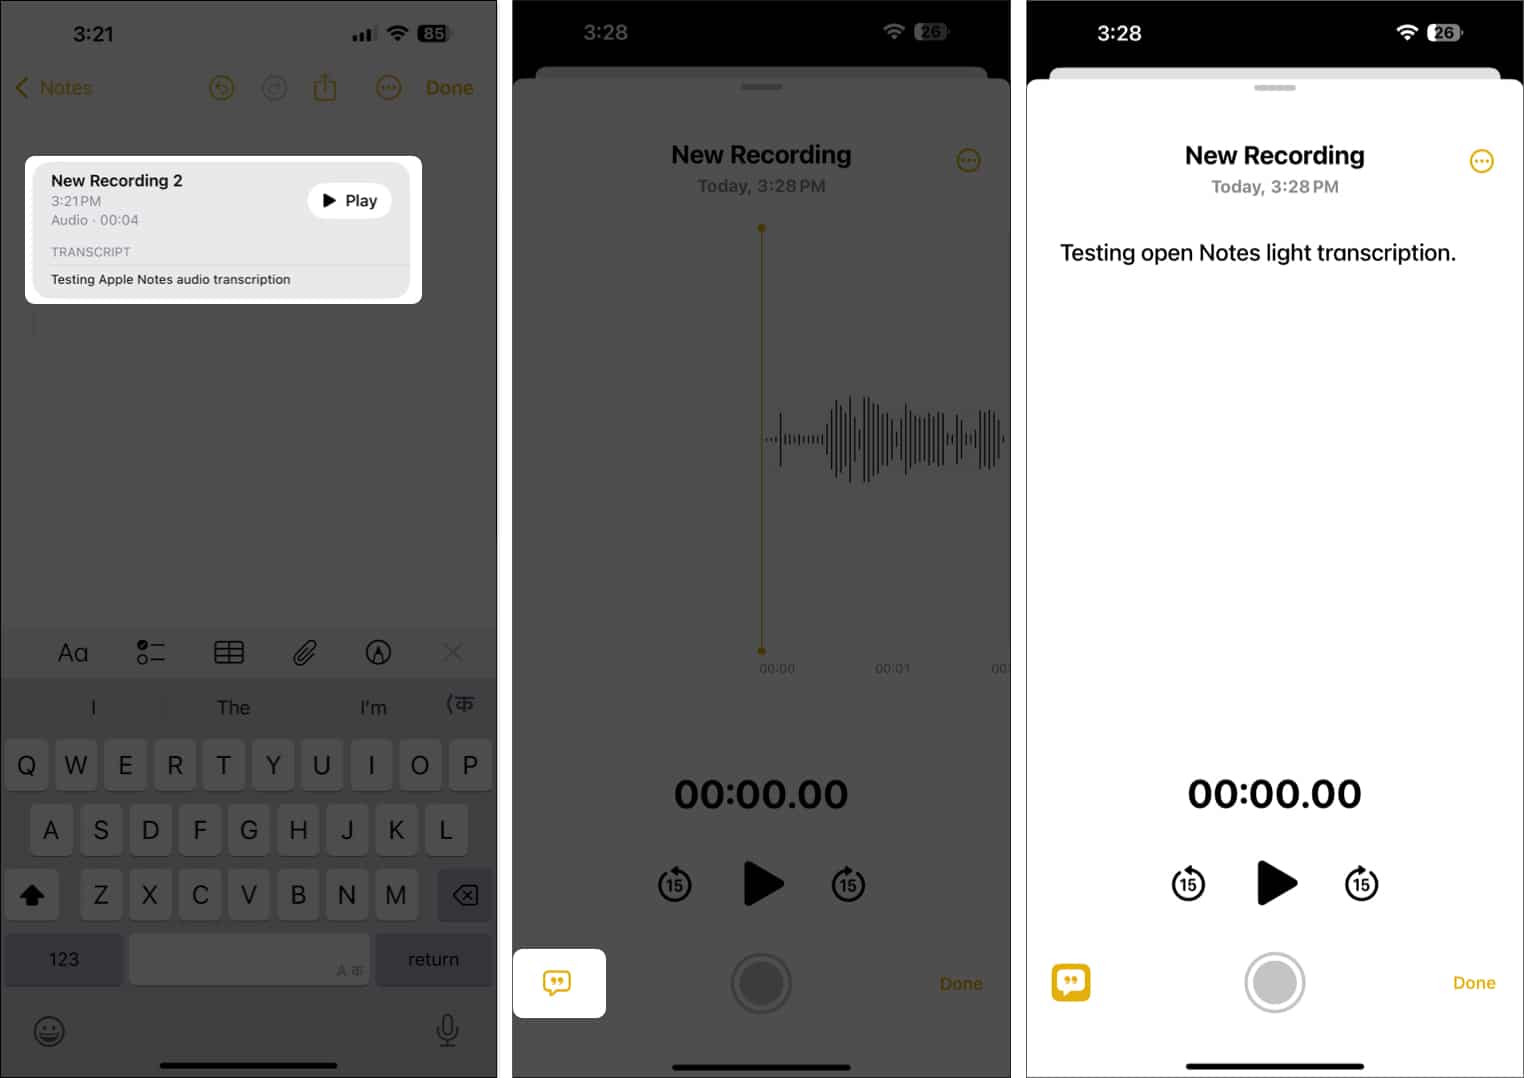
- Wait for a few seconds, and you’ll see a transcription preview. Select it.
- Next, hit the yellow quotation box button in the bottom-left corner to view the full audio transcription.
From here, tap on More (three-dots icon) to add the transcript to the note or copy it to use elsewhere. You can also share the audio file or save it to your iCloud files. If you no longer need it, you can delete it, too.
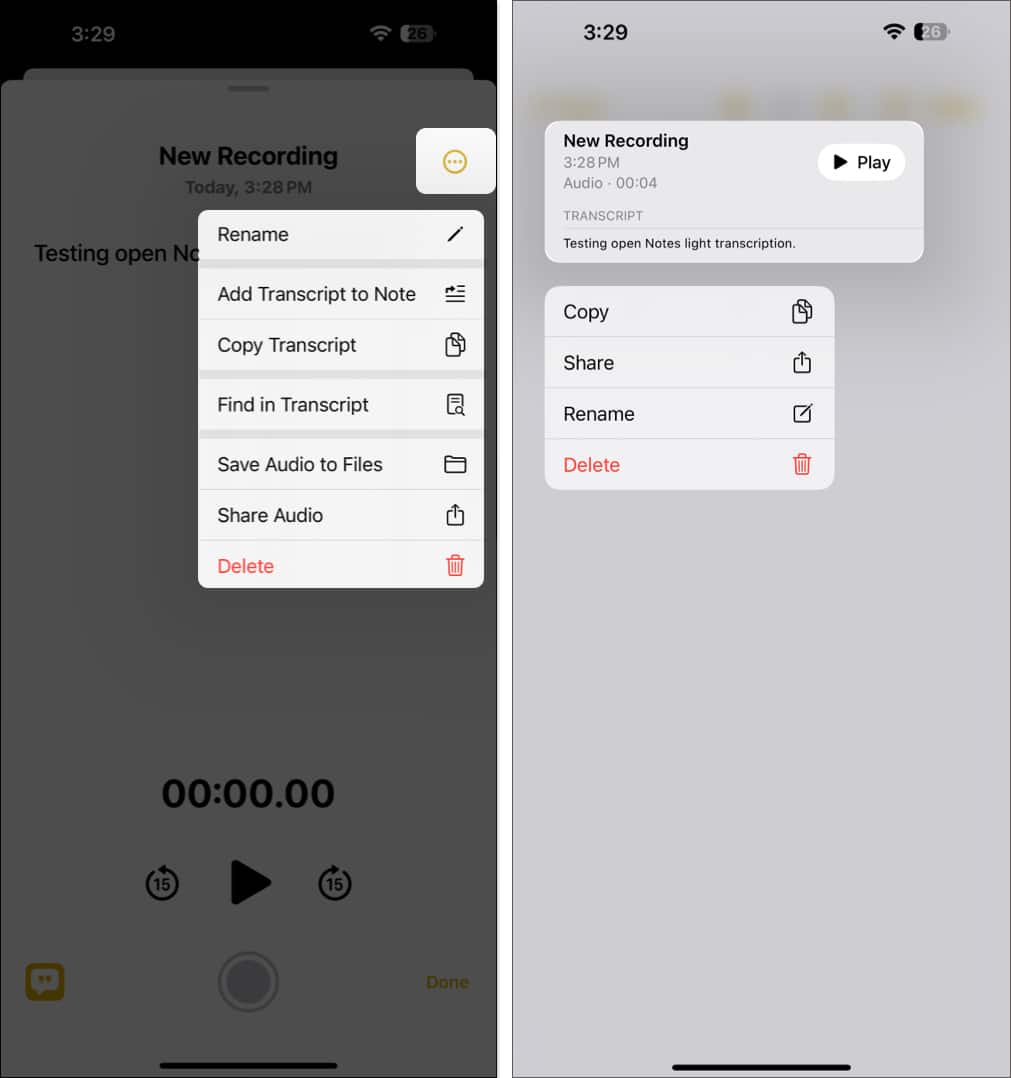
Whether you have the quotation icon while recording or not, you’ll see the transcription under the audio box in the note. Live audio transcriptions were unavailable on my iPhone 11; it only allowed me to record audio within the note.
I also found out that the transcripts are sometimes inaccurate and that the feature can’t differentiate between homophones. I hope Apple improves the audio transcription accuracy with the upcoming iOS 18 beta updates.
How to generate live transcriptions in Notes in macOS Sequoia
Moving to the Mac, the process of generating live audio transcriptions is just as seamless, and it’s perfect for those who prefer working on a larger screen.
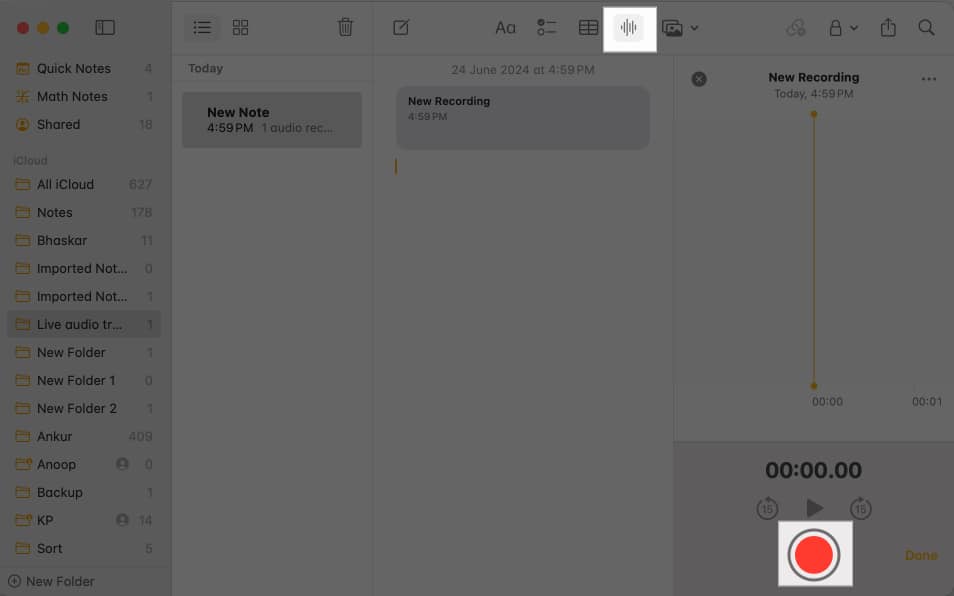
- Launch the Notes app on your Mac.
- Click the pen icon to create a new note or select an existing one.
- Select the Record Audio button from the toolbar.
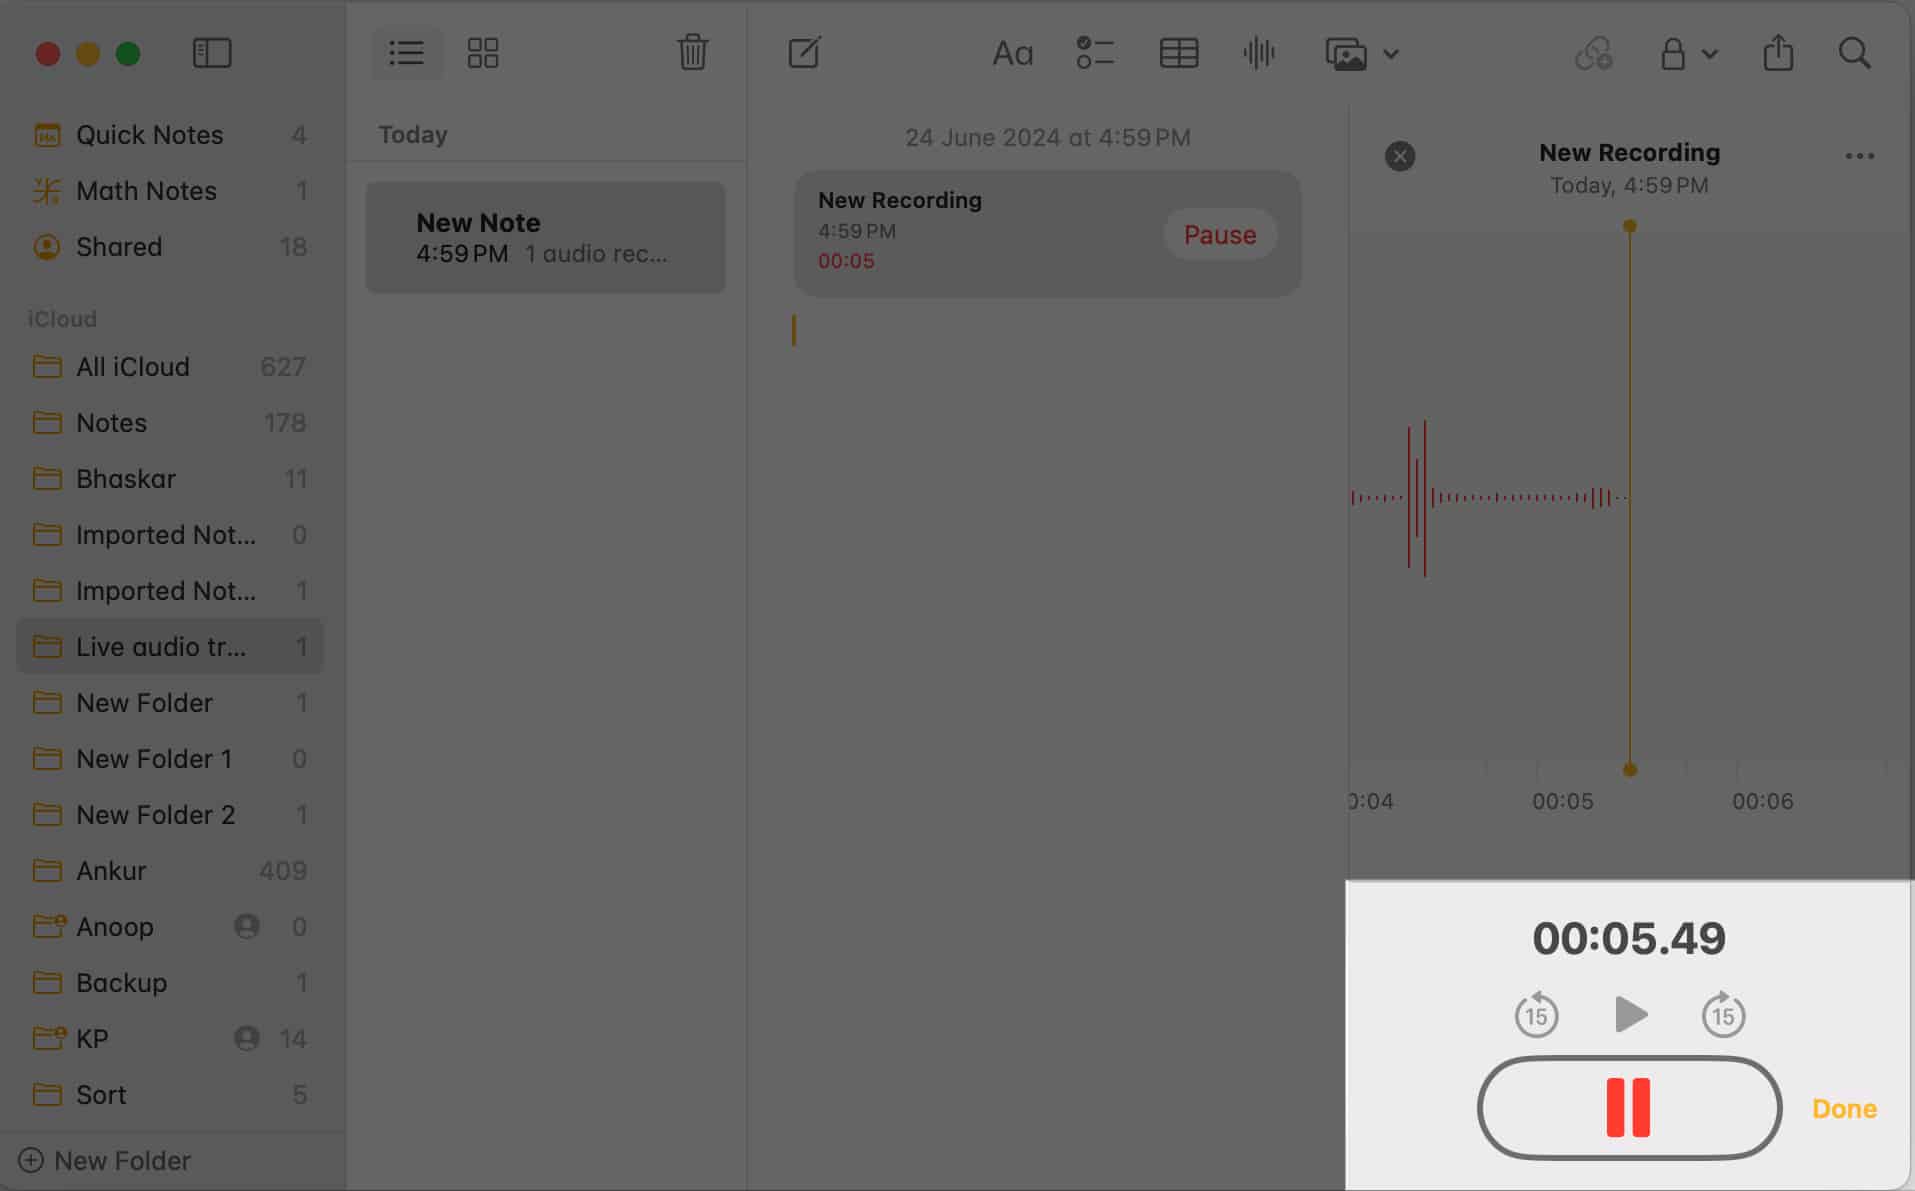
- Click the red circular button to start recording the audio.
- Tap the red pause button to pause the audio recording.
- Click Done to save your recording and get back to the note.
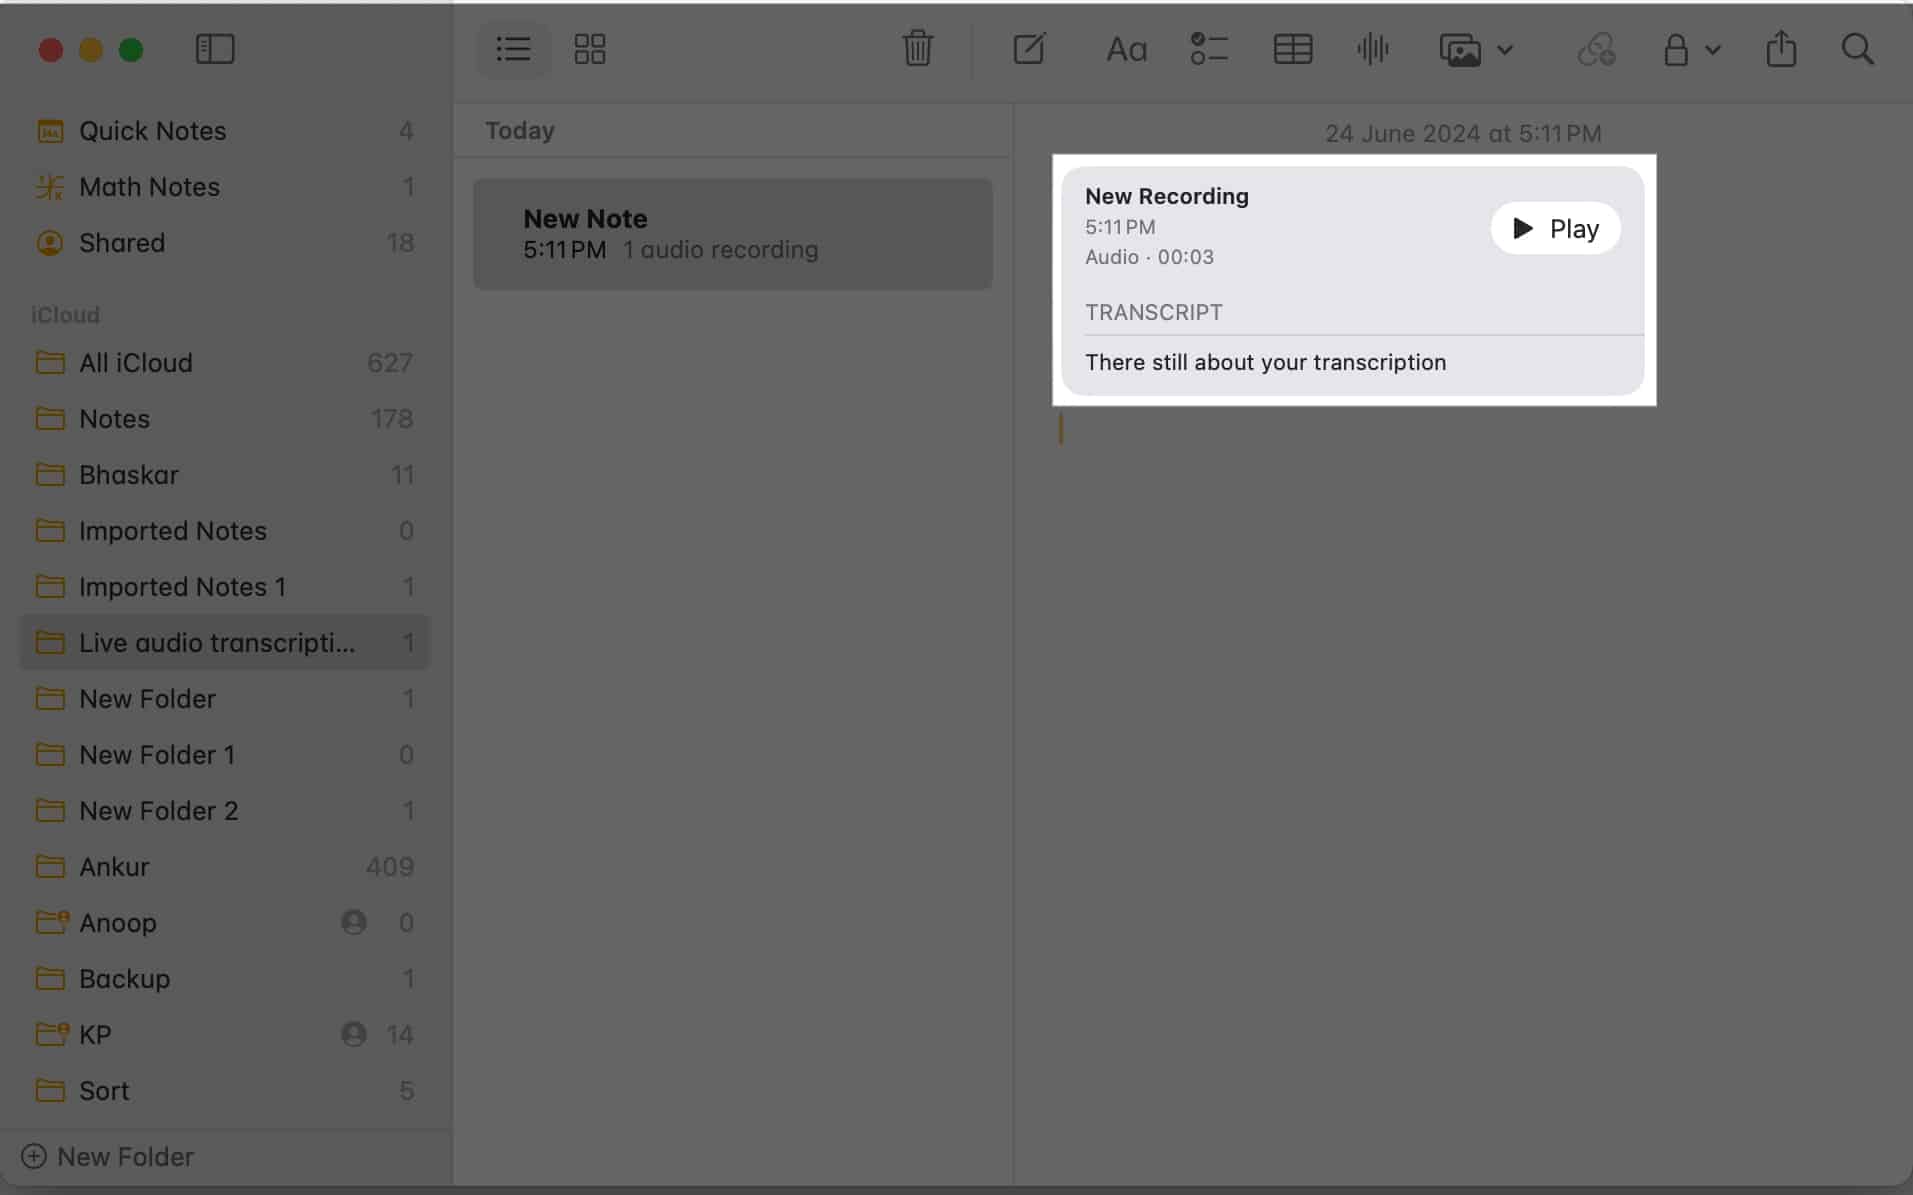
- Wait for a few seconds, and you’ll see the transcription for the recorded audio.
When it comes to meetings, the audio transcriptions feature stands out for me among other macOS Sequoia features since it saves and transcribes everything, so I can pay full attention to what’s being said without worrying about having to note it down.
Signing off…
Recording audio with the Transcripts in Notes is useful to both students and professionals. If you’re a student, you can use it to record lessons and transcribe for future use and revision. That way, you wouldn’t need to worry about missing out on important parts.
Similarly, if you’re a professional, you can also take advantage of the feature, especially during meetings, interviews, or brainstorming sessions. With it, you can have a precise record of everything discussed in a meeting, which you can easily review and share.
Feel free to explore the feature and see how it fits into your routine. Happy transcribing!
Read more:

