With the Apple ecosystem, you can do a lot on your Mac using your iPhone. But have you ever wondered if you can use your iPhone as a mouse for your Mac? This can come in handy when your Mac’s trackpad isn’t working, and you don’t have access to an external mouse.

In this article, we’ll explore whether you can use your iPhone as a mouse for your Mac and provide a step-by-step guide to help you set it up. Keep reading to find out!
Can you use an iPhone as a mouse for Mac?
Yes, you can use your iPhone as a mouse or trackpad for your Mac, but it’s not a built-in feature. You’ll need a third-party app to make it work and control the cursor and functions on your Mac. If you’re having issues with your Mac’s trackpad, this can be a good alternative to keep using your Mac effectively until you find a better solution.
How to use an iPhone as a mouse for MacBook
Remote Mouse is the most popular app for using your iPhone as a mouse for your Mac. Once set up, it lets you navigate your Mac screen and even includes a keyboard function, allowing you to type directly from your iPhone instead of using your Mac’s keyboard.
Here’s how to use Remote Mouse with your Mac:
Step 1: Install Remote Mouse on your Mac
First, you’ll need to install the Remote Mouse app on your Mac. You can download it from the App Store or install it using the DMG file. Once installed, launch the app and follow the on-screen prompts to grant the required accessibility permissions.
Step 2: Install Remote Mouse on your iPhone
Next, go to the App Store on your iPhone and install Remote Mouse.
Step 3: Pair your devices
After installing the app on your iPhone, open it and tap Allow to enable Bluetooth for connectivity. Make sure Bluetooth is turned on for both your iPhone and Mac. Then, follow the prompts and tap Allow again to let Remote Mouse find and connect to Macs on your network.
You’ll now see the Select a computer screen. If your iPhone and Mac are on the same network, your Mac’s name will appear under the WiFi category. If you’ve paired them via Bluetooth, your Mac will show up under the Bluetooth icon.
Finally, select your Mac’s name, and the mouse setup will be complete.
Step 4: Start using your iPhone as a mouse
Once both devices are connected, Remote Mouse will walk you through a tutorial to help you get started. It’s pretty simple, and the functions are similar to using a trackpad, so you should pick it up quickly.
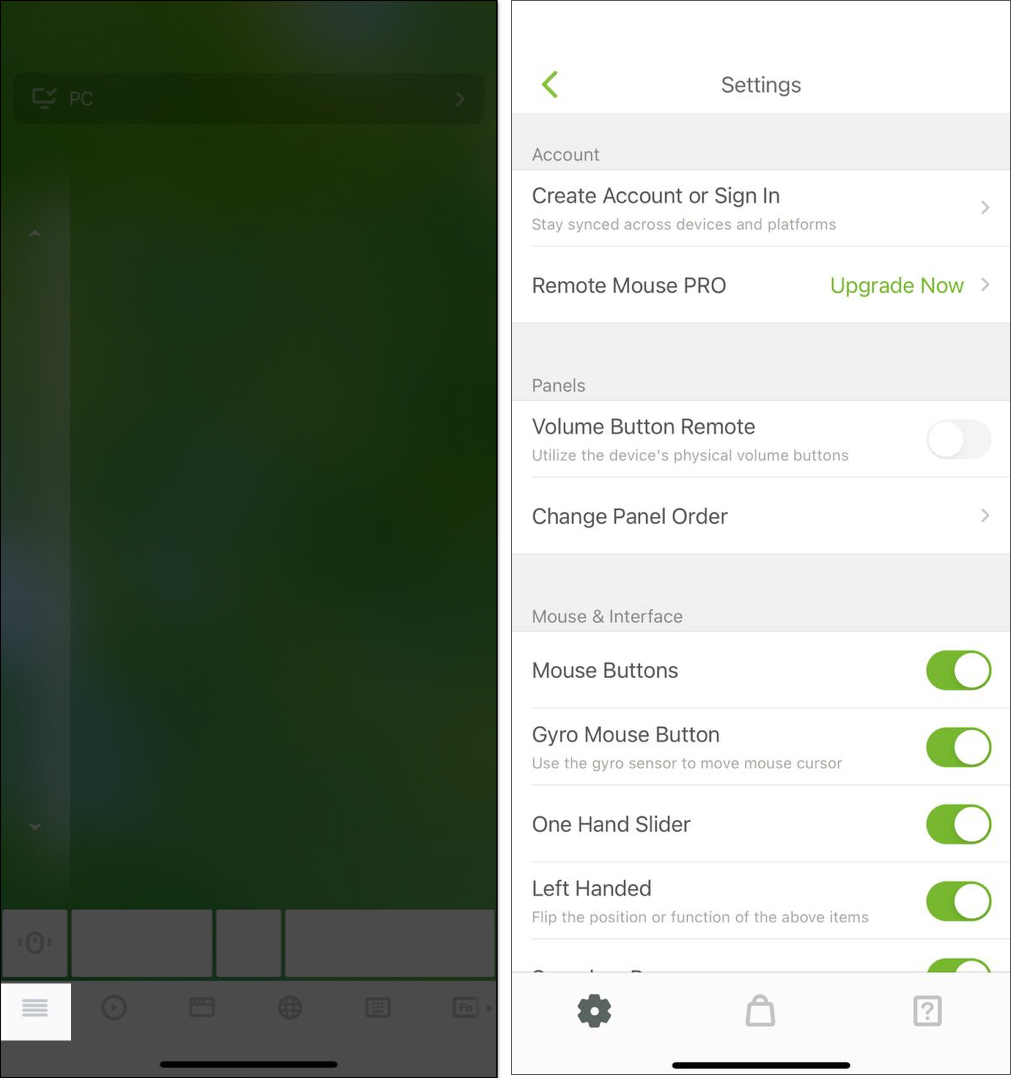
You can also tap the hamburger icon in the bottom-left corner of the app to customize the mouse settings, like enabling or disabling Mouse Buttons and removing the One Hand Slider for scrolling. Just note that some features are behind a paywall.
Alternative apps to use iPhone as a mouse
Other than Remote Mouse, you can also use the following apps to use your iPhone as mousse for your Mac:
1. Remote, Mouse & Keyboard
Remote, Mouse & Keyboard is an app that turns your iPhone into a remote control for your Mac or Windows PC. Its setup is similar to Remote Mouse and works much like it but with added features, especially useful for presentations or when your computer is connected to a TV. Key features include:
- Remote Mouse and Keyboard: Navigate your Mac’s screen and type from a distance.
- Media Controls: Control playback on media applications and websites directly from your phone.
- Add Control Panel: Customize your controls for a more personalized experience.
- System Commands: Perform actions like shutdown, restart, or sleep remotely.
- Custom Actions: Create personalized control panels using AppleScript or PowerShell.
2. WiFi Mouse
WiFi Mouse turns your iPhone into a wireless mouse, keyboard, and trackpad, similar to Remote Mouse. To set it up, you’ll need to install a server application on your Mac, and connect to the same Wi-Fi network. However, some users have reported ads and occasional lag. Despite its dated interface, WiFi Mouse supports the following features:
- Gesture Control: Simulate mouse clicks and use touchpad gestures for navigation.
- Full Keyboard Support: Type with a complete QWERTY keyboard layout.
- Media Control: Control playback on apps like VLC and Netflix
Why you might need to use an iPhone as a mouse for your Mac
Using your iPhone as a mouse for your Mac can be a smart and practical solution in a variety of scenarios. Here’s why this option might be worth considering:
For Convenience
- Reliable Backup: When your Mac’s trackpad or regular mouse stops working or is left behind, your iPhone can instantly step in as a substitute for tasks that require a mouse.
- Always on Hand: Since your iPhone is likely with you at all times, it’s a portable and dependable option for controlling your Mac in a pinch.
For Enhanced Functionality
- Advanced Features: Sometimes, third-party mouse apps can unlock extra functionality, such as multi-touch gestures, customizable controls, and media playback options, making your workflow more efficient.
- Touchscreen Precision: Using your iPhone’s touch screen offers a unique and often more intuitive way to interact with your Mac, particularly for tasks that require precision or fine control.
Signing off…
With the steps we’ve covered, you can now use your iPhone as a mouse on your Mac when needed. However, keep in mind that these apps may not offer the same efficiency as a traditional mouse, as they’re designed as temporary solutions for specific use cases. If you have any questions, feel free to drop them in the comments section below.
FAQs
Yes, you can use your iPhone as a touchpad for your Mac. However, this requires third-party apps like Remote Mouse, and we’ve covered the steps to set it up in this article.
Yes, using an iPhone as a mouse on a Mac is safe, but you should be cautious about the apps you choose to add the functionality. Apps with malware can put your device and privacy at risk.
For more tips:


This is such a handy guide! I had no idea I could use my iPhone as a wireless mouse. The step-by-step instructions were super easy to follow, and it works like a charm. Thanks for sharing!
Great post! I never knew I could use my iPhone as a wireless mouse. The step-by-step instructions were super helpful. Can’t wait to try this out with my Mac!