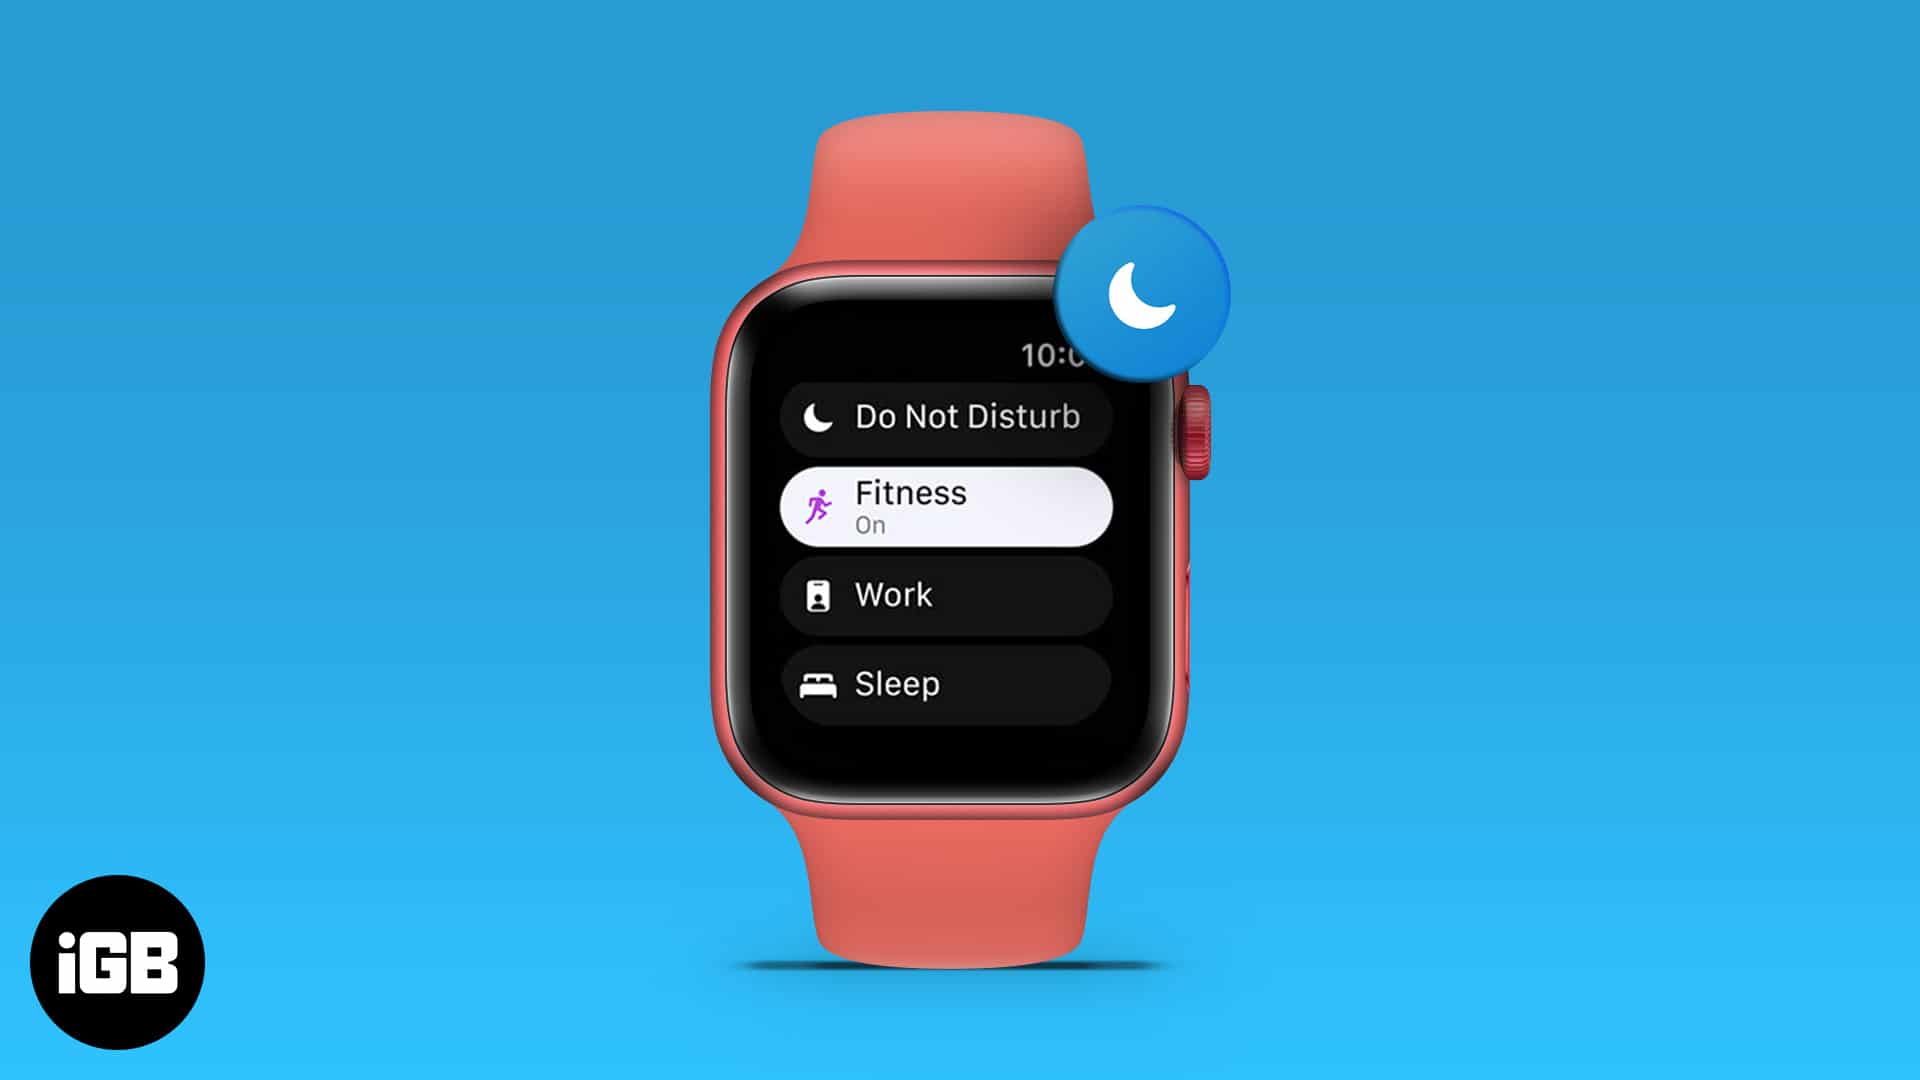
I’m sure you’d agree that the utility the Apple Watch provides is unmatched, but it is a tool of distraction in numerous instances. Apple offered a solution to this with the introduction of Focus; a feature similar to DND with more features and customization. Here’s how you can set up Focus on your Apple Watch and focus more on your life.
How to create a Focus on Apple Watch (custom Focus)
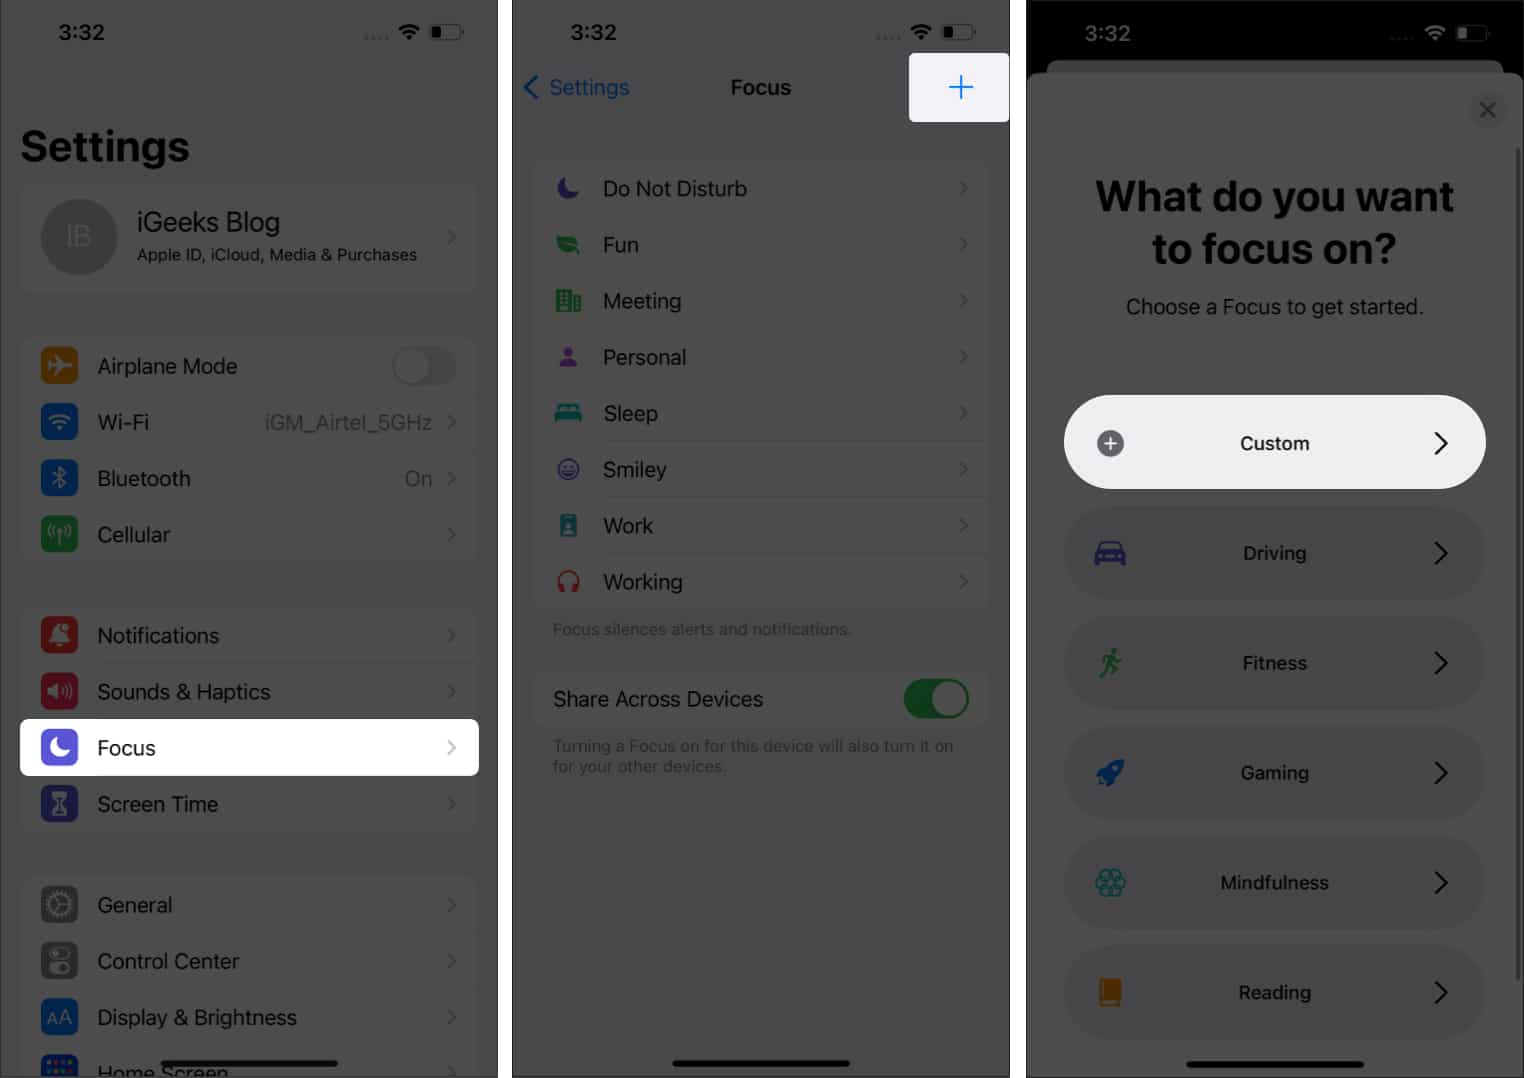
You can create a custom Focus for your Apple Watch. However, you need to do so on your iPhone. Once you’ve created a custom Focus the same will be reflected on your Apple Watch. Here’s how to go about it:
- Open iPhone Settings.
- Tap Focus.
- Select the + icon at the top right.
- Tap Custom to create a custom Focus.
- Now, follow the on-screen instructions to complete the setup.
How to turn on Focus on Apple Watch
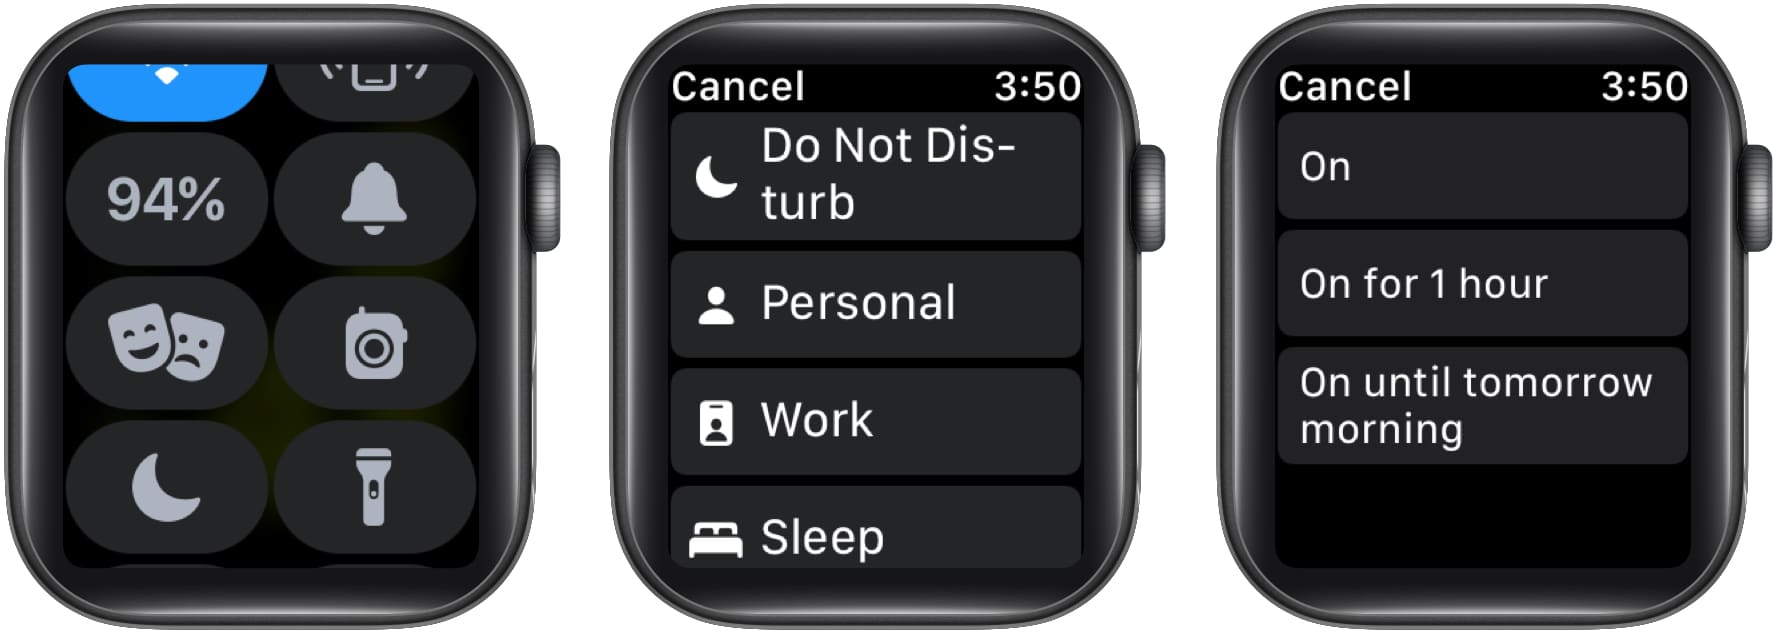
- Swipe up from the screen’s bottom to launch Control Center.
- Touch and hold the crescent moon icon.
- Select a Focus mode.
- Choose from On, On for 1 hour, or On until tomorrow morning to turn on Focus.
Turn off Focus on Apple Watch
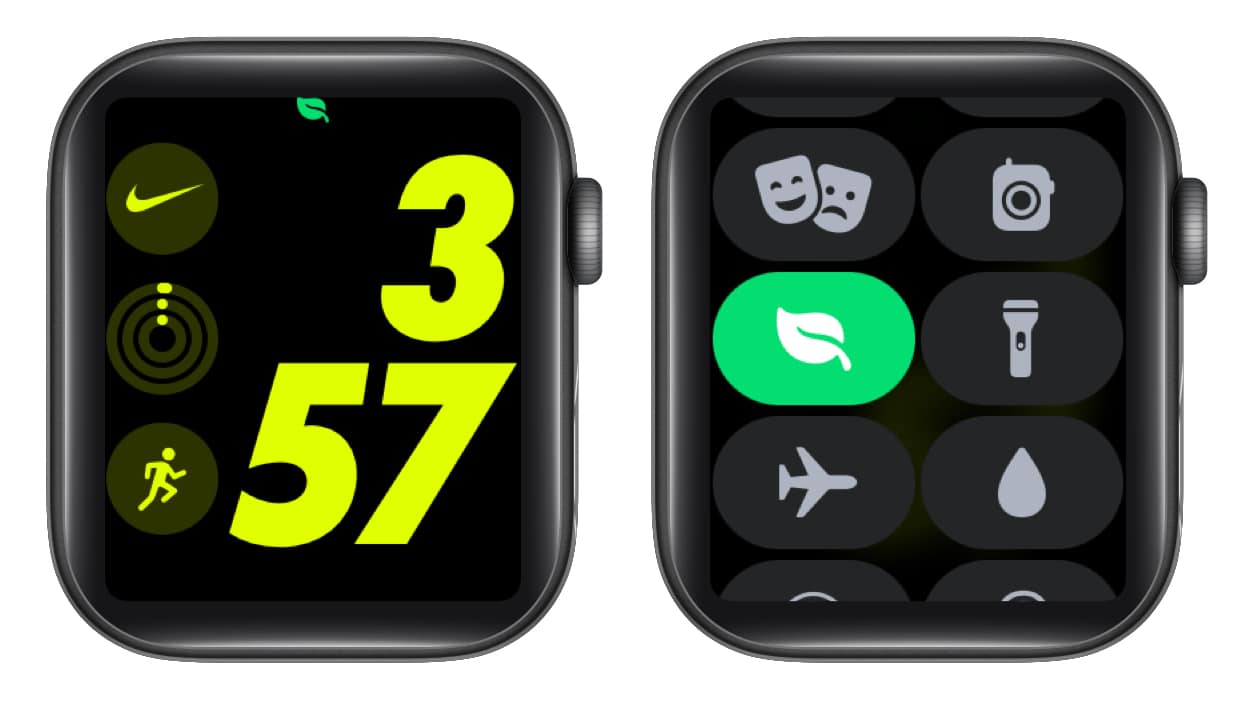
If a Focus is turned on, its icon will be displayed on your Apple Watch Face. To turn it off,
- Launch Control Center on Apple Watch.
- Tap the Focus mode icon.
- Now, tap the enabled Focus mode icon to turn it off.
Create a Focus schedule on Apple Watch
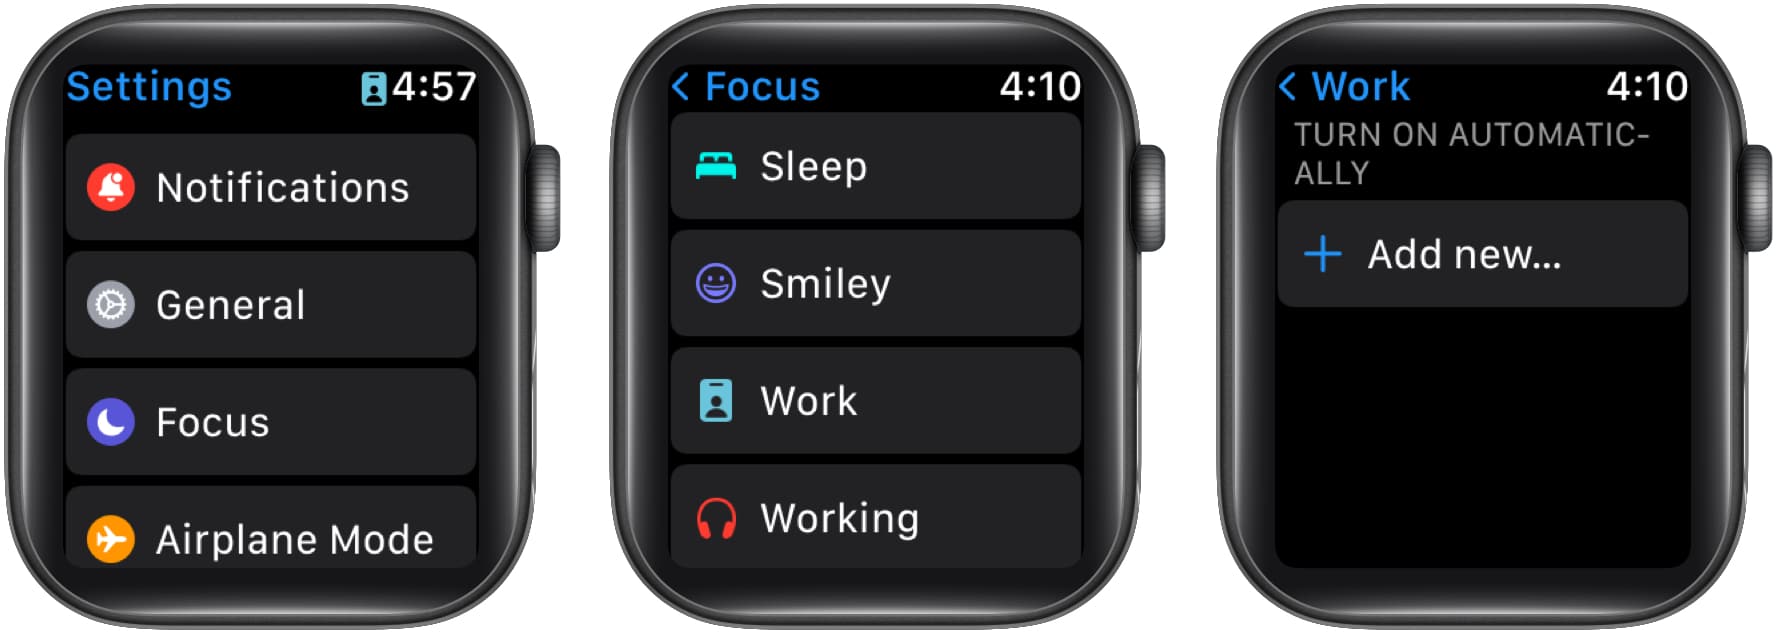
Many of us follow a daily schedule. Say you visit the gym every morning from 6am to 7am and go to work from 9am to 5pm on weekdays, you can schedule different Focus modes to automatically turn on at their designated time frames. Here’s how:
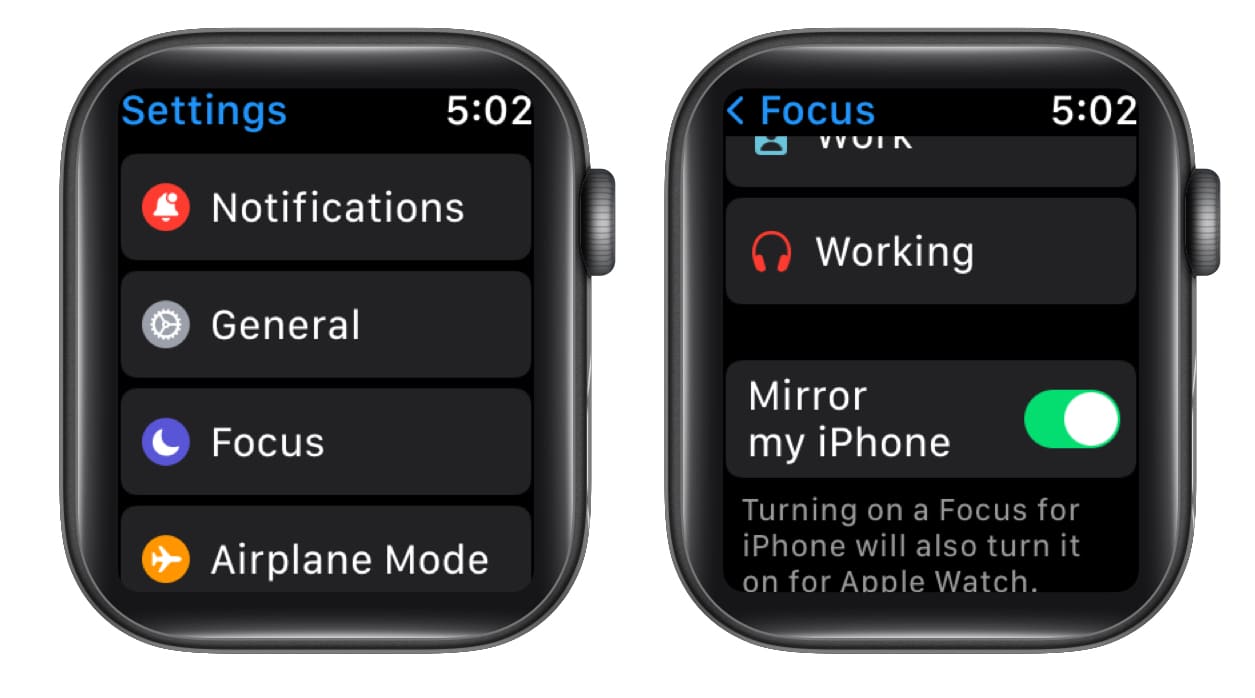
- Open Settings.
- Tap Focus.
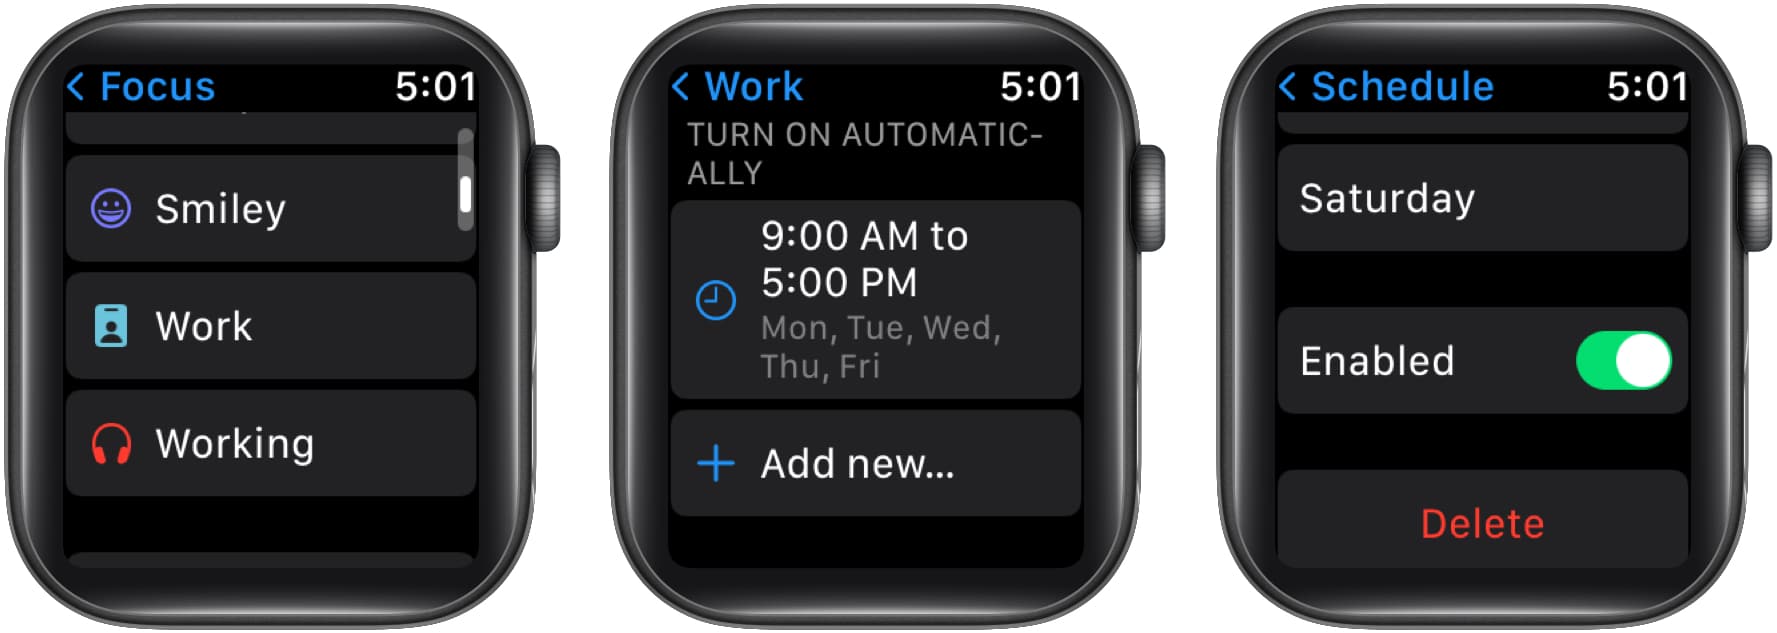
- Select a Focus.
I took Work as an example here. - Tap the “Add new…” option.
- Set the time you want it to turn on and off.
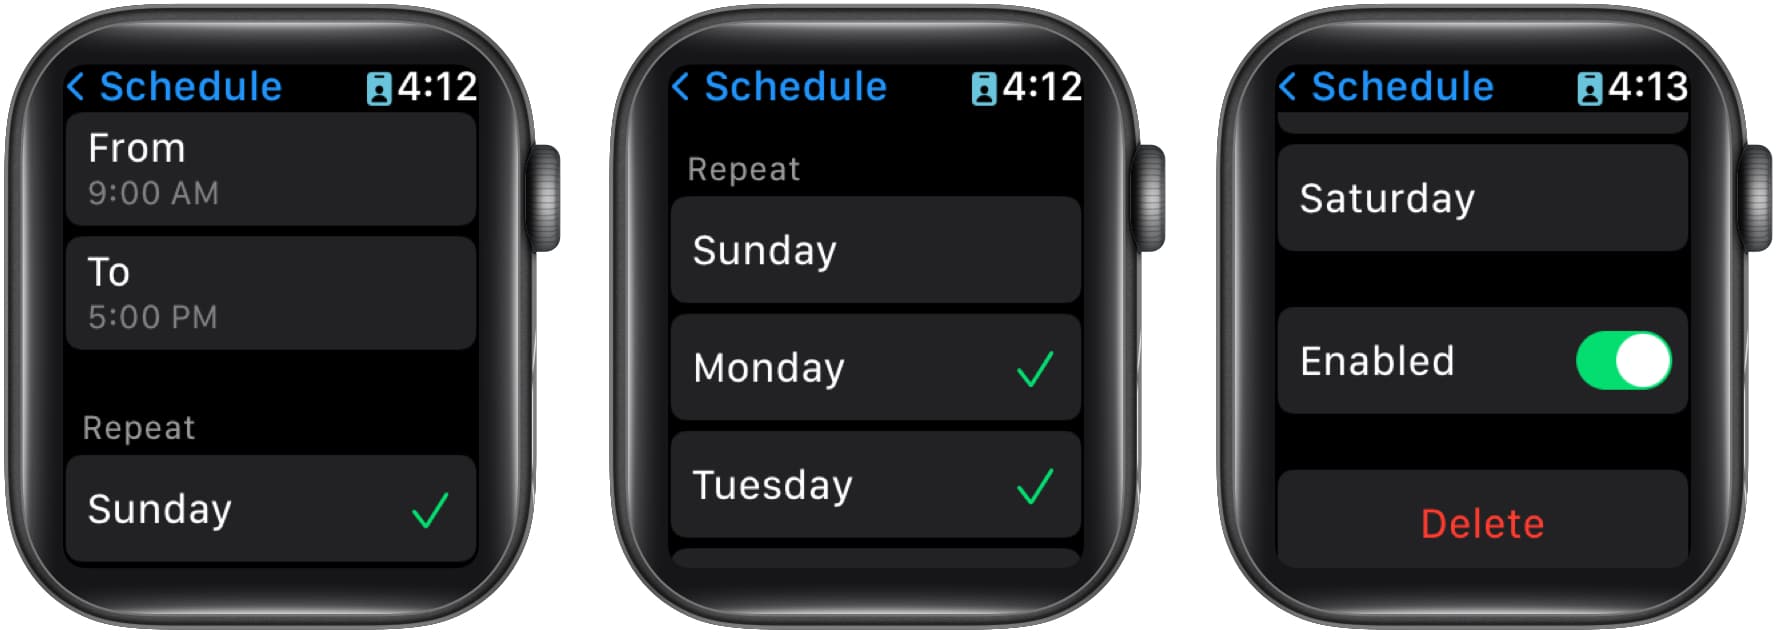
- Under Repeat, select the days you want it to turn on.
How to delete or disable a Focus schedule on Apple Watch
- Open Settings → tap Focus.
- Select the Focus you want to delete or disable.
- On the next screen, tap the schedule you want to delete or disable.
- Now, scroll down and toggle off the Focus.
You can also delete the Focus by tapping the Delete button.
Sync a Focus across your devices
- Open Settings → tap Focus.
- Scroll down and toggle on Mirror my iPhone.
From now, if you turn on Focus on your Apple Watch, it’ll also turn on your iPhone!
I hope this guide helped you enable Focus on Apple Watch. If you have any other doubts, let me know in the comments below and I’ll try my best to help you resolve them.
FAQs
Focus is similar to the Do Not Disturb mode, however, it offers a more versatile feature set than its traditional counterpart.
Focus is better as you can schedule it based on time, location, etc. You can also decide on different permissions for different Focus modes.
Focus mode does not block all calls. Calls from emergency contacts are always enabled, no matter which Focus mode you are in. However, you have the choice of whether you want to allow calls or not for other contacts.
Open Shortcuts → tap the Automation tab → select Create Personal Automation or + → Create Personal Automation → select a mode → tap When Turning On → Next → Add Action → select or search Set Watch Face → Select the option at the end of Set active watch face to → Choose the Apple Watch face → tap Next → turn off Ask Before Running. Now, confirm Don’t Ask → tap Done.
Read more:

