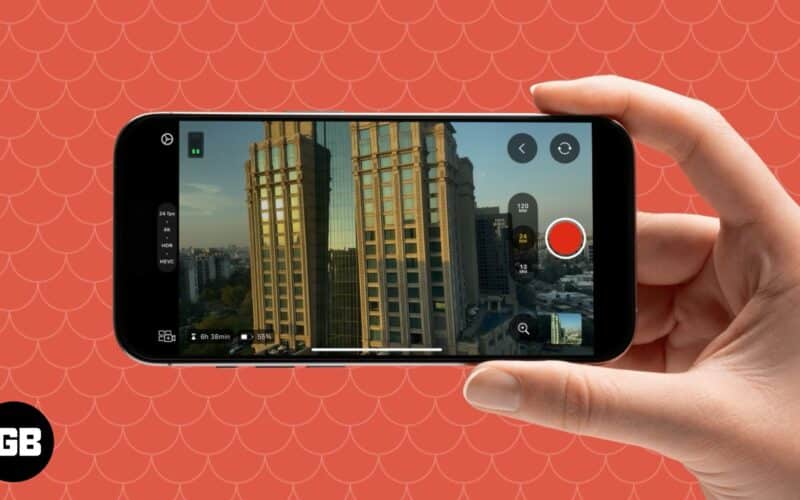
iPhone power users have long criticized Apple for not allowing them to shoot in manual mode. So, in 2024, Apple finally addressed the criticism by launching the Final Cut Camera app. With Final Cut Camera, you get complete control over most of the settings while shooting videos on your iPhone, which makes it a must-have for content creators, filmmakers, and professionals. Keep reading to learn more about the Final Cut Camera app on an iPhone, including how to use it.
What is Final Cut Camera app?
Final Cut Camera is a standalone camera app by Apple that unlocks a range of pro video camera features on your iPhone. It lets you manually adjust key camera settings such as ISO, exposure, shutter speed, white balance, and focus, allowing greater creative control over your footage. This makes it an excellent tool for those who want to shoot professional-quality videos without relying solely on automatic settings.
Final Cut Camera also seamlessly integrates with Final Cut Pro for iPads. This means you can wirelessly connect your iPhone to an iPad running Final Cut Pro and control your camera settings from it. Additionally, you can monitor live recordings and make real-time adjustments, streamlining your workflow and making the editing process more efficient.
Final Cut Camera vs. Default iPhone Camera
The Final Cut Camera and the default iPhone Camera differ in more ways than one. The table below lists down all the differences.
| Feature | Final Cut Camera | Default Camera App |
| Manual controls | Yes – Adjust ISO, exposure, shutter speed, white balance, and focus manually | Limited – Mostly automatic with some control over exposure and focus |
| Shoot photos | No – Can only record videos on this app | Yes – Can shoot photos as well |
| Multicam support | Yes – Supports live preview and multi-cam recording integration with Final Cut Pro for iPad | No – Single-camera recording only |
| Audio monitoring | Yes – Real-time audio level monitoring | No – No built-in audio level meters |
| Ease of use | Designed for professionals and requires manual adjustments | User-friendly, automatic settings for quick capture |
| Integration with Final Cut Pro for iPad Integration with Final Cut Pro for iPad | Yes – Seamless integration for professional editing workflow | No direct integration with Final Cut Pro |
Key elements of the Final Cut Camera app
You can download the Final Cut Camera app from the App Store for free. Once downloaded, follow the on-screen instructions to grant the app necessary permissions, and you are all set. Here’s an overview of what the app looks like and what it offers.
User interface
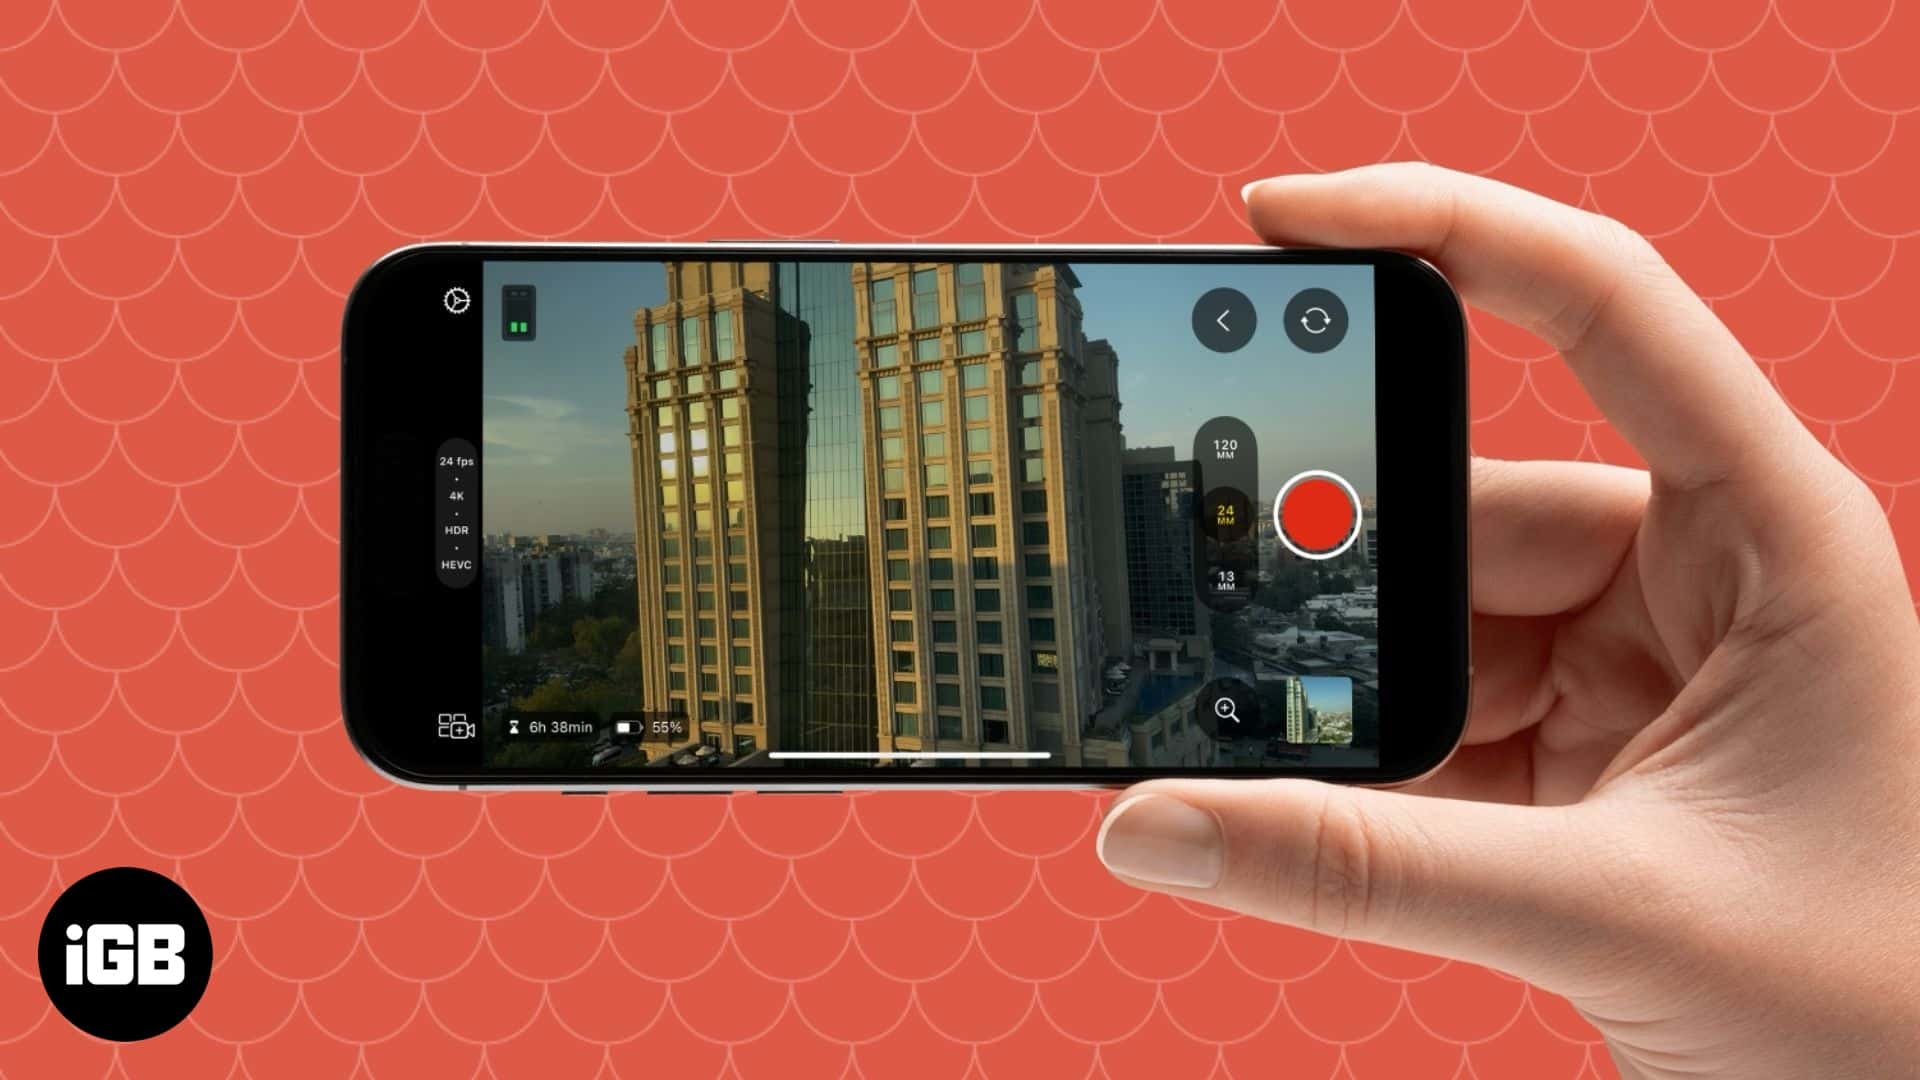
When you open the Final Cut Camera app, you are greeted with a standard camera app UI. You get the big red record button at the bottom, and right above it are a bunch of buttons, including those for switching lenses. You can change the video recording settings by tapping the label at the top. Similarly, you can tap the settings button (with a gear icon) in top-right corner for more advanced settings.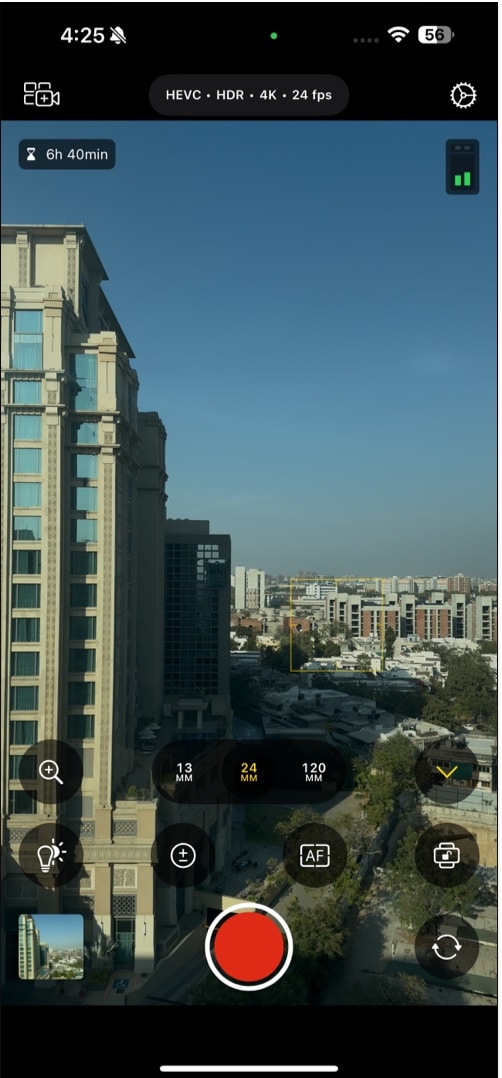
Settings
Tap the pill in the top middle to change the video recording settings. Here, you can adjust individual settings, such as the codec, video format, resolution, and frames, based on your preference.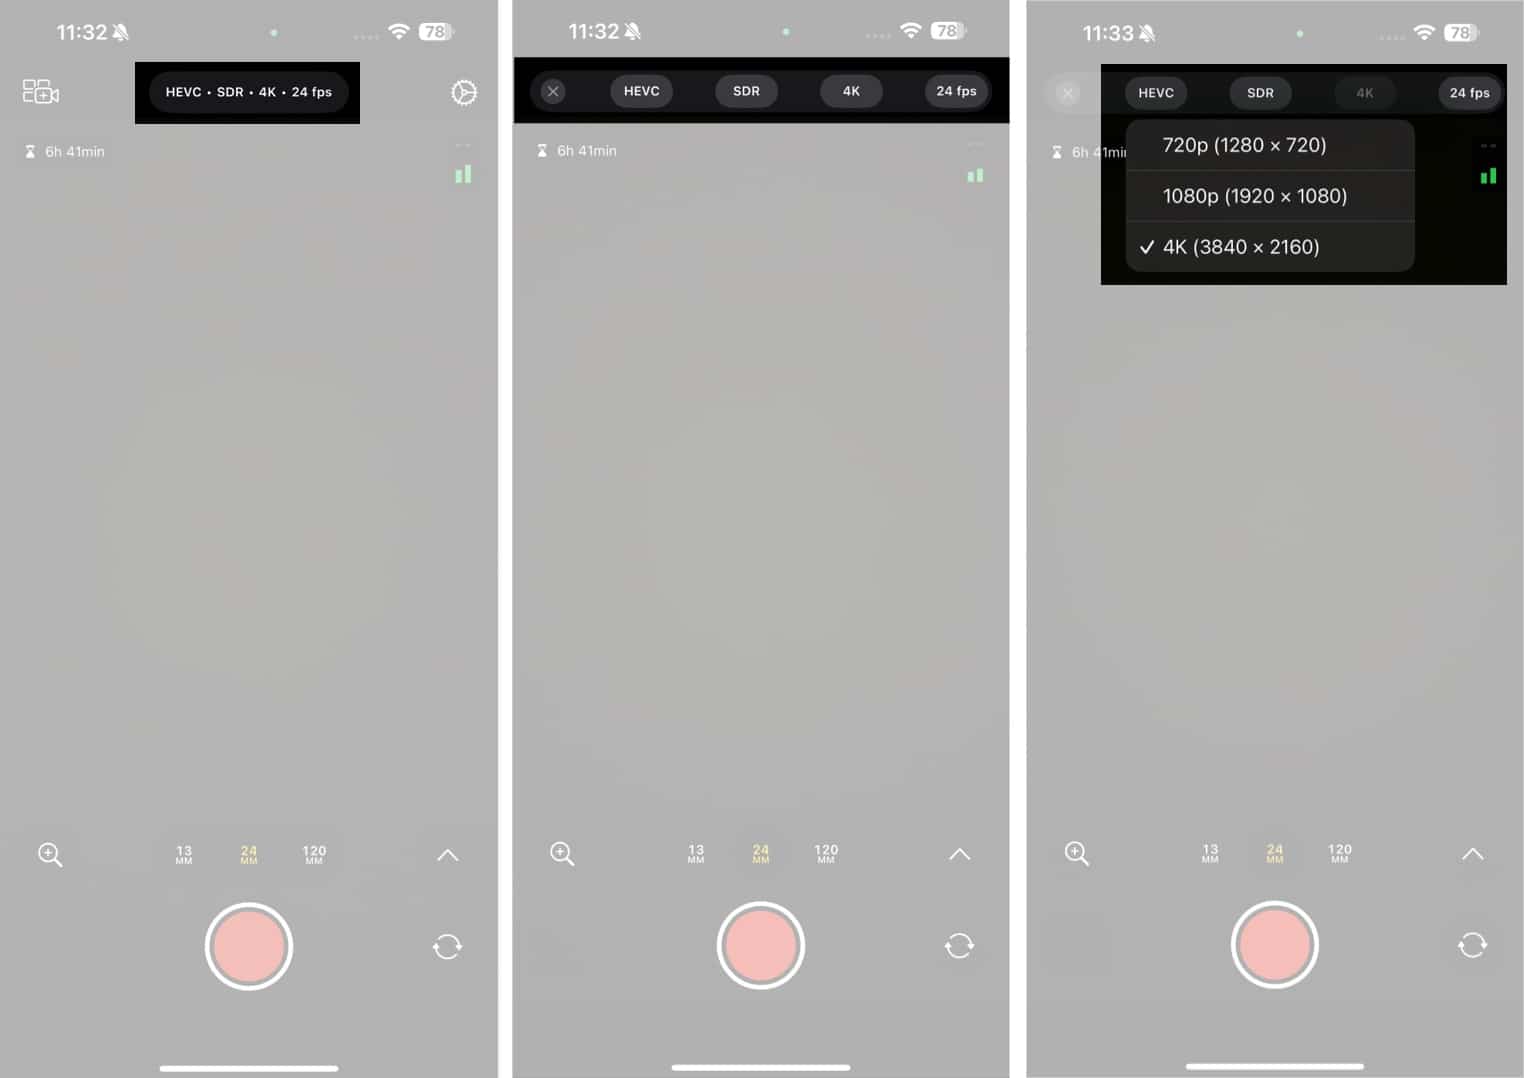
For more advanced settings, tap the settings icon in the top-right corner. Even here, you can use the video recording settings, and alongside, you can enable stabilization, change the video aspect ratio, add a Grid Overlay or Level indicator, change the audio recording source, and also enable Overexposure Indicator and Focus Peaking in the viewfinder.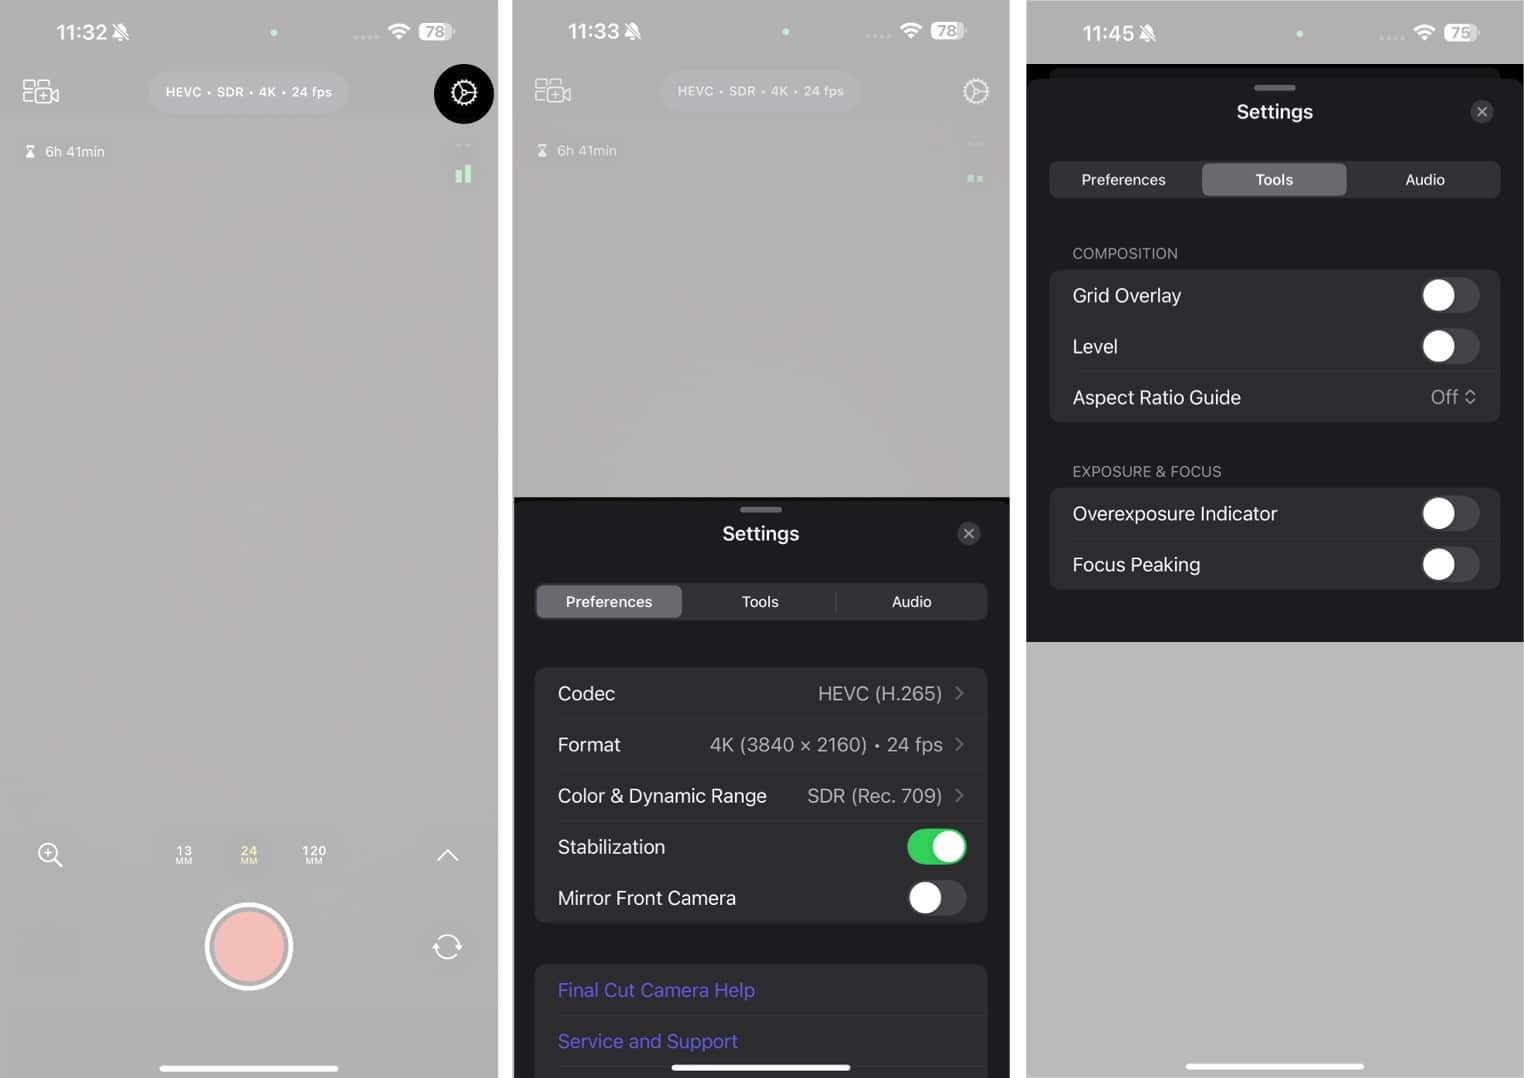
You can also enable LUT preview under Settings → Preferences → Color & Dynamic Range → Log and toggle on Preview with LUT. This allows you to preview your Log footage in SDR or HDR format while shooting, allowing you to understand the colors on the device itself.
With the latest update, Final Cut Camera also lets you shoot in 4k 120fps on the iPhone 16 Pro series.
Lenses
Unlike the default iPhone Camera app, the lens switches here are labeled with their focal lengths, such as 13mm, 24mm, and so on. Generally, 24-26mm is your standard 1x camera, 13-15mm is your wide-angle 0.5x camera, and anything beyond 50mm is your telephoto zoom camera.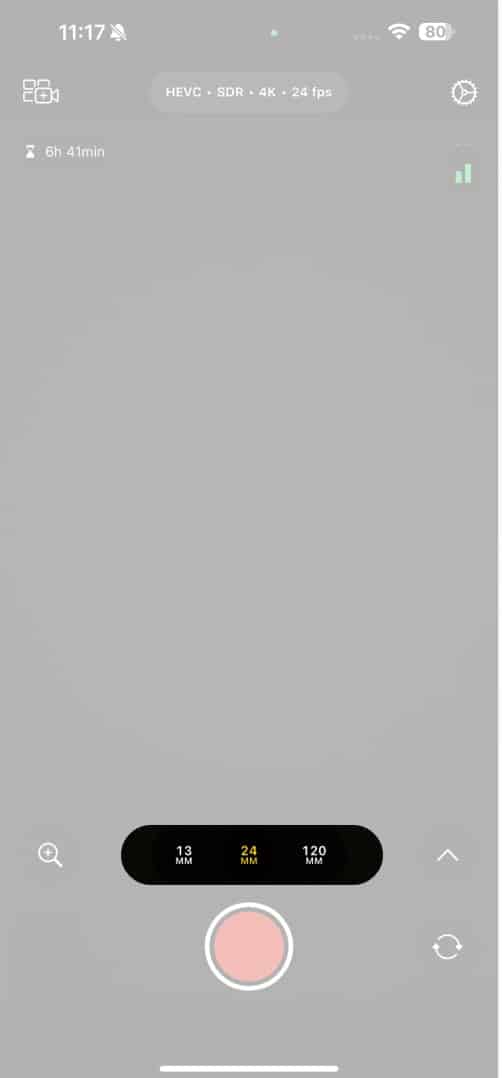
Manual settings
Now, for the main part: Final Cut Camera’s manual settings. To access the manual settings menu, swipe up on the screen or tap the up arrow in the bottom-right corner.
For white balance, tap the bulb icon and swipe left or right on the menu to adjust it according to your preference.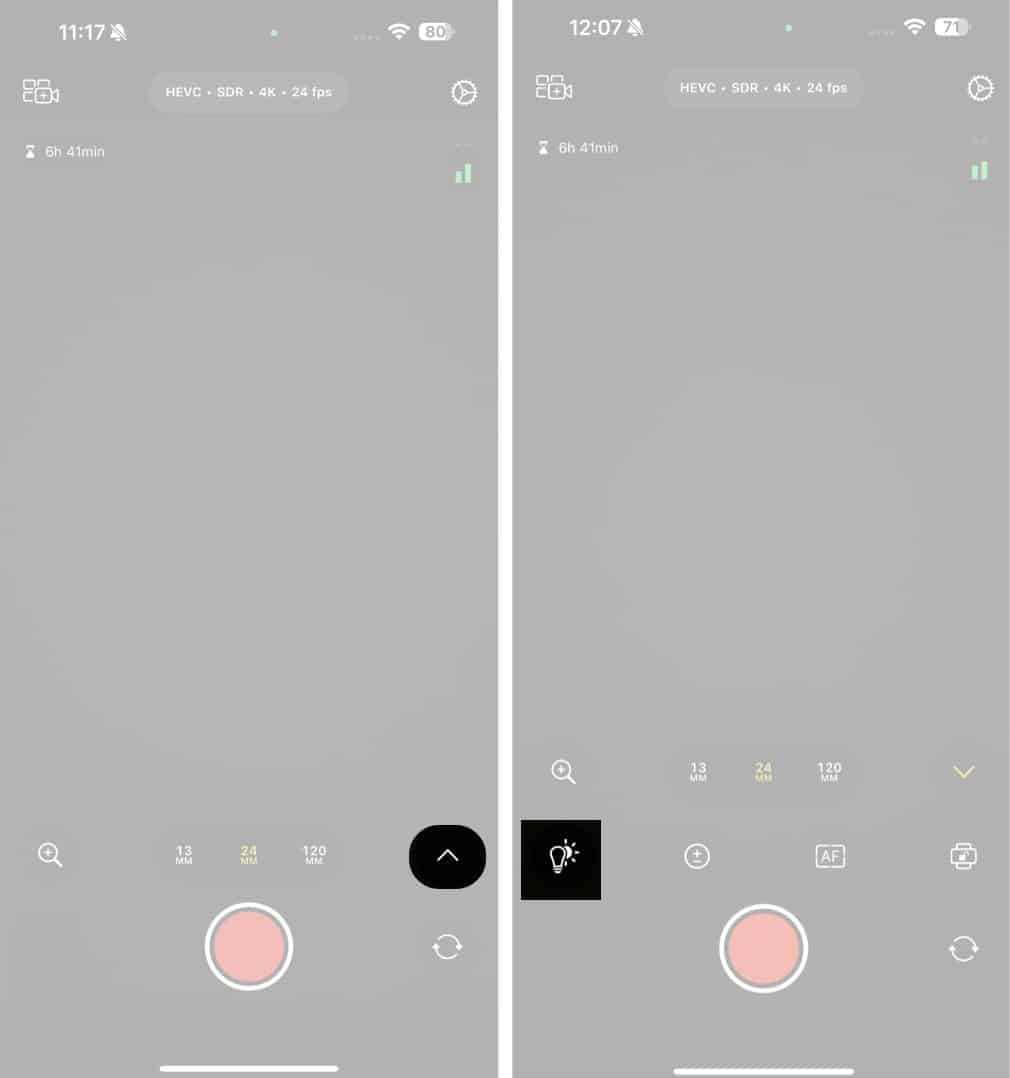
You can also tap the Auto button on the right to bring up a menu with some white balance presets.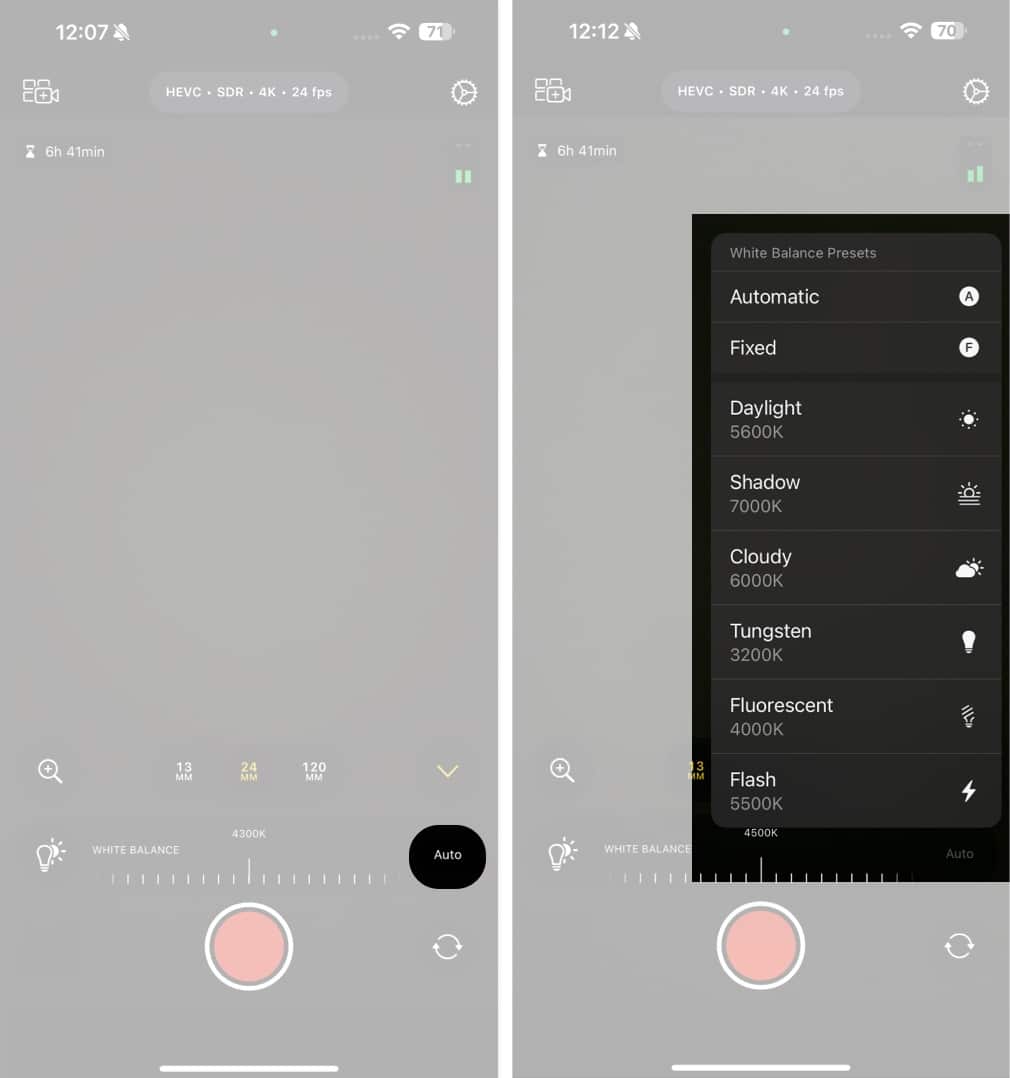
For exposure, tap the icon with the +/- sign and swipe along to change it. On the same screen, tap the Auto button on the right to bring up Shutter Speed and ISO settings. Tap on either to set them manually.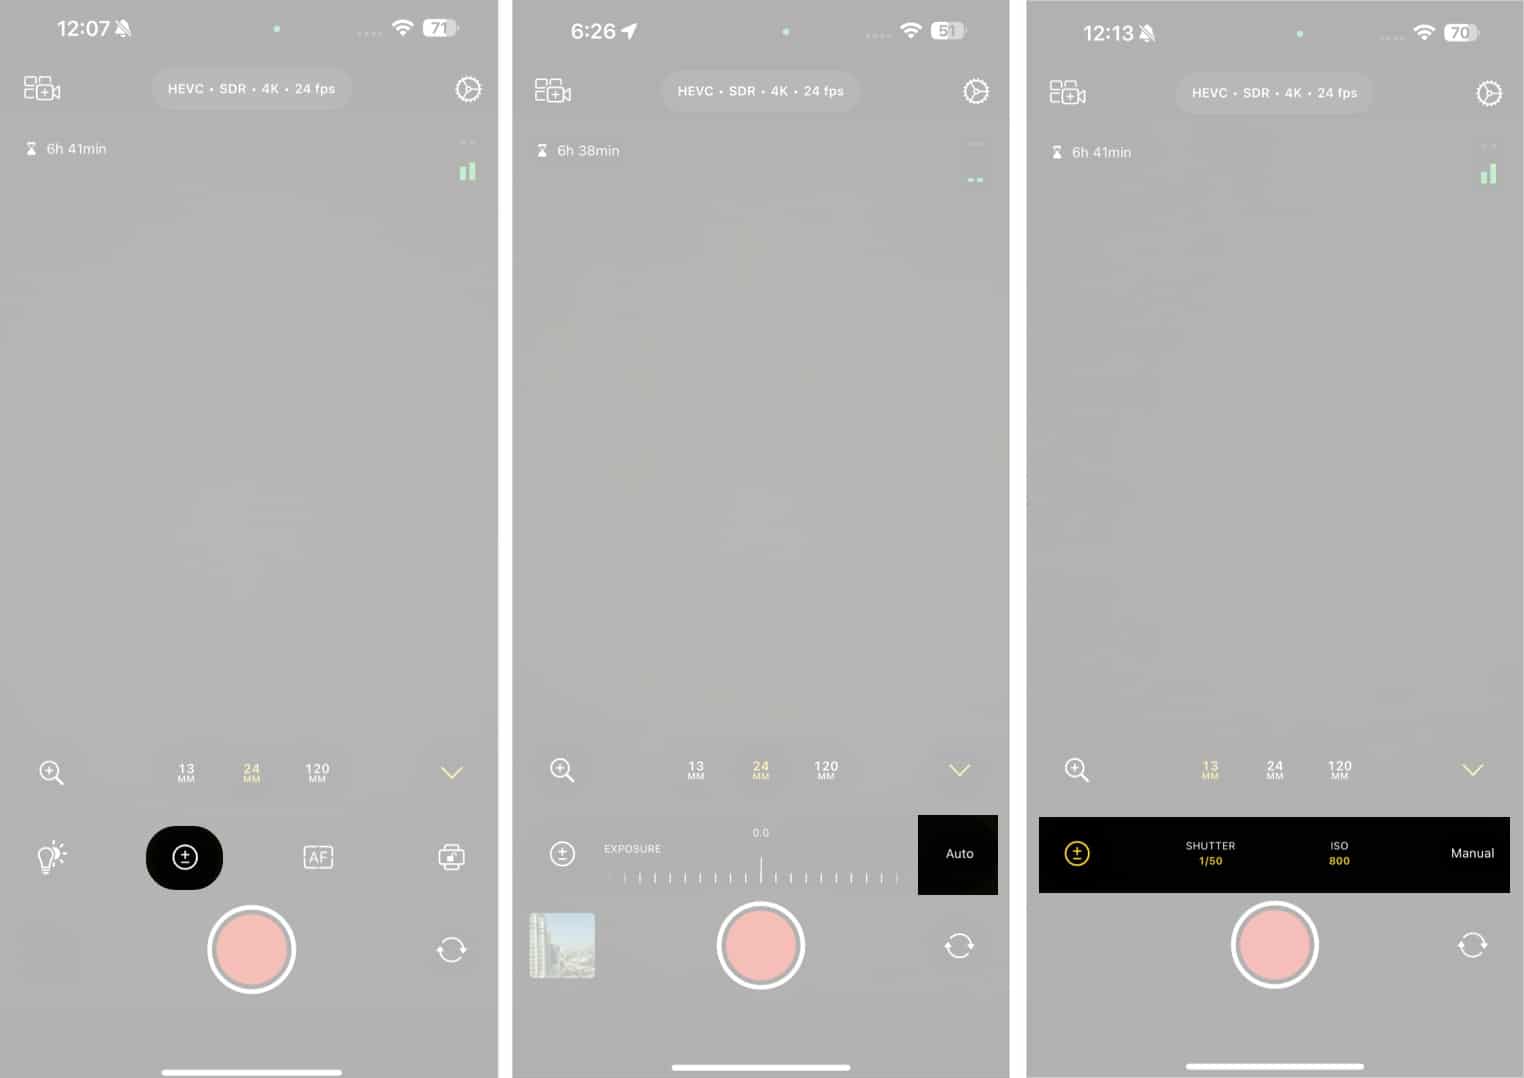
Lastly, the orientation button allows you to set your camera’s orientation to landscape (left or right) and portrait.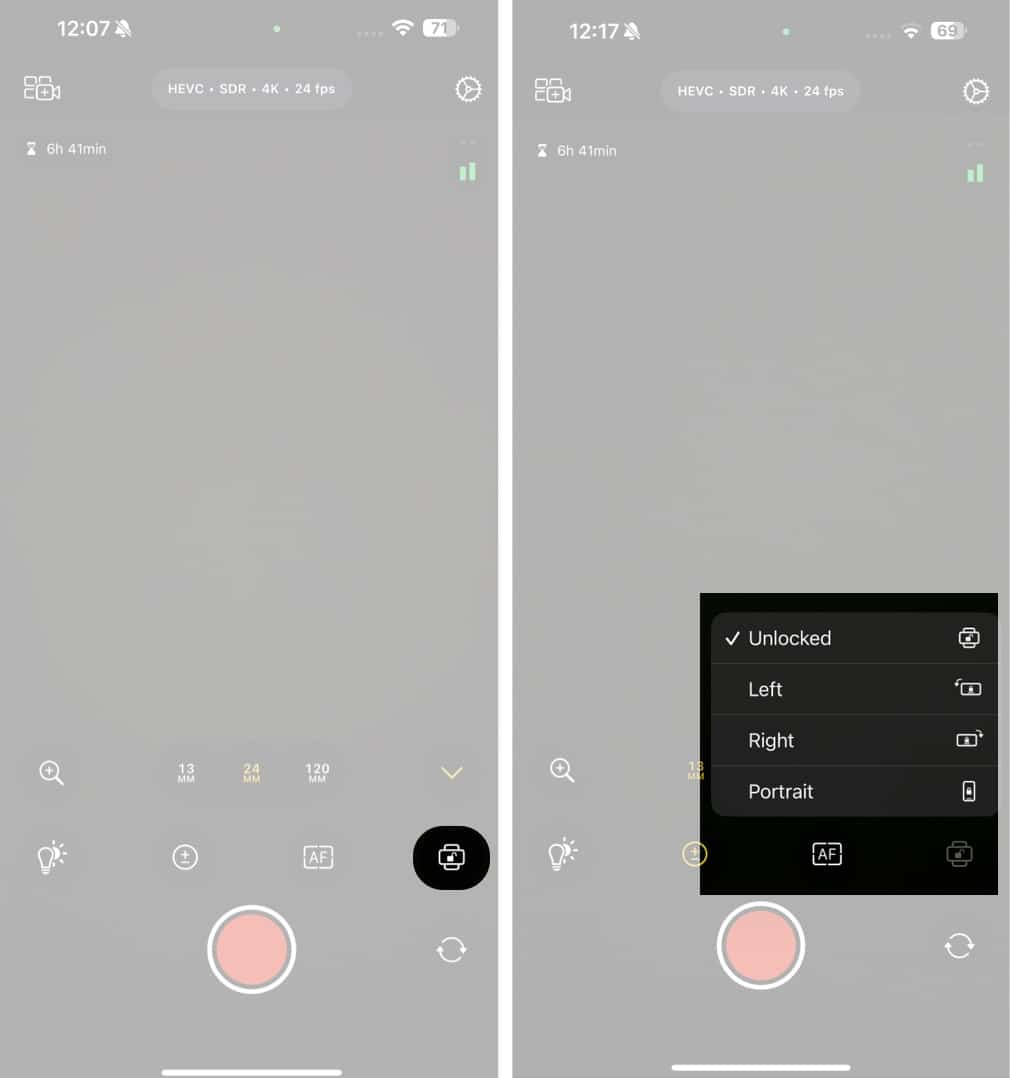
Zoom
You can zoom in and out while shooting videos using the magnifying glass icon on the bottom-left screen. One thing to note is that when you zoom in, it will only zoom in on that particular lens and won’t switch to the zoom lens or ultra-wide automatically as it does in the default Camera app.
Live Multicam
You can use the Live Multicam feature to record videos from up to four different Apple devices simultaneously. To do this, tap the multicam icon in the top-left corner of the screen. Keep in mind that you should have an iPad running the Final Cut Pro app to use this feature. Also, all the recording devices should be nearby and logged into the same Apple Account with the Final Cut Camera app open.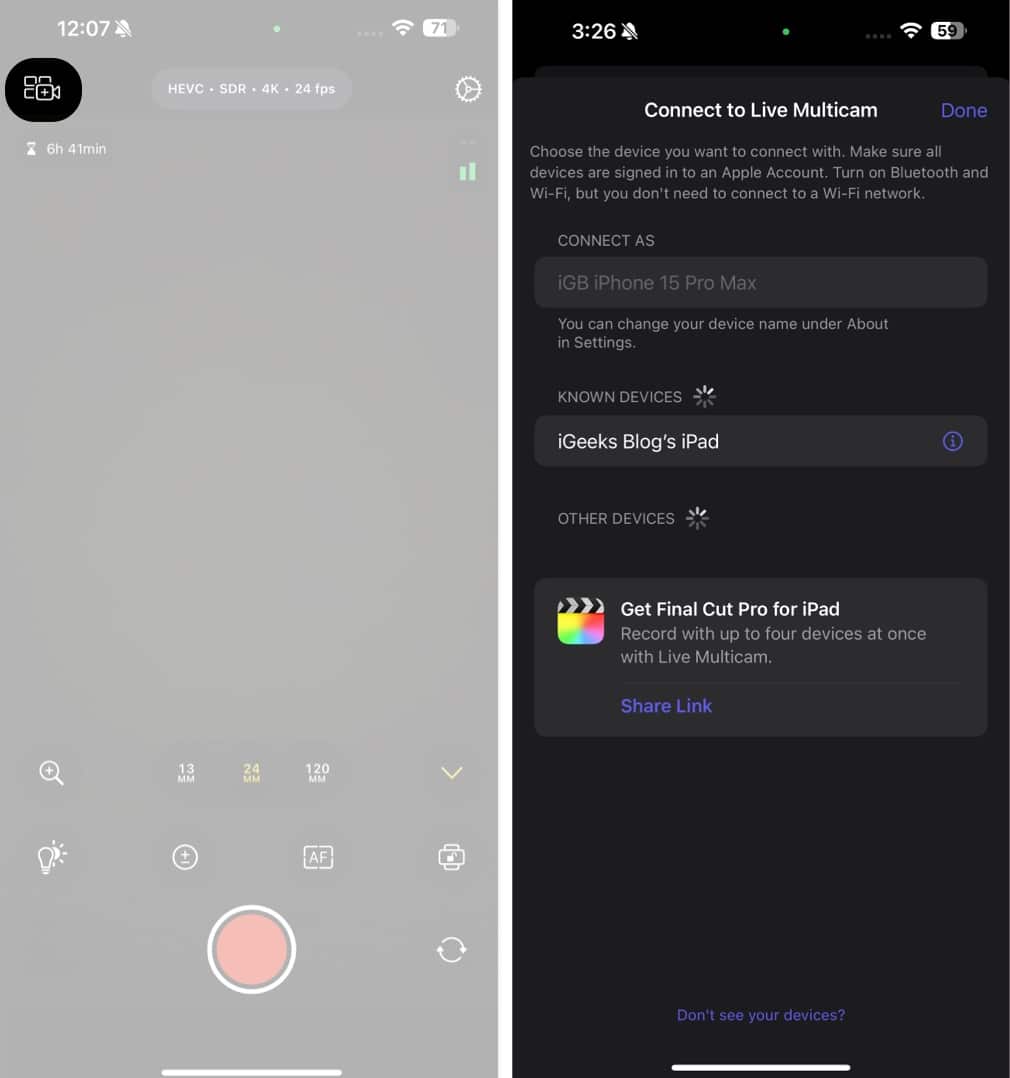
How to record and save with Final Cut Camera on iPhone
Now that you know all the settings in Final Cut Camera, go ahead and adjust all the manual settings according to your preference. Once done, tap the record button at the bottom to record the video. Tap the same button to stop recording.
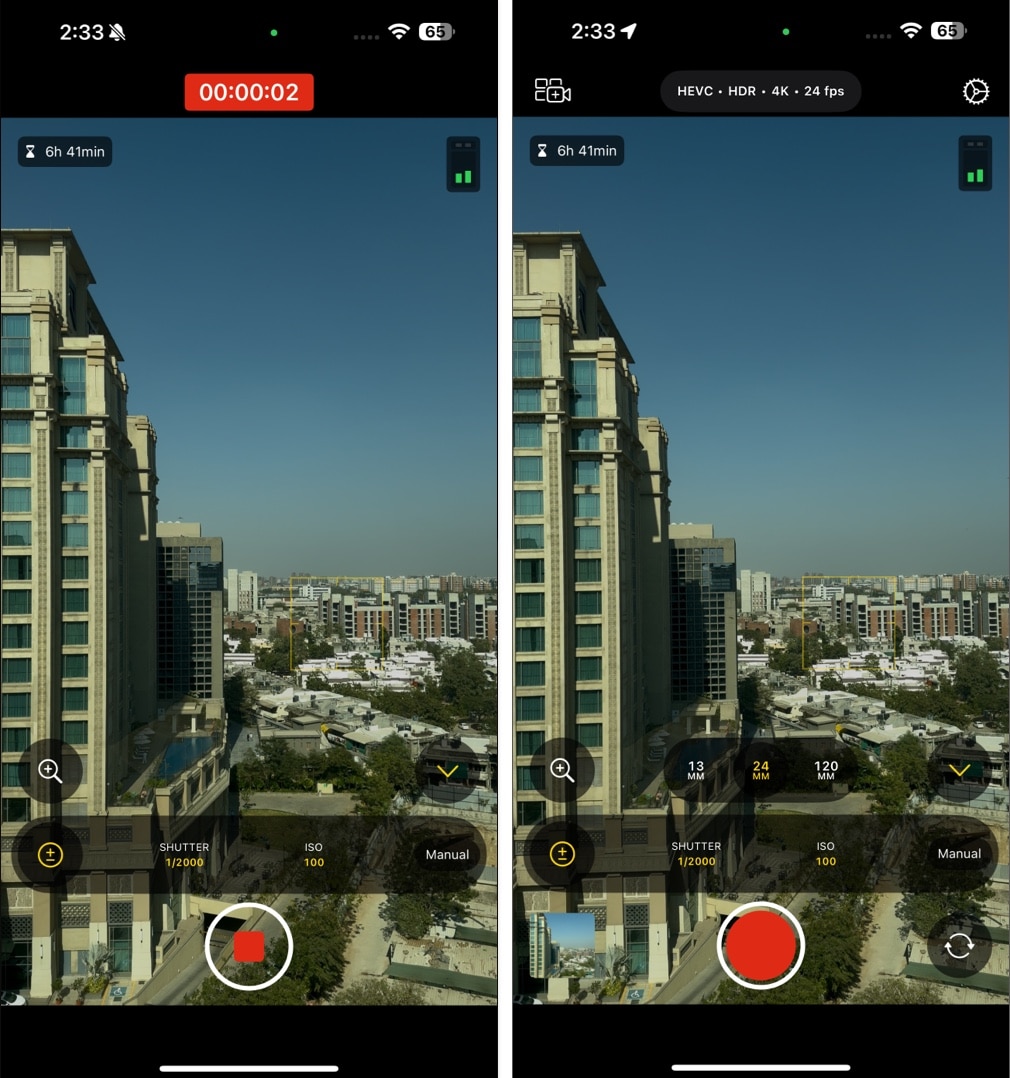
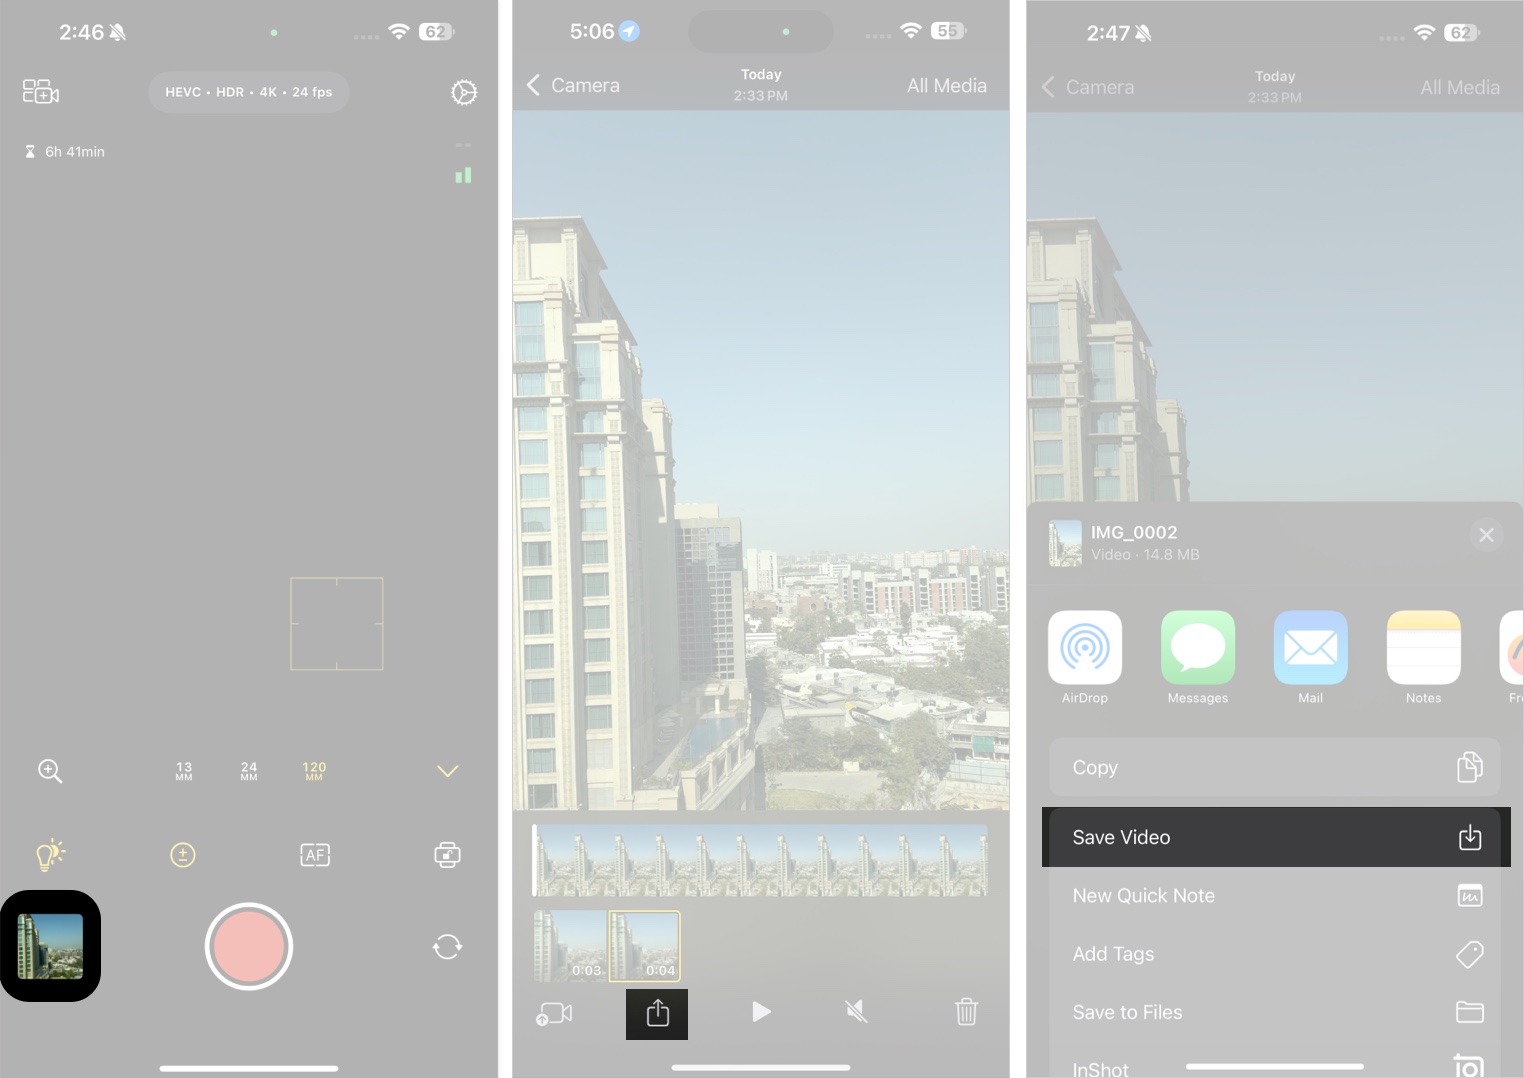
Remember that once you end the recording, it is not automatically saved to your photos app. Instead, you will have to do it manually, like this.
- Tap the preview thumbnail in the bottom-left corner of the screen.
- You will see all the videos you have recorded with the Final Cut Camera app.
- Tap the video you want to save, hit the share icon at the bottom, and then tap Save Video to save it in the Photos app.
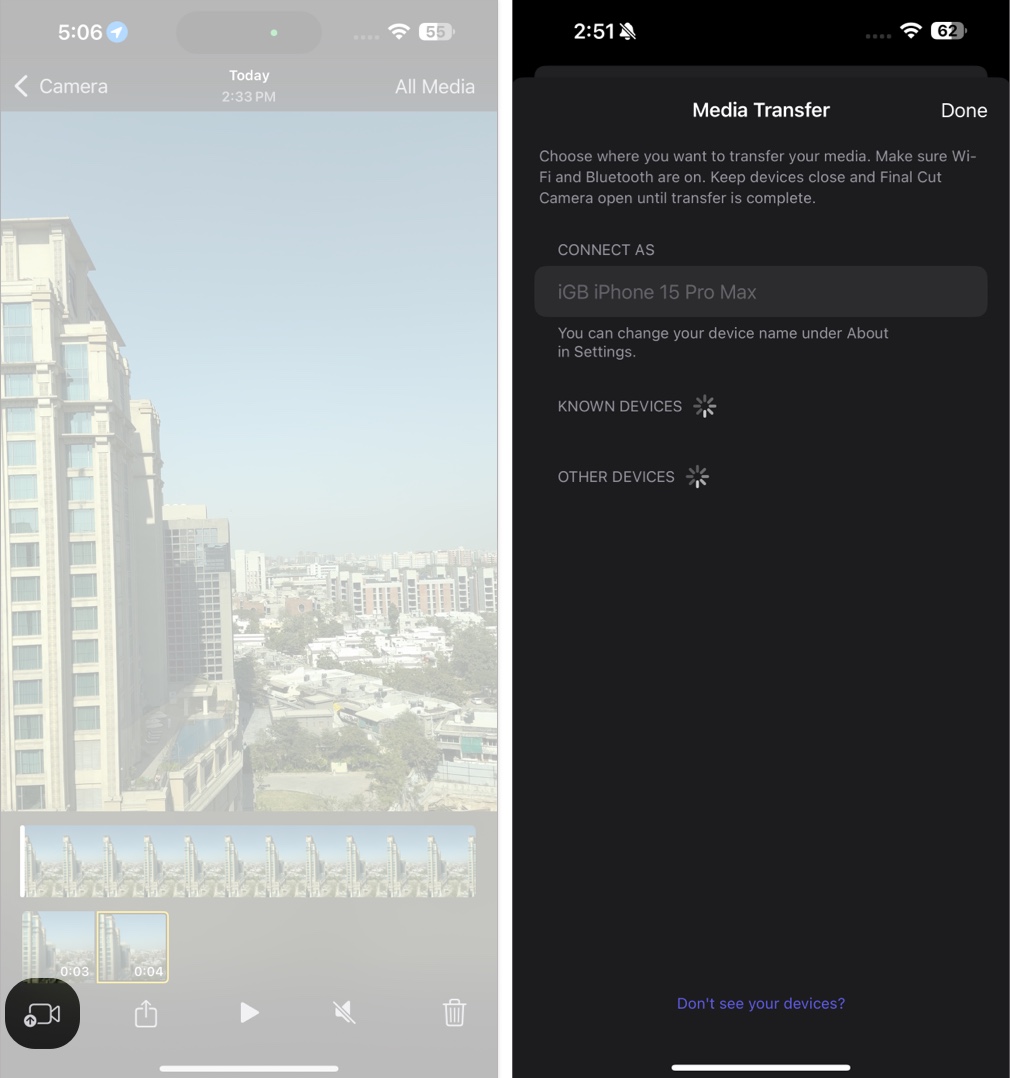
- You can also transfer the video directly to your connected devices by tapping the media transfer button if you are connected to an iPad running the Final Cut Pro app.
Tips for getting the most out of Final Cut Camera
Here are some tips to shoot the best quality videos with Final Cut Camera.
- Use suitable camera gear: Using an appropriate camera gear can significantly boost your video recordings. If you are shooting a stationary object or an interview, we recommend the SENSYNE 62″ Phone Tripod to get jitter-free videos. If you shoot a lot of action, like sports and adventure, getting a gimbal like the DJI Osmo Mobile SE will give you super stable videos.
- Experiment before shooting: Before you start shooting, experiment with different frame rates and white balance. Record a sample and check if it feels okay, only then proceed with your shot.
- Use Log and Apple ProRes: The Final Cut Camera allows you to shoot in the Apple ProRes codec and the Log format. Use it if you are shooting high-production videos.
Record videos on your iPhone with more control
Final Cut Camera is an excellent tool for professionals who want to get the best out of their iPhone camera system in terms of videos. Even if you are an amateur filmmaker, this is still a great app for learning manual video controls. As long as you know what you are doing with the settings, you can get cinema-level videos from your iPhone using this app.
You might also like:

