With iOS 13.3 or later, Apple includes new Communication Limits to its Screen Time options, which let parents restrict whom their kids can call or text. The primary reason behind it is to discourage kids from excessive smartphone usage and increase productivity. Follow the steps below to set up communication limit for your child.
- How to Set Up Screen Time on Child’s iPhone or iPad
- How to Set Communication Limits for Child on iPhone and iPad
Before you start to set the Communication Limits, it is essential to first turn on Screen Time directly on your kid’s device. You can also set it up via Family Sharing.
How to Set Up Screen Time on Child’s iPhone or iPad
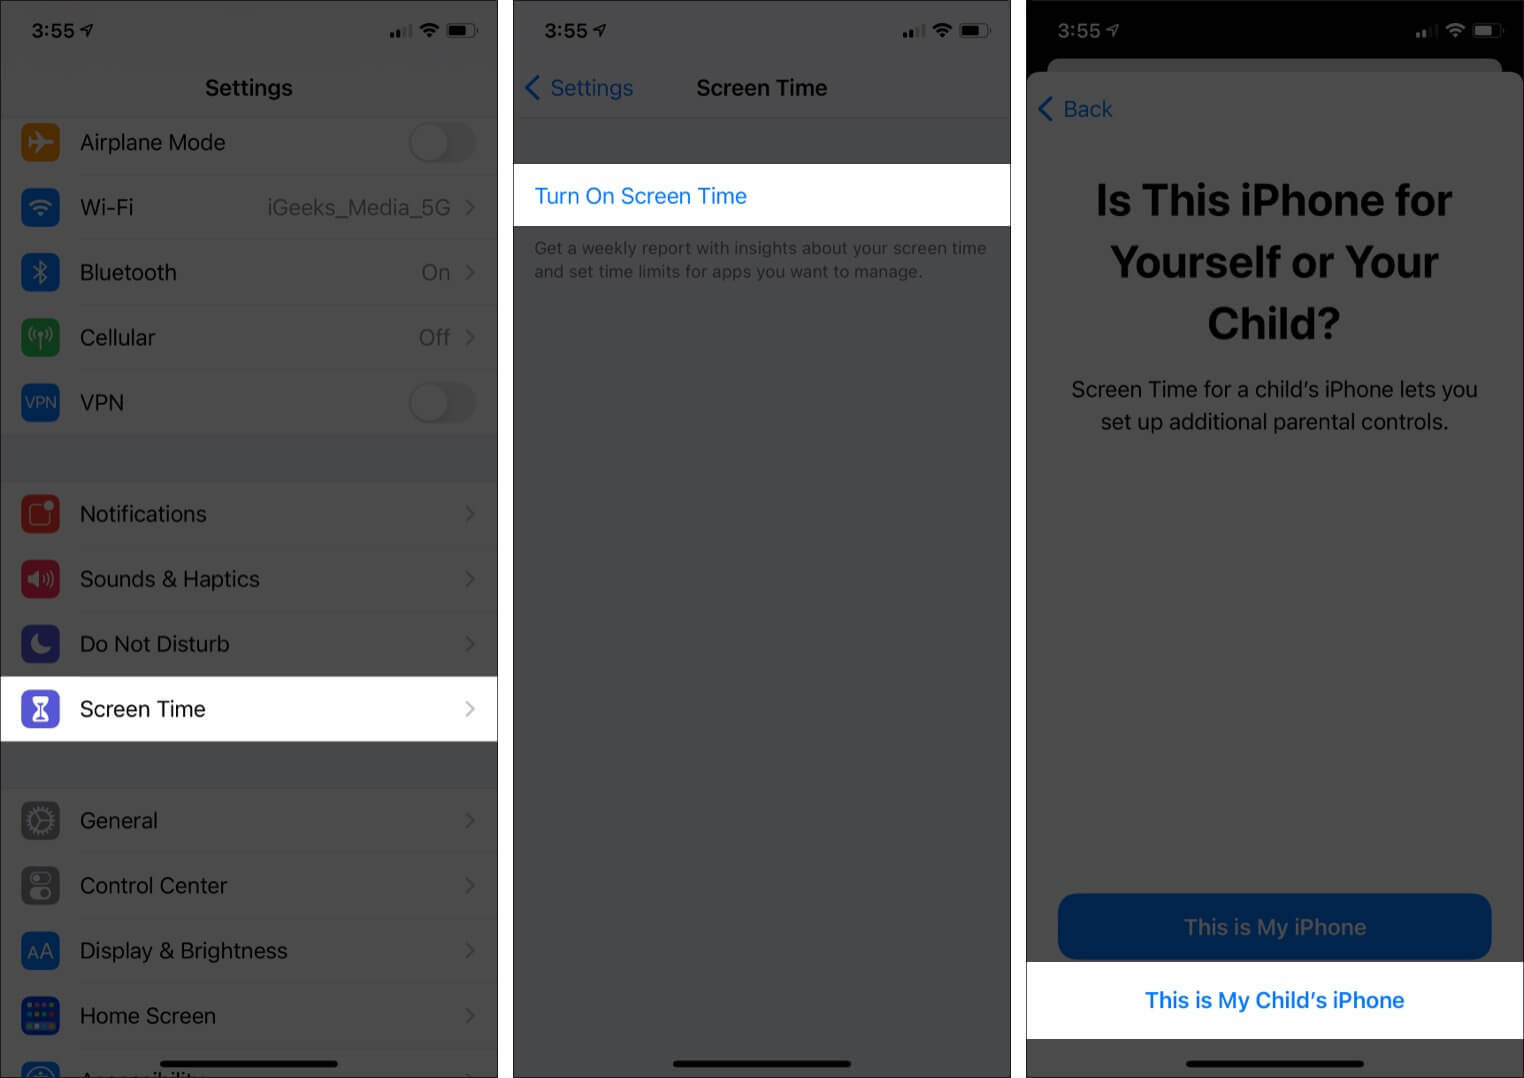
- Open the Settings app on your kid’s iPhone.
- Tap on Turn On Screen Time → Continue.
- Select This is My Child’s iPhone.
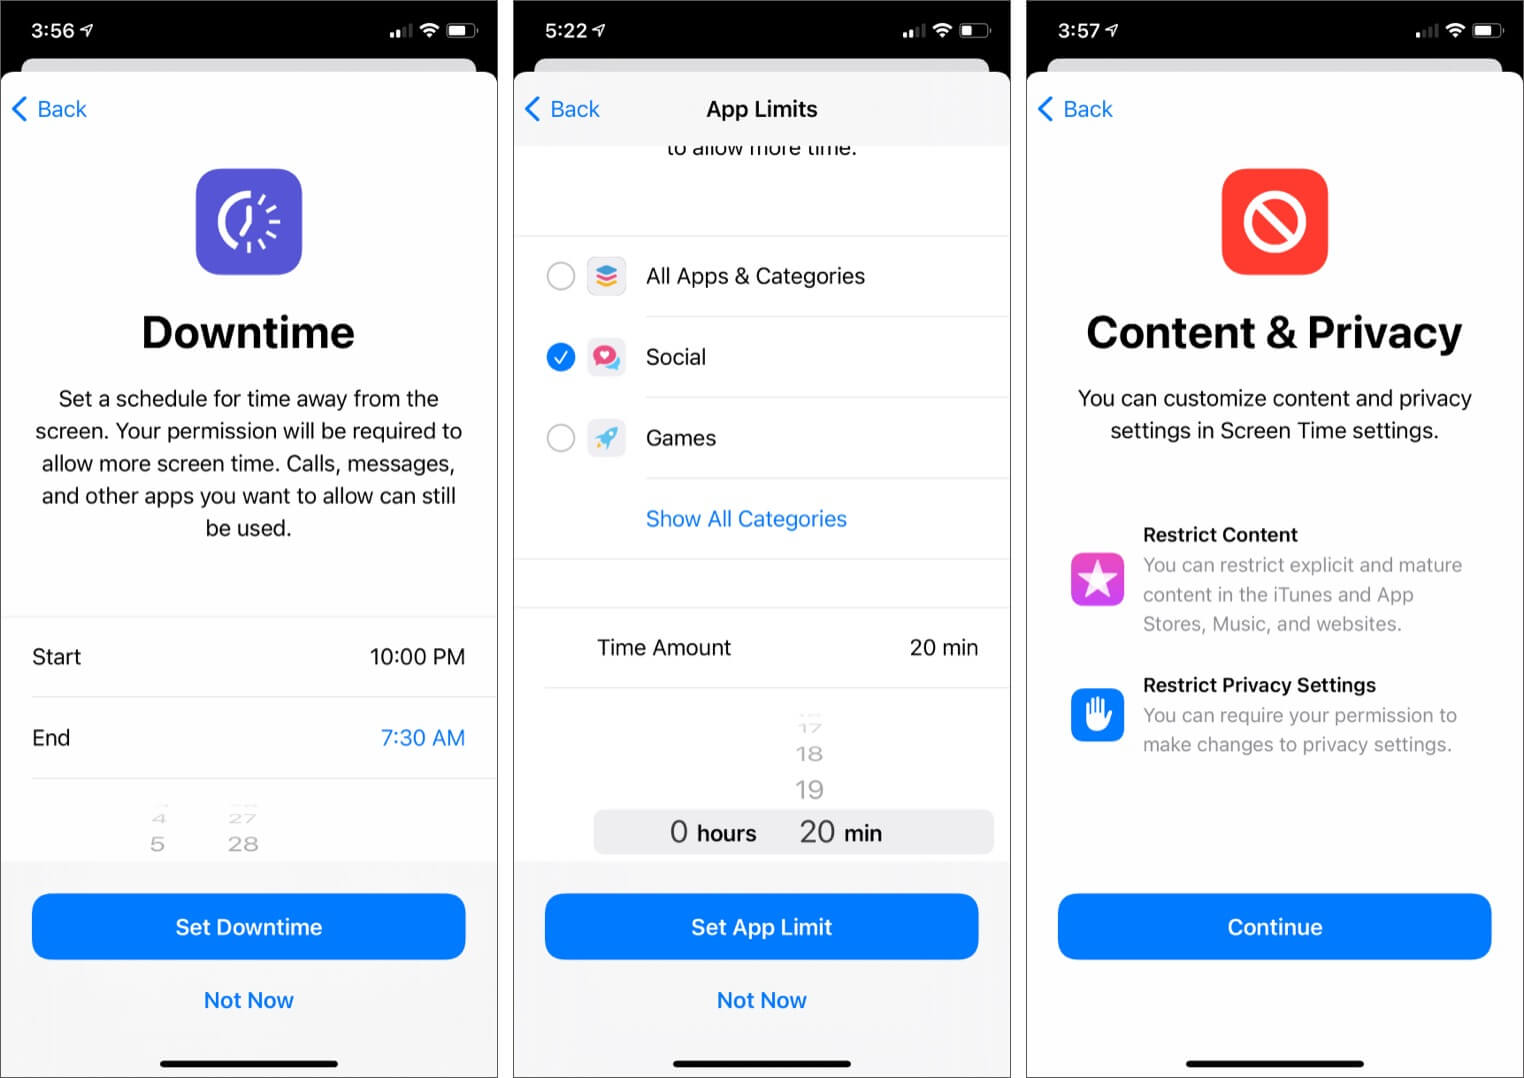
- On the next screen, you will see Downtime. To set this, tap on Start and choose a time. Do the same by tapping on End and select a time. Next, tap on Set Downtime.
(If you set up this, your kid will not be able to use the apps during the time set by you. For example, you can set 10 PM to 7:30 AM when it is their sleep time. However, calls, messages, and any apps you allow (like educational or bedtime stories apps) can be used even during DownTime.) - On the App Limits screen, Tap on one of the categories, scroll down and tap on Set next to Time Amount. Choose a time and finally tap on Set App Limit.
(You can choose which apps from specific categories will become inaccessible once the time limit is reached. For example, if you set a time limit of 20 minutes for social media apps, then after 20 minutes, all apps like Facebook, Instagram, Snapchat, etc. will be locked, and the kid can not use them.) - On the Content & Privacy screen, tap on Continue.
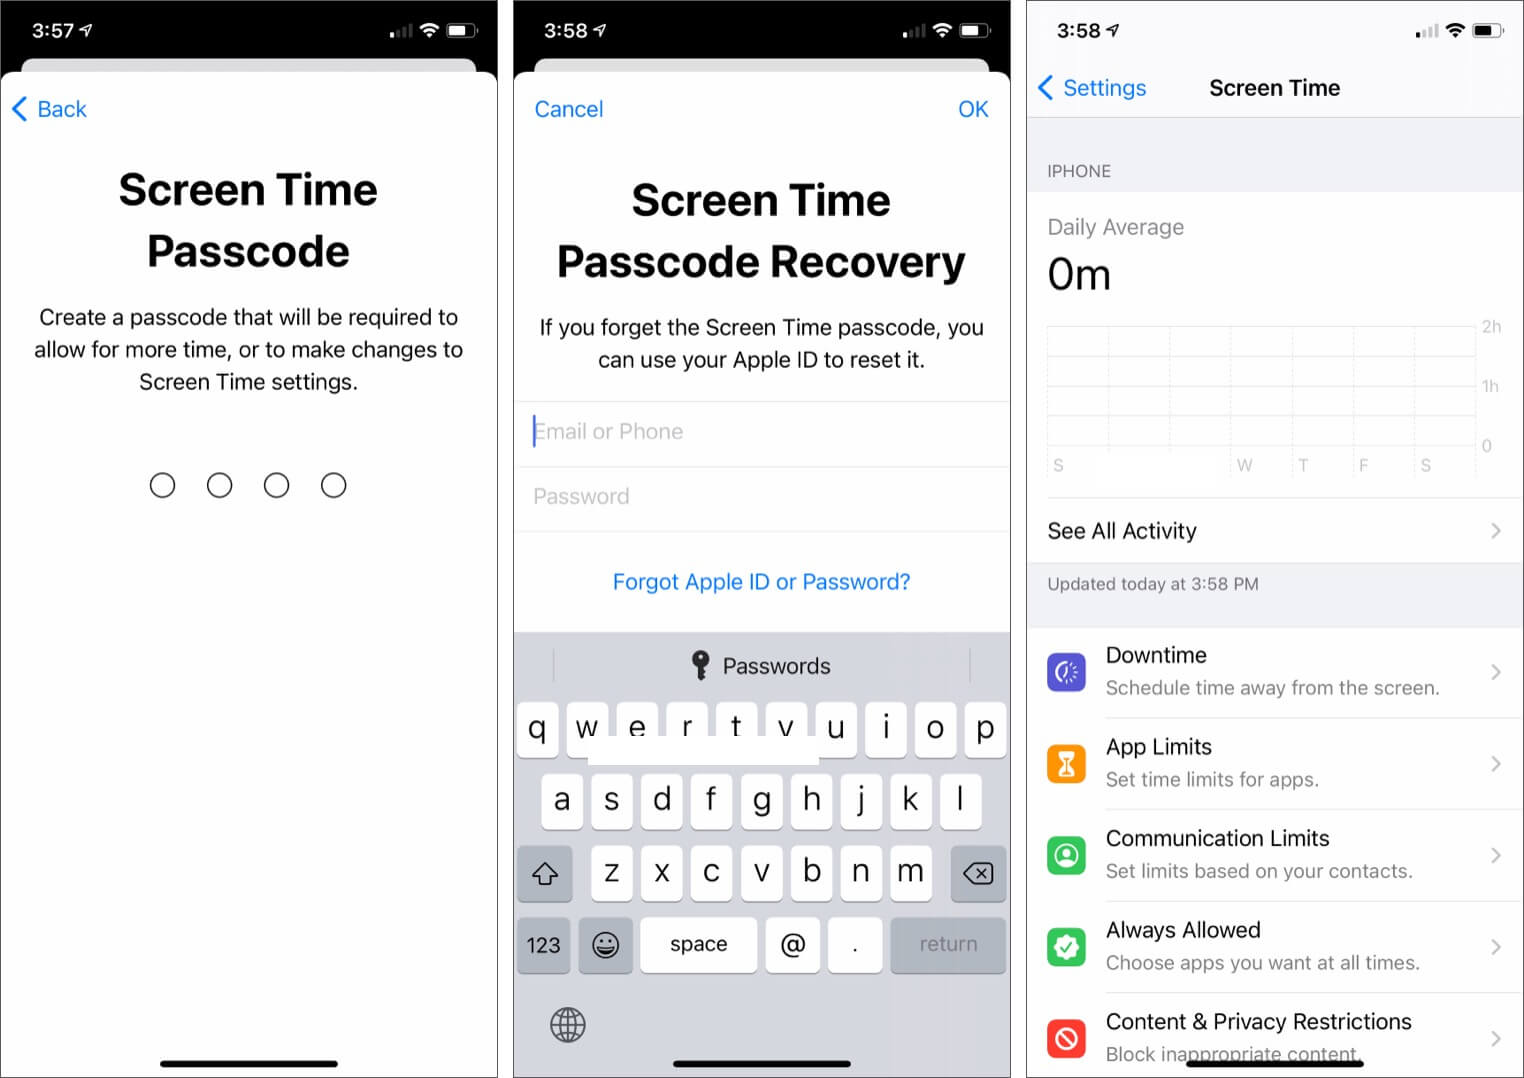
- Enter a Screen Time Passcode. Make sure it is something different than the child’s iPhone passcode.
- Enter your Apple ID and password. This will allow you to reset the Screen Time passcode in case you forget it. If you do not want to do this, tap on Cancel from the top left and then choose Skip from the popup.
That’s it. You have successfully enabled Screen Time on your kid’s iPhone or iPad (see the rightmost image above). Now let us set call and text restrictions!
How to Set Communication Limits for Child on iPhone and iPad
Communication limits are for Phone calls, FaceTime calls, Messages, and iCloud contacts. There are two ways to set communication limits.
- With Allowed Screen Time: The time when your kid is permitted to use Phone, FaceTime, Messages, Contacts, and other apps.
- With Downtime: The period when your kid is restricted from using all apps, except those added inside Screen Time → Always Allowed.
Set Communication Limit During Allowed Screen Time
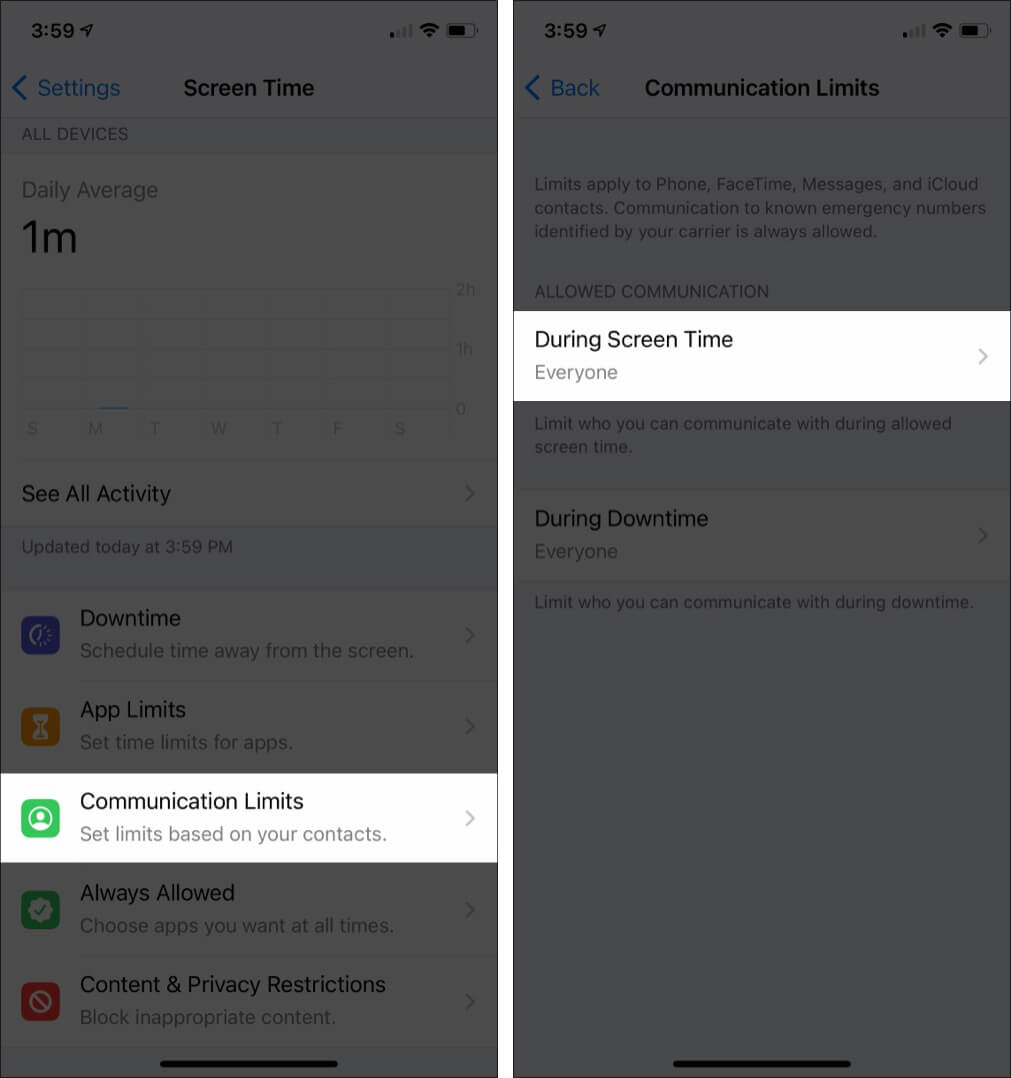
- Open the Settings app, tap on Screen Time, and then tap on Communication Limits.
- Tap on During Screen Time. Enter the Screen Time passcode to proceed, if asked.
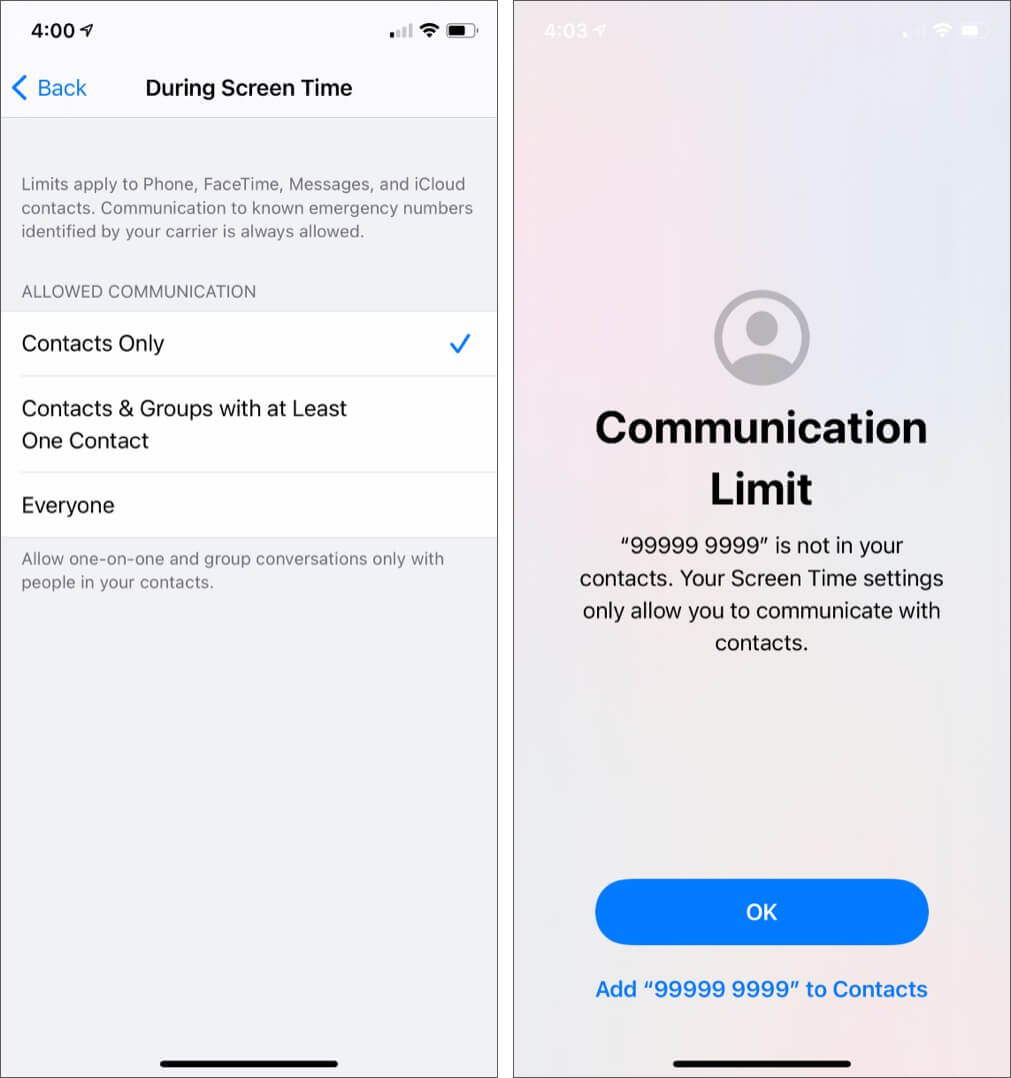
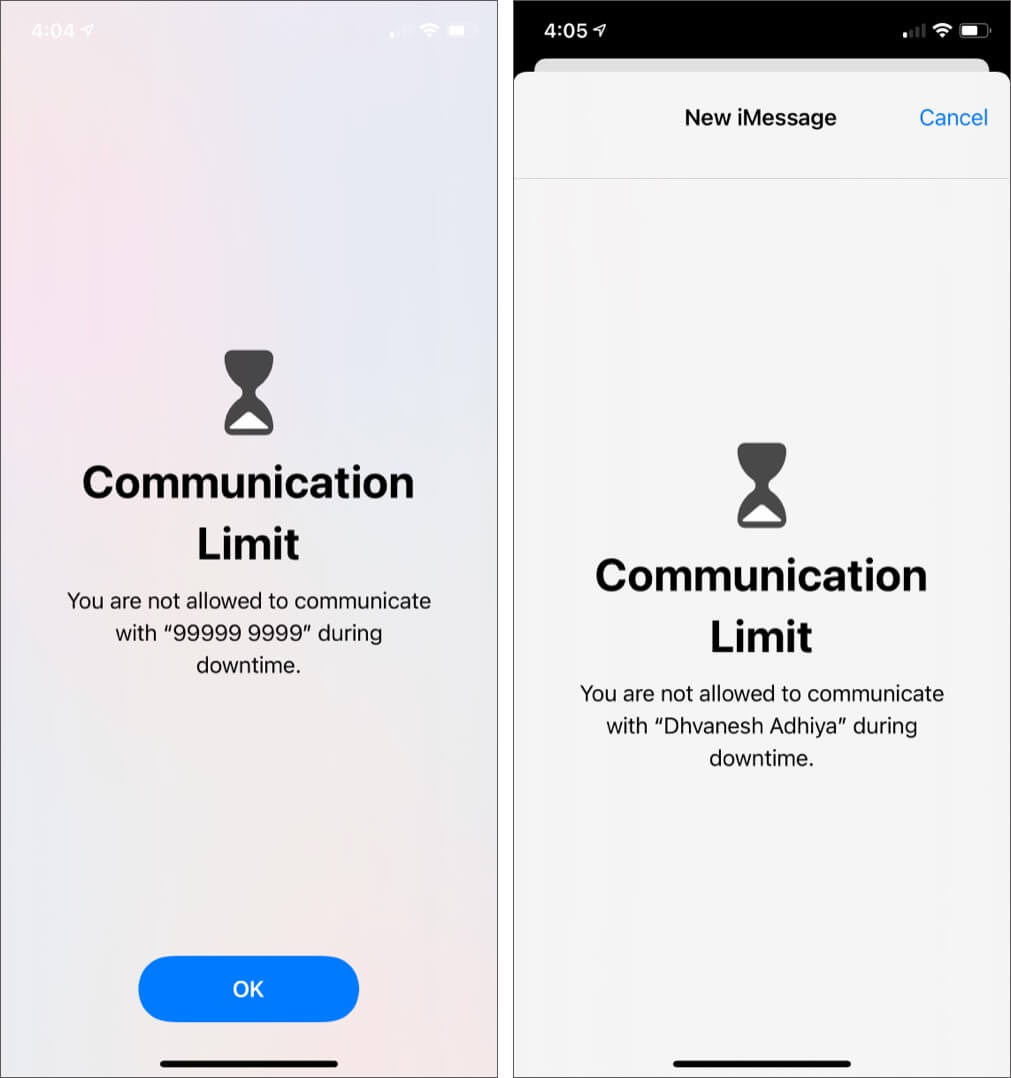
- Tap on Contacts Only. It will allow the kid to communicate only with people added to the contacts. After enabling, open the Phone app and try it yourself by calling any random non-saved number (see the right screenshot below). If you choose Contacts & Groups with at Least One Contact, the child can communicate only with contacts plus in those groups where at least one family member or someone from the iCloud contact is already a part of that group. In contrast, if you choose Everyone, the kid can contact anybody, including unknown numbers, which would defeat the communication limit’s purpose.
- To remove communication limits, open the Settings app → Screen Time → tap on Turn Off Screen time to disable this feature altogether. Or, in step 3 above, choose ‘Everyone.’
Set Communication Limit During Downtime
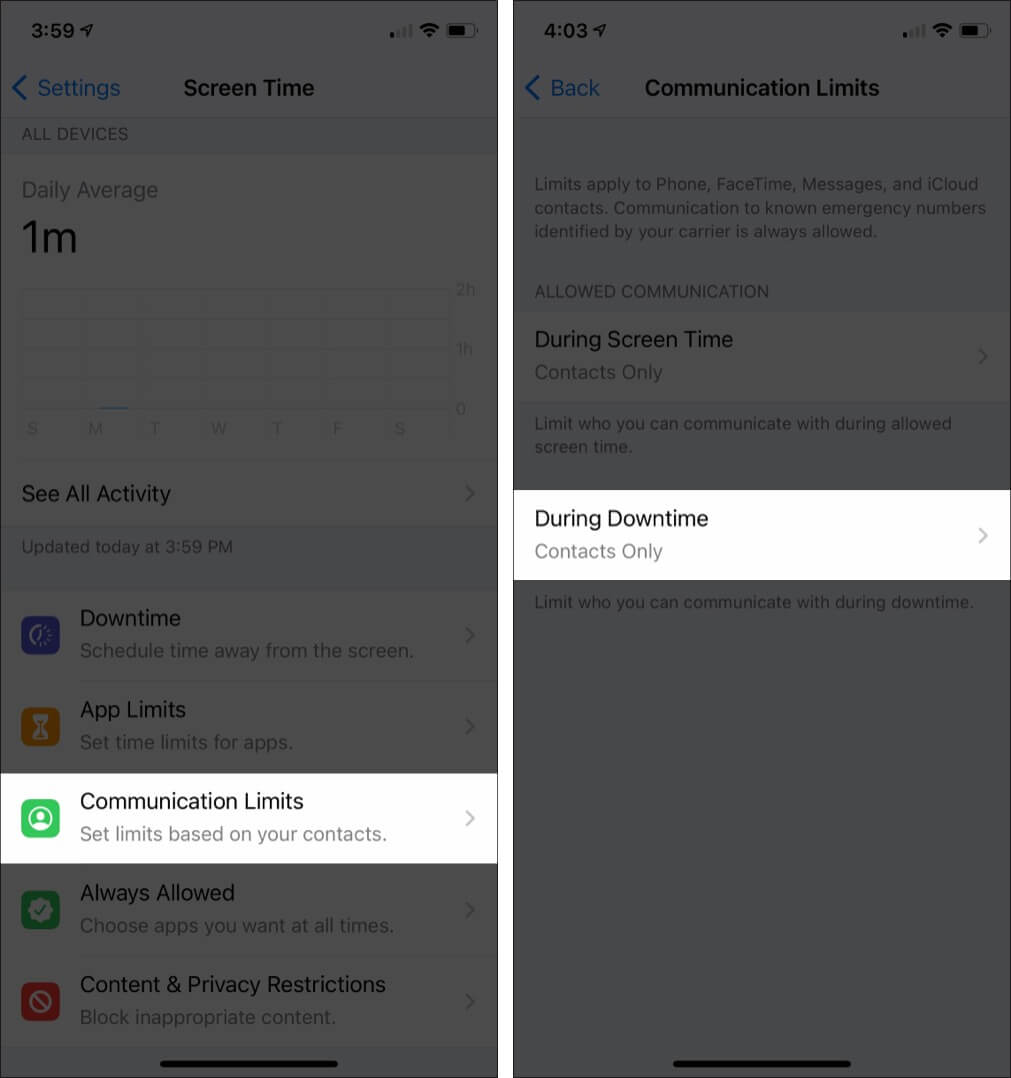
- Inside the Settings app, tap on Screen Time → Communication Limits.
- Tap on During Downtime.
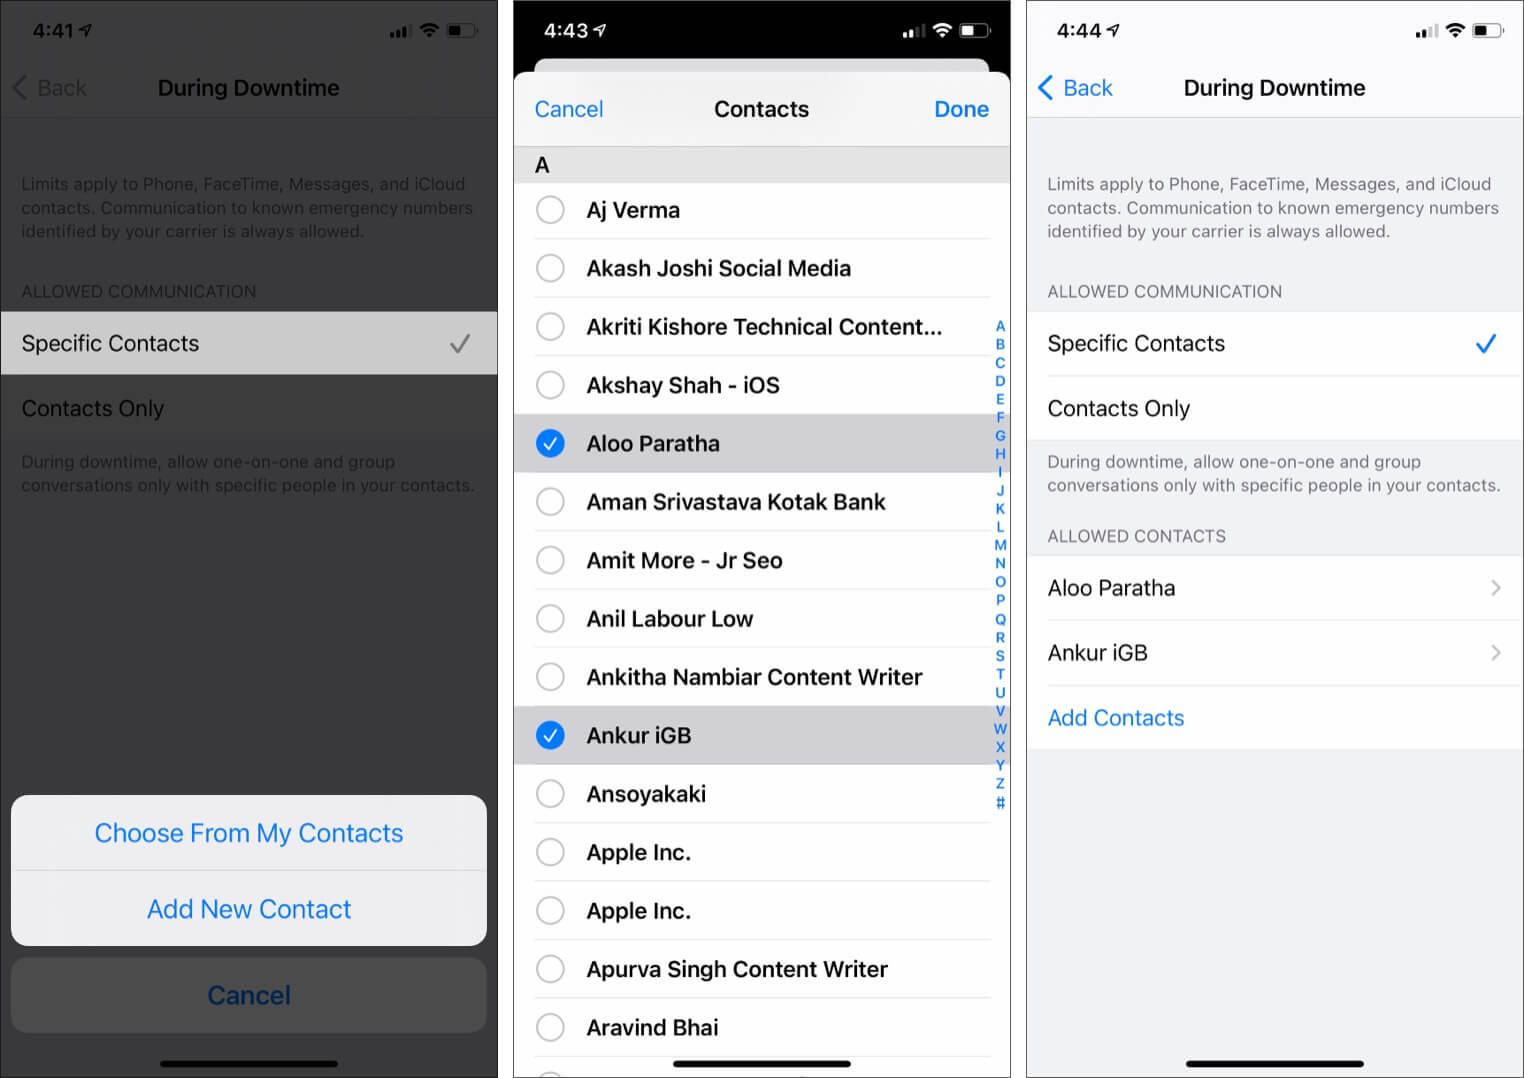
- Tap on Specific Contacts. Now select the persons who can be contacted during Downtime. You may also add a new contact if the person is currently not already saved in contact. Finally, tap on Done. (Whether you see Specific Contacts, Contacts Only, or Everyone depends on what you choose During Allowed Screen Time.)
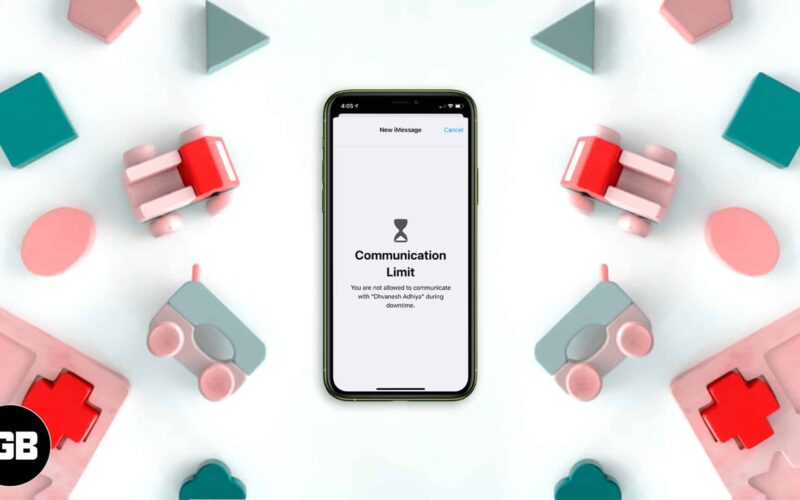
- Now, during Downtime, he/she can only contact the persons you selected using the steps above. If the child tries to call or message somebody else, they will see this:
Further, if you turn off the toggle for Allow Contact Editing, your child won’t be allowed to edit their contacts.
To disable communication limits during Downtime, you can either turn off Screen Time or choose ‘Everyone’ in step 3 above.
Important Notes:
- Irrespective of any of the above settings, the child can always communicate with known emergency numbers.
- Further, once the kid contacts any emergency number, all communication limits (during Screen Time or Downtime) are disabled for the next 24 hours. This is to ensure that your kid is not restricted from contacting anybody else during this distress. Nicely thought by Apple!
Signing Off
This is how you can set call and message (communication) limits on your child’s iOS or iPadOS device. It will ensure their well-being by encouraging (forcing) them to get off iMessage and spend time doing something else outside the digital world!
At last, please note that a few options may be differently renamed in iOS 13 and iOS 14, but they do the same thing.
READ NEXT:

