Imagine heading home late at night, and you want to assure your loved ones that you’ll arrive safely. The Check In feature in Messages offers a simple way to keep them updated without constant texting or calls. It lets you share your trip details with your friends and family and automatically notify them when you reach the destination.

So much useful, right? In this blog, I will share how to use the Check In feature in Messages on your iPhone.
What is Check In on iPhone, and how does it work?
Check In is a safety feature in the Messages app that is designed to keep your loved ones informed about your safe arrival. We all want our friends and family to return home safely, but sometimes we forget to send that reassuring “Reached Home” message, which can cause unnecessary worry. That’s where Apple Check In comes in!
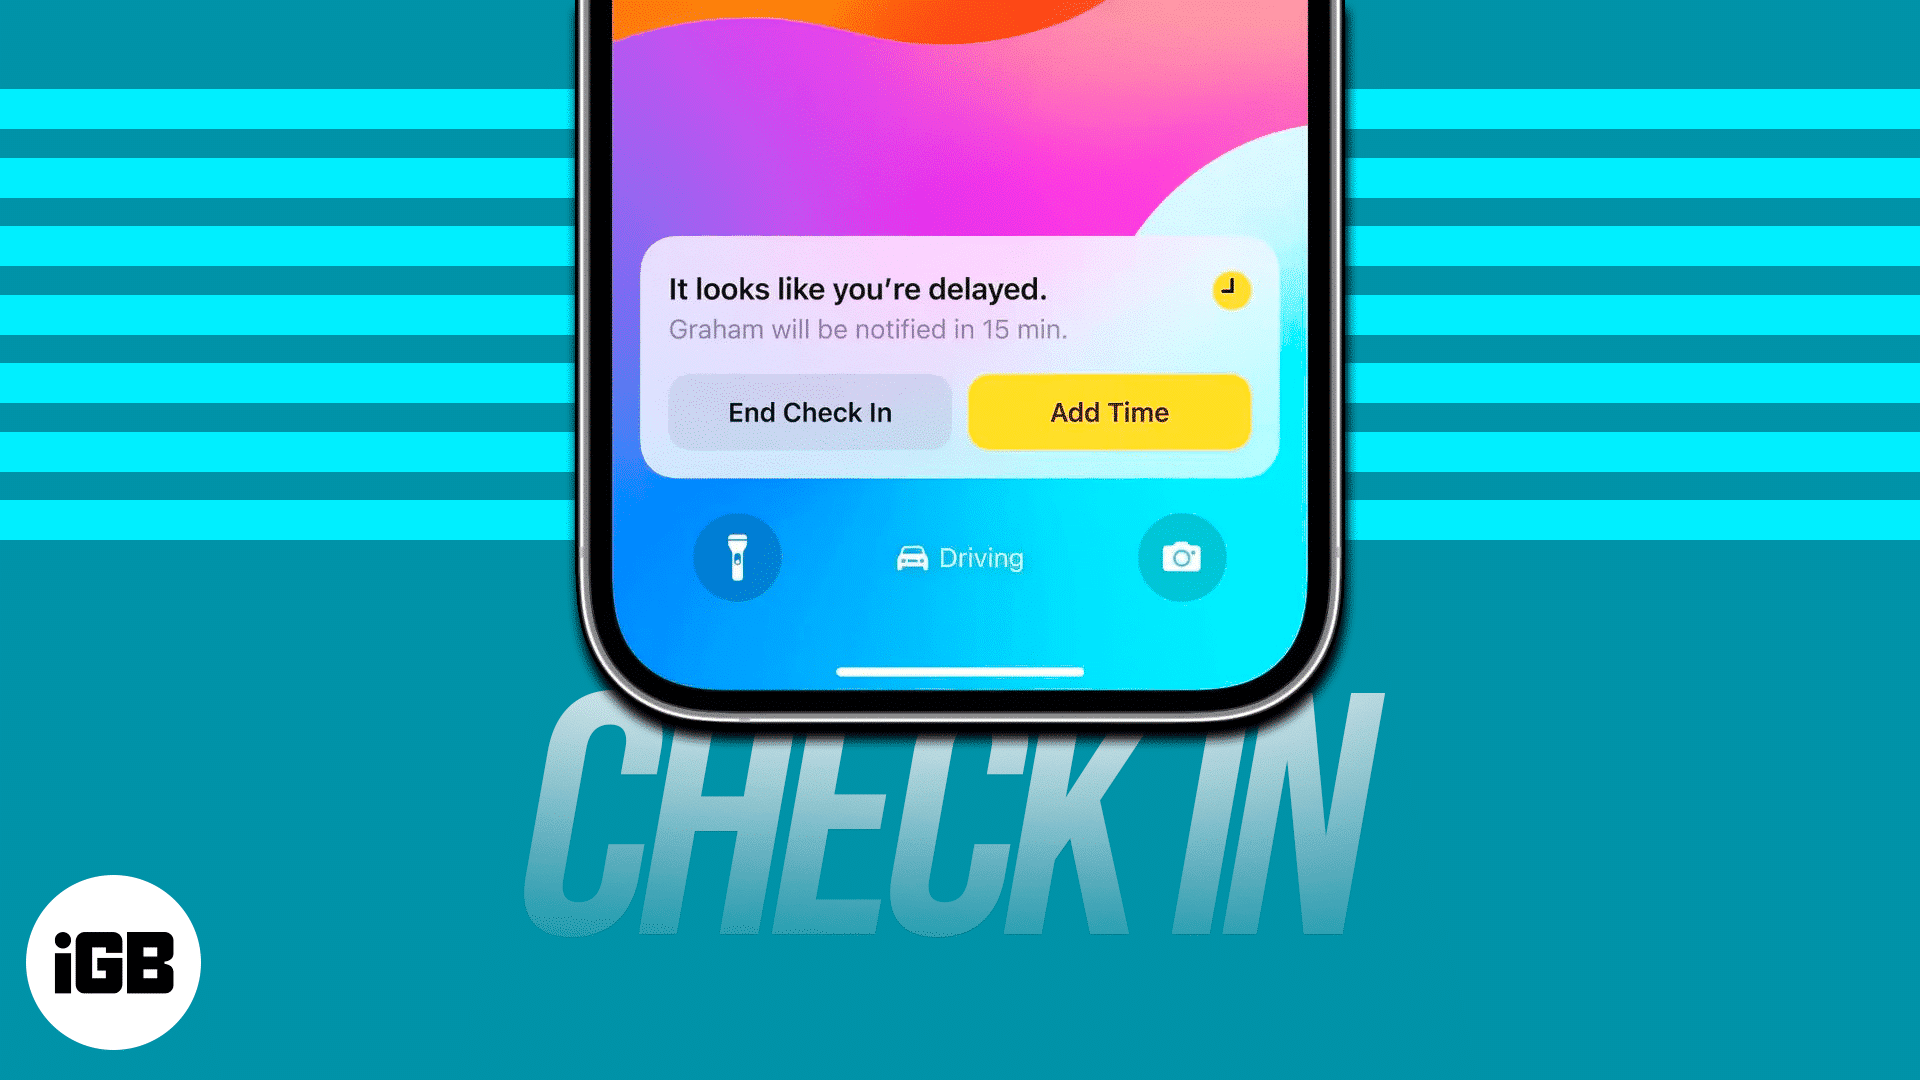
With Check In, you can easily notify friends and family about your journey. When you reach your destination safely, the Check In process is complete and alerts your chosen contact of your arrival. If you’re running late or not moving toward your destination, the feature prompts you to extend your estimated arrival time. If you don’t respond within 15 minutes, your iPhone will automatically share your location, battery life, network signal, the location of your last iPhone unlock, and details from your Apple Watch with your selected contact.
In addition to travel-based Check In, you can also set time-based Check In. For instance, if I’m meeting a new friend at a familiar location, I might send a 1-hour Check In to a trusted contact. This way, they know I’m safe when I complete the Check In after one hour. If I don’t complete it or if my iPhone goes offline for an extended period, they’ll still have access to my location and other relevant details.
This feature uses end-to-end encryption to ensure your privacy. Now, let’s see how to enable this feature on your iPhone.
Requirements to use Check In feature
- Remember, for this feature to work, the sender and recipient should have iOS 17 or later installed on their iPhones.
- Also, they need to make sure that Location Services are enabled for the Messages app. Go to Settings, tap Apps, and select Messages. Tap Location and select While Using the App or Widget.
- The sender must have an active cellular data plan.
How to send a Check In using Messages on your iPhone
- Launch the Messages app on your iPhone.
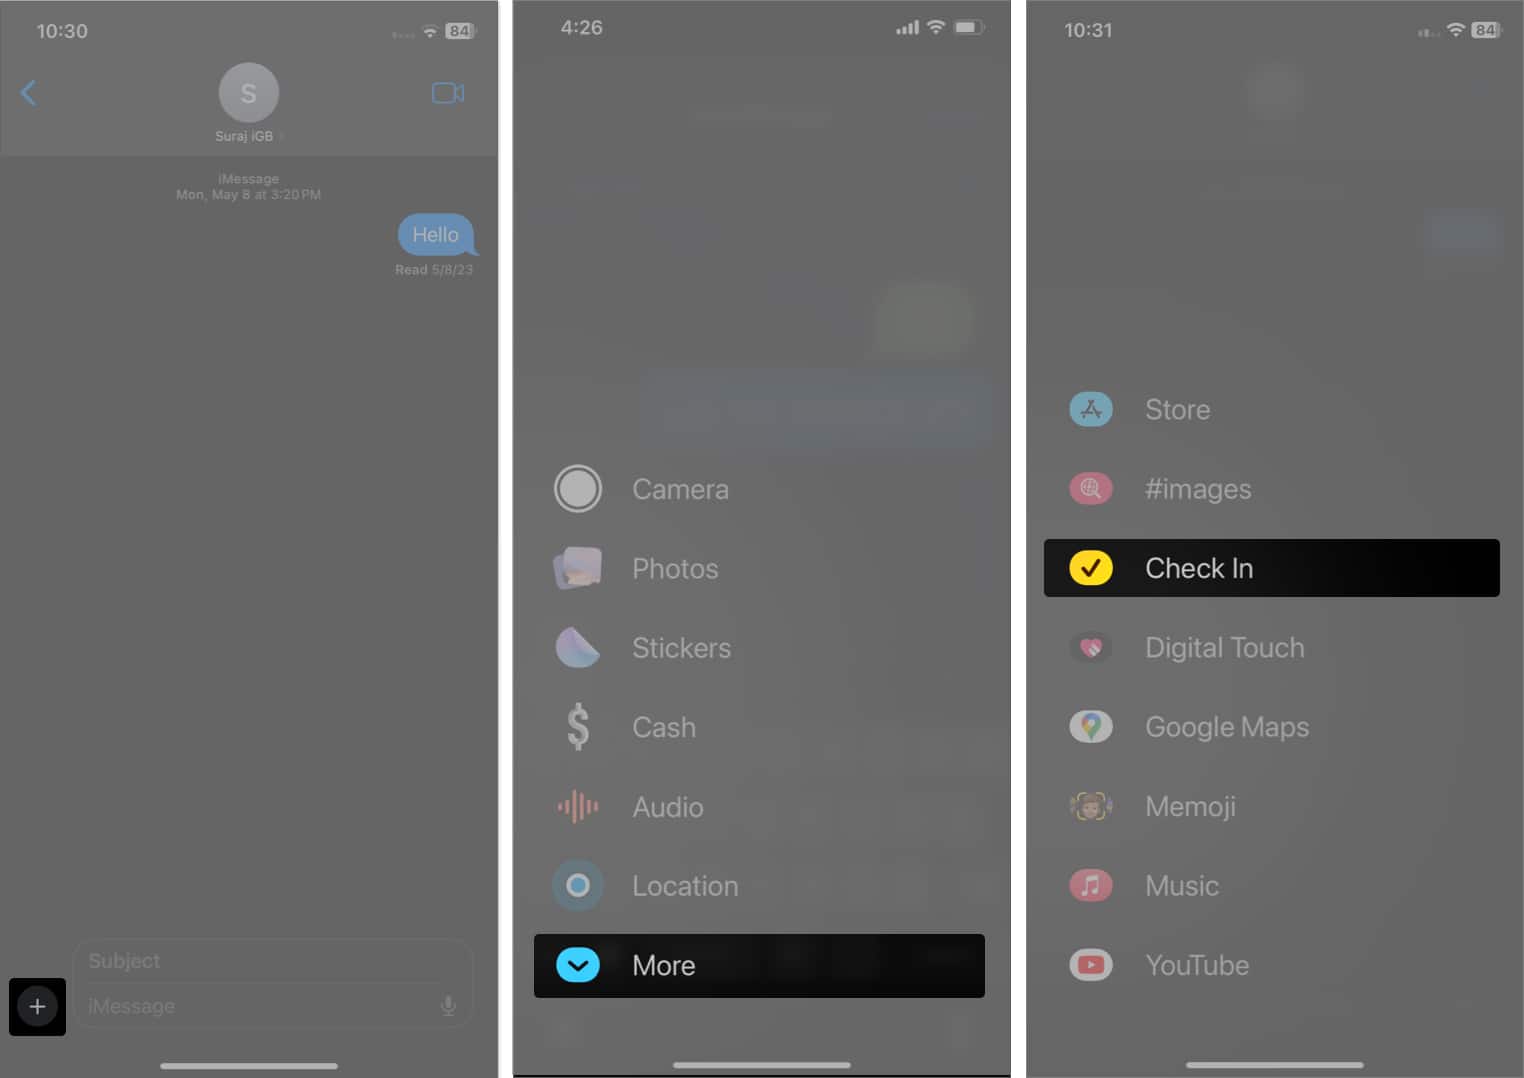
- Tap the plus (+) sign to the left of the message bar → Select More.
- Select Check In.
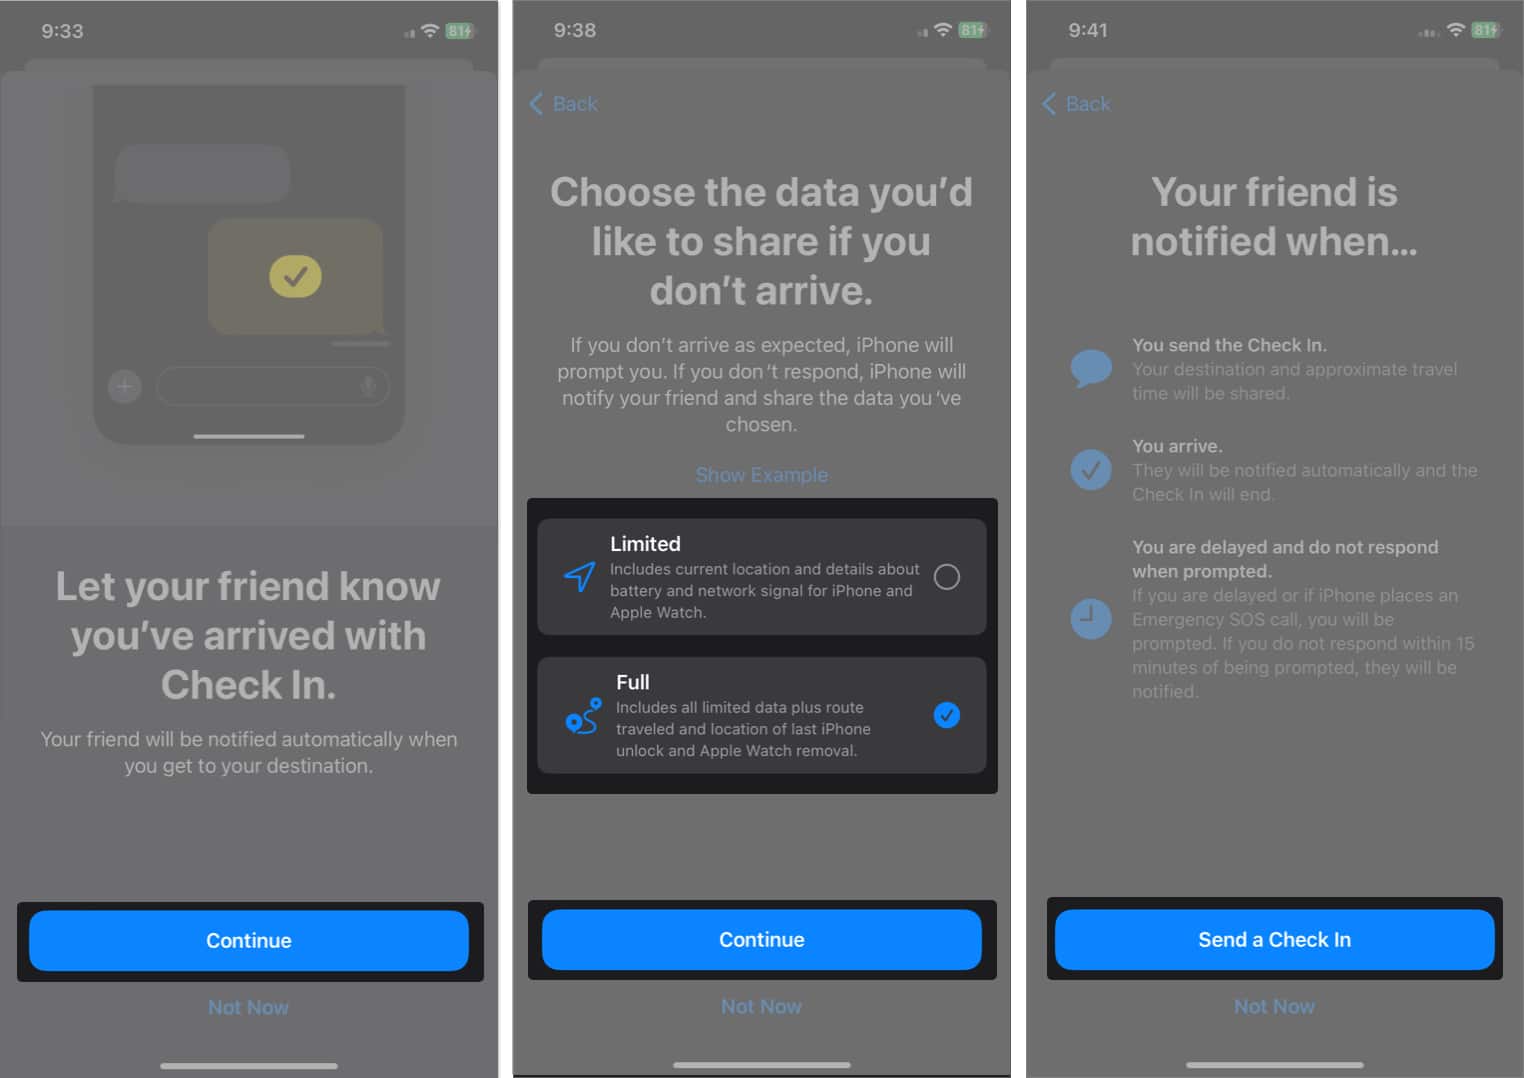
- When using this feature for the first time, tap Continue twice → Select either Limited or Full as the preferred location permission → Tap Continue → Send a Check In.
- When using this feature for the first time, tap Continue twice → Select either Limited or Full as the preferred location permission → Tap Continue → Send a Check In.
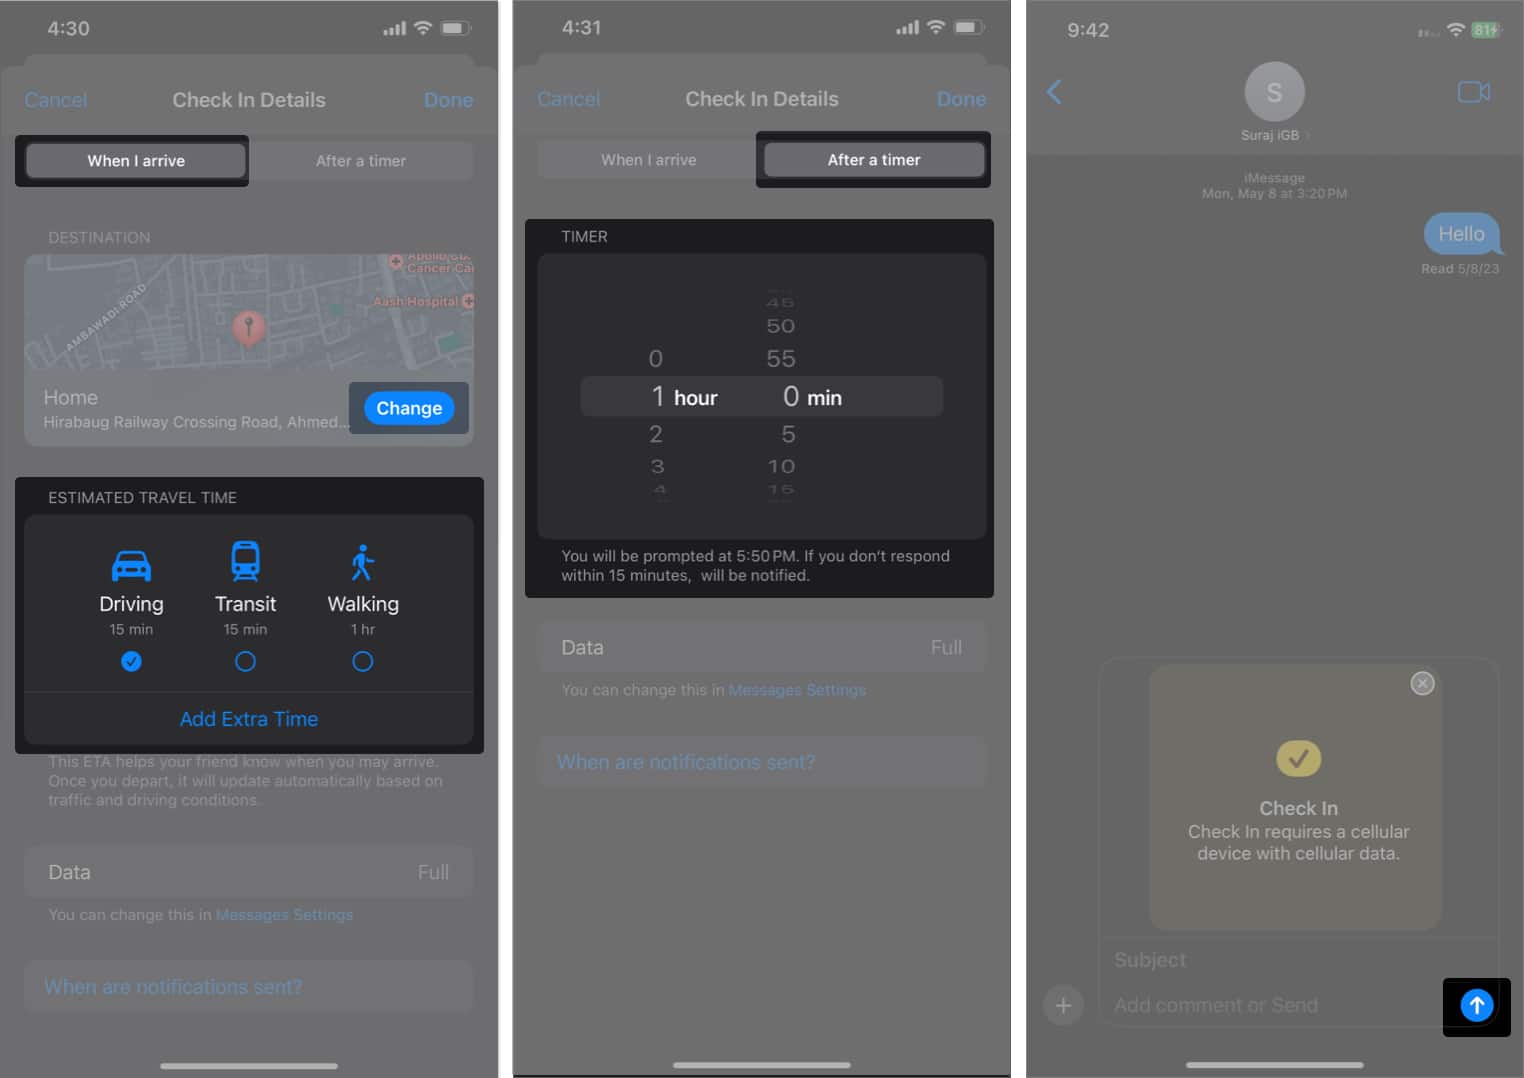
- By default, you’ll be sharing the location of your Home. You can tap Edit to further narrow down how and which location you wish to share.
- In the When I arrive tab, tap Change to add a new destination. Choose between Small, Medium, and Large to set the area radius. You can also adjust the estimated travel time by choosing the mode of your transport between Driving, Transit, and Walking.
- In the After a timer tab, you can set a timer, after which you’ll be prompted to update your progress. Your iPhone will alert the chosen contact in case you fail to respond within 15 minutes of receiving that prompt.
- Select Done in the top right corner after making the necessary changes.
- Finally, hit the send button (blue arrow). The recipient will get a notification about your Check In.
How to view Check In details in Messages on your iPhone
When you receive a Check In for the first time, you will see a banner explaining the feature. Tap OK to continue. Then, you will be asked if you want to get critical alerts. Tap Allow on the prompt. This way, you will continue to receive alerts even in Silent and DND mode. To view your friend’s Check In, tap Details on the preview card in chat.
For the travel-based Check In, the feature will calculate the distance between your live location and your destination and show an estimated arrival time to the recipient. You will get a Lock Screen banner. Tapping it will show you your destination and real-time ETA based on current traffic and driving conditions.
When you arrive at the destination radius, the Check In will be completed automatically, and your friend or family will get an “Arrived” notification. In case you are delayed, the recipient can tap Details on the card and see your last location.
If you have shared a time-based Check In, the recipient will see when you started the timer and the end time you have set. It doesn’t contain any details about your journey or destination. When the Check In timer ends, you need to tap End Check In on the Lock Screen prompt.
Besides this standard basic functionality, it has some additional features.
- If you are running late, you may also extend the estimated arrival time. On the Check In card, select Details and hit Add Time. For time-based Check In, tap Add Time in the Lock Screen. The recipient will be notified at the end of the updated time.
- Your iPhone will always track your progress. If it finds any strange activities, your iPhone will ask whether everything is okay. You may also make an Emergency SOS call.
- You can choose how much information you want to share with the recipient. Go to Settings → Apps → Messages and select Data. The Limited option only shares your current location, your iPhone’s battery life, and your network signal. If you choose Full, the details will include the route you traveled and the location where you last unlocked your iPhone, along with the basic ones.
How to cancel a Check-In using Messages on your iPhone
You may quit the session at any time, whether it’s because you’ve reached your destination or you simply want to stop.
- Open the iMessage chat where you have sent the Check In.
- Tap Details on the card.
- Tap the Cancel Check In option.
- Select Cancel Check In on the prompt to confirm your choice.
Don’t let your friends and family worry!
I hope this blog post has helped you learn how to use the Check In feature on your iPhone. It is a great way to inform your loved ones when you are expected to arrive and ensure them that you are safe and sound.
FAQs
No, the sender and recipient must use the most recent version of iOS 18 to use the Apple Check In function in iMessage.
If you use the iMessage Check In function, your location won’t be disclosed in real time. If something goes wrong, it will only send your present position or alert your friends or family when you arrive at your destination.
Explore more…


