Using the Calendar app on your Apple Watch is a great way to stay organized and informed. It helps you keep track of your appointments without needing to pull out your iPhone. Thanks to the Apple Ecosystem, you can add, view, remove, and even respond to a Calendar invite right from your wrist.
In this tutorial, I’ll show you how to use the Calendar app on the Apple Watch running on watchOS 11.
Table of Contents
How to add a Calendar event on Apple Watch
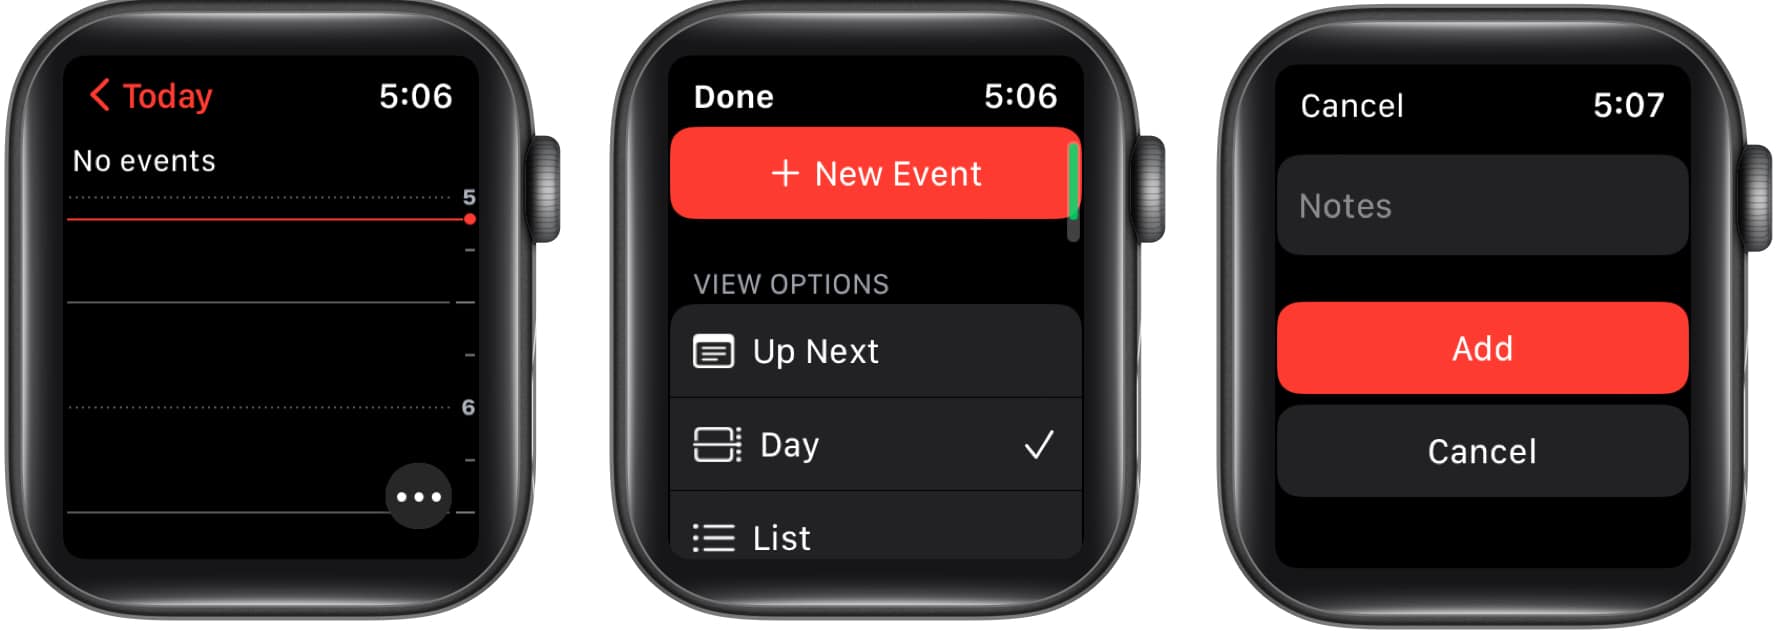
- Launch the Calendar app on the watch.
- Tap the three dots icon.
- Select New Event. Now, fill in the required information.
- Then tap Add.
How to view your events on Apple Watch
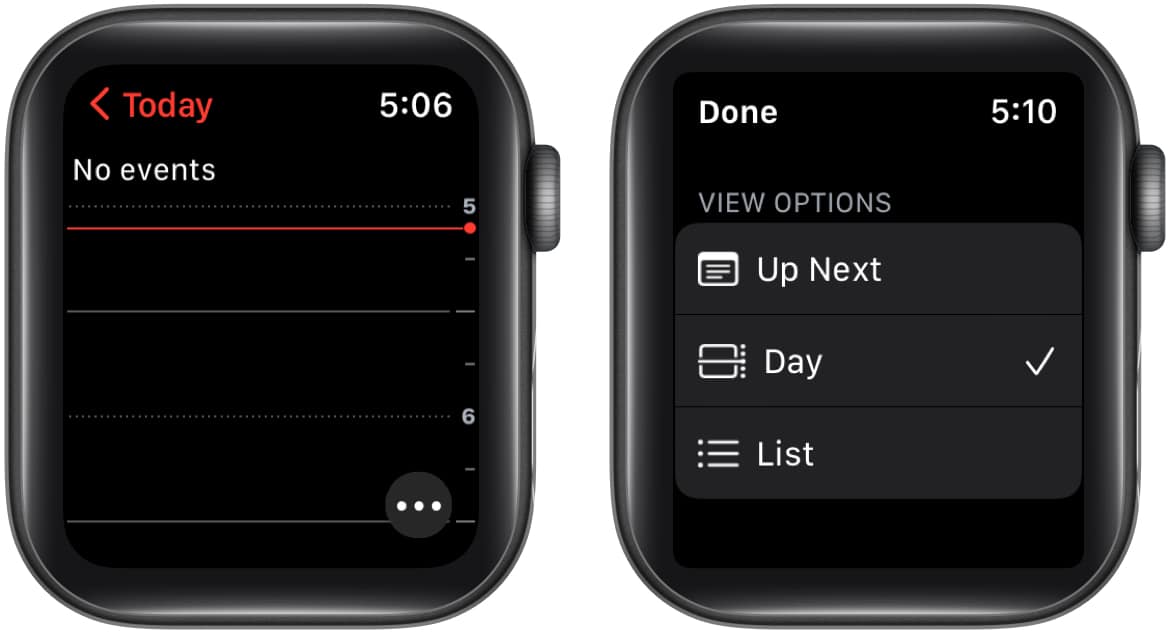
- Head to Calendar → Tap three dots.
- Choose an option from the view options list.
- Up Next: Displays the upcoming week’s events.
- Day: Covers only the activities for the current day.
- List: Reflects on all your events, beginning from weeks ago and up to the next two years.
View events based on weeks and months
You can get the month and week views if you have a Day or List selected as your view option. Do the following in the Calendar app:
- Current week: Select < icon in the top-left corner of the screen.
- Different week: Swipe right or left.
- Particular week: Navigate to the calendar and tap a day.
- Current month: Tap < icon in the top-left corner on the week view.
- Different month: Rotate the Digital Crown.
- Week in the monthly calendar: Choose the week.
Delete an event on your Apple Watch
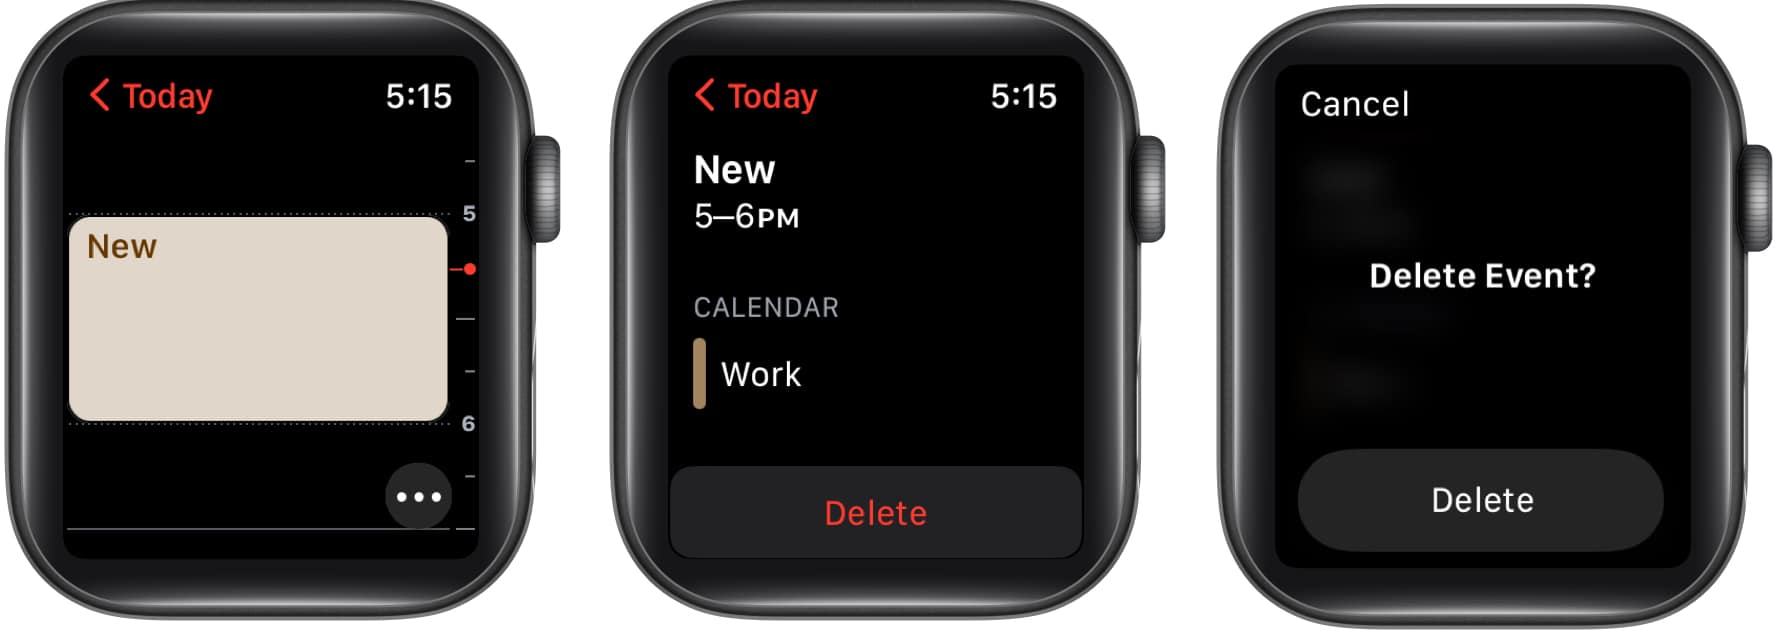
- Launch Calendar on your Apple Watch.
- Tap the event → Delete.
- Confirm by tapping Delete.
Note: If you wish to change an event on your Apple Watch, you can use the Calendar app on your iPhone.
Respond to calendar invitation on Apple Watch
You have the freedom to respond to a Calendar invitation as soon as you receive it or later.
- If you wish to respond immediately: Scroll to the bottom of the notification and choose between Accept, Decline, or Maybe.
- If you wish to respond later: Go to your list of notifications → scroll, and respond.
- In the Calendar app: Tap the event and do what is needed.
To contact an event organizer, go to event information and press the phone, message, email, or Walkie-Talkie button.
Get directions to an event on Apple Watch
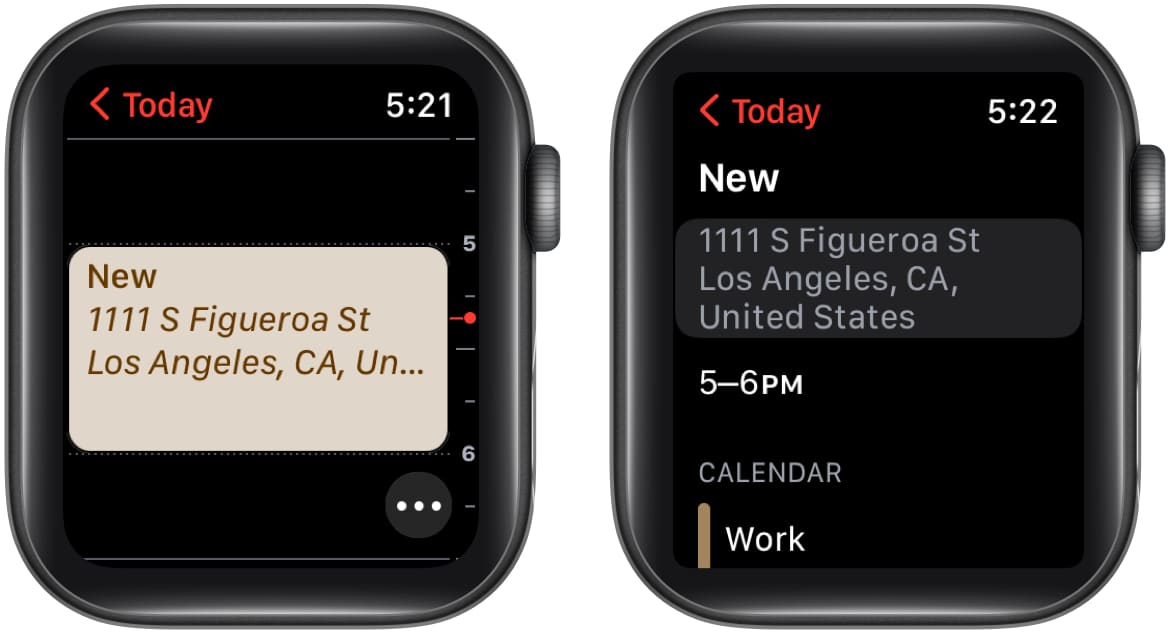
- Open Calendar on your Apple Watch.
- Tap the event → select an address.
Want to learn more about Apple navigation? Check out tips and tricks for Apple Maps.
Modify “leave now” alerts
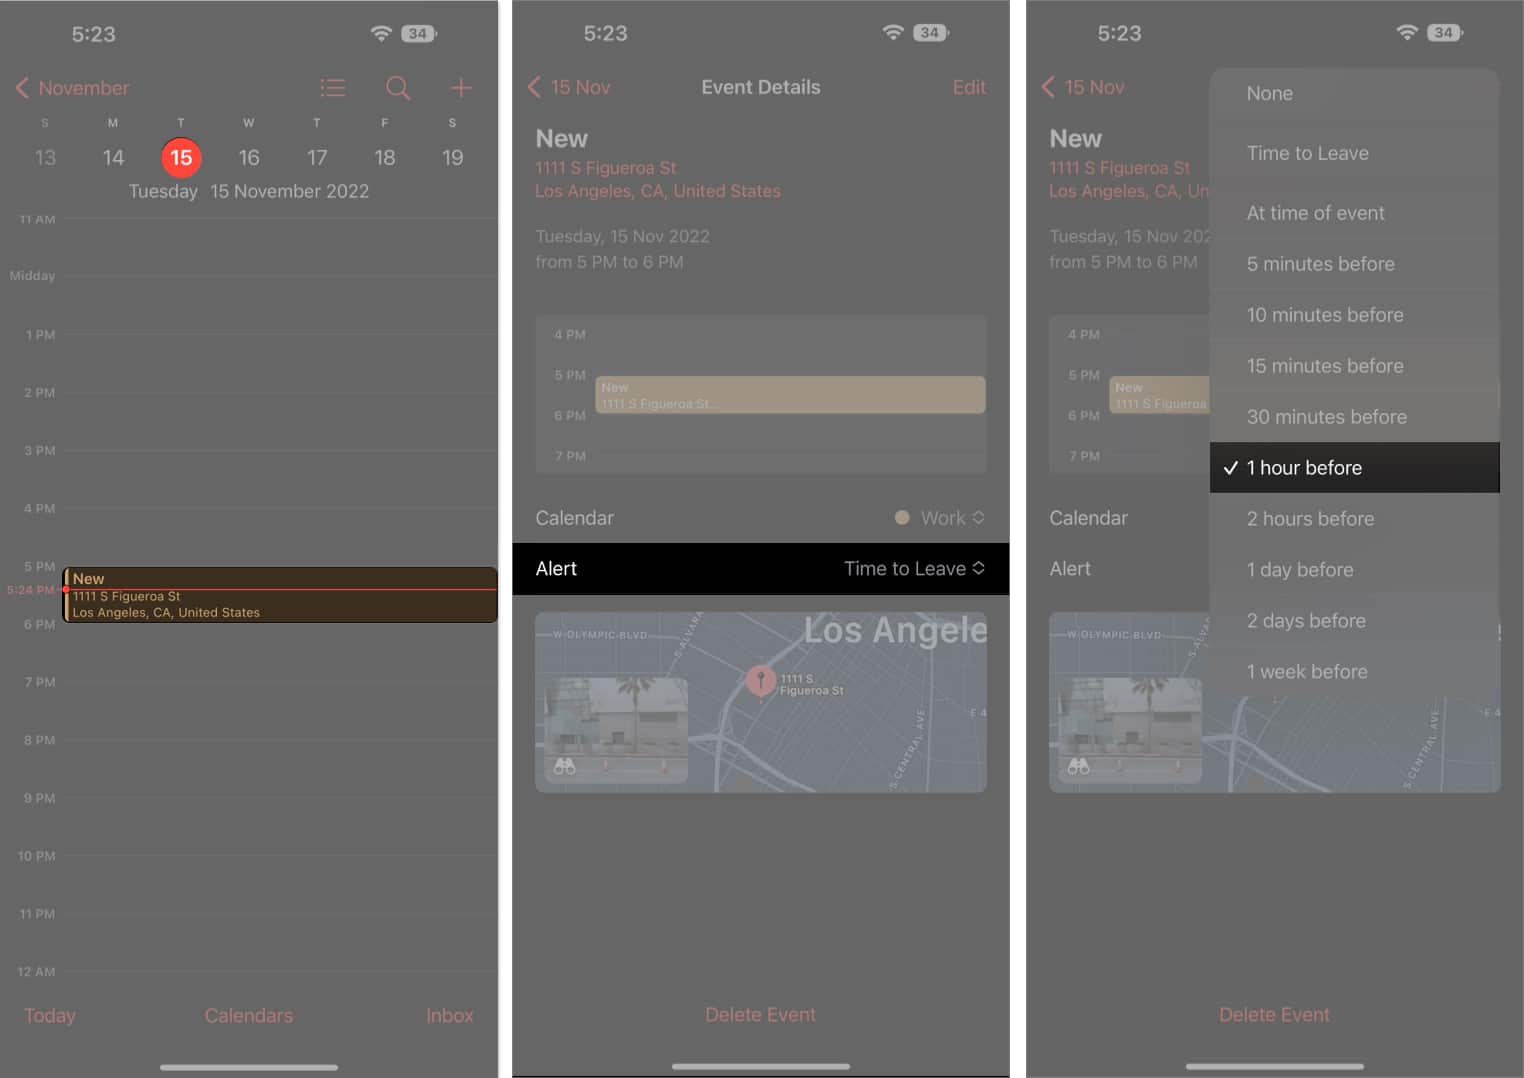
On your Apple Watch, there will be a leave now alert with an address for the event. The alert will be based on the estimated travel time. To adjust the alert’s time interval, follow the procedures below.
- Launch the Calendar app on your iPhone.
- Go to the event.
- Tap alert and choose another option.
Adjust calendar settings
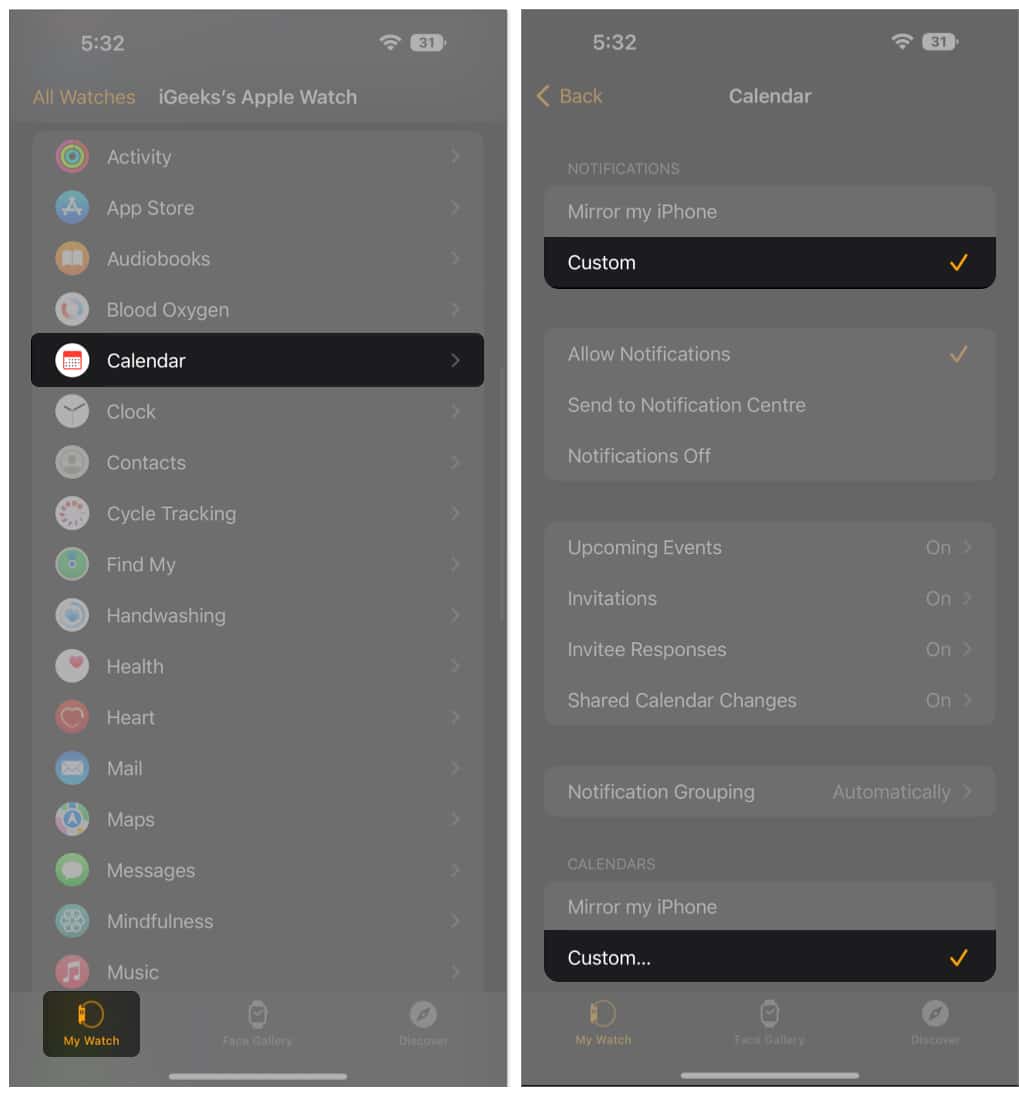
- Open the Watch app on your iPhone.
- Tap My Watch → Calendar.
- Tap Custom under the Notifications or Calendars section.
Then change the settings according to your preferences.
Signing out…
And that’s how you use the Calendar app on your Apple Watch to stay ahead of your schedule. Whether you want a quick glance at your day’s agenda, manage appointments, or receive timely reminders, the Calendar app on your Apple Watch can do it all right from your wrist.
Don’t hesitate to reach out to us via comments if you have any doubts regarding the watchOS 11 or everything Apple.
Also read:

