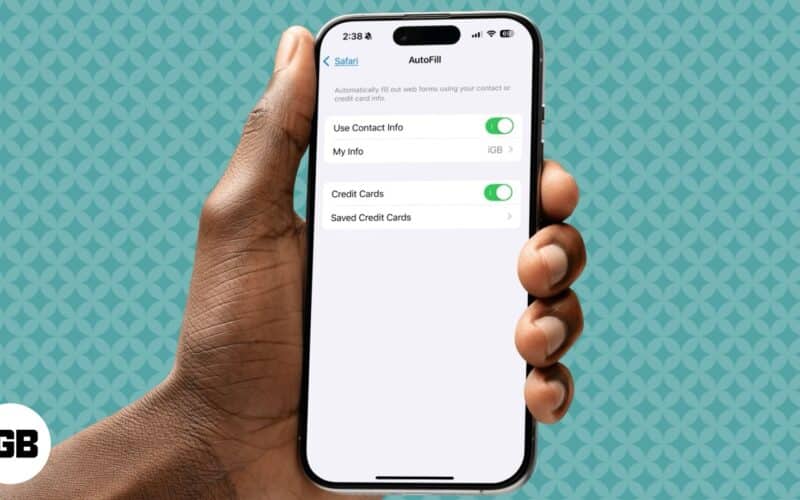
Your iPhone saves your passwords, passkeys, and verification codes securely in the Passwords app. However, it doesn’t make sense to manually see, copy, and paste your credentials every time. This is where AutoFill comes in. It quickly fills in the required details including your payment information. This article will guide you on how to use AutoFill on your iPhone and iPad.
What is AutoFill and how does it work?
AutoFill is a feature on your iPhone and iPad that helps you input your credentials and payment details into forms and login fields without typing them each time. So, you can log into accounts and do online shopping faster and easier. It also reduces the likelihood of errors when entering information manually.
When you encounter a form or login page, AutoFill recognizes the required fields and offers to fill them with your saved information. This process is secure, as the data is encrypted and pasted only after you authenticate your Face ID or Touch ID. Additionally, you can manage or delete your information at any time through your device’s settings.
Types of information AutoFill can handle:
- Contact information: AutoFill can input your name, address, phone number, and email address into forms.
- Usernames, passwords, and 2FA codes: It can access the Passwords app to populate your login details for various websites and apps. Thus, you can sign in quickly.
- Credit card information: AutoFill can store your credit card numbers and expiration dates, so you don’t have to enter them each time you make a purchase.
Now that you have a clear understanding of the AutoFill feature on your iPhone and iPad, let’s see how to enable it.
How to set up AutoFill on iPhone and iPad
To make the most of AutoFill, you’ll need to configure it to use your personal information, payment methods, and passwords.
Configure your contact information
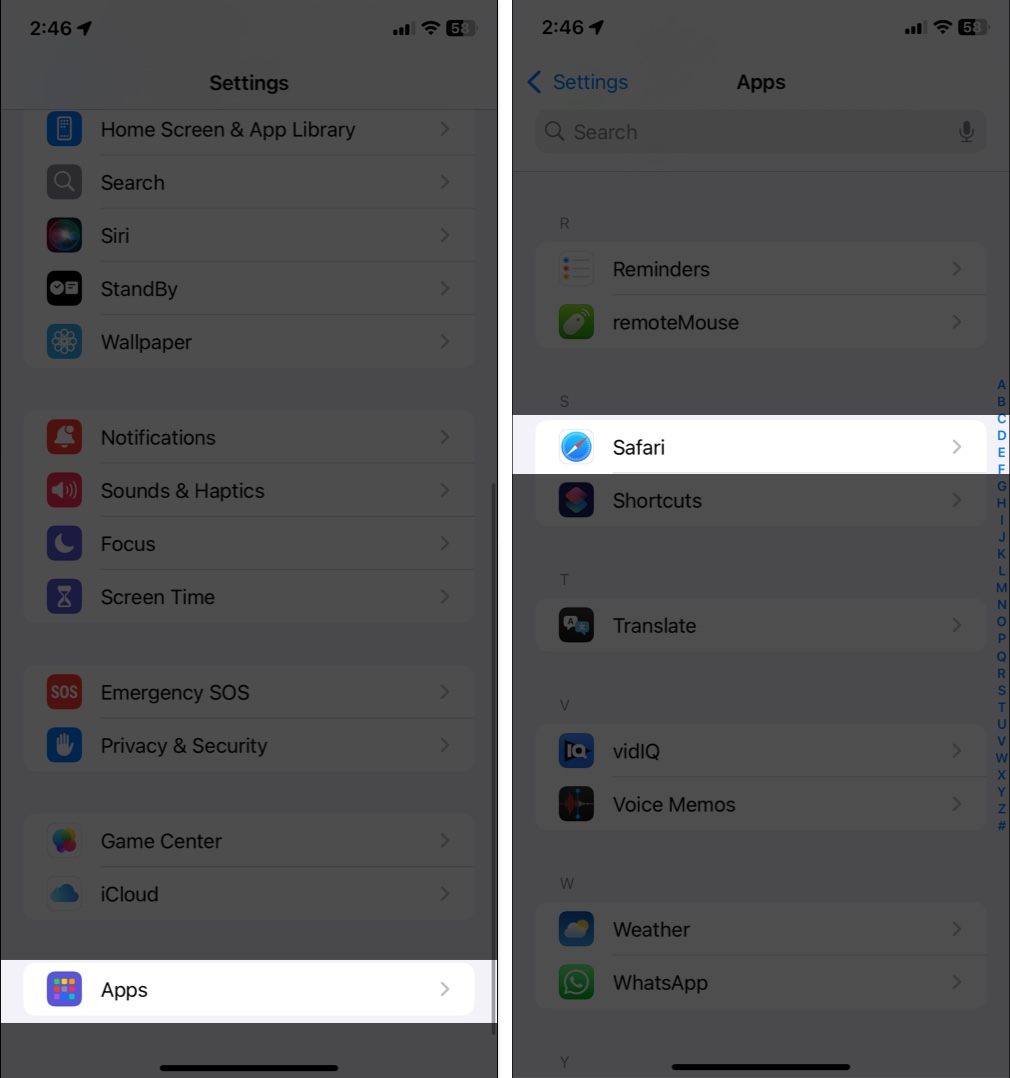
- Open the Settings app on your iPhone.
- Scroll down, tap Apps, and select Safari.
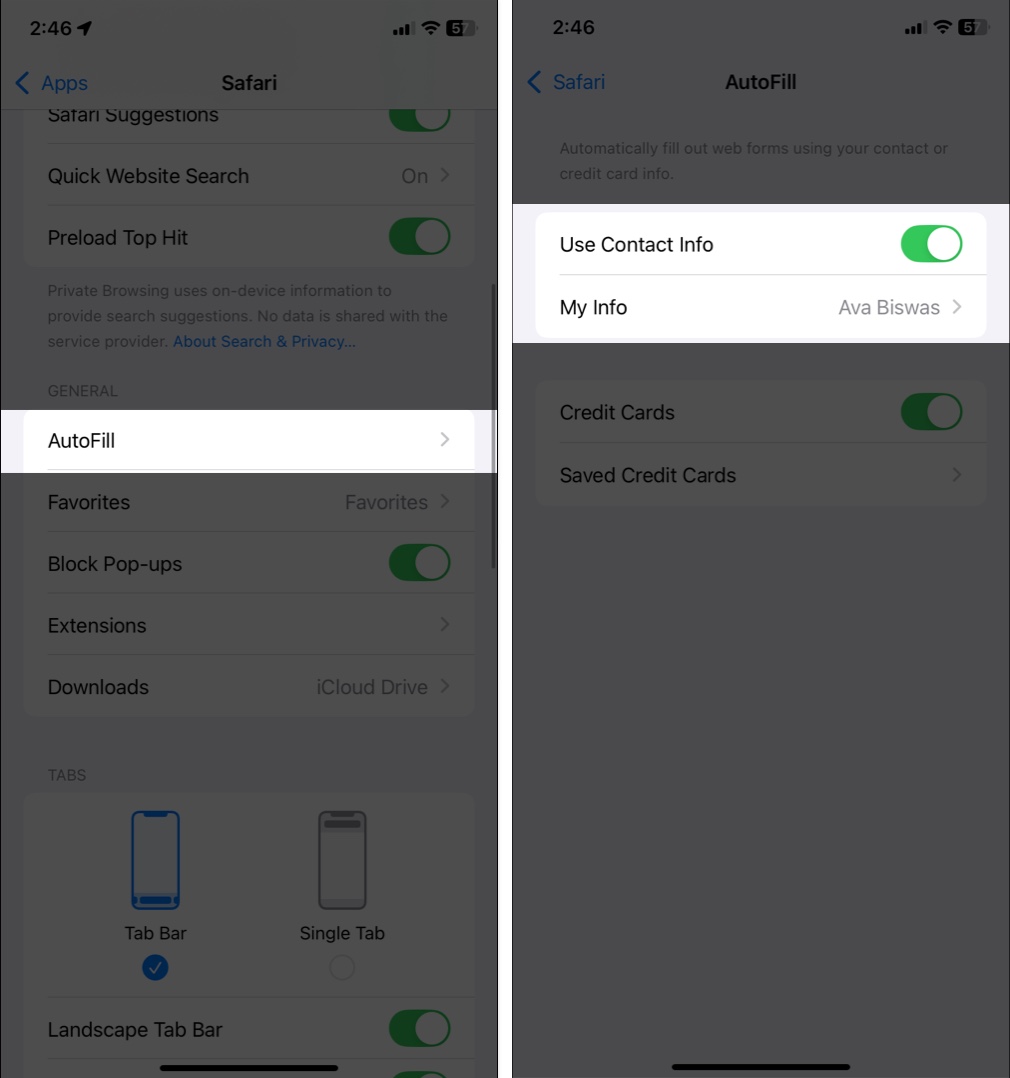
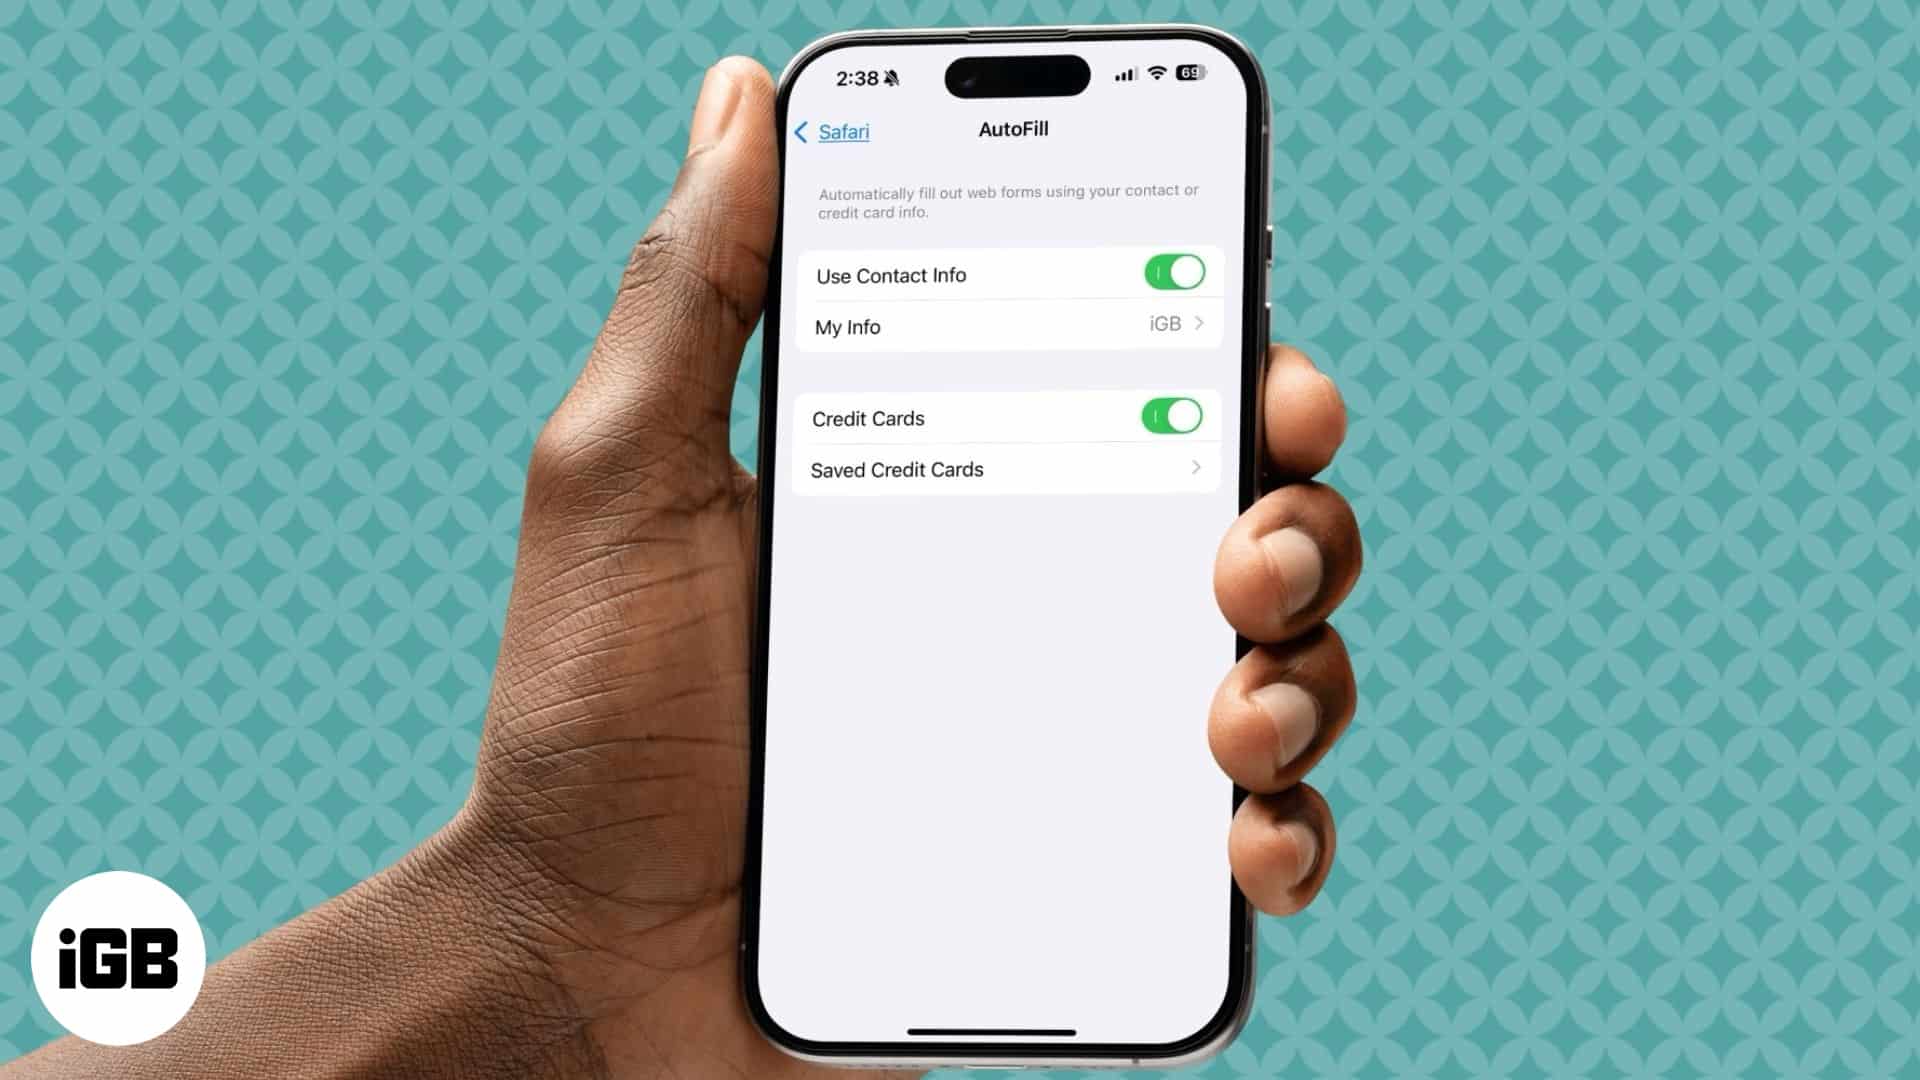
- Tap on AutoFill.
- Here, toggle on Use Contact Info.
- Tap My Info and choose your contact card from the list.
Add payment method
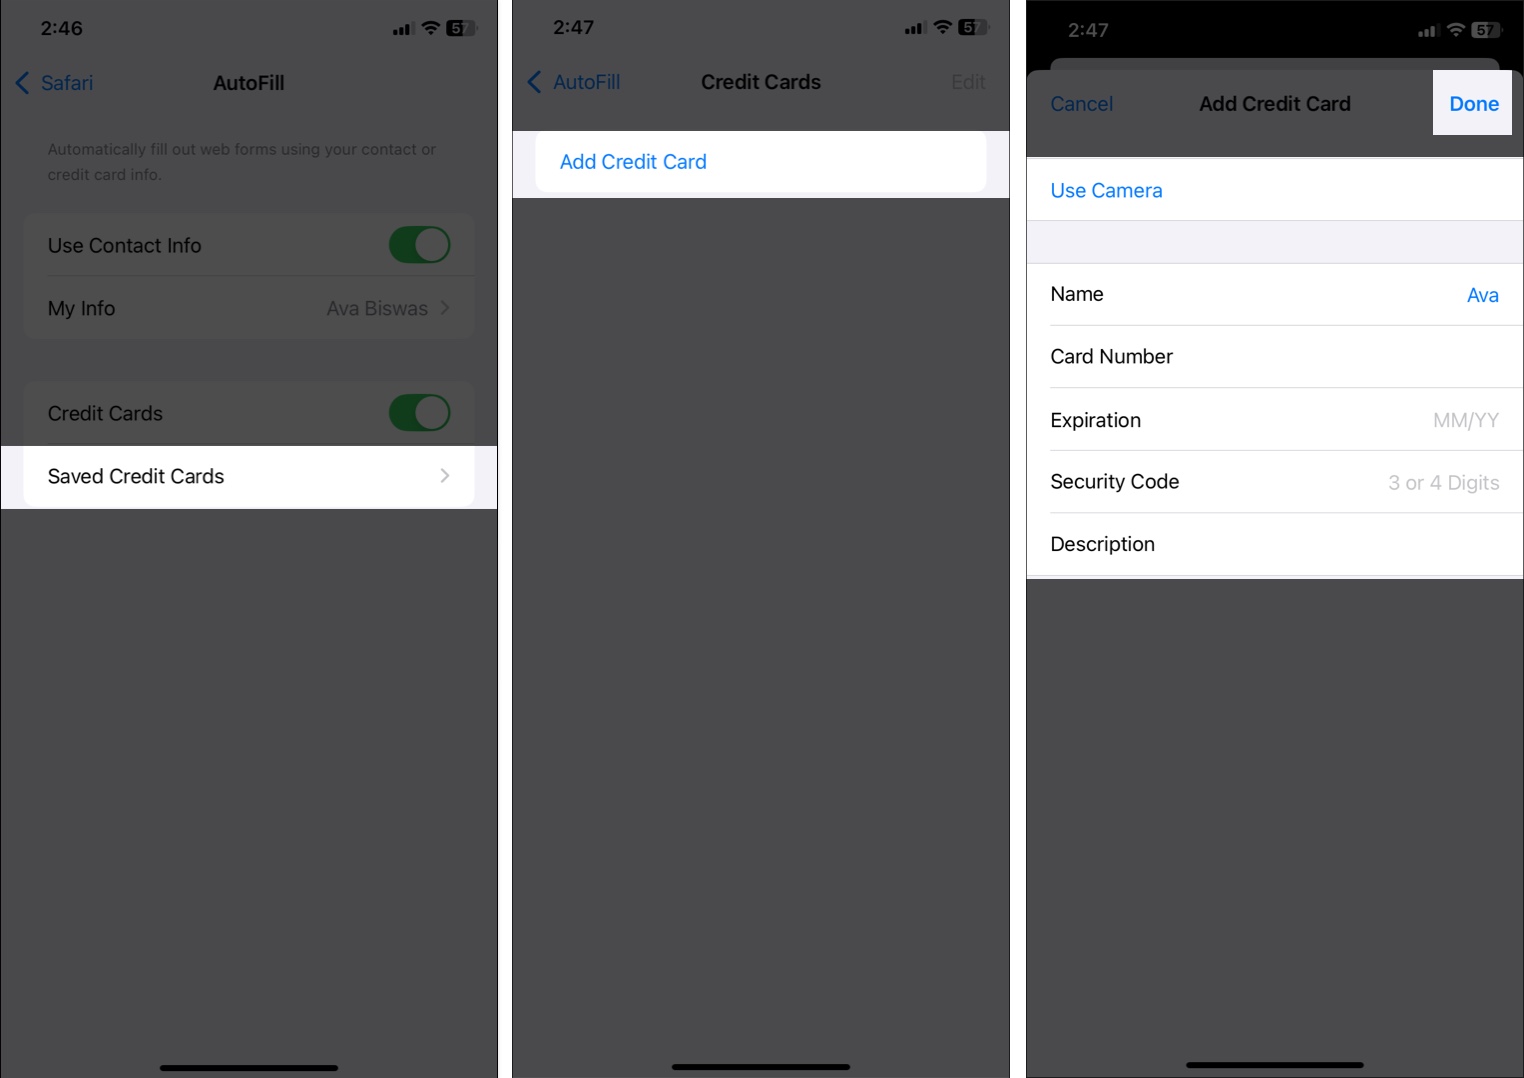
If you do online shopping frequently, you should save your credit card details in AutoFill. So, you don’t need to look for the details or run into typing errors while paying. However, note that you need to use Safari to complete the purchase.
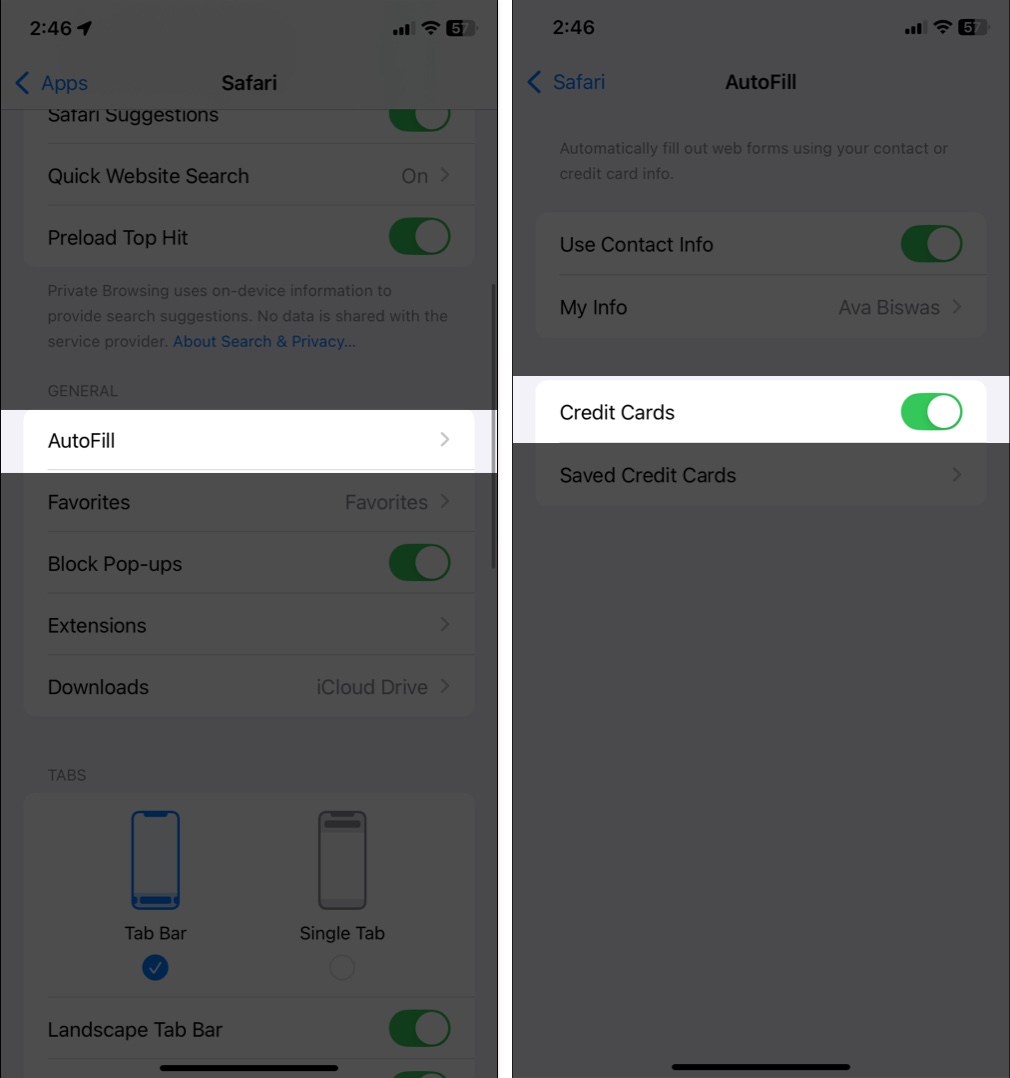
- Go to the Safari settings as mentioned above.
- Tap on AutoFill and toggle on Credit Cards.
- Next, select Saved Credit Cards and authenticate using Face ID, Touch ID, or your passcode.
- Tap Add Credit Card.
- Now, you may click a photo of your credit card to fill in the information or enter your card details manually.
- Once completed, hit Done to save it.
You may repeat the process to add more credit cards.
Enable AutoFill passwords, passkeys, and 2FA codes
The best and most common use of the AutoFill feature is to input your credentials and verification codes automatically when signing into apps and websites.
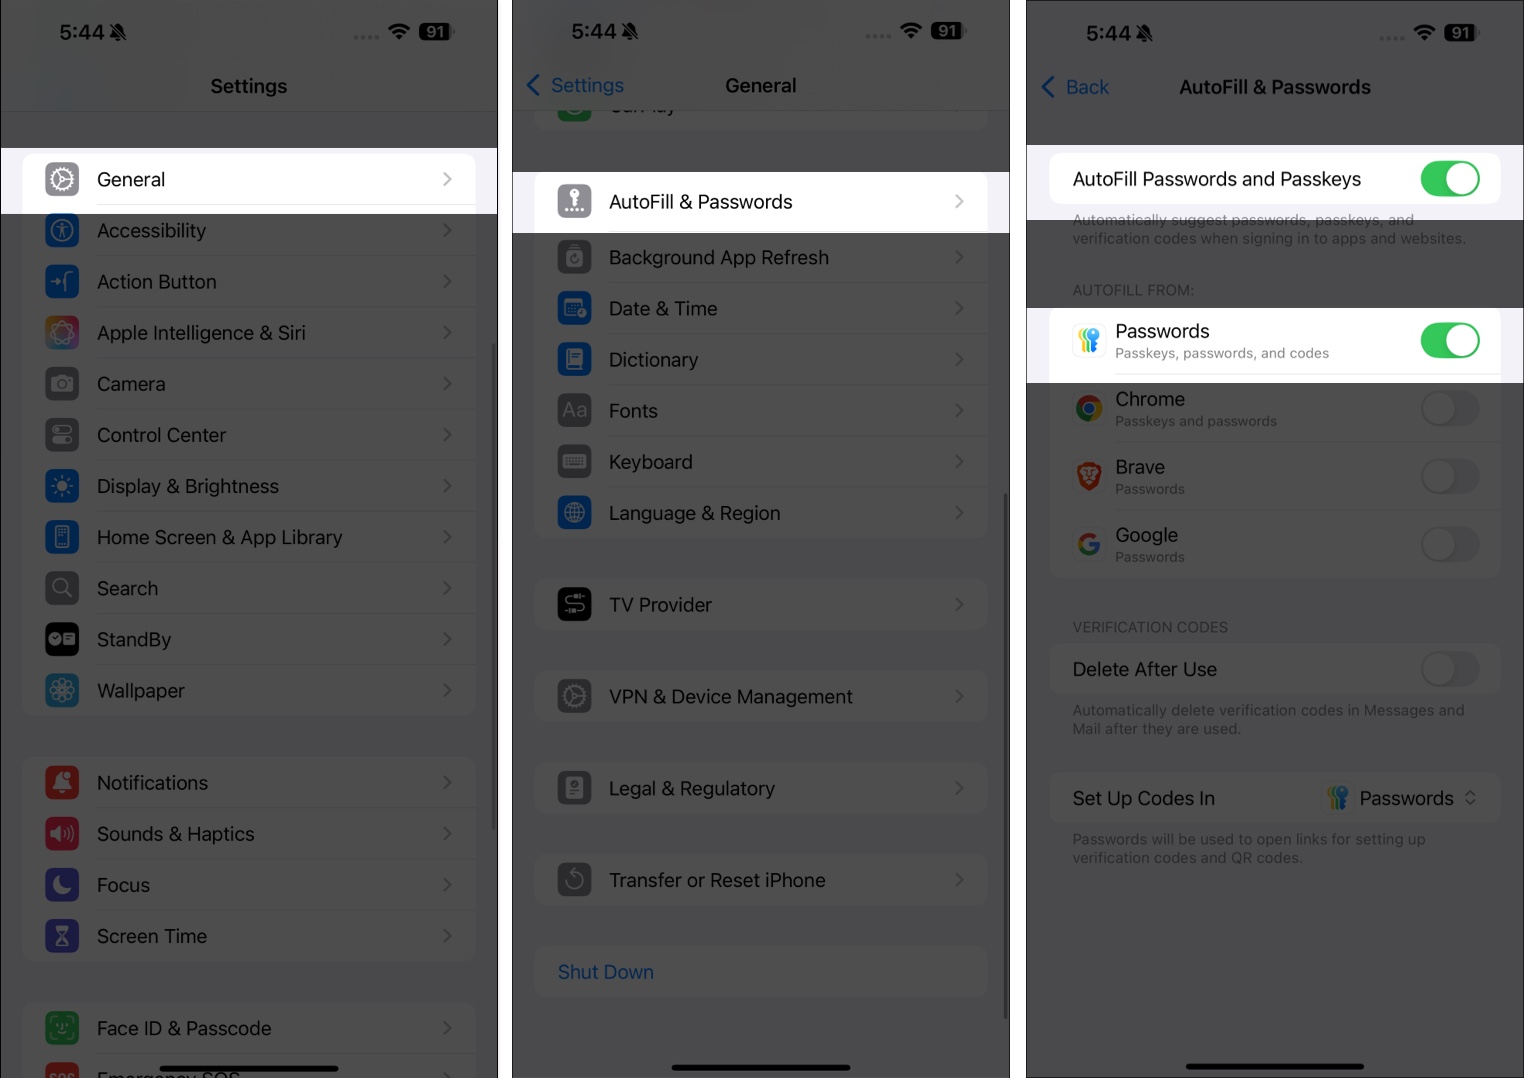
- Open the Settings app and go to General.
- Scroll down and select AutoFill & Passwords.
- Now, toggle on AutoFill Passwords and Passkeys.
- Also, ensure the Passwords app is enabled.
How to use AutoFill in Safari and apps on your iPhone
Once configured, AutoFill can enter information in Safari and supported apps. When you encounter a login page, tap on the username field. You will see an AutoFill suggestions prompt. Tap Fill in Username/Password and authenticate your Face ID to input your credentials.
If you missed the prompt or have multiple accounts on that website or app, you can manually choose which username to autofill. When you tap the text field on the login page, you will see a key icon at the top of your keyboard. Now, choose the appropriate credential to log in. You may also select the password manager where you save your password.
Safari also allows you to fill out website forms quickly, making it helpful when registering an account or signing up for a service. Here, I will demonstrate the process by signing up for iGeeksBlog Premium.
On the Sign-up page, I needed to input my details. Simply, tapping on the respective text field, my keyboard suggested my first and last name, my saved address as home, and my email address. I just selected the suggestion, and AutoFill populated all the details in the right field.
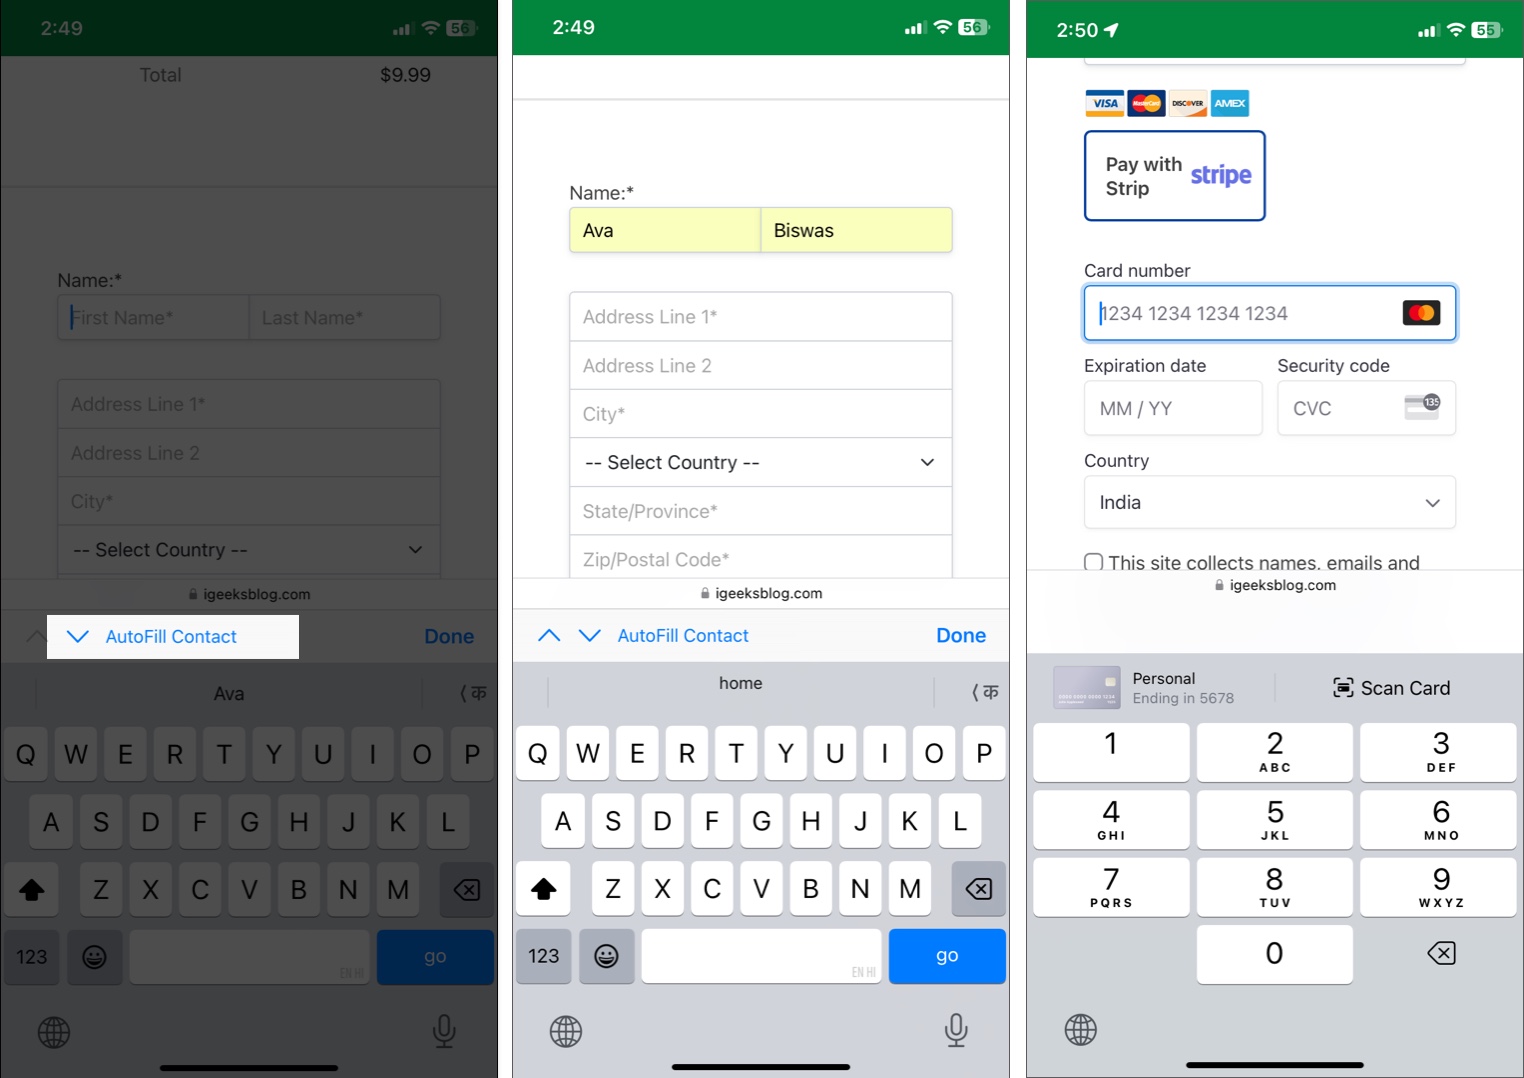
Next, in the Card number field, AutoFill showed my saved credit card with its name and ending number. So, I can quickly select which payment method I want to use. Similarly, you can use AutoFill to complete any transaction on your iPhone apps and Safari.
AutoFill your data in PDF forms
With iOS 17.2 and later, you can use AutoFill to complete PDF forms. However, note that the PDF should have a fillable format so that your iPhone can recognize the text fields and populate your details.
Once you have downloaded the PDF, save it in your Files app and open it there. You will see an AutoFill Form prompt at the top. Tap it to start editing and select the field you want to fill in. AutoFill will suggest relevant data based on your saved information. You may select it or choose other options.
There’s more to it! To learn in-depth, go through our guide on how to AutoFill PDF forms on iPhone, iPad, and Mac.
Troubleshoot AutoFill issues on your iPhone or iPad
Though AutoFill is easy to use, you may run into issues when you want to input details. If you encounter problems with AutoFill:
- Ensure AutoFill is enabled and properly set up as mentioned above.
- Verify if your contact details and saved credit card information are current.
- If a password does not appear, ensure iCloud Keychain is enabled. It helps to sync your passwords across your Apple devices and keeps them up-to-date.
- A simple restart can often resolve temporary glitches affecting AutoFill.
- Ensure your device is running the latest version of iOS or iPadOS by going to Settings → General → Software Update.
If issues persist, you may take our expert solutions from the AutoFill not working guide.
Signing off
This is how you can enable and use AutoFill on iPhone and iPad. I hope this brief article helped you streamline tasks like filling out forms, entering passwords, and completing purchases, making them faster and more efficient. Remember to keep your AutoFill information updated to ensure your personal data remains accurate.
If you need further assistance, share your queries via the comments section below.
You might also like:

