Covid-19 has become a global crisis that’s got us all anxious, fearful, and worried. At this time, it’s essential to have access to accurate information. Learning how to use Apple’s COVID-19 screening app and website can make it easier for you to gain medical guidance about the disease. Here’s how you can use it for yourself or others:
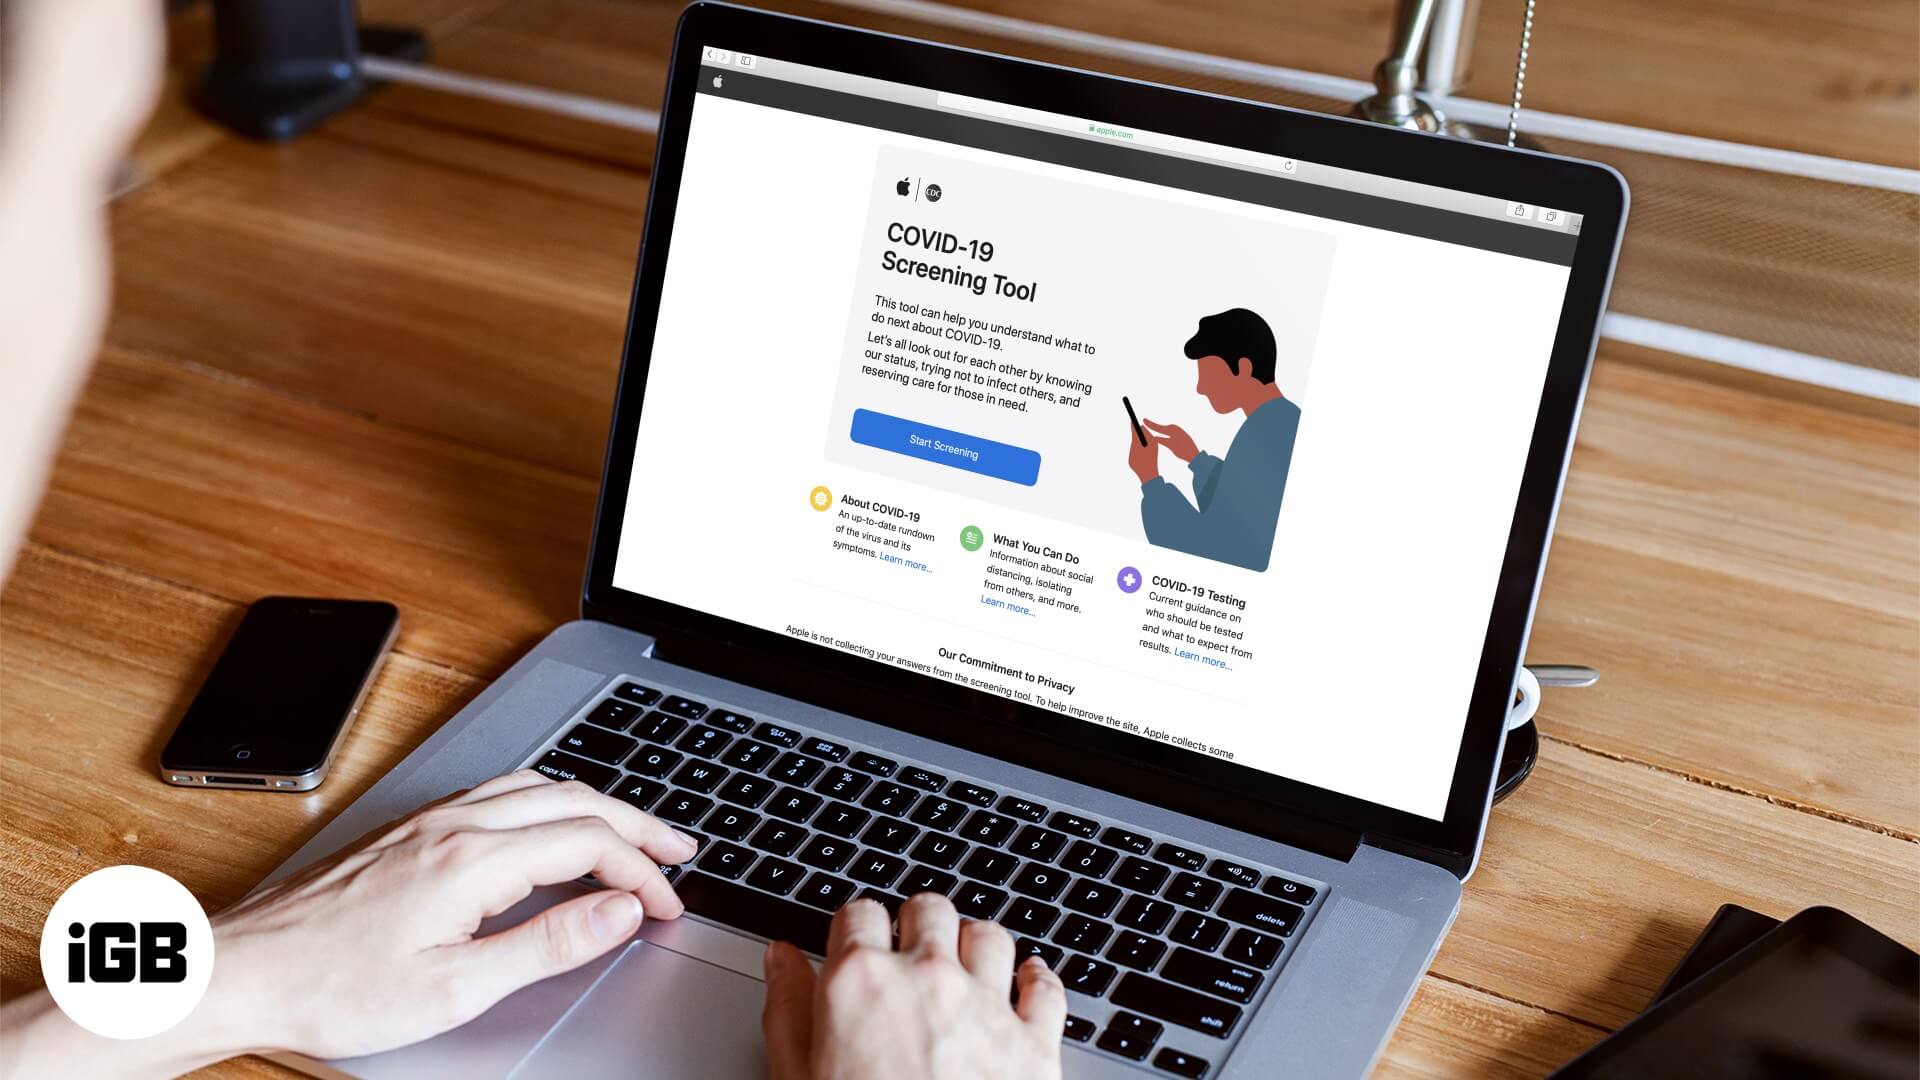
How to Use COVID-19 Screening App and Website on iPhone
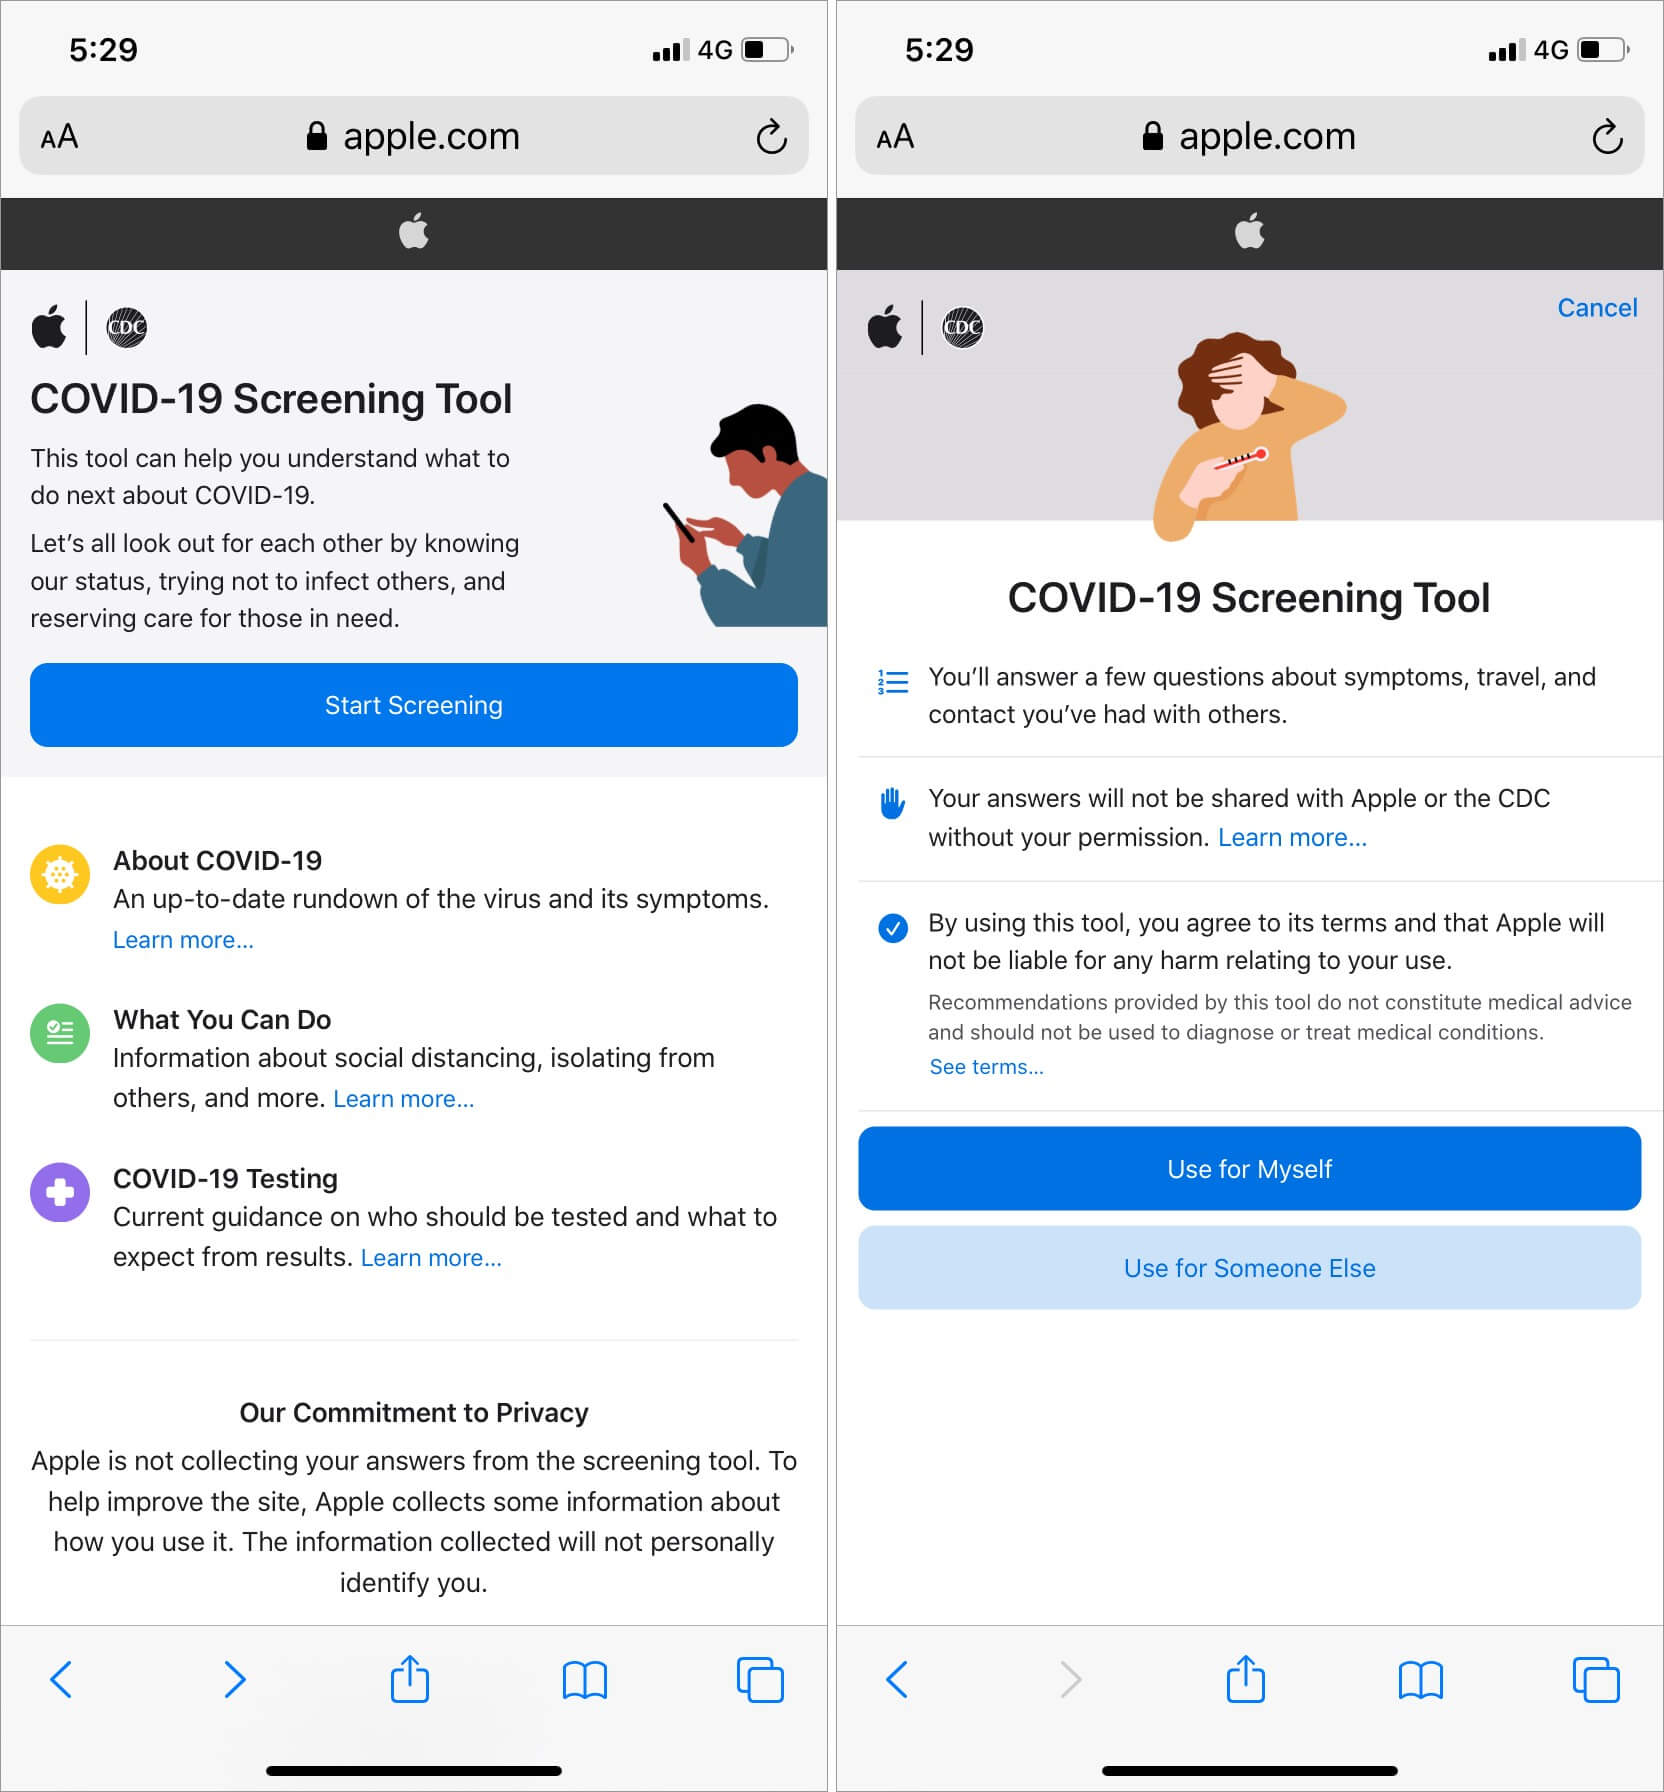
Step #1. First off, download the COVID-19 app (No longer available) or go to the website.
Step #2. On the home page you’ll see sections for info “About COVID-19”, “What You Can Do”, and “COVID-19 testing”.
Step #3. If you or someone you know is experiencing flu-like symptoms and want to know what steps to take, click or tap on the blue Start Screening button.
Step #4. Choose if the screening is for yourself or someone else.
Step #5. Follow each prompt and answer the questions as accurately as you can.
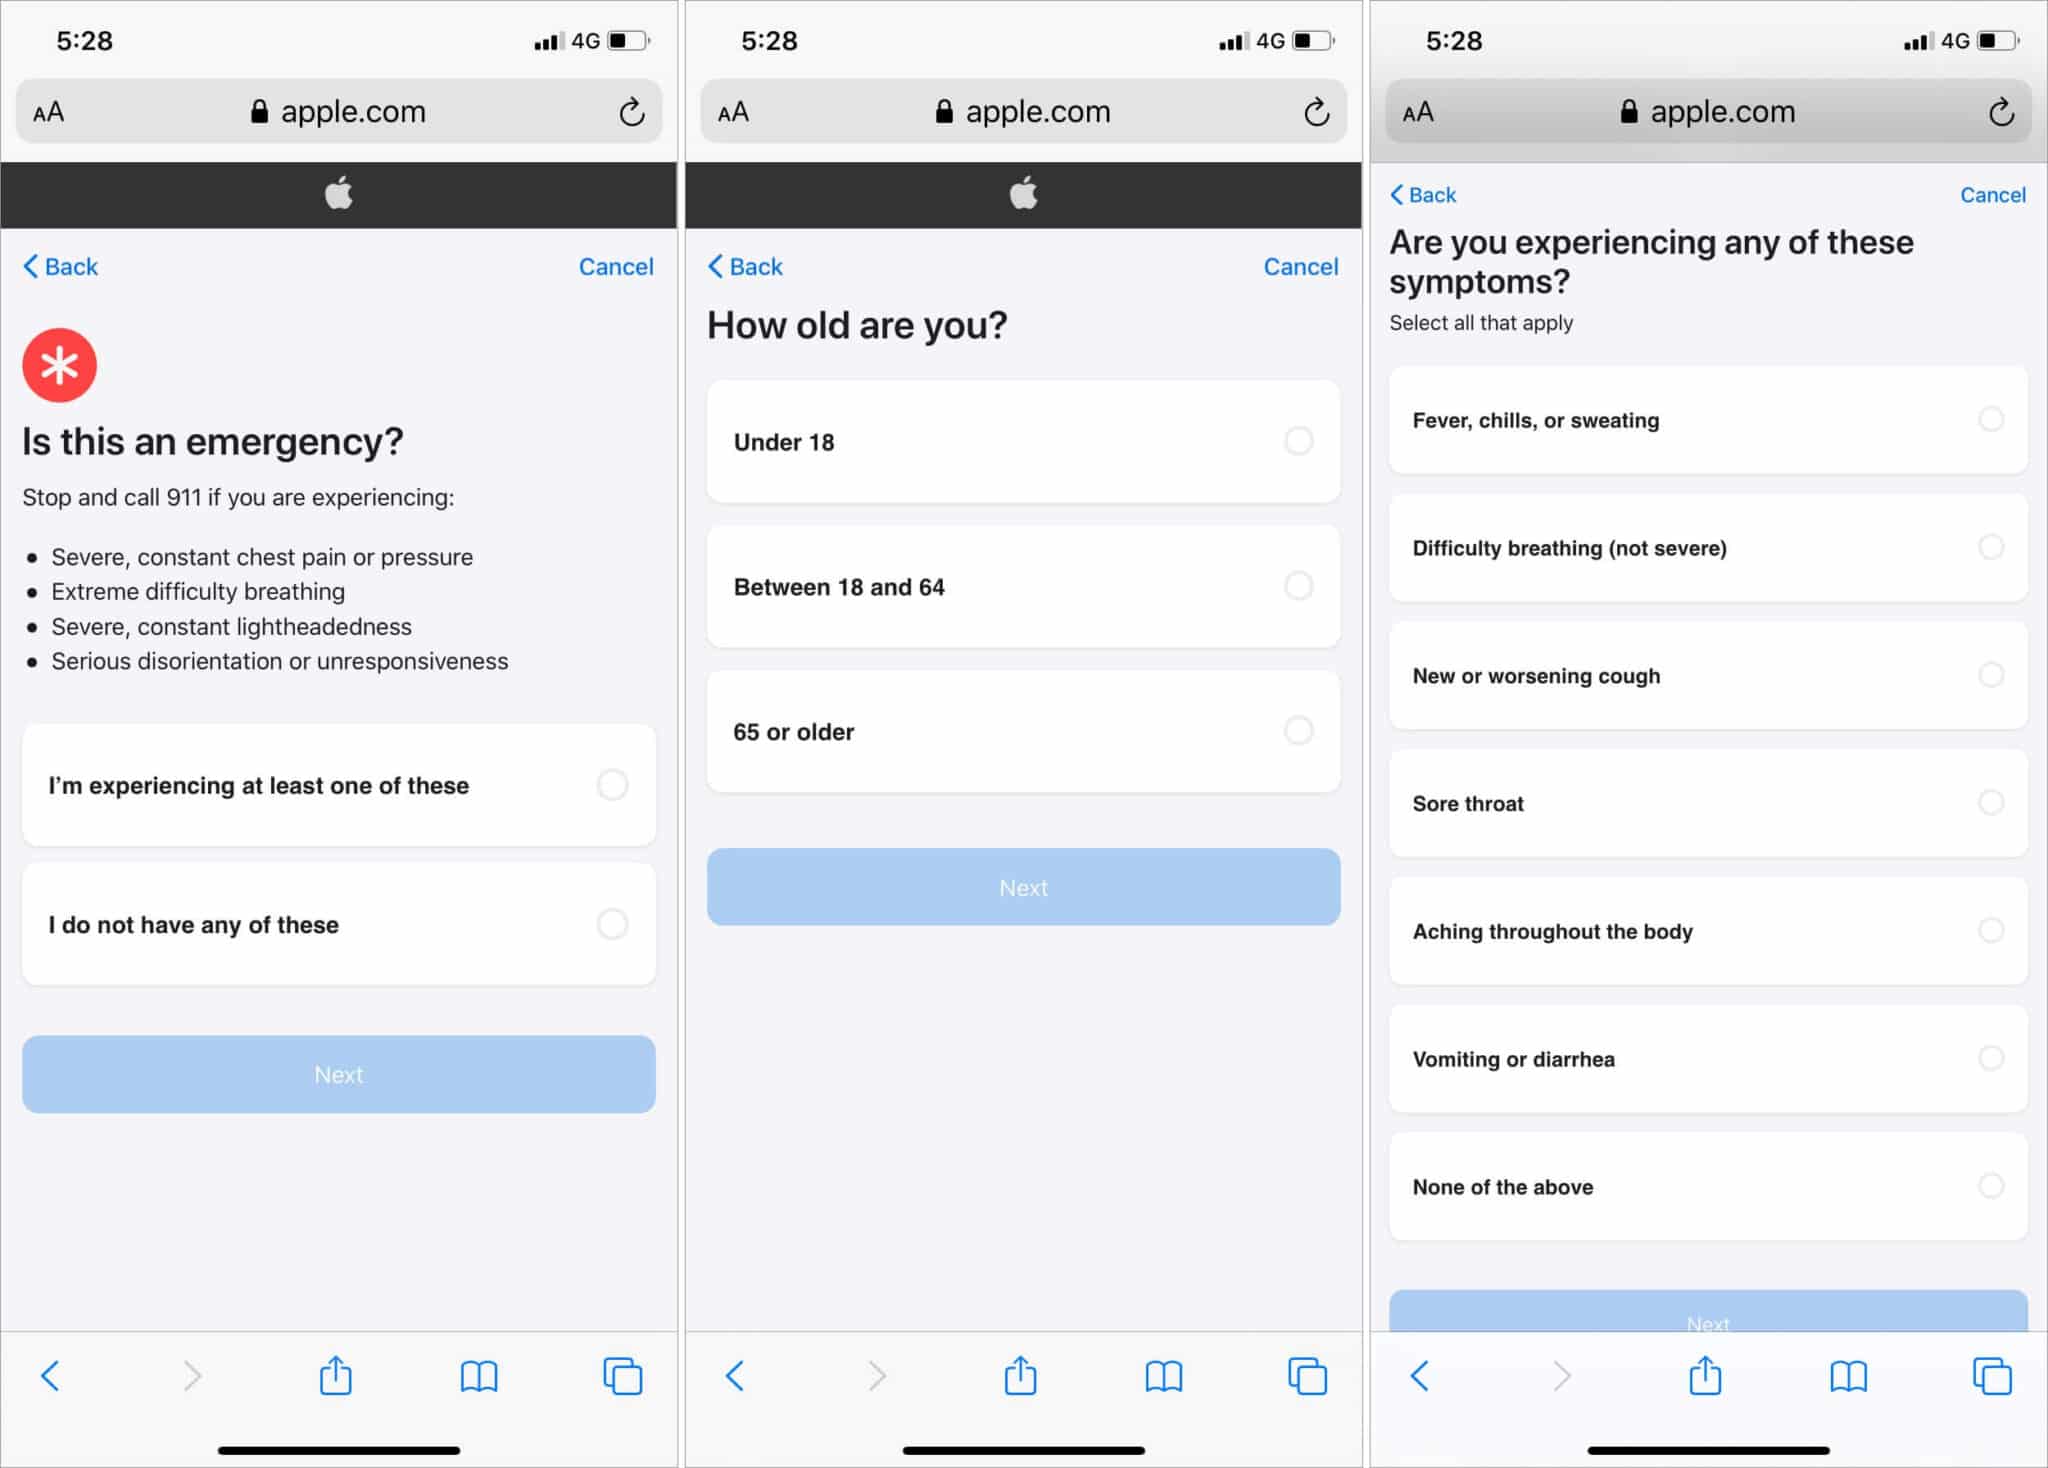
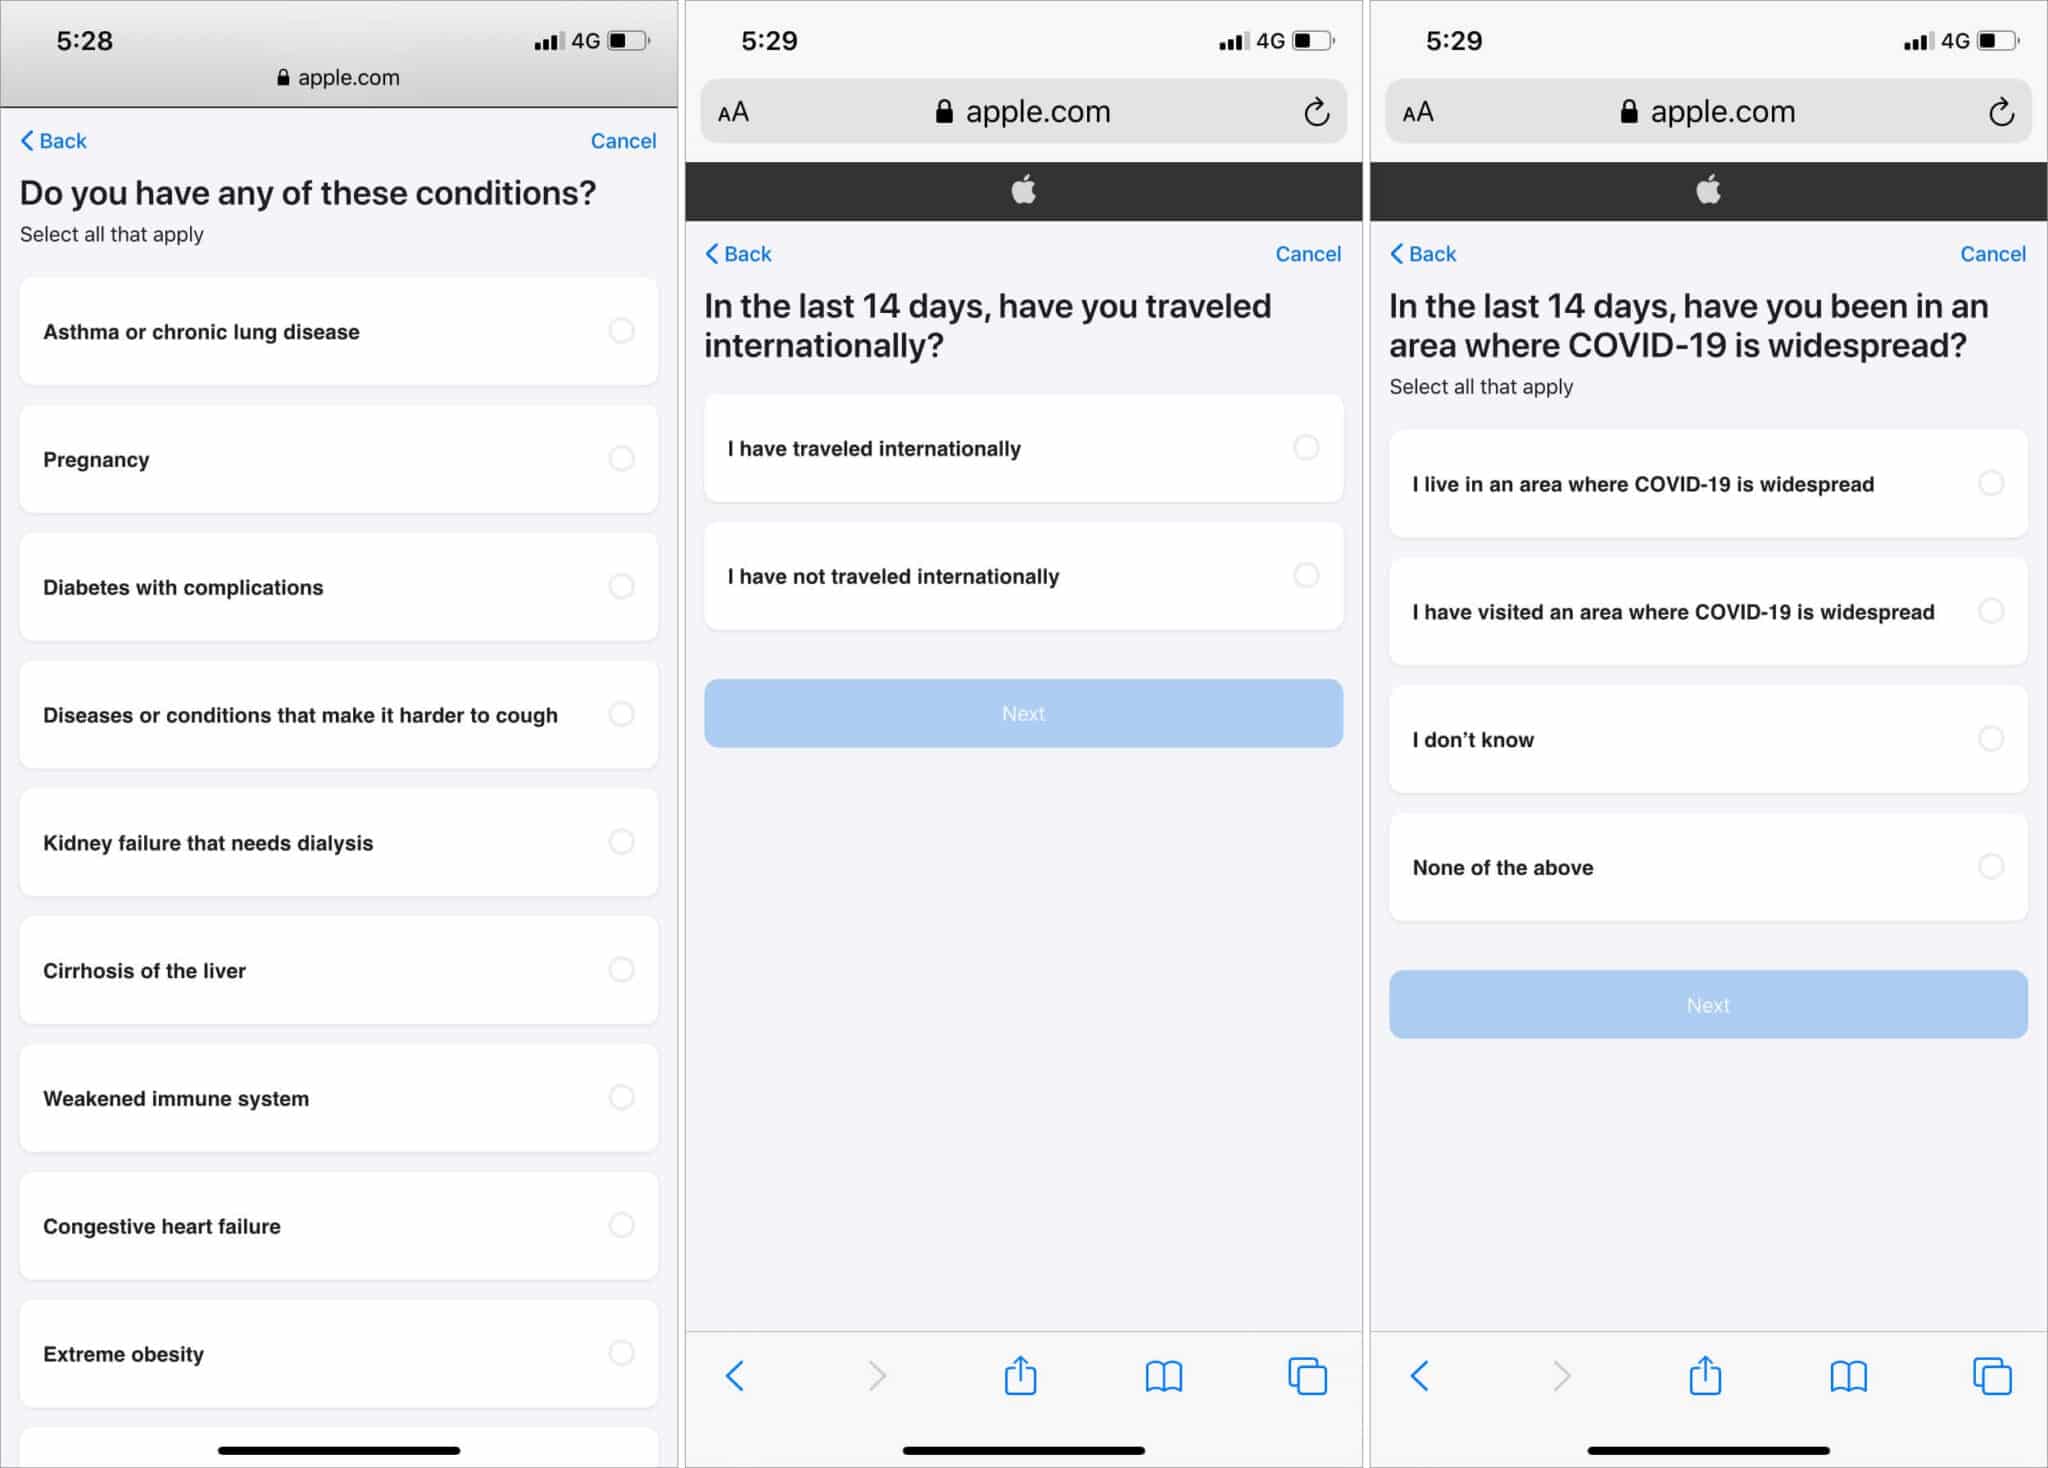
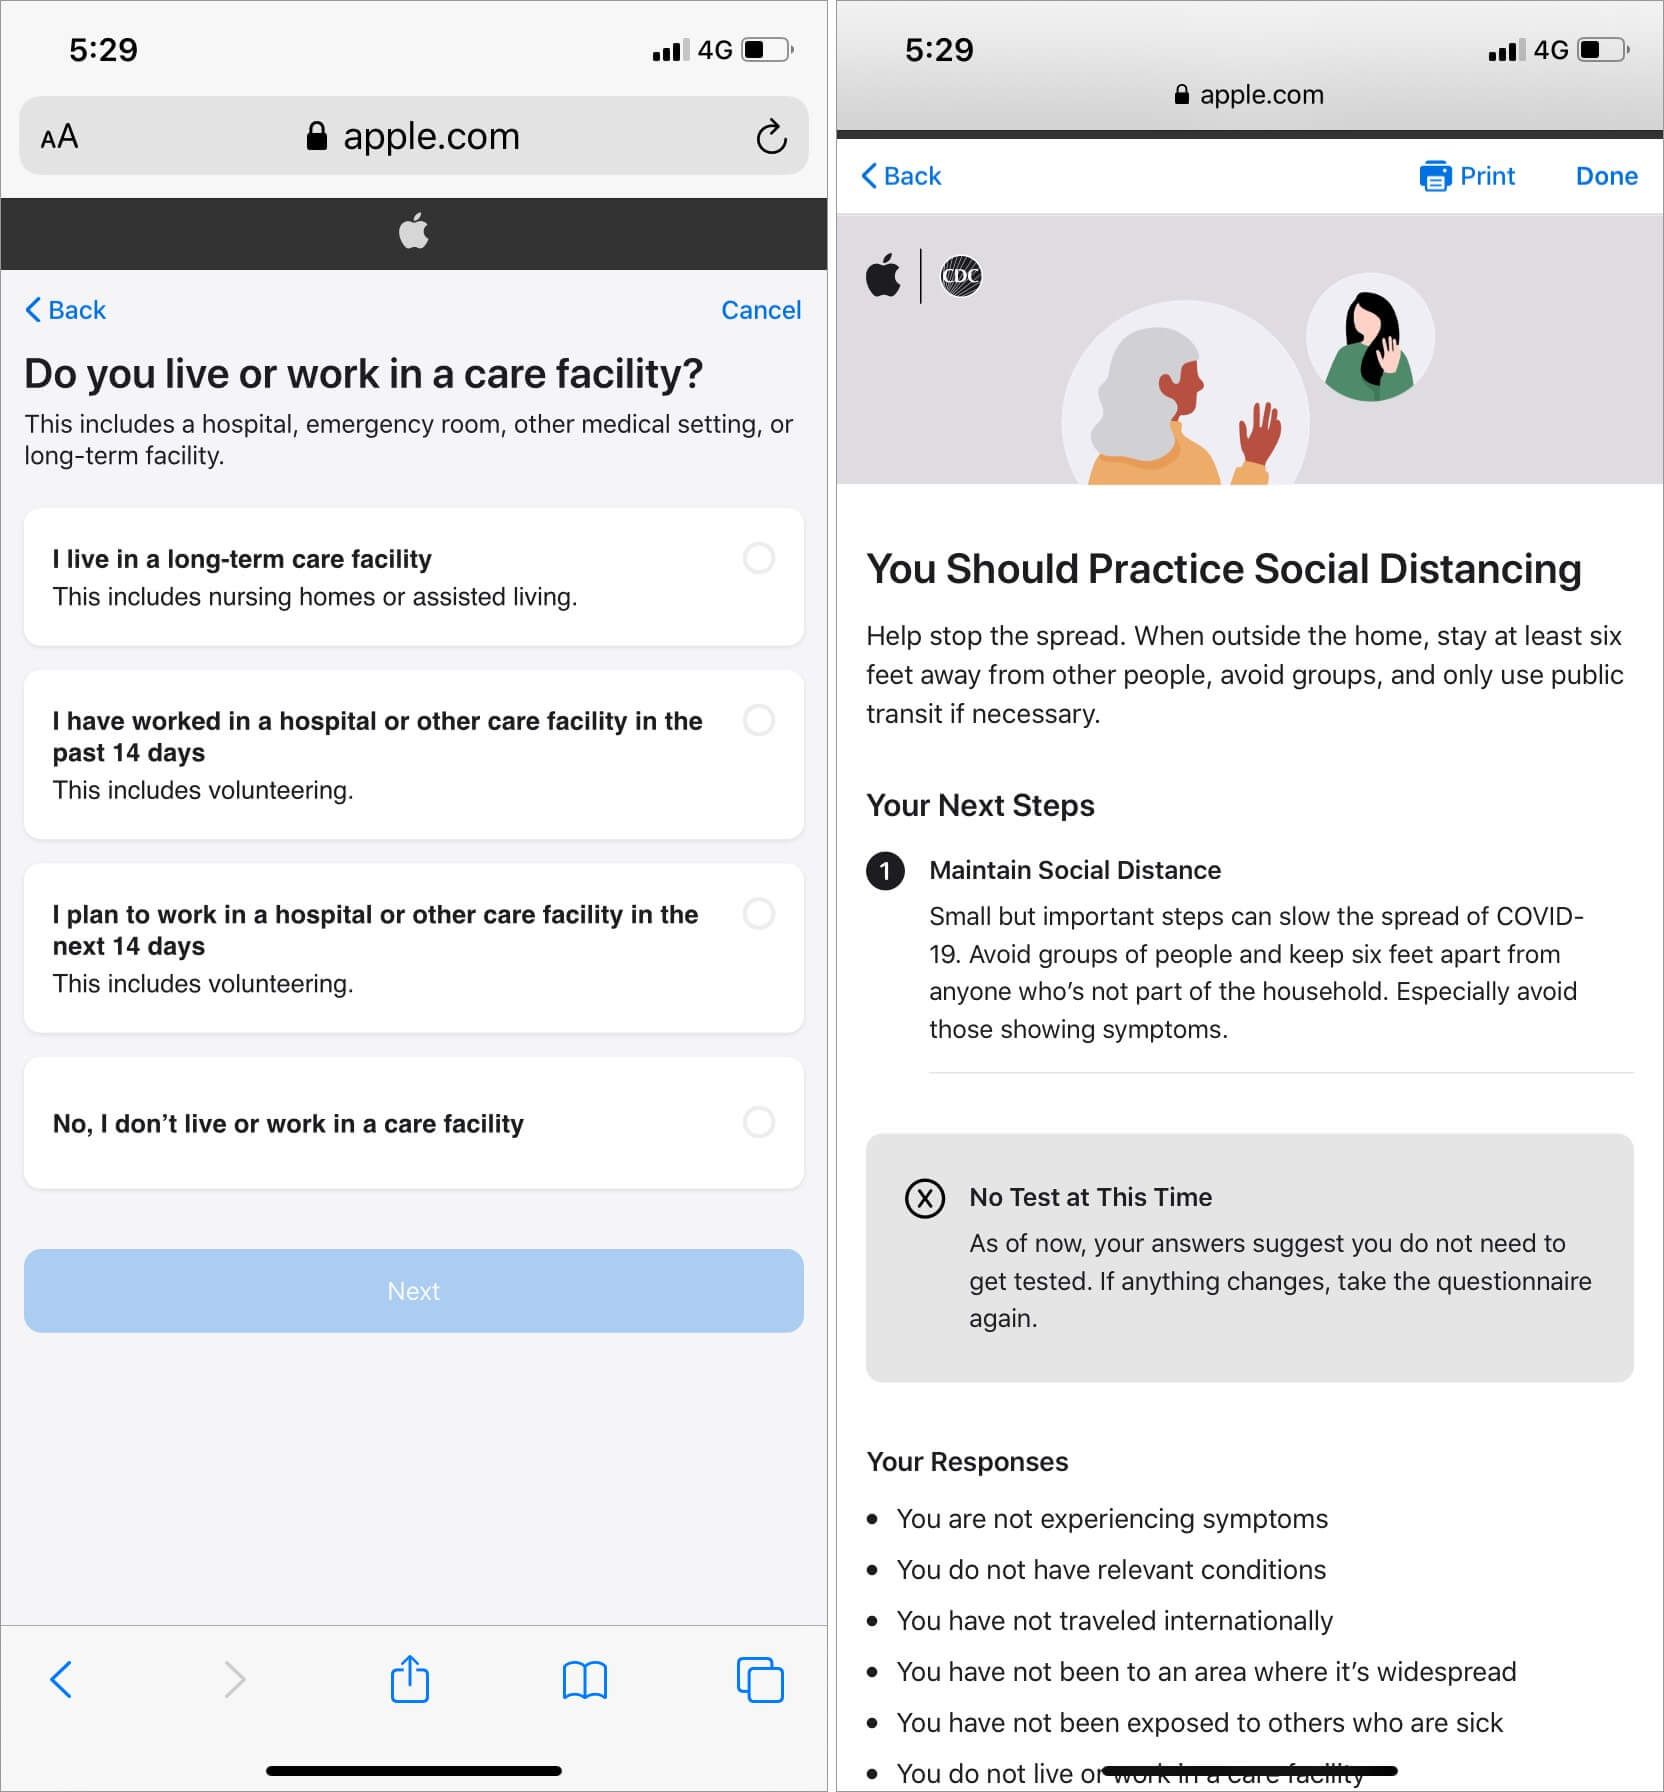
Step #6. Once the screening questionnaire is complete, you will be advised about the next steps you need to take. This advice can include things like “You Should Self-Isolate,” or “You Should Practice Social Distancing,” or “Contact Your Healthcare Provider.”
That’s all!
Wrapping Up…
The great part about Apple’s COVID-19 screening app is that you don’t even need to sign in to use it and you can take the screening questionnaire as many times as you want.
Once you’ve taken the screening test once, you can view your past results at any time from the home page of the app or website.
You would like to read these posts as well:
We think this is a great free tool from Apple and true to the company’s style, it’s incredibly user-friendly and simple to navigate. Let us know what you think in the comments below and stay safe, folks!


