
When writing a research paper, working on a math assignment, or formatting chemical equations, you will probably need to type superscripts or subscripts on Mac. Superscripts are small characters positioned slightly above the regular text line, often used for exponents (e.g., 2³) or citations (e.g., “Smith¹”). Subscripts, on the other hand, appear slightly below the baseline and are commonly used in chemical formulas (e.g., H₂O) or mathematical notation.

Keep reading below to learn how to create superscripts and subscripts on macOS.
Type Superscript and Subscript in Pages
Pages is the default word-processing app on Mac. It boasts a range of powerful features to create documents of all kinds. If you need to type superscript or subscript in Pages, you have the following options.
Using keyboard shortcuts
Keyboard shortcuts are a quick solution when you want to type special characters, such as the degree symbol. They are also handy to superscript or subscript on Mac.
To apply superscript, select the text you want to raise and press Control + Shift + Command + Plus Sign key (+).
To apply subscript, press Control + Command + Minus Sign key (-).
From the Menu bar
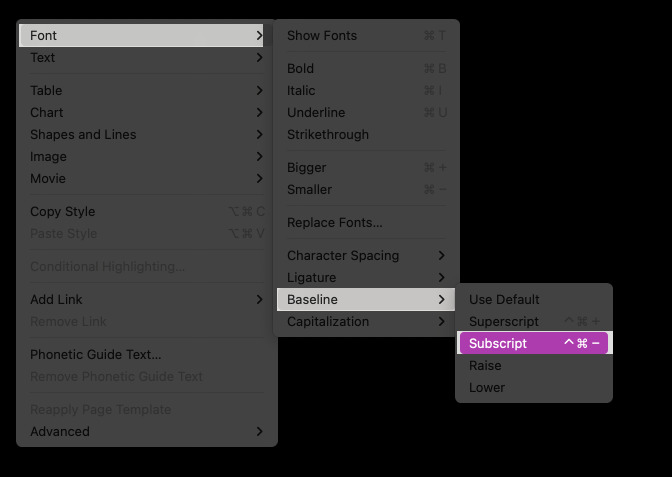
- Select the character or text you want to raise or lower.
- In the top menu bar, click Format → Font → Baseline and choose either Superscript or Subscript.

Using text options
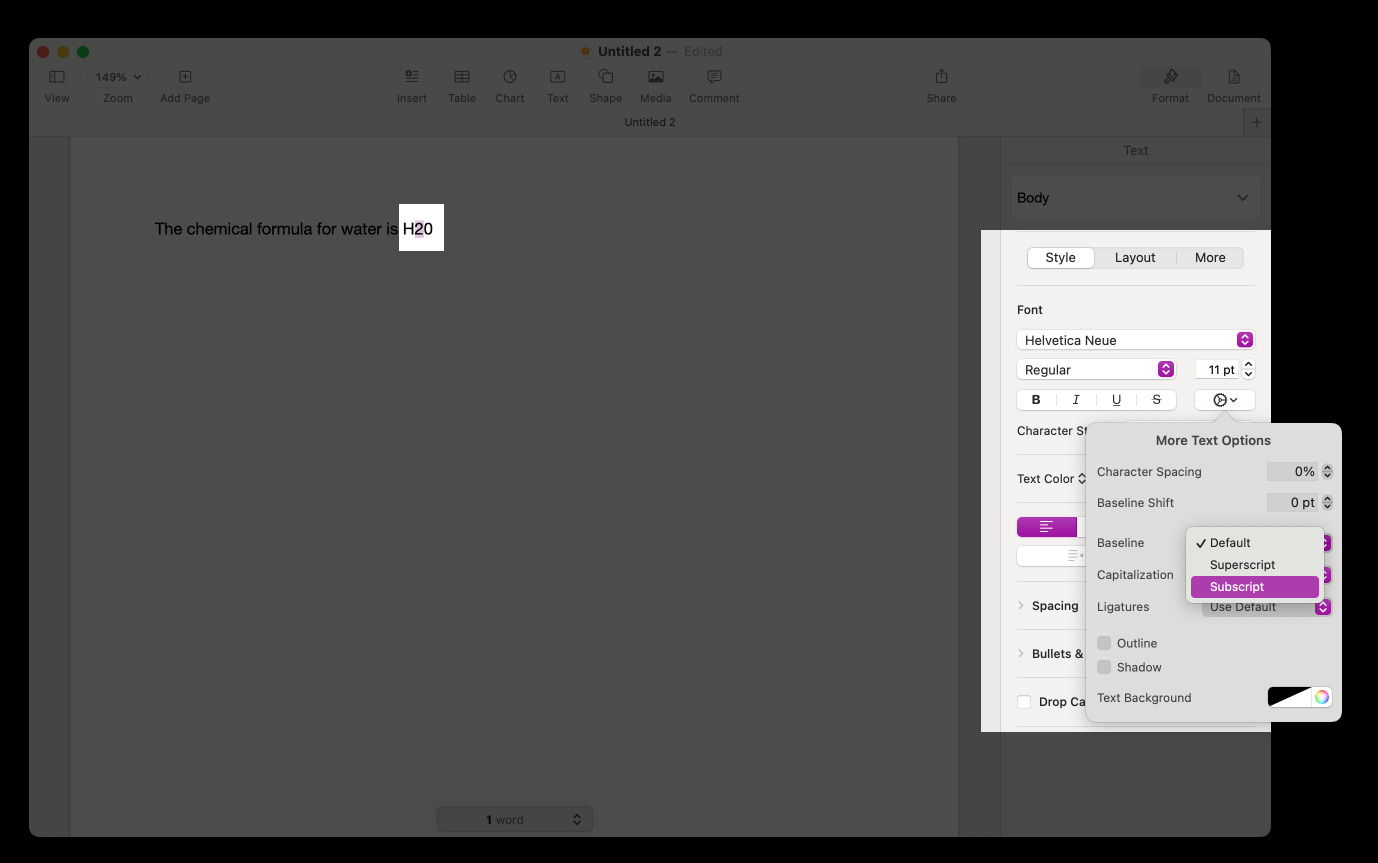
- Select the characters or text you want to raise or lower.
- Go to the Format sidebar and click the Style button near the top. In case the selected text is inside a table, shape, or text box, first click the Text tab at the top of the sidebar and then click the Style button.
- In the Font section, click the small settings gear to access the Advanced Options. Then click the Baseline pop-up menu and select Superscript or Subscript.

Add superscript and subscript shortcuts to the toolbar
If you use the superscript or subscript option pretty often, you can add a shortcut to it to the Pages toolbar. This will make it much easier to raise or lower text whenever you need to.
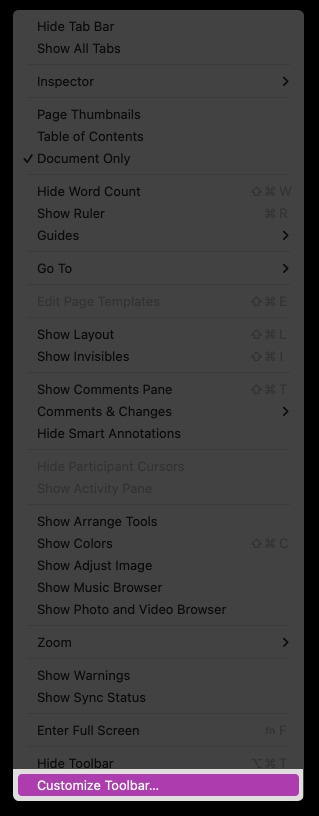
- In the top menu bar, click View and select Customize Toolbar.

- Drag the Superscript and/or Subscript icon upwards into the Pages toolbar.
- Click Done.

Automatically Superscript Numerical Suffixes
If you prefer writing 1st, 2nd, 3rd, as 1st. , 2nd, 3rd, you can set Pages to superscript such numerical suffixes automatically as you type.
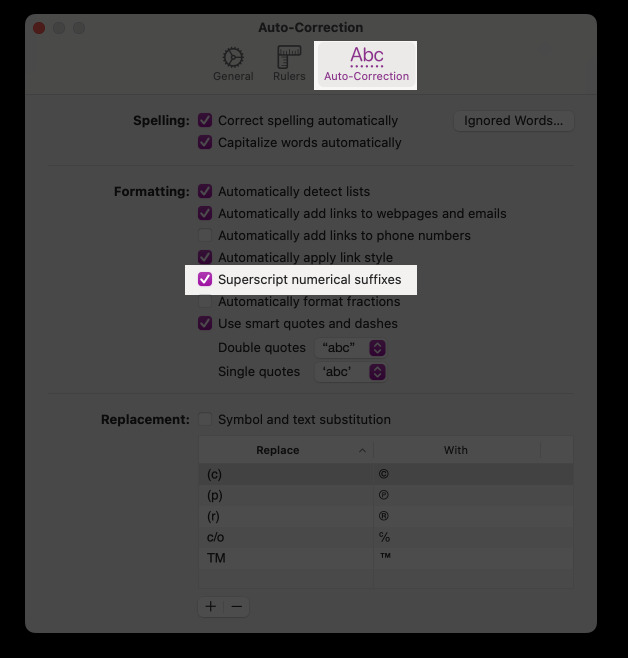
- Click the Pages menu at the top of the screen and select Settings.
- Click Auto–Correction.
- In the Formatting section, select the “Superscript numerical suffixes” tickbox.

Tip: If you want to save time when typing, you might want to use inline predictive text on your Mac.
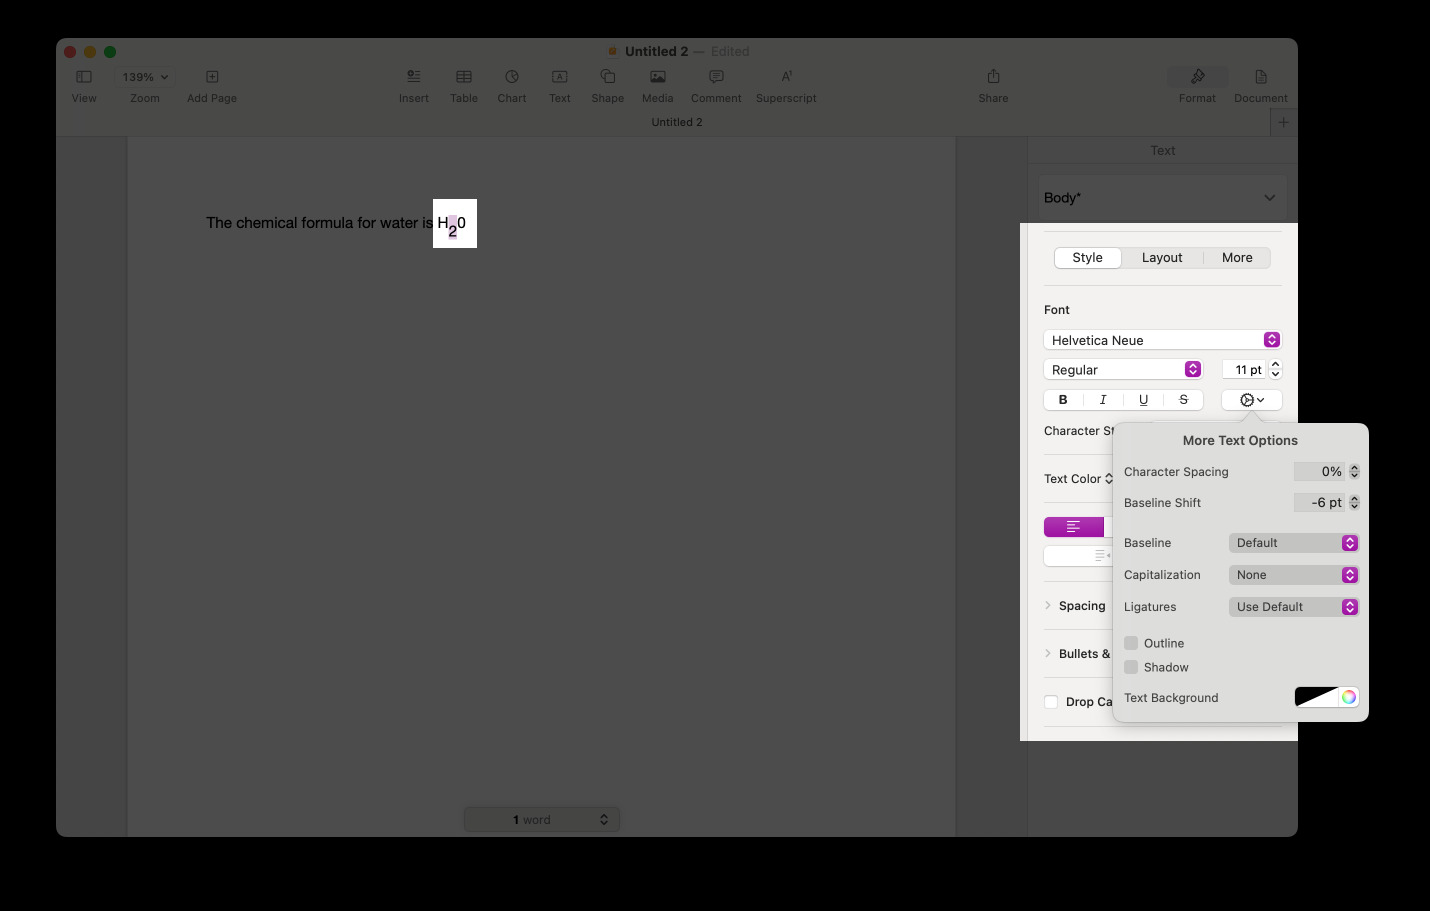
Raise or lower text without changing font size
When you use any of the methods described above, the size of the text that’s superscripted or subscripted becomes smaller. If you want to keep the text size the same, follow the steps below.
- Select the desired text or characters.
- Click Format on the right side of the Pages screen.
- Click on Style and then the Settings gear in the Font section.
- Next to Baseline Shift, click the up or down arrows to raise or lower the selected text without changing its size.

Type Superscript and Subscript in the Notes app
The Notes app also supports superscripts and subscripts. Just follow the steps below.
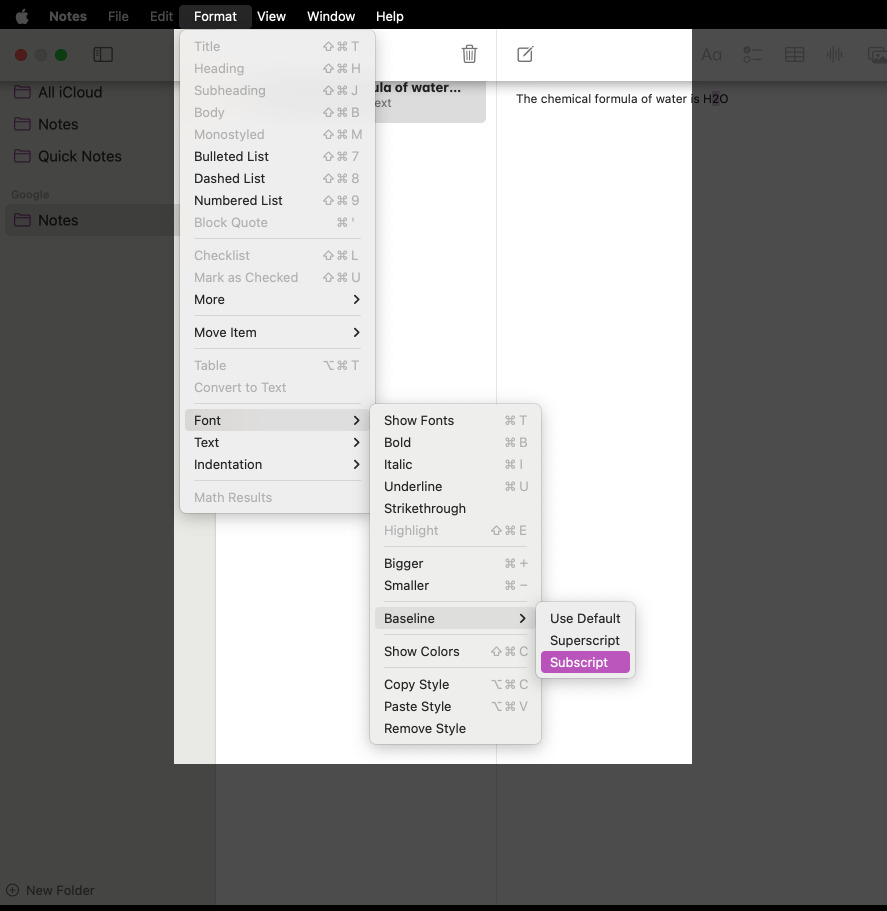
- Select the text or characters you want to raise or lower.
- In the top menu bar, click Format → Font → Baseline → Superscript or Subscript.

To return to typing in normal letters, follow the above steps and choose Use Default.
Type Superscript and Subscript in Numbers
Numbers is the default spreadsheet app in macOS. Just like on Pages, you can type superscripts and subscripts in Numbers using the methods below.
Using keyboard shortcuts
To apply superscript, select the text you want to raise and press Control + Shift + Command + Plus Sign key (+).
To apply subscript, press Control + Command + Minus Sign key (-).
Tip: You can customize keyboard settings on Mac to create your own keyboard shortcuts.
From the Menu bar
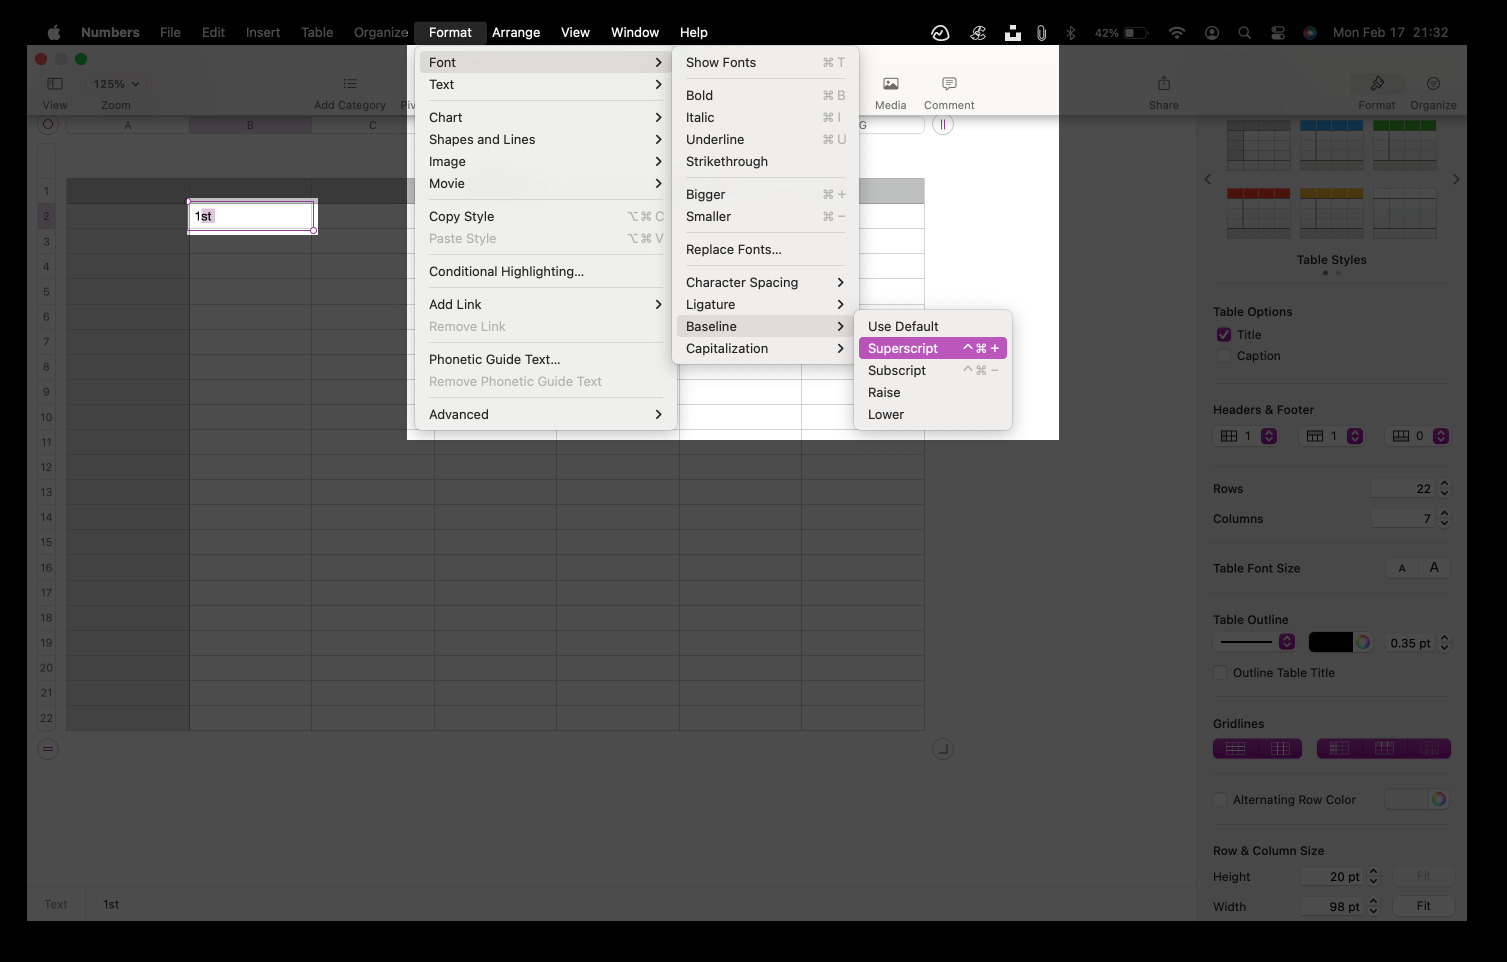
- Select the characters or text you want to raise or lower.
- In the top menu bar, click Format → Font → Baseline and choose either Superscript or Subscript.

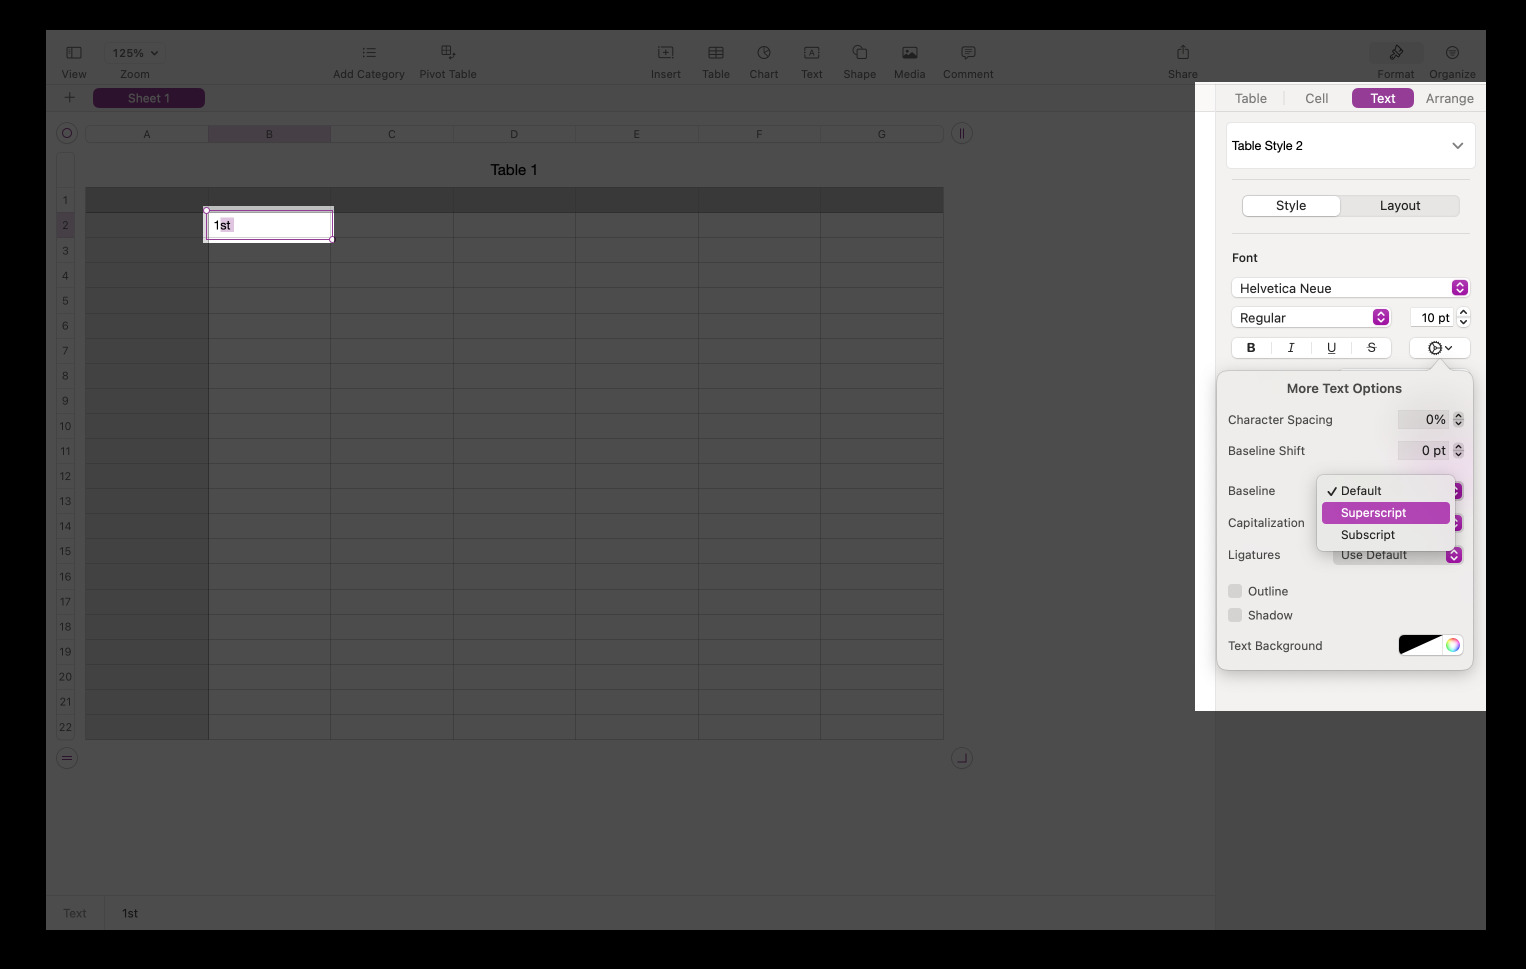
Using text options
- Select the characters or text you want to raise or lower.
- On the right side, click the Format button and click Text.
- Click the small settings gear to access the Advanced Options. Then click the Baseline pop-up menu and select Superscript or Subscript.

Add superscript and subscript shortcuts to the toolbar
If you often use the superscript or subscript option, you can add a shortcut to it to the Numbers toolbar. This will make it much easier to raise or lower text whenever you need to.
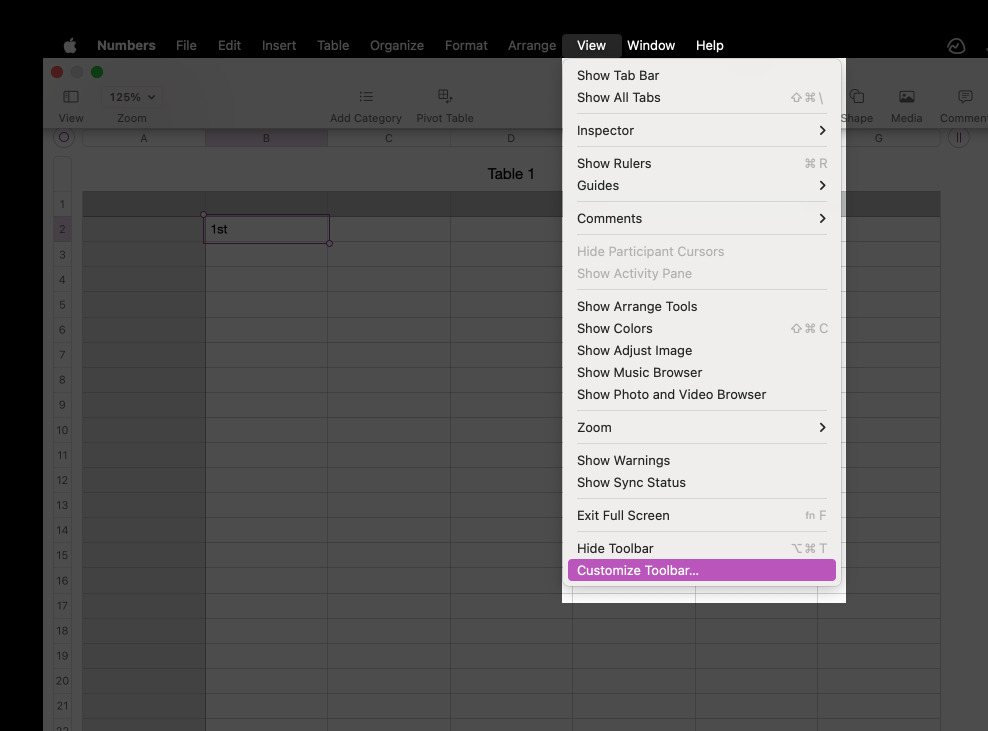
- In the top menu bar, click View and select Customize Toolbar.

- Drag the Superscript and/or Subscript icon upwards into the Numbers toolbar.
- Click Done.

Automatically Superscript Numerical Suffixes
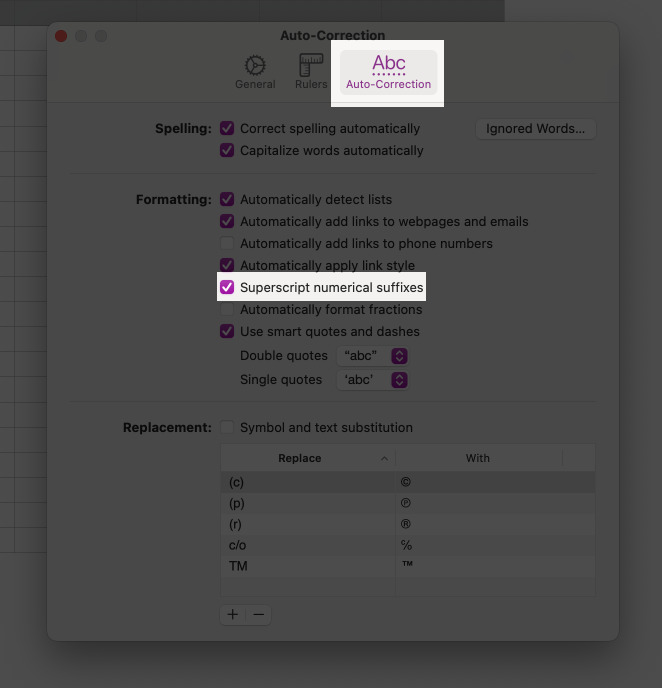
If you prefer writing 1st, 2nd, 3rd, as 1st. , 2nd, 3rd, you can set Numbers to superscript such numerical suffixes automatically as you type.
- Click the Numbers menu at the top of the screen and select Settings.
- Click Auto–Correction.
- In the Formatting section, select the “Superscript numerical suffixes” tickbox.

Raise or lower text without changing font size
When you use any of the methods described above, the size of the text that’s superscripted or subscripted becomes smaller. If you want to keep the text size the same, follow the steps below.
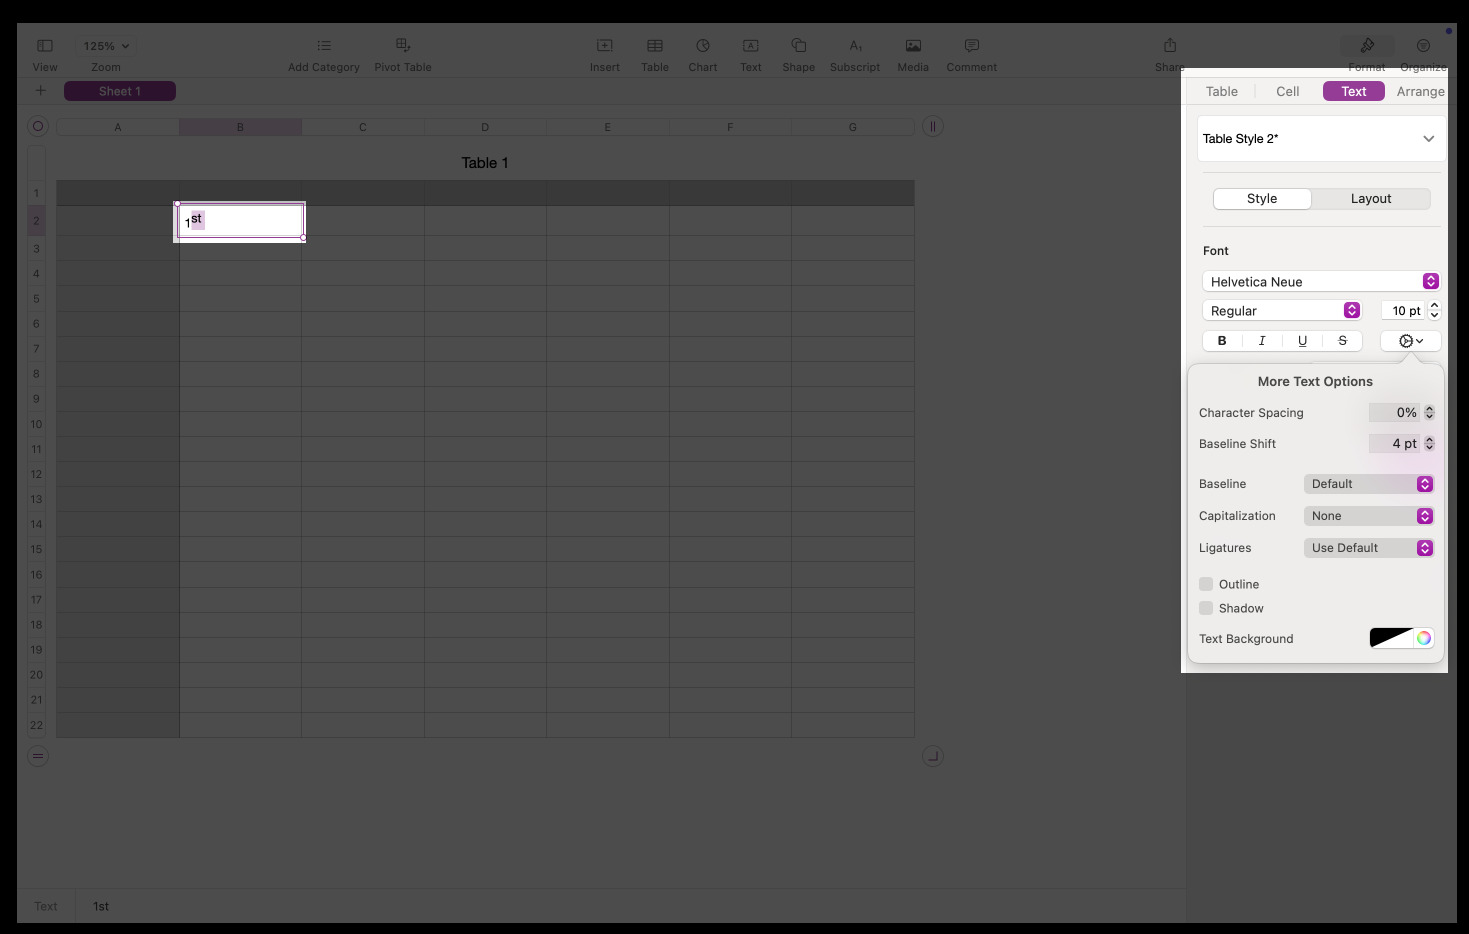
- Select the desired text or characters.
- Click Format on the right side of the Numbers screen.
- Click on Text and then the Settings gear in the Font section.
- Next to Baseline Shift, click the up or down arrows to raise or lower the selected text without changing its size.

Signing off
I hope this guide has equipped you to use superscripts and subscripts on your Mac. You might also want to check out how to type the Apple logo on your Mac or type inverted exclamation points that are necessary when typing in Spanish.
You might also like:
