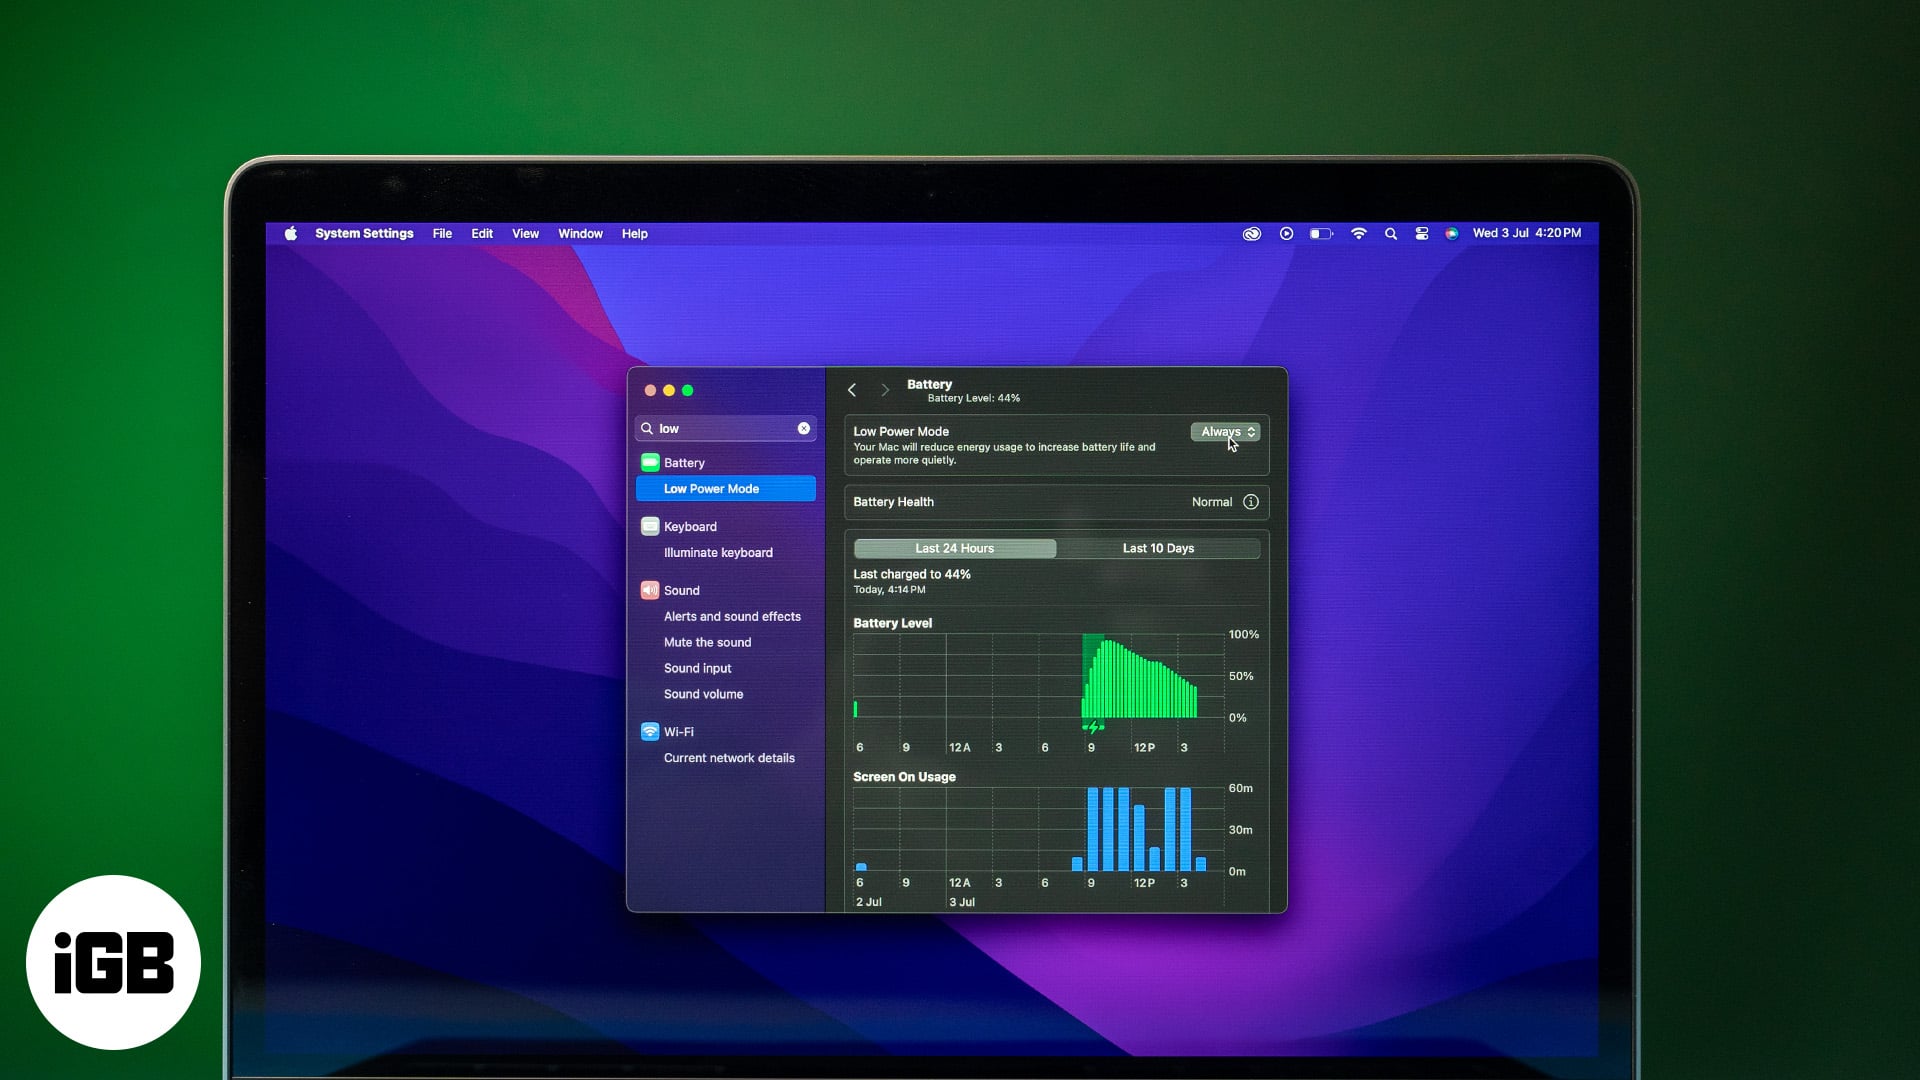
The latest MacBooks offer a good battery life that can easily last through the day for most users. However, if you’re a power user who does a lot of energy-intensive tasks like video editing or if your Mac is getting older, the battery may not last as long as it usually does. This is where the Low Power Mode can really help you. When enabled, this feature extends your Mac’s battery life by making minor adjustments that decrease power usage. Keep reading below for more details and learn how to turn on low power mode on your Mac.

What does Low Power Mode do on a MacBook?
Similar to the low power mode on the iPhone and Apple Watch, the feature on the MacBook is designed to preserve battery life. It does this by adjusting some processes and settings to optimize power usage while maintaining performance efficiency.
Some of the key features of Low Power Mode include:
- Lower screen brightness: The display is slightly dimmed to reduce power consumption.
- Limited background activity: Background processes on your Mac, such as app refreshes, or downloads, get reduced or paused.
- Optimized CPU and GPU performance: The CPU and GPU may function at lower frequencies to save energy.
These changes combine to cut down power consumption, which can significantly extend the battery life of your computer.
How to turn on Low Power Mode in macOS
If your Mac meets the system requirements mentioned above, here’s how to enable it on your MacBook Pro or MacBook Air:
- In the menu bar, click on the Apple logo and select System Settings.
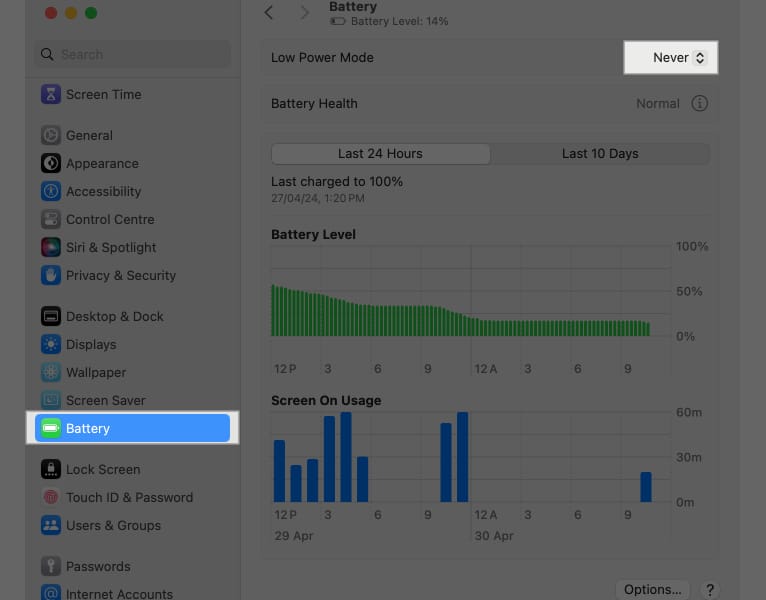
- In the sidebar click on Battery.
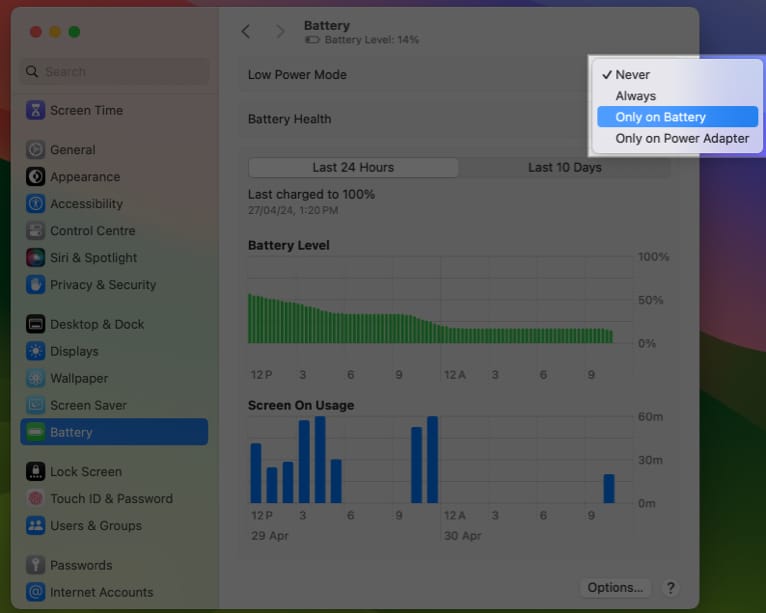
- Here, click the Up Down Arrows button next to Low Power Mode and select one of the available options. By default, the Never option is selected.
- Always: This will always keep your MacBook in the Low Power Mode.
- Only on Battery: This will ensure that the Lower Power Mode automatically turns on when you unplug the charger from your MacBook.
- Only Power Adapator: The battery-saving feature will be enabled whenever you connect the charger to your MacBook. Technically, there is no benefit in this because there’s no reason to run low power mode when your Mac is charging.
- If you are enabling Low Power Mode for the first time, your Mac will ask you to enter your login password or Touch ID to confirm.
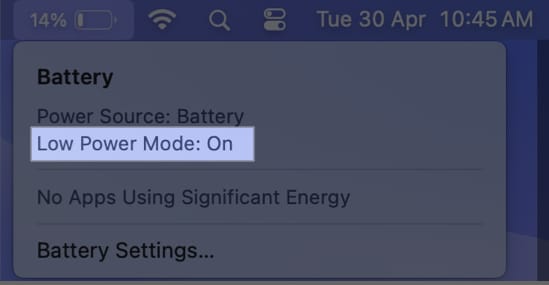
When low power mode is enabled, the quickest way to check it is by clicking on the battery icon in the menu bar.
If the battery icon isn’t in the Menu Bar, here’s how to make it appear:
- Click on the Apple menu and go to System Settings. Then select Control Center and scroll down to the Battery section.
- Toggle on the option for Show in the Menu Bar.
Then, you can simply click the battery icon in the menu bar to check whether Low Power Mode is enabled on your Mac.
When to use Low Power Mode on a MacBook?
Apple designed the Low Power Mode to give your device a little extra juice whenever it is on low battery. This way, you can use your MacBook for a longer period than you would normally do without connecting it to a power source.
This comes in handy if you’re stuck somewhere without a charger or if you’re traveling and need your battery to last a little longer.
Disadvantages of Low Power Mode on MacBook
While Low Power Mode on a MacBook can help conserve battery life, it comes with some disadvantages:
- Low screen brightness
- Less CPU clock speed
- Slower transfer speed and more
If you’re a power user, you will certainly notice a dip in the performance of your MacBook. Therefore, I recommend keeping Low Power mode turned off unless you need it.
Signing off….
I hope I’ve answered all your questions about Low Power Mode on Mac. If you need help with anything else, let me know in the comments below.
FAQs
It depends on your personal preference. Low Power Mode gives you a slightly longer battery life, and there is no harm in keeping it enabled. However, it also makes your MacBook deliver less power than usual, so it could impact performance.
No, Low Power Mode does not affect the charging speed of your Mac or other Apple devices.
Also Read:


