The native Voice Memo app on iPhone provides a great way to record meetings and seminars or even make quick audio notes of your ideas on the go. But too many recordings can take up valuable space on your iPhone and slow it down. So, it’s useful to transfer voice memos from iPhone to Mac.
There are multiple ways to do this, and here, I’ll share different methods that are easy, quick, and, most importantly, free! Let’s begin.
1. Sync your voice memos via iCloud
With iCloud, you only need to enable syncing of voice memos between your iPhone and Mac to transfer voice memos.
Once synced, you can access the voice memos from iPhone on Mac and vice versa.
Enable iCloud syncing of Voice Memos on your iPhone
Before using iCloud to transfer voice memos from iPhone to Mac, you must first enable iCloud syncing of voice memos on your iPhone. Here’s how:
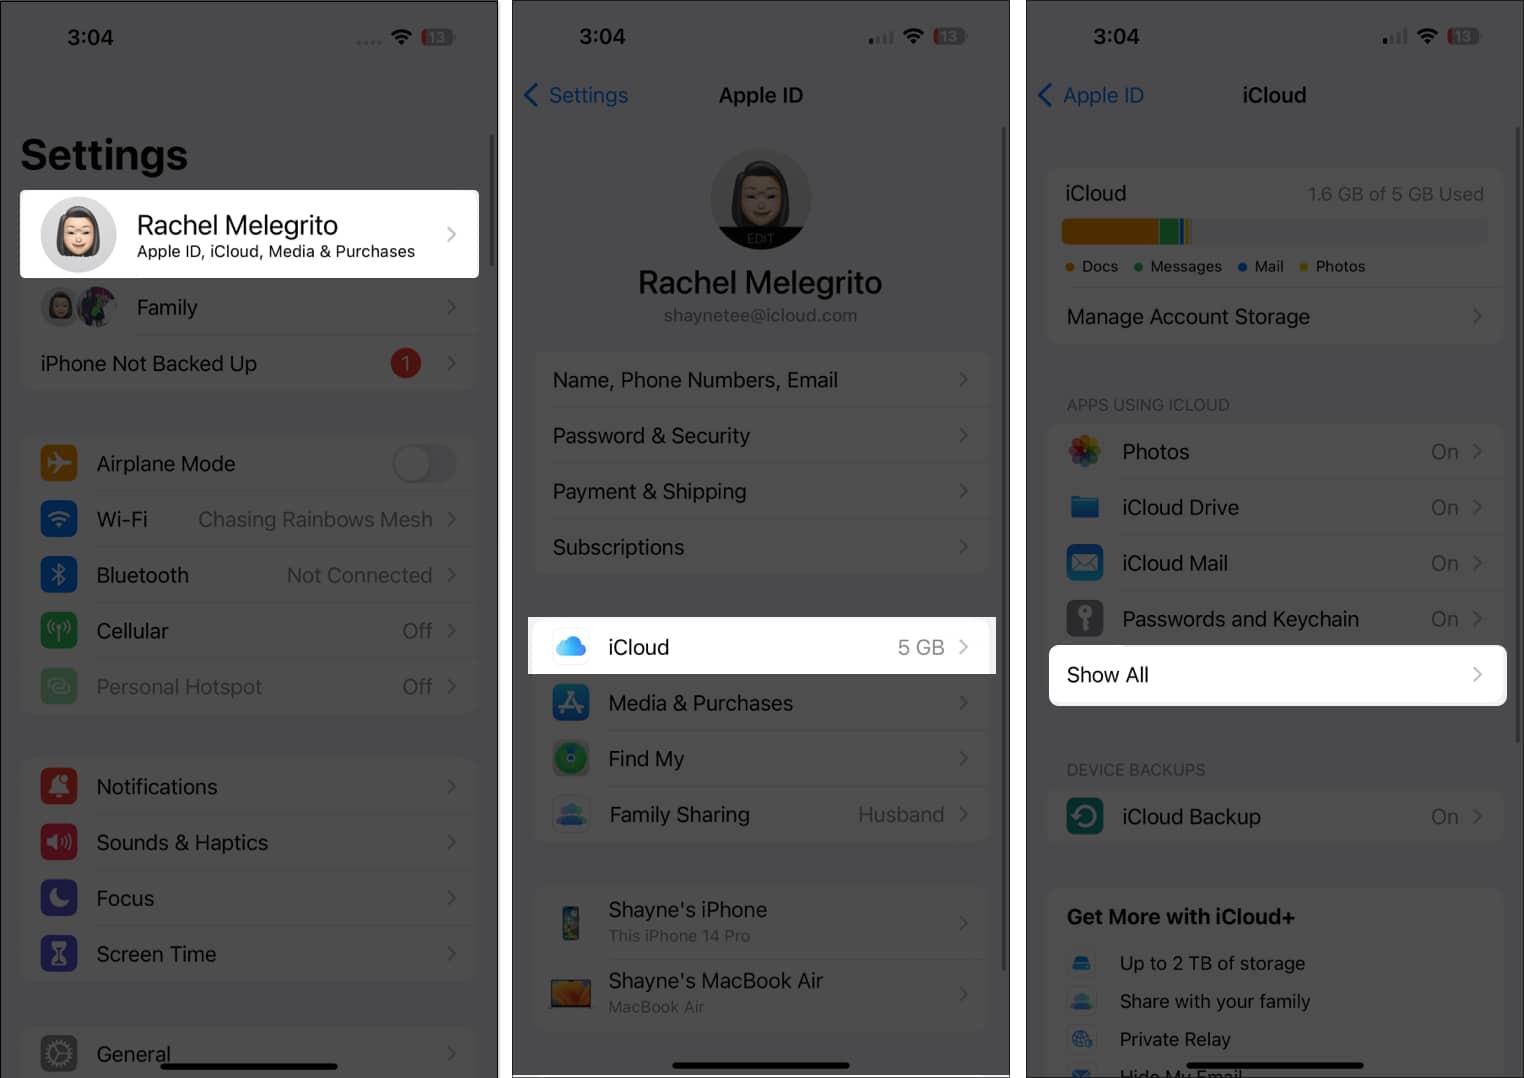
- Open Settings → Tap your name.
- Tap iCloud → Select Show All to expand the selection.
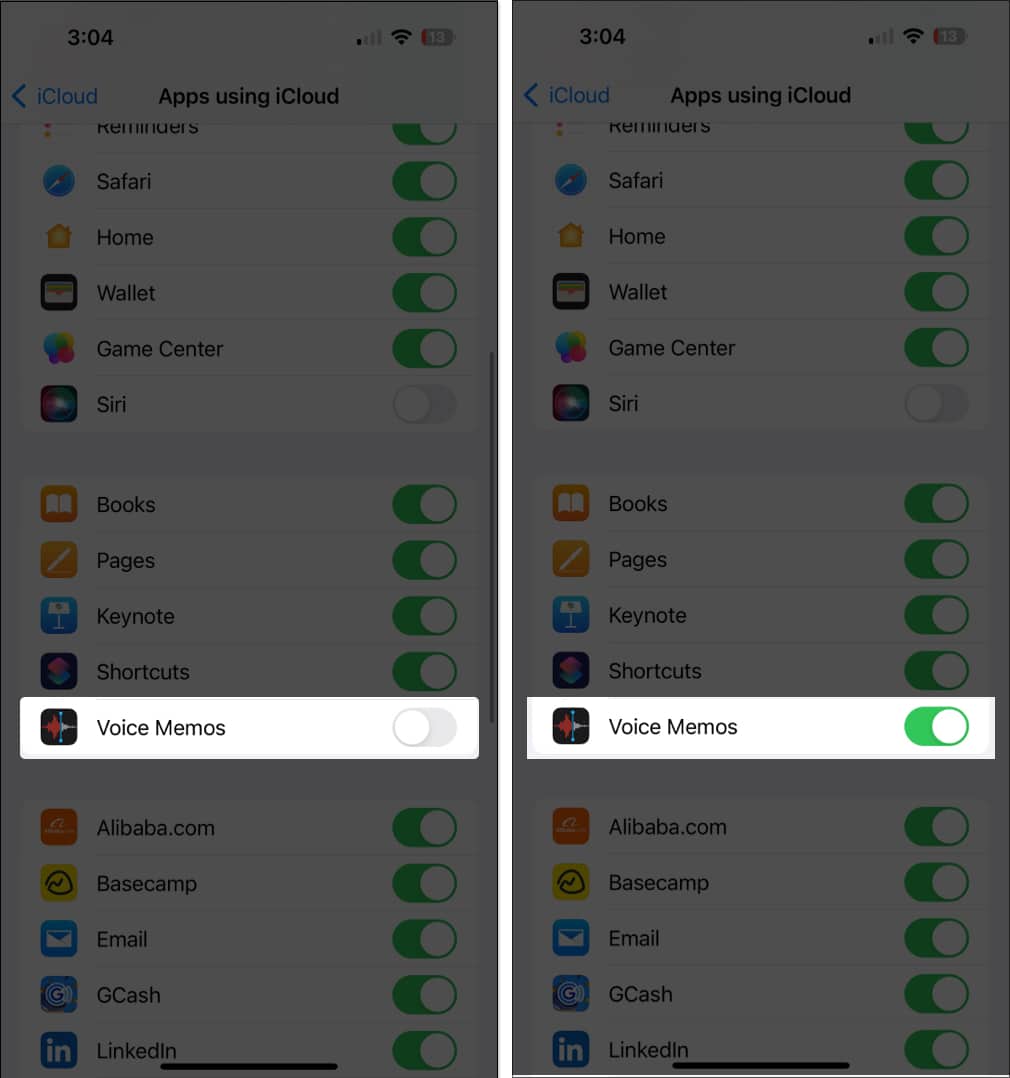
- Scroll down and toggle on Voice Memos.
Enable iCloud syncing of Voice Memos on your Mac
You should also enable voice memo syncing on your Mac.
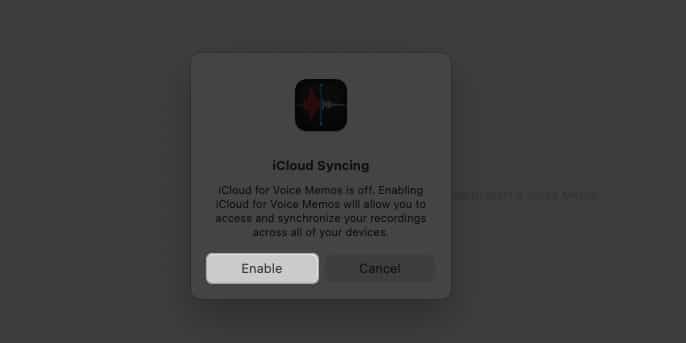
- If it’s your first time using Voice Memos on your Mac, open Voice Memos.
- A popup window will ask if you want to enable iCloud Syncing. Click Enable.
If you’ve been using Voice Memos on your Mac for a time, here’s how you can enable it:
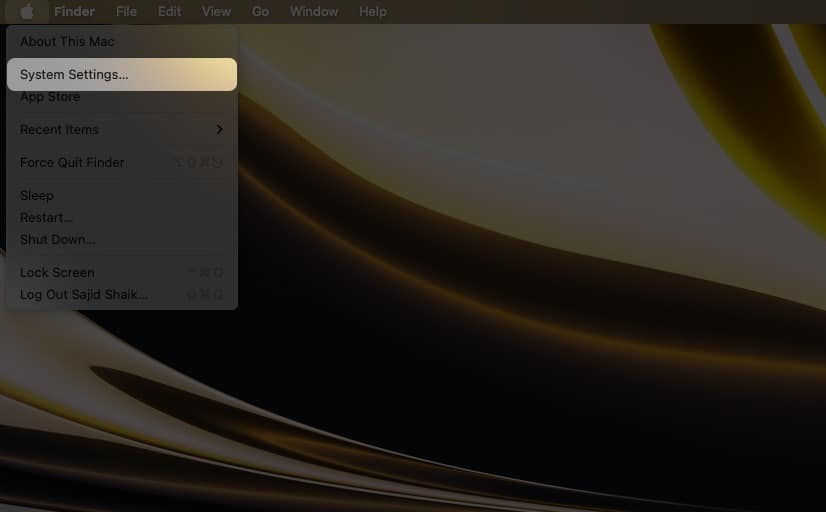
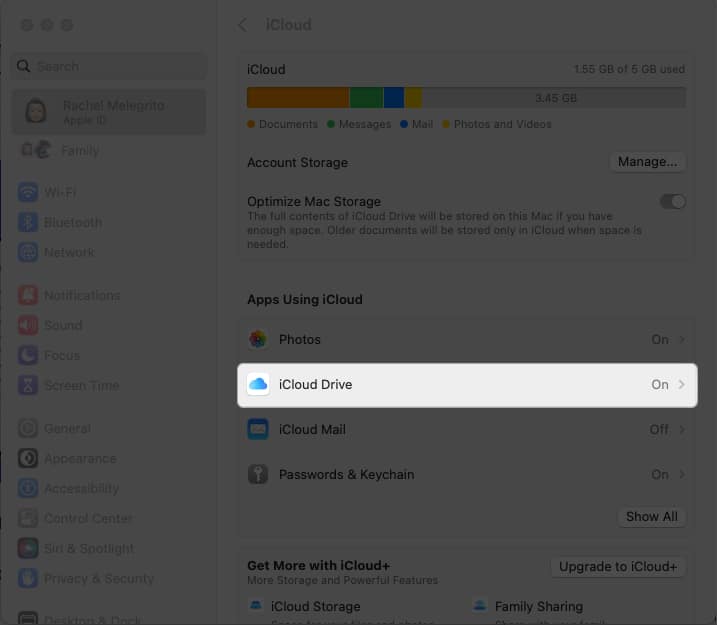
- Click the Apple menu → System Settings.
- Select your Apple ID account at the top.
- Click iCloud → iCloud Drive.
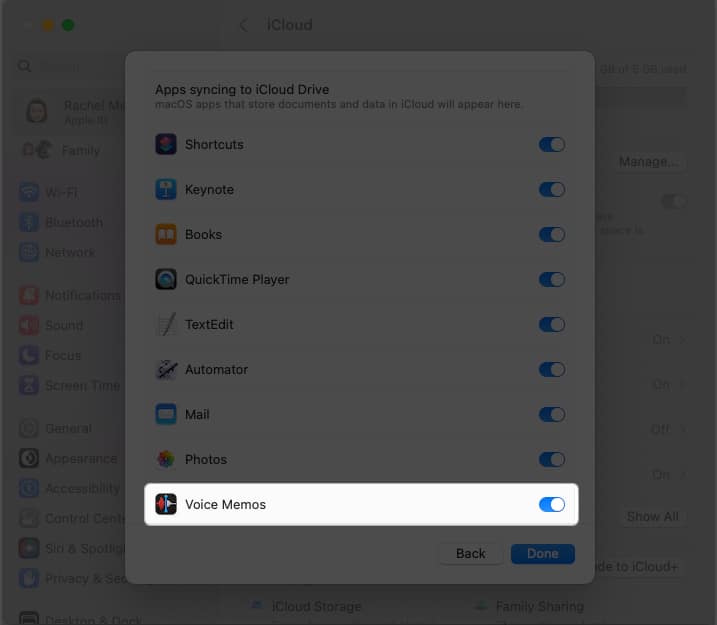
- Click Show More Apps.
- Toggle on Voice Memos → Tap Done.
2. Send voice memos via AirDrop
AirDrop is one of the easiest ways to share files within the Apple ecosystem. To send a voice memo via AirDrop:
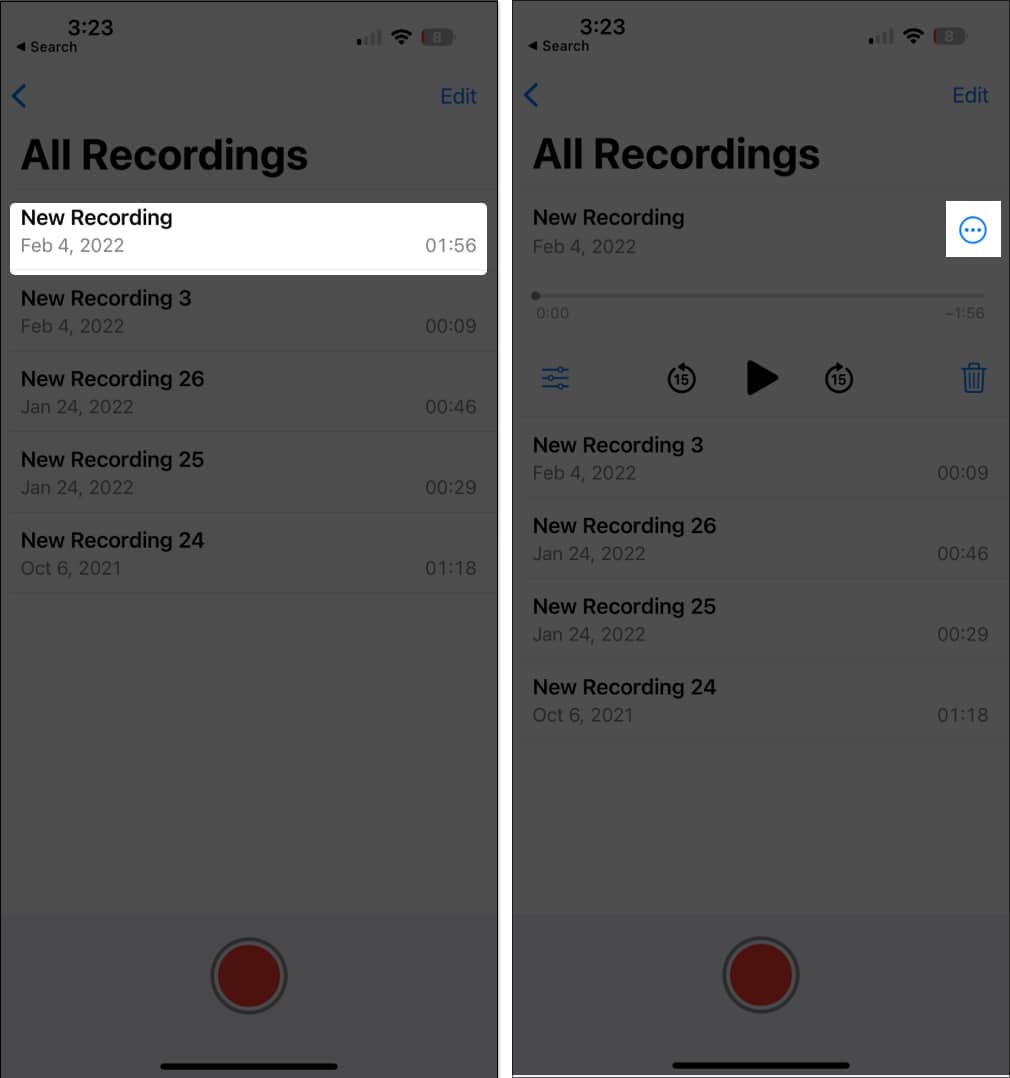
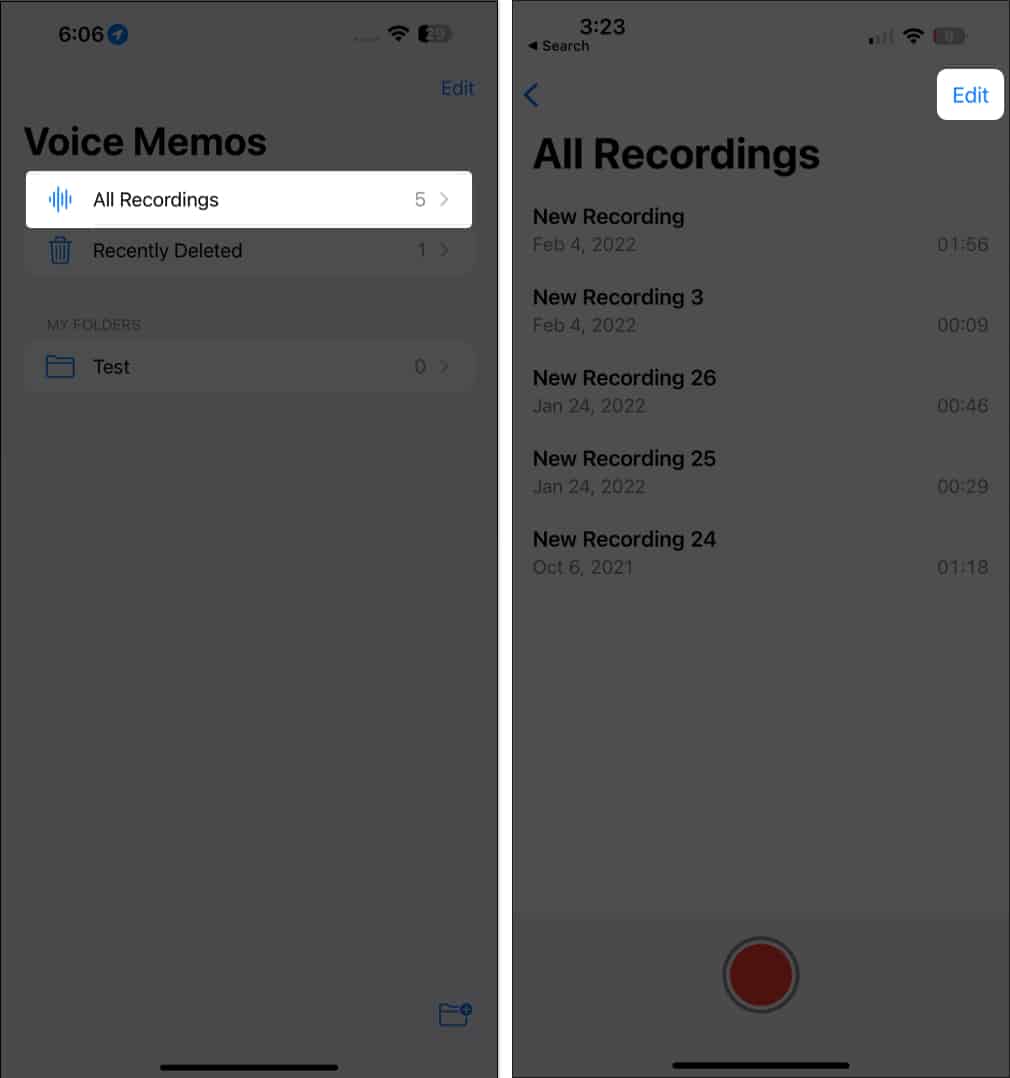
- Open Voice Memos on iPhone → Go to All Recordings.
- Tap the voice memo you want to send → Select the three-dot icon.
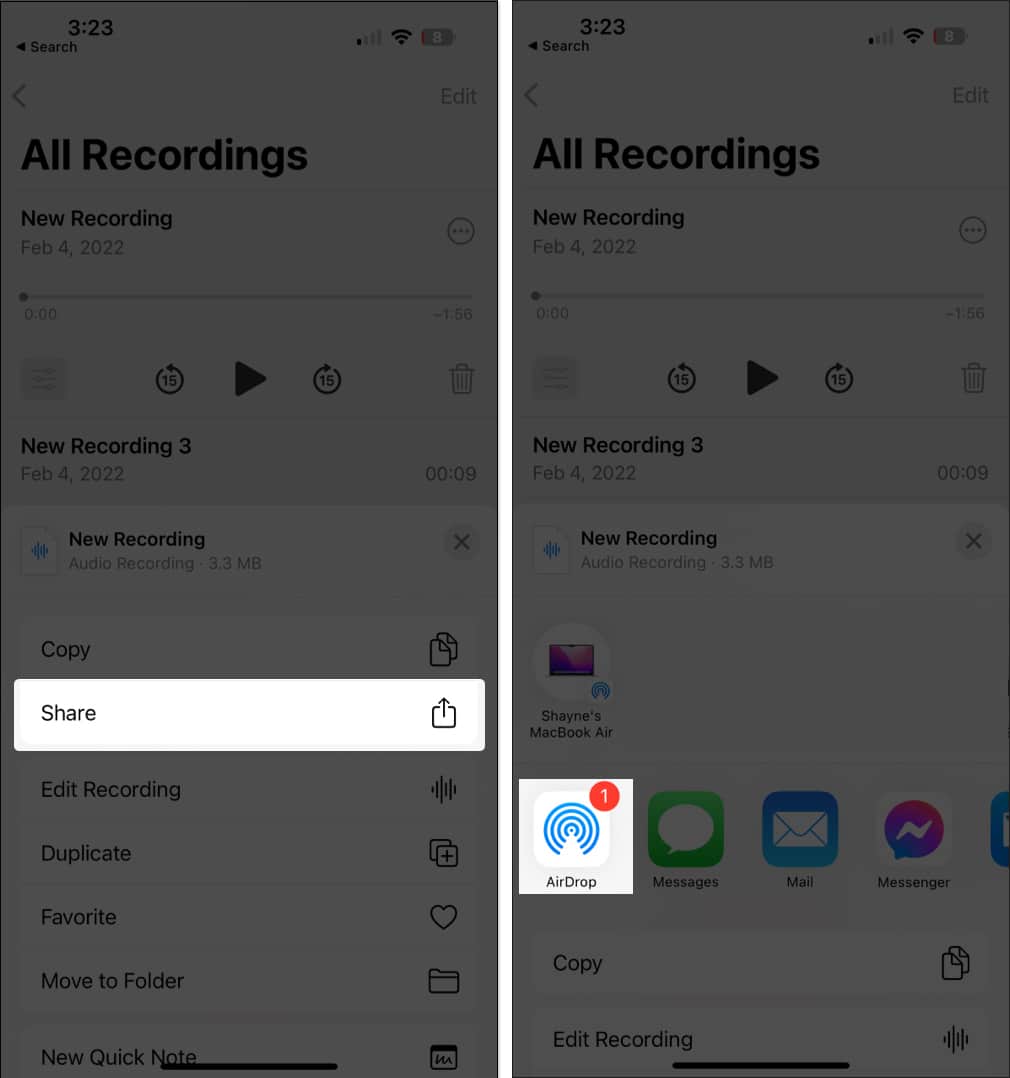
- Select Share → AirDrop → Select your Mac. If you can’t see your Mac, ensure both your Bluetooth and Wi-Fi are turned on for both devices.
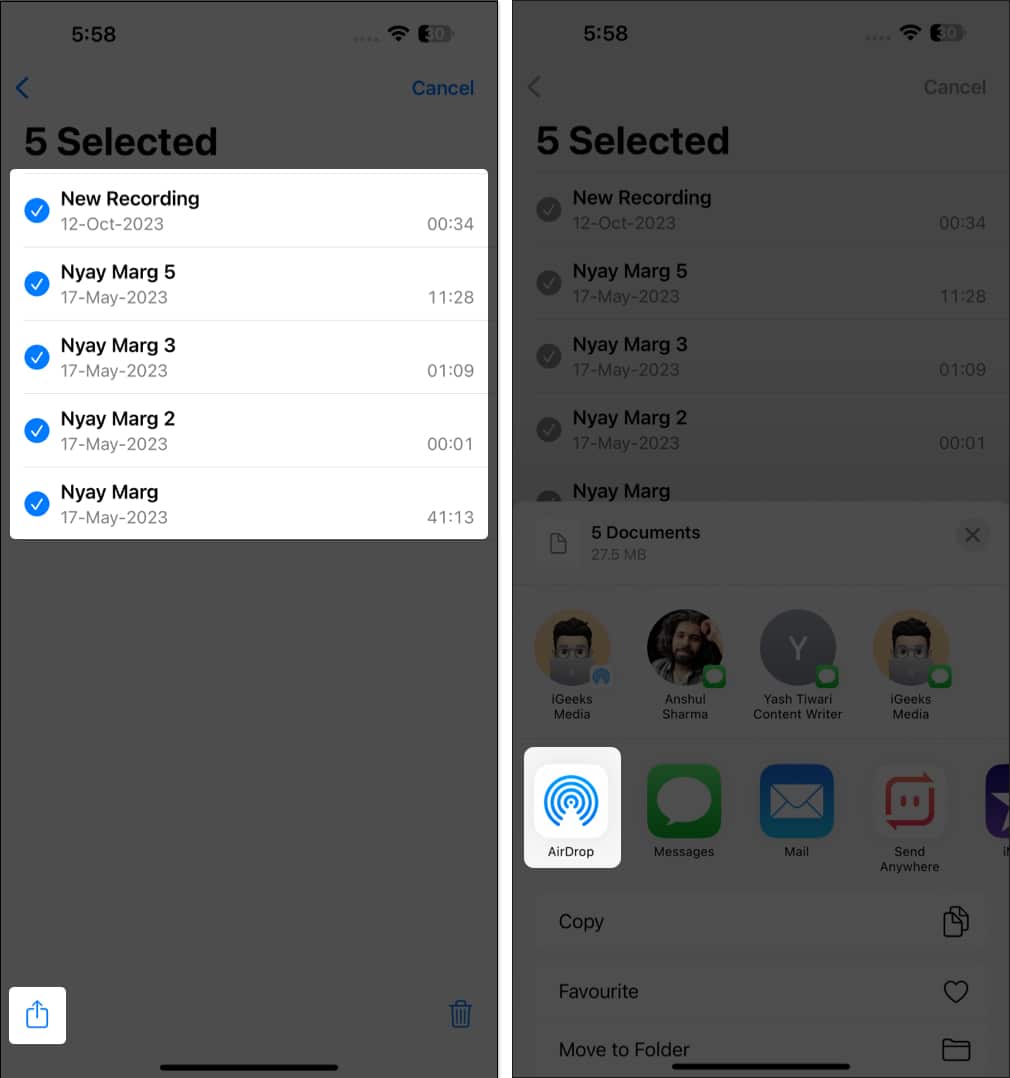
If you want to send multiple voice memos via AirDrop:
- Open Voice Memos → Go to All Recordings.
- Tap Edit.
- Select all the voice memos you want to send.
- Tap the Share button on the lower left side of the screen.
- Select AirDrop.
3. Email voice memos
For voice memos with a more formal purpose, such as meeting minutes or seminar recordings, you can send them directly to the intended recipients from your iPhone using email.
The process of sending a voice memo is similar to when you AirDrop them.
- Open the Voice Memo app → Go to All Recordings.
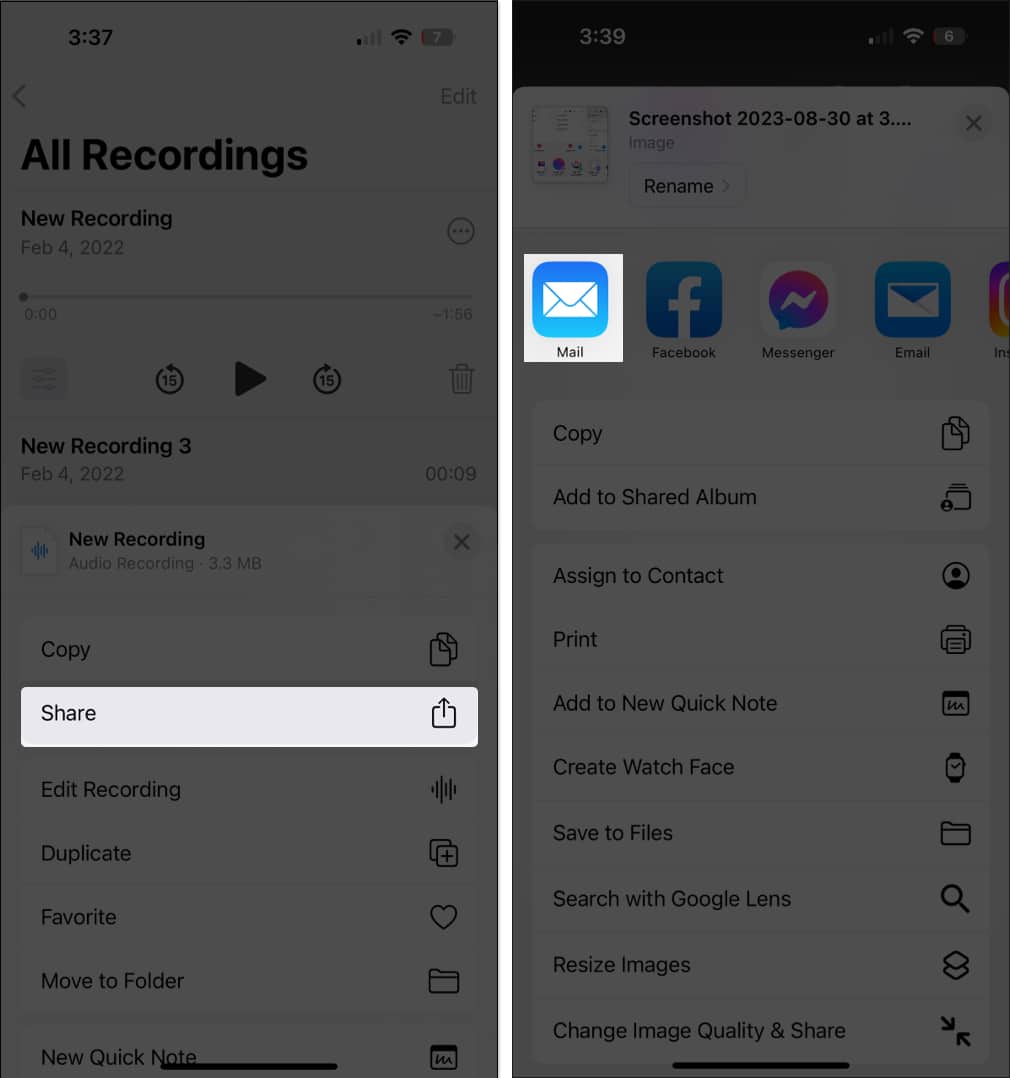
- Select a recording → Tap the three-dot icon.
- Choose Share and tap the Mail app or any other email service app on your iPhone.
Once you do this, the recording will be attached to the email. After that, you can mail it to your email ID or another desired contact.
Open the email on your Mac and download the attachment to save it.
4. Share your voice memos via messaging apps
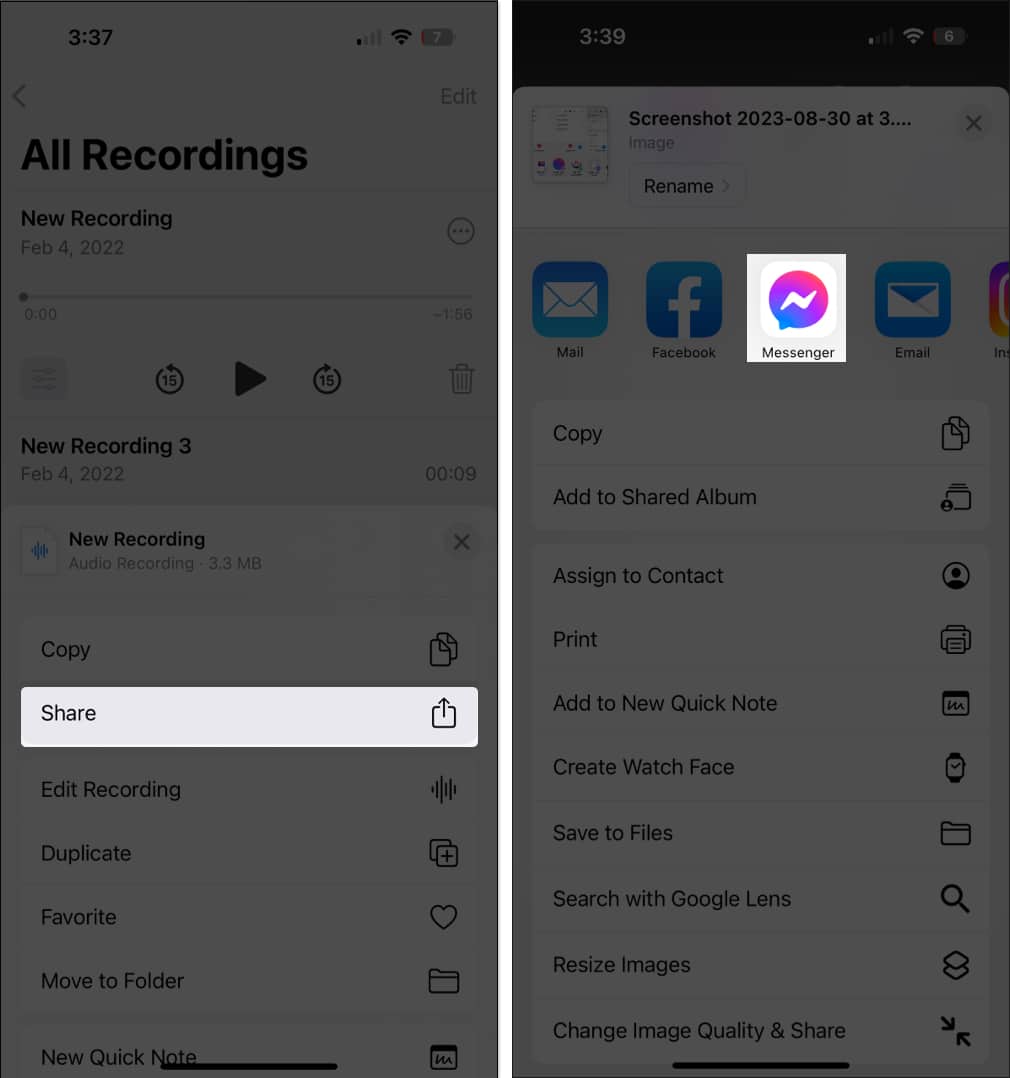
If you don’t want to send them via email, you can move voice memos via messaging apps like Facebook Messenger, WhatsApp, and Viber.
- Once you select the recording → Tap the three-dot icon → Share.
- Select your preferred messaging app and choose whom to send the voice memo to.
5. Transfer Voice Memos using Files app
The Files app on your iPhone is another built-in app that lets you sync your files automatically across all your Apple devices. It is a suitable mode of choice for transferring voice memos from iPhone to Mac.
To save a voice memo to Files:
- Open Voice Memos → All Recordings.
- Select the voice recording and tap the three-dot icon.
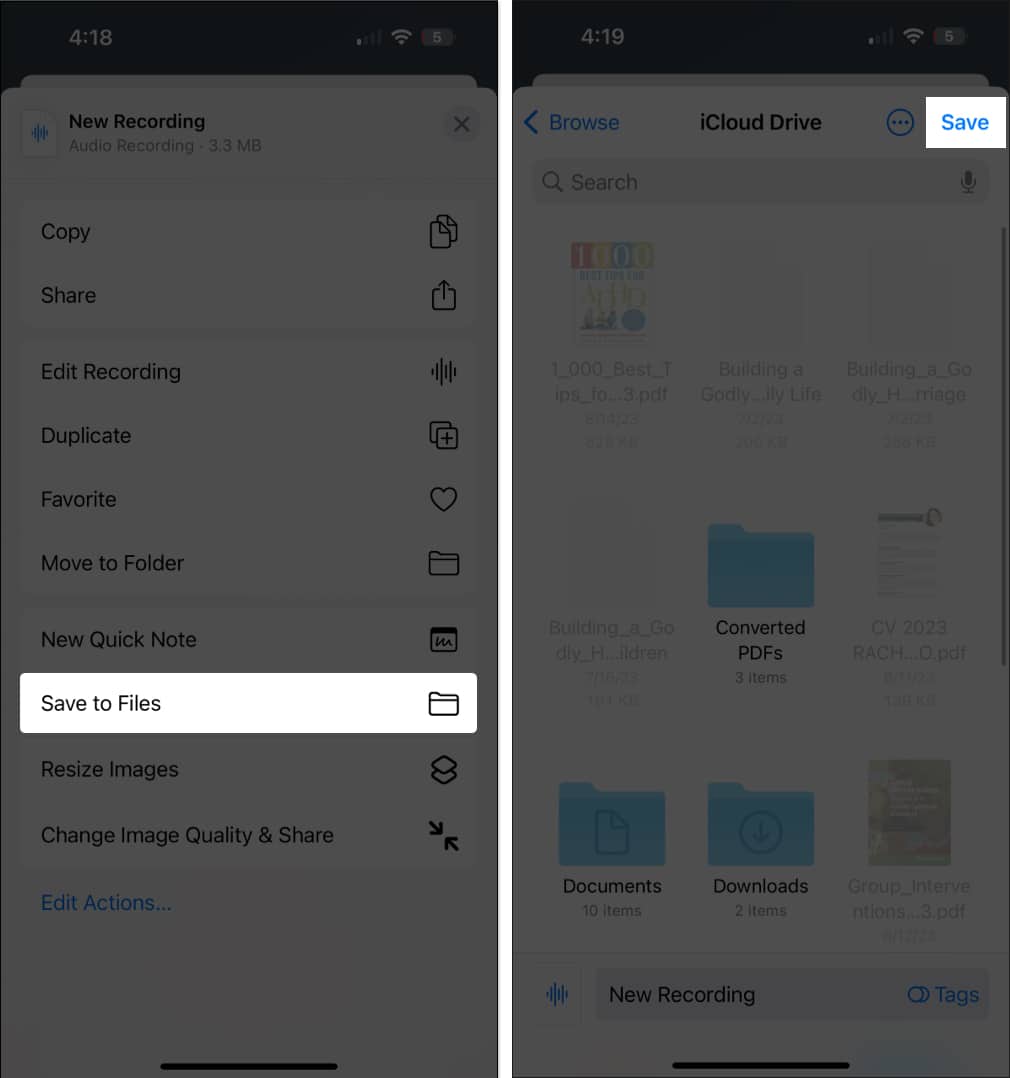
- Choose Save to Files.
- Save your file in the iCloud Drive and tap Save.
- Once you’ve saved the voice recording in Files, you can use your Mac to find the file. Open Finder → Click iCloud Drive on the sidebar.
- Look for your voice memo and save it in your preferred folder on your Mac.
This method is also convenient if you intend to save multiple voice memos. On the Voice Memos app, tap Edit and choose all the voice memos you want to send. Select Share → Save to Files.
6. Use other Cloud storage
Aside from iCloud, you can also use other cloud storage services on your iPhone, like Google Drive and Dropbox. These cloud storage services have dedicated iOS apps, and you can easily access them via your browser on a Mac.
So simply download the iOS app of the cloud storage you’re using and follow the steps below:
- Go to All Recordings → Select a voice recording.
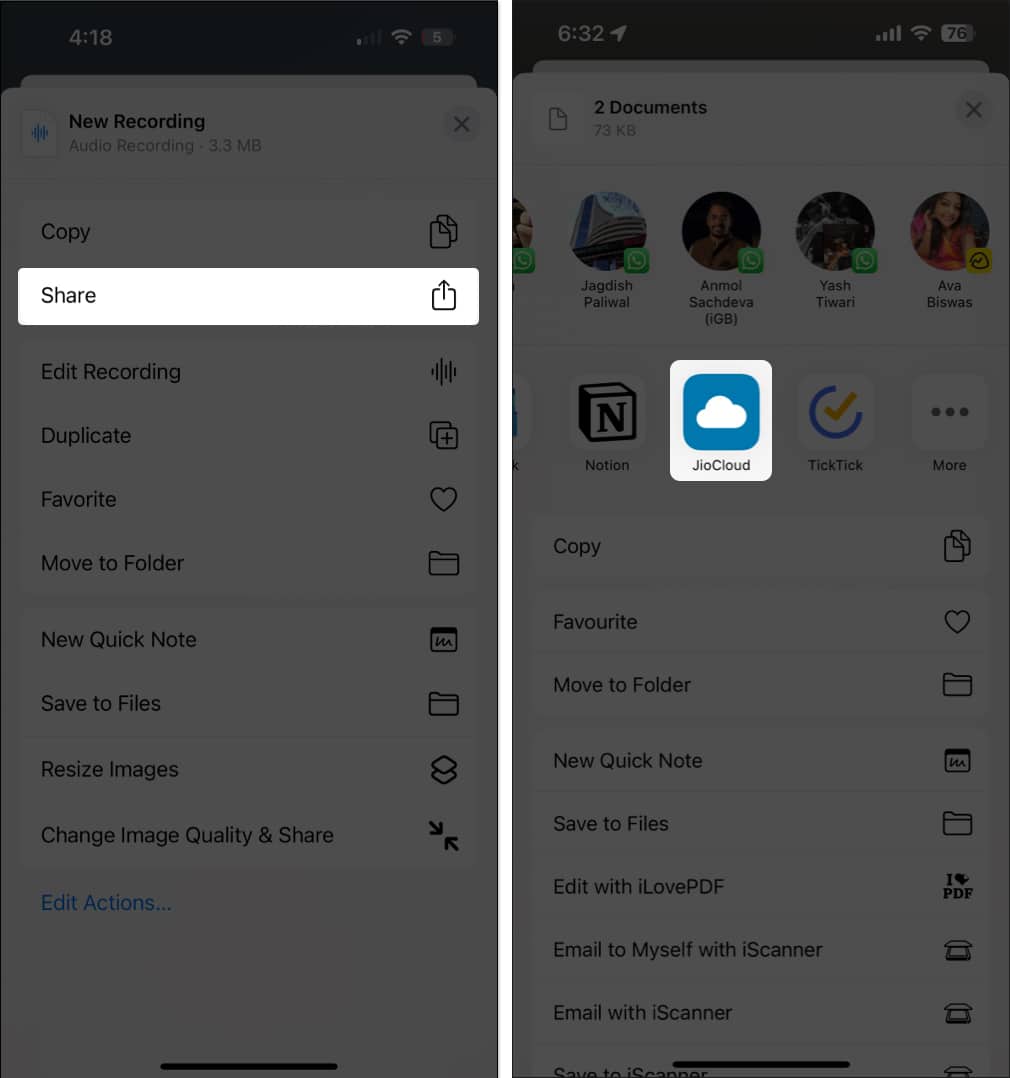
- Tap three-dot icon → Choose Share.
- Select the cloud storage app of your preference and upload it.
- Once done, you can open the drive on your Mac’s browser and download the file.
7. Transfer voice memos using third-party apps
You can also use third-party data management apps to help send voice memos from iPhone to Mac or Windows PC.
Some apps you might consider include Mobikin.
Wrapping up…
Above are different ways to transfer voice memos from your iPhone to your Mac. Most of these techniques leverage the built-in features of your iPhone and Mac, eliminating the need for additional downloads. You may also explore other third-party apps to transfer outside the ecosystem.
While some are ideal for individual transfers, options like AirDrop and the Files app excel at handling bulk transfers. Do you have a preferred method? Let us know in the comments below!
Read more:


