Taking a screenshot using traditional methods on the iPad can sometimes be a hassle. Your fingers might have to do a lot of dancing to reach the power and volume buttons simultaneously. Thanks to the latest iPadOS updates, you can now use gestures to take a screenshot with a simple swipe. Read on as I show you how to do it on iPadOS 18.
How to use gestures to take a screenshot on iPad
iPad offers more than just the traditional method of taking screenshots. With its user-friendly interface, users can use gestures to take screenshots easily.
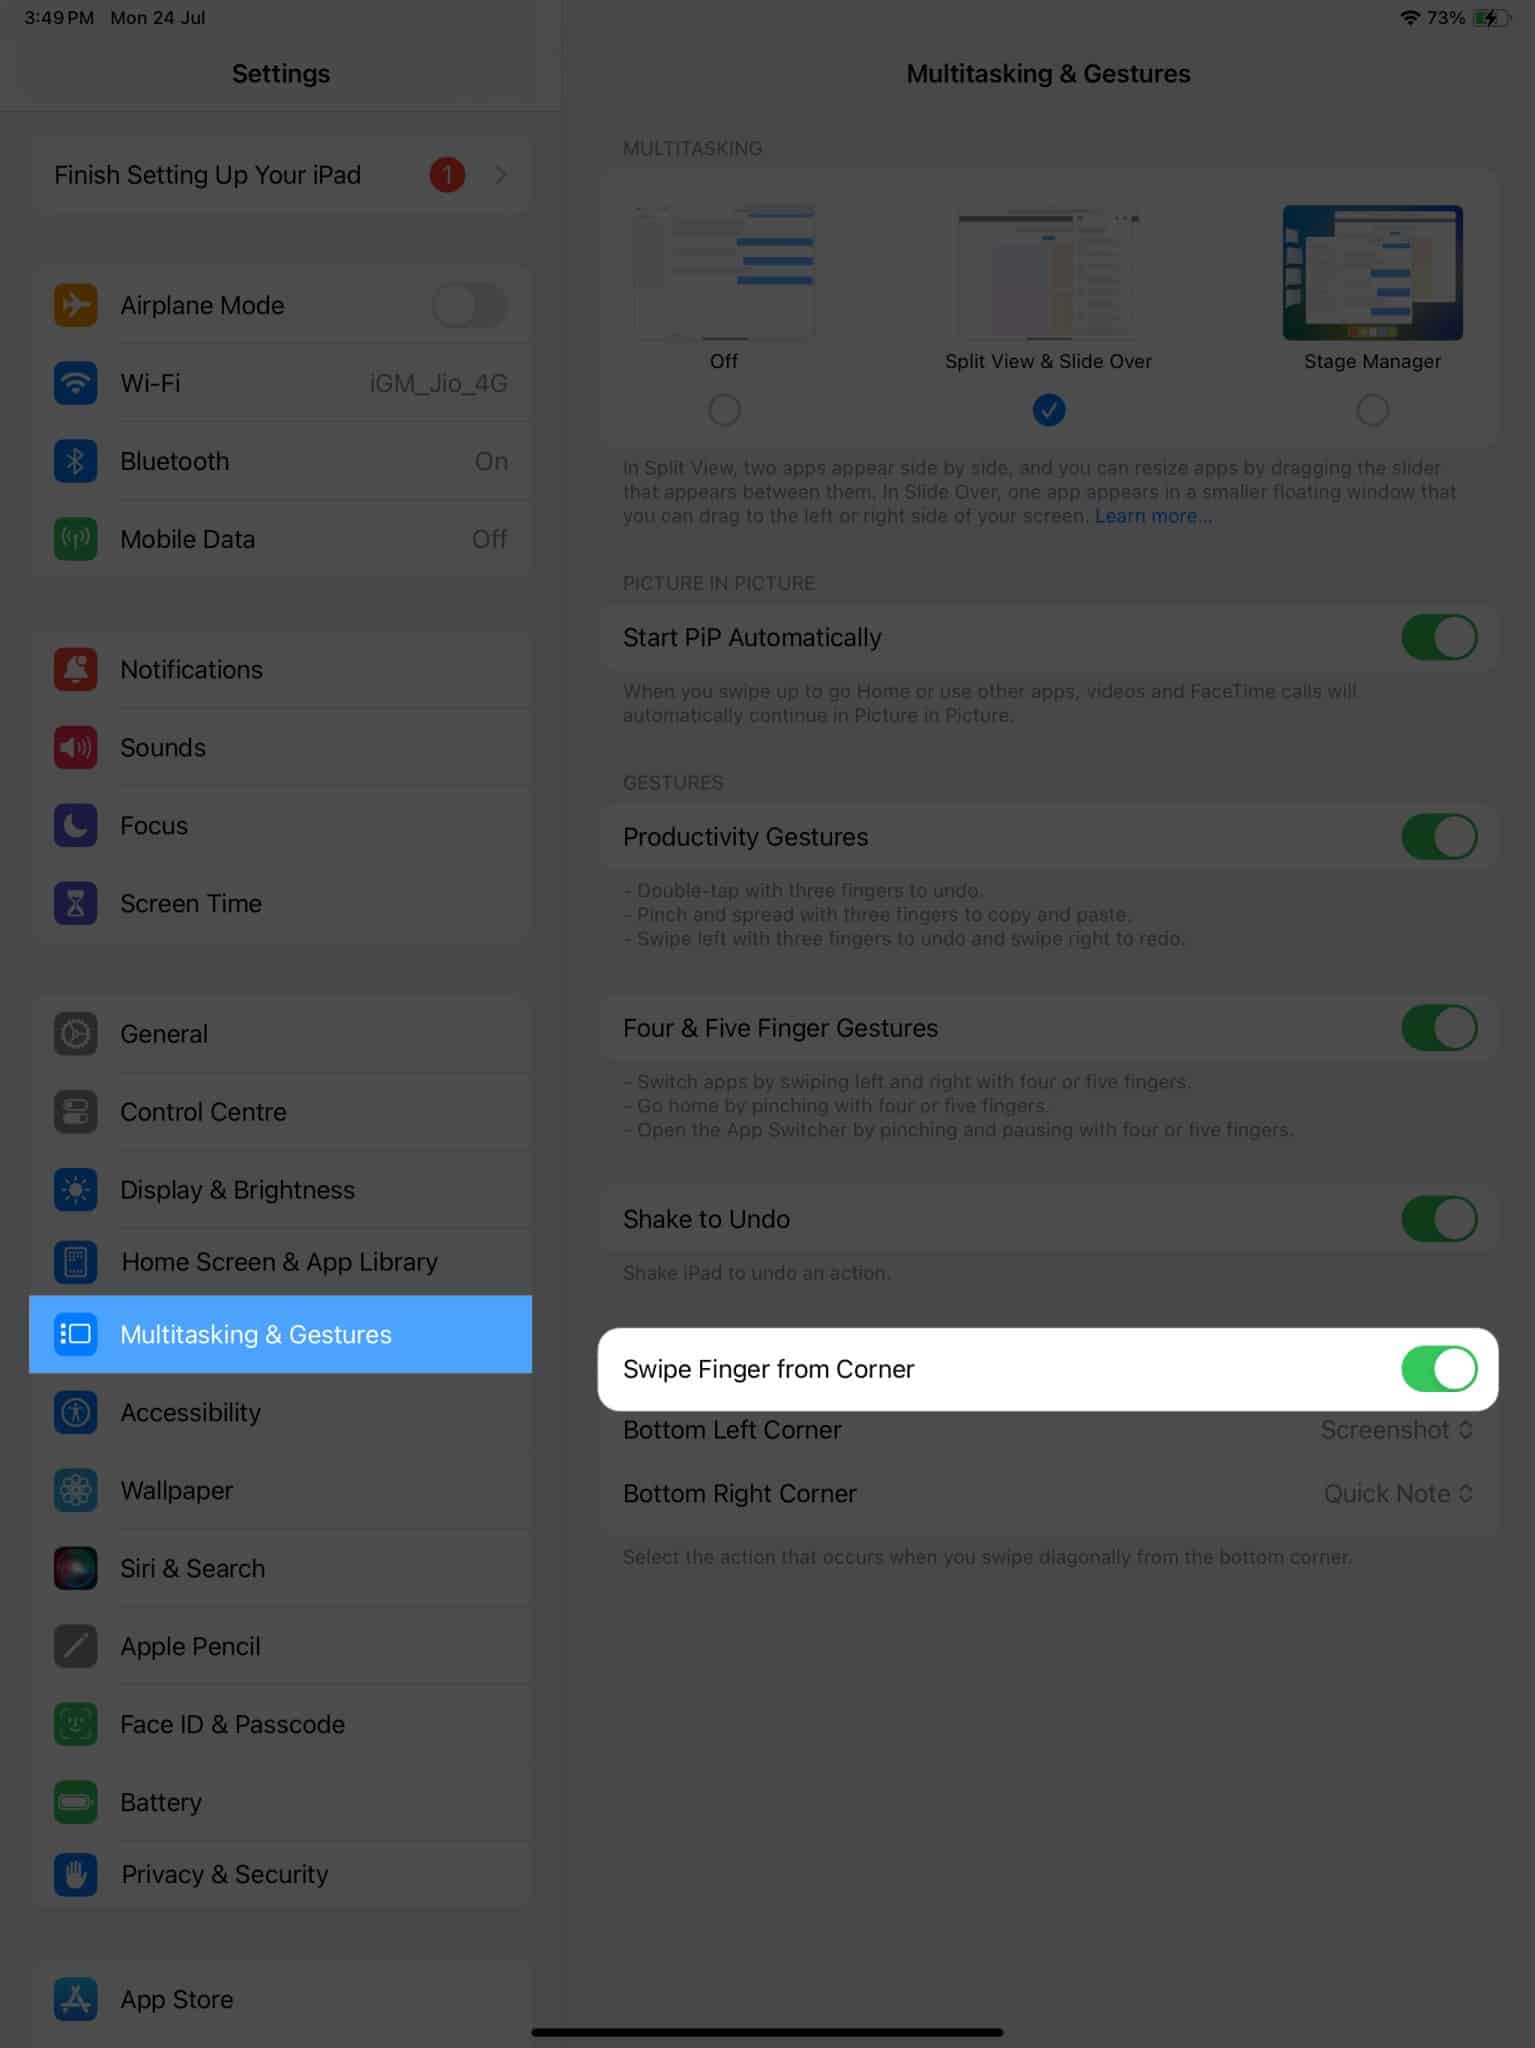
- Access the Settings app on your iPad.
- Select Multitasking & Gestures to proceed.
- Toggle on Swipe Finger from Corner.
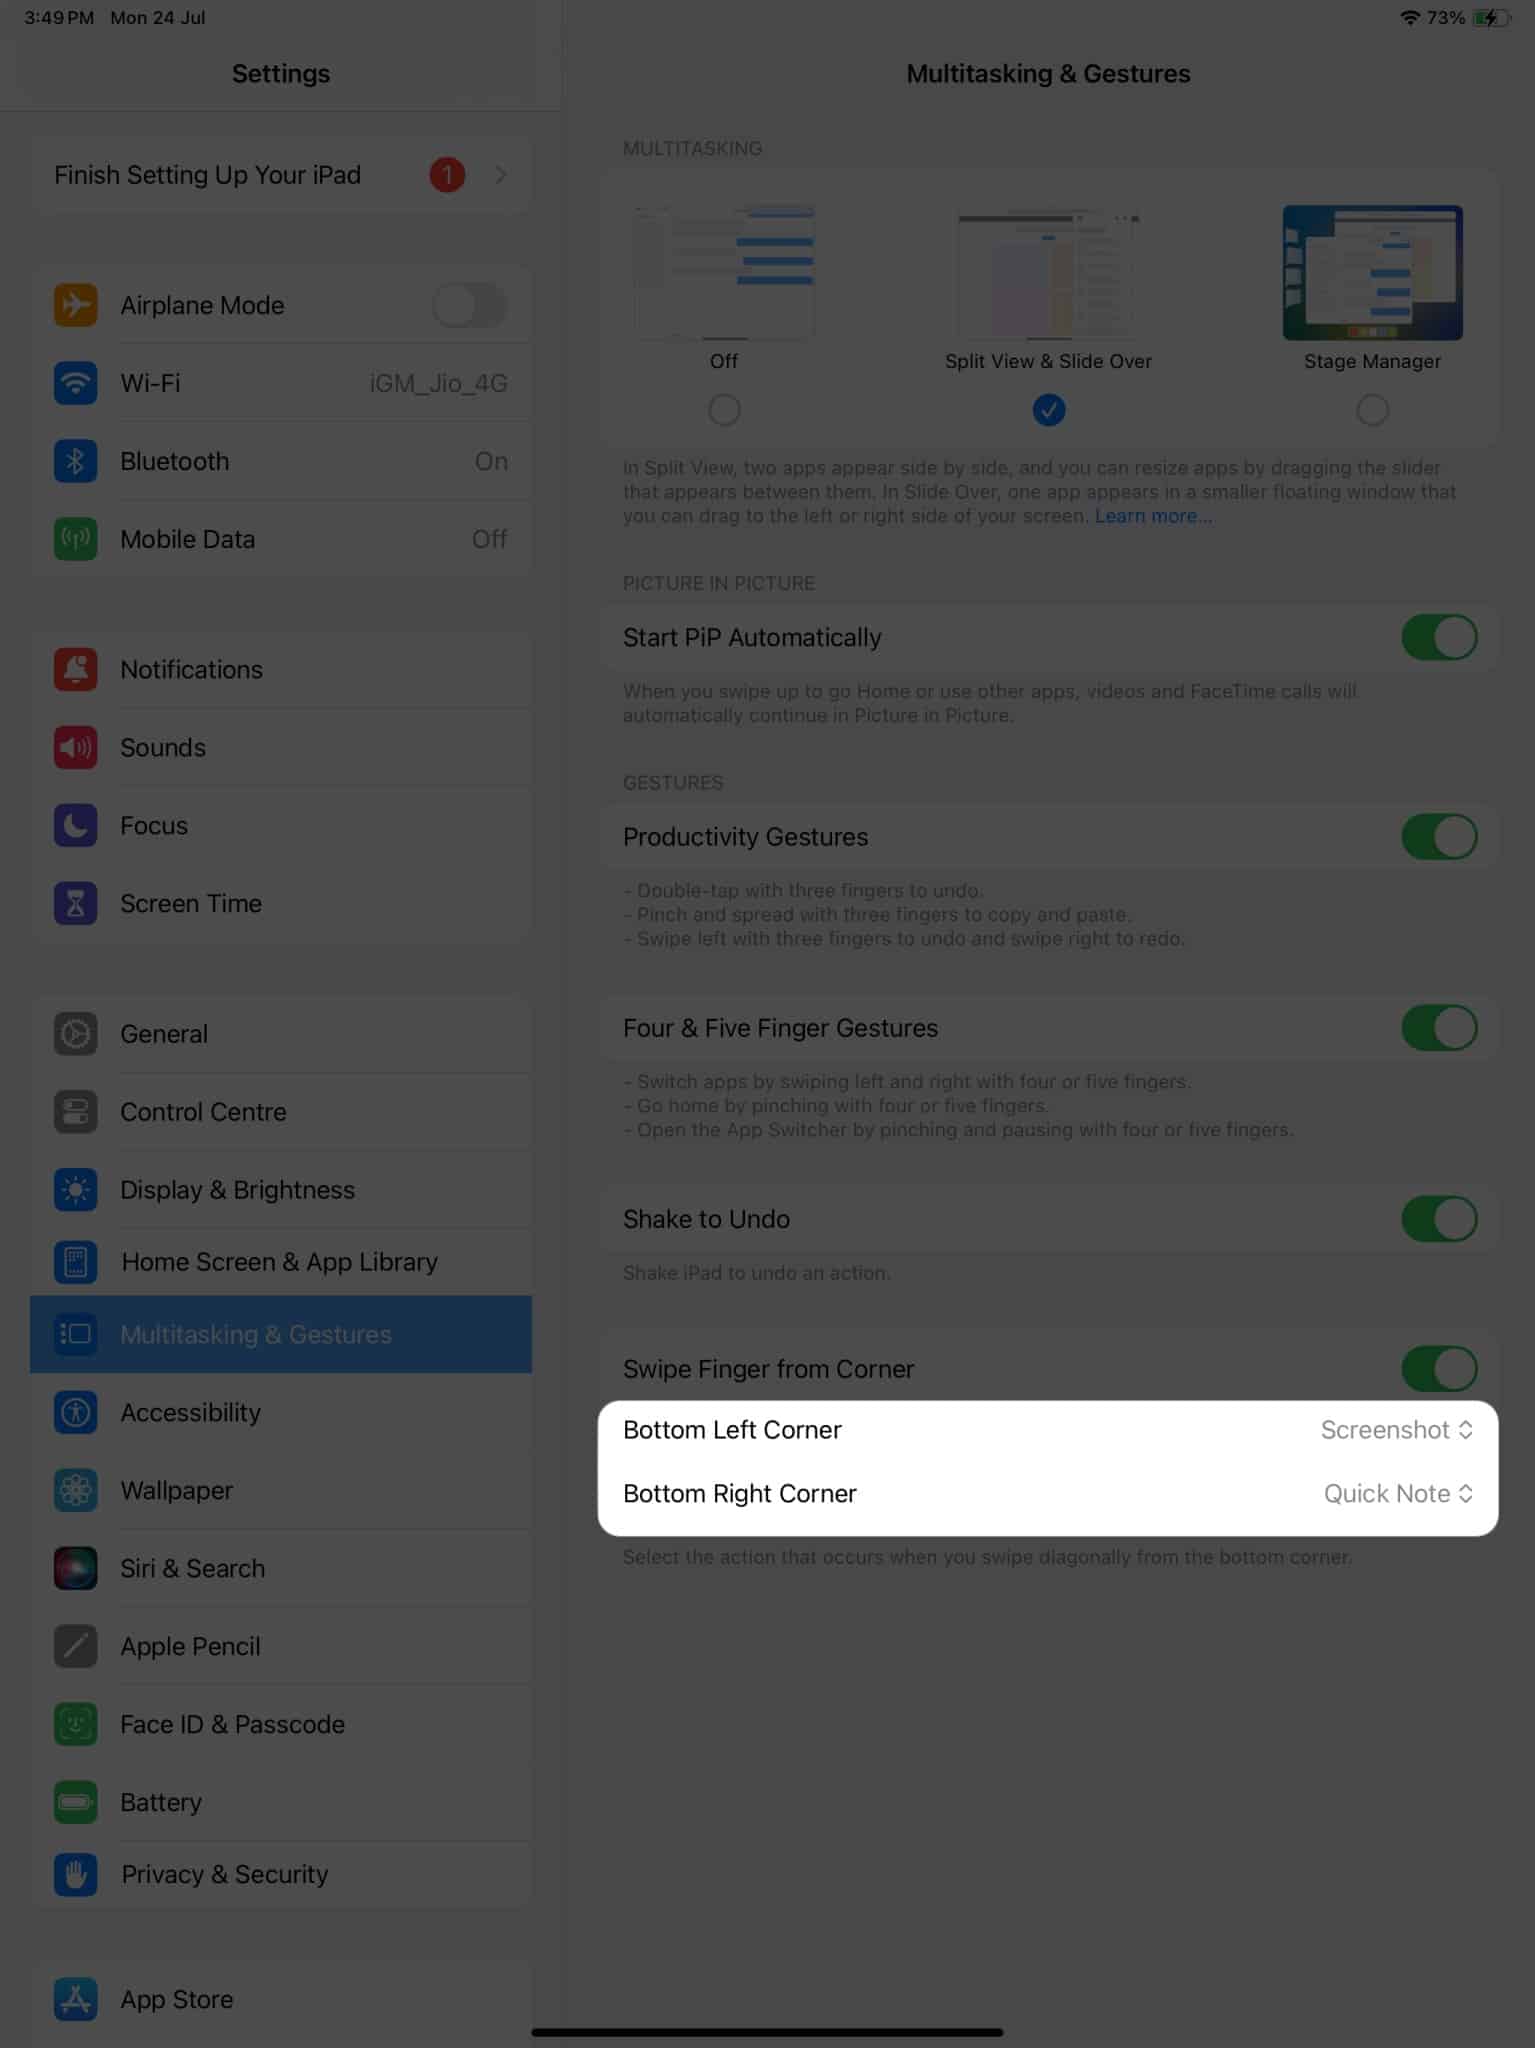
- When prompted, assign an action for either Bottom Left Corner or Bottom Right Corner, whichever gesture you prefer.
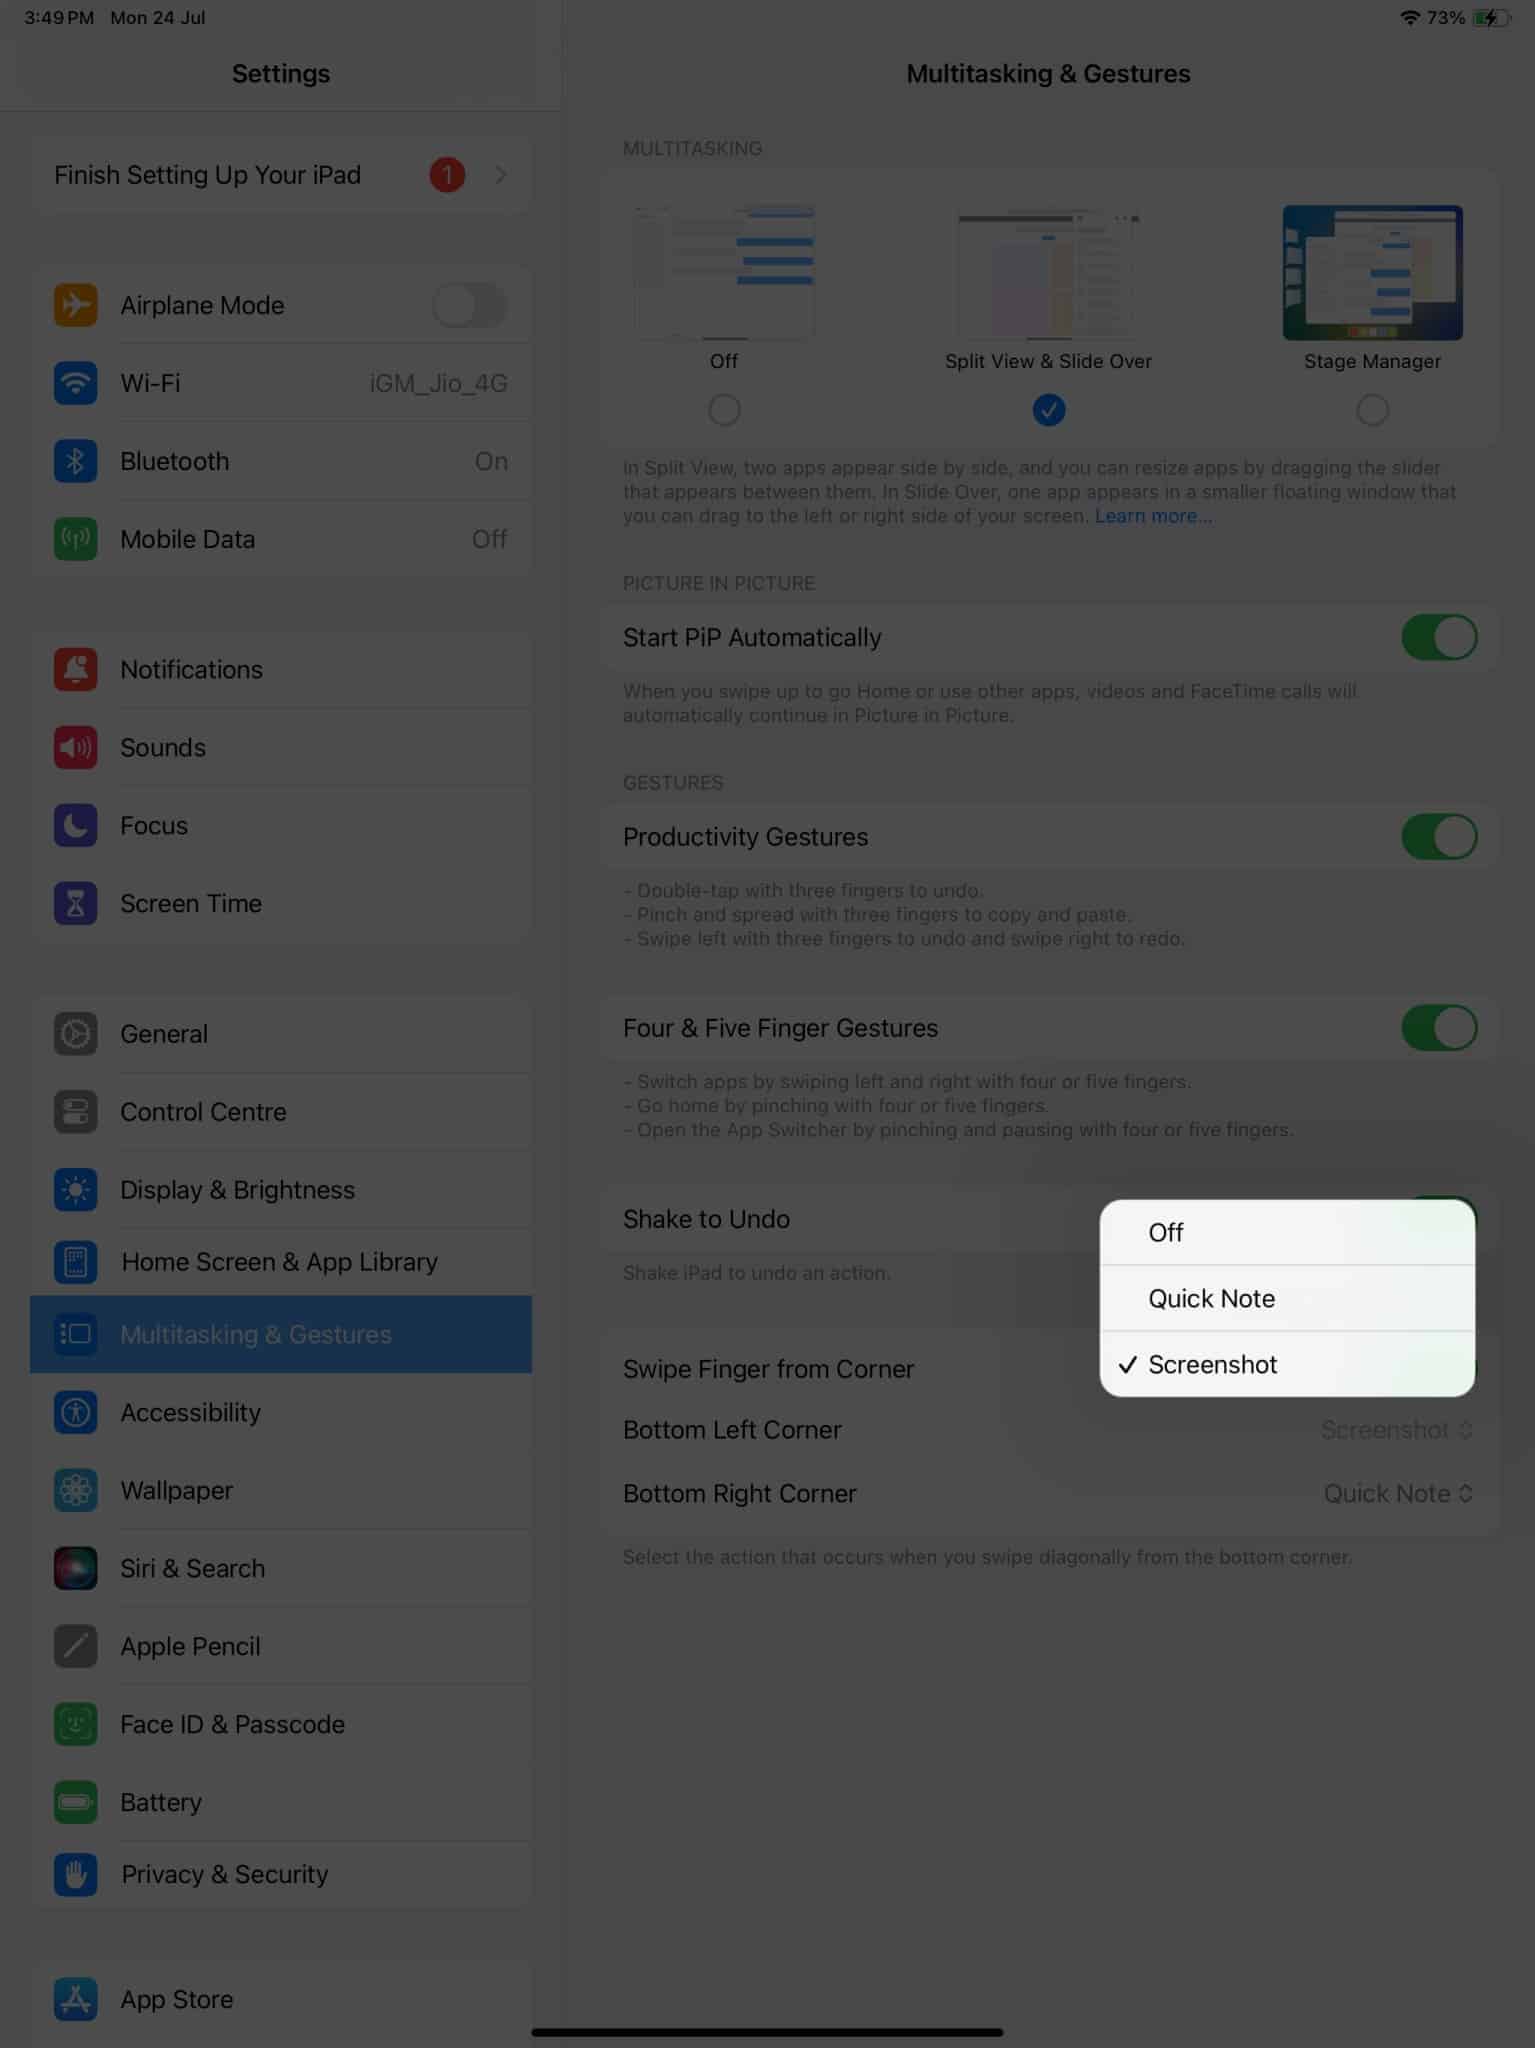
- Here, you can select either of the following:
- Off: Disable the respective action.
- Screenshot: Take a screenshot of the particular interface.
- Quick Note: Summon a quick note anytime you desire.
How to take screenshots using gestures in iPadOS 16 or earlier
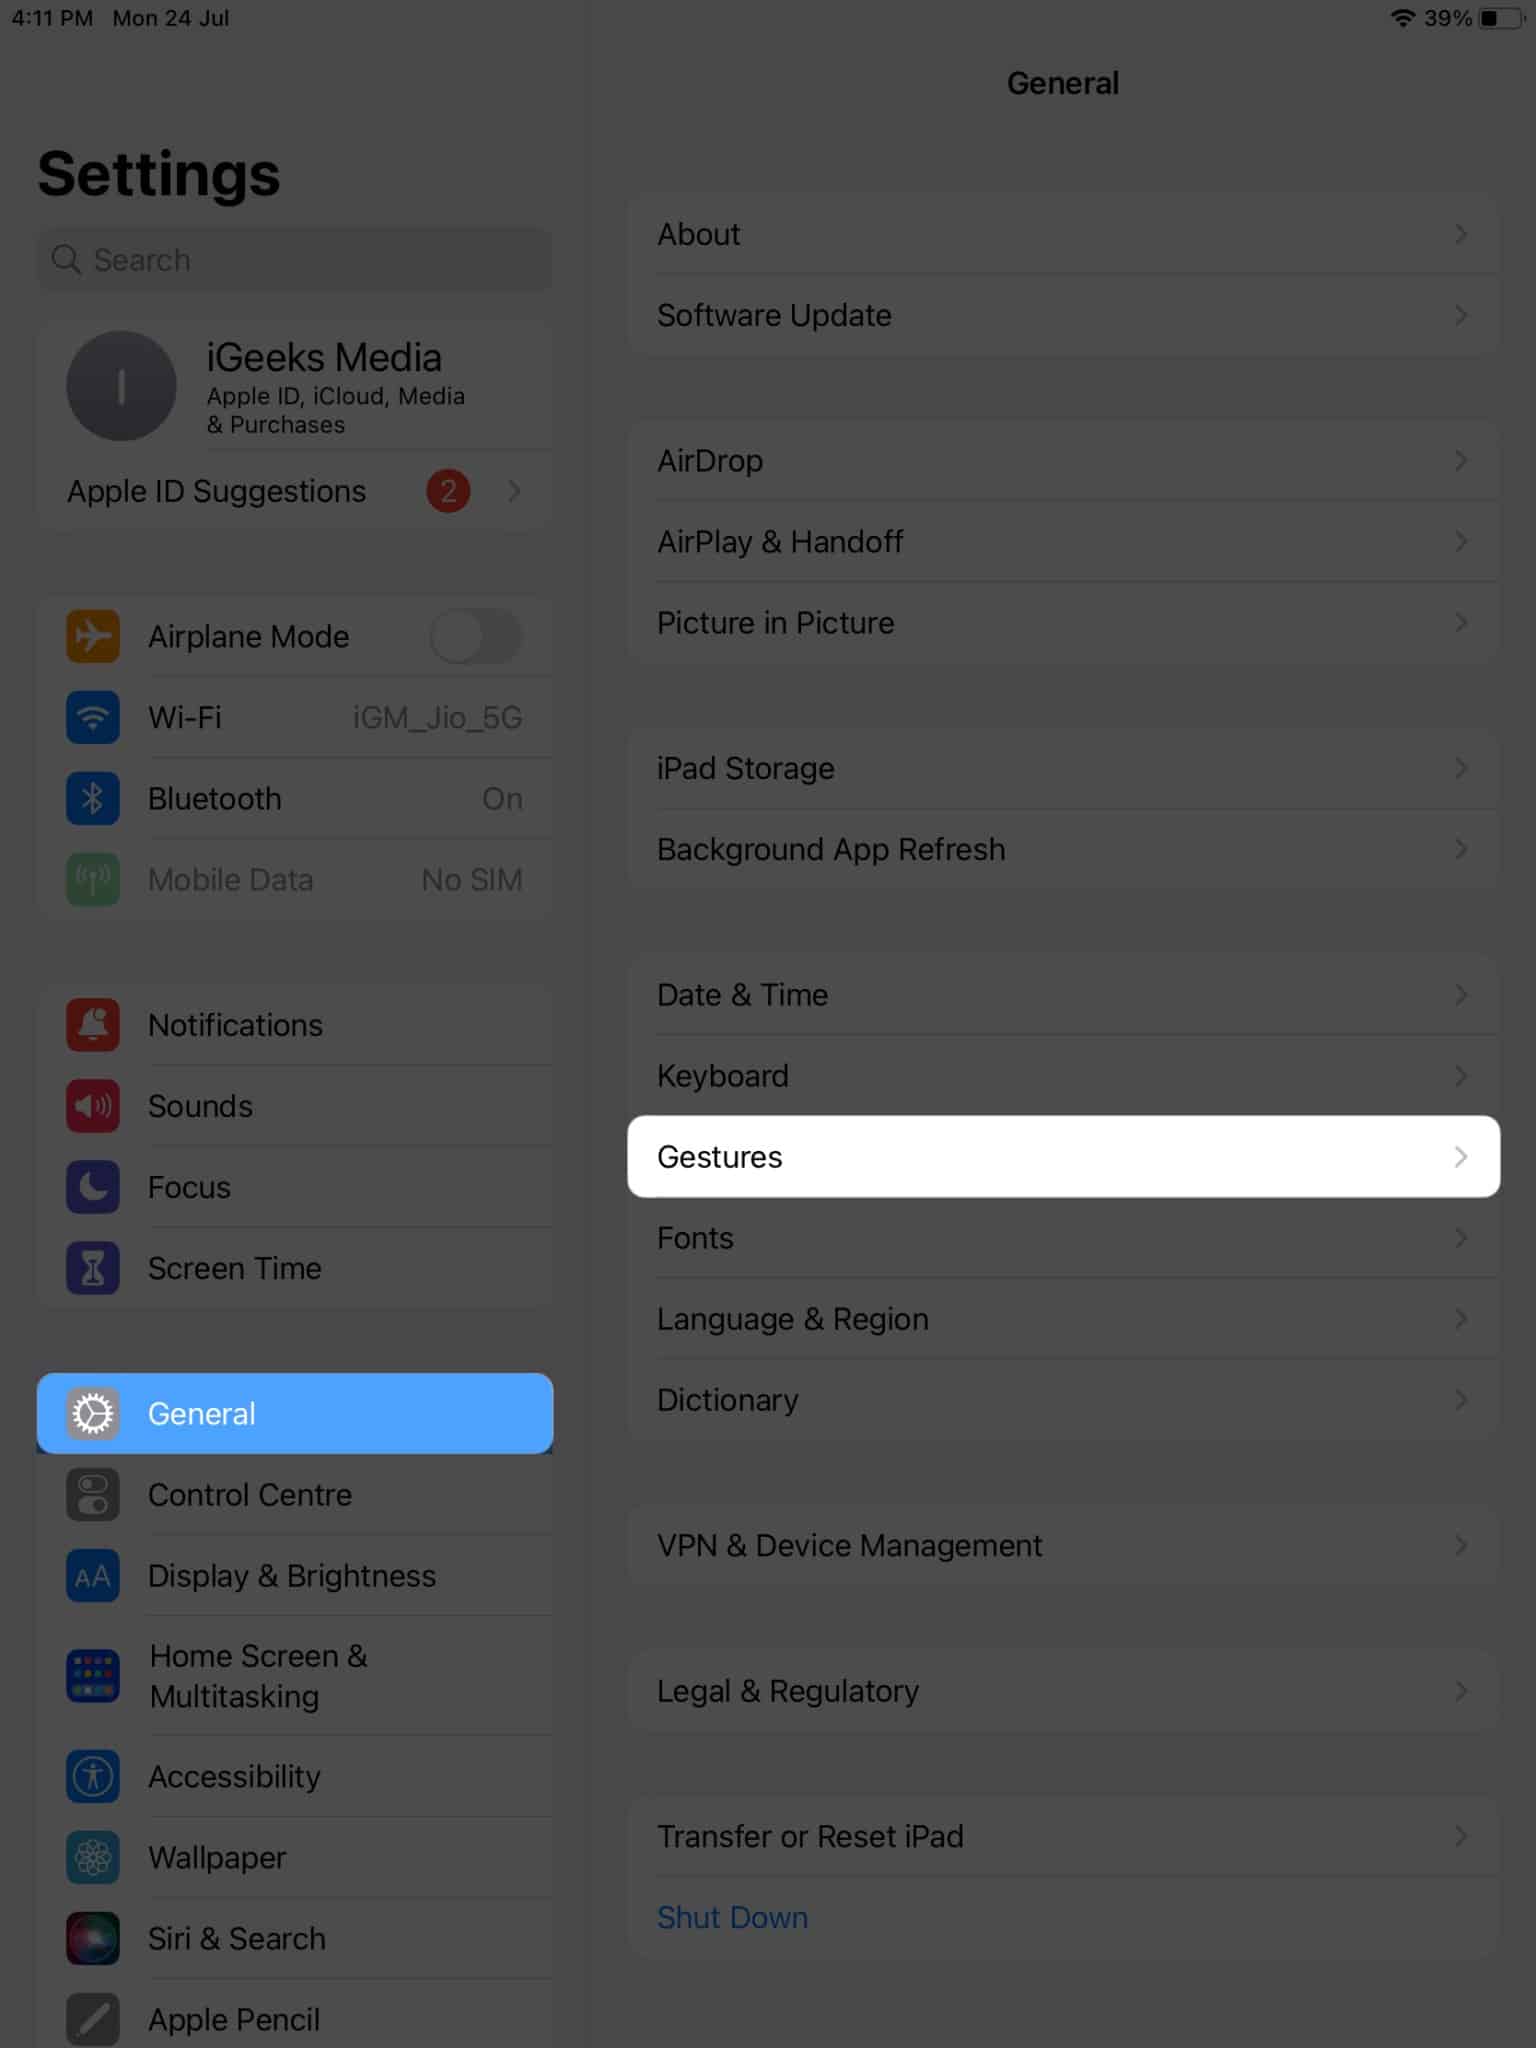
The following steps reflect the process of enabling screen gestures on iPad running iPadOS 16 or ealier.
- Launch the Settings app on your iPad.
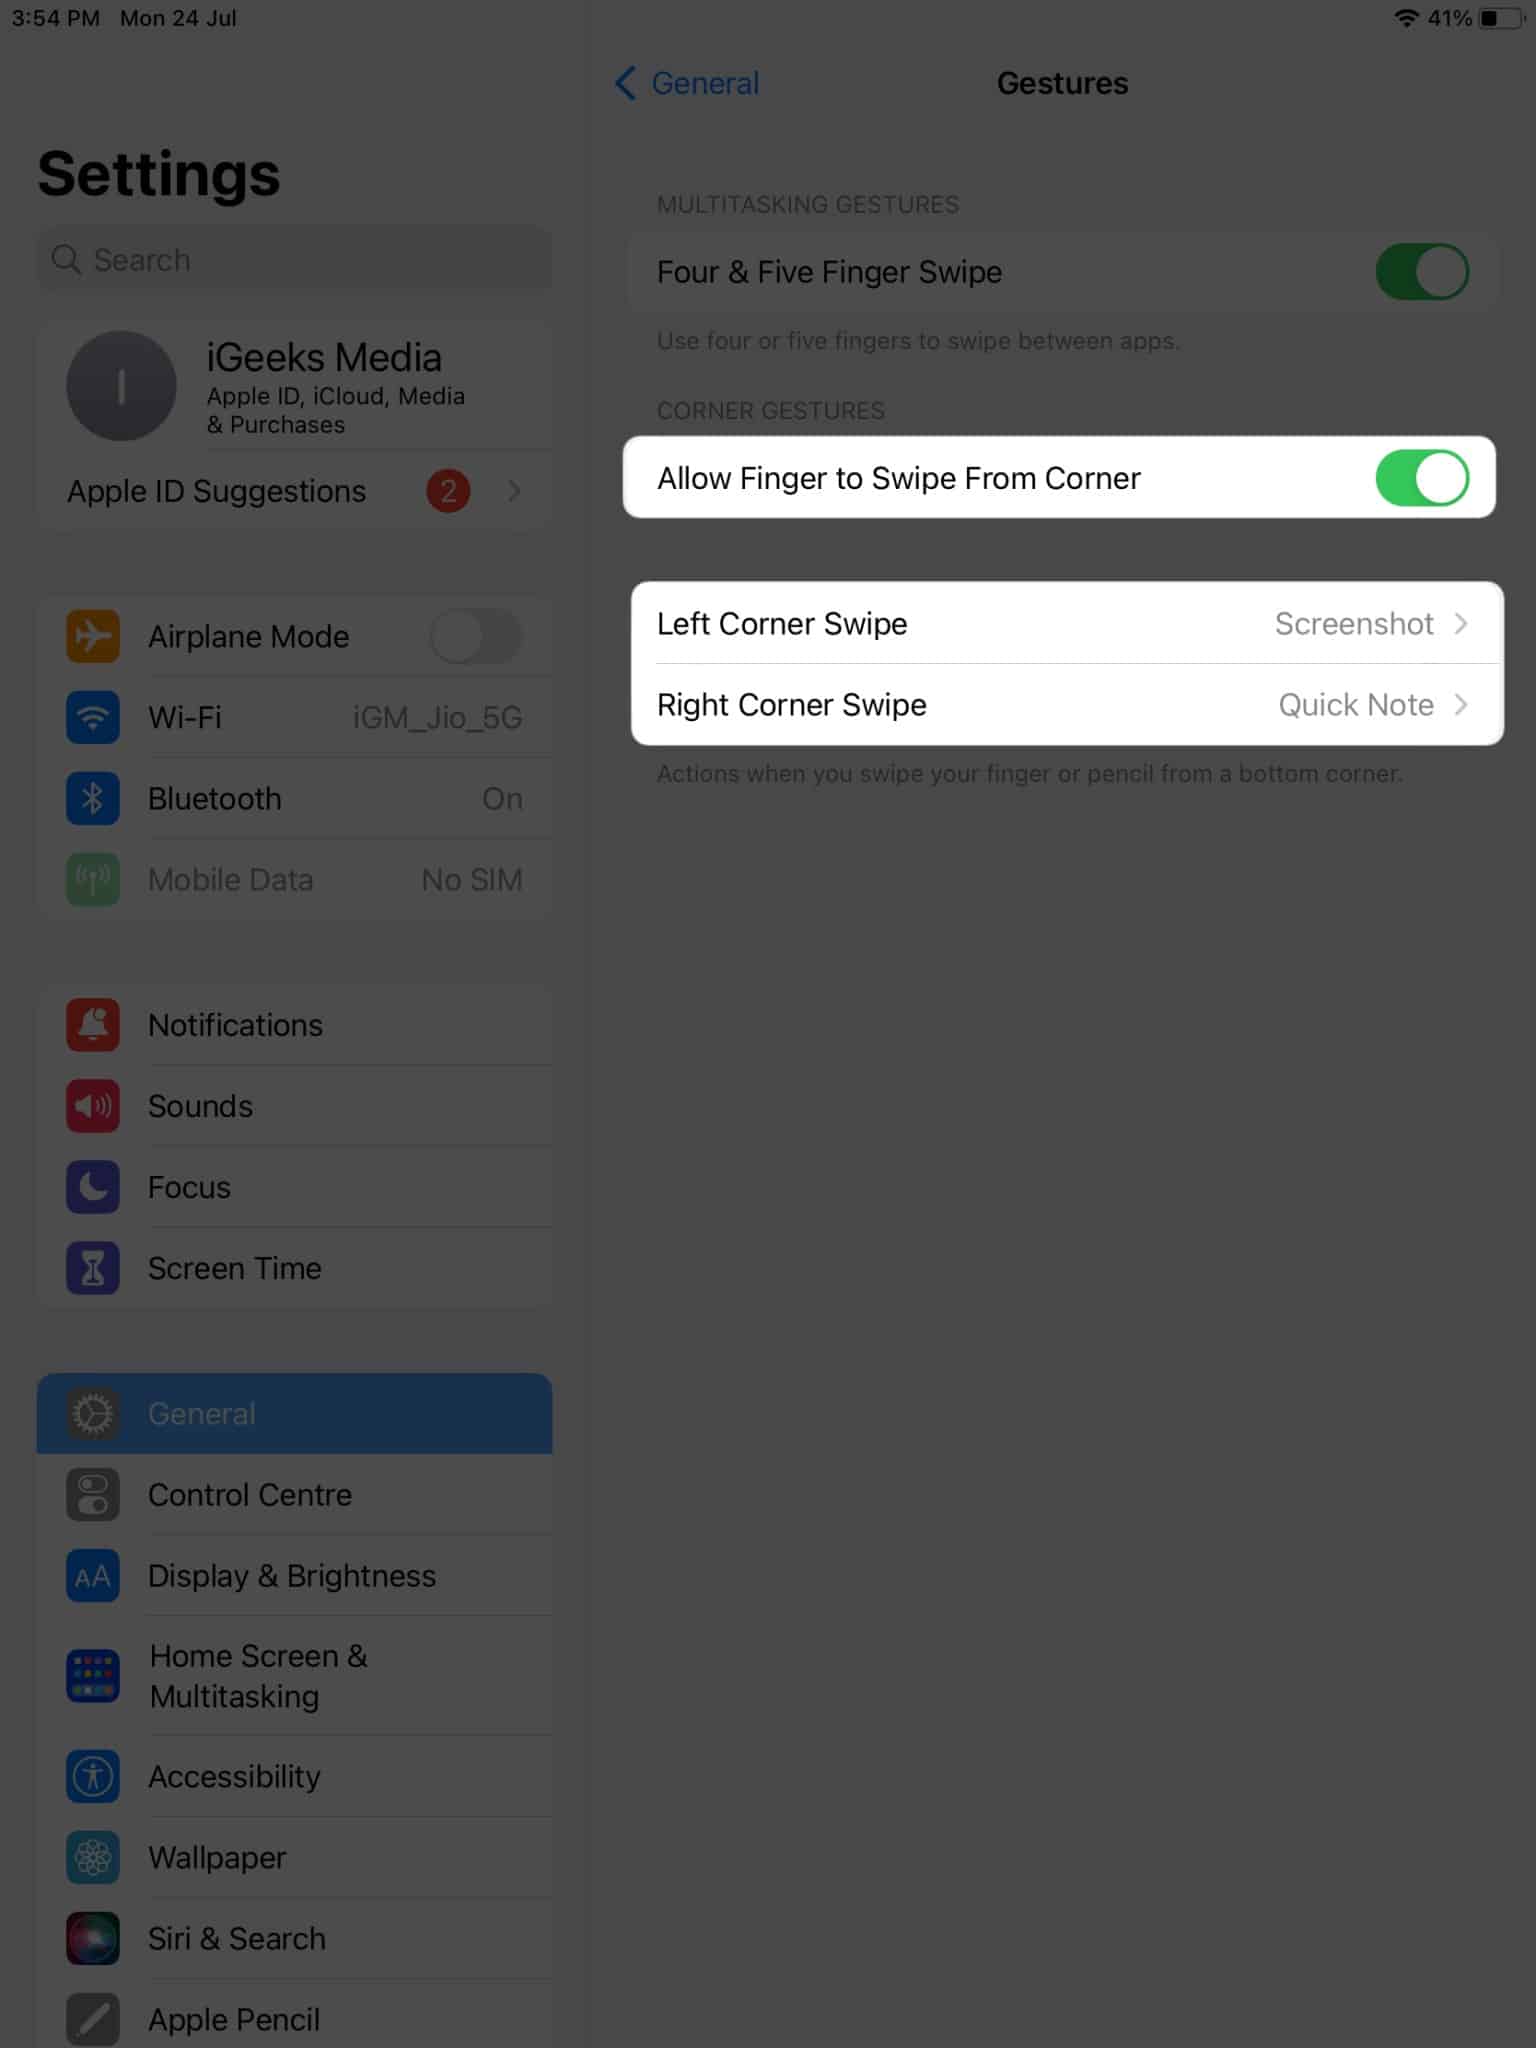
- Navigate to the General menu → Select Gestures.
- Now, toggle on Allow Finger to Swipe From Corner.
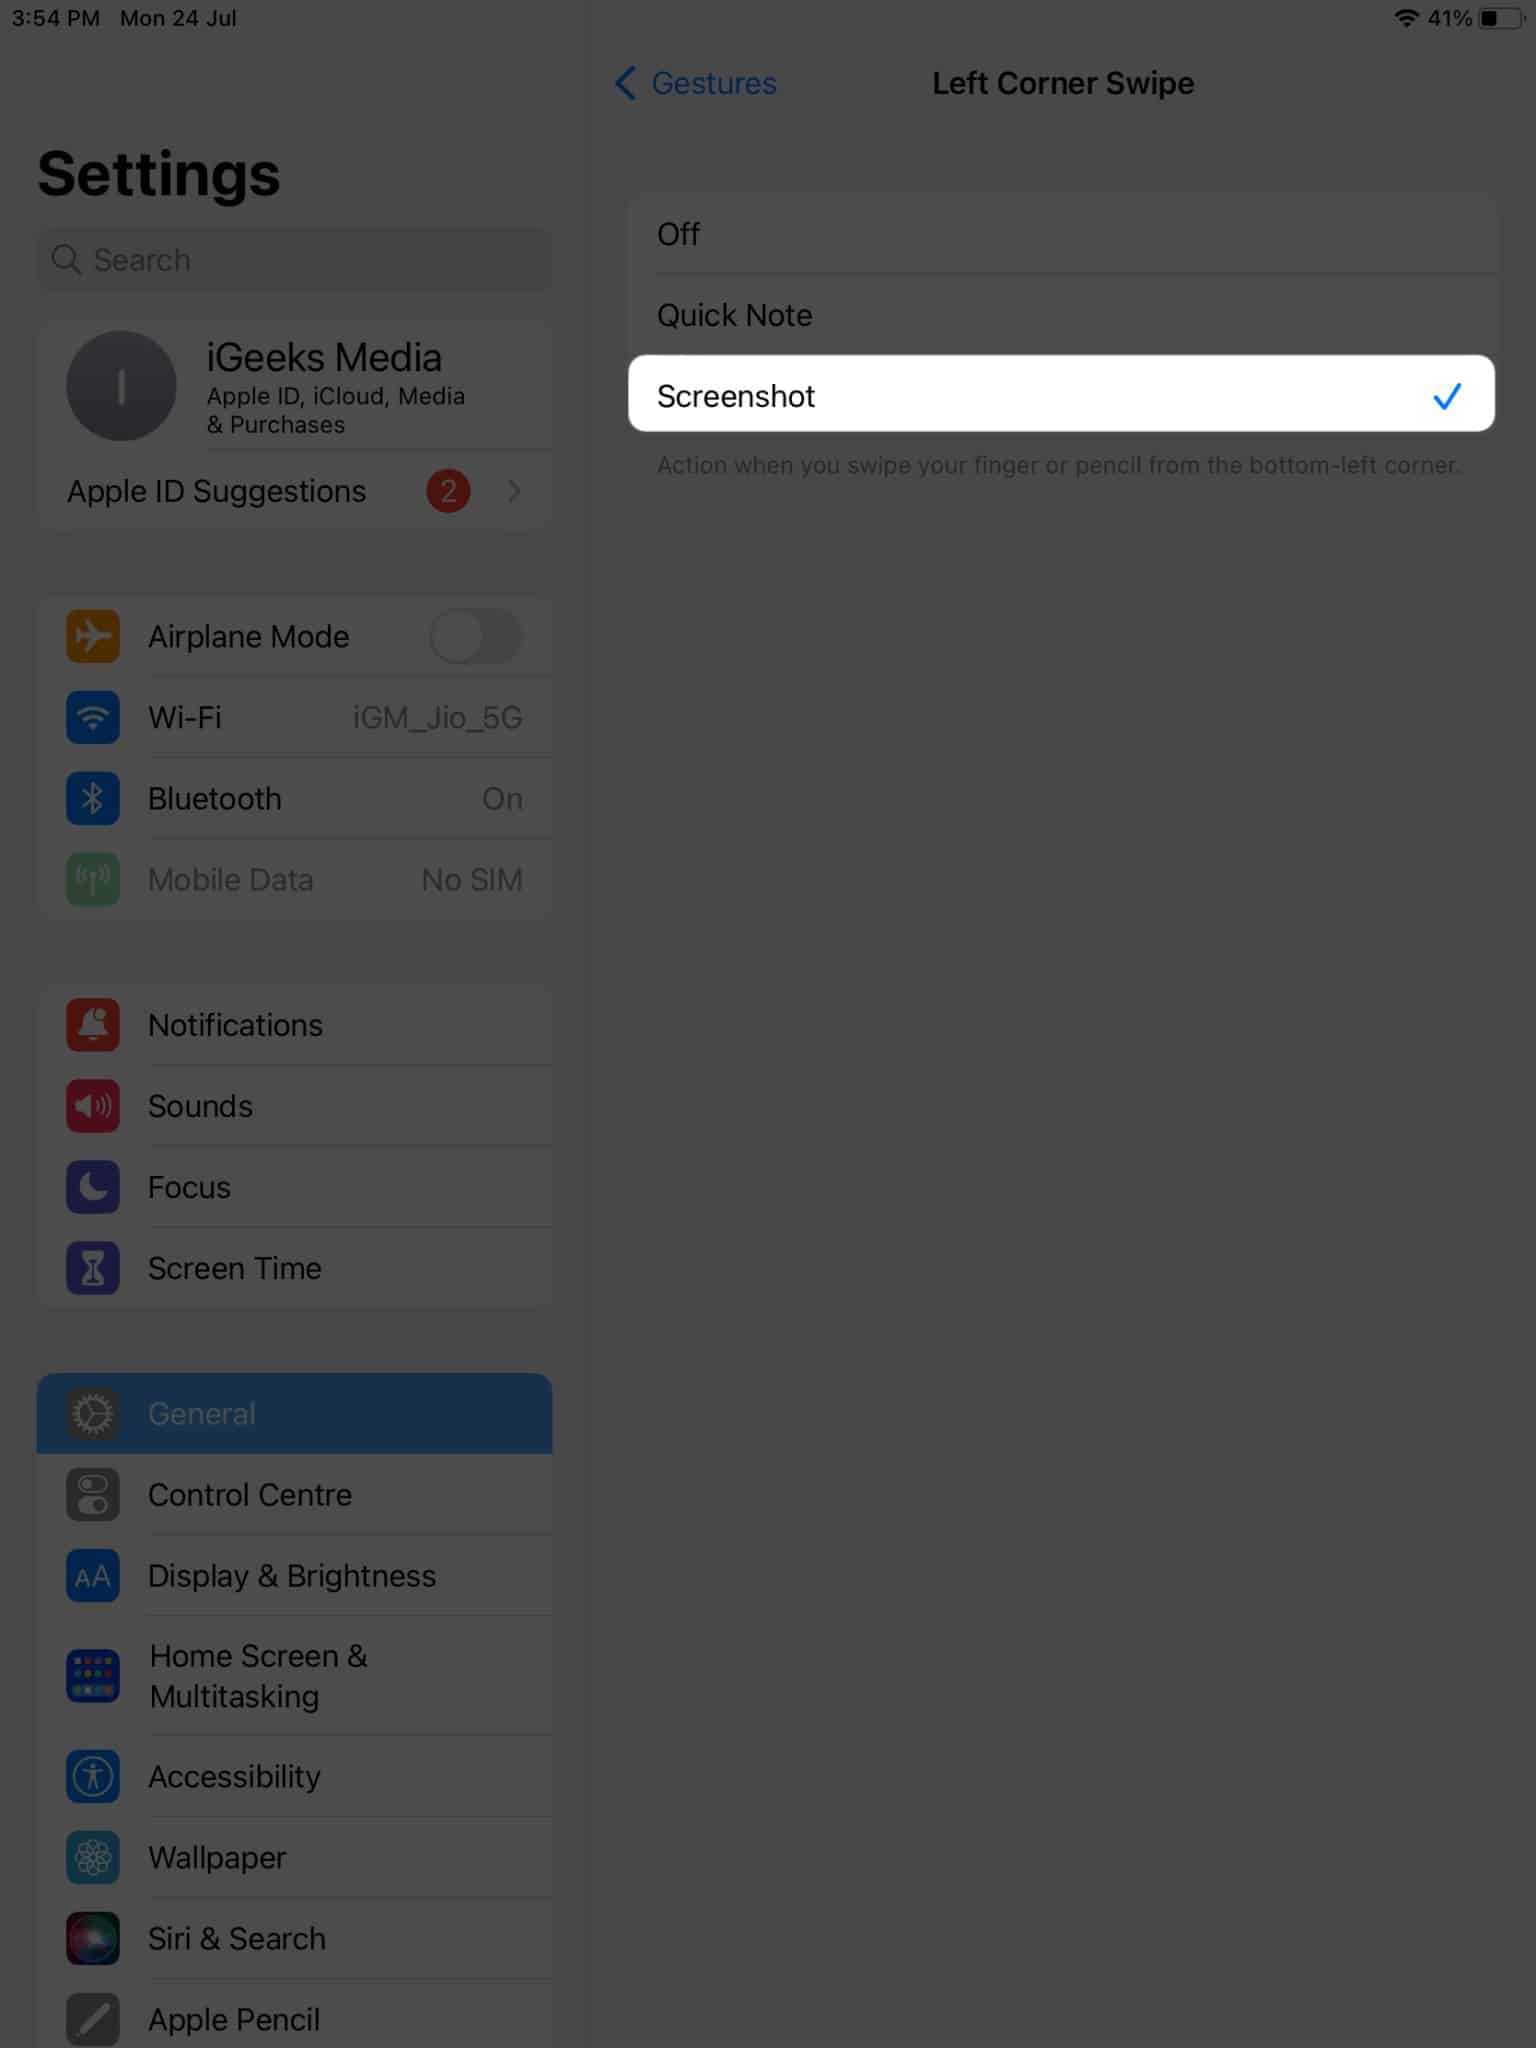
- Choose an action between Left Corner Swipe and Right Corner Swipe.
- Finally, select the Screenshot action for the respective action.
If you wish, you can also enable Quick Note for the untouched action.
Swipe in style!
It might seem a little childish, but this feature will unlock a new level of productivity and convenience you never imagined. Take this opportunity to preserve memorable moments or share important information with simplicity. Remember, all it takes is a swipe. So go ahead, put your newfound knowledge to use, and share your screen captures with friends, family, or colleagues.
Thank you for reading. Please leave your thoughts in the comments below.
Read more:

