Apple Notes is a simple yet powerful note-taking app. With seamless iCloud integration, you can effortlessly sync notes between your iPhone and Mac, ensuring instant access on both devices. Read on to explore all the ways to sync Notes from your iPhone to Mac.
Before syncing Notes from iPhone to Mac:
- Ensure that the Apple ID is the same on both devices.
- Make sure your iPhone and Mac are connected to the internet.
How to sync iPhone Notes to Mac with iCloud
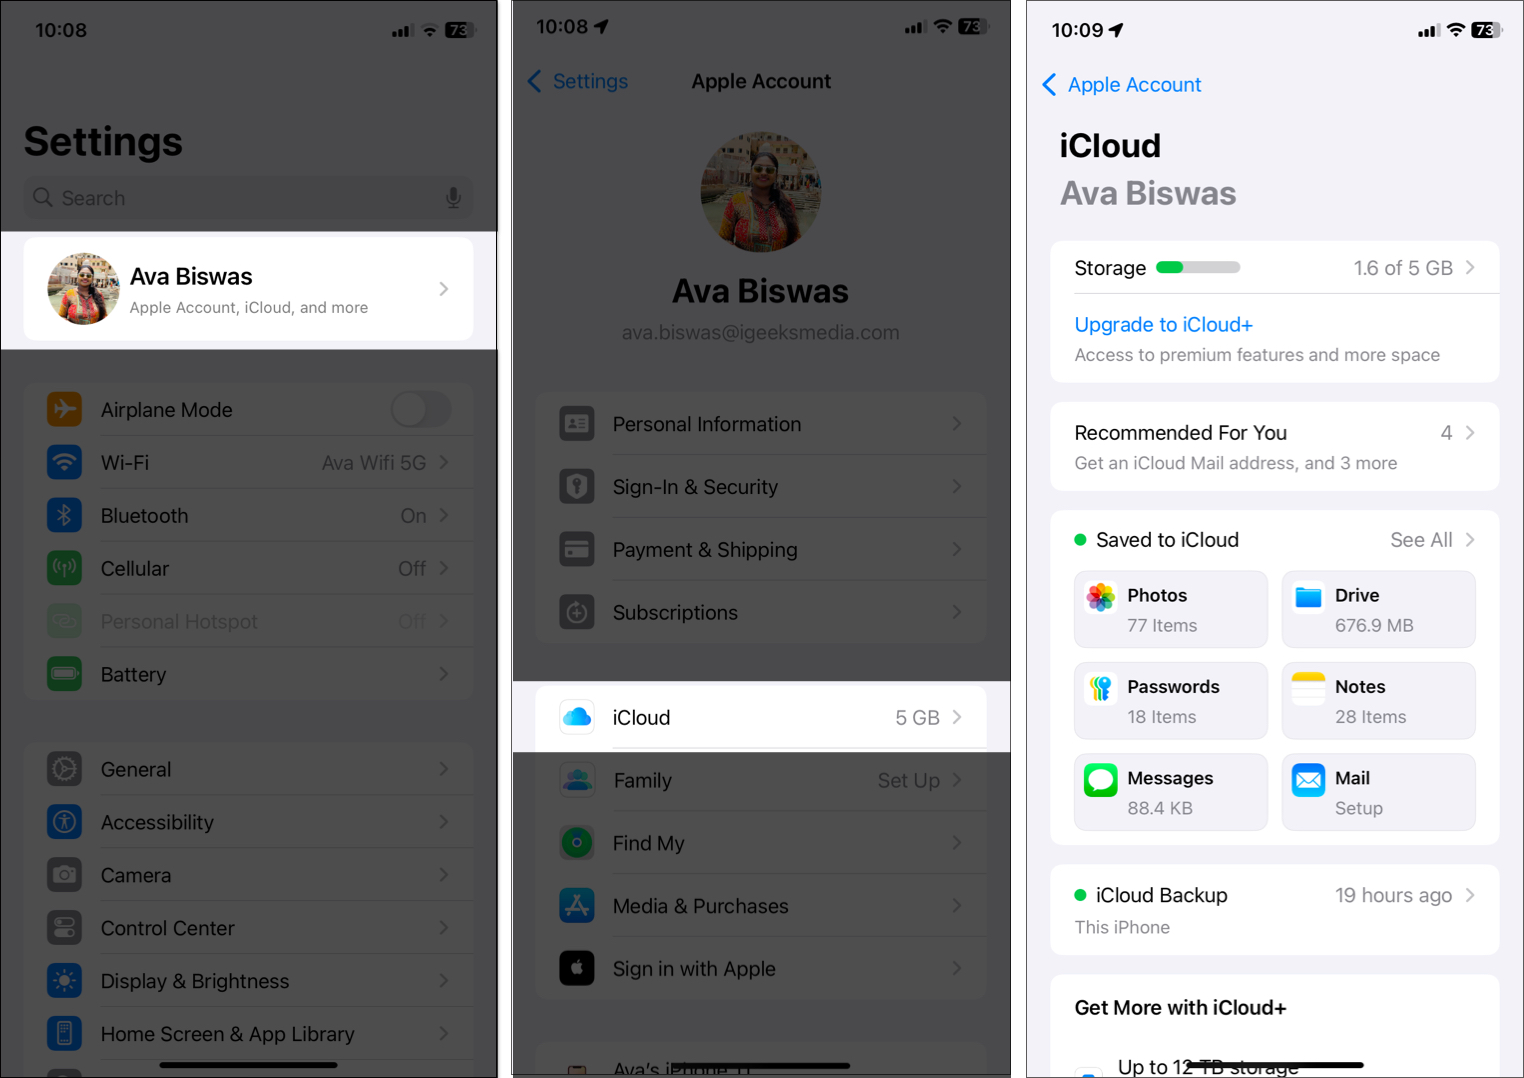
iCloud is one of the easiest ways to sync Notes between iPhone and Mac. Moreover, notes will automatically sync across all devices signed in with the same iCloud account. Here’s how to enable iCloud sync for Notes on your iPhone.
On your iPhone
- Go to Settings.
- Tap your name → iCloud.
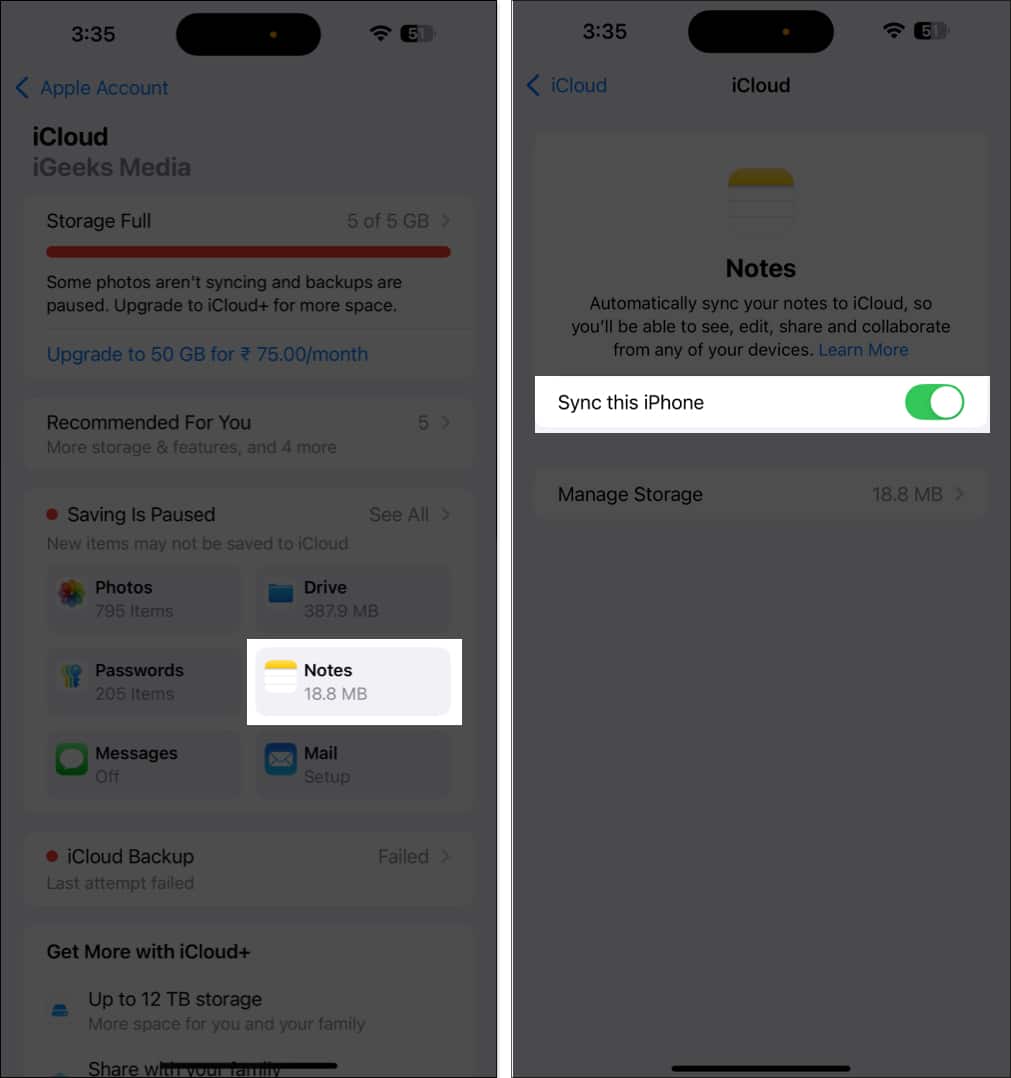
- Tap Notes under Saved to iCloud.
- Toggle on Sync this iPhone on the following screen.
Now, all the notes you’ve made on your iPhone will automatically sync to your iCloud. However, you must also turn on iCloud syncing for Notes on Mac.
On your Mac
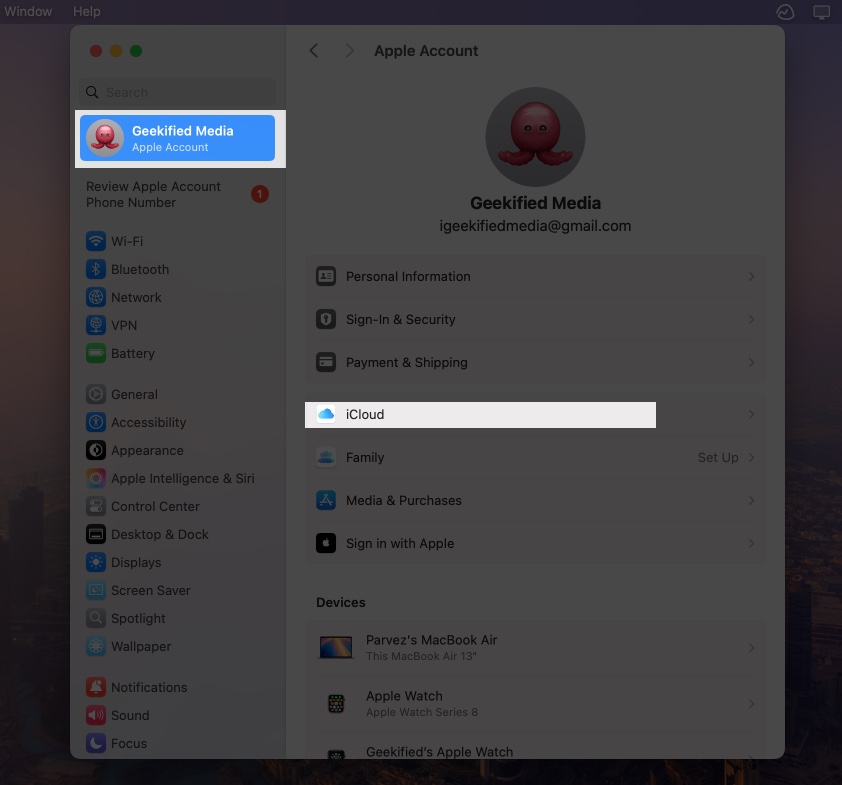
- Open System Settings on your Mac.
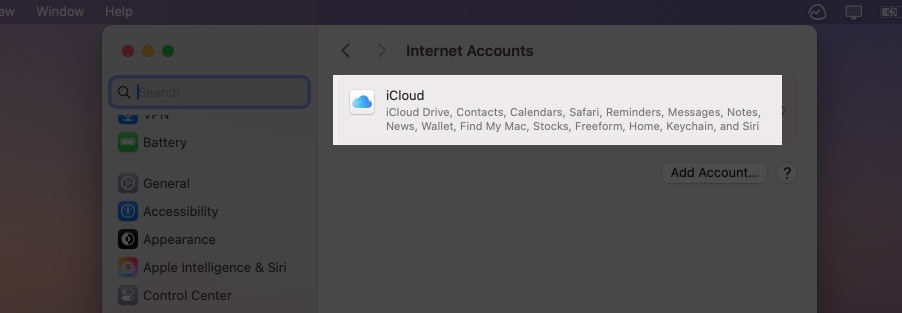
- Click on your Name → iCloud.
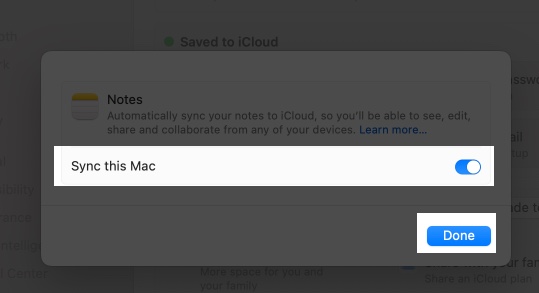
- Click on Notes under Saved to iCloud.
- Toggle on Sync this Mac in the following screen.
Alternatively, you can set this up directly from the Notes app on your Mac:
- Open Notes.
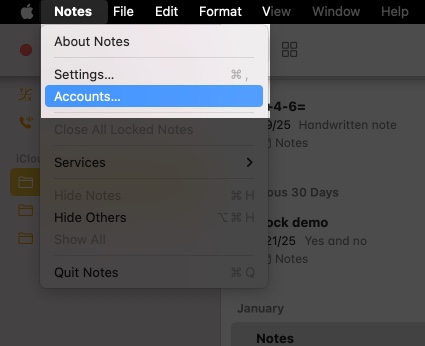
- Click Notes on the menu bar → Accounts.
- Click iCloud → Notes.
- Toggle on Sync this Mac in the following screen.
Aside from syncing Notes across your devices, you could do the same for your Safari bookmarks, Calendars, Reminders, and more.
How to sync Notes from iPhone to Mac without iCloud
While iCloud syncing is the easiest way to access your Notes across devices, there are other methods that don’t require iCloud. You can also save notes locally on your iPhone or store them in a third-party email account, such as Gmail.
If you haven’t done it yet, the first step is to add your third-party email account like Gmail to your Notes app on iOS:
- Open Settings → Apps → Notes → Tap Notes Accounts.
- Tap Add account.
- Select an email account → Continue.
- Sign in on your account.
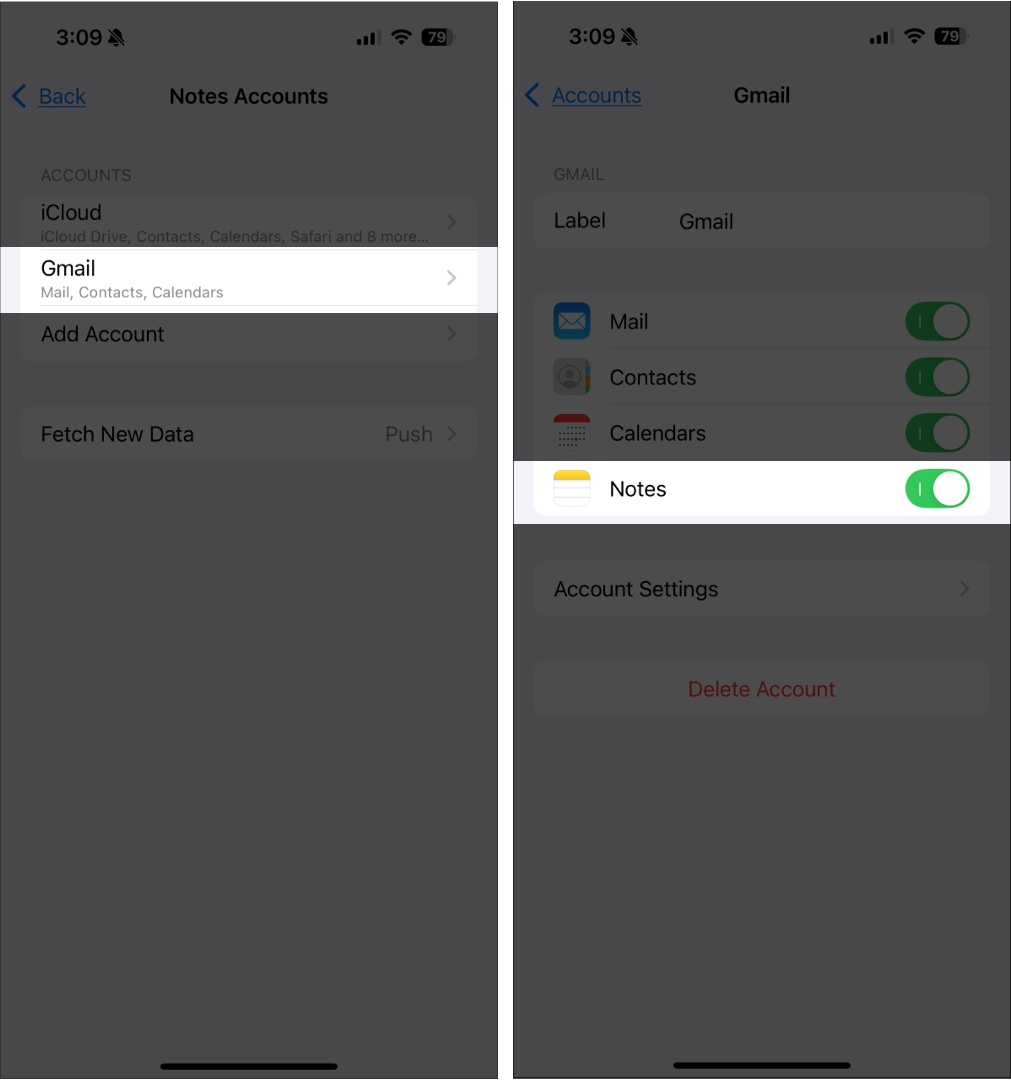
- Next, go to Notes Accounts → select the email account.
- Ensure Notes is toggled on.
Once done setting up, you can now create a note that will automatically be saved on your Google account. Go to Notes → tap the Back icon until you see all folders → Select Notes under the email account → tap Compose.
You should see a Notes category on your Gmail account where all your Notes are stored.
Wrapping up…
Notes is a handy way to log your thoughts and ideas throughout the day. Syncing your iPhone notes to your Mac may be ideal if you’re the type who wants to view, organize, or continue the note-taking and brainstorming process on a Mac.
Personally, I prefer iCloud because it’s the most seamless method. How about you? Share your favorite syncing method below in the comments section!
FAQs
There may be several reasons for that to happen. You can check out our troubleshooting guide on Notes not Syncing, to fix this issue.
If not for iCloud, you can share your Notes via airdrop from your iPhone to your Mac.
Read more:

