Your Apple ID is your digital passport to access Apple’s apps, services, and other essential features. However, there might be times when you need to update it. But how do you do it? No worries; I’ll walk you through the steps to change your Apple ID email on your iPhone, iPad, and Mac in this article.
Difference between switching Apple ID and changing Apple ID
Changing your Apple ID and switching your Apple ID are two distinct actions that involve your Apple account, but they serve different purposes and have other implications. Let’s explore the differences between these two actions.
- Switching an Apple ID: It means using a different existing ID on your device or within an Apple service. People do this for reasons like using a separate account for iCloud, the App Store, iTunes, or other Apple services. It’s like logging out of one account and logging into another.
- Changing Apple ID: It requires editing the email linked to your Apple ID. You may do it for various reasons, like losing access to your current email, preferring a new primary Apple ID email, or updating your details. This process might include moving your data, purchases, and subscriptions to the new email address.
Though you can’t change your Apple ID using the Mac Settings app, you may use the web browser on your Mac to do the same. The same steps can also be applied on your iPhone, Android device, or Windows PC.
How to change your Apple ID email address on Mac
- Open a web browser you like.
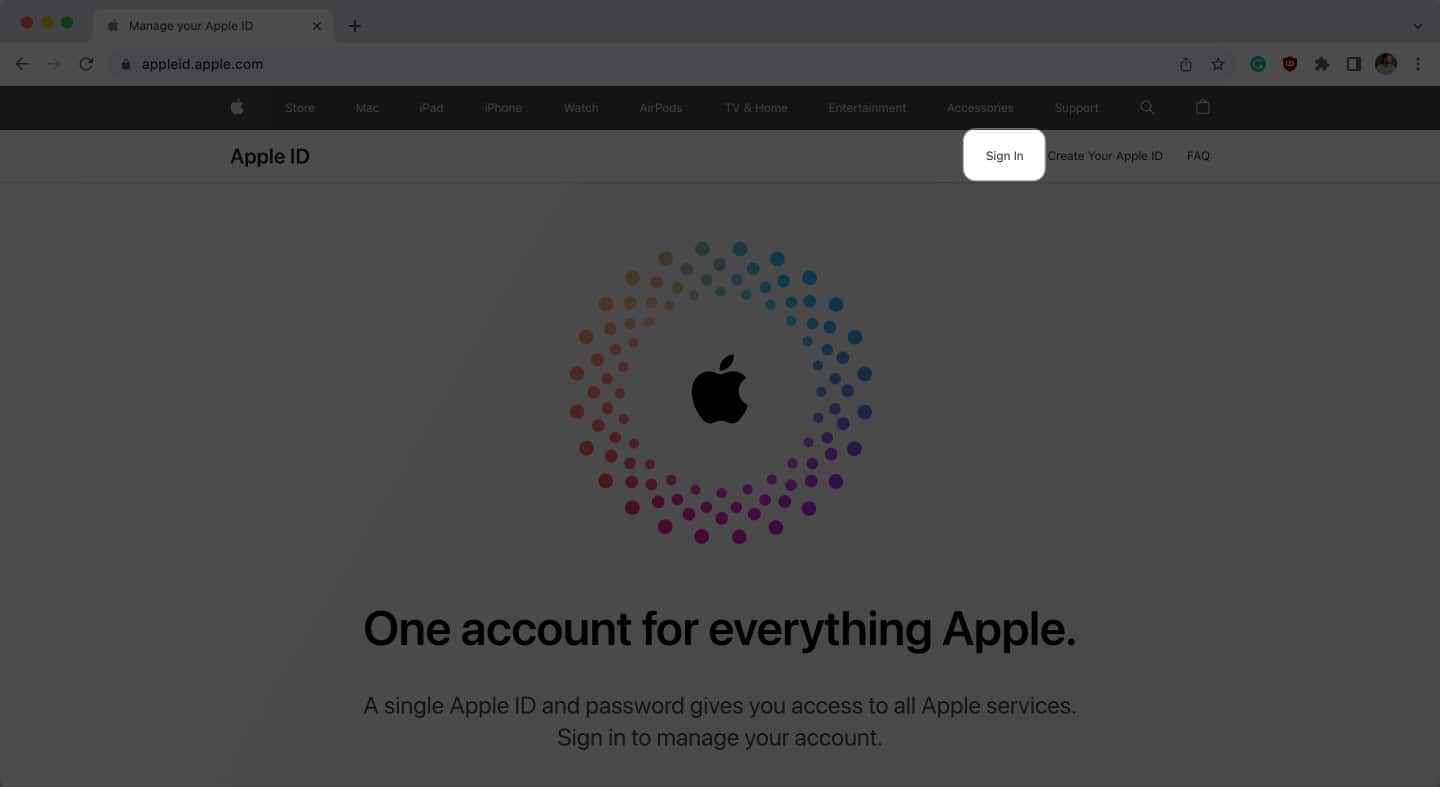
- Go to appleid.apple.com → Click Sign In.
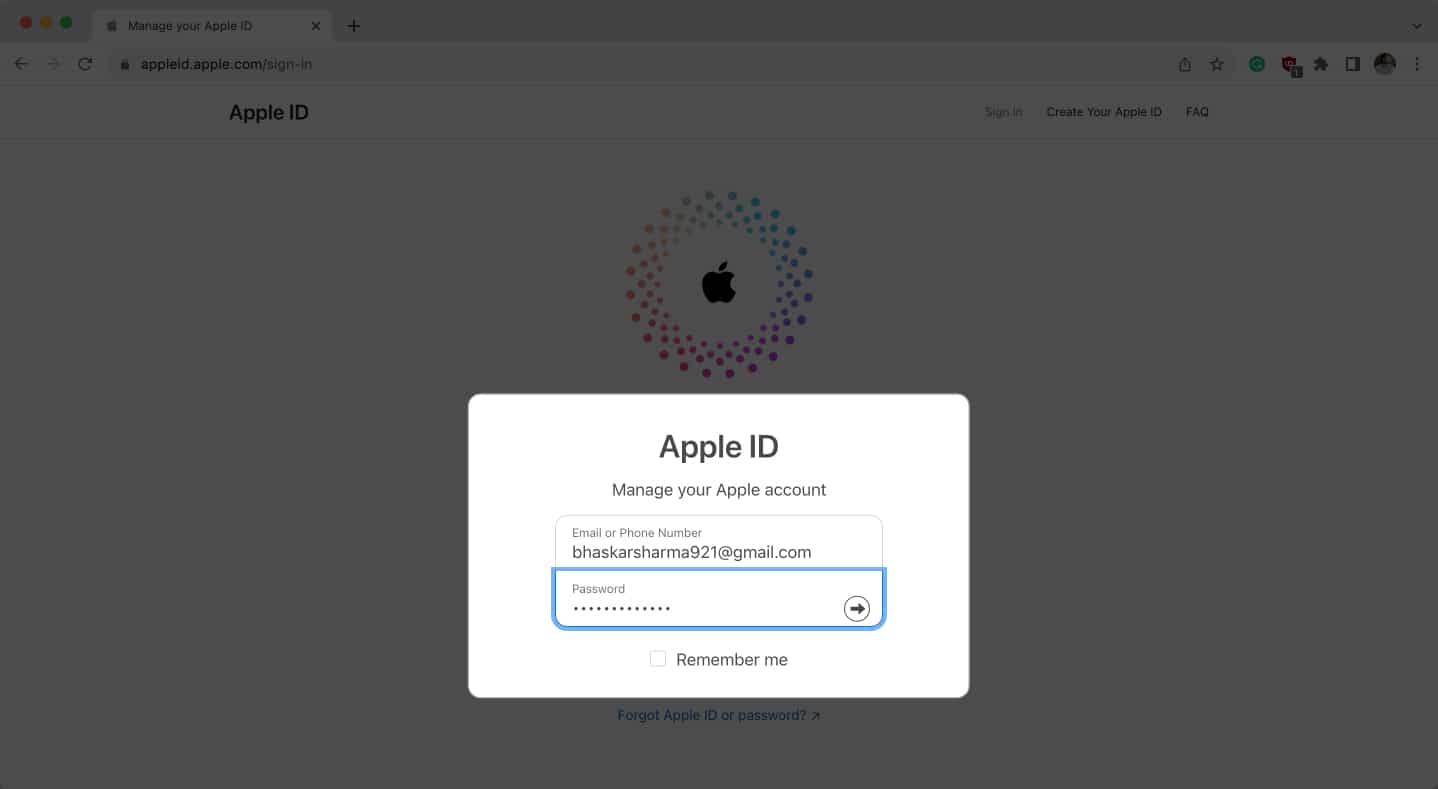
- Use your Apple ID and Password to sign in.
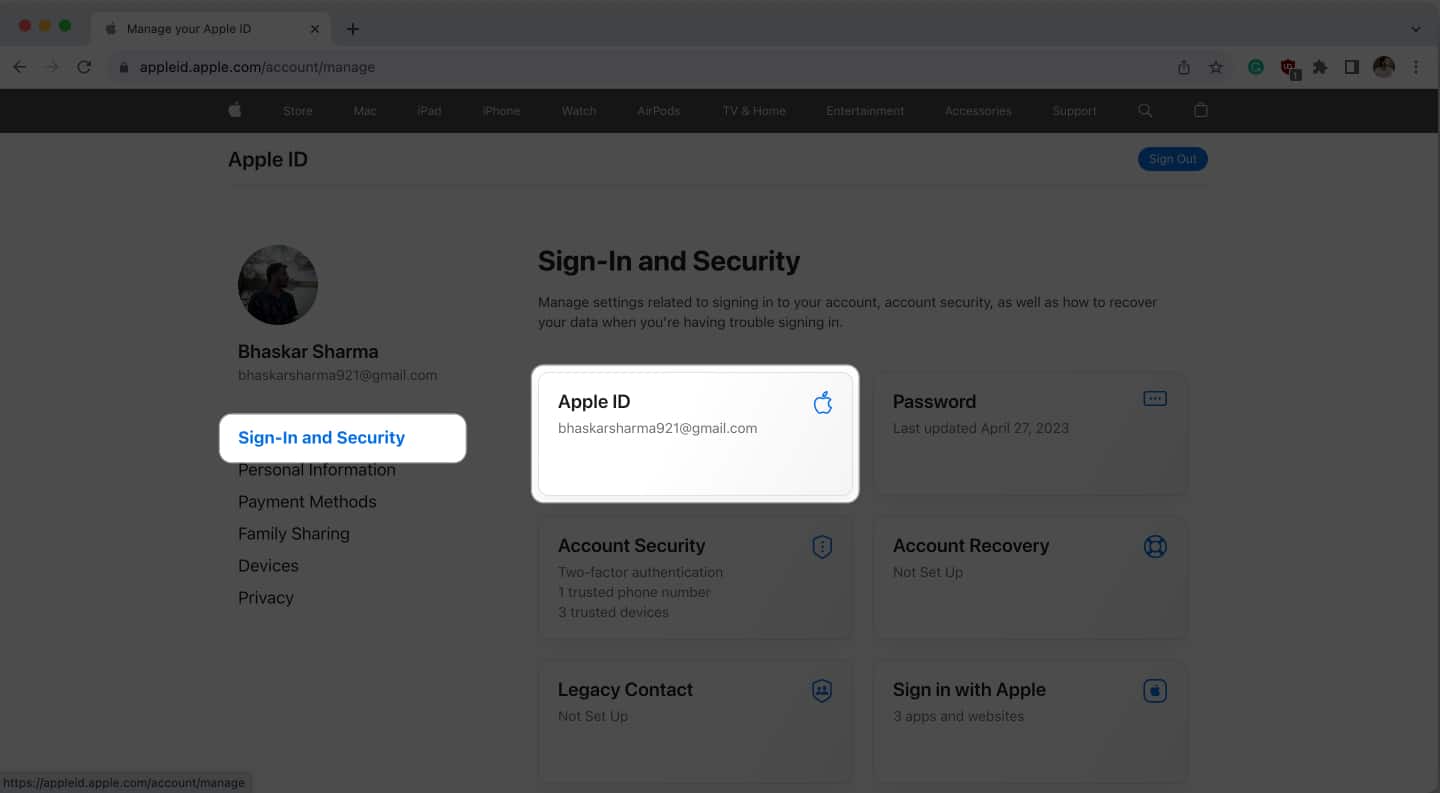
- Head to Sign-In and Security → Select Apple ID.
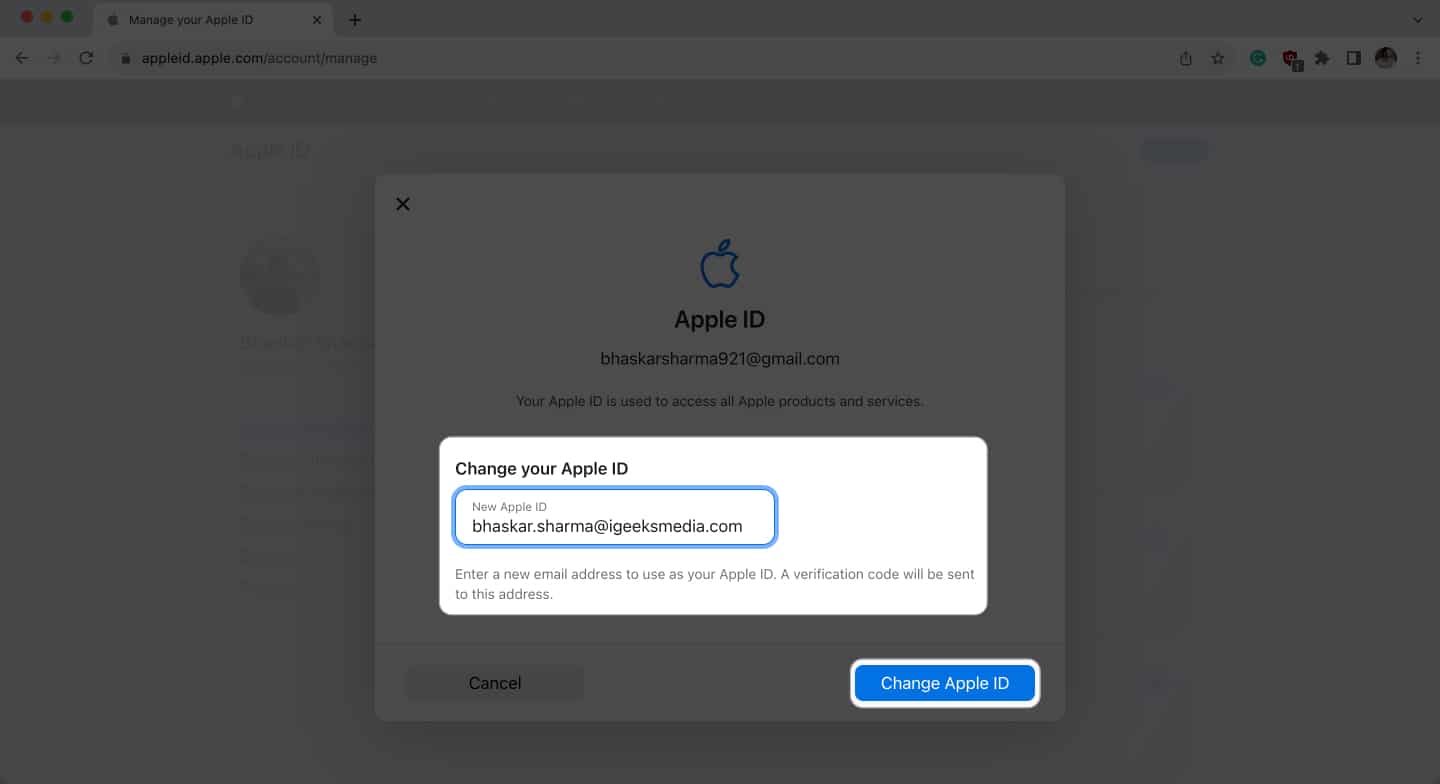
- Type your new Apple ID → Choose Change Apple ID.
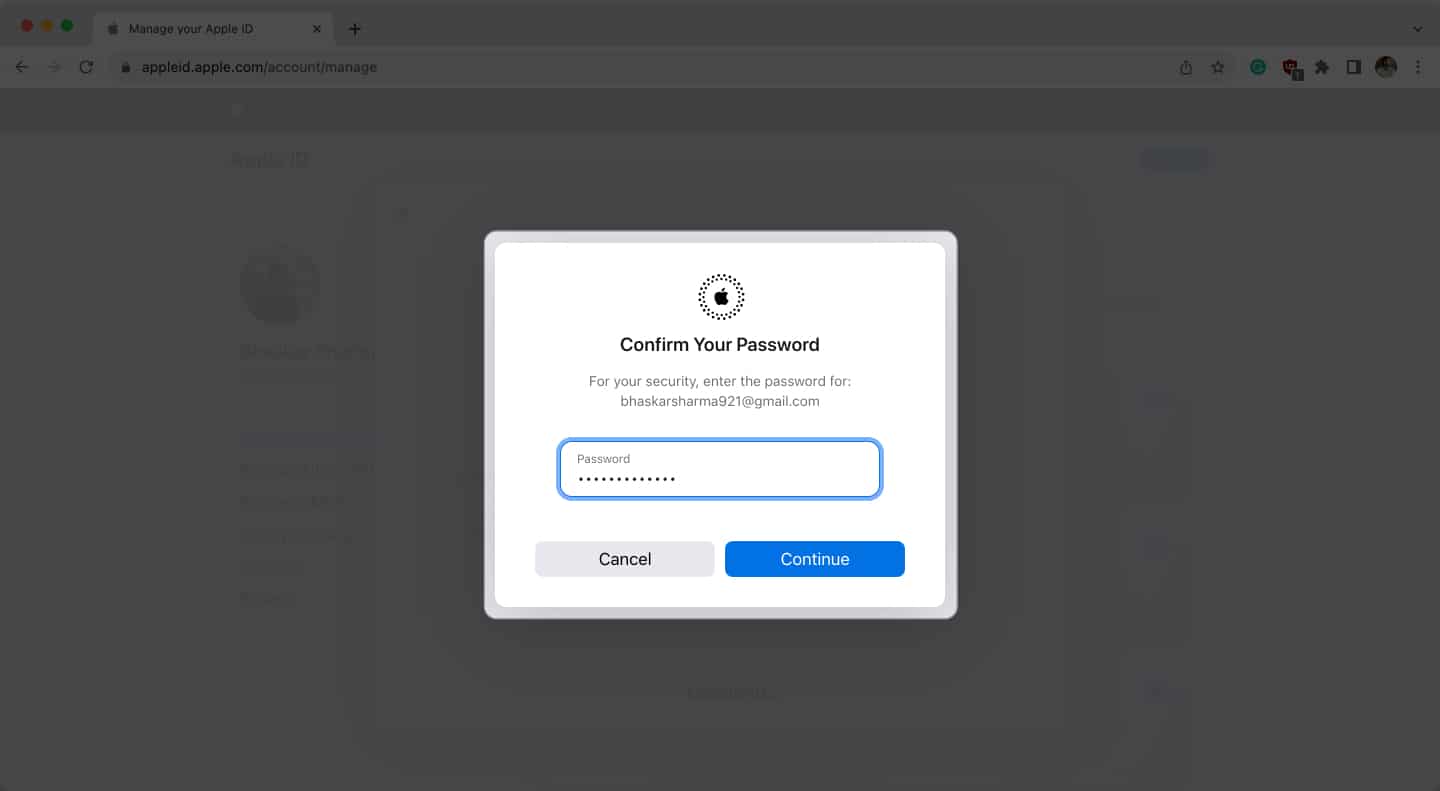
- Enter your current Apple ID password → Hit Continue.
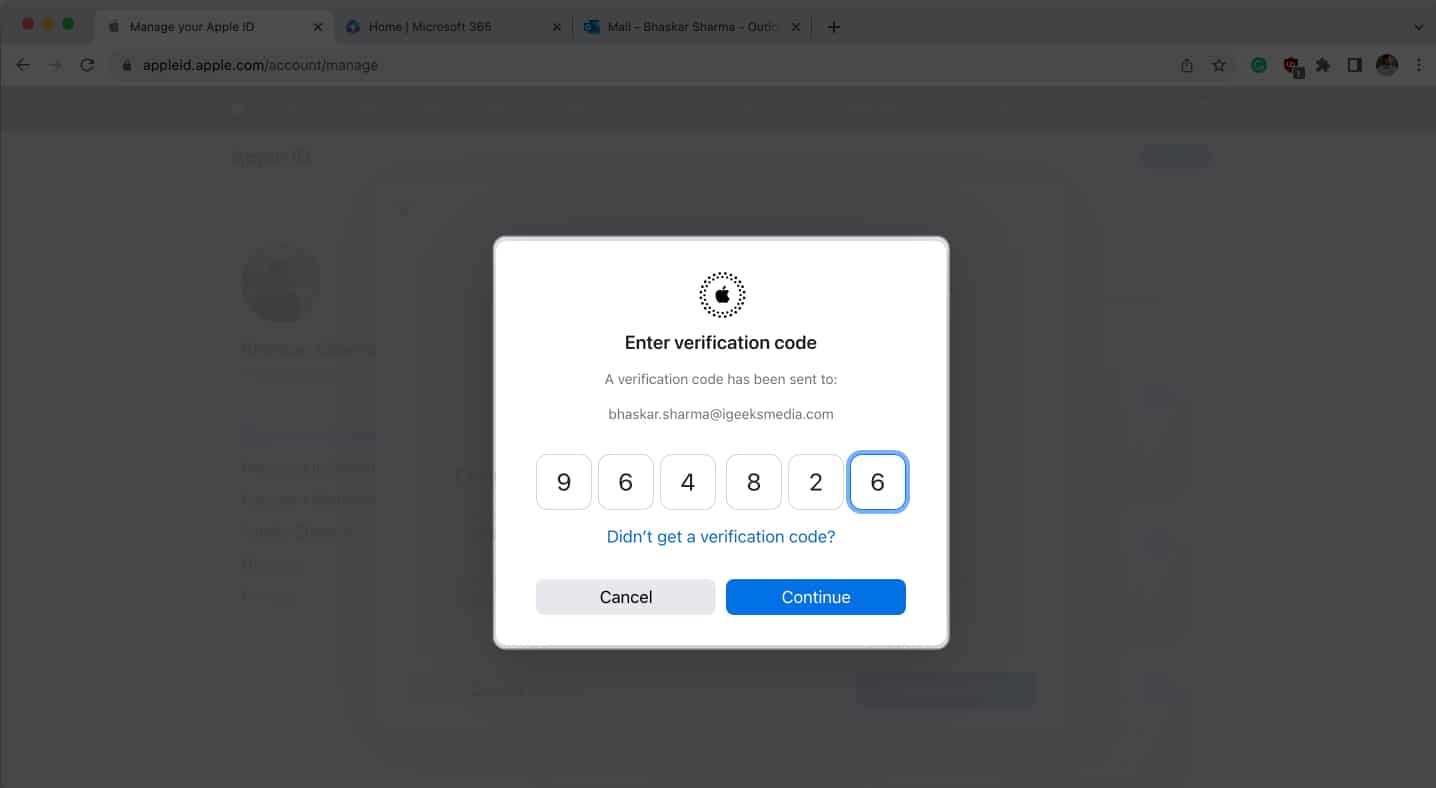
- Type the OTP from your new Apple ID → Select Continue.
And there you have it! Your Apple ID has been successfully updated. Now, you must sign in to all the devices associated with your Apple ID using the new email address.
If you don’t have access to any computer, you may change your Apple ID email address from your iPhone settings. Let’s learn how to do that!
How to change your Apple ID email address on iPhone or iPad
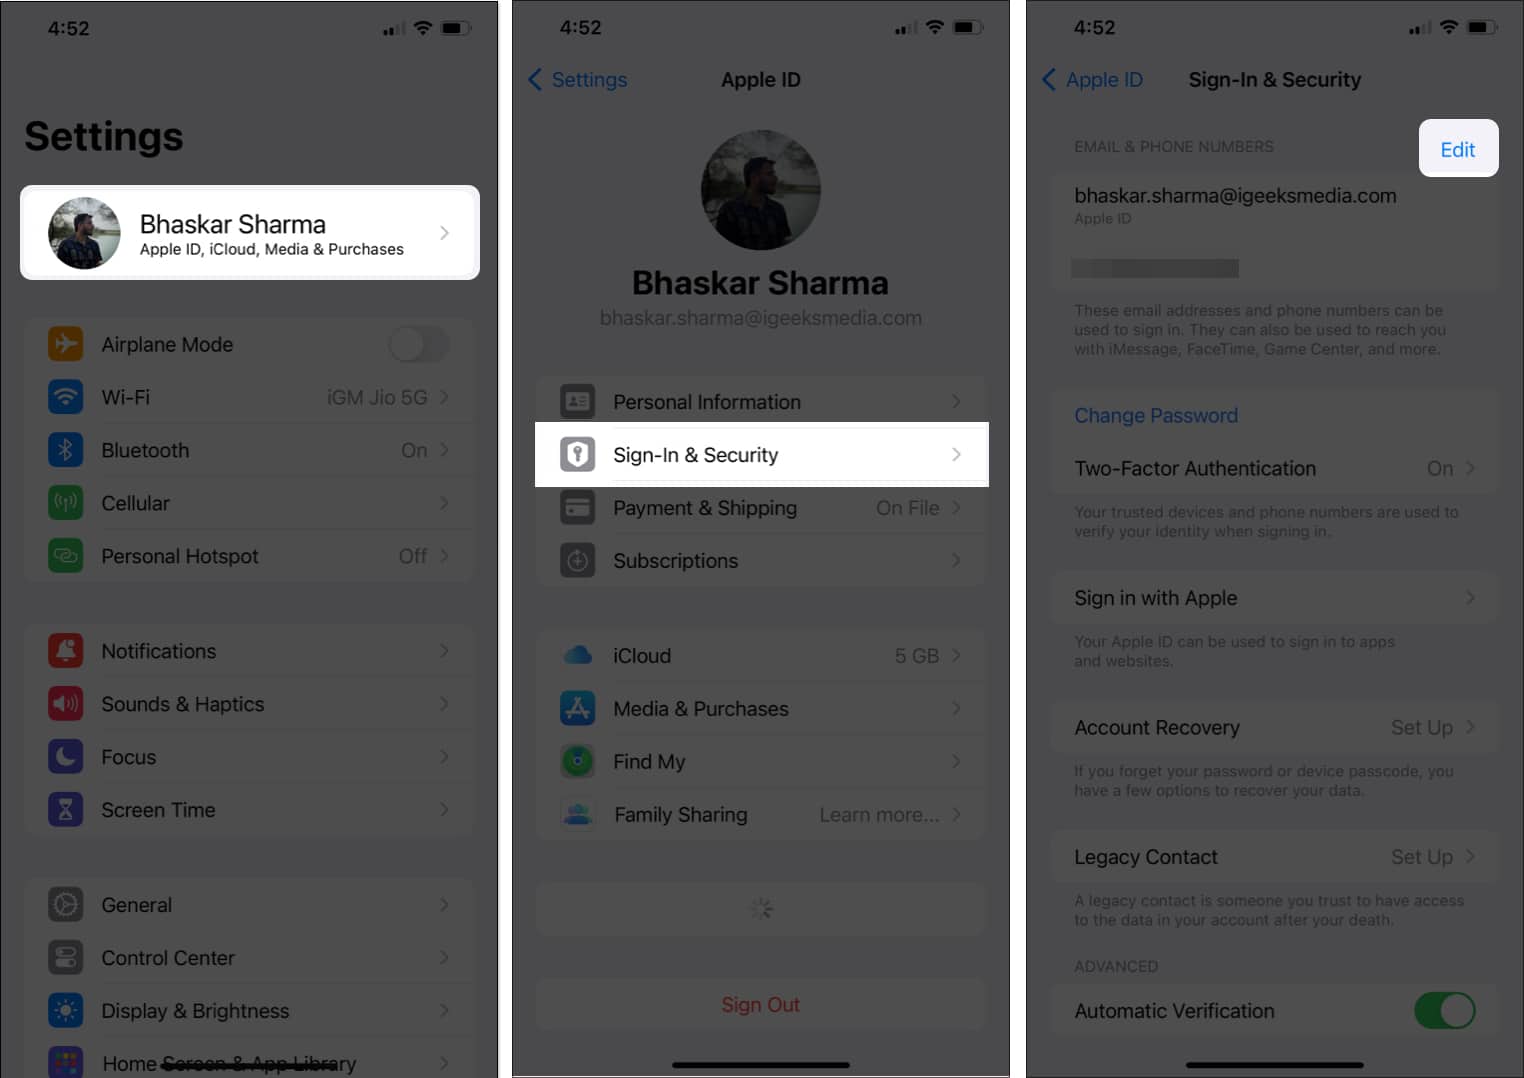
- Navigate to the Settings app.
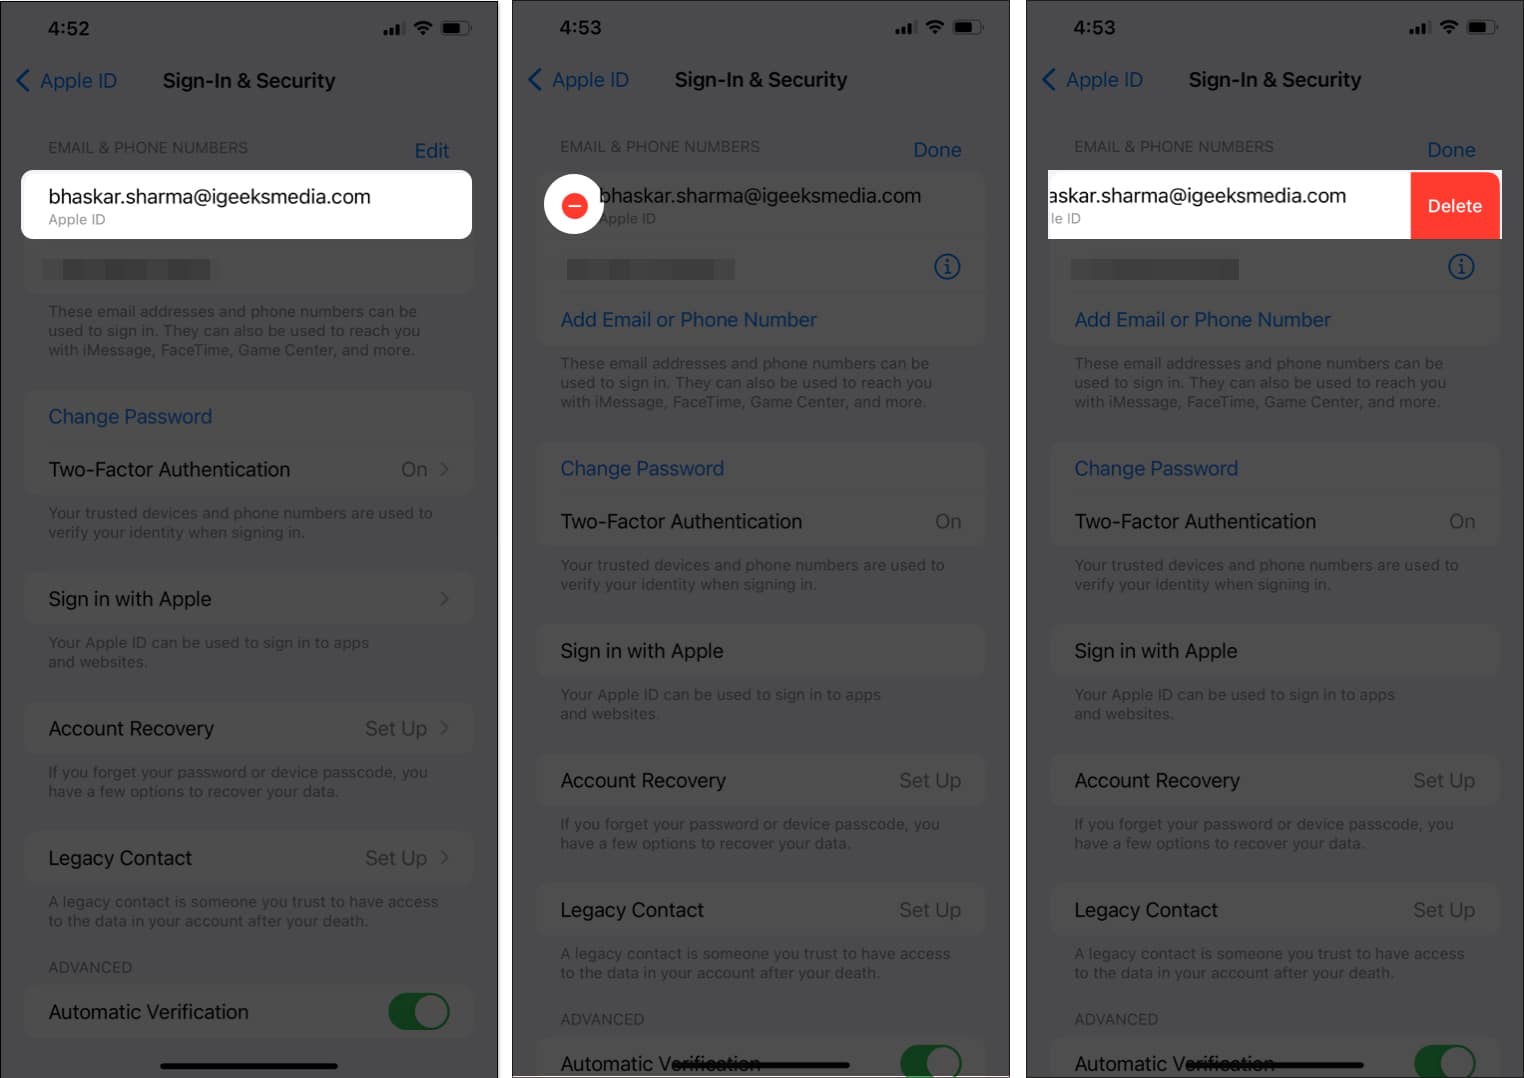
- Go to your Contact Card → Choose Sign-In & Security → Click Edit next to Email & Phone Numbers.
- Tap the (-) button next to your Apple ID → Confirm by tapping Delete.
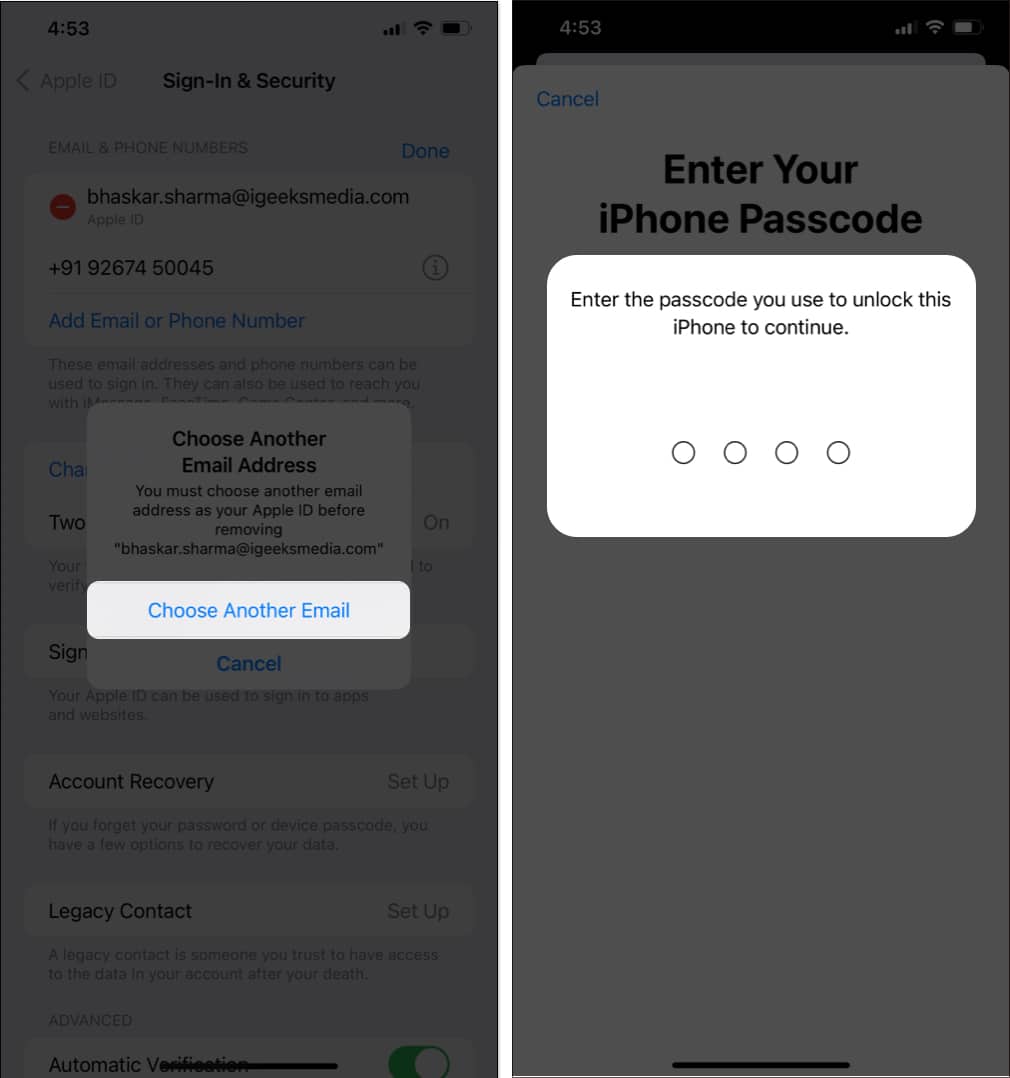
- Tap Choose Another Email on the prompt → Enter your iPhone’s Passcode.
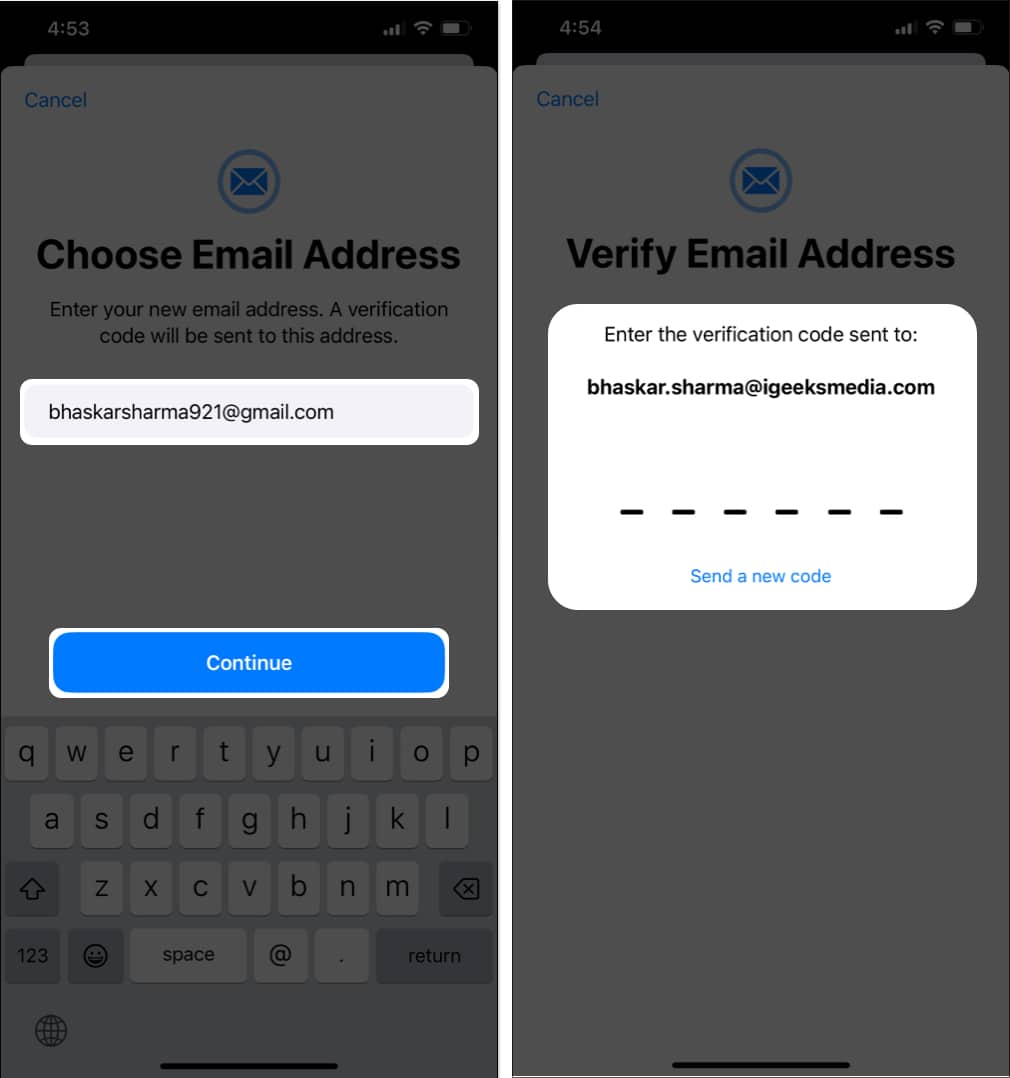
If you’ve turned on Stolen Device Protection, wait for one hour before changing your Apple ID. - Type in your new email address → Tap Continue → Use the OTP from your email.
Video: How to change Apple ID email address on iPhone, iPad, and Mac
Change your existing Apple ID
Your Apple ID is like a unique key that unlocks everything Apple offers, such as Apple Music, Apple Arcade, and Apple TV+. So, ensure you link the most accessible email address with the ID. If you have any other problems with your Apple ID, please drop them in the comments.
FAQs
When you change your Apple ID to a different email address, you don’t lose any data like synced contacts, purchases, photos, or other information. Only you will use the new email to sign in to your Apple ID and receive the alerts or verification codes on that address.
No, Apple does not offer the option to merge two Apple IDs. However, you can use Family Sharing to share purchases between different Apple IDs.
Yes, you can set up different user accounts on your Mac to sign in to several Apple IDs.
You can link one email address to one Apple ID. Therefore, you can create several Apple IDs if you have multiple email addresses.
Log in to the user account whose Apple ID you want to remove. Then go to System Settings → Apple ID card → Click Sign Out. Now, enter your password and confirm your choice.
Read more:

