Your Mac’s menu bar allows you to quickly reach important tools and features. However, if it is too crowded with icons, you might have difficulty finding what you need. Don’t worry; it is possible to simply add or remove icons from the menu bar and modify how it looks on your Mac. Here, I will show you how to use and customize the Mac menu bar.
What is the menu bar on a Mac?
The menu bar appears across the top of your Mac’s screen. It holds various system and app menus, the status icons, and the time. From here, you can quickly access tools like Wi-Fi, sound controls, and your battery status. The menu bar is consistently present unless you’ve set it to disappear automatically.
Let’s see how you can use the Mac menu bar to make the most out of it.
How to use the Mac menu bar

The Mac menu bar is divided into different parts, each serving a specific purpose:
- App menus: On the left side, you’ll find menus that change based on the active app. These menus include options like File, Edit, and View, which offer different functions depending on the app you’re using.
- Status icons: To the right, you’ll see small icons representing various system functions and third-party apps. These icons provide quick access to things like User, Wi-Fi, Spotlight Search, battery status, and more.
- Control Center: You can use Control Center on your Mac to control system settings like Wi-Fi, Bluetooth, sound, display brightness, and more.
- Notification Center: The Notification Center is where you can view all your notifications and widgets. It’s accessible by clicking the date and time in the menu bar.
You can click on any of these items to open their respective menus or panels.
Therefore, the menu bar is an essential part of the macOS that helps in managing your Mac efficiently. Thus, ensure it is organized and personalized according to the regular tasks to enhance your productivity.
How to customize the menu bar on your Mac
The beauty of the Mac menu bar is that you can tailor it to your needs. Here’s how you can do that:
Rearrange the menu bar icons
Want your most-used icons in a specific order? Simply hold down the Command (⌘) key, then click and drag the icons to rearrange them as you like. If you want to make sure an icon stays in the same place, you can pin it by dragging it further to the left.
Add/remove menu bar icons
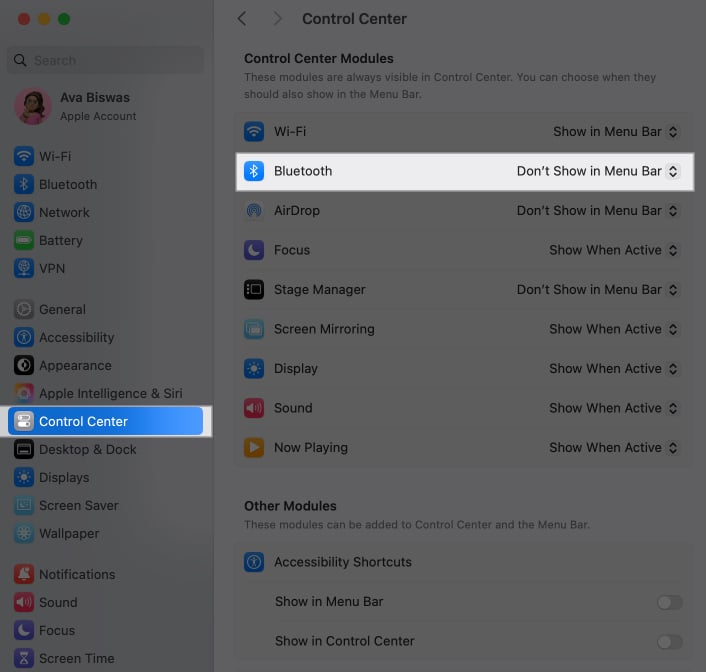
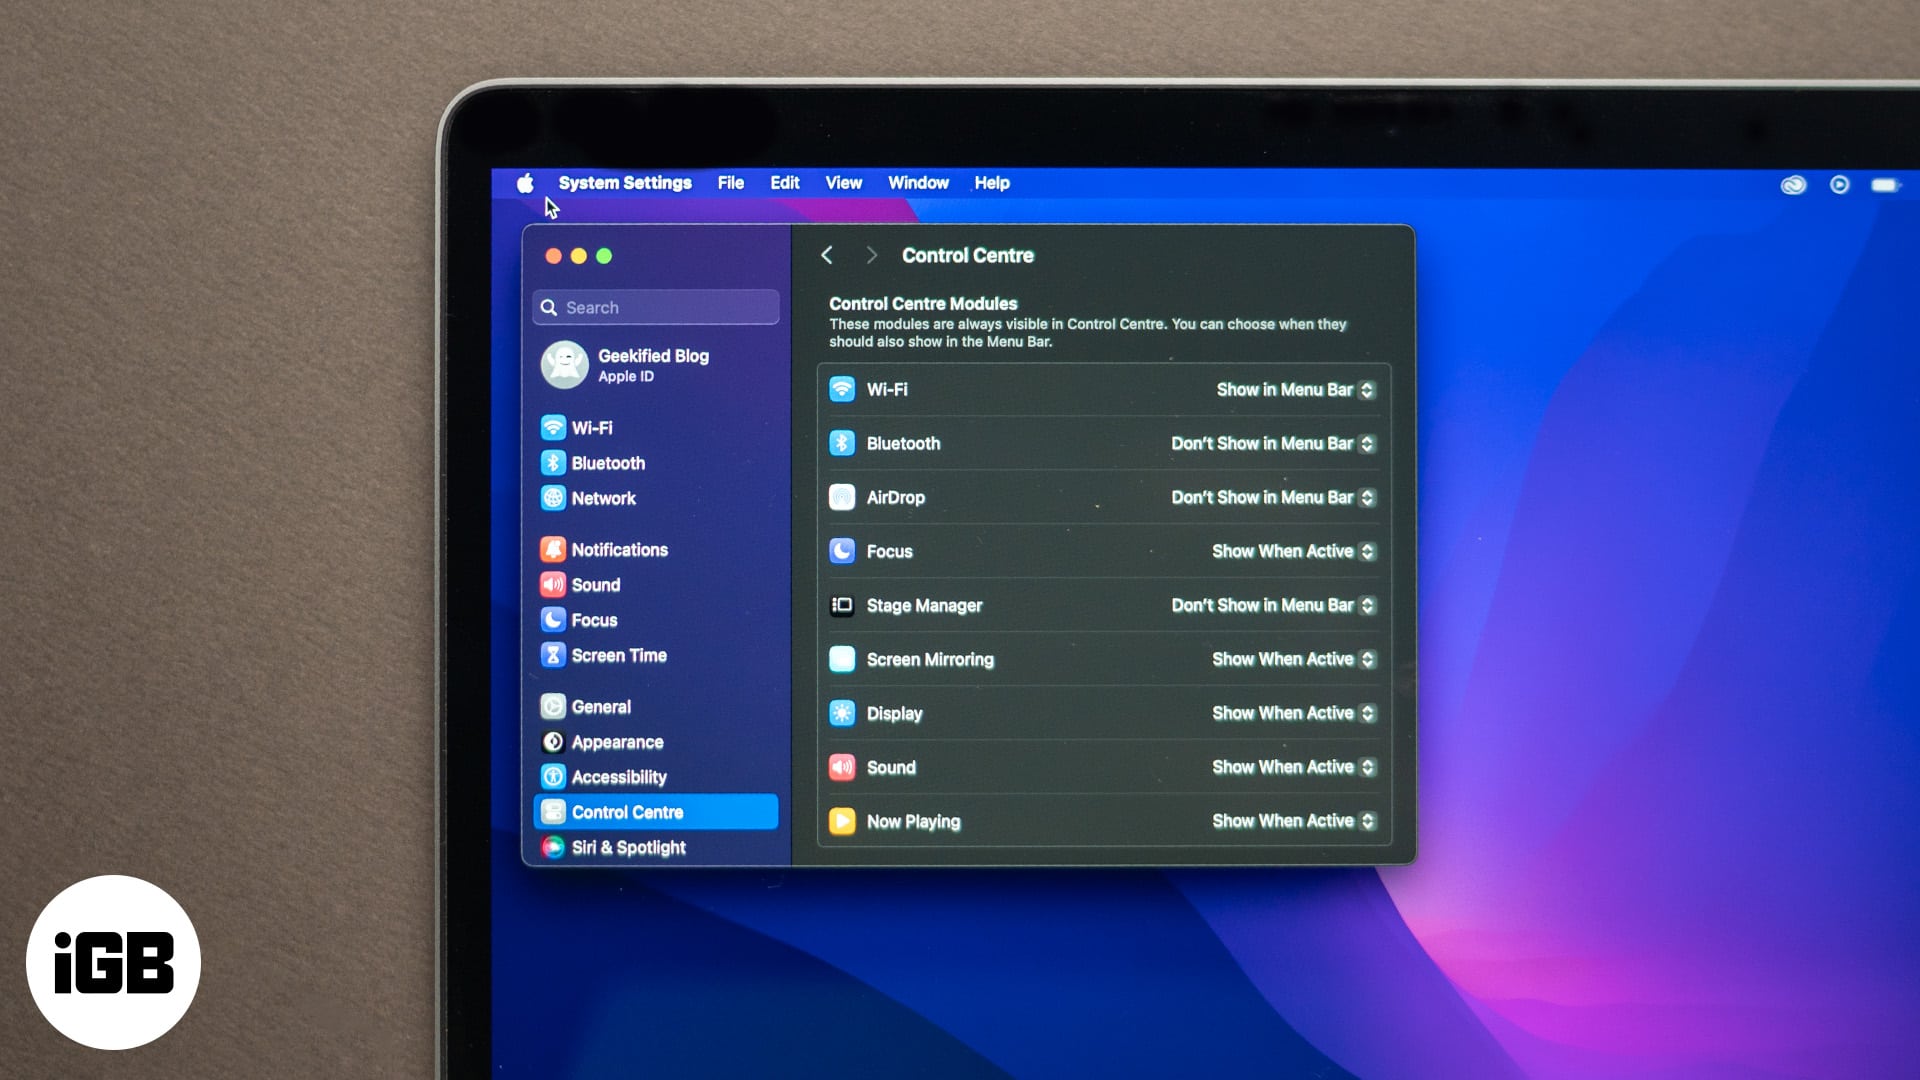
You can add or remove icons from the menu bar depending on what you need. For example, if you use Bluetooth often, you can show the Bluetooth icon to the Mac menu bar:
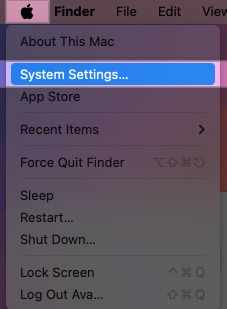
- Go to the Apple menu and select System Settings.
- Click on Control Center from the left panel and locate Bluetooth.
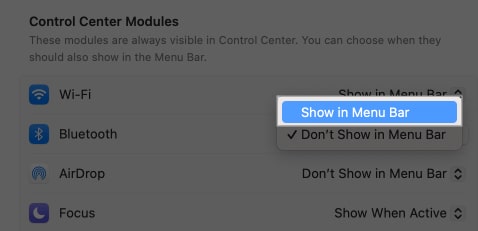
- Select Show in Menu Bar in the dropdown.
With this method, you can add any Control Center icon and other system icons such as Accessibility Shortcuts, Keyboard Brightness, Siri, etc. on your Mac menu bar and rearrange them accordingly.
If you want to declutter your menu bar for a clean look, you can easily remove icons from there. For that, simply drag it out of the menu bar while holding the Command (⌘) key. If it doesn’t get removed, use the above steps and select Don’t Show in Menu Bar.
However, you can’t remove the Control Centre and the data and time icons. Furthermore, macOS doesn’t allow you to remove opened apps’ icons from the menu bar until you close them.
Customize system icons on the Mac menu bar
The system icons, like the date, time, and battery, are also customizable.
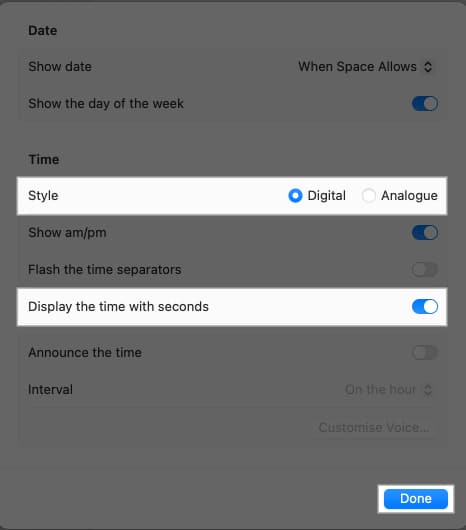
To change the Date and Time appearance on your Mac menu bar, follow the steps below:
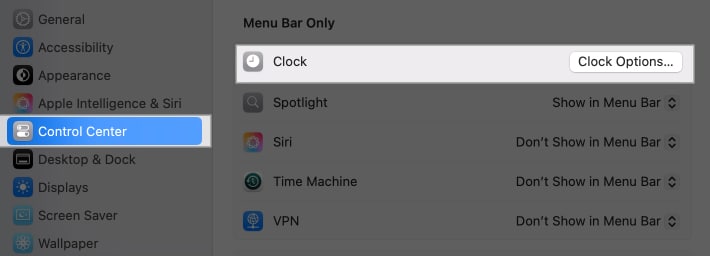
- Go to System Settings and access the Control Center menu.
- Scroll down and click on Clock Options.
- Now, you can adjust how the time and date appear.
- You may change clock style to digital or analog and toggle on Display the time with seconds, then click on Done.
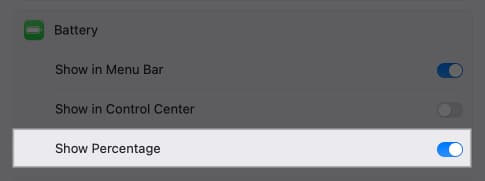
If you want to show the battery percentage of your Mac on the menu bar, locate Battery in Control Center menu. Toggle on Show Percentage.
Manage third-party app icons
If you have third-party apps installed, their icons might show up in the menu bar. You may manage them just like system icons.
However, some third-party icons can’t be removed using the Command (⌘) key trick. For that, go to the settings of the specific app and set it to not appear in the menu bar.
Change the color of the Mac menu bar
The menu bar color automatically changes based on your desktop background, but you can force it to be light or dark. To change menu bar appearance on your Mac:
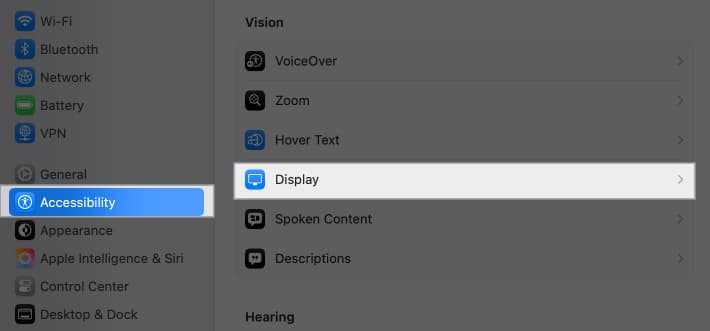
- Head to System Settings and select Accessibility.
- Select Display from the menu.
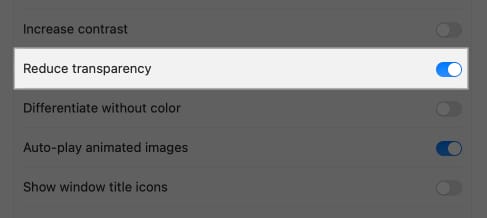
- Toggle on Reduce Transparency.
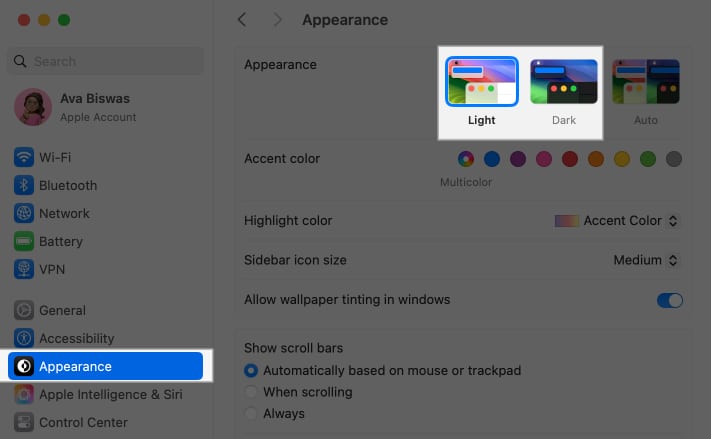
- Now, get back and select Appearance from the left panel.
- Here, choose Light or Dark as Appearance.
Automatically hide or show the menu bar on Mac
The Mac menu bar is visible always unless you enter the full-screen mode of an app window. You can set your menu bar to hide when not in use, giving you more screen space. To do so,
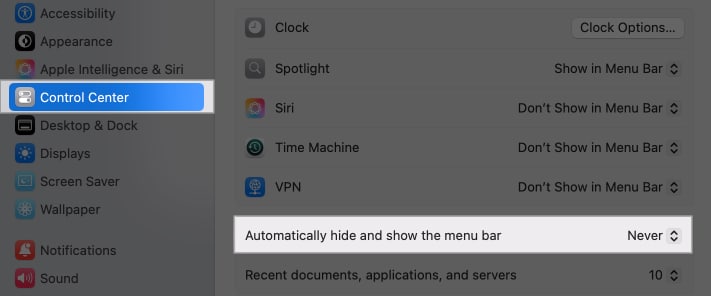
- Head to System Settings and select Control Center.
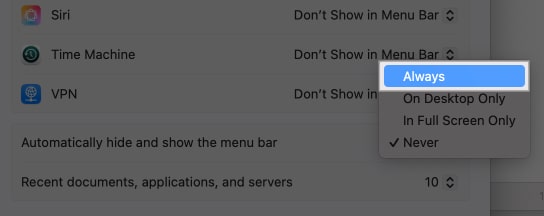
- Click on the dropdown beside Automatically hide and show the menu bar.
- Here select Always.
Now, whenever you take your cursor to the top of your Mac, you will see the menu bar. If you want to keep the menu bar hidden only when using apps in full-screen mode, select In Full Screen Only.
Add your name to the Mac menu bar
If you want to know which user account you are logged in on your Mac currently, you can set it to show on your menu bar. It will also add a personal touch. To display your name on the menu bar:
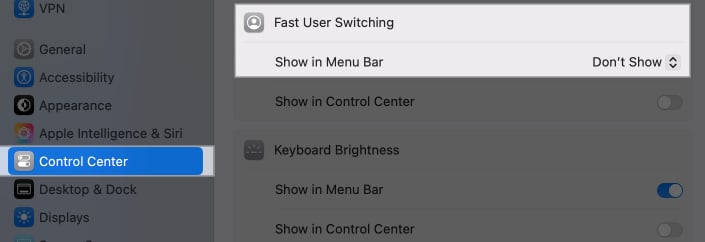
- Go to Control Center settings as shown above.
- Scroll and locate Show in Menu Bar under Fast User Switching.
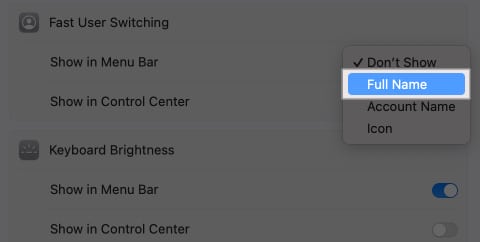
- Click on the dropdown and select Full Name.
Adding this to your menu bar will also help you to logout and switch to your other accounts on your Mac.
Run apps from the menu bar
Some apps allow you to run them directly from the menu bar for quick access such as Weather Dock, MenubarX, etc. Just install the app and its icon will appear automatically.
Signing off…
The Mac menu bar is more powerful than it appears at first glance. By customizing it, you can streamline your workflow and have all the tools you need right at your fingertips. If you face issues in the process, please let us know in the comments.
FAQs
One popular app is Bartender, which lets you manage and organize menu bar icons. Another great option is iStat Menus, which offers detailed system monitoring. Check out our top picks for customizing the Mac menu bar apps.
If your menu bar isn’t showing, it might be set to hide automatically. You can fix this by going to System Settings and select Control Center. Here set Automatically hide and show the menu bar as Never.

