When you’re out of the office for a trip or need to send predefined responses to specific emails, setting up an auto-reply in Apple Mail can help. In this guide, I’ll demonstrate the ways to configure this on iPhone, iPad, and Mac. As a bonus, I’ll show you the process of creating automatic replies in iCloud Mail and Outlook as well. Let’s get started.
What is an automatic reply in Apple Mail?
When you create an automatic email reply, any emails you receive are then sent that response automatically. Most times, people set up an out-of-office reply when they go on vacation or are away from work for another reason.
For example, an automatic reply typically reads, “I’ll be away from the office from June 1 until June 8. I’ll respond to emails when I return.”
Along with messages when you’re out of the office, you can create an auto email reply to acknowledge clients, customers, or similar using an automated message. However, there are some limitations for the iPhone:
Limitations of Mail app on iPhone
The Mail app on iPhone can only create automatic responses for specific clients, such as Microsoft Exchange. Therefore, for most other email providers, the iPhone lacks a direct, native method to set up auto-replies in Mail.
However, the macOS app offers greater flexibility. Therefore, if you don’t have an Exchange account, I suggest moving on to the Mac steps or trying the iCloud Mail method.
Conversely, Gmail users can establish out-of-office responses directly within the Gmail app on their iPhones.
For Outlook app users, there are slightly more options available since it supports out-of-office messages for Exchange, Office 365, and Outlook.com accounts. More on that later!
How to set auto-reply in Apple Mail on iPhone or iPad
If you use an email account such as Exchange, you can set up an auto-reply in Mail using the steps below:
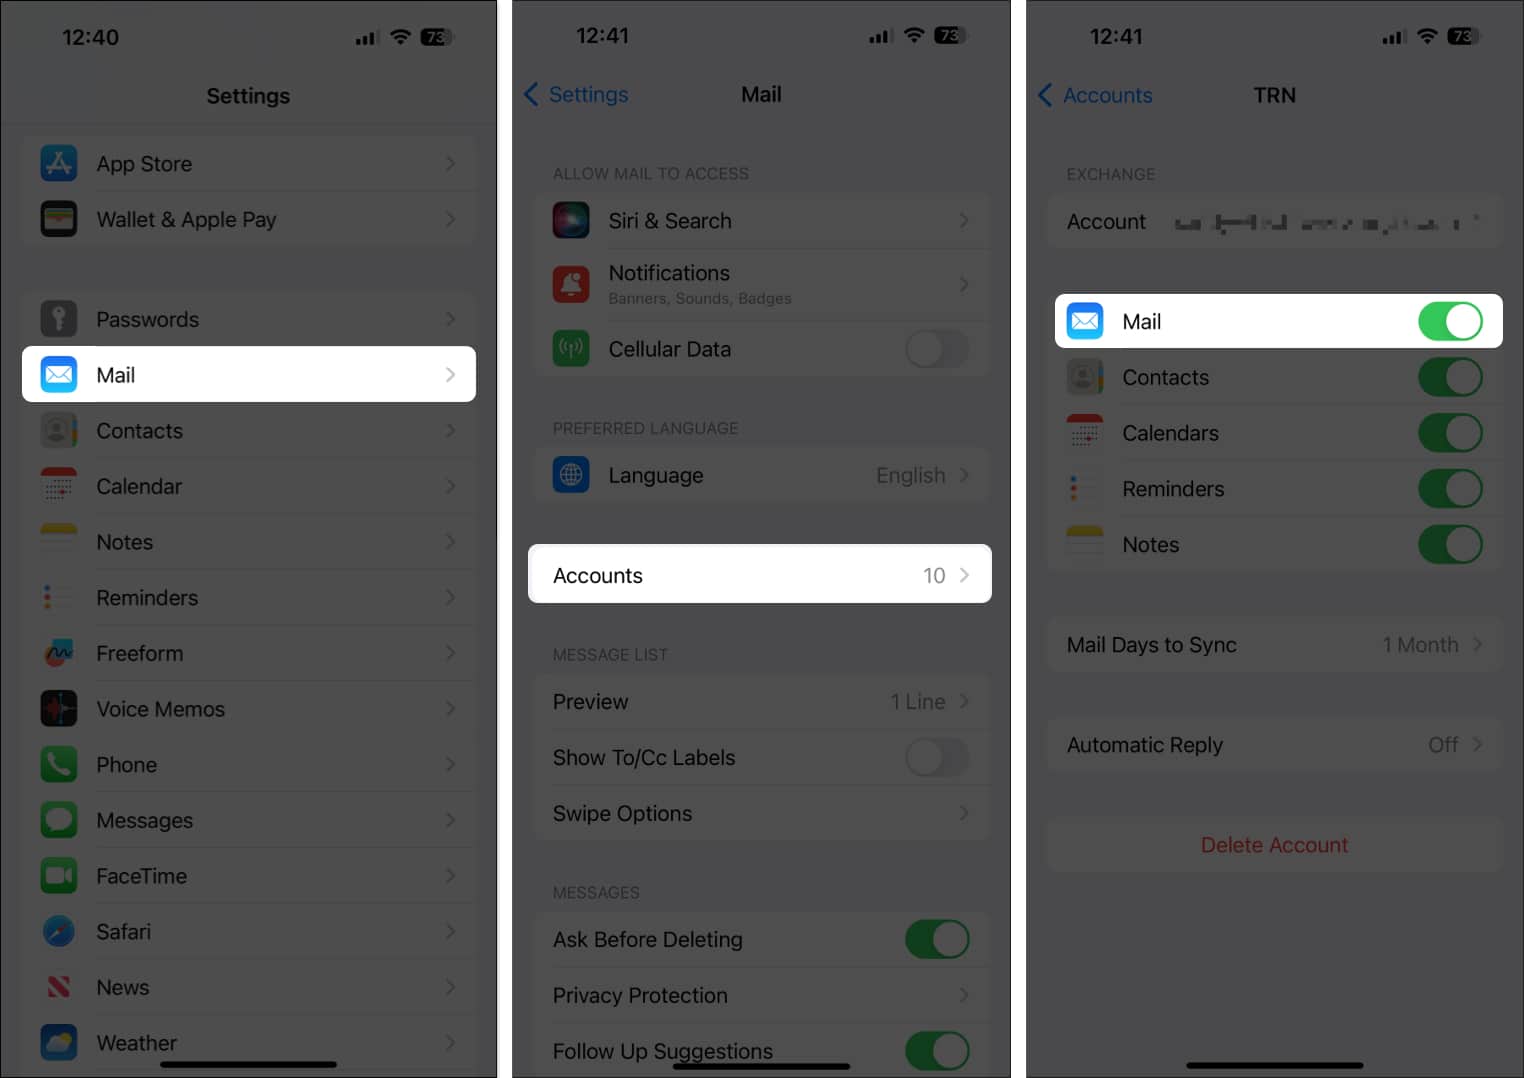
- Open the Settings app → Select Mail.
- Tap Accounts → Pick the email account.
- Choose Automatic Reply which displays as “Off” until you set it up and turn it on.
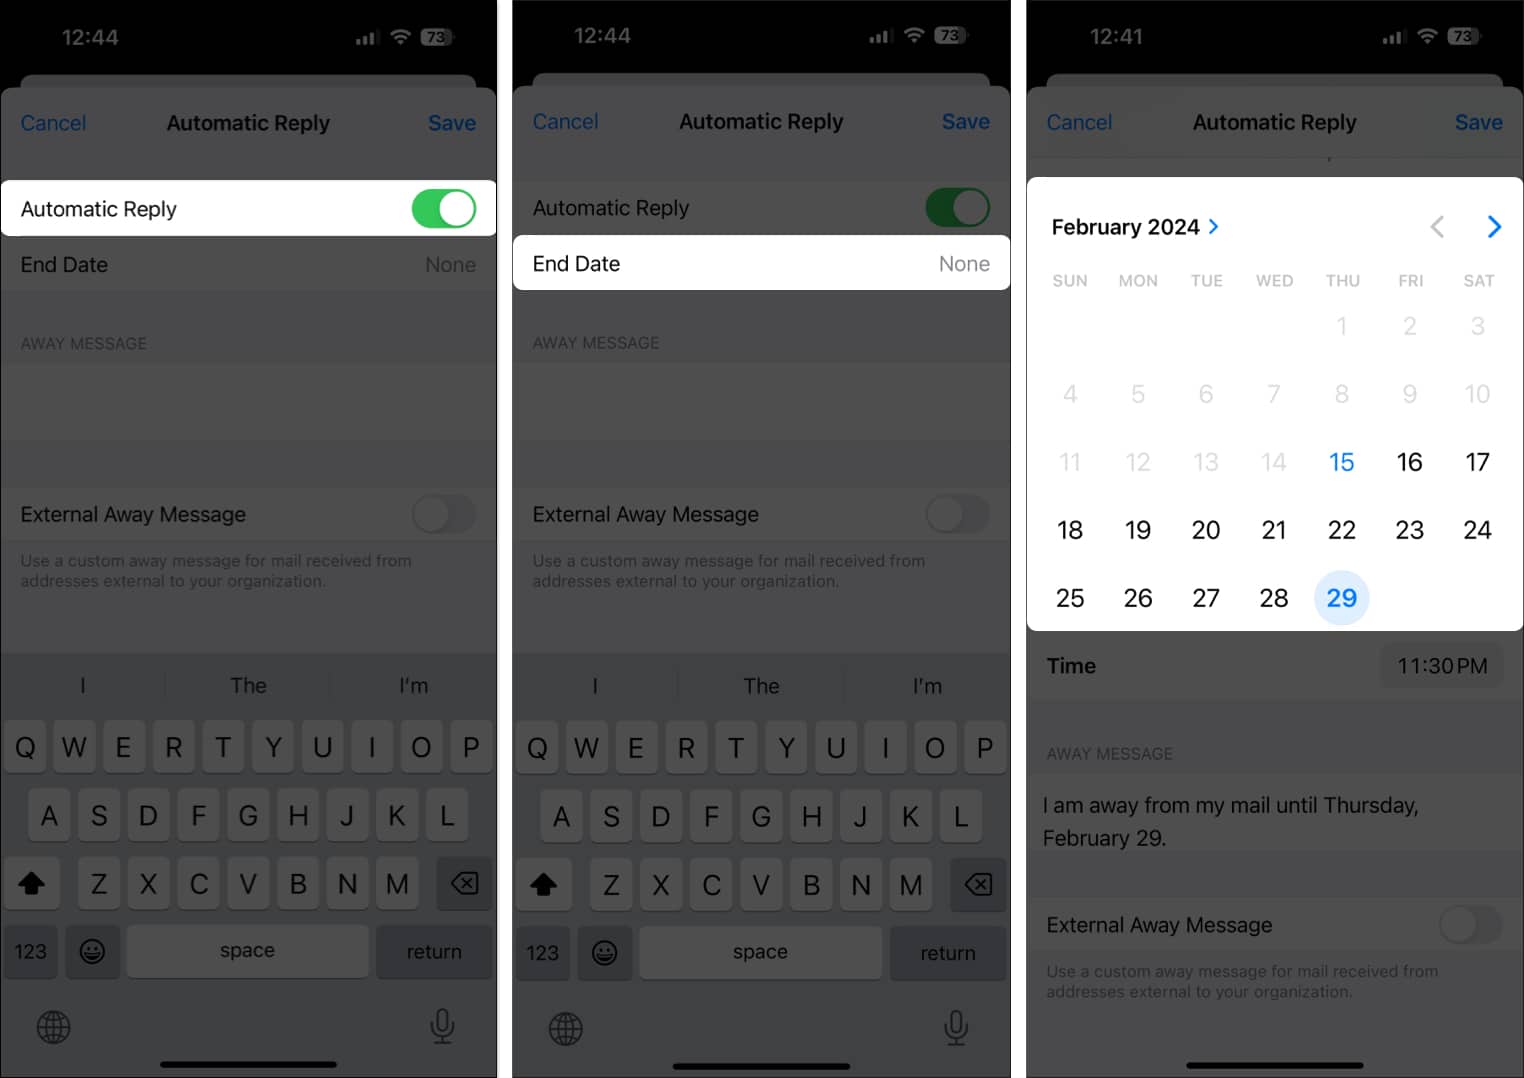
The Automatic Reply option will only appear if the email account you are using allows it in the Apple Mail app. - Turn on the Automatic Reply toggle at the top.
- Optionally, select End Date to stop the automated reply on a specific date and time. If you choose None, you can simply return to this section and turn off the Automatic Reply toggle manually.
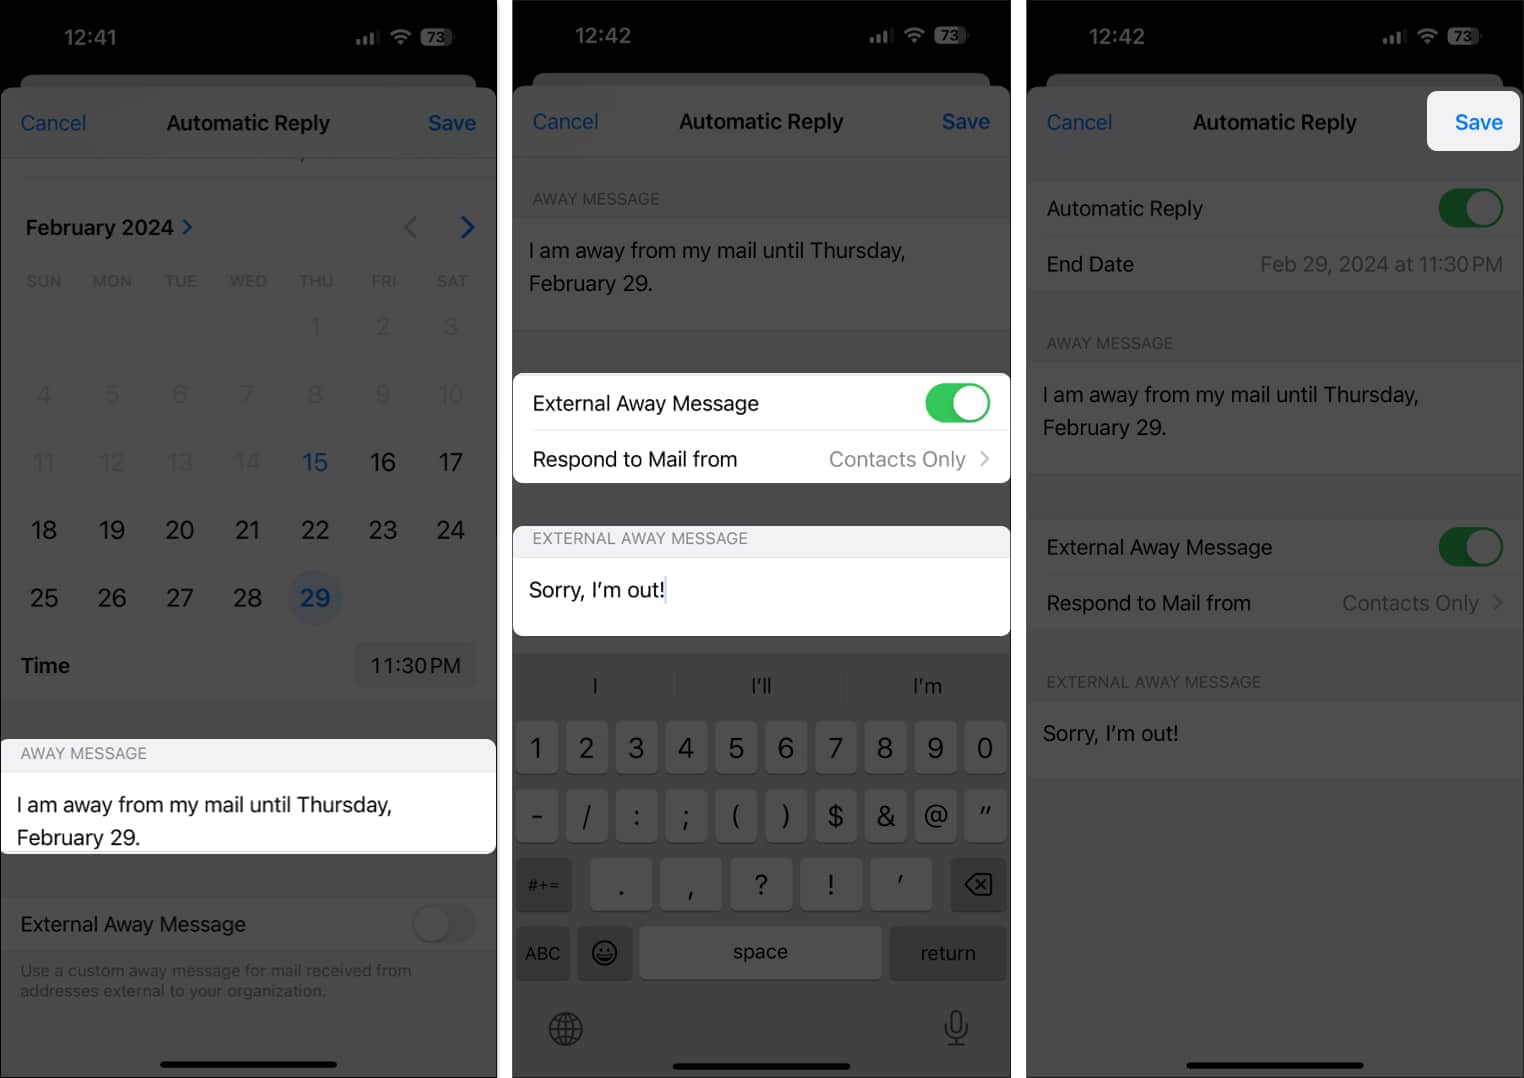
- Enter the reply in the Away Message box.
- If you want a different message sent to those outside your organization, turn on the External Away Message toggle, optionally pick a Respond to Mail from option, and enter your reply beneath.
- Tap Save on the top right when you finish.
Since Mail on iPhone lacks a Start Date option for auto email replies, any reply you create will start sending immediately. If you want to set up the message first and activate it later, simply toggle off the Automatic Reply switch. When you’re ready, come back here and toggle it back on.
How to set up automatic reply in Apple Mail on Mac
Maybe you’d like to set up an out-of-office reply for your other email accounts or send it only under specific conditions. You can do this on macOS by setting up a rule in the Mail app, which gives you great flexibility.
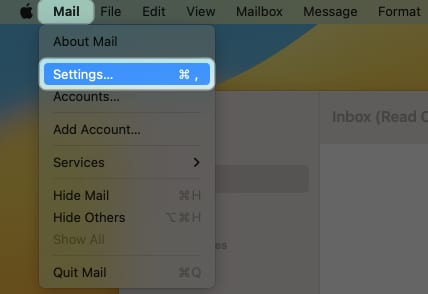
- Open the Mail app on Mac. Select Mail → Settings in the menu bar.
- Go to the Rules tab → Pick Add Rule.
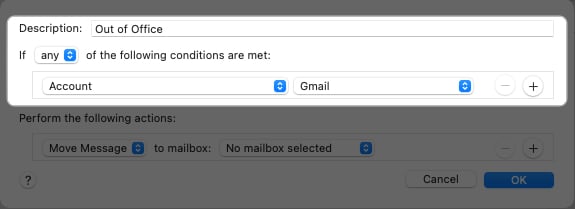
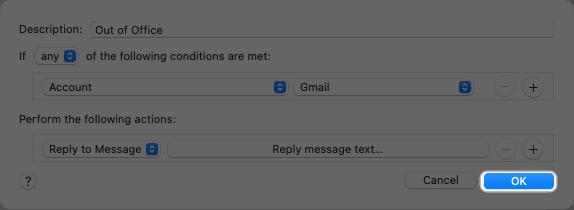
- Enter a Description in the pop-up window. This will also serve as the name of your rule.
- In the If section, set up the condition(s). Start by picking any or all in the drop-down menu to apply the rule to any or all of your conditions.
- Set up the first condition using the drop-down box labeled From. For example, you can select Subject, Contains, and enter a keyword or phrase. Or you can select Account and pick a connected email account from the list.
- To add another condition, click the plus sign on the right and enter the details.
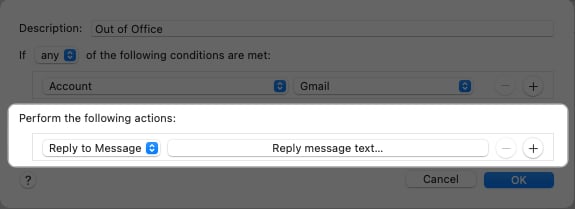
- Under Perform the following actions, click the first drop-down arrow.
- Pick Reply to Message.
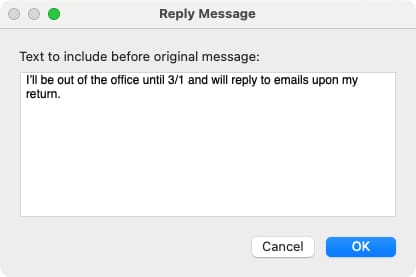
- Enter your reply in the pop-up window, and hit OK to save it.
- To add another action, click the plus sign on the right and enter the details.
- Select OK when you finish.
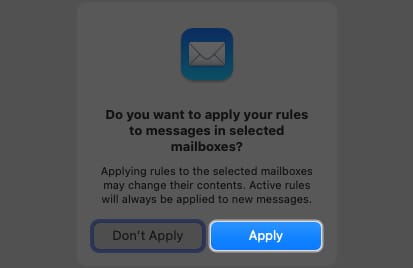
- You’ll see a message asking if you want to apply the rule to existing emails in your inbox. Pick Don’t Apply if this is an out-of-office message and you don’t want it to start yet, or Apply if it’s a different type of reply that you do want to send immediately.
- In the Rules list, you’ll see your new rule with the box checked. This means it’s active and begins right away. If you prefer to wait, uncheck the box and return here to check it when you want it to begin sending.
Additionally, because you cannot set an end date, return to this spot when you want to stop the reply and uncheck the box for it.
Tip: For other types of rules you can set up in Mail on Mac, look at the steps to color-code emails.
How to set up auto-reply in iCloud Mail
If you have created an iCloud email account, you wish to set up an auto-reply, you can do so through the iCloud.com website.
The best part about this option is that you can schedule the reply with both start and end dates from any device – iPhone, iPad, or Mac.
- Visit iCloud Mail → Sign in with your Apple ID.
- Use the Show Mailboxes icon (square) on the left if you don’t see the side panel open.
- Select the Settings gear icon → Choose Settings.
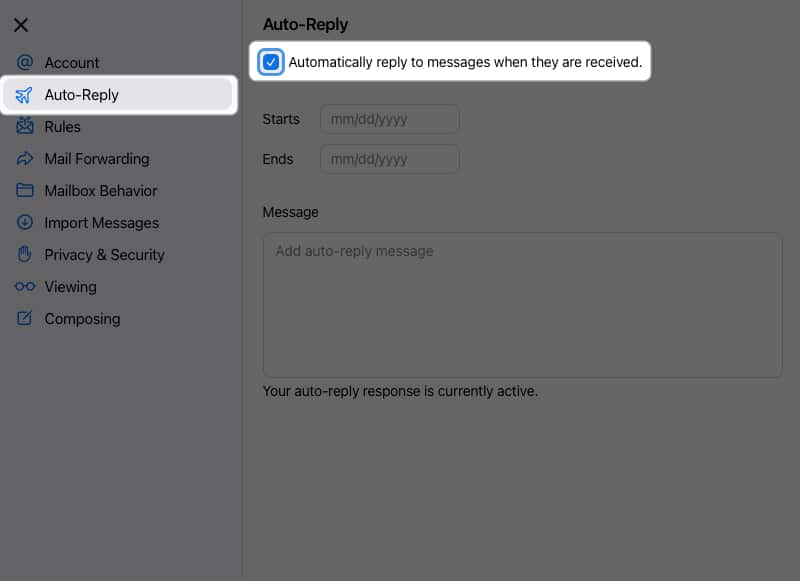
- Pick Auto-Reply on the left pane.
- Check the box next to Automatically reply to messages when they are received.
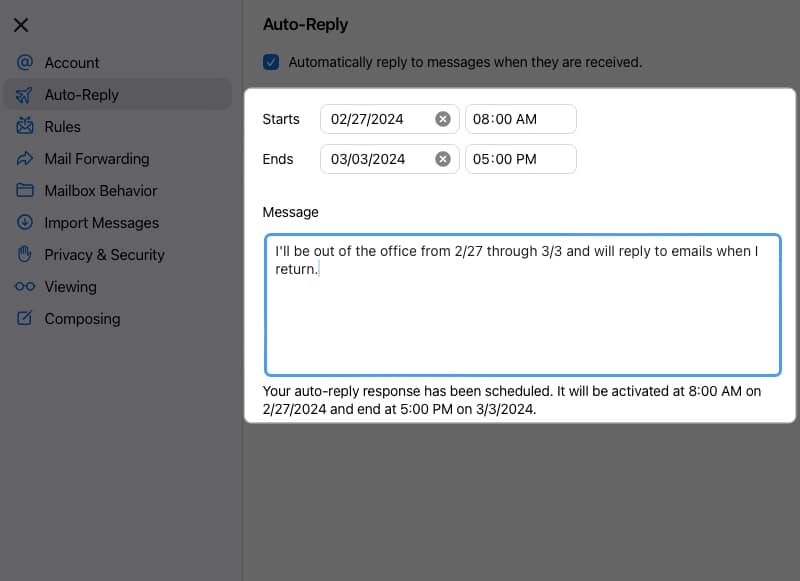
- Enter the dates and times for Starts and Ends. Note that you can use one, the other, or both, which allows you to manually start or end the reply as needed.
- Enter your reply in the Message box.
- Close the window using the X on the top left.
- If you choose to manually start or end the automated message, return to this spot and check or uncheck the Auto-Reply box.
If none of the above methods quite fit your situation, you can also look at the auto-reply options for your particular email service provider. For instance, Microsoft Outlook, Gmail, and Yahoo Mail all provide an automated reply feature.
Here, we’ll walk through setting up an out-of-office reply on Outlook.com. Keep in mind that no matter where you create your auto-reply for Outlook, it should sync with your other Outlook apps using the same Microsoft account.
Bonus
How to set out of office auto reply in Outlook
- Visit the Outlook homepage and sign in with your Microsoft account.
- Select the Settings gear icon on the top right.
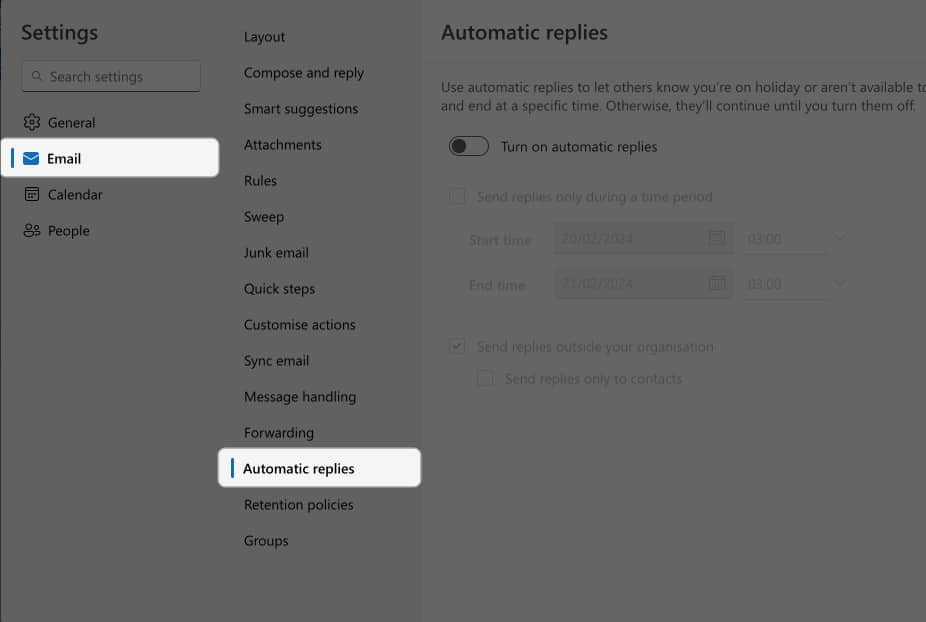
- Choose Mail on the left and Automatic Replies to the right.
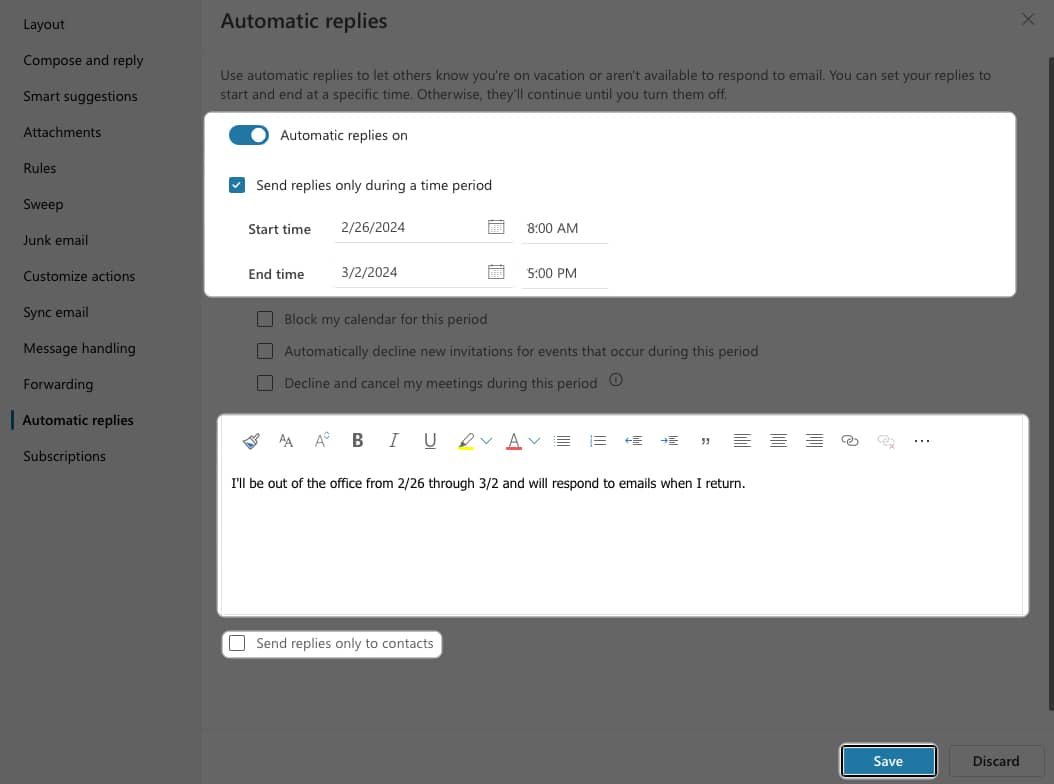
- Toggle on Turn on Automatic Replies on the right.
- Check the box if you want to schedule the reply, and select the dates and times. You also have options to manage your Outlook Calendar during this time frame by checking the boxes.
- Enter your message in the box beneath and use the editor to format it if you like.
- Optionally, check the box to Send Replies Only to Contacts.
- Click Save and use the X on the top right to close the window.
Consider automated replies
With various options, you can create an auto-reply in Mail easily on your Apple devices. This is a courteous way to let senders know you’re out of the office for a period of time or to send thank you notes to your clients automatically.
Are you going to set up an automatic reply in Apple Mail? If so, let us know which of these methods works best for you!
Read more:



Charming topic
Bravo, this idea is necessary just by the way
Bravo, your idea simply excellent