Text message scheduling lets you create a message now and have it automatically sent at a pre-determined time. While message scheduling on the iPhone was missing for a long time, Apple finally listened to users’ demands and added text message scheduling support, known as the Send Later feature, with iOS 18.
But what about users whose iPhone isn’t iOS 18 compatible? That’s where I come in. This post details how to schedule text messages using the iOS 18 Send Later feature on iPhones, and a workaround to perform the same on non-iOS 18 compatible iPhones. Now, let’s dive deep into the main topic.
How to schedule a message in iOS 18 and iPadOS 18
The Cupertino tech giant at WWDC 2024 gave a special mention to the Messages app while introducing iOS 18, and the new text message scheduling feature got the loudest roar. Here’s how you do it:
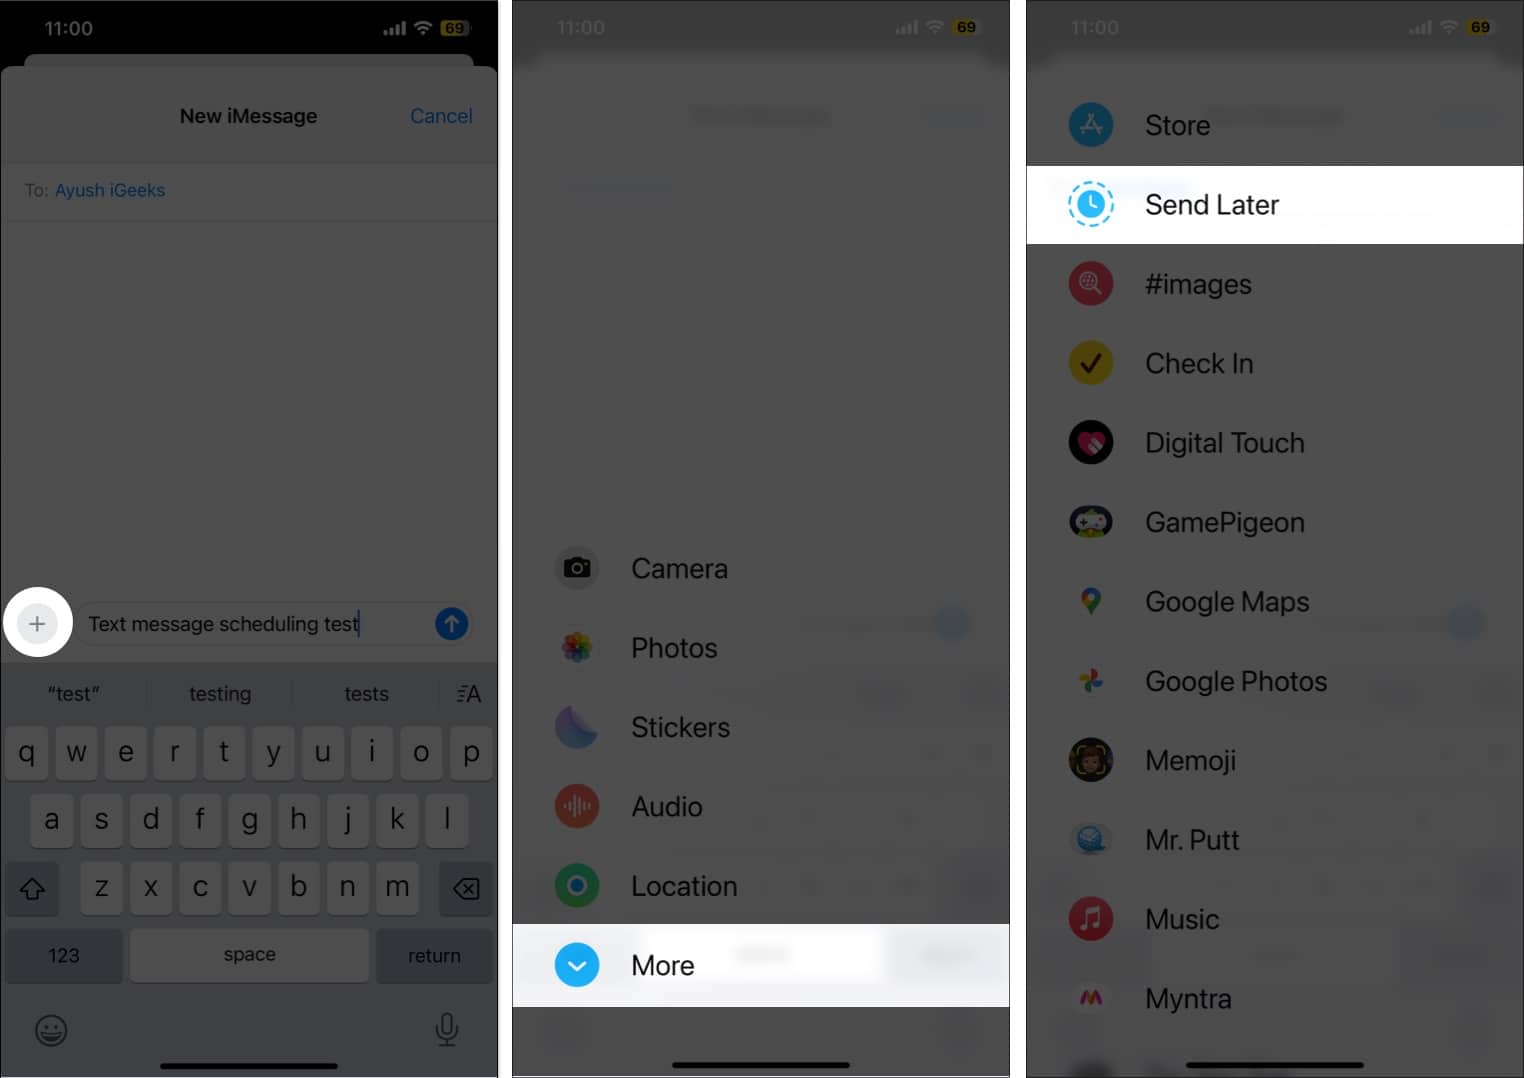
- Open the Messages app and head to iMessage conversation to create a new one.
- Type in the Message you want to schedule.
- Next, tap the “+” button and select More in the pop-up menu that appears.
- Here, tap on Send later.
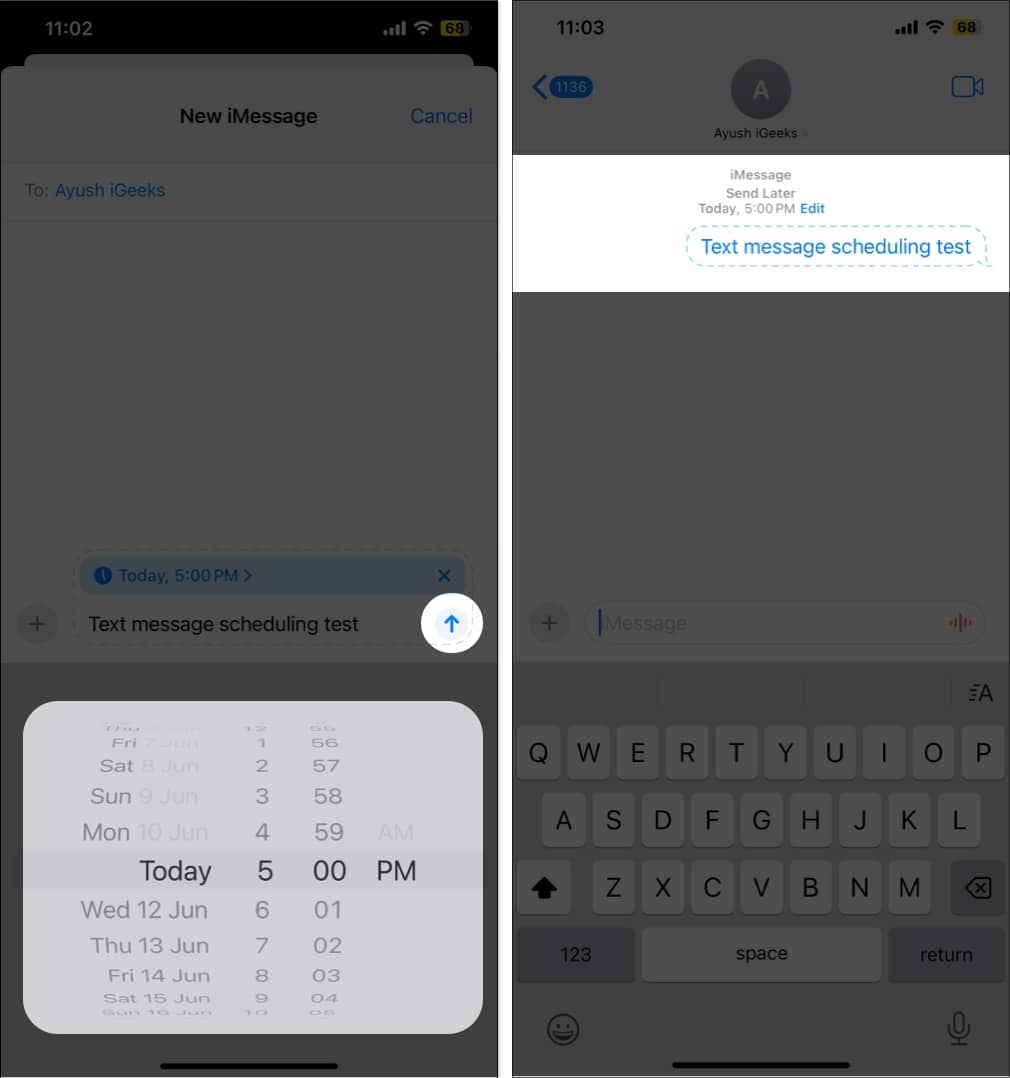
- Now, choose the preferred Time and Date.
- Once done, hit the Send (upward arrow) button next to your text to confirm text scheduling.
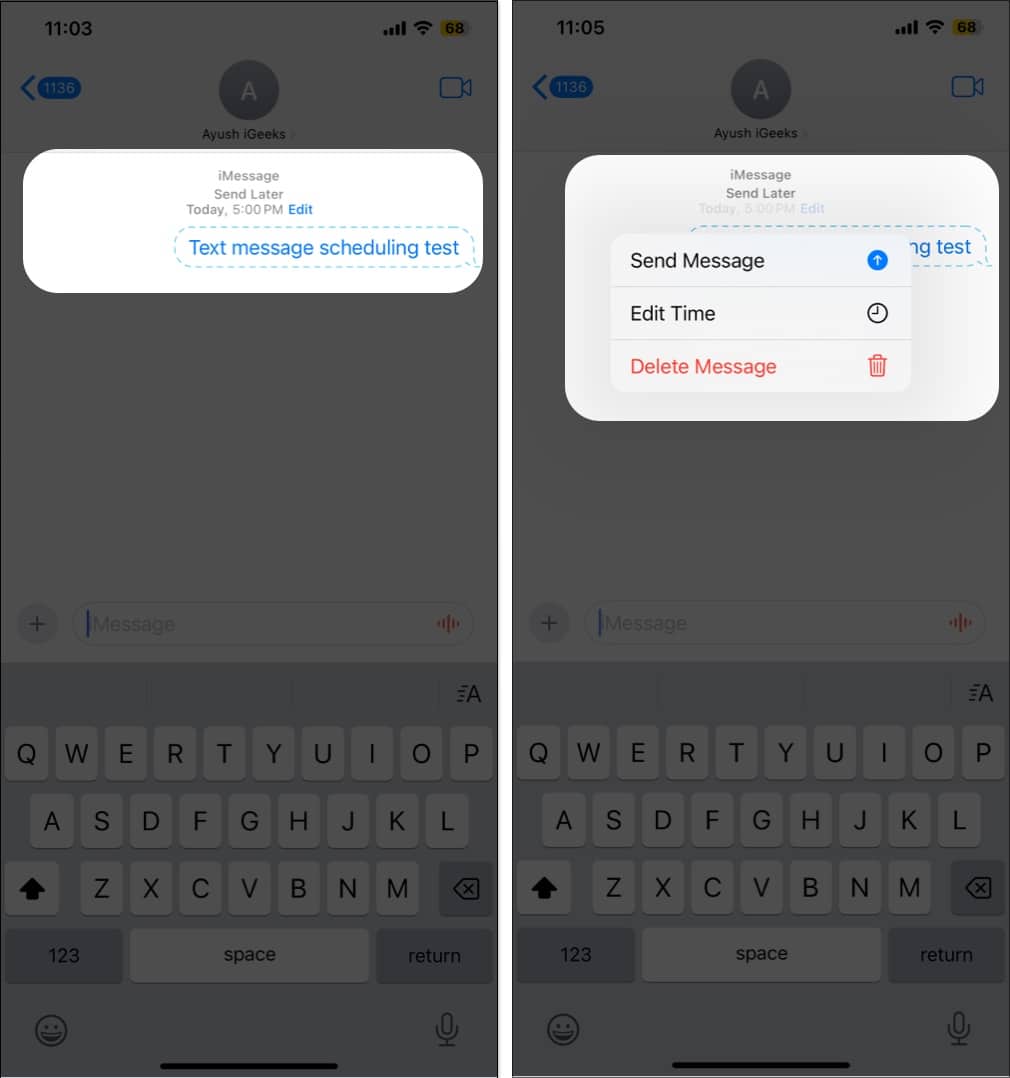
- You will see the scheduled message on the screen and a Send Later tag with the date and time above it.
- You can also edit the Date & Time, send the message immediately, or delete the scheduled message if you change your mind by tapping the Edit button.
Here, we have learned how to schedule a text message if your iPhone is supported by iOS 18. For more clarification, please refer to our iOS 18 compatibility list. If your iPhone is not on that list or you don’t want to update it, you can follow the next process.
How to schedule a text message on iPhone using the Shortcuts app
Shortcuts is an incredible app native to iOS devices that allows you to automate various tasks on your iPhone, including scheduling text messages.
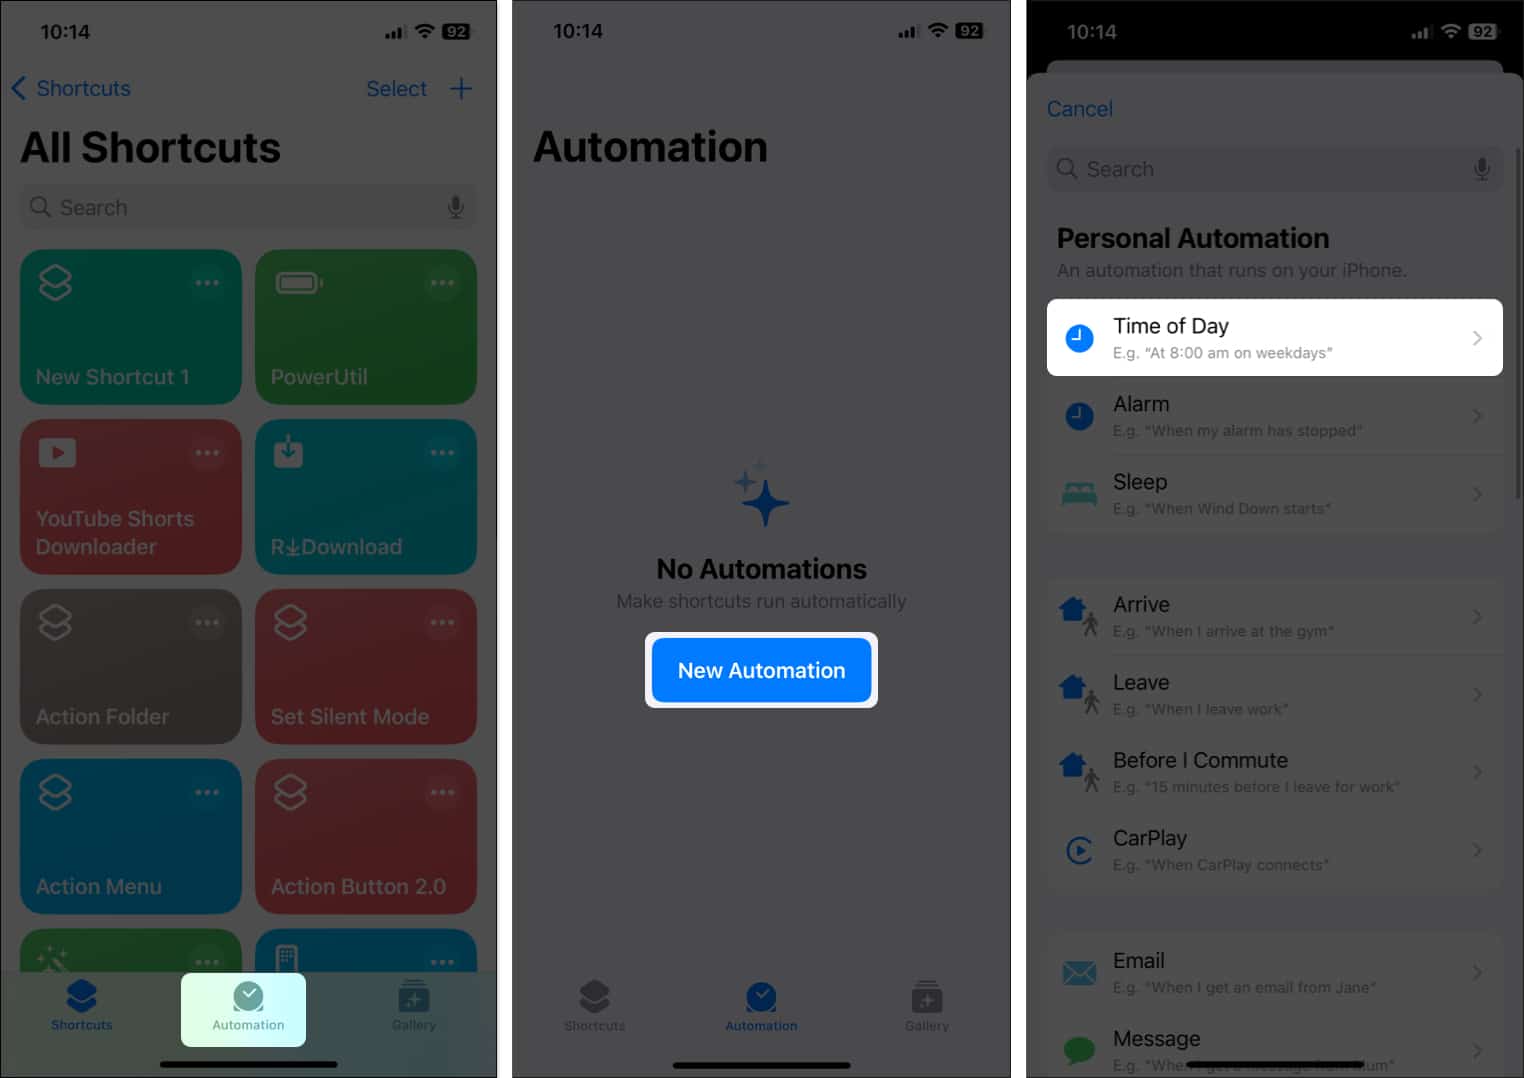
- Open the Shortcuts app → Pick the Automation tab at the bottom.
- Tap New Automation → Choose Time of the day.
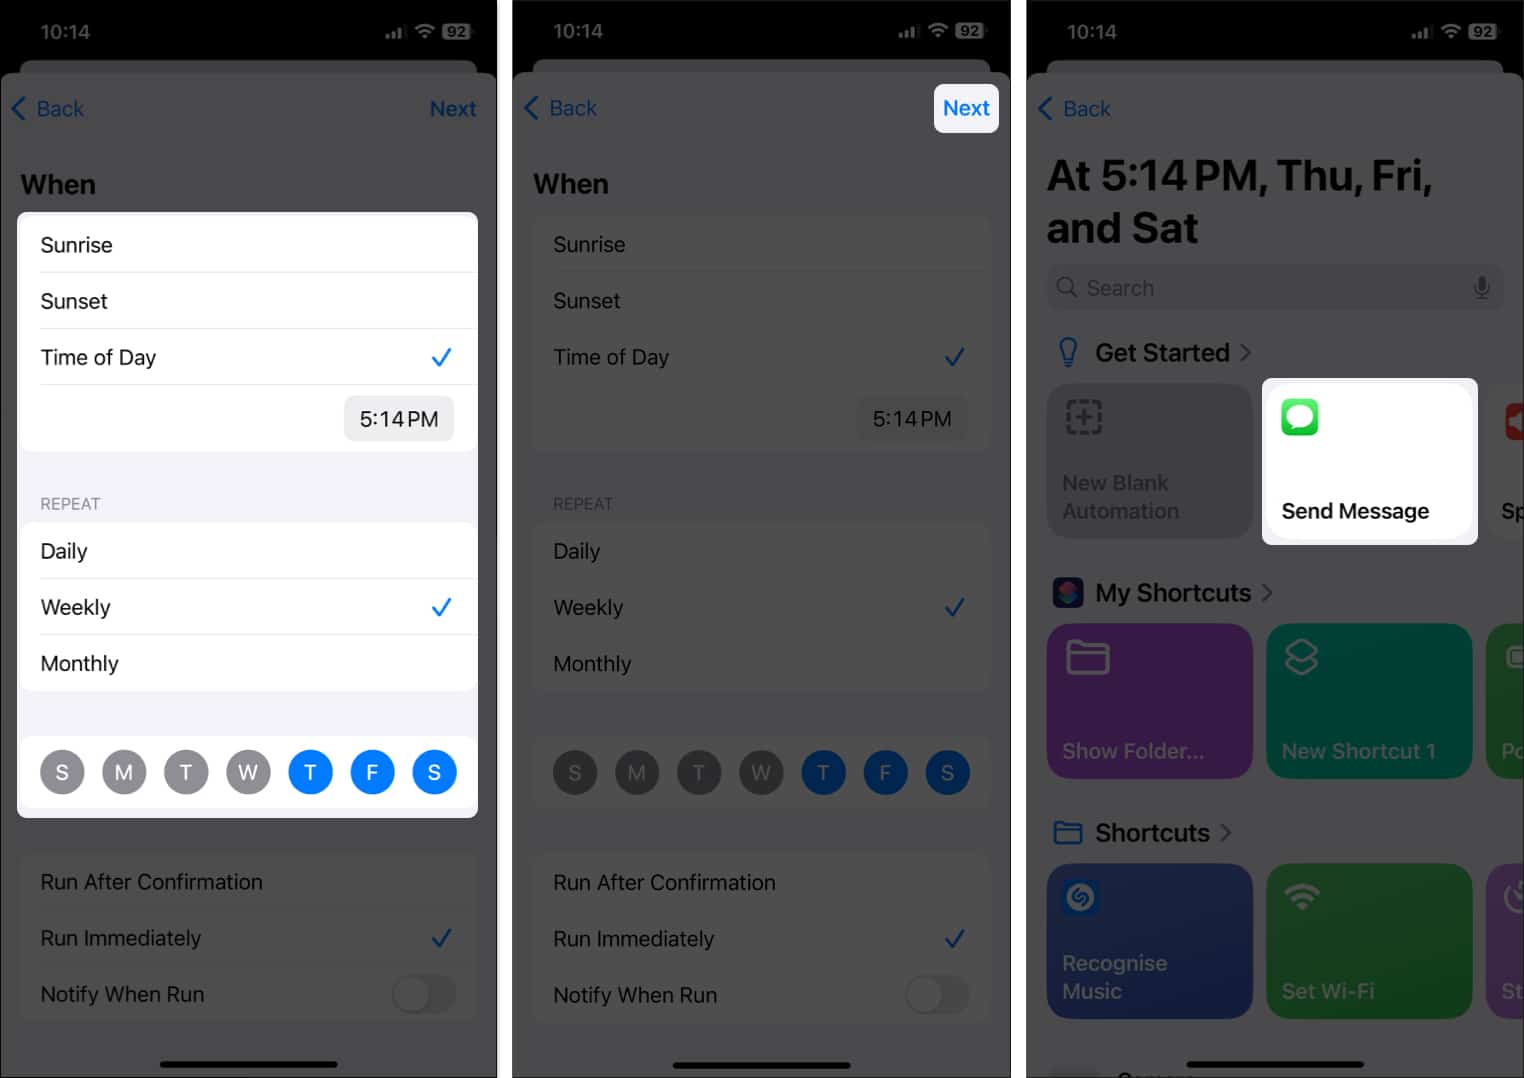
- Now, based on your requirements, adjust the task’s Time and Repeat parameters.
- Once done, hit Next.
- Pick Send Message under the Get Started section.
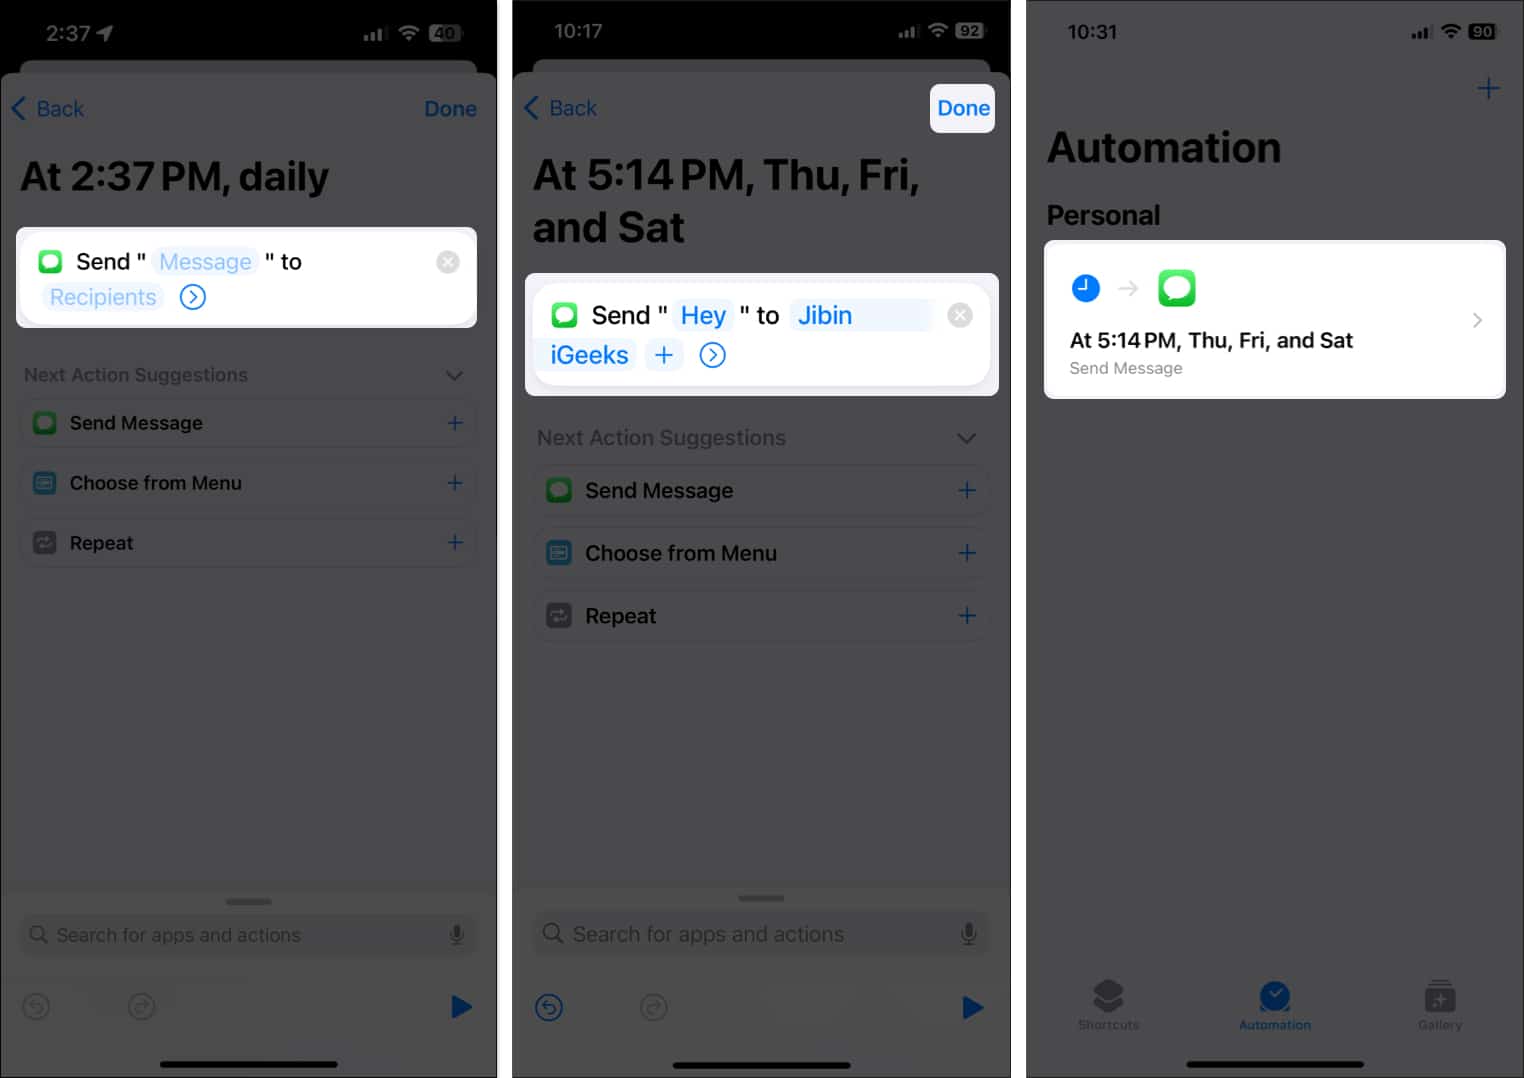
- Tap the faded Message bar (in blue) → Enter your desired text.
- Next, pick Recipients and add the receiver. You can add multiple contacts.
- Tap Done to save your preferences.
That’s it! Now, at your chosen time, a message will be sent to the recipient. Further, if you have enabled Notify When Run while creating the Shortcut, you will get a status update notification as well.
The best part is that since the text will be sent as an SMS, you can send it to any contact on your iPhone!
How to delete a scheduled text message shortcut on an iPhone
There may come a time when the scheduled text has served its purpose, or maybe you don’t want to send it anymore. In that case, here’s how you can delete the scheduled message.
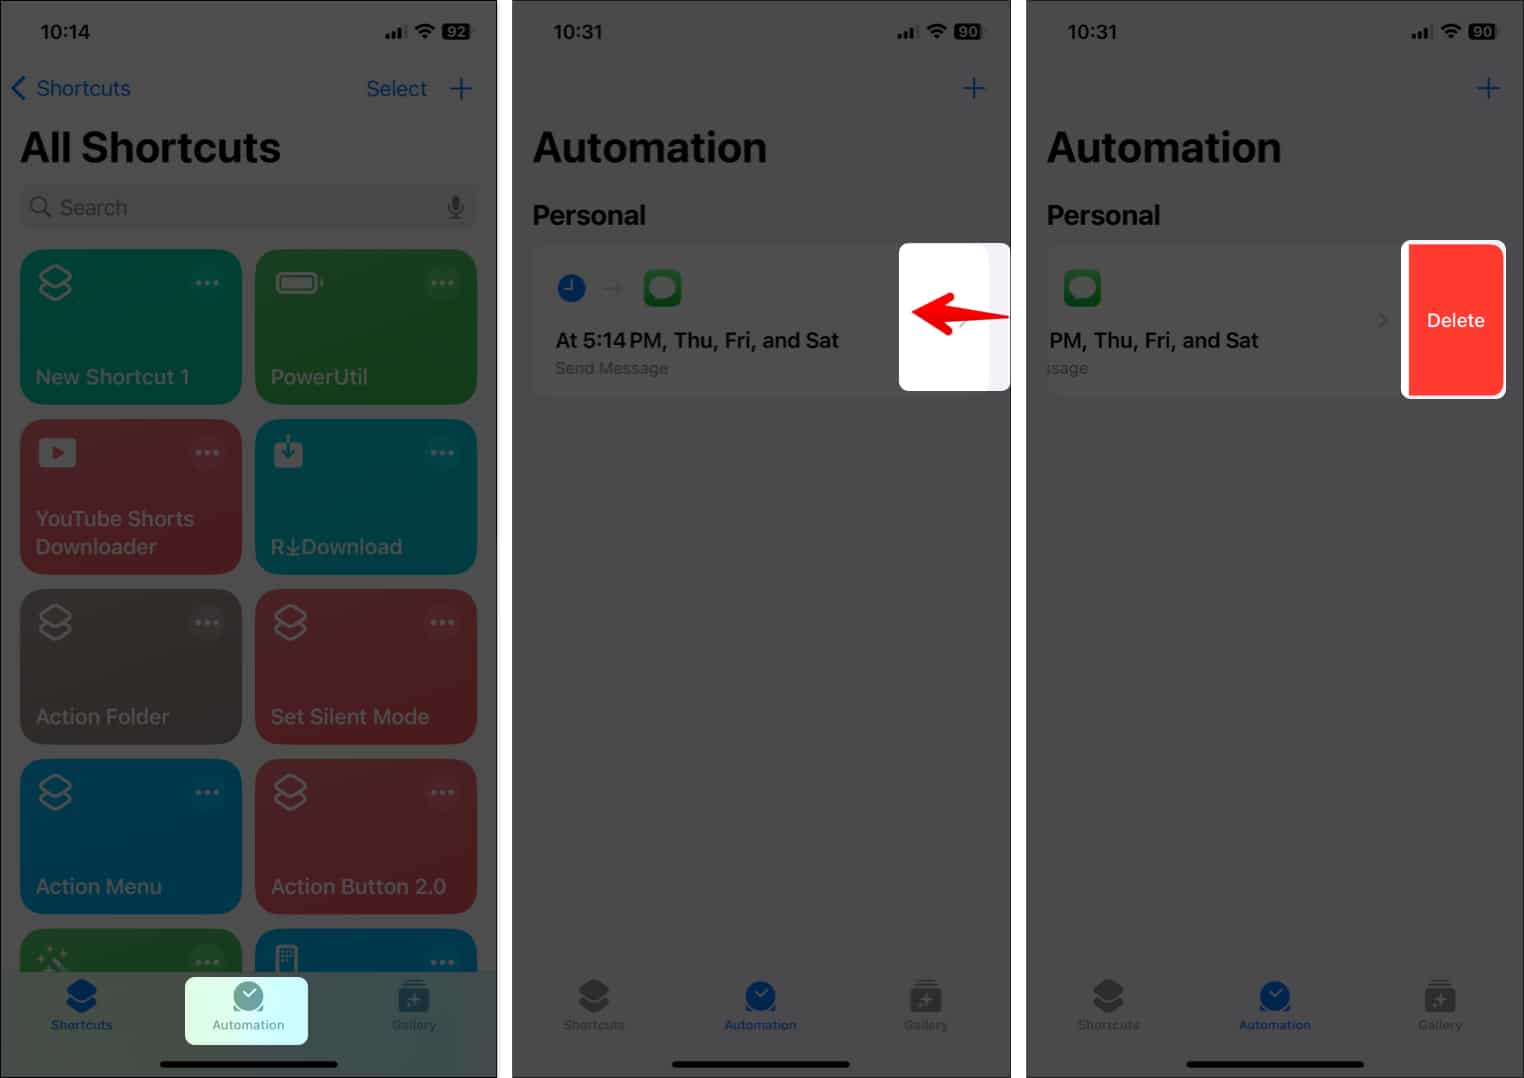
- Open the Shortcuts app → Head to the Automation section.
- Swipe left on the Send message automation.
- Tap the red Delete button that appears.
Happy texting!
And that’s it; this is how you schedule text messages on your iPhone using the Send Later feature. You can also create automation using the native Shortcuts app.
Do you think Apple should provide this feature natively for at least iMessage? I’d like to hear your thoughts. Please share them below!
Read more:


Is this a feature that is coming later? I have the dev beta installed but when I tap plus and swipe Send Later isn’t an option for me. I have store, images, check in, Digital Touch, and Memoji.
No, the Send Later is a part of the 1st dev beta only, and there is no reason why it’s not available on your iPhone if it is running on iOS 18 dev beta. However, you can try changing the Region and check if the option appears.