If you’ve recently switched to macOS from Windows, you might wonder how to right-click on a Mac. That’s because the right-click on macOS is slightly different from Windows. While the left-click on macOS allows you to select something, the right-click, on the other hand, lets you open contextual menus, sub-menus, and shortcuts. In this guide, I’ll show you different ways to right-click on a Mac while using the default Trackpad, the Magic Trackpad, Magic Mouse, or any other mouse. Let’s get started!

- How to right-click using the MacBook’s Trackpad or Magic Trackpad
- How to right-click with Magic Mouse
- How to right-click on Mac with a regular mouse
- How to right-click without a secondary button on Mac
- Use Accessibility options for right-clicking with keyboard
How to right-click using the MacBook’s Trackpad or Magic Trackpad
If you have a MacBook Air, MacBook Pro, or Magic Trackpad, you can use the below methods to right-click or secondary-click on your Mac.
Using two fingers
The best way to second-click on a Mac is to tap with two fingers on the trackpad. Though it’s disabled by default, you can follow these steps to enable the right-click with two-fingers option:
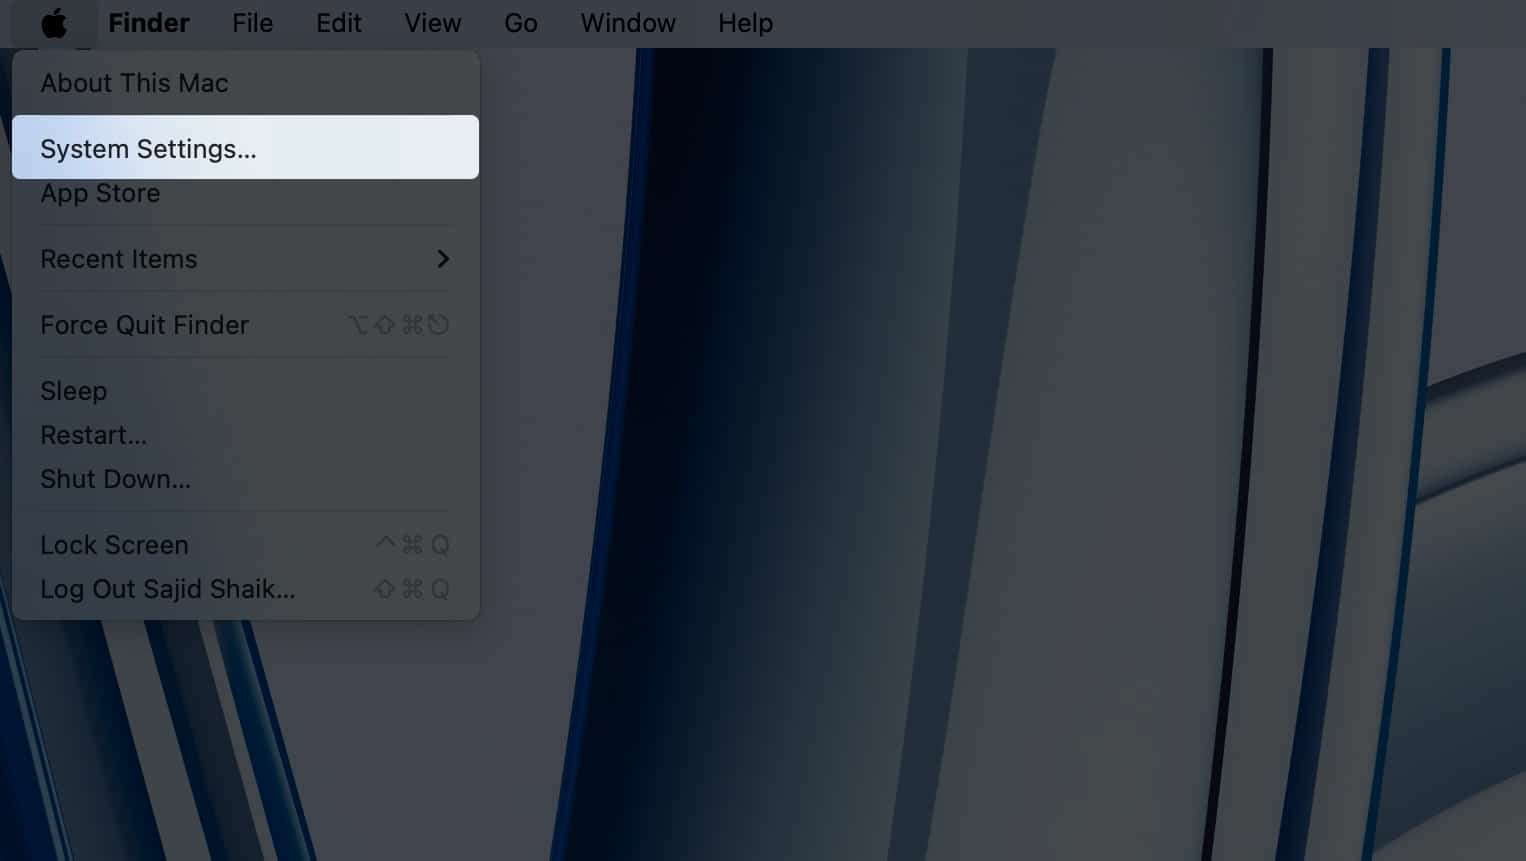
- Click the Apple menu () on the top-left and select System Settings.
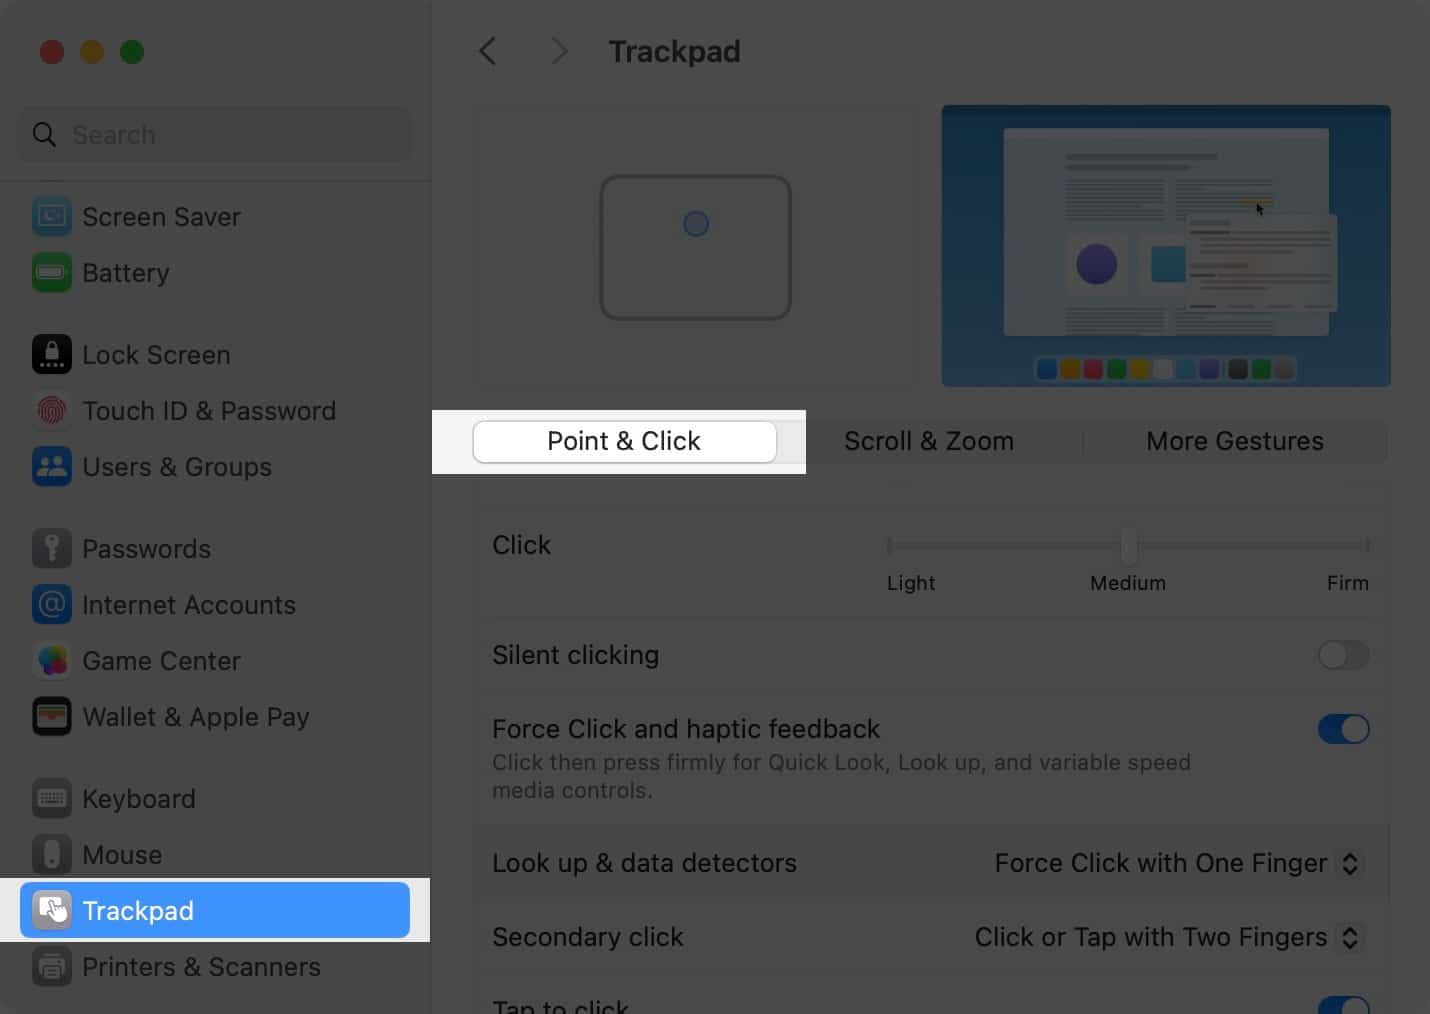
- Scroll down and click Trackpad on the left pane.
- Select the Point & Click tab.
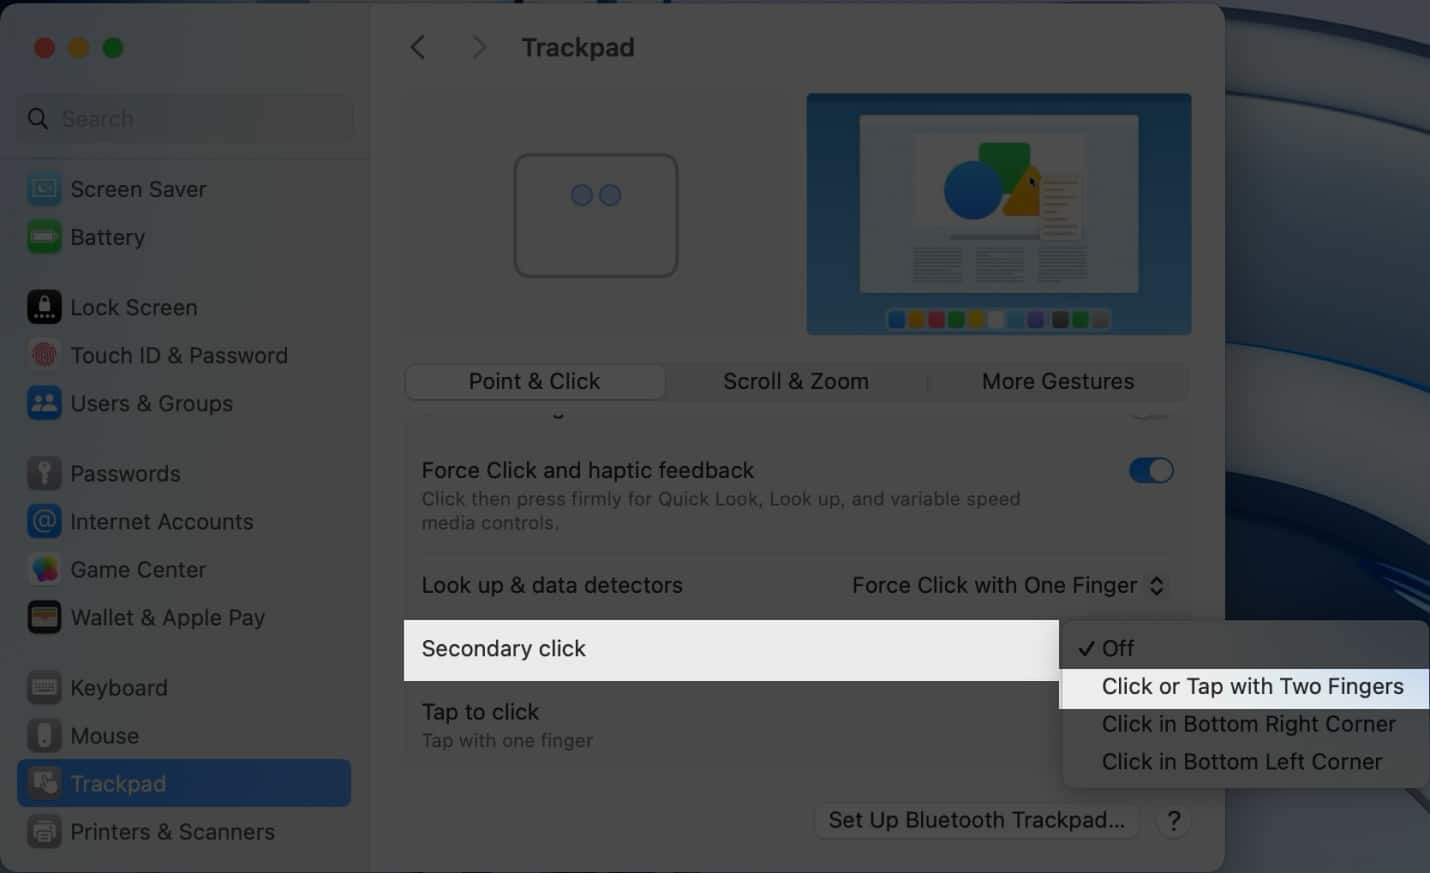
- Click the dropdown next to Secondary Click and select the Click or Tap with Two Fingers option.
Clicking on the bottom right corner of your trackpad
If you prefer clicking on the bottom right corner of the trackpad instead of tapping, you can set Secondary Click under Trackpad settings to the Click in bottom right corner option. It also acts as a physical button; you won’t need to use two fingers for this. Moreover, if you accidentally tap on the trackpad with two fingers, it won’t register as a right-click or secondary click.
Clicking on the bottom left corner of your trackpad
Similarly, if you’re left-handed, you might prefer using the bottom left corner of your trackpad for the secondary click. In that case, you can set Secondary click under Trackpad settings to the Click in bottom left corner option.
How to right-click with Magic Mouse
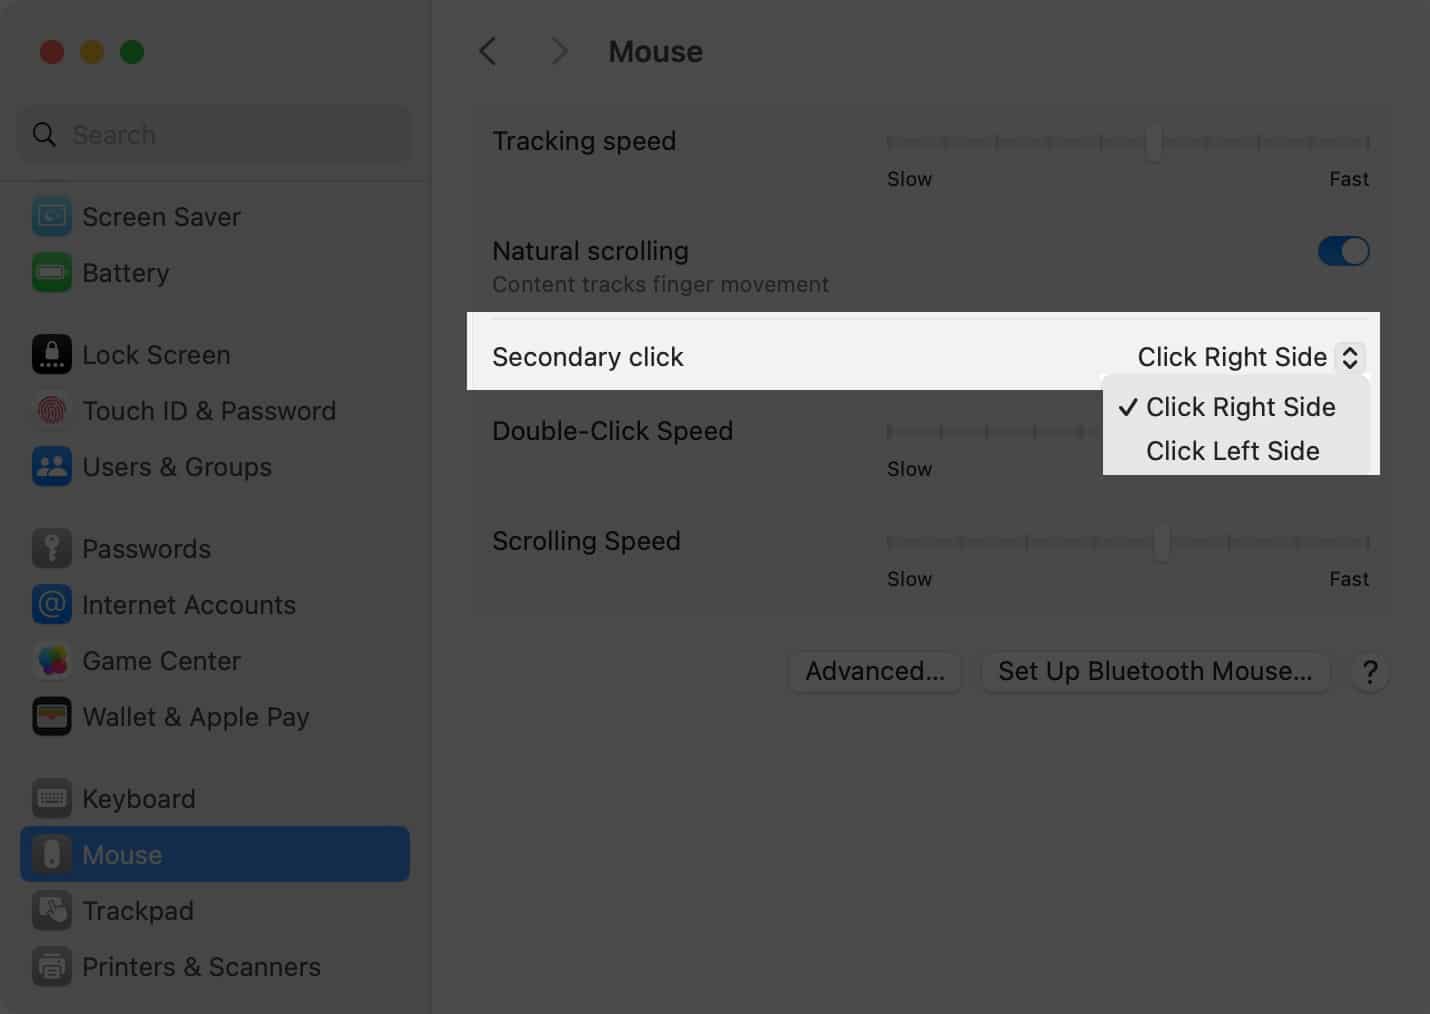
Apple’s Magic Mouse isn’t much different from a mouse you use with Windows PCs. It has a touch-sensitive surface that detects which side you tap with your finger. By default, Mac assigns the secondary click to the right side, but you can change it by following these instructions:
- Open System Settings from the Apple menu ()
- Scroll down and click Mouse from the left pane.
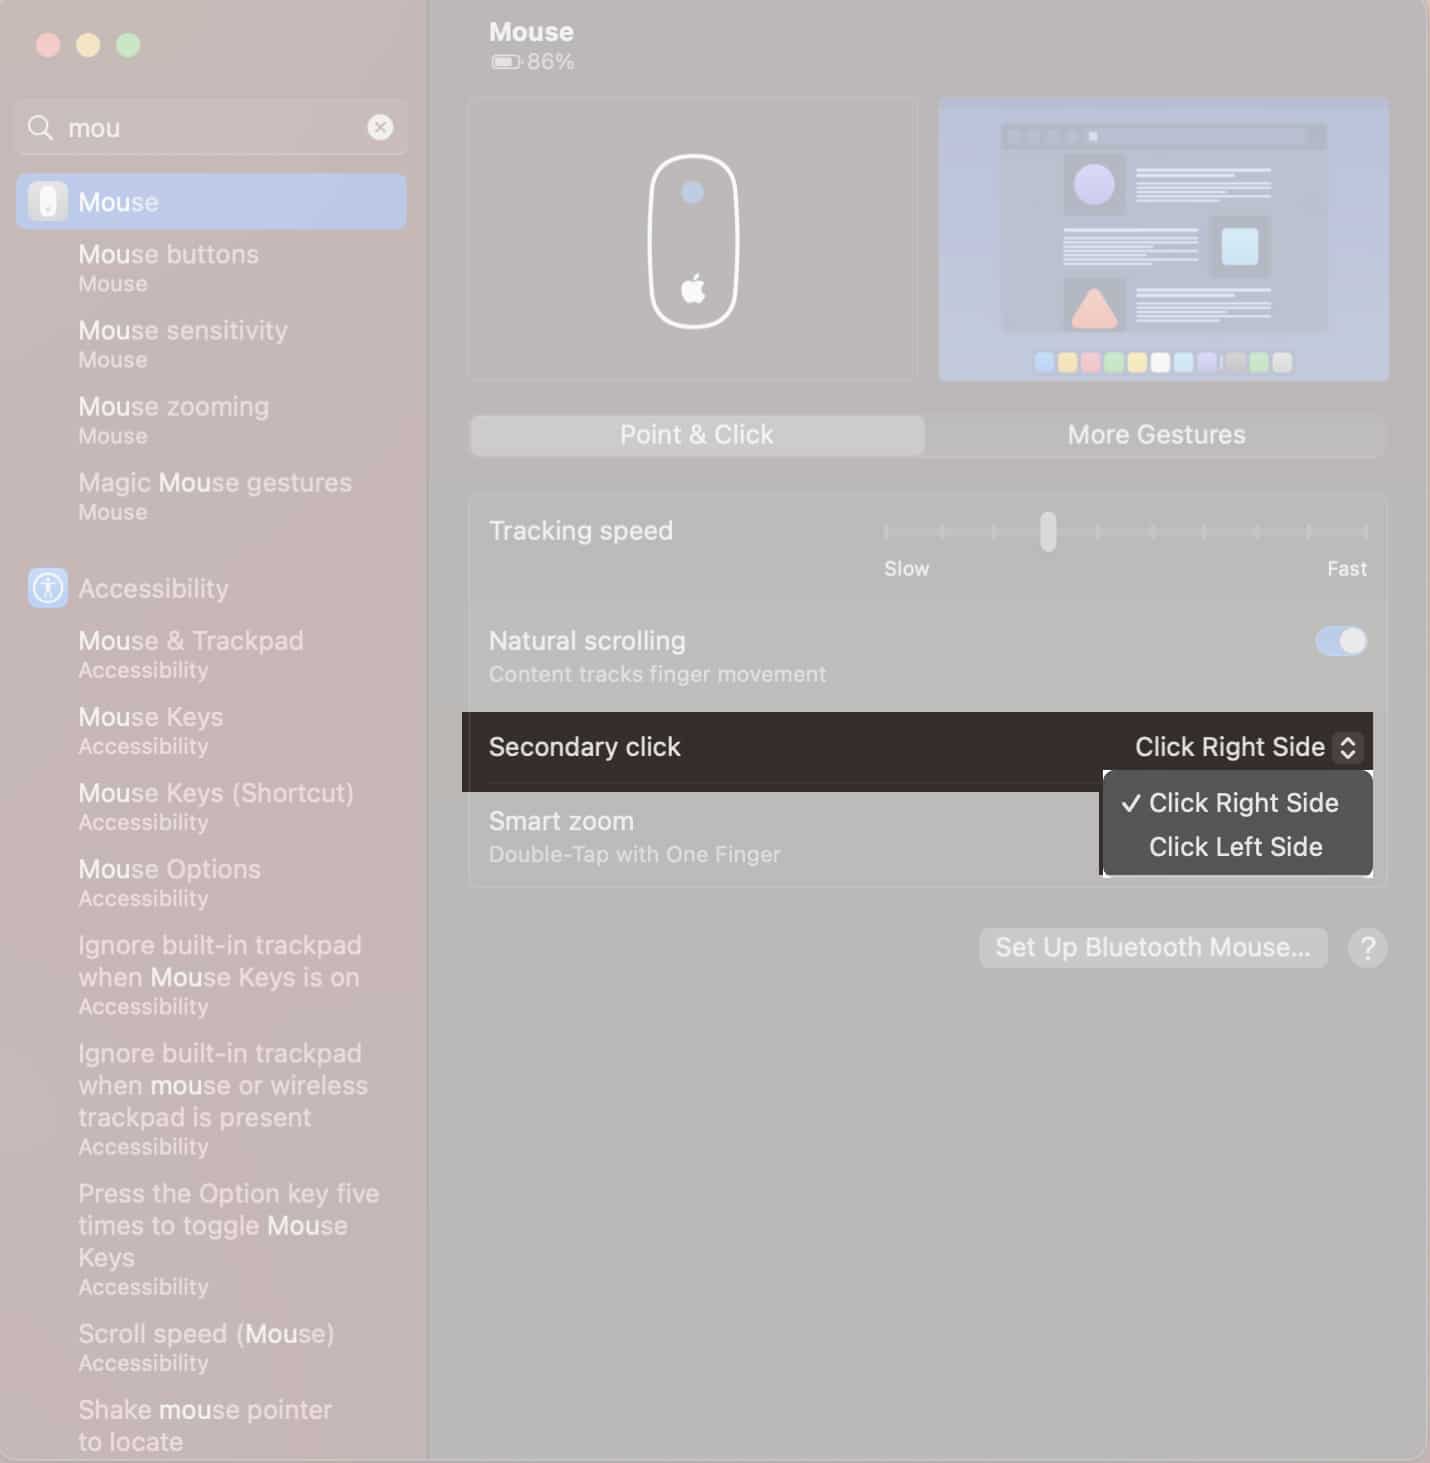
- Set the Secondary Click option under the Point & Click tab to Click on right side or Click on left side as per your liking.
How to right-click on Mac with a regular mouse
When you connect a regular mouse with buttons, macOS will recognize it and map the left-click and right-click accordingly. As a result, when you connect a regular mouse with your Mac, it’ll work just like when connected to Windows.
You can swap the left-click and right-click of your mouse when connected to a Mac. Follow these instructions to learn how:
- Click the Apple menu () on the top-left of your screen and select System Settings.
- Scroll down and select Mouse from the left pane.
- Set the Secondary Click option to Click on right side or Click on left side as per your liking.
How to right-click without a secondary button (using the Control key) on Mac
In the worst-case scenario, if the right-click stops functioning on your mouse or trackpad, there’s an alternative way to use the right-click functionality. Press the Control (⌃) key on your keyboard and click the left button on your mouse, tap on your trackpad, or press the bottom left corner of the trackpad.
Use Accessibility options for right-clicking with keyboard
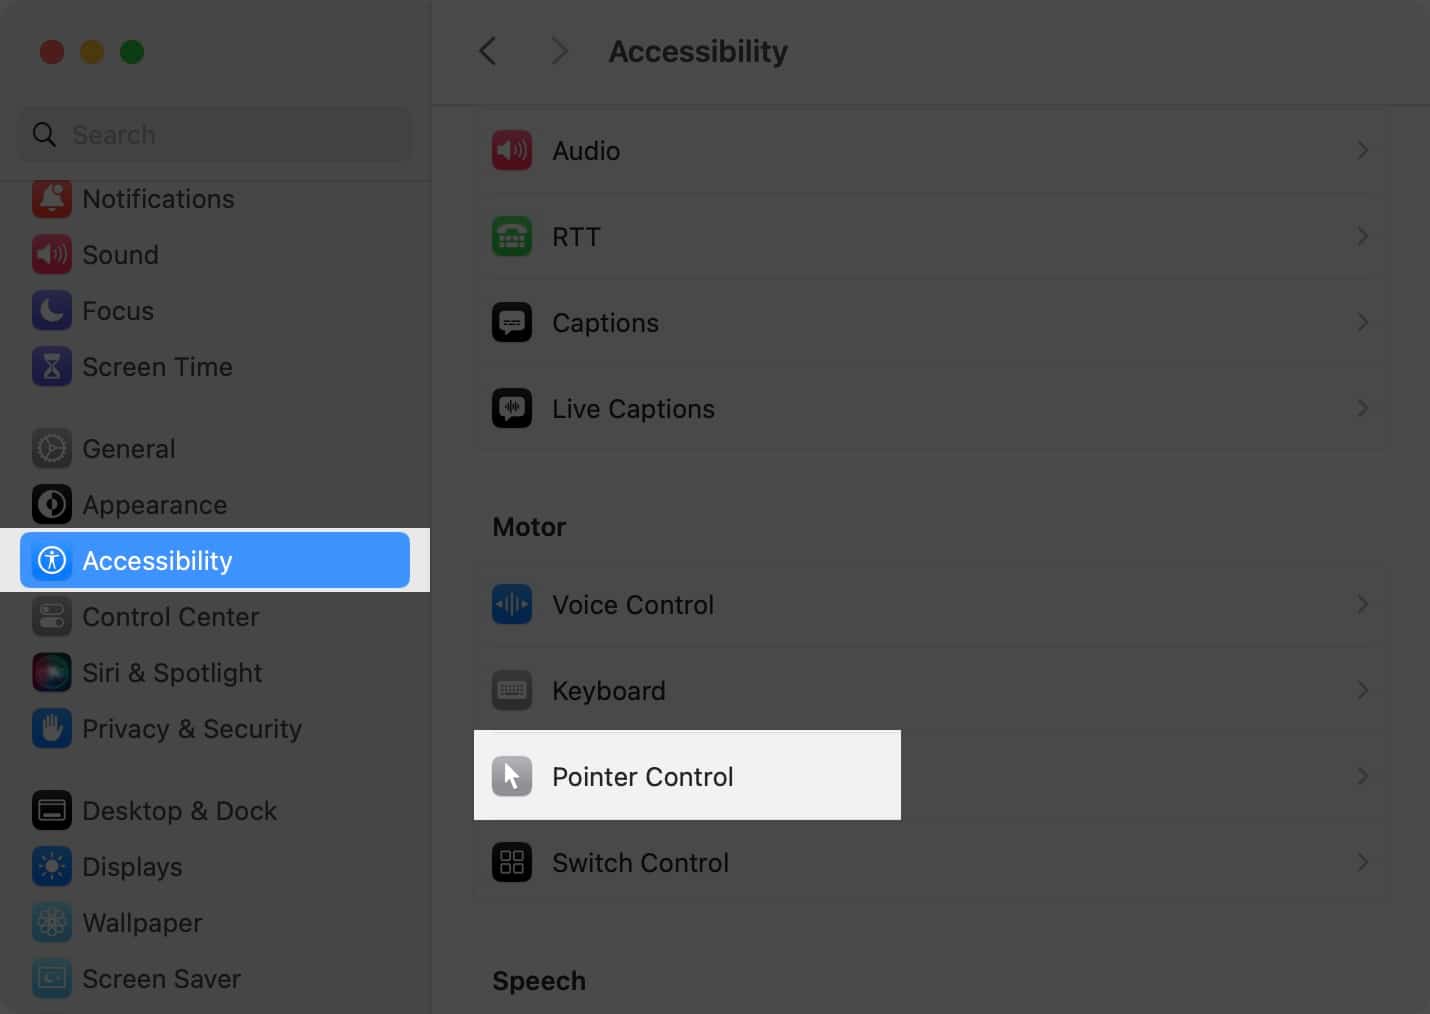
If you use Accessibility options on Mac, macOS lets you use it for right-click. It might not be ideal for everyone, but it works like a charm for those who have to control the mouse with their keyboard. To right-click with Accessibility options on Mac, follow these steps:
- Open System Settings from the Apple menu () on your Mac.
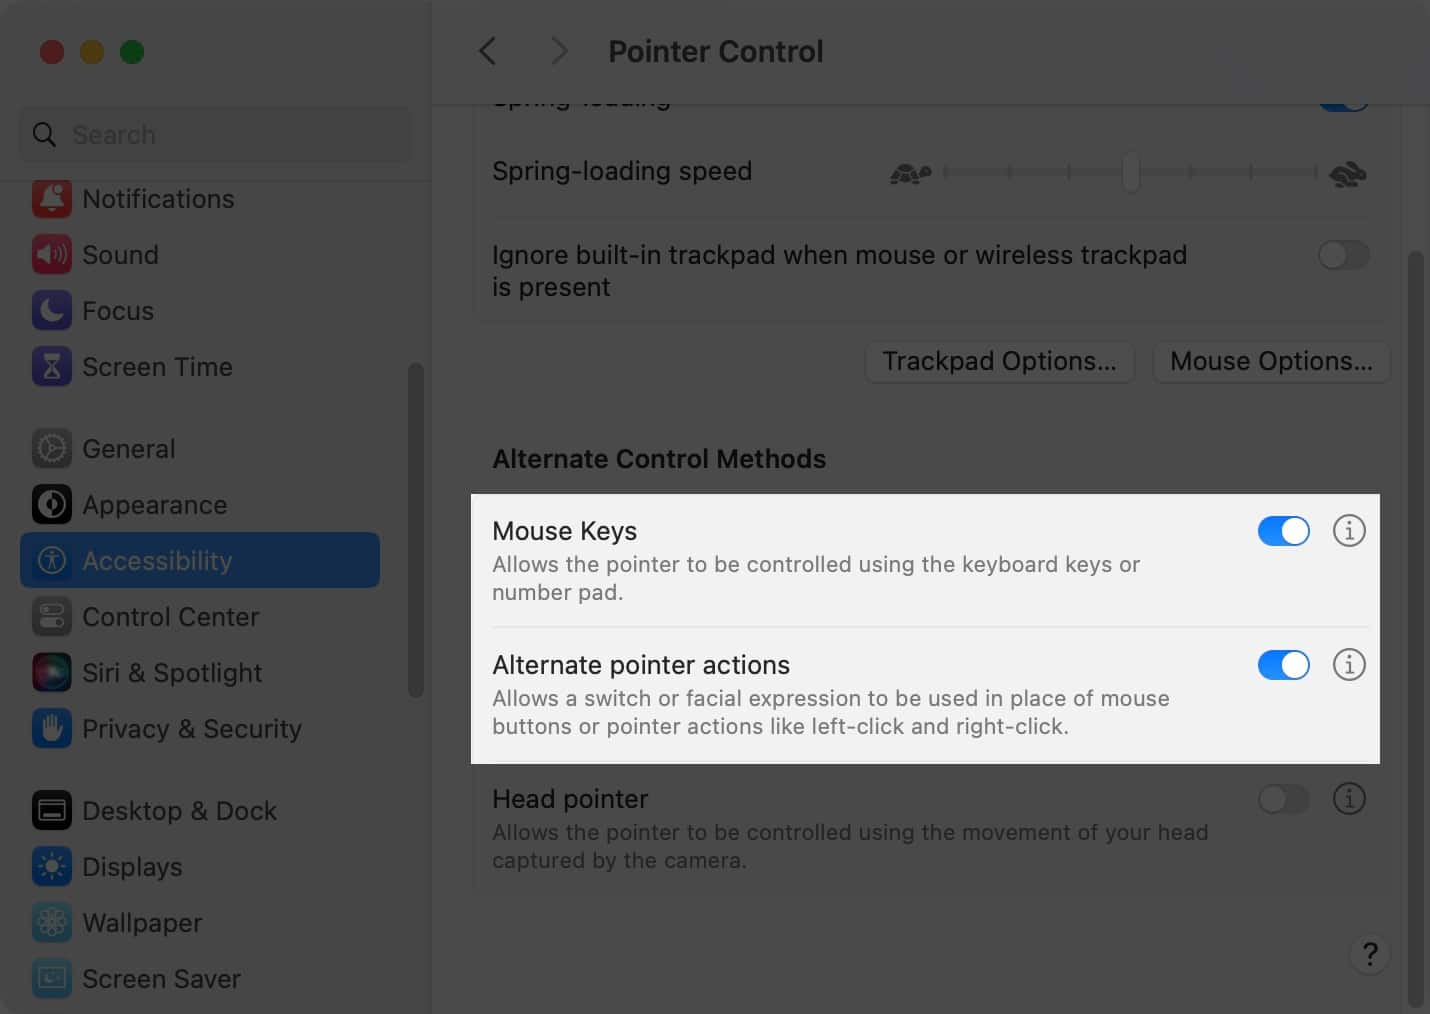
- Select Accessibility from the left pane and then Pointer Control on the right.
- Enable the toggle next to Mouse Keys and Alternate pointer actions options.
Once enabled, you can move your mouse and press F12 or Fn + F12 on your keyboard to right-click with your mouse. Similarly, press F11 or Fn + F11 on your keyboard if you want to left-click.
However, when you enable Mouse Keys and Alternate pointer actions in Accessibility settings, some keys and keyboard shortcuts might not work as intended. You can enable and disable these options quickly using Accessibility Shortcuts. To access, Accessibility Shortcuts on your Mac, press Fn + Option + Command + F5, and if you’ve a Mac or Magic Keyboard with Touch ID, press the Touch ID three times to summon it.
Various ways to right-click on Mac
These are the different ways you can right-click with your mouse, trackpad, or keyboard on your Mac. Even though it’s called secondary click on macOS, it functions the same as right-click on Windows. I hope you learned how to right-click on a Mac and MacBook. If you’ve any other methods or queries regarding this guide, please leave them in the comments below.
Read More:

