The grey bar at the bottom of the iPhone is a visual indicator of where you can swipe up to return to the home screen. But if you have used an iPhone for a long time, you might find it annoying. Sadly, there is no way to remove the grey Home Bar at the bottom of the iPhone, as it is a fundamental part of its UI.

Thankfully, I have found a workaround to temporarily hide the grey home bar on iPhones. And before I show you the steps to do that, let me explain what purpose the grey bar actually serves.
Why do I have a grey bar at the bottom of my iPhone?
The grey bar found at the bottom of newer iPhones works as a substitute for the home button found on older iPhones. Let me explain further.
Older iPhones had a physical home button that was used to return to the home screen and unlock your iPhone. But, with the latest iPhones, you get a virtual home bar that functions similarly. You can also swipe right or left on it to switch between the active apps.
Despite its usefulness, you may want to remove the grey home bar at the bottom of your iPhone to avoid distraction. Sadly, there is no native way to turn it off. However, the Guided Access accessibility feature can help you temporarily hide it from your screen.
Let’s learn how to perform this quick workaround and enjoy an actual full-screen experience!
How to remove the grey bar from iPhone
The Guided Access is an accessibility feature that limits access to your iPhone functionalities and locks you in one app. When you activate it, the grey Home Bar is removed from the screen to stop you from exiting the app.
So, whenever you want to immerse yourself in an app, turn on this mode. Follow the steps below to set up Guided Access on your iPhone:
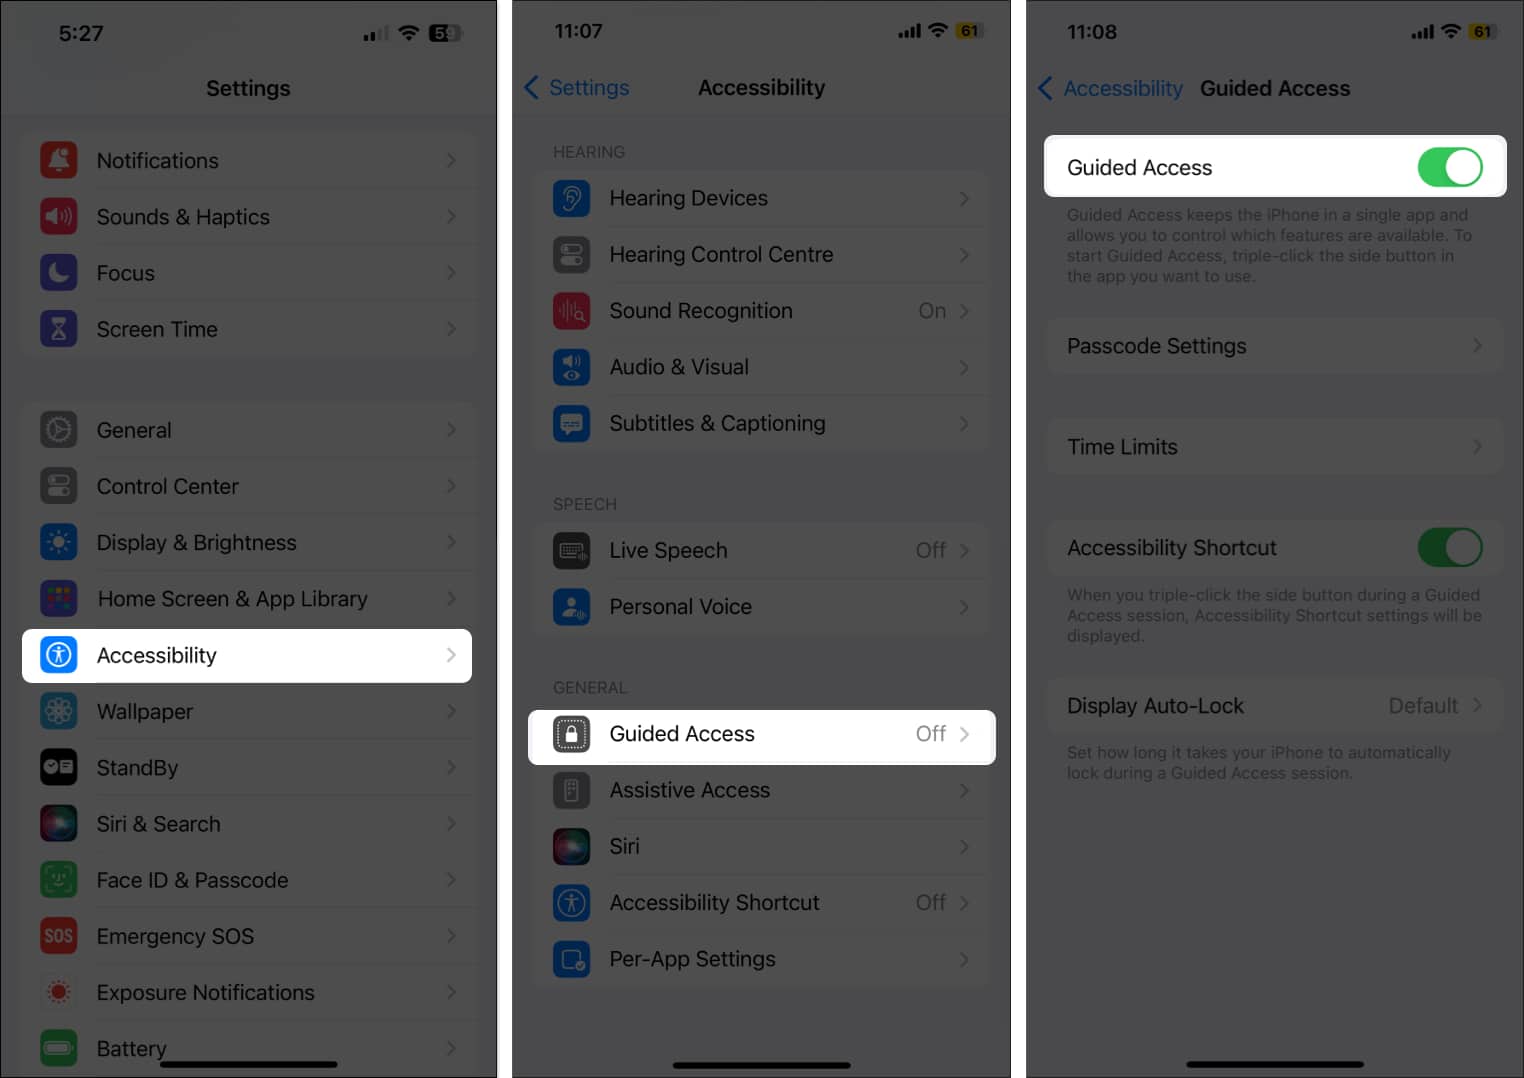
- Open the Settings app → Select Accessibility.
- Here, scroll down and tap Guided Access.
- Toggle on Guided Access → Tap Continue.
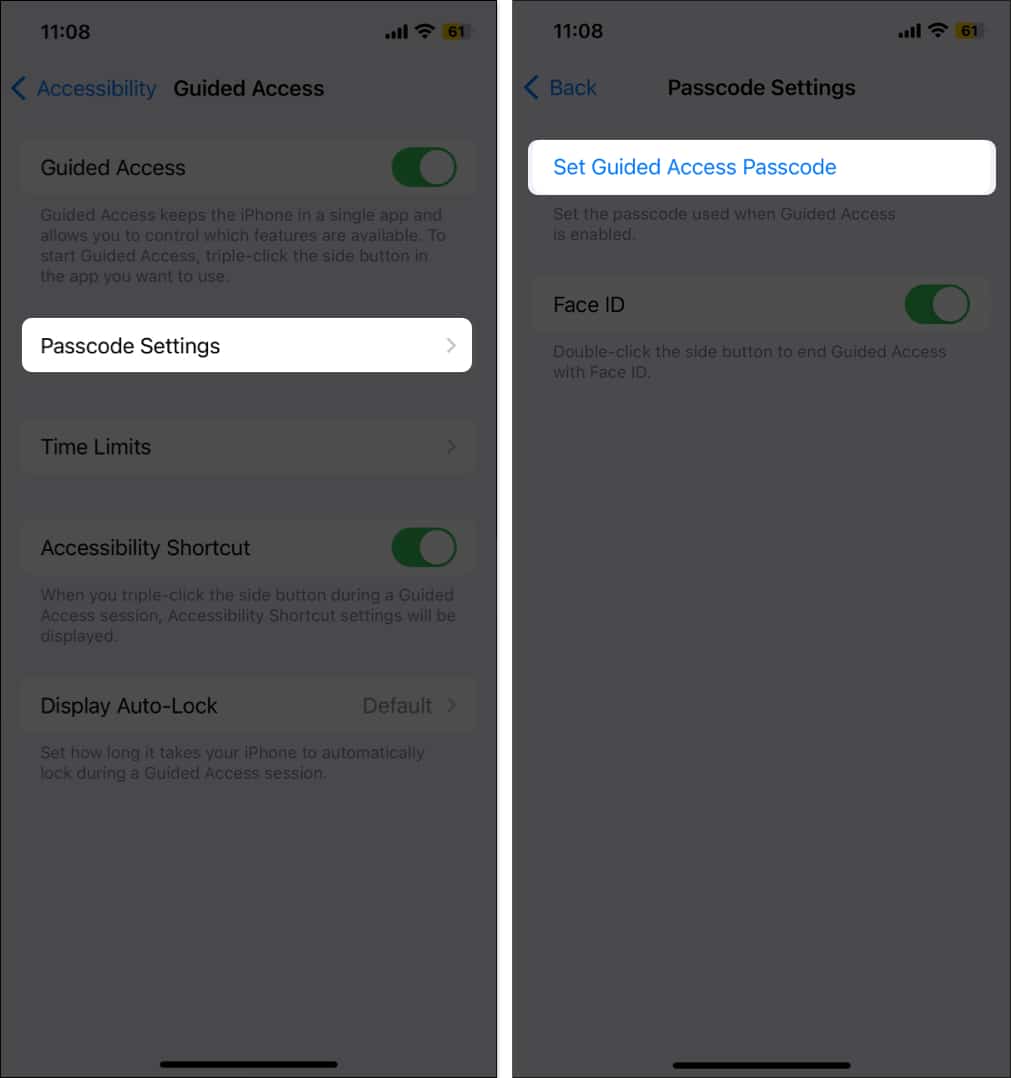
- Now, select Passcode Settings.
- Tap Set Guided Access Passcode → Enter a passcode that you will use to end the Guided Access session.
Alternatively, toggle on Face ID to end a Guided Access session with it.
Now that you have configured the Guided Access settings let’s hide the grey Home Bar from your iPhone screen.
- Open the app where you wish to remove the grey bar.
- Press the Side button thrice to activate Guided Access.
- Tap the Start button to start the Guided Access session.
You will see that the app is in full-screen mode now, and there isn’t a grey home bar at the bottom center.
To exit Guided Access, triple-press the Side button and enter the passcode you set previously. Next, tap the End button to confirm.
Alternatively, you can double-press the Side button and use your Face ID to deactivate Guided Access on your iPhone.
Note
Earlier, you could use Siri to turn on Guided Access. However, this functionality no longer works.
Have you enjoyed the hack? Guided Access offers many more features. Check out our detailed guide on how to use Guided Access on your iPhone.
Yes, it does. When you activate Guided Access to hide the Home Bar, you won’t be able to access other features or apps. You must deactivate this mode to use your iPhone again.
All glory to your display!
I hope now you can quickly remove the grey home bar on your iPhone. You may get advice to Jailbreak your iPhone to permanently remove the grey bar. But I would advise against it, as doing so can void your iPhone’s warranty.
If you face any issues, let me know in the comment section below!
Read more:


