The cameras on the iPhone are great. However, the iPhone is renowned for its exceptional video recording capabilities. It has consistently had the most reliable cameras. Those who use their iPhone to capture videos are aware of this. But have you been in a situation where you capture a great video and want to share it with your friends or on social media but can’t because the audio ruins it?
In such cases, you can get rid of the audio from your iPhone. You need not install any third-party applications either. Intrigued? Read along to know how to remove audio from videos on your iPhone.
- Remove audio from iPhone video through the Photos app
- How to restore the audio removed from the video on iPhone
- How to remove sound from video through iMovie
Remove audio from iPhone video through the Photos app
As I already said, you need not install any third-party video editing application on your iPhone to remove the audio track from the video. Doing so is helpful in scenarios where the background audio is too loud or too muffled.
Also, if you’re a content creator and record B-rolls through your iPhone, it’s necessary you get rid of the background audio, especially because you never know what will get you a copyright claim. With that said, here’s how to remove any background sounds from a video:
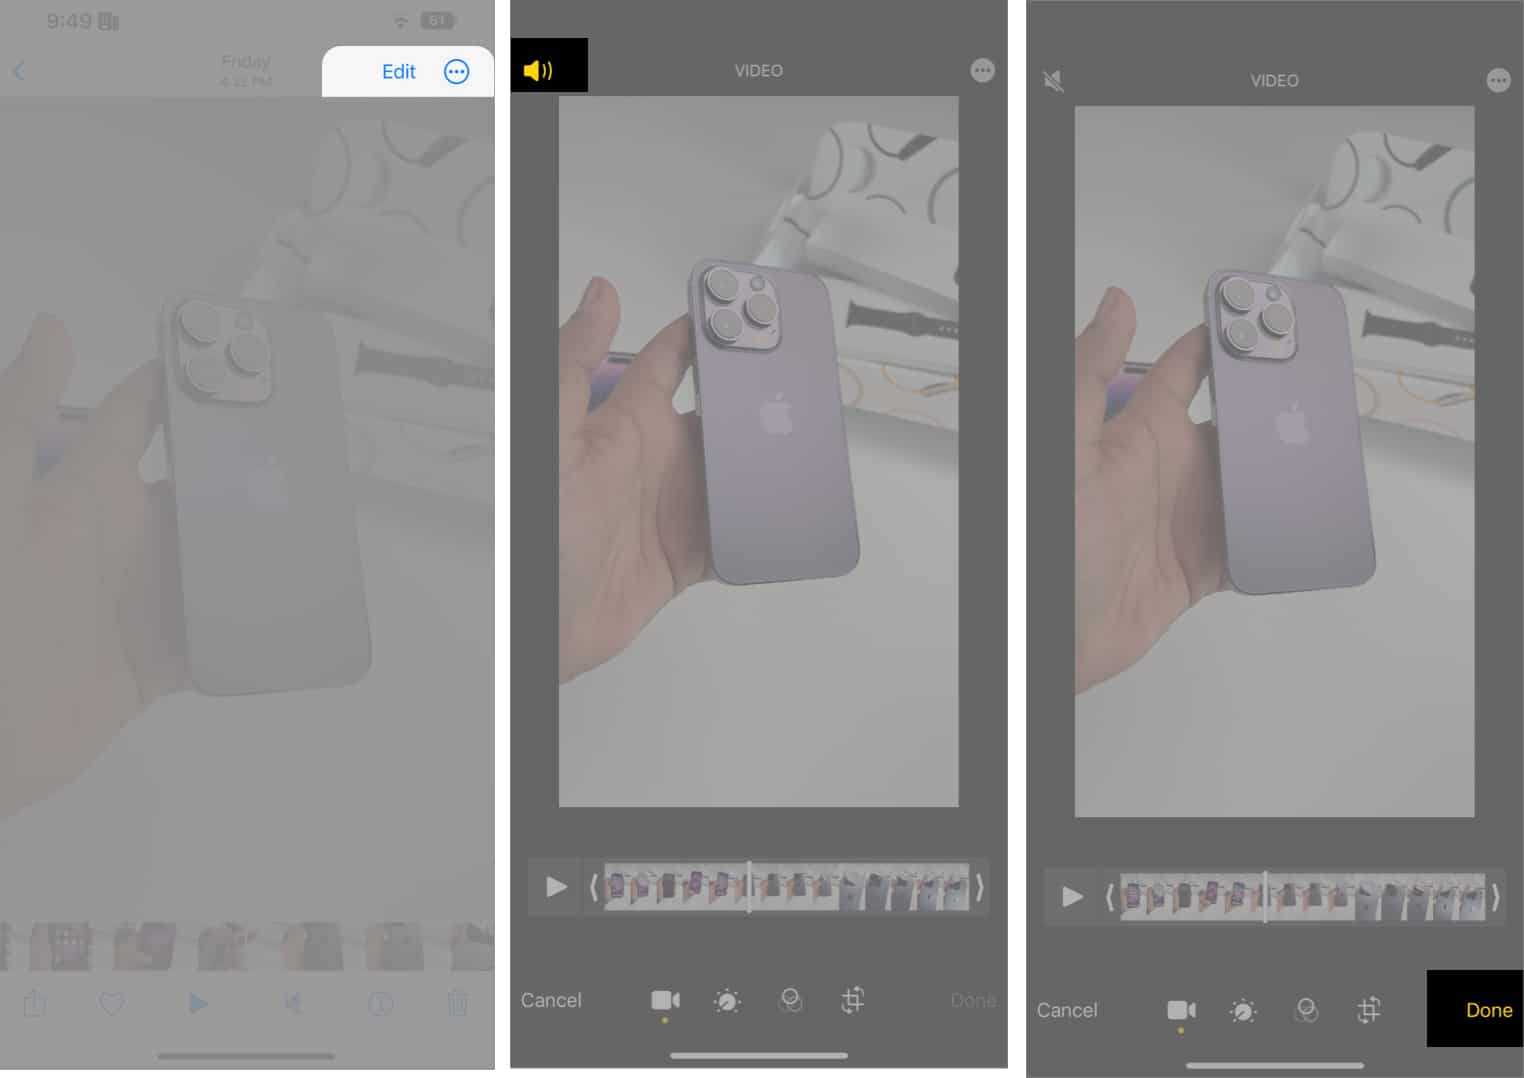
- Open Photos app on your iPhone.
- Select the video you want to remove the audio from.
- Tap Edit at the top right corner of the screen.
- On the next screen, tap the Speaker icon in yellow at the top left corner. Doing so will mute the video, and the icon will change to a grey shade with a strike on the speaker.
- Tap Done.
The video will no longer contain an audio file if you plan on sharing it. Please note that the audio file won’t be available if you intend to edit the audio file after exporting the video to any video editing platform.
How to restore the audio removed from the video on iPhone
If you want to restore the audio you just removed from the video for whatever reason, here’s how to do it:
- Open Photos app on your iPhone.
- Select the video you removed the audio from.
- Tap Edit at the top right corner of the screen.
- Then tap Revert at the bottom right corner.
- Select Revert to Original to confirm your selection.
The audio is restored. You can now share the video with audio.
How to remove sound from video through iMovie
iMovie is a video editing application developed by Apple. It comes preinstalled on Apple devices and is loaded with a bunch of features like merging videos, adding royalty-free music, and more. Moreover, it works not only on your iPhone but also on your Mac and iPad.
Now that you have a basic idea of what iMovie is and what it does, let’s get started and learn how to remove audio from a video using iMovie.
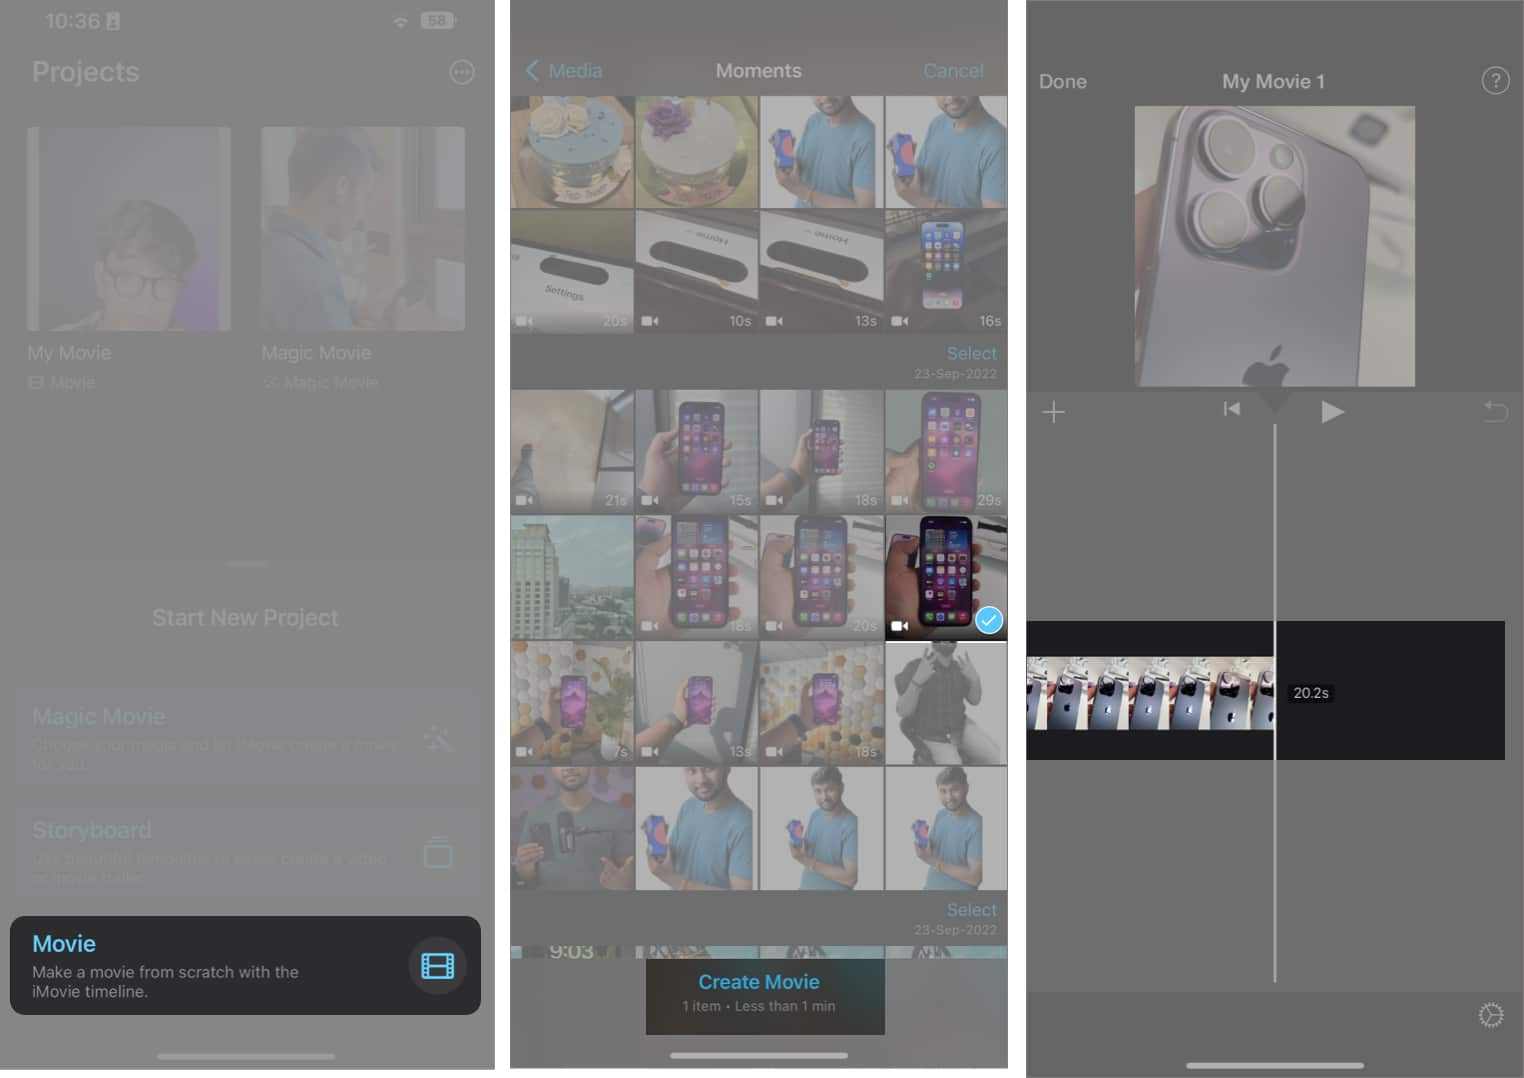
- Open the iMovie application on your iPhone.
- Select Movie under the Start New Project tab.
- Select the video you want to edit on the next screen and tap the Create Movie option at the bottom.
- Tap the video timeline once it appears on the screen to make changes to the video. Doing so will display all editing tools.
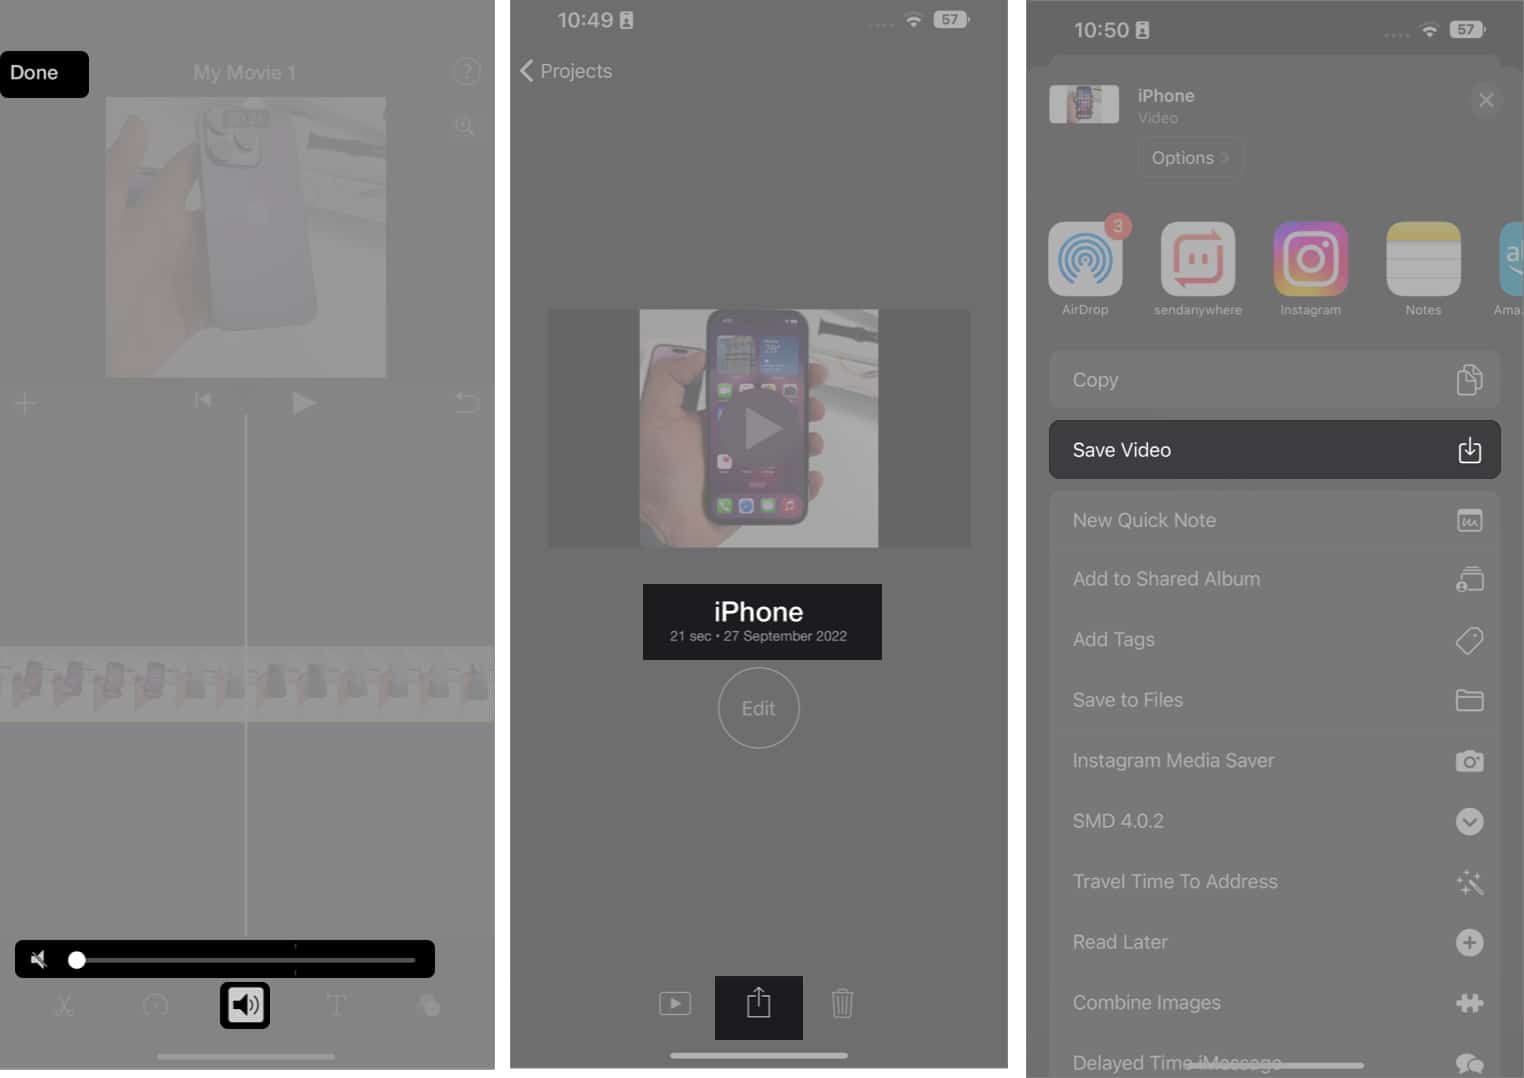
- Tap the Speaker icon at the bottom.
- A Volume slider set to 100% will appear on your screen. Set it to 0% to mute the audio completely.
- Tap Done at the top left corner.
- You can rename the video file on the next screen from the default name. To do so, tap the file name above the Edit button and make the necessary changes.
- Now, export the video to save the necessary changes by selecting the Share icon at the bottom of the screen.
- Tap Save Video and the video will start exporting. Once the progress bar is complete, the video will be saved without the audio file.
No sound, just good vibes…
I’m sure the steps are simple to follow. Go ahead and share the video without that disturbing audio playing in the background. However, if you encounter any issues during the process, leave a comment below, and I will get back to you with the solution as soon as possible.
Read more:

