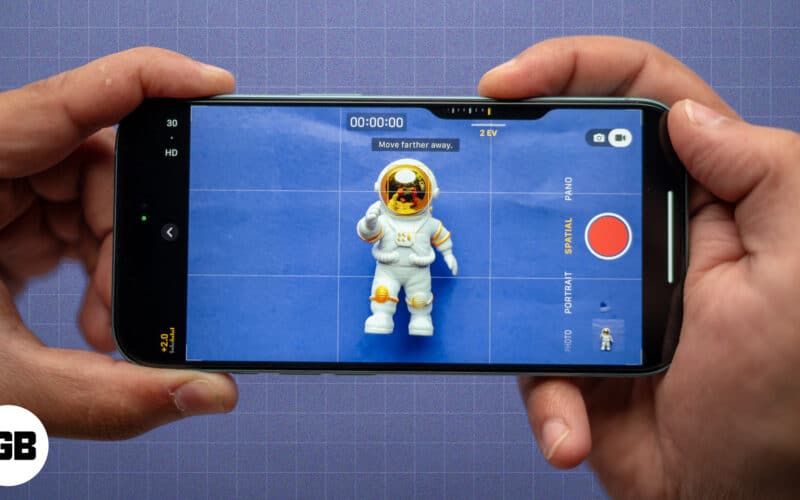
Introduced in the iPhone 15 Pro, spatial photography brings a new dimension to capturing memories on the iPhone. It lets you capture immersive 3D-like photos and videos, which can be later experienced on the Apple Vision Pro. Keep reading to learn everything you need about spatial photography on your iPhone 16 and 15 Pro series.
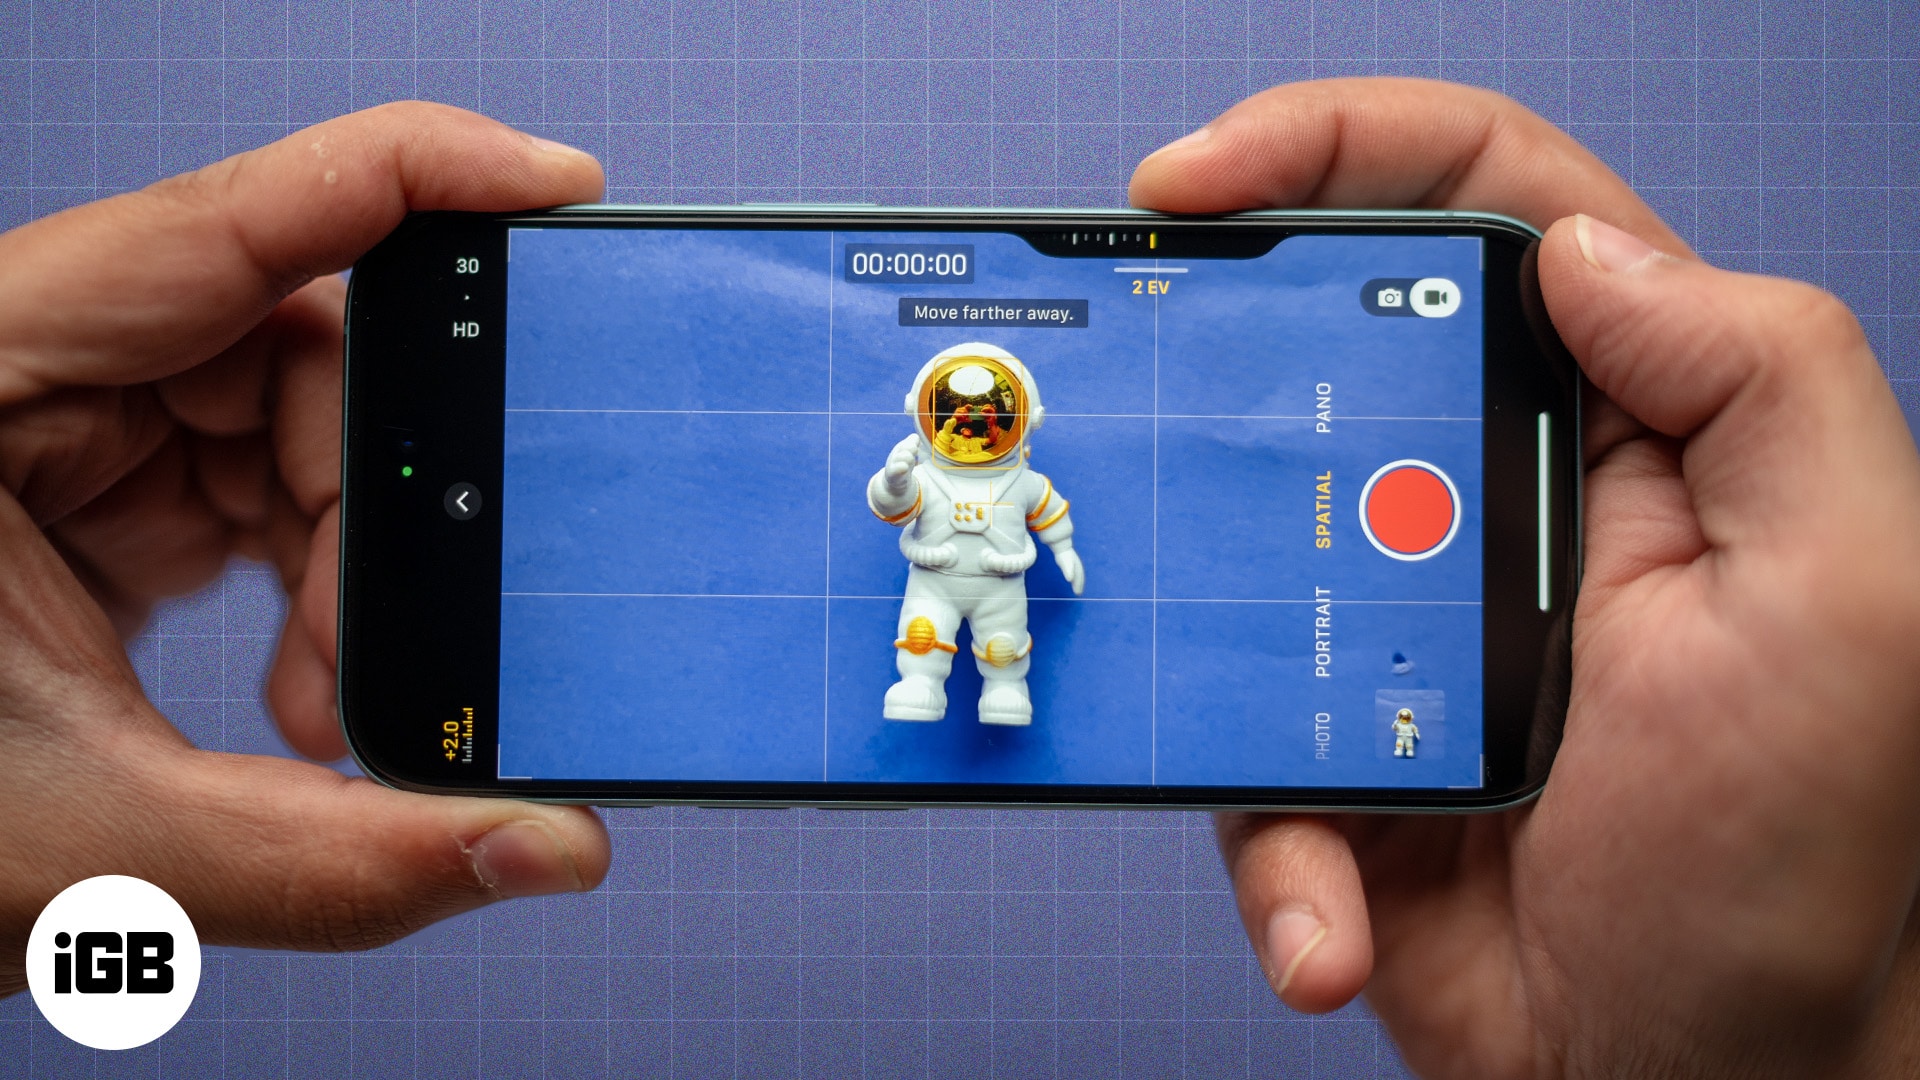
Table of Contents
- What is Spatial mode on an iPhone camera?
- iPhone models that support spatial photos and videos
- How to take spatial photos on your iPhone
- How to record spatial videos on your iPhone
- How to view spatial videos and photos
- How to edit and share Spatial photos or videos
- Tips to capture stunning spatial photos and videos on iPhone
What is Spatial mode on an iPhone camera?
Reserved for the iPhone 15 Pro, Pro Max, and the entire iPhone 16 lineup, Spatial mode uses the depth data captured by the iPhone’s advanced camera system camera to create a 3D effect in the photos and videos. When viewed on the Apple Vision Pro mixed reality headset, these photos and videos come to life with depth and realism, making them perfect for preserving your most memorable moments.
iPhone models that support spatial photos and videos
Apple introduced the concept of spatial videos in 2023 with the iPhone 15 Pro and Pro Max, but this feature became available only after the release of iOS 17.2. So, before you start snapping spatial photos and recording spatial videos, ensure you meet the following requirements:
- iPhone 16, 16 Plus, 16 Pro, 16 Pro Max
- To record spatial video, you’ll need an iPhone 15 Pro or 15 Pro Max with iOS 17.2 or later. For spatial photos, make sure your device is running iOS 18.1 or later.
- Keep the iPhone in landscape mode.
How to take spatial photos on your iPhone
Earlier, you needed to manually enable the Spatial Video for Apple Vision Pro setting before you could capture spatial video on your iPhone 15 Pro. However, the arrival of the iPhone 16 lineup has added a separate Spatial mode within the Camera app itself; thus, the ability to capture and record spatial photos/video comes auto-enabled.
Here’s how you can:
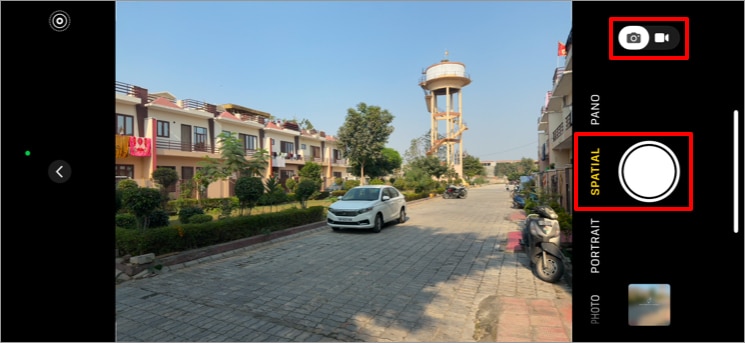
- Launch the Camera app and switch to Spatial mode.
- Here, rotate your iPhone to landscape mode.
- Next, ensure the photo video toggle is set to Photo mode.
- To get the best possible shot, make sure you are in good lighting condition.
- Once done, hit the Capture button to take the spatial photo.
How to record spatial videos on your iPhone
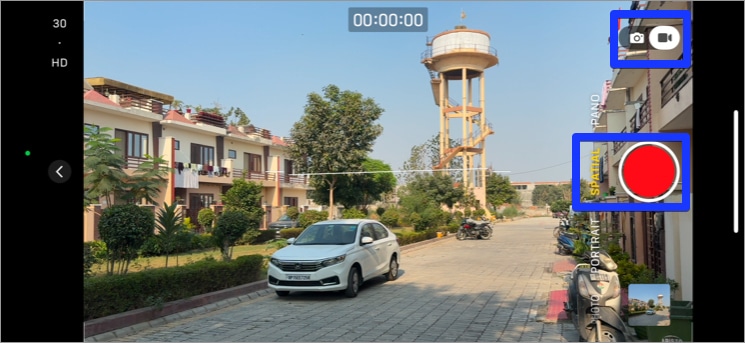
- Open the Camera app and switch to Spatial mode.
- Here, rotate the iPhone to landscape mode and switch the photo video toggle to Video mode.
- Next, hit the Record button to start recording the spatial video.
How to view spatial videos and photos
While you can head to your iPhone gallery to view the spatial photos and videos you have captured, you can only view them as standard photos and videos. Here’s how to view it.
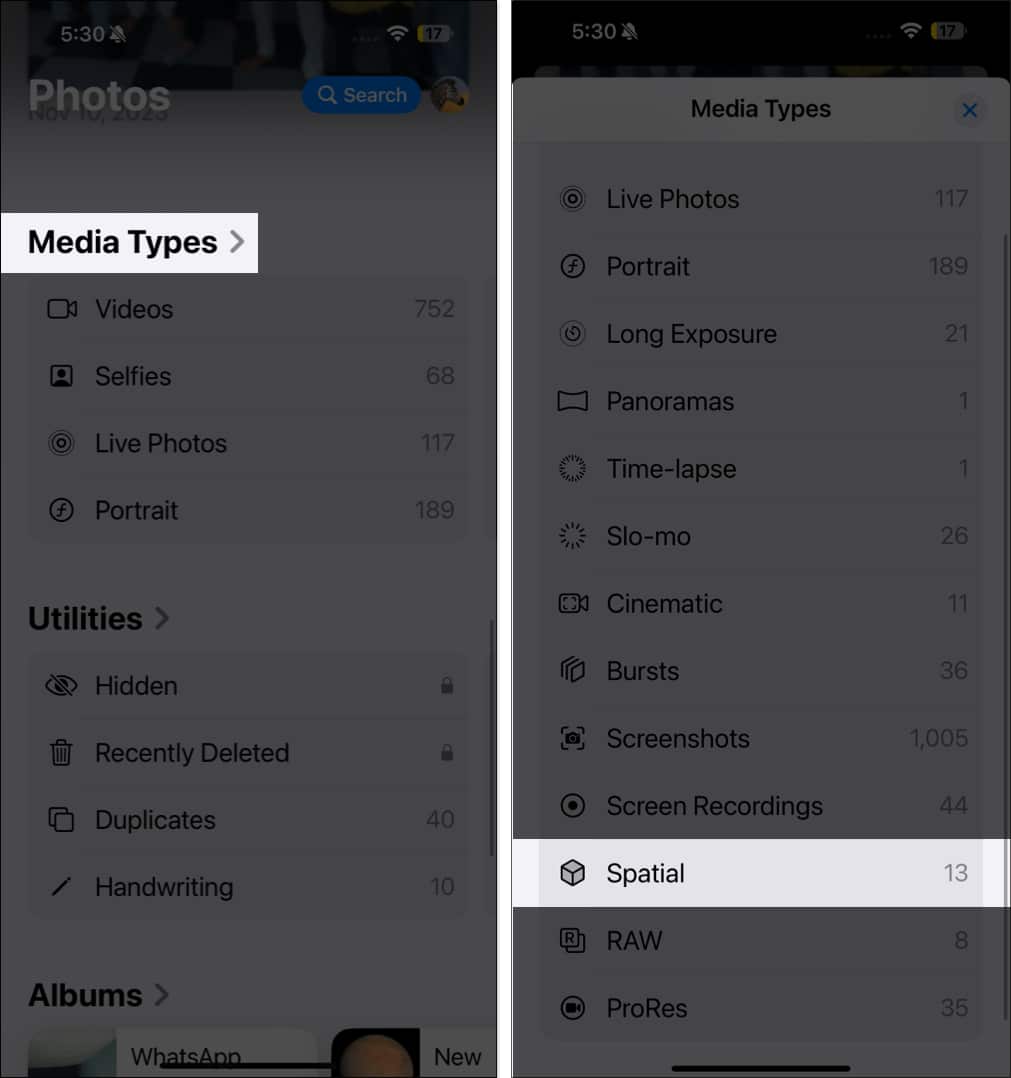
- Go to the Photos app on your iPhone.
- Under the Media Types section, you’ll find a Spatial category.
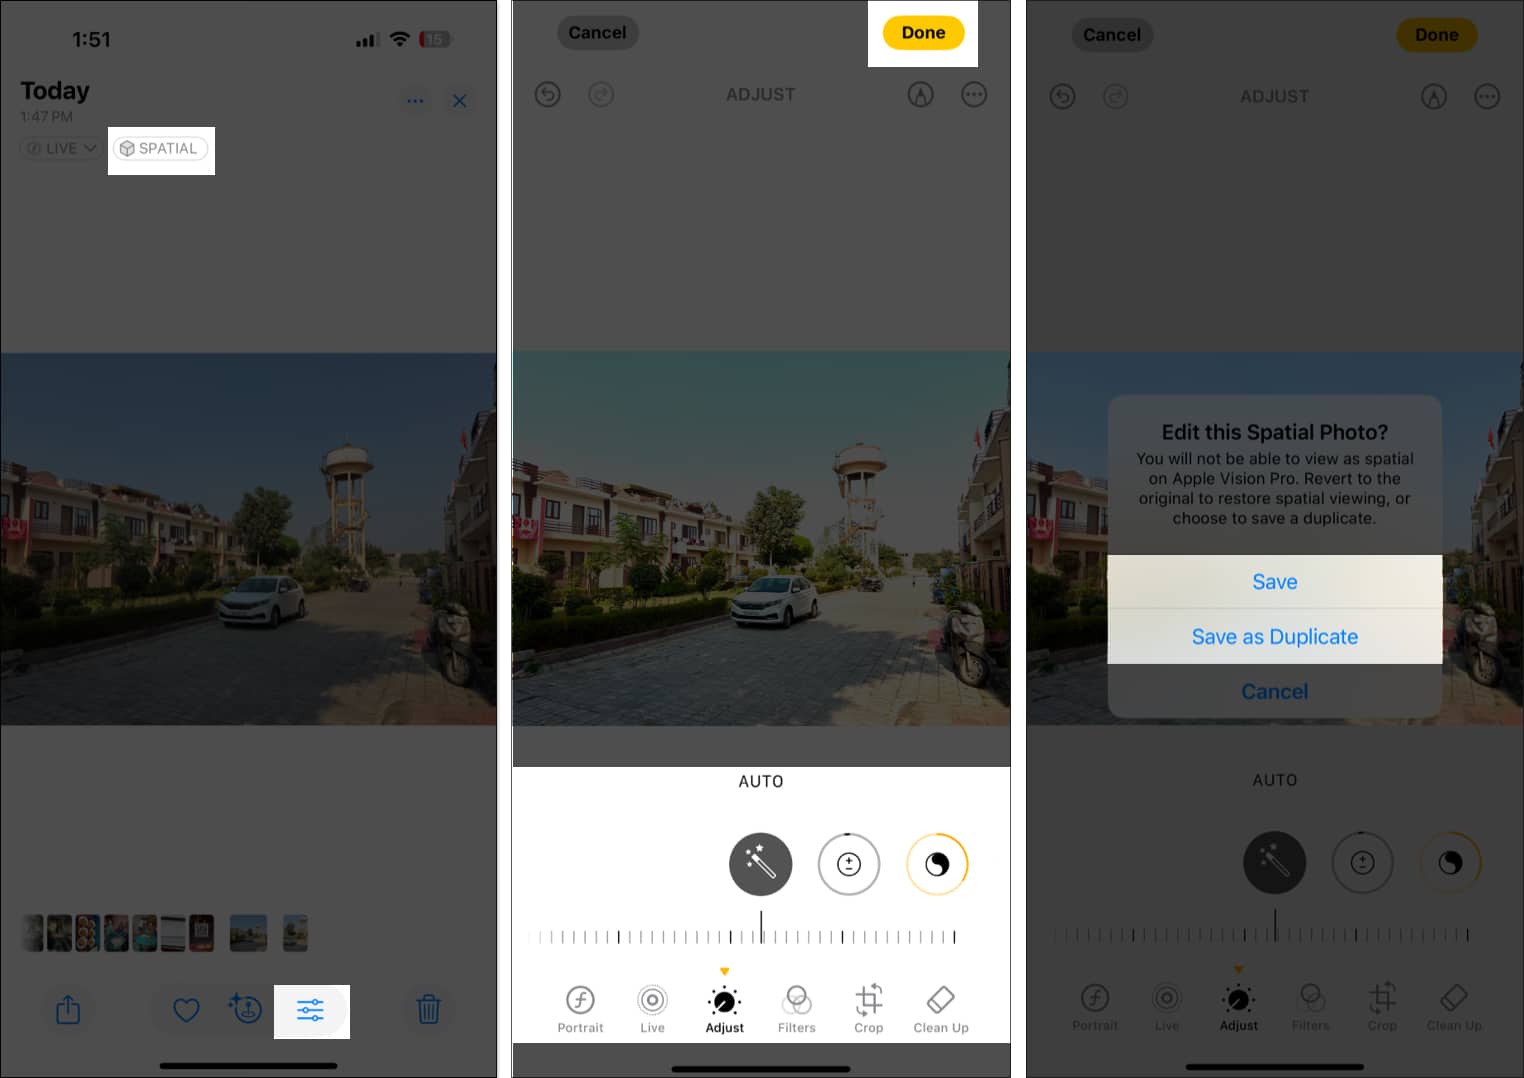
- Any individual spatial media will have a SPATIAL label at the top.
The true magic of these photos and videos comes to life on Apple’s Vision Pro mixed reality headset. When uploaded, they create an immersive 3D experience that makes the scene feel vibrant, real, and dynamic.
How to edit and share Spatial photos or videos
Although the iPhone is capable of capturing stunning spatial photos and videos, you can fine-tune them to enhance the experience and then share them with others so they can also relive those 3D moments.
Editing spatial photos and videos
Despite the fact that spatial photos and videos are very unique, you can edit them as standard photos and videos using the built-in editing tools in the Photos app. Here’s how:
- Launch the Photos app and open the spatial photo or video you want to edit.
- Tap the Edit button in the bottom toolbar.
- Here, use the built-in tools to adjust brightness, contrast, exposure, and more.
- For portrait subjects, adjust the depth effect or blur using the f-stop slider.
- Once satisfied with the changes made, tap Done at the top right corner to save them.
For more in-depth knowledge, go through our detailed guide on how to edit videos on your iPhone. While standard editing doesn’t alter the 3D effect, you can experiment with depth layers in first apps like iMovie and Final Cut Pro and third-party apps that support spatial media editing.
Share spatial photos and videos
Sharing spatial photos and videos captured on your iPhone allows others to experience their immersive qualities, particularly if they have access to Apple Vision Pro.
- Share on Apple Devices: Select the spatial photo or video → tap the Share icon → Choose AirDrop to share directly with another Apple device.
- Send via iCloud: Enable iCloud Photos on your iPhone to sync your spatial photos across your devices, then share the iCloud Link with others.
- Post on social media: Most social media platforms like Instagram or Facebook convert uploaded spatial photos into standard 2D images. However, apps designed for AR/VR media might support their 3D aspects.
- Export to Vision Pro: If you own an Apple Vision Pro, simply sync your Photos library to it to fully experience the immersive qualities of spatial photos and videos.
Tips to capture stunning spatial photos and videos on iPhone
Now that you know how to capture spatial media on your iPhone, here are a few tips and tricks you can employ to ensure you get the best possible shots and videos.
- Use good lighting: As soon as you switch to spatial mode, a “More Light Recommended” dialogue box will appear if you are in poor lighting conditions. This is because the iPhone camera needs proper lighting to improve the depth and detail of your photos. Natural light works best, but studio lighting can add a professional touch.
- Incorporate depth: Always try to include subjects at various distances from the camera to maximize the 3D effect. For example, a person in the foreground and trees in the background can create a striking image.
- Focus on Subjects: Portraits, pets, and textured objects often look incredible in spatial photos.
- Experiment with Angles: Try different perspectives to make your spatial photos and videos more engaging. Low or high angles can add an artistic flair.
Bring photos and videos to life…
Capturing and recording spatial photos and videos on your iPhone is a fun way to capture your memories with depth and realism and experience their immersive feel on the Apple Vision Pro. So, grab your iPhone, switch spatial mode, and start creating immersive memories today!
What are your thoughts on the new spatial mode in the iPhone camera? Do share your thoughts in the comments.
FAQs
For viewing, Apple Photos and Vision Pro should be the only go-to options for spatial content. For editing, first-party apps like iMovie and Final Cut Pro and third-party tools like Halide, Pixelmator, and Adobe Lightroom are excellent for improving details.
Yes, you can. To do so, open the Photos app on Vision Pro → open a 2D photo → tap the Spatial tag at the top of the photo.
The compatibility of the spatial photos and videos with non-Apple devices depends on how they are shared and viewed. You can view them as standard media on devices other than Vision Pro or other AR/VR platforms.
As spatial media captures multiple perspectives of the environment in the frame to create a 3D effect, such media takes up more storage than regular 2D media. One minute of spatial video recording takes up to 120 MB of storage.
Read more:

