X (formerly Twitter) lets you pin a post to the top of your profile to ensure it’s the first thing visitors see on the page. This is useful when you want to increase engagement on a post, showcase your best post, or convey important information.

If you haven’t explored this feature yet, this guide will walk you through the steps to help you pin your first post on X on your iPhone, iPad, or desktop.
How to pin a post in X on iPhone, iPad, or desktop
Pinning a post on X is pretty straightforward, regardless of the device you’re using X on. All you have to do is locate the post and follow the appropriate steps for iPhone, iPad, and desktop below to pin it to your X profile.
How to pin a post in X on iPhone or iPad
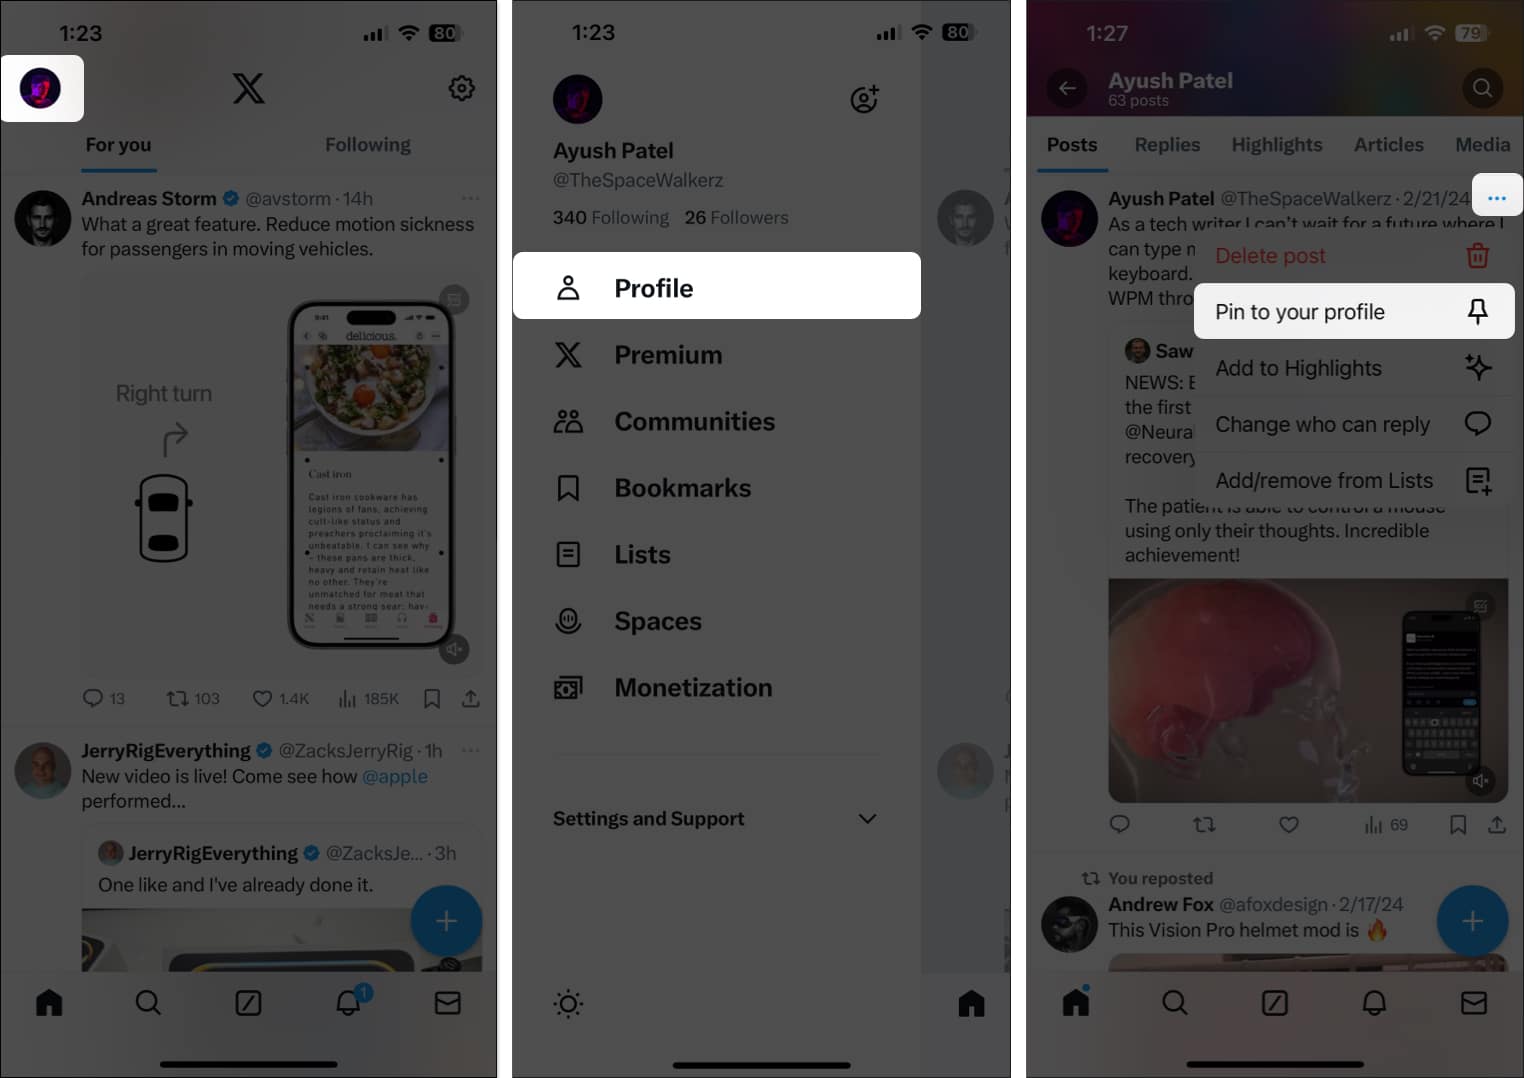
- Open the X (Twitter) app.
- Tap your profile picture icon in the top-left corner of the screen.
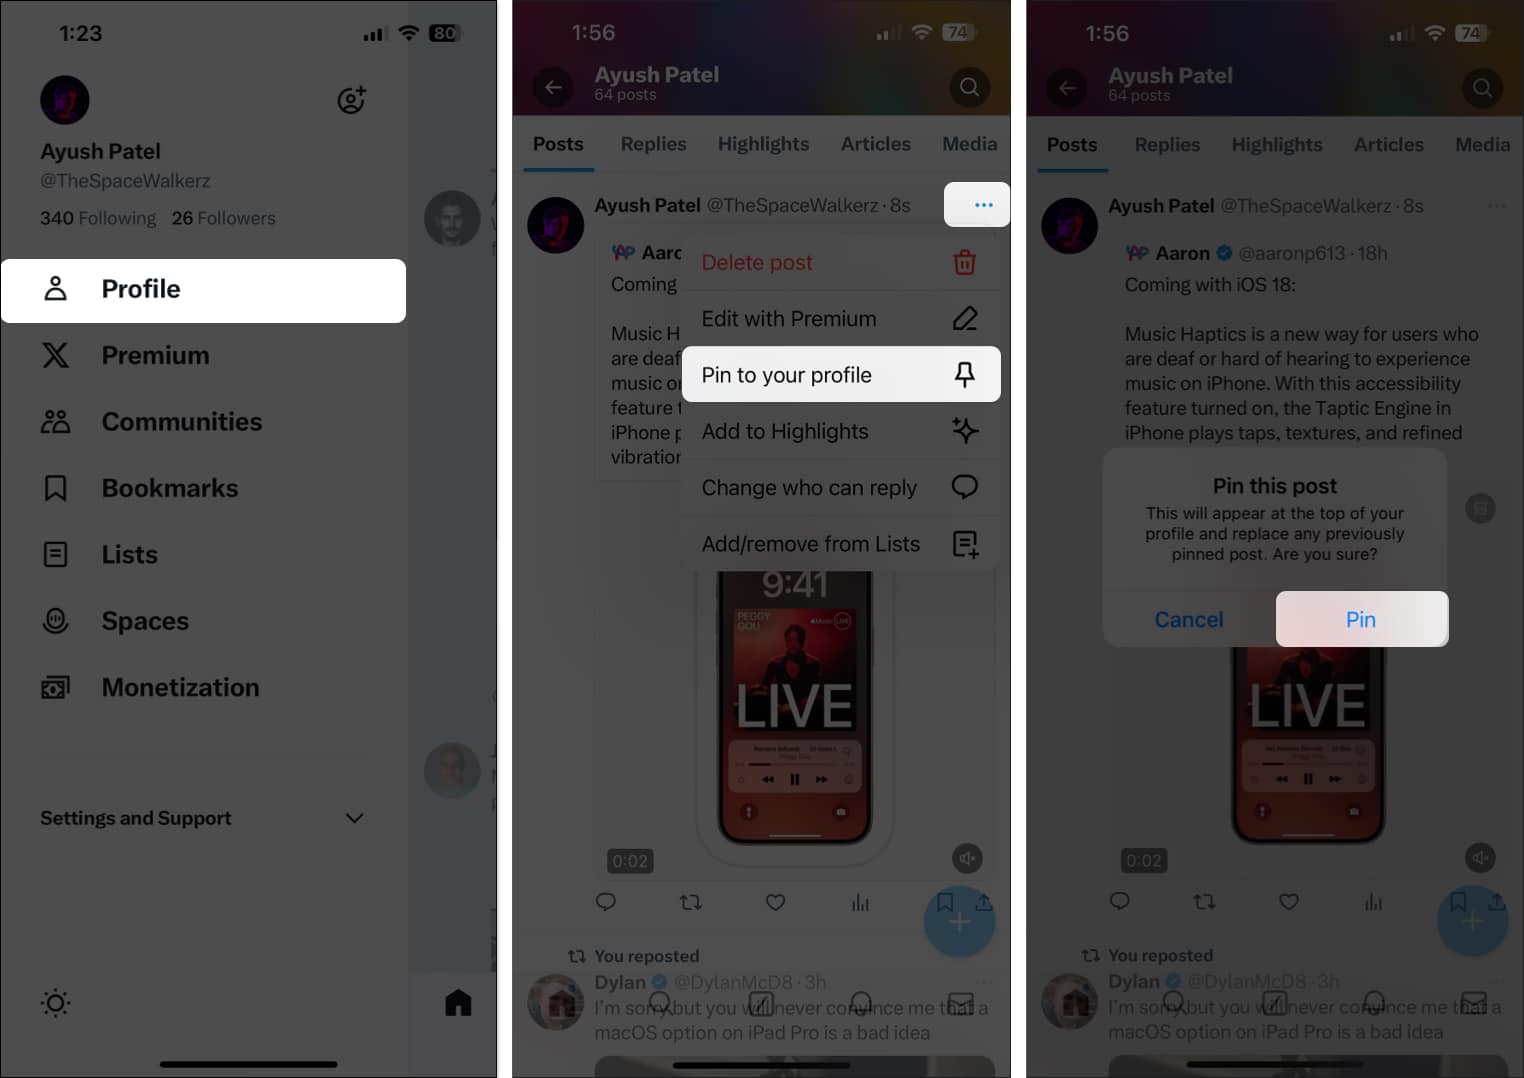
- Tap on Profile and locate the post you want to pin.
- Tap the three dots in the top-right corner of the post.
- Hit Pin to your profile from the menu options, and tap Pin to pin the post to your profile.
X allows you to pin only one post to your profile at once. If you pin another post, it will replace the one you pinned earlier.
If you want to unpin a post from your X profile at any point, repeat the process detailed above and tap Unpin from your profile.
How to pin a post in X on a desktop
The steps to pin a post on X on a desktop are just as simple as those for doing it on an iPhone or iPad. Here’s what you need to do:
- Go to twitter.com/home in a web browser.
- Click the profile from the sidebar on the left.
- Scroll down and locate the post you want to pin to your profile.
- Click the three dots in the top-right corner of the post.
- When a context menu appears, click on Pin to your profile and hit the Pin button in the confirmation prompt to confirm pinning the post.
When you want to unpin the post from your X profile, click the three dots above the pinned post and click Unpin this post.
How to pin someone else’s post on X
As of the time of writing, X doesn’t allow you to pin someone else’s post on your profile. However, you can use a workaround if you still need to do it.
- Open the X app on your iPhone or iPad.
- Find and tap on the post you’d like to pin to your profile.
- Tap the share icon under the post. Then, tap Copy Link.
- Now, tap the repost icon under the post and tap Quote.
- Paste the link in the Add a comment section and hit the Post button. (You can’t pin the post on your profile if you skip this step.)
- Tap your profile picture in the top-left corner and select Profile.
- Tap the three dots above the post you just quoted on your profile.
- Finally, when a menu appears, tap Pin to your profile and hit the Pin button to pin the post to your X profile.
Wrapping up…
The ability to pin posts is an underrated feature on X. We recommend you start using it today to give your existing and potential followers a glimpse of your personality and, in turn, drive more traffic and engagement to your profile.
FAQs
The pinned post is visible at the top of the Twitter timeline labeled as ‘pinned post.’ So, go to the person’s Twitter account to view it. If you can’t see such a label, the person hasn’t added a pinned post.
You can’t pin more than one post. You have to be selective and choose one from the many tweets available.
Also read:

