The moment you type out something and hit that tempting Tweet button, millions of people across the world will be able to see what you have said. The experience after this can start to go downhill quite easily. If you aren’t up for all this hassle and do not want to become a “tweleb,” it’s easy to make your Twitter account private!
If you don’t know how to do it, don’t panic. Let me tell you how to make your Twitter account private on iPhone, iPad, and desktop, allowing you to control who views your tweets.
Note: If someone has been following your account even before you privatized it, they will still be able to see and interact with your tweets.
- How to make your Twitter account private on iPhone
- Make Twitter account private on desktop
- How to manage follower requests on Twitter
- How to make your Twitter account public
- Other safety measures on Twitter
How to make your Twitter account private on iPhone
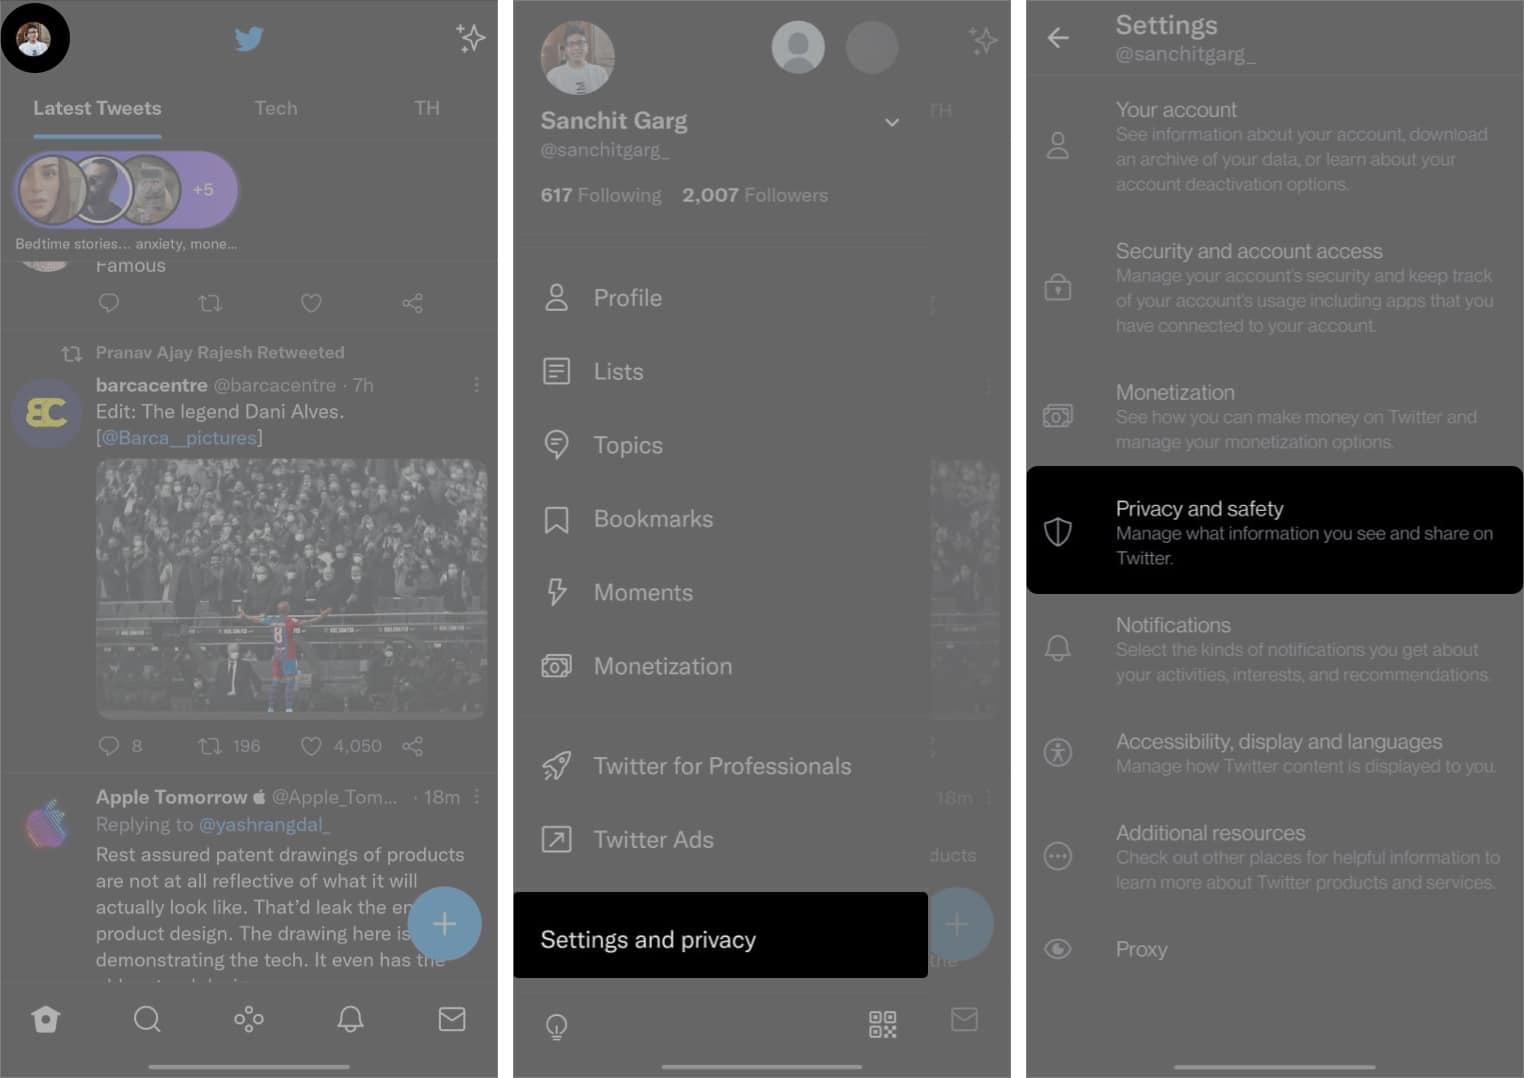
- Open the Twitter app on your device.
- Tap your profile picture on the top left.
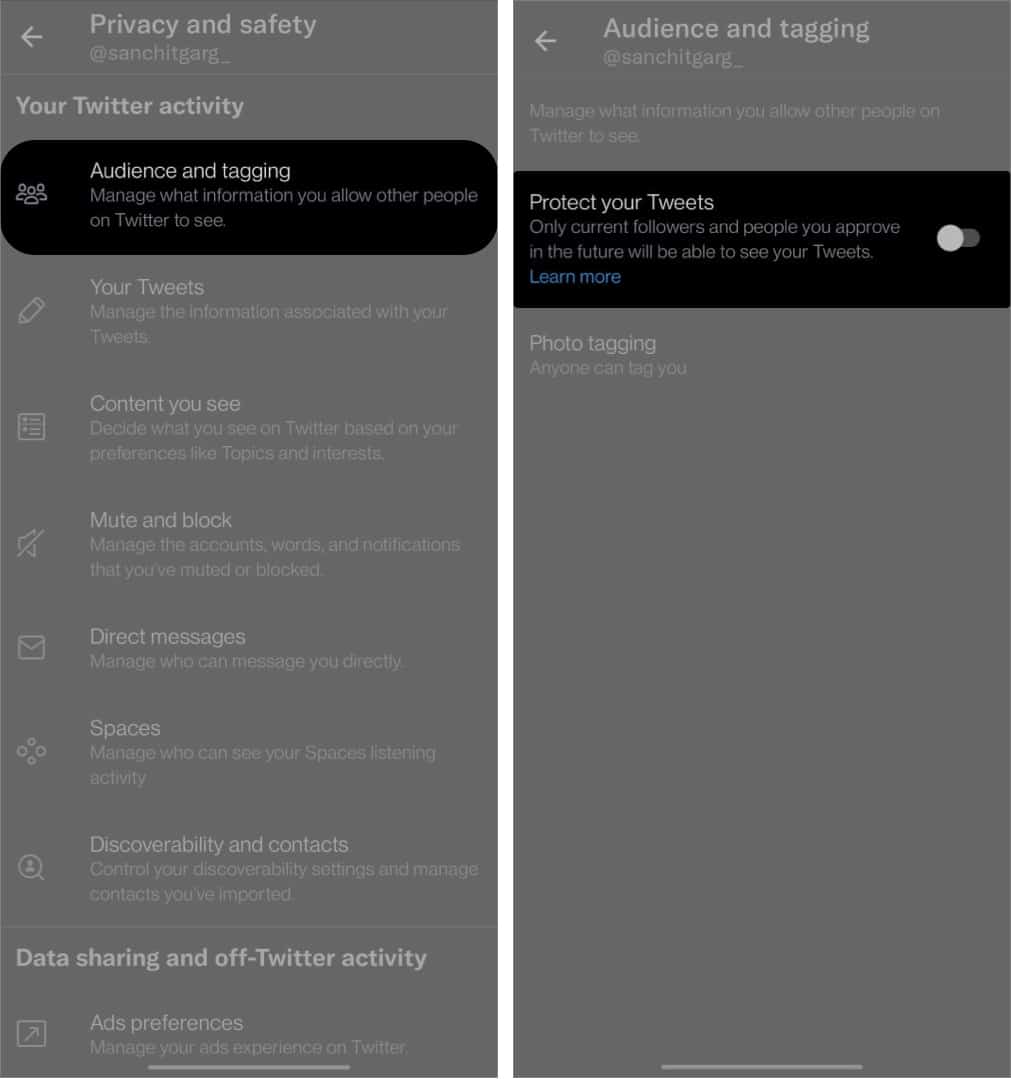
- From the menu, tap Settings and privacy → Privacy and safety.
- Tap Audience and tagging.
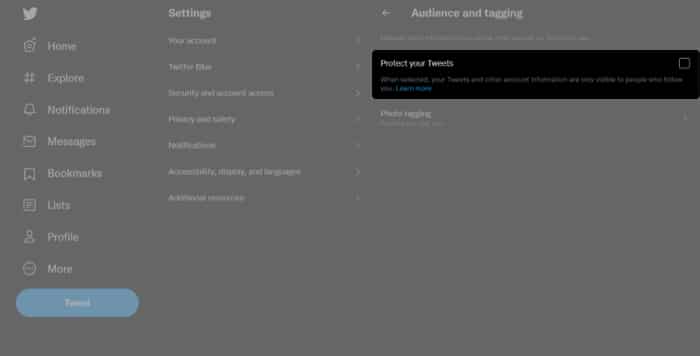
- Next, turn on Protect your tweets.
That’s actually all you need to do! This process remains the same for iPhone and Android, and while it is better to do it from the app, you may also be using Twitter on your desktop. Read on to do it from the desktop.
Make Twitter account private on desktop
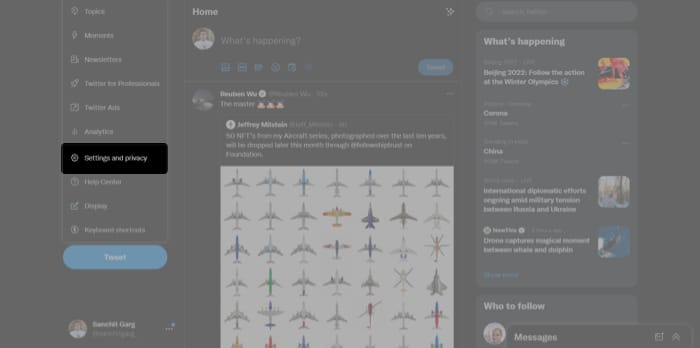
- Open Twitter on any browser.
- Click More (on the left bar) → Settings and Privacy.
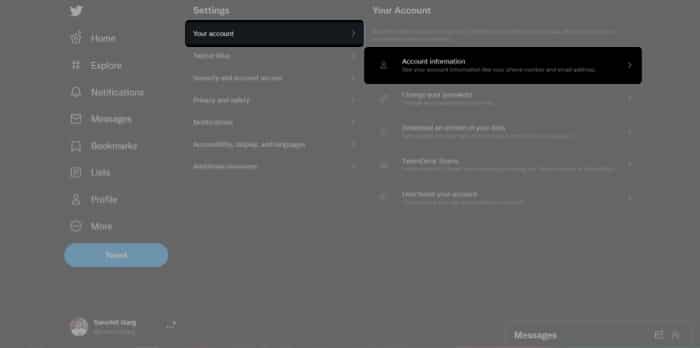
- Next, choose Your account → Account information.
- Enter your Twitter password.
- Scroll down and click Protected Tweets and check the box next to Protect your tweets.
Your account has now been privatized!
You should see a lock symbol next to your name on your profile, and you will now be able to choose who can follow you and who cannot. Moreover, your tweets can’t even be retweeted anymore. Read on to see how to accept followers.
How to manage follower requests on Twitter
Making your account private means that people can’t follow you instantly. Whenever someone wishes to follow you, a request will be sent, and you can choose to approve or deny it. Here’s how:
- Open Twitter and go to your notifications (bell icon in the menu bar)
- Tap the notification about new follower requests.
- Approve or deny the request.
The process is similar to managing follow requests on Instagram.
How to make your Twitter account public
If this looks a bit too much, you can always unprivate your Twitter account. Here’s how:
I. On iPhone and Android
- Within the Twitter app, tap your profile picture on the top left.
- Now, select Settings and privacy → Privacy and safety → Audience and tagging.
- Now, toggle off Protect your tweets.
II. On desktop
- Open Twitter on any browser.
- Click More on the left bar → Settings and Privacy → Your account → enter the Twitter password.
- Now, select Protected Tweets and un-check the box next to Protect your tweets.
If you can’t decide whether to keep your account private or public, we can’t blame you since both ways have their advantages and disadvantages.
Besides privatizing your account, you can also take a few more safety measures on the platform. Let’s get acquainted with some of them!
Other safety measures on Twitter
- Safe Search – Twitter’s safe search allows users to hide sensitive content and blocked or muted words from your Twitter timeline. This feature helps keep the platform safe and friendly for everyone!
- Hide sensitive content – Twitter considers violence and adult content as “potentially sensitive” and gives users the option to block it from their timeline. If you want to know how, check out our article on how to view sensitive content on Twitter.
That’s it!
Twitter is constantly adding more and more features that make your experience better on the platform. If you have more queries about making your Twitter account private and more secure, feel free to leave them in the comments below. While you are at it, don’t forget to follow us on Twitter @igeeksblog!
Read more:

