When you have many tasks to take care of, it’s easy to lose track of time. But with a simple setting, you can hear your Mac speak the time out loud to keep you on task. You can set the time interval, choose the voice, and adjust the speaking rate. Then, just listen for the time.

Why hear the time on Mac?
From staying on track to getting extra assistance, there are several reasons to have your Mac announce the time.
Here are just a few:
- If you auto-hide the menu bar and can’t see the clock at a glance.
- If you are in deep concentration on a particular task, you don’t have to continue checking the clock.
- If you only want to spend a certain amount of time on a task and don’t use a time-tracking app.
- If you have a vision impairment, announcements from the Mac can come to your aid.
Whatever the reason, this feature is one of those little things that can enhance your macOS experience.
How to enable time announcement in macOS Ventura or later
It takes only a minute to enable the time announcement feature on Mac.
- Click the Apple logo on the menu bar → Open System Settings.
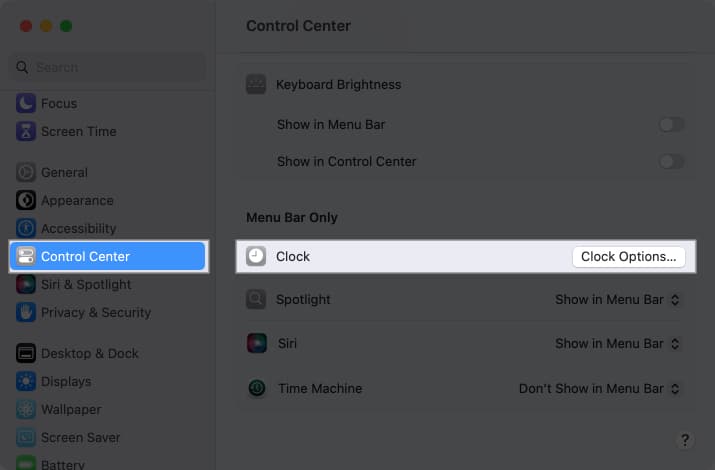
- Select Control Center in the sidebar and scroll down to the Menu Bar Only section on the right.
- Next to Clock, click Clock Options.

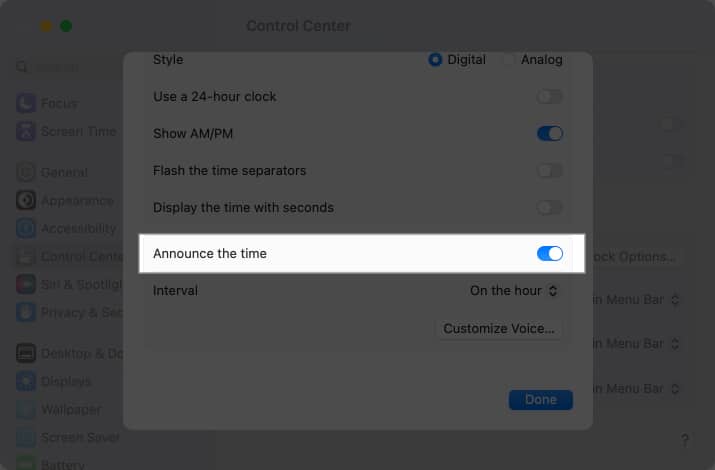
- In the pop-up window that appears, scroll near the bottom and turn on the toggle for Announce the time.

- To the right of Interval, use the drop-down box to choose how often you want to hear the time.
You can pick hourly, every half hour, or on the quarter hour. - You can then select Done to confirm your choices or customize the voice, which we’ll discuss next.
Note: If you are on macOS Monterey or earlier, you need to head to System Preferences → Dock & Menu Bar → Clock and follow steps 4-6 as mentioned above.
How to customize announce time voice on Mac
If you want to hear a particular voice or adjust the speaking rate and volume, you can change the voice options as well.
- While still in System Settings → Control Center → Clock Options as explained above, select Customize Voice below the Interval section.
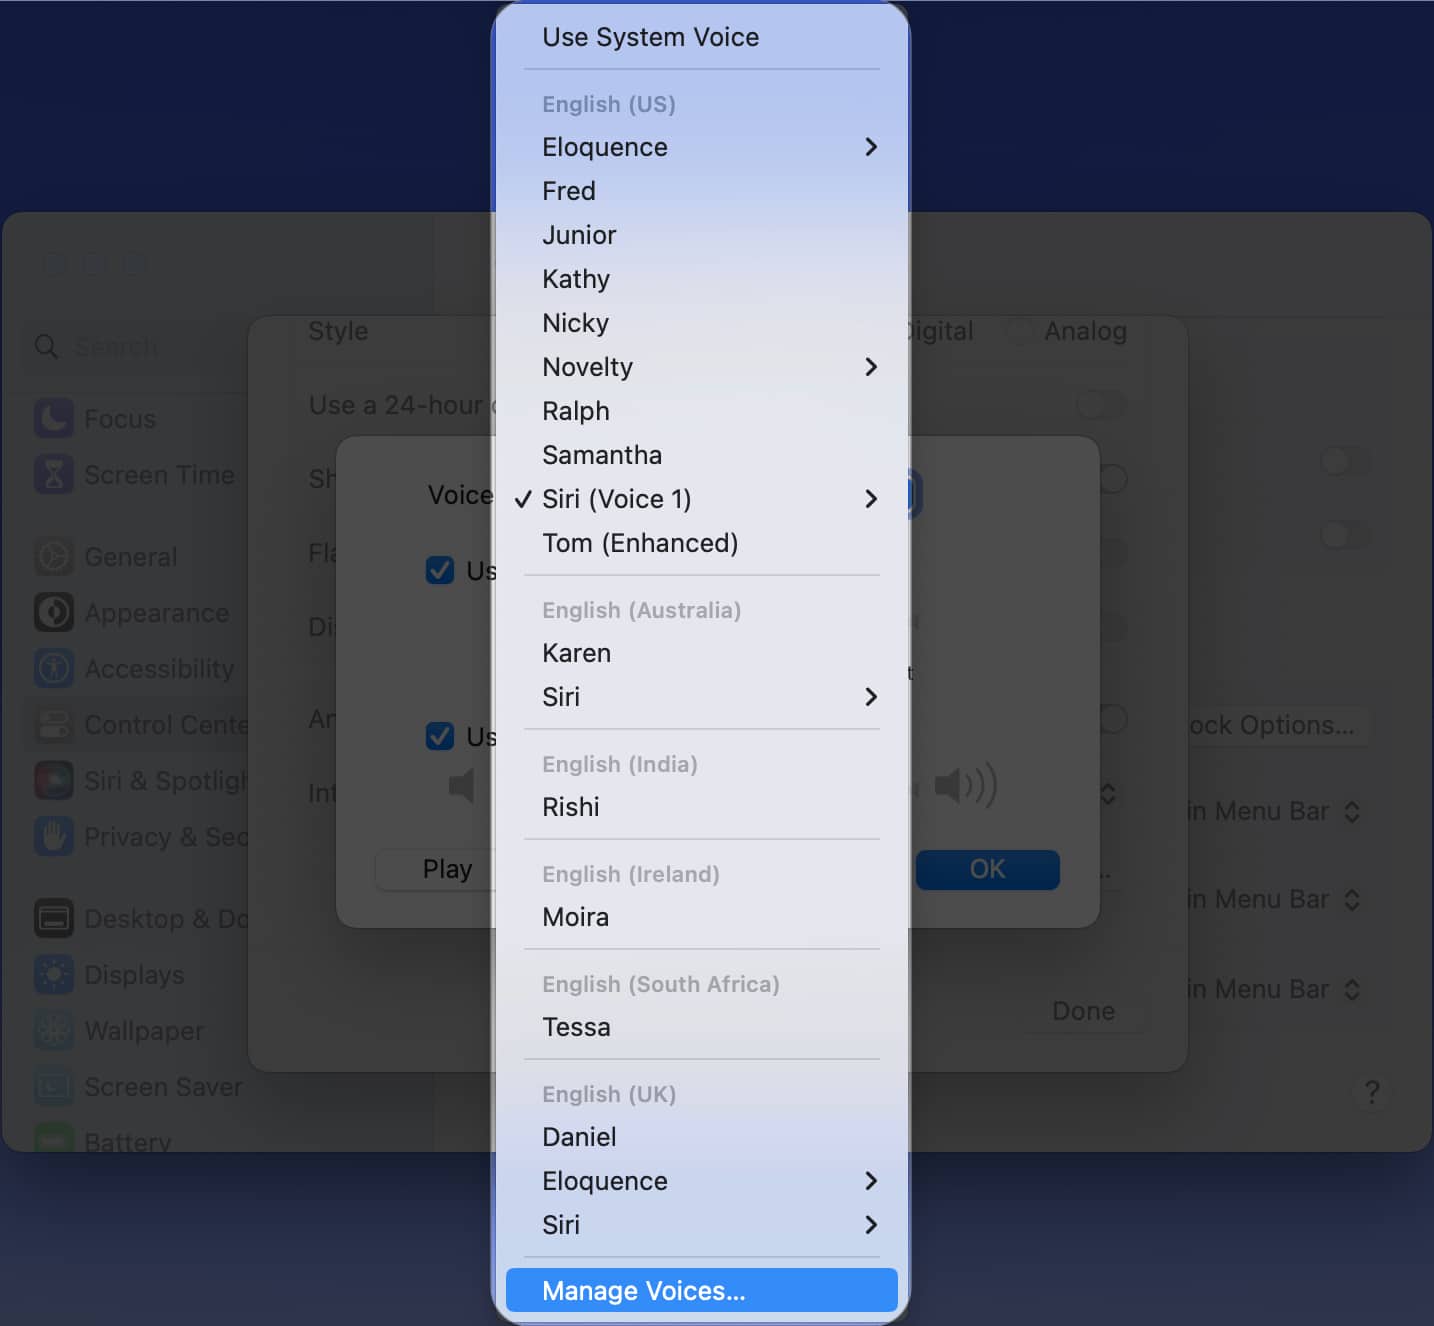
- Use the drop-down list next to Voice to pick an option.
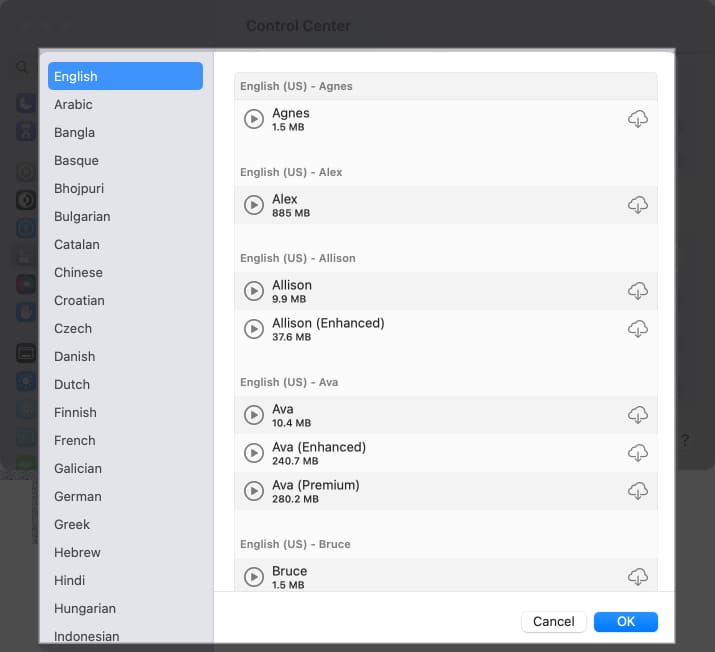
- To review additional voices, scroll down and choose Manage Voices. You can then use the play icon to hear a voice and the download icon to install it. Click OK when you finish.
- To review additional voices, scroll down and choose Manage Voices. You can then use the play icon to hear a voice and the download icon to install it. Click OK when you finish.
- To adjust how fast or slow the voice speaks, check the box for Use custom rate. Then, drag the slider right or left to increase or decrease the speed.
- To set the volume for the time announcement, check the box for Use custom volume. Then, drag that slider right or left to increase or decrease the volume.
- When you finish, select Play to hear a sample of your selections. You can then make further adjustments or click OK to save the changes.
- Select Done when you return to the Clock Options box.
You should then hear your Mac tell you the time in the voice and interval you picked.
Be on time with help from your Mac!
By having your Mac announce the time, you can continue focusing on your business-related tasks or schoolwork without constantly checking the clock. You can stay on track and on time with this one simple macOS feature. For more, look at how to play white noise in the background as you work.
Are you going to enable time announcements on your Mac? Let us know if it helps you!
Read more:


