Although Apple allows you to change fonts in Mail, Notes, and Safari apps, the choices are restricted to the ones that come with the device. If you want more variety, you can use custom fonts on your iPhone or iPad. Interested? In this guide, I’ll show you how to easily install and manage custom fonts on your iPhone or iPad.
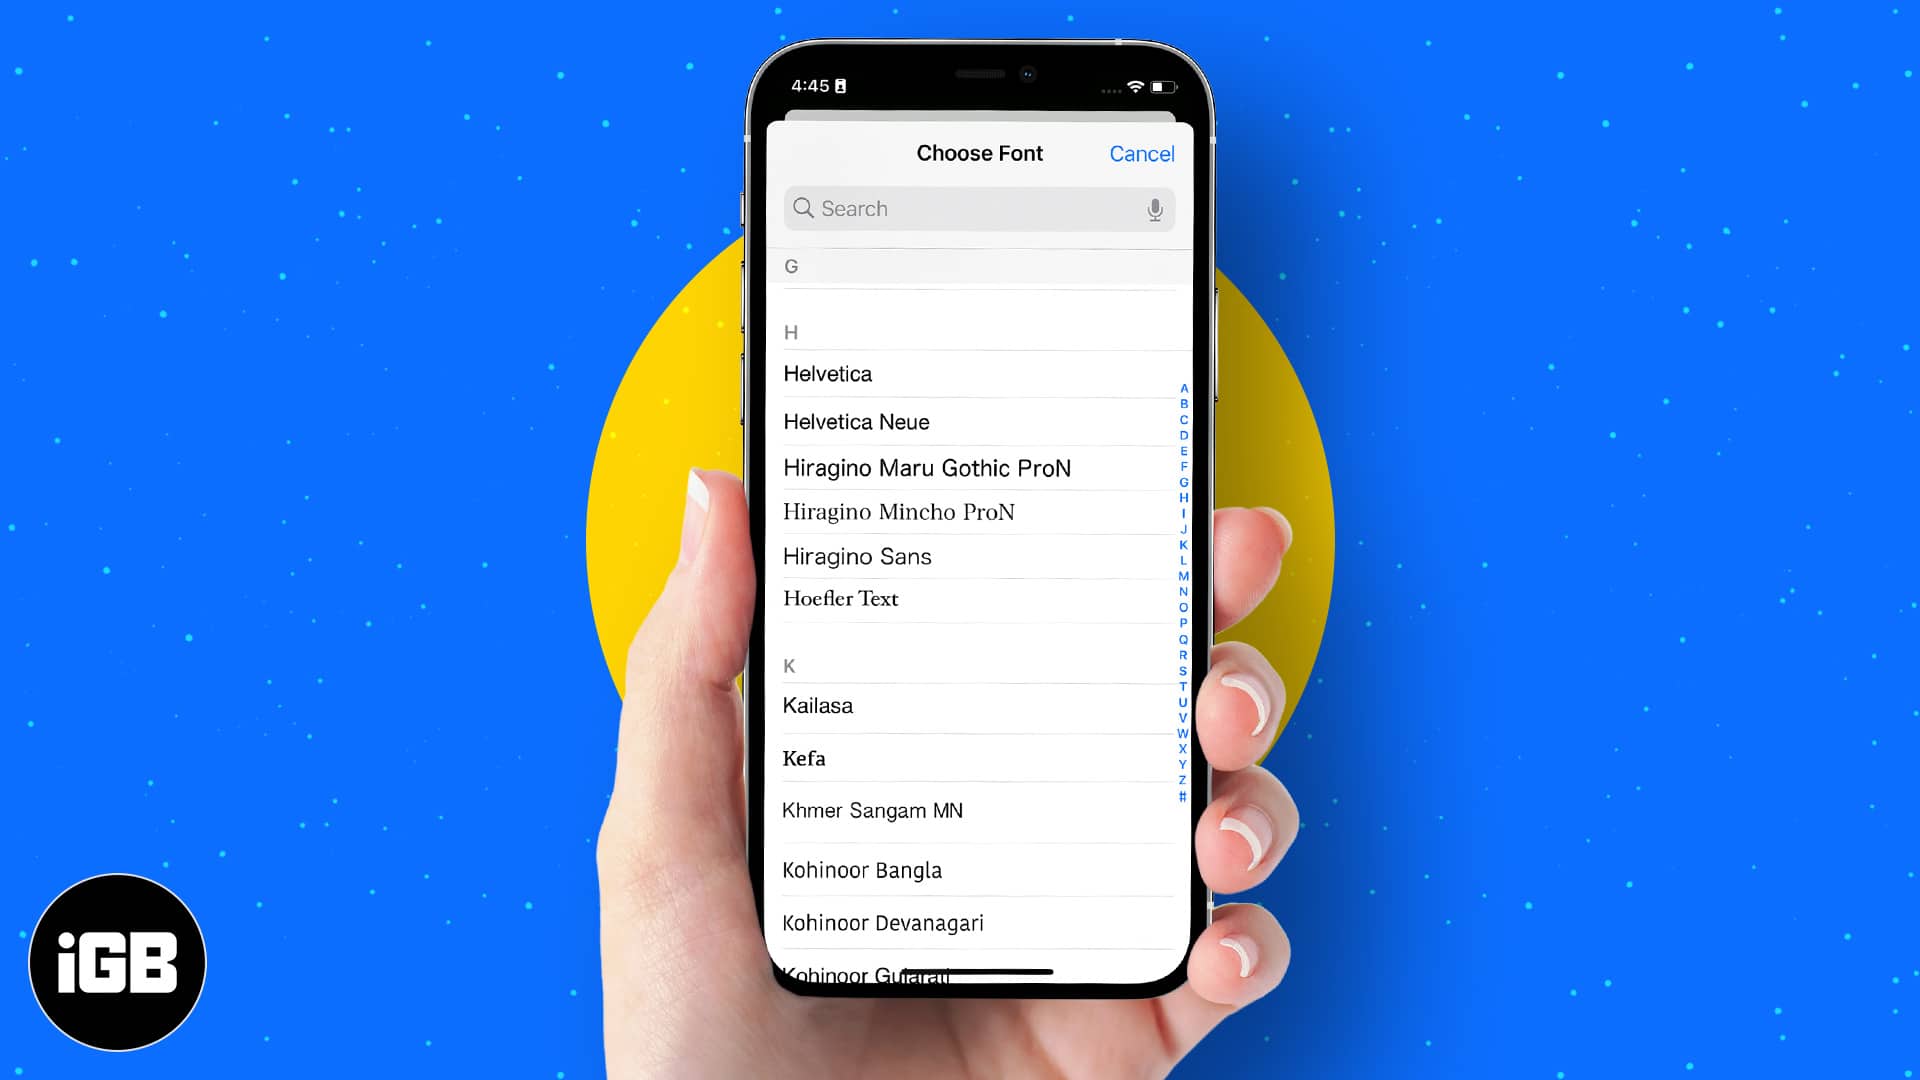
How to download and install fonts on iPhone or iPad
While Apple allows installing custom fonts on iPhones or iPads, you can’t modify the system-wide fonts. Custom fonts are only functional in supported apps such as Pages, Keynote, and Numbers.
Additionally, custom fonts must be installed through third-party apps such as Fonts, Font Diner, etc. Here, I will demonstrate the steps to download and install custom fonts using the Font Diner app. The steps are somewhat similar for every app.
- Download and open the Font Diner app.
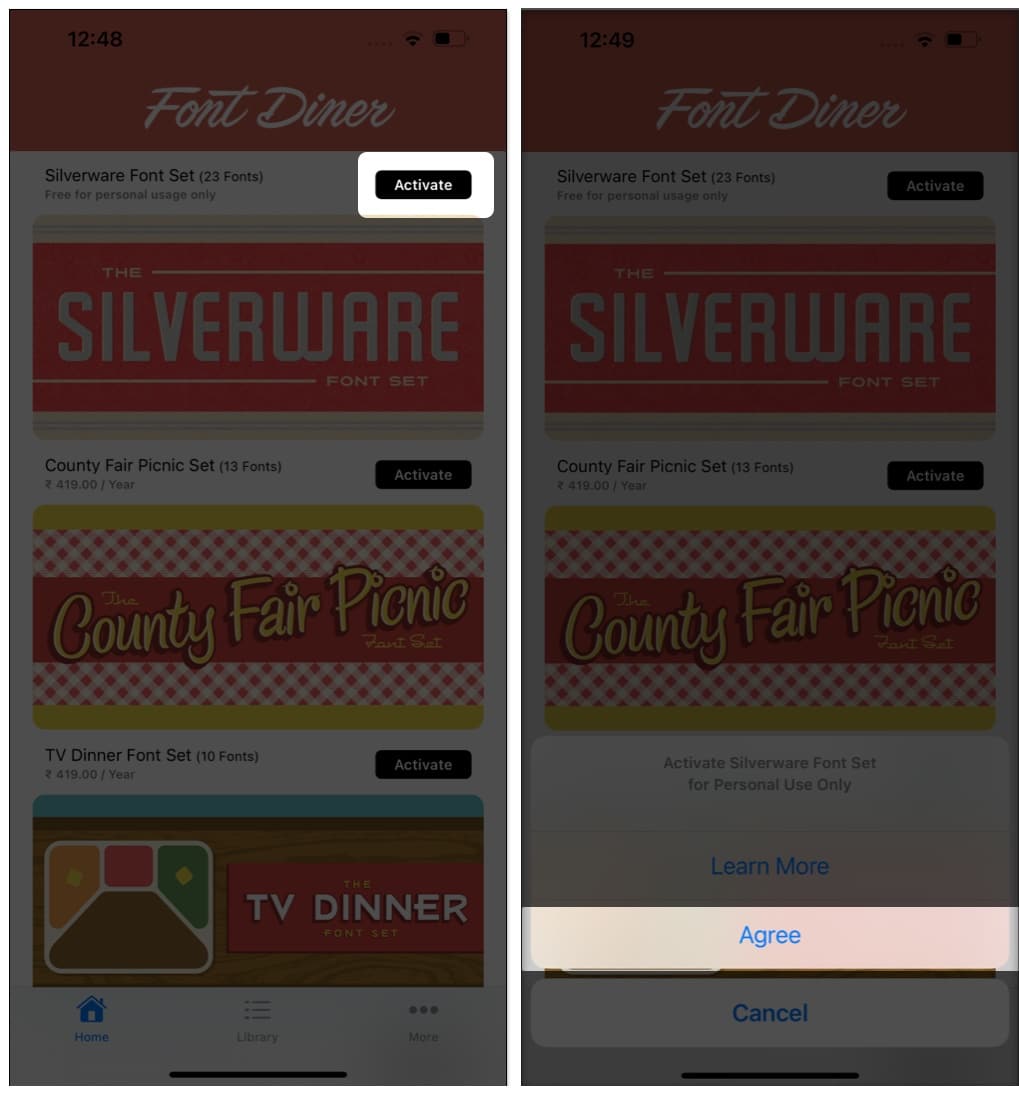
- Tap Activate next to the Silverware Font Set → Tap Agree.
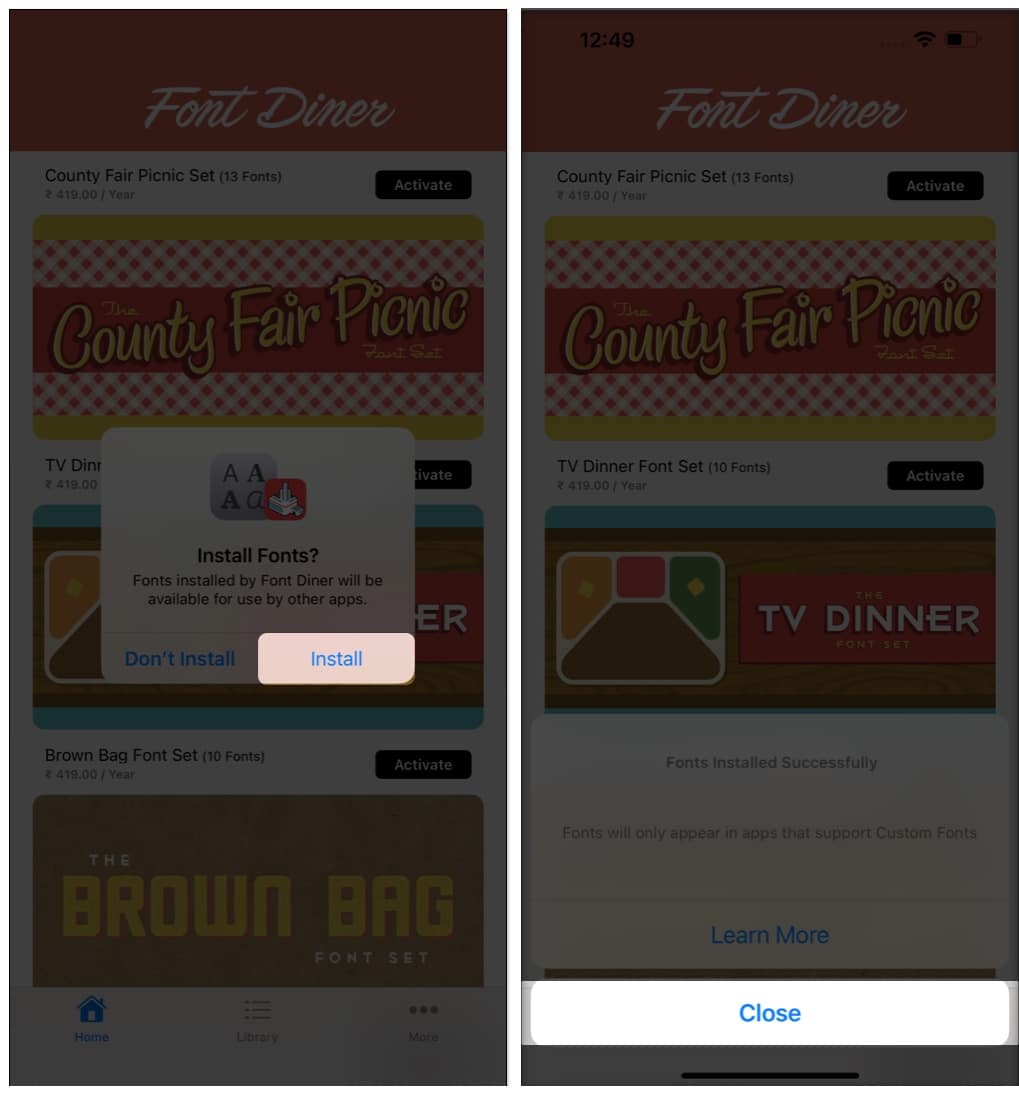
- Choose Install → tap Close.
In this app, you can only download one free Silverware set of 23 fonts for free.
If you wish to get more fonts, you must make an in-app yearly purchase for other sets that contain more fonts. If you don’t want to use Font Diner, we’ve done all the hard work for you and curated a list of the best third-party font apps.
If you have your favorite font’s TTF, OTF, or TTC format file, you can install it on your iPhone using the iFont app. This app also lets you access Google Fonts’ free font library.
Now that you have installed your favorite fonts, let’s see how to use them in the supported apps on your iPhone and iPad. Thus, you can customize your documents or presentations.
How to change fonts on iPhone and iPad
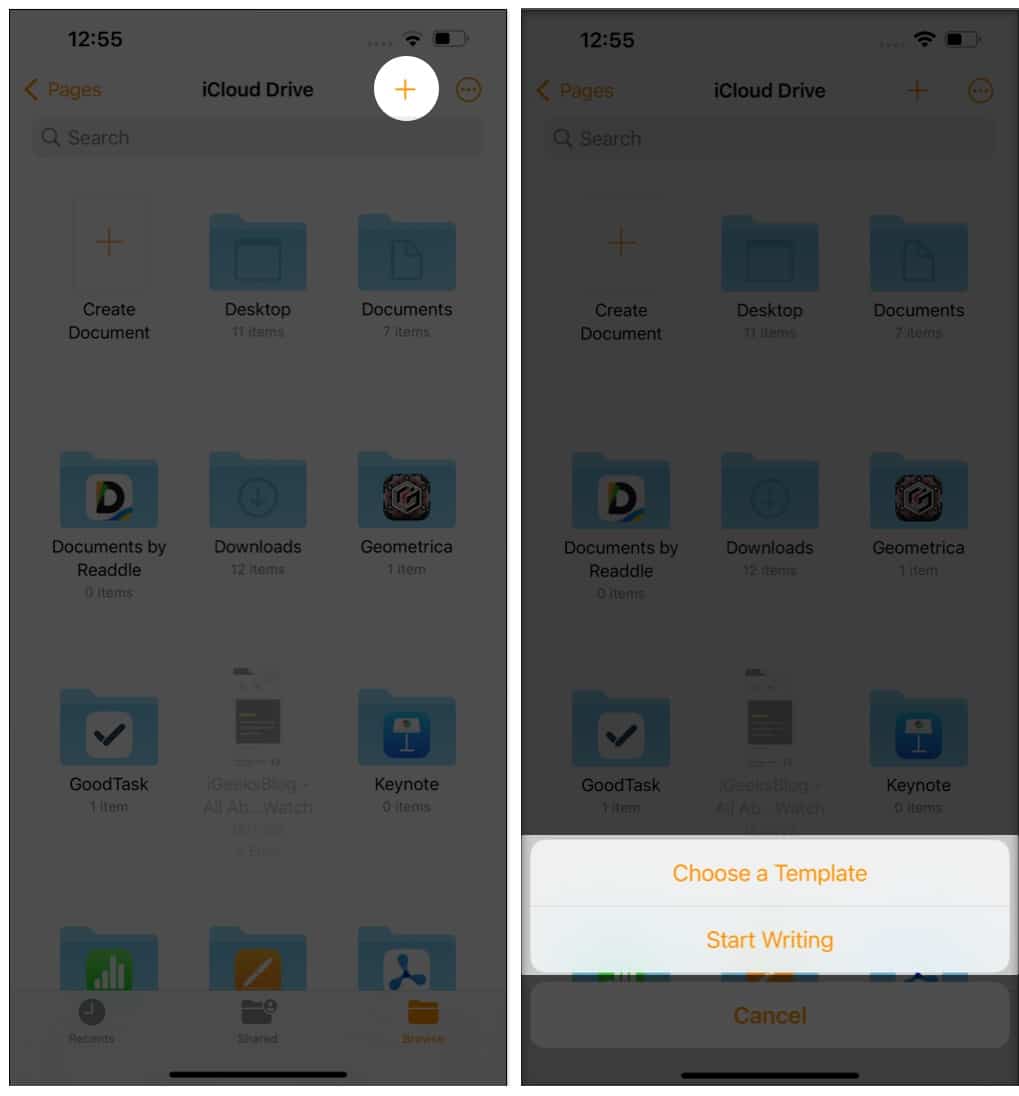
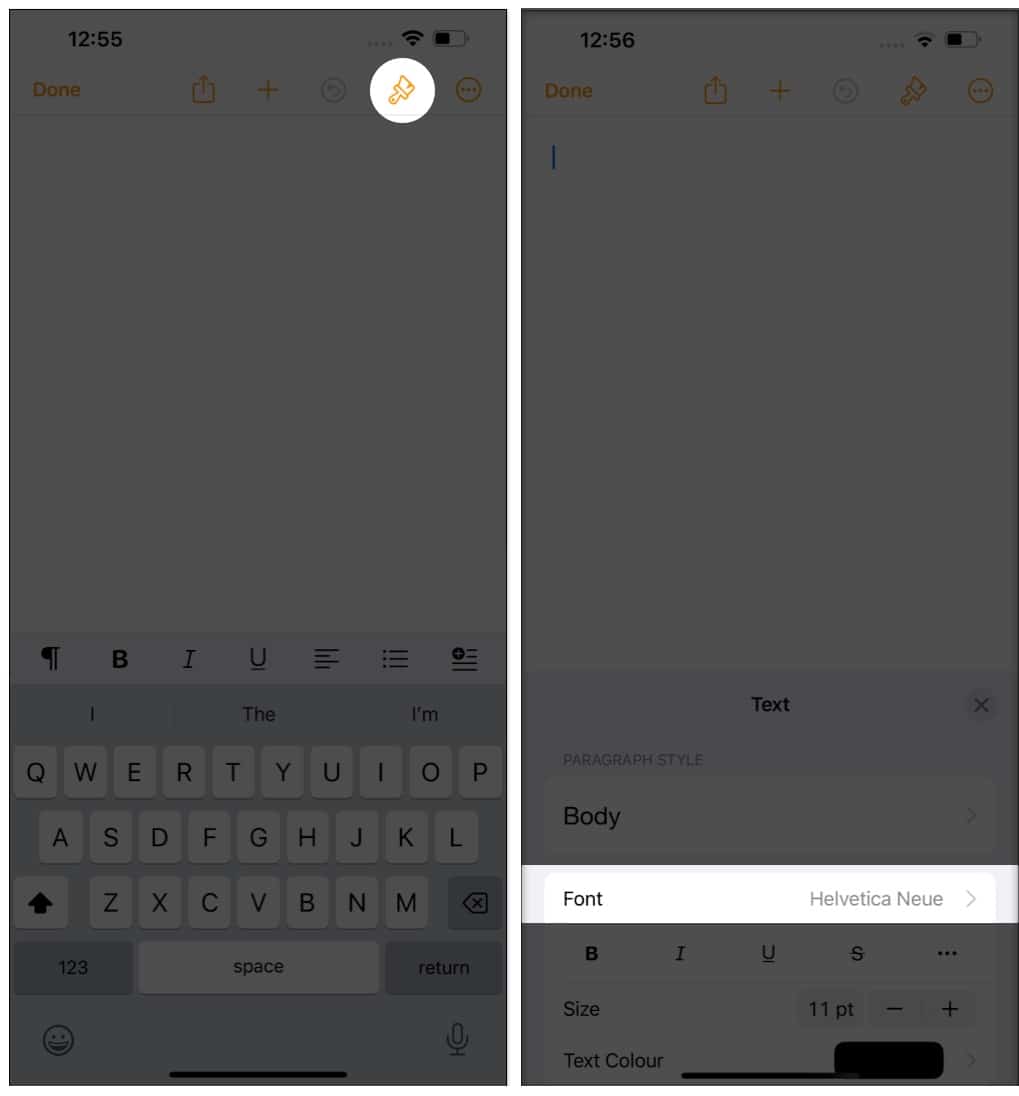
- Launch Apple’s Pages App.
- Now select Start Writing or Choose a Template.
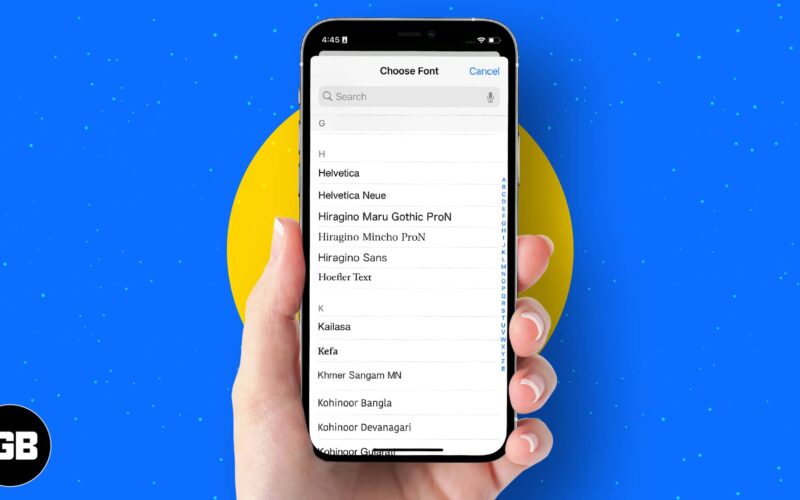
- Choose the Format icon (painter brush) ➝ Tap in front of Font.
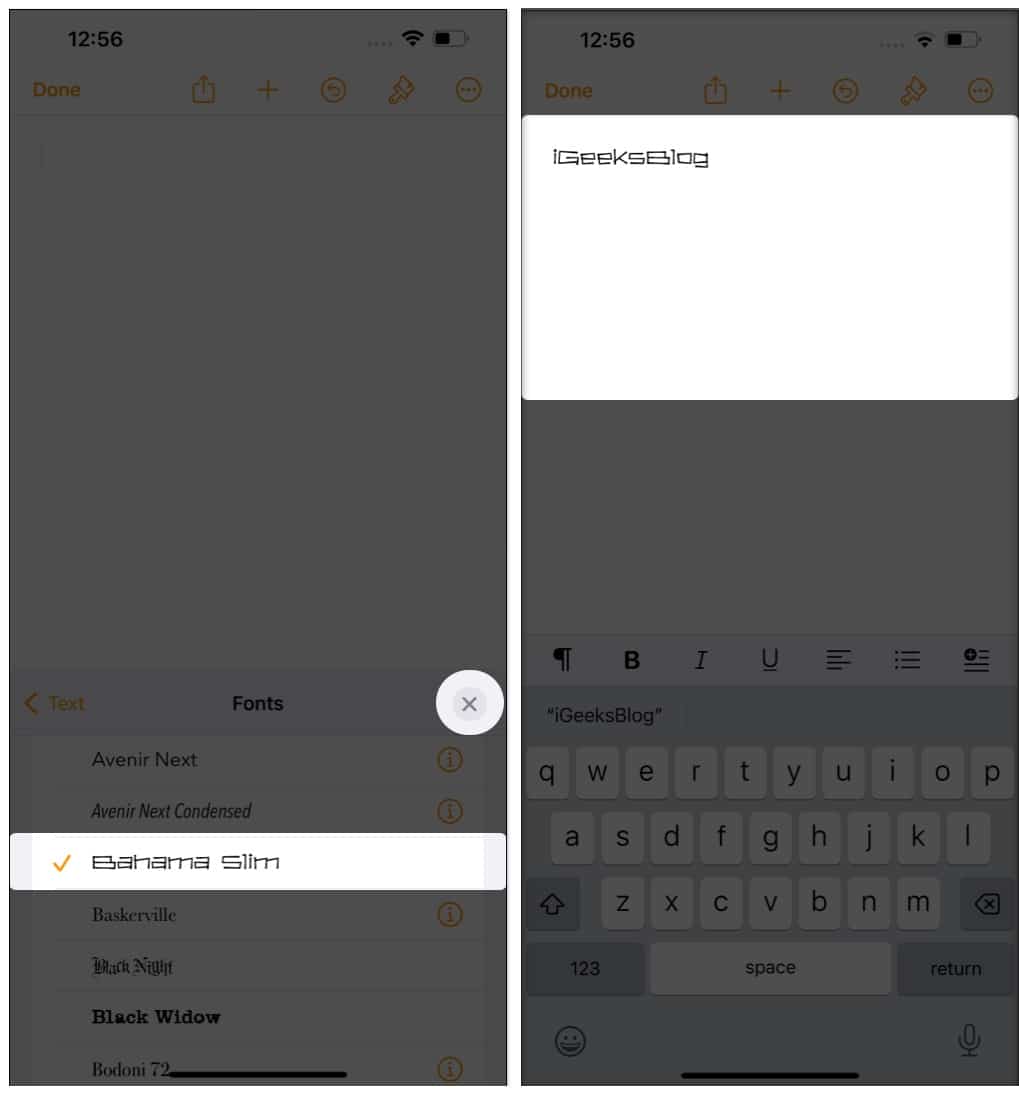
- Scroll and select the custom downloaded font.
- Tap the ‘x‘ button to close the pop-up.
Use custom font in unsupported apps
If you want to use custom fonts in your notes, messages, social media, or any text-supported apps, you need to install specialized keyboards. Here, I will show you how to do that.
- Download and launch the Fonts app.
- Tap Get Started and review the privacy policy. Now, customize your preferences and continue.
- Hit Next three times.
- Now, tap Add Now. It will redirect you to the Settings app.
- Here, select Keyboards and toggle on Fonts.
- Toggle on Allow Full Access and select Allow on the prompt.
- Get back to the Fonts app and tap Install next to the font you like.
- Select Install to confirm your choice.
Now, open any app where you can type and start typing using the customized font you’ve chosen. You will also see different font options above the keys. This way, you can use unique fonts to send messages on WhatsApp, write an Instagram bio, and much more.
If you don’t get the keyboard, tap and hold the globe icon in the bottom left corner and select Fonts.
Wish to resize the font? You may read our article on how to increase font size on iPhone.
However, if you forget which fonts you downloaded with the sets, you can always look them up. The process for viewing or even removing downloaded fonts is described below.
How to manage fonts on your iPhone
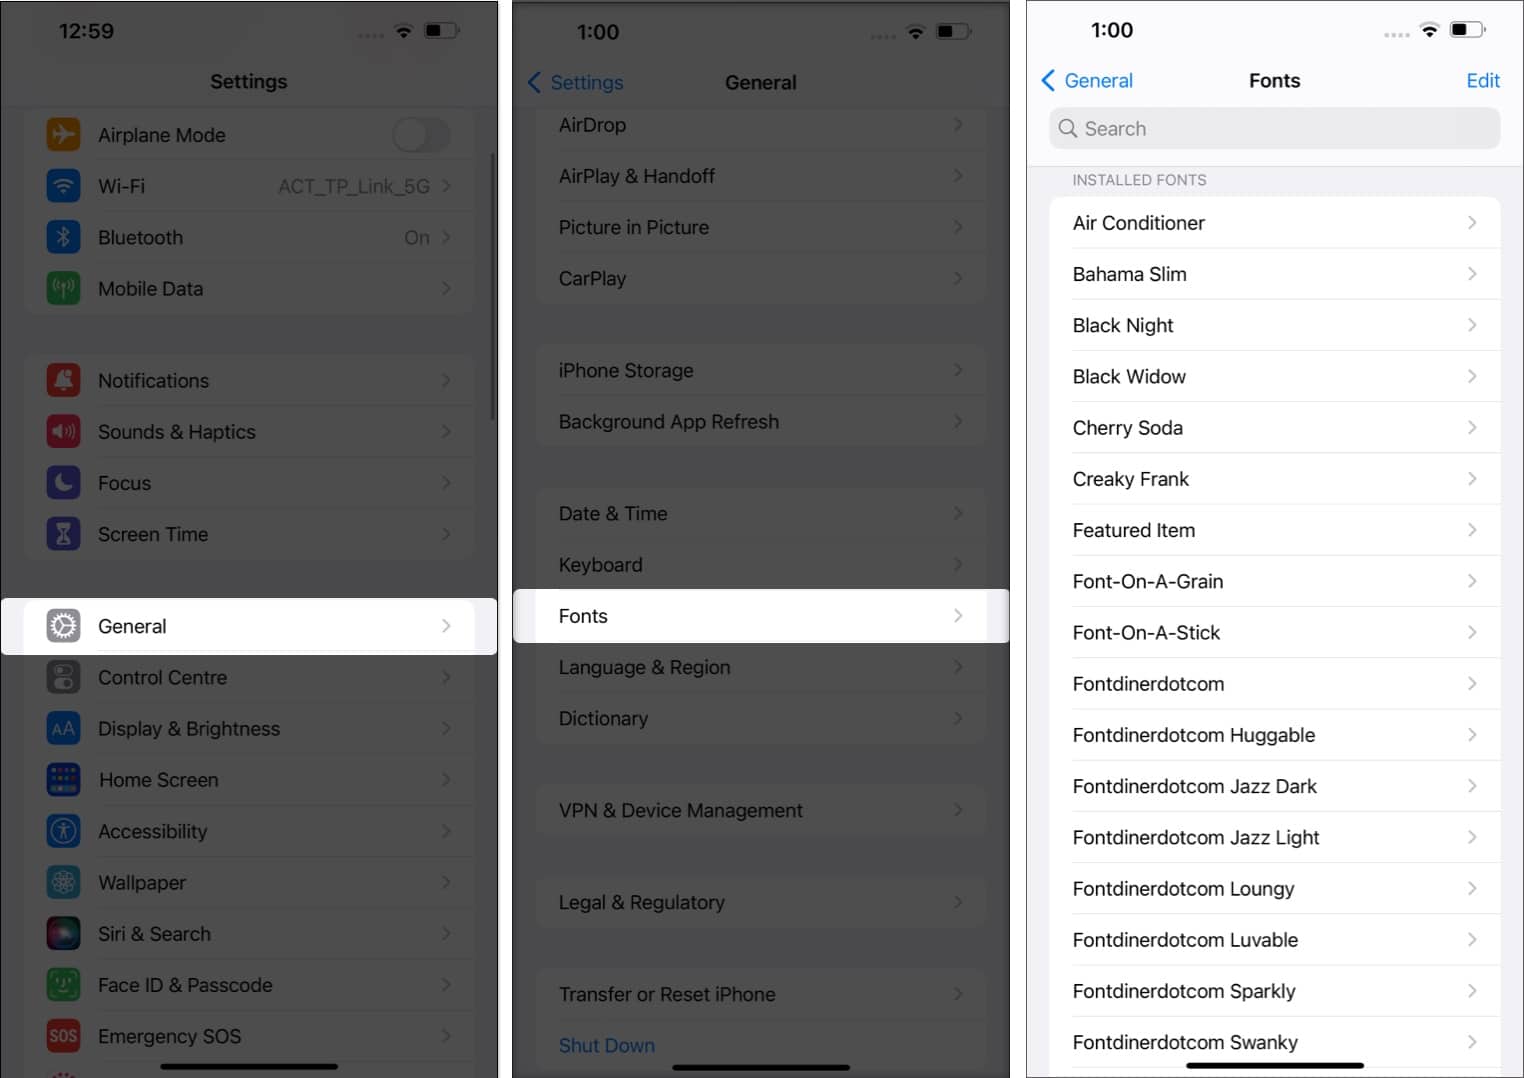
- Open the Settings app and tap General.
- Tap Fonts.
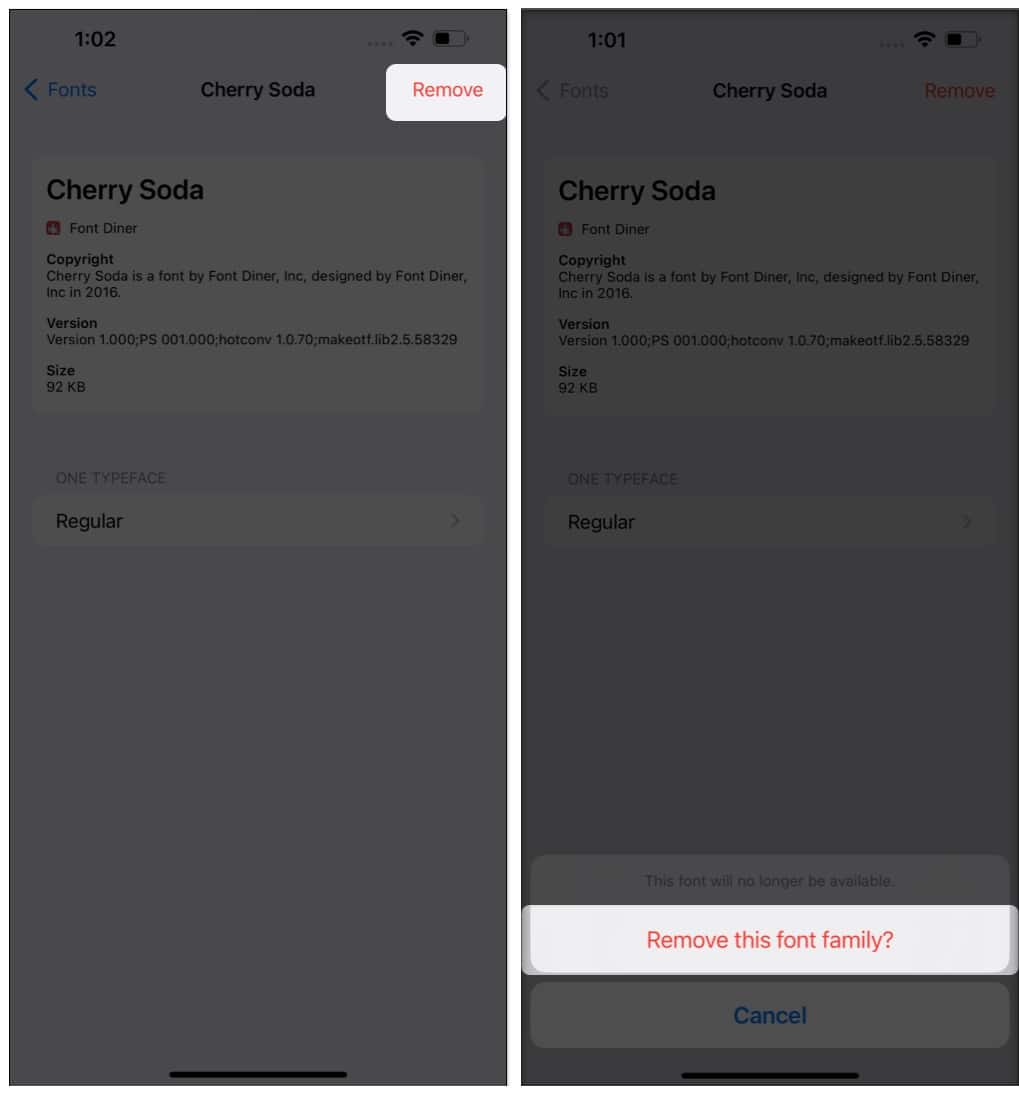
You can now view all the downloaded fonts. - Head to a custom font list. Now select which font family you want to remove. Here, I’m selecting Cherry Soda.
- Now, you can see the Font size, version, copyright information, and the app used to download the font.
- Select Remove.
- Select Remove this font family to confirm.
You can also remove a font by swiping right to left on a custom font name → Remove. Plus, to remove multiple fonts at once, click Edit → Select Fonts/Select All → Remove.
Like custom fonts?
This is how you can install and change fonts on your iPhone and iPad. While it has some limitations, like app compatibility, it still lets you explore different styles to enhance your work. Feel free to get creative and make your texts stand out.
Did you like the custom fonts feature? Share your views with us in the comment section below.
FAQs
When preparing a presentation, a word document, or an Instagram direct message, diverse typefaces can help you make a good first impression with unique fonts.
Only certain apps that support compatible font libraries will appear in Settings. Font Diner is one of those applications.
No, you cannot. The installed customized fonts on the iPhone and iPad can be used only in supported apps such as Notes, Pages, Numbers, iMessage, Instagram, Twitter, Word, Powerpoint, Autodesk Sketchbook, and so on.
More from us:

