Home – How-to – 20 tips to use Apple Notes on iPhone or iPad like a pro

20 tips to use Apple Notes on iPhone or iPad like a pro

Do more with the Apple Notes app on your iPhone or iPad
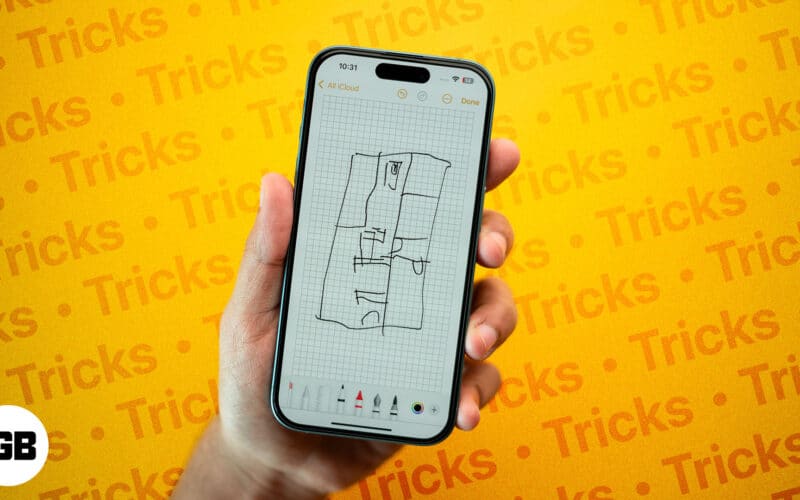
Apple Notes App Tips and Tricks for iPhone and iPad

During my quest to find the perfect note-taking app, I spent hours going through several paid and free options on the App Store. However, I later realized I already had the best note-taking app installed on my iPhone. Indeed, it was the default Apple Notes app, which packs plenty of features you can use—for free!

Apple Notes App Tips and Tricks for iPhone and iPad

Here are some of the best Apple Notes tips and tricks to help you enhance your note-taking experience on your iPhone or iPad.

Become an iOS 18 Master: Download Your Free eBook đź“š Now!

1. Use iCloud for syncing: Access your notes across all Apple devices

Creating notes inside the iCloud folder lets you access and edit your notes across all of your Apple devices. Here’s how to enable the iCloud folder in the Notes app:

  1. Open Settings on your iPhone and tap your profile icon at the top.

    Accessing iCloud settings in iPhone Settings app
  2. Select iCloud. Now, tap Notes and then turn on the toggle for Sync this iPhone/iPad.

    Enabling iCloud sync for Apple Notes app
  3. Open the Notes app and go to the iCloud folder. Any note you add in this folder will be backed up to iCloud and available on all your other Apple devices using the same Apple Account.

2. Formatting options: Style your text with various fonts and sizes

The Notes app provides multiple formatting options to stylize your text. You have the option to bold and underline text, use italics, headers, block quotes, use text alignment and so on.

Tap the Aa button at the top of the keyboard, and you will see various formatting options. To add formatting to an existing text, select the text and then choose the formatting option.

Changing text style in Apple's Notes app on an iPhone.

To add content in a tabular format, the Notes app lets you create a table inside a note. Tap the table icon on the toolbar to add a table. Tap the three-dot icon next to a column or a row to insert more columns or rows in the table.

Adding a table in Notes app and inserting new rows and columns into it

3. Highlight text in Apple Notes

If you’re adding a lot of content in a single note in Apple Notes, finding key points will eventually become a bit difficult. To avoid this, you can use the built-in highlighter in the Notes app to highlight and emphasize important parts of the text.

  1. Select the text you want to highlight.
  2. Tap the Aa icon at the top of the keyboard and select the highlighter pen icon.
  3. Tap the circular dot next to it to choose a color of your choice to highlight the text.

    Selecting and highlighting text in the iOS Notes app

4. Drawing and sketching: Create illustrations in your notes

Apple’s Notes app lets you draw and create illustrations, and you can use it to add flowcharts, diagrams, and various other annotations to accompany your text.

Tap the pen icon at the bottom of the Notes app. Select a pen tool of your choice and the color with which you want to draw and begin doodling. You can use the eraser tool to remove and clean up what you’ve written.

Doodling in a note in the Apple Notes app on an iPhone

5. Insert photos, files, and attachments into notes

Besides allowing you to create illustrations to add more context to a note, Apple also lets you insert images, audio, files, and any sort of attachment in your notes in the Apple Notes app.

To do this, tap the attachment icon at the bottom and select what you want to attach to the note. You can add photos, videos, or insert documents from the Files app. You can also capture a photo or a video in real time and attach it to the note.

If you want to resize a photo, tap on the attached photo and drag it along its four corners.

You can also edit the size of the attachment preview. Tap the three-dot icon, select Attachment View, and choose whether you want a small or a large preview of the attachment inside the note.

6. Add Voice Memos to notes and automatically generate the transcript

For times when you want to insert additional context or comments to a note, you can quickly record and attach a voice note to your notes in Apple Notes.

Tap the attachment icon and select Record Audio. Once you add the recording, you can also check the transcript for the audio. Tap on the transcript to expand and view it for the full duration of the voice note playback.

Adding a voice note to a note in Apple Notes and seeing its transcript

7. Solve mathematical equations using Math Results

Math Results is one of the best new features in iOS 18. The Notes app can automatically suggest and insert the solution when you type a mathematical equation. This also works with handwritten notes using Apple Pencil on your iPad.

  1. Tap the three-dot icon in the top right corner of a new note and select Math Results.
  2. Select Suggest Results if you only want to see the solution and then decide to keep it, or select Insert Results if you want the app to enter the solution automatically.
  3. Type in an expression you want an answer to and append it with an equals sign (=). Math Notes will suggest the answer as an inline text. Hit the space key on your keyboard to insert it.

    Getting answers to mathematical expressions using Math Notes in Apple Notes app

8. Create collapsible sections on Apple Notes

Another Apple Notes feature in iOS 18 is adding headings and subheadings to your notes and creating collapsible sections. This lets you fit more content in your notes without hampering readability.

  1. Select the text you want to convert to a heading or a subheading.
  2. Tap the Aa icon at the top of the keyboard and select Heading or Subheading.
  3. By default, the heading or subheading you create is expanded. But if you want to collapse it, simply tap it and hit the arrow to its left. Tap it again to expand it and view the text under it.

    Creating a heading in a note in the Notes app on an iPhone

9. Correct errors and refine your handwriting (iPad-only)

If you’re using the Apple Pencil on your iPad, spelling errors are automatically detected in your handwriting. Tap the underlined error to insert the correct version of the spelling. The feature uses the same handwriting as yours while it fixes the error.

iOS 18 also adds a new feature called Auto Refine Handwriting, which smoothens and straightens your handwriting, making it legible and easier to read.

  1. Tap the pencil icon and select the three-dot button in the pencil menu.
  2. Turn on the toggle for Auto-refine Handwriting.

    Turning on the Auto refine Handwriting option in the Notes app on an iPad

10. Use lined or gridded backgrounds in Apple Notes

If you’re using your Apple Pencil to write notes, aligning text on a blank page can get difficult. Enabling grids and lines can certainly help. Even if you’re typing on the Notes app on your iPhone, you can still enable grids and lines to keep your text clean and well organized.

  1. Tap the three-dot icon in the top right corner and select Lines and Grids.
  2. Select the line or grid style you want to use.

    Select Lines and Grids in Notes menu on iPhone

Alternatively, you can apply lines or grids to notes by default:

  1. Open the Settings app.
  2. Tap Apps and select Notes.
  3. Select Lines & Grids. Choose the preferred grid or the line system.

    Applying lines and grids to notes in the Apple Notes app by default

11. Protect sensitive notes with a password

If you’re using the Notes app to store important information and documents, consider adding a layer of security. You can protect these notes with a password.

  1. Open Settings.
  2. Tap Apps and select Notes.
  3. Select Password. Select whether you want to lock the On my iPhone/iPad folder or the iCloud folder. You can either create a separate passcode or use your existing iPhone/iPad passcode. You can also use your Face ID or Touch ID.

    Setting up a lock method for notes in the Apple Notes app
  4. Now, go back to the Notes app. Tap and hold the note you want to lock and select Lock Note. You can now lock the note using Face ID, Touch ID, or passcode.

    Locking a note in the Apple Notes app

However, you cannot lock a note that contains audio, video, file attachments, and tags.

12. Organize notes with folders in Apple Notes

The most used app on my iPad is the Notes app. I create a document for everything from shopping lists, chapter summaries from a book, or notes from a podcast. This leaves me with a ton of notes, and segregating them using multiple folders makes it easy to keep everything organized.

  1. Tap the Folders option to go to the screen that displays all the folders in the Notes app.
  2. Tap the add folder button in the bottom-left corner. You can either create a folder in your local storage or in iCloud. Select the location and give a name to your folder.
  3. Now, you can move your existing notes to this new folder to organize them. Simply tap and hold on a note, select Move, and then choose the folder you want to move it into.
  4. Additionally, you can also turn it into a Smart Folder by tapping Make Into Smart Folder. This lets you add notes to this newly created folder based on the rules or filters you select. All the notes on your device that match the selected filters will be added to this folder. Further, any note that you create that follows the set rules and the filters will automatically be inserted into this folder.

    Creating a folder in the Apple Notes app

You can also convert an existing folder into a Smart Folder. Tap on the Edit button at the top, select the three-dot button next to the folder, and select Convert to Smart Folder.

Converting an existing folder into a Smart Folder in Apple Notes app

13. Create tags to quickly access notes

Another way to organize your notes in Apple Notes is to use tags. This lets you quickly browse and open notes that contain the respective tag.

All you need to do is, inside the note you want to tag, type a tag in the following format: #name-of-tag. If you’re adding multiple words to the tag, they must be separated with a dash (-) character.

Once you do this, the note will be linked to all the respective tags present inside it. All the created tags are on the Folders page in the Notes app.

Adding a tag to a note and checking all linked notes in the Apple Notes app

    To ensure the tags are automatically recognized, go to Settings → Apps → Notes and turn on Auto Convert to Tag.

    14. Scan and store physical documents on the Notes app

    Apple lets you scan a physical document using the Notes app to create a digital copy of it. This way, you don’t have to carry a hard copy of your documents with you, minimizing the risk of losing or damaging them.

    1. Tap the attachment icon at the bottom and select Scan Documents.
    2. This will open the camera. Use it to frame the document properly.
    3. Capture all pages of the document and tap Save. This will attach and save the document to the Notes app. You can swipe/left or right to view different pages in the document.

      Scanning documents in the iPhone Notes app

    15. Collaborate with other users in Apple Notes

    If you’re working on a project with your team and you plan to use the Apple Notes app on your iPhone or iPad, Apple has you covered with the collaboration feature. Thanks to it, you can share documents with other users and invite them to collaborate with you in the Notes app.

    Please note that you can only collaborate on documents in the iCloud folder. To enable the iCloud folder, go to Settings, tap your name, select iCloud, and enable Notes.

    1. Open the note you want to collaborate.
    2. Tap the share icon at the top and make sure you’ve selected Collaborate in the drop-down below it.
    3. Tap the Only Invited People option and set the relevant permissions. Tap Done to save the changes.

      Configuring collaboration permissions for a note in the Apple Notes app before sharing it
    4. Select the app of your choice and share the invite link with the user.

    16. Pin important notes at the top of the folder

    I often refer to a note on my iPhone that contains my proof of identity. However, it’s a struggle to find it when it gets lost in the sea of all the other notes I’ve stored. I only recently learned that you can pin selected notes so that they always stay on top of your list.

    1. Tap and hold on the note you want to pin.
    2. Select Pin Note, and the note will be pinned to the top of the folder in the Notes app.

      Pinning a note in the iOS Notes app on an iPhone

    You can use the search feature in Notes if you’re looking for a sentence that contains a specific phrase or a word in a long, text-heavy document. Use the search feature inside a folder, and type the phrase, word, or sentence you want to find.

    You can also find and replace text inside a note. Tap the three-dot icon at the top, select Find in Note and type the word you want to find. Tap the up (^) or down (v) arrowhead icons to see every instance of the word in the note.

    Finding text in the Apple Notes app

    Then, tap on the search icon to see the Find and Replace. Tap on it, enter the replacement text in the appropriate text field, and tap Replace.

    Finding and replacing a word in the Apple Notes app on an iPhone

    18. Convert handwriting to typographic text (iPad-only)

    Publishing a handwritten note or sharing it in a professional setting may not be the best idea. Apple Notes lets you convert handwriting to typographic text, which makes it easier to read and understand the document.

    Select a piece of handwritten text inside a note. Tap Copy as Text in the pop-up menu. This will copy the text to your clipboard, which you can paste anywhere. Once you do this, you’ll be able to view a typographic version of your handwriting.

    Using the Copy as Text option to copy a handwritten text in Apple Notes

    If you want to convert handwriting to text in real-time, use the pencil tool that has an A written over it. This will convert your handwriting to text as you write.

    19. Create a Quick Note

    You don’t have to open the Notes app and create a new note to quickly jot down your thoughts. The Quick Notes feature lets you take notes with just a tap of a button from the Control Center.

    1. Open the Control Center.
    2. Tap and hold an empty area and select Add a Control.
    3. Search for Quick Note and select the option.

      Adding the Quick Note control in iOS Control Center
    4. Now, open the Control Center, tap Quick Notes, enter the text and tap Save.

    If you’re using an iPad, you can swipe from the bottom left or the bottom right corner of the screen to open a quick note.

    1. Open Settings, go to Apps and select Notes.
    2. Tap Corner Gestures. Select Left Corner Swipe or Right Corner Swipe and assign the Quick Note action.
    3. The gestures work with your Apple Pencil by default. To ensure it works with your finger, turn on the Allow Finger to Swipe From Corner toggle.

      Configuring the Corner Gestures settings in the iPad Settings app
    4. Once you swipe from the bottom left or right corner, a quick note appears as a floating window. Enter the text and tap on Save to save it.

    20. Export notes as a PDF: Save and share notes in PDF format

    If you want to publish a document you’ve created in the Notes app, you may consider exporting it as a PDF file so that it can be accessed on any device.

    1. Tap the share icon in the note you want to export and select Markup.

      Accessing the Markup option on a note in Apple Notes
    2. Here, you can create annotations and fill any empty forms. Tap Done, select Save File To, and choose the desired destination in the Files app.

      Saving a note in the Apple Notes app a a PDF

    This will save the note as a PDF in your chosen destination. To access the note, go to this folder in the Files app.

    Wrapping Up

    We hope the above tips help you make the best use of the Apple Notes app on your iPhone and iPad. You can also take a look at Apple’s Pages app, which provides a superior set of features that help you craft your entire project in a single app. That said, if you’re still on the lookout for more options, you can read an article we published earlier featuring a list of some of the best note-taking apps on the App Store.

    Read more…

    Leave a Reply

    Your email address will not be published. Required fields are marked *