Running out of storage on a Mac is an issue that almost every Mac user faces at one point or another. Not only does the low storage limit your ability to install new apps and save important files, but it can also degrade your Mac’s performance.
Thankfully, there are multiple ways to free up storage space on a Mac. Keep reading to find out.
Table of Contents
How to check storage on Mac
Before you start removing stuff to reclaim storage on your Mac, knowing where most of your Mac’s storage is being used is essential to eliminate any risk of accidentally deleting any important stuff. Follow the steps below to check your Mac’s storage usage:
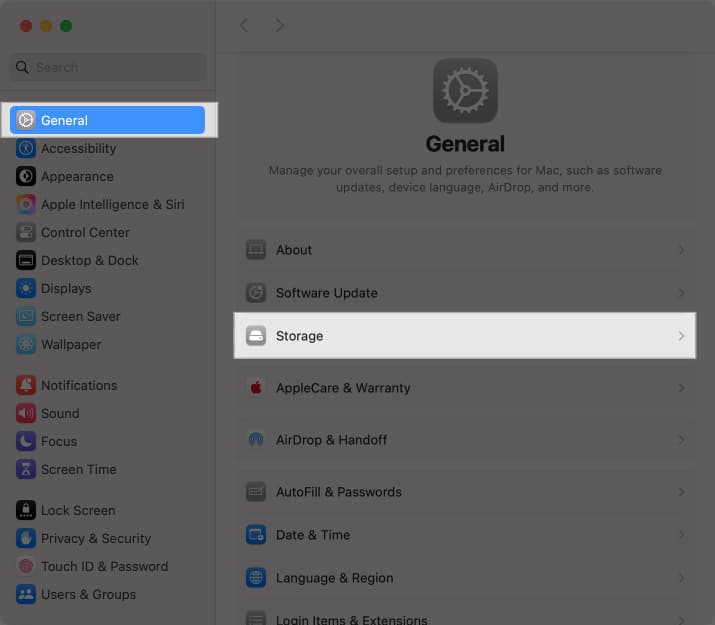
- Open the Settings app and select General on the left.
- Click on Storage on the right.
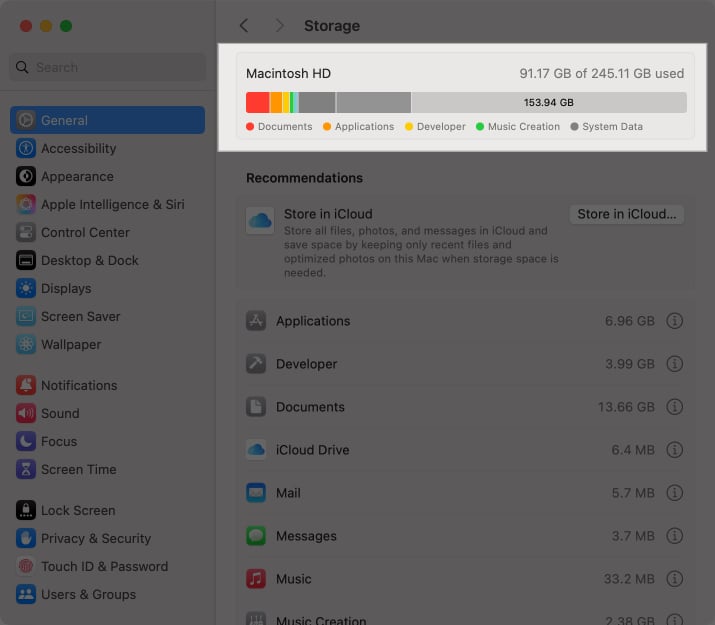
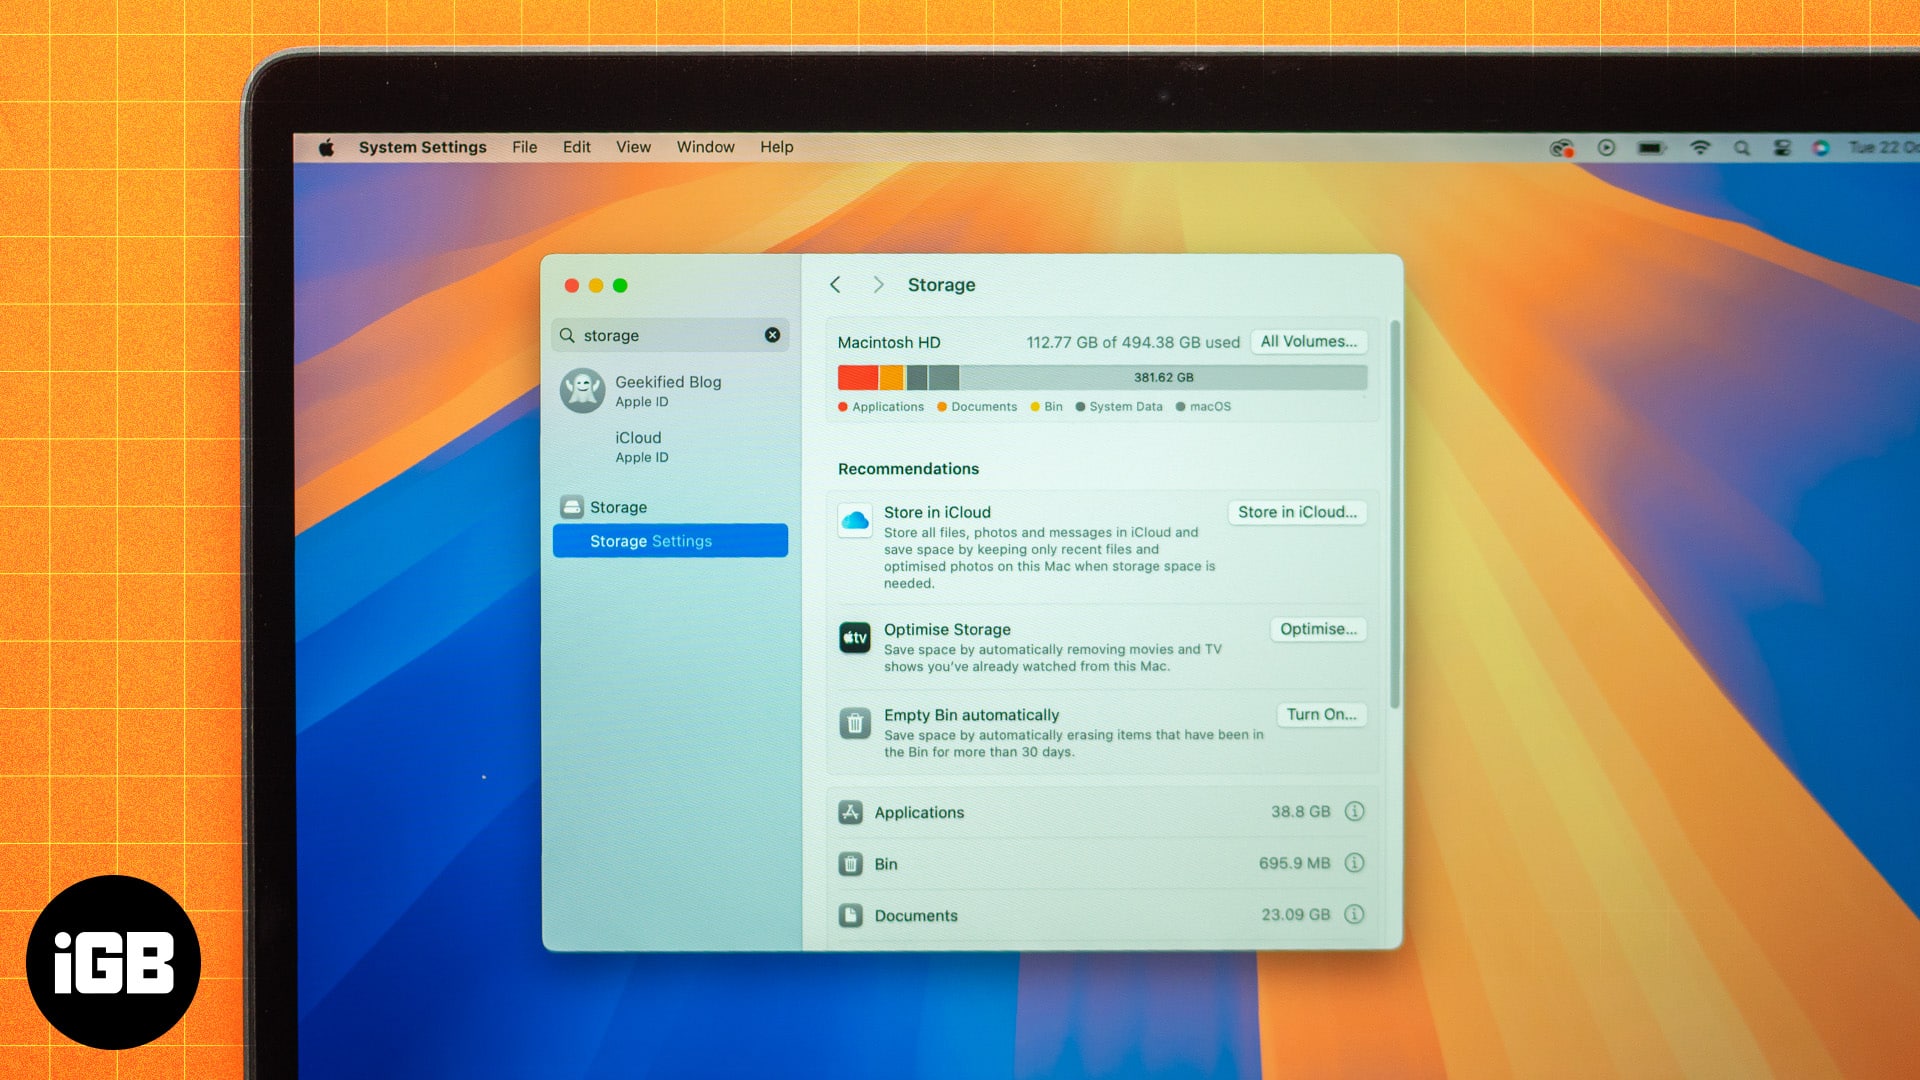
Your Mac will now give you a detailed breakup of your storage space by displaying how much space is occupied by what by classifying them into different categories such as Applications, Documents, Mail, and more. This information can help you comprehend which category is occupying an unusual amount of space, so you can confidently remove unnecessary stuff from it.
9 ways to free up disk space on Mac
Now that you know what’s eating the most storage on your Mac, here are all the ways to delete it and reclaim the lost storage space.
1. Empty Trash
While you may regularly delete unnecessary files from your Mac, the fact is that most of the time, it is not removed immediately and sent to the Trash Folder instead to ensure no important file is accidentally deleted from your Mac. As such, emptying the Trash folder is one of the simplest ways to free up space on your Mac. Here’s how:
- Right-click on the Trash icon in your Mac’s dock.
- Select the Empty Trash option in the contextual menu that appears.
2. Empty Trash automatically
While many of us habitually delete clutter on our desktop, only a few permanently delete items from the Trash, causing it to accumulate. This feature automatically erases items in the Trash for more than 30 days.
You can also select an item and press Control+Delete if you want to delete an item on the spot permanently.
3. Manage large files and downloads
It isn’t uncommon to forget about a downloaded file once its purpose is served instead of deleting it. Such downloaded files can easily consume a significant amount of storage space on your Mac. Hence, deleting the ones you no longer need is the way to go. Here’s how:
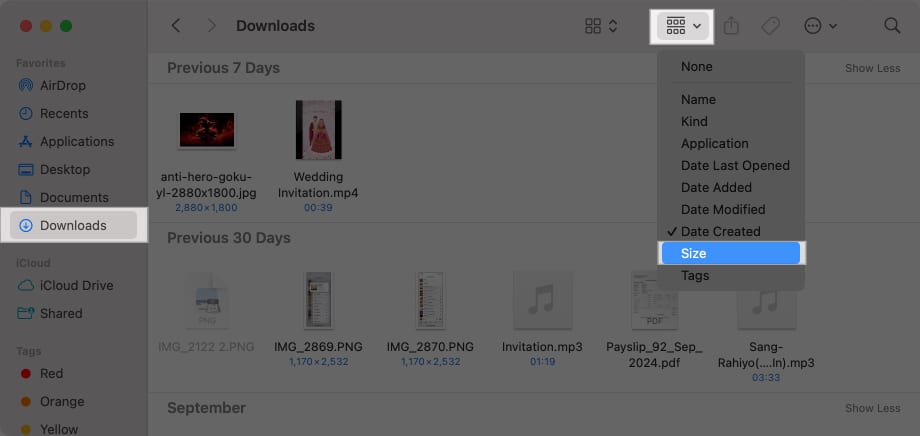
- Open Finder and select the Downloads folder from the left sidebar.
- Click the Sort button and select the Size option in the drop-down menu to sort the downloaded files by file size.
- Finally, delete the files you no longer need.
4. Uninstall unused apps
We often install many apps we only need for a specific time, then forget that they even exist on our Mac and sit comfortably in our storage, eating up the space. Identifying and removing such apps can free up much space on your Mac.
Here’s how to uninstall such apps on your Mac:
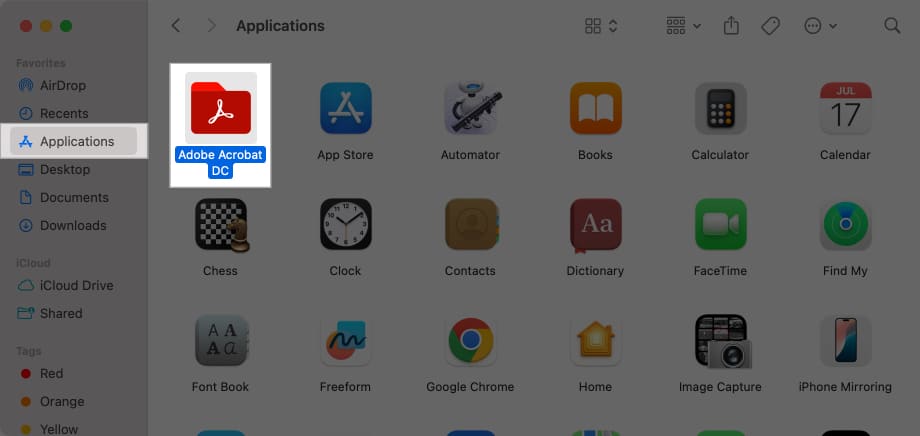
- Open the Finder window and select the Applications folder on the left.
- Here, select the unneeded app and drag it to the Trash.
- Be sure to empty the Trash as well.
5. Delete mail attachments
Like large files and downloads, mail attachments can also eat up a lot of disk space on your Mac. You can delete the old attachments without deleting the emails and stop the Mail app from automatically downloading mail attachments in the future. Here’s how:
- Open the Mail app.
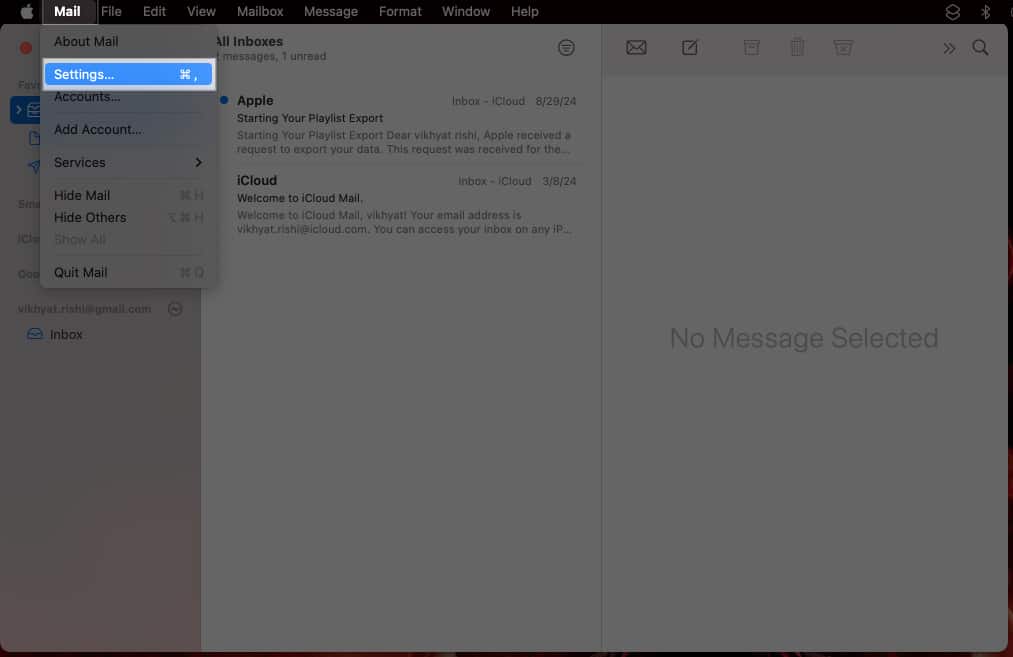
- Click the Mail button in the top menu bar, then select Settings in the drop-down menu.
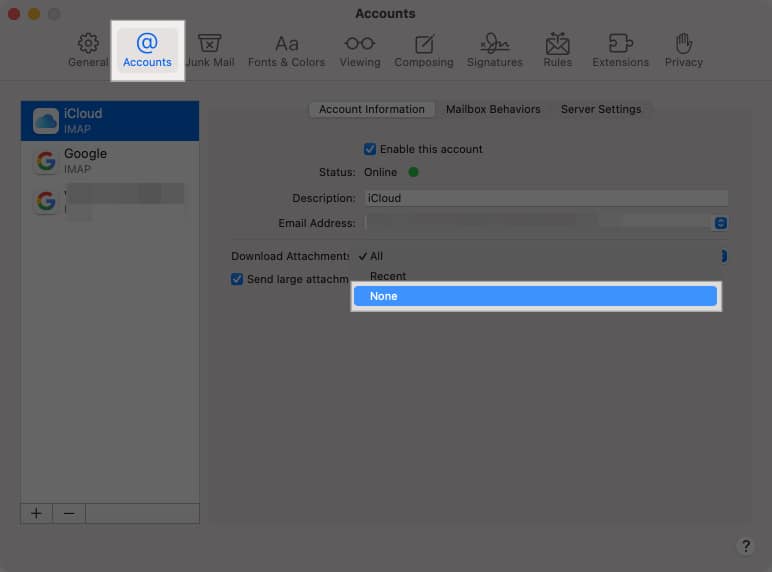
- Here, select the Accounts tab.
- Click the More button (with the up-down arrow) next to Download Attachments and choose the None option in the drop-down menu.
To delete old downloaded mail attachments:
- Open Finder, click Go in the menu bar, and select Go to Folder.
- Enter
~/Library/Mailand hit Return. - Locate and delete attachments from the Mail folder.
6. Clear cached files
Cache files are temporary files stored by macOS and apps to improve performance. However, these can accumulate and take up considerable space over time. You can avoid this by clearing the cache files on your Mac:
To clear cache files:
- Open Finder, click Go, and select Go to Folder.
- Type
~/Library/Cachesand hit Return. - Go through the folders and delete the contents inside each folder (not the folders themselves).
7. Remove old backups and iOS files
If you often back up your iPhone or iPad to your Mac, you will end up with multiple backup files on your Mac. These backup files can occupy considerable space in your Mac’s storage. So, it would be wise to build a habit of deleting previous backup files that are no longer needed before creating a new backup.
8. Optimize storage with macOS tools
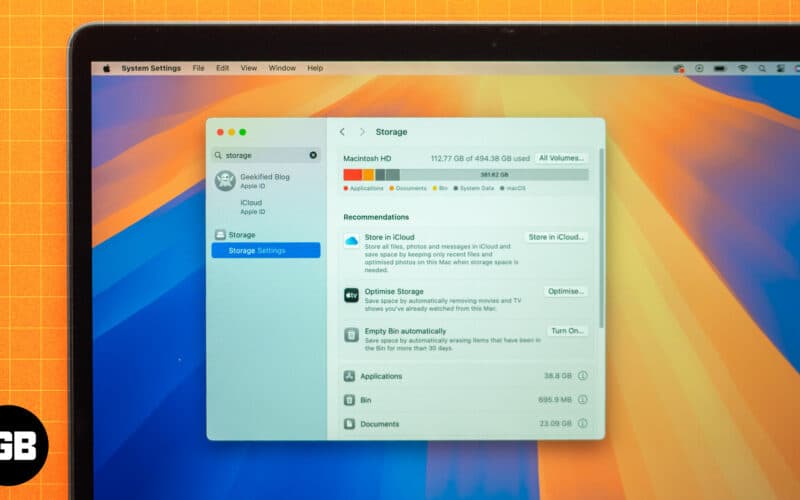
If managing your Mac’s storage feels like a hassle, Apple has a built-in utility that helps you optimize your storage space. To access it, go to the Storage Settings, as mentioned above. Under Recommendations, you’ll see system suggestions that you may implement to free up space on your Mac.
Store in iCloud
iCloud is a handy external storage space that helps declutter your Mac while ensuring you can easily access your files. The feature allows you to store all the files saved on your Desktop, Documents, Photos, and Messages.
When your Mac is low on storage, your Mac keeps only your recently opened files and space-saving versions of your photos to free up as much local space as needed.
Optimize Storage
We know how huge downloaded movies and TV shows are, especially those in HD resolution. So, this feature helps you save space by automatically removing your purchased Apple TV shows and movies after you’re done watching them. You can always download them again.
It also keeps your recent mail attachments to prevent bulky attachments from cluttering your drive, especially when you need that extra storage space.
9. Use iCloud or other cloud storage services
There’s no point in keeping your Mac’s storage filled with photos, videos, and other files you don’t frequently need when you access them on demand by storing them in cloud storage, such as iCloud, Google Drive, Dropbox, and more. A cloud-based service helps you keep your Mac storage free to install new apps and store more important data.
Consider using an external storage
If paying the monthly subscription cost for iCloud storage isn’t your fancy, you can opt for an external portable storage drive. Once you transfer large files like photos, videos, music, or iPhone backups to an external storage drive, you can enjoy additional free storage on your Mac. Moreover, this will also prevent your Mac’s internal storage drive from overloading.
Storage space reclaimed…
Those were some of the best ways to help you reclaim the lost disk space on your Mac. Once you’ve freed up space, remember to keep track of your storage regularly, as it will make it easy for you to manage it and prevent low-space issues in the future.
If you have other ways you think should be on this list, share them in the comments.
Read more:

