Apple’s Siri is mainly thought of as a voice assistant designed to perform various tasks using voice commands. However, dictating commands isn’t sometimes feasible, courtesy of the environment you are in at that particular moment.
For such instances, Apple lets you interact with Siri via text. The Type to Siri feature is most useful in quiet environments or for users who prefer typing over speaking. Keep reading to learn how to enable Type to Siri on Apple devices and use it in the most effective manner.
What is Type to Siri?
Type to Siri is a feature that lets you use your iPhone’s or Mac’s keyboard to input your queries and commands instead of speaking them. It gives you greater control over the privacy and accuracy of your commands and requests, especially in noisy environments where Siri might face difficulty in listening to you or in ones where silence is required, such as meeting halls and libraries.
The feature makes Siri accessible even to users with vocal disabilities.
Why use Type to Siri instead of talking?
Here are a few reasons why many Apple users prefer typing to Siri instead of interacting with it via voice commands:
- Privacy concerns: When you have people around you, they can hear or eavesdrop on what you are asking Siri, which can jeopardize your privacy. With Type to Siri, you can ensure your queries remain private, even in public spaces. You can further enhance your privacy by deleting Siri history.
- Noisy environment: No matter how good the microphones on your iPhone are, Siri might find it difficult to listen to your queries in noisy surroundings.
- Accessibility needs: Type to Siri is most useful for those users with speech impairment or who find speaking difficult in certain situations.
- Language barrier: It is not uncommon for Siri to sometimes misinterpret voice commands due to unfamiliar accents or regional pronunciations. Typing your queries to Siri eliminates these issues and ensures your commands are understood accurately.
- Personal preference: Some users simply feel more comfortable typing instead of speaking, making this feature an ideal alternative.
How to turn on Type to Siri
While the Type to Siri feature has been available on Apple devices for years now, you no longer need to take a longer route to enable it if you own an Apple Intelligence-supported device. This is because the Type to Siri feature is enabled by default on iPhones and Macs running on iOS 18.1 and macOS Sequoia 15.1 or later, which are compatible with Apple Intelligence.
On iPhone or iPad
Here’s how to enable Type to Siri on Apple Intelligence-supported iPhones:
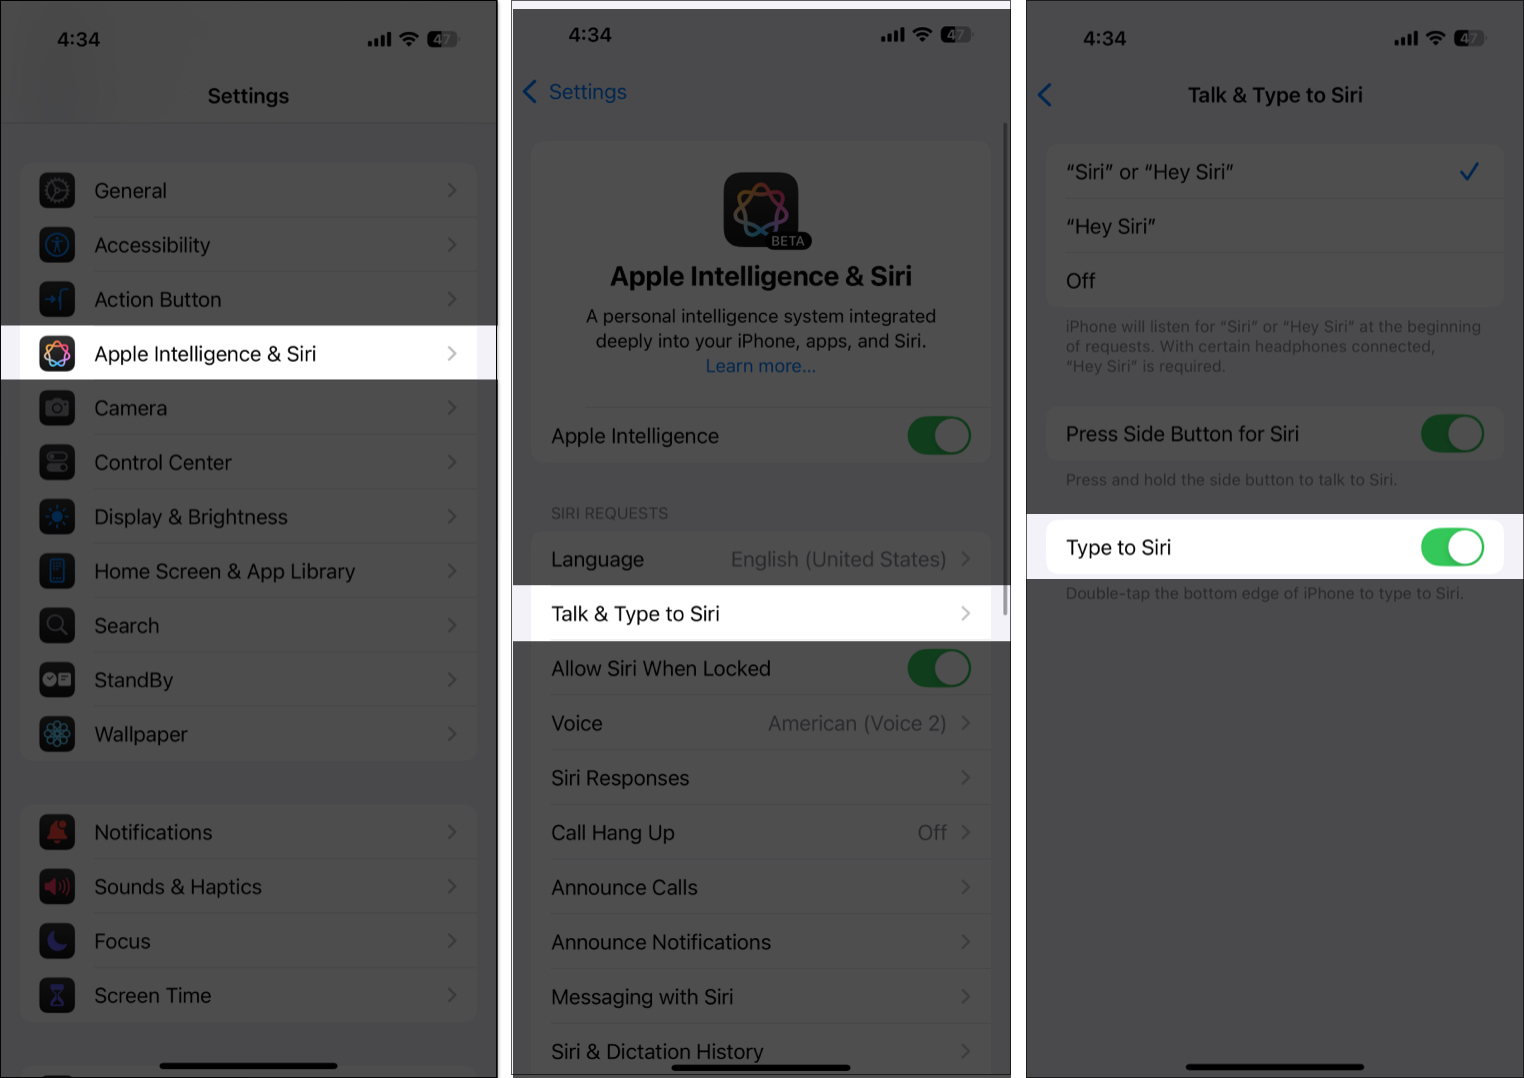
- Open the Settings app and head to Apple Intelligence & Siri.
- Next, tap on Talk & Type to Siri under the Siri Requests section.
- Here, make sure the Type to Siri toggle is on.
To enable Type to Siri on non-Apple Intelligence-supported iPhones, follow these steps:
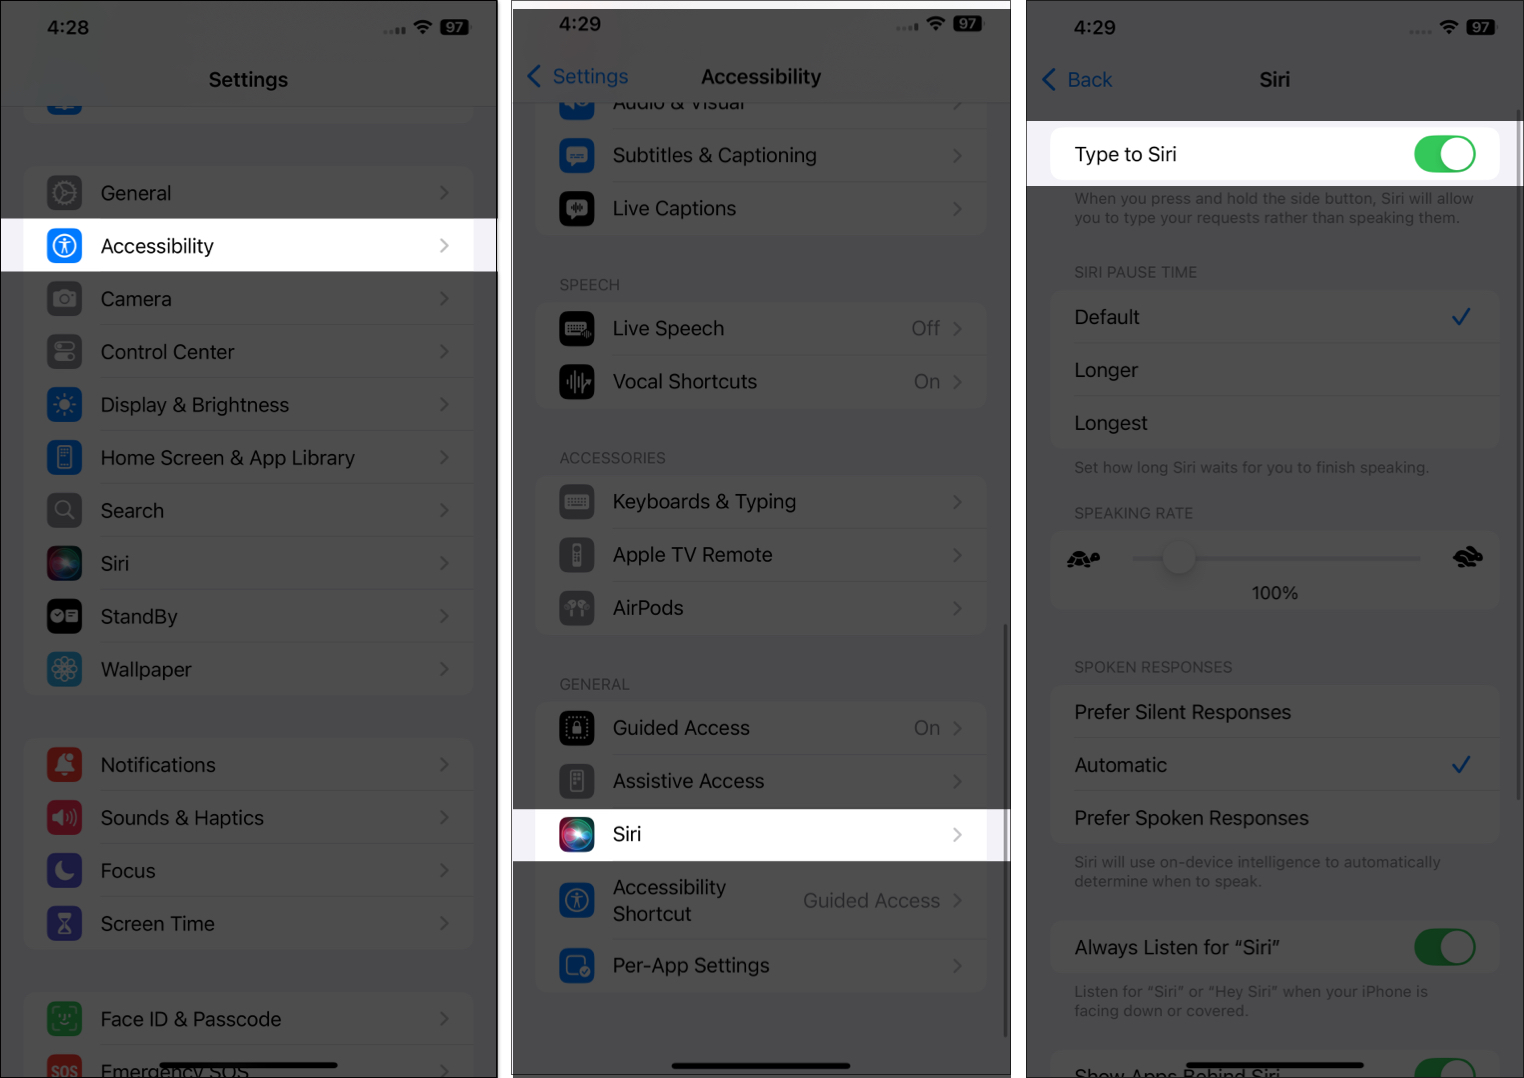
- Open Settings and tap Accessibility.
- Here, scroll down to the General section and tap on Siri.
- Next, toggle on Type to Siri.
On Mac
Unlike iPhones, you can not turn on or off Type to Siri on Apple Intelligence-supported Macs, as it is enabled by default. You can only change the way you access it. On the other hand, you still need to enable Type to Siri manually on non-Apple Intelligence-supported Macs.
Here’s how you enable Type to Siri on Apple Intelligence-supported iPhones:
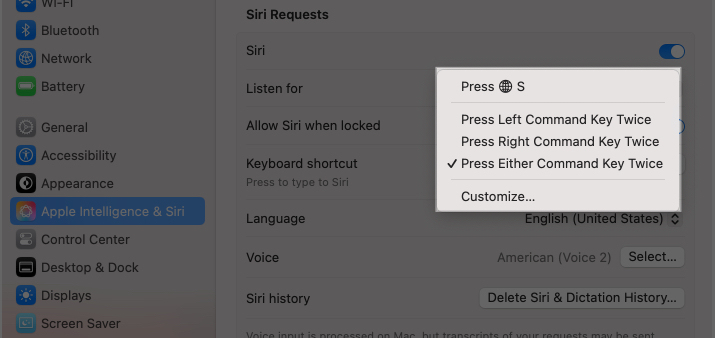
- Open the Settings app and select Apple Intelligence & Siri from the left sidebar.
- Next, click on the up-down arrow button next to Keyboard Shortcut and select which Command key shortcut you want to use to access Type to Siri.
You can enable Type to Siri on non-Apple Intelligence-supported Macs like this:
- Open the Settings app and select Accessibility on the left.
- Scroll down and click on Siri in the right window.
- Next, toggle on Type to Siri.
- Now, click the Siri Settings button.
- Then, click on the up-down arrow button next to Keyboard Shortcut and select a keyboard shortcut you want to use to access Type to Siri.
How to use Type to Siri
Now that you have enabled Type to Siri on your iPhone, iPad, and Mac, you can use Siri by typing in your requests directly instead of speaking them. However, you can not use the regular Siri activation command to wake it up to use Type to Siri.
Below, I have detailed how you can access and use Type to Siri on your iPhone, iPad, and Mac.
On iPhone or iPad
Using Type to Siri on iPhones is different for models that support and do not support Apple Intelligence.
On Apple Intelligence-supported iPhones:
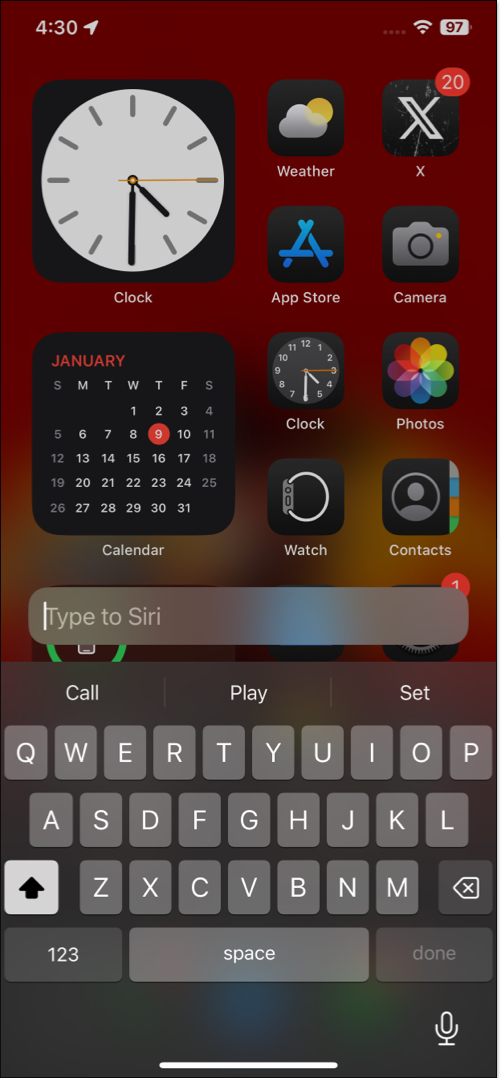
- Double-tap the iPhone’s bottom edge to bring up the Type to Siri interface.
- Now, type in what you want to ask Siri.
- As you type, Apple Intelligence will offer suggestions based on the most common Siri requests. You can either use one of the suggestions or type your command.
- Once done, hit the Send button (with an upward-pointing arrow) button, and Siri will respond as usual, but without making any sound.
With Apple Intelligence, Siri can maintain context between messages for natural back-and-forth conversations.
On non-Apple Intelligence-supported iPhones:
- Press and hold the Side button to bring up Type to Siri.
- Here, type in your request and hit the Send button.
Once done, Siri will respond and perform what you asked.
On Mac
The method to access and use Type to Siri on both Apple Intelligence-supported and non-supported Macs is the same. Here’s how it is done:
- Press the Command key shortcut you selected while setting up Type to Siri, and a Type to Siri text box will appear in the top-right corner of the screen.
- Enter your request and hit Return, and Siri will do the job.
Signing off…
Type to Siri is an exceptional accessibility feature that further enhances the versatility of the new Apple Intelligence-powered Siri. With this option enabled, you can switch between typing and speaking to Siri based on your preferences or the situation.
What do you think about this feature? Let us know in the comments below.
FAQs
While you can use Siri offline to perform some basic tasks, such as opening an app or setting alarms, more complex commands, such as searching the web or retrieving information, require an active internet connection. Like the standard voice-based Siri, this feature relies on Apple’s servers to process and interpret most commands or queries.
Yes, you can still use voice commands even if Type to Siri is enabled. Having Type to Siri enabled does not disable voice interaction. You simply get an option to type your queries.
Read more:

