Twitter is one of the largest social media platforms. We follow politicians, brands, famous personalities according to our preference. Further, Twitter’s direct message has private conversations. To safeguard all these against hackers and unnecessary access, it is vital to turn on two-factor authentication. This will act as an extra security check after you have entered the correct password. Let me show how to enable 2FA for Twitter on iPhone, iPad, and Computer.
- How to Enable 2FA for Twitter on iPhone and iPad
- Enable 2FA via Text Message for Twitter on Computer
- How to Enable 2FA via an Authentication App for Twitter on Computer
- How to Enable 2FA via a Security Key for Twitter on Computer
- Generate a Temporary Password for Twitter on iPhone and iPad
- Turn off Two-Factor Authentication for Twitter
How to Enable 2FA for Twitter on iPhone and iPad
Enable 2FA via Text Message
- Open the Twitter app, tap on the Hamburger icon from the top left.
- Tap on Settings and privacy.
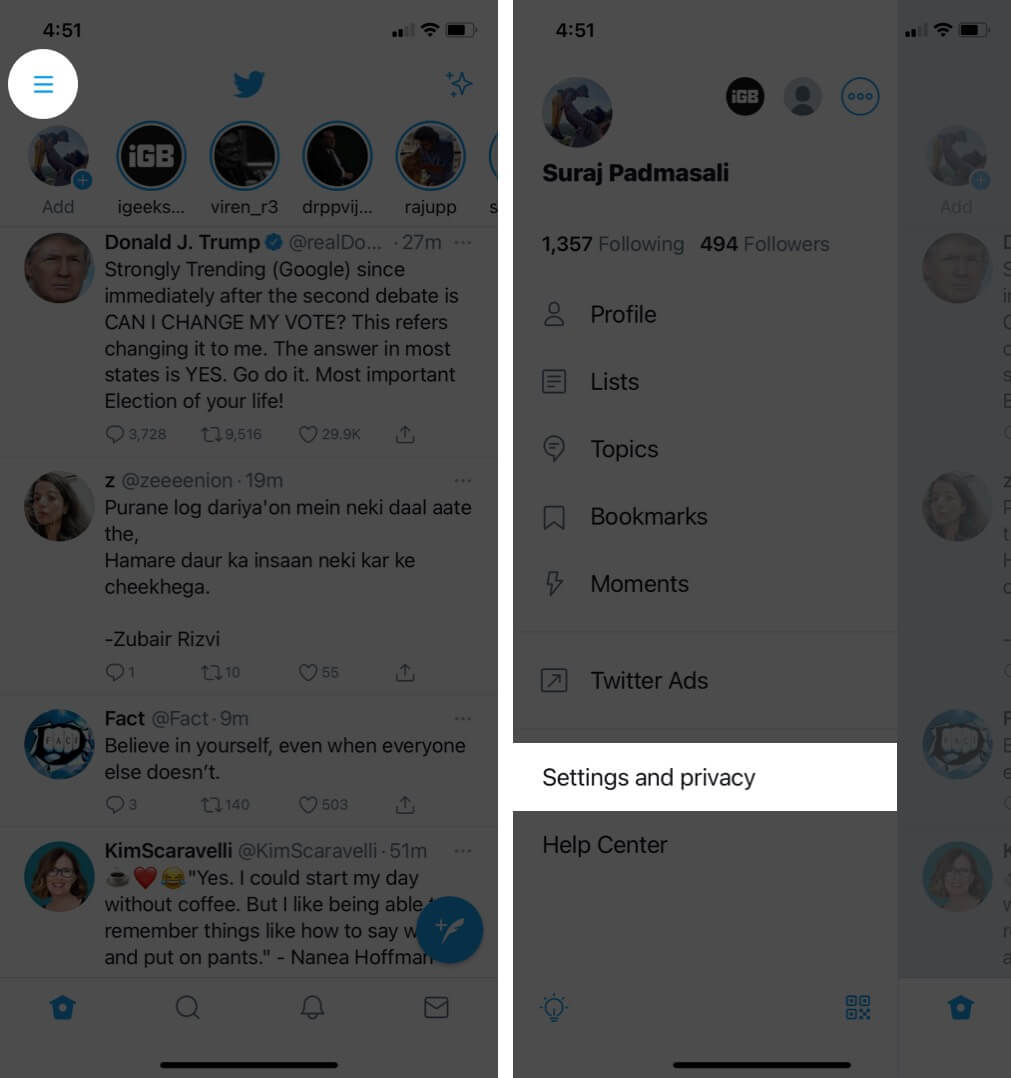
- Tap on Account → Security → Two-factor authentication.
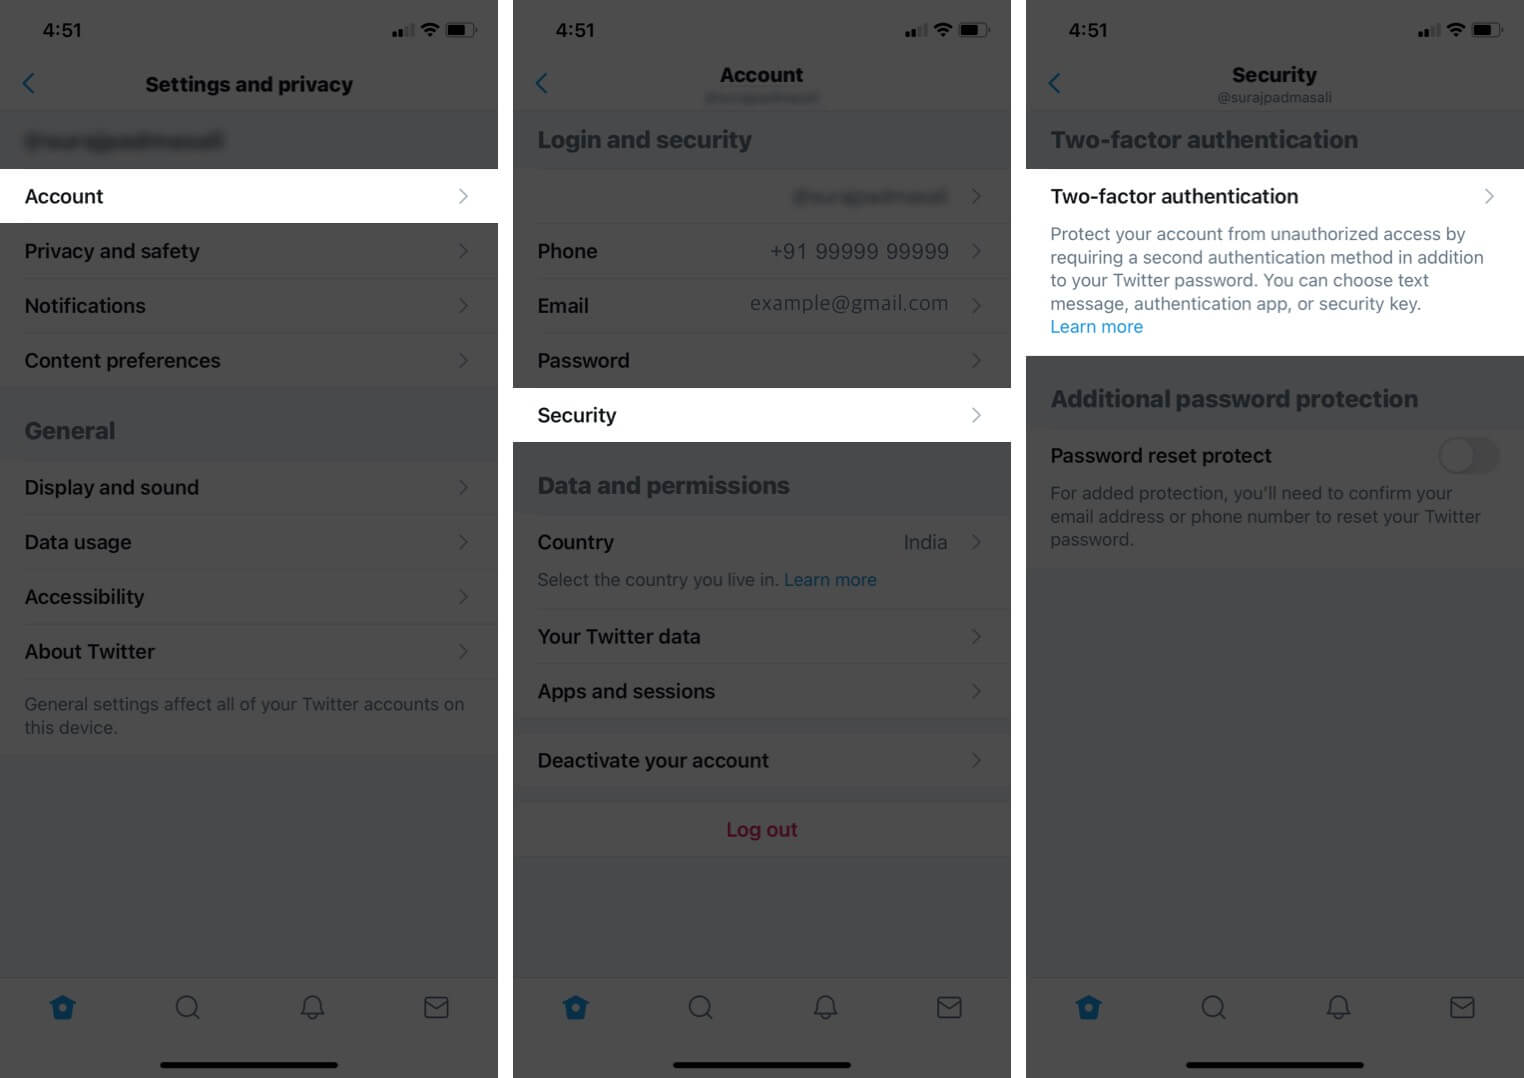
- Tap on the toggle for a Text message.
- Tap on the Get Started to → verify by entering your existing Twitter password.
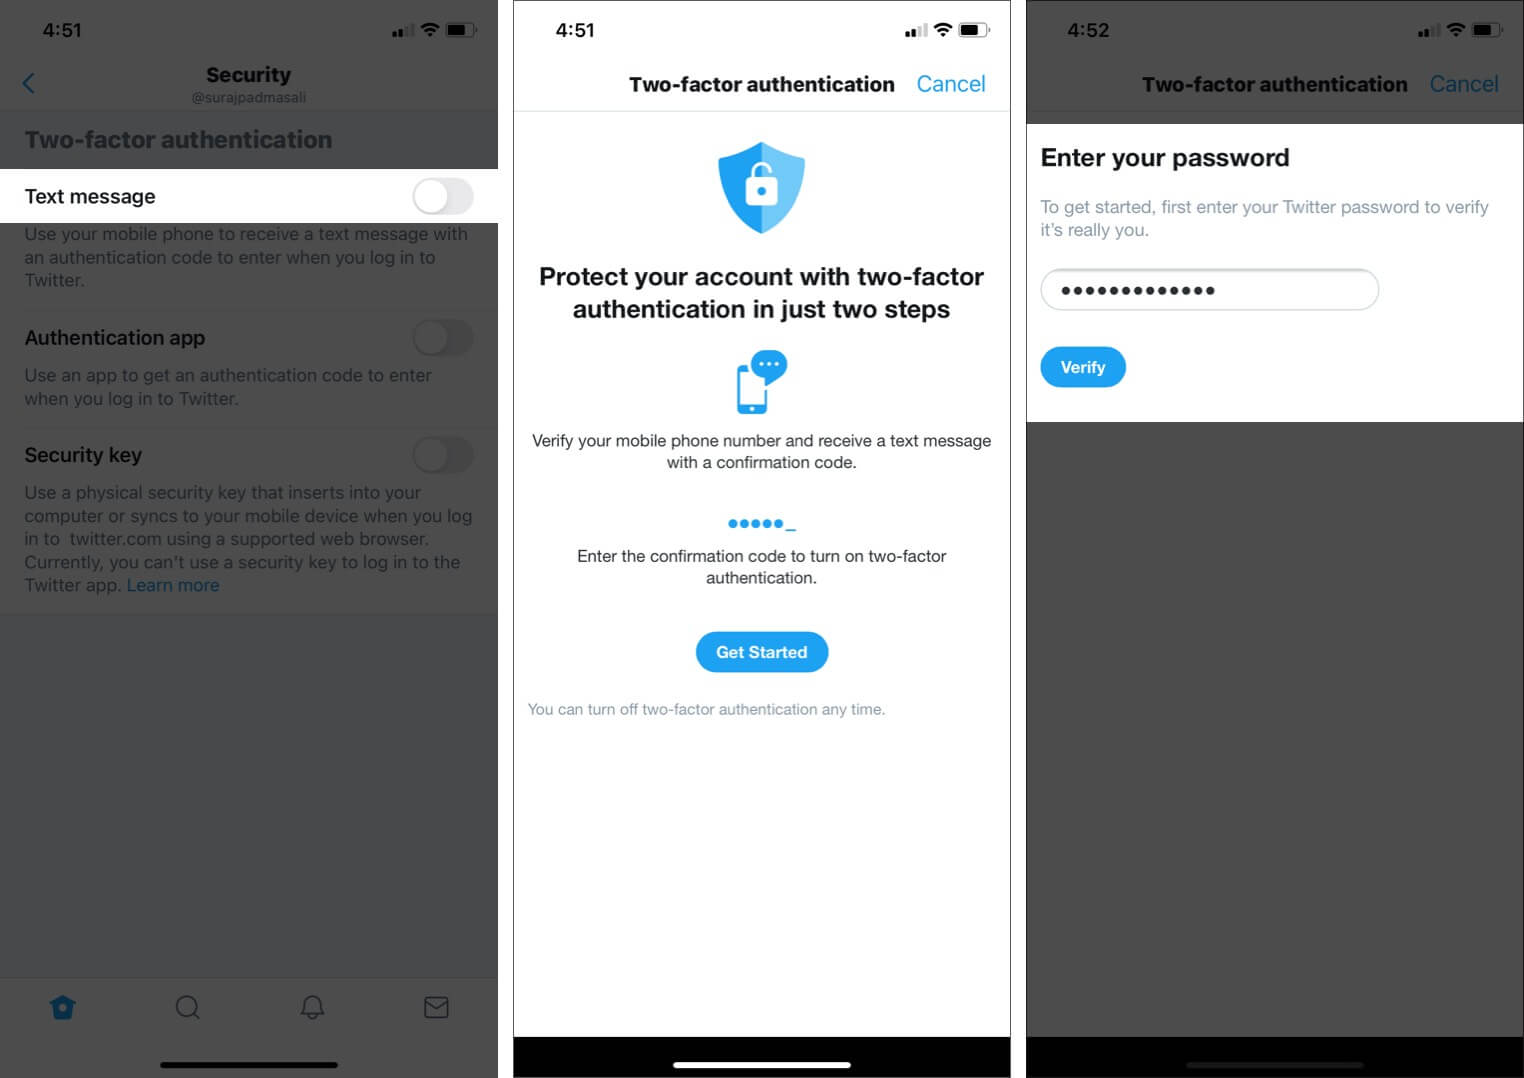
- Make sure the correct country is selected. Then enter your phone number and tap on ‘Next.’ If you have already added your number to Twitter, tap on Send code. Enter the verification code you receive via SMS and then tap on Next.
- Important: At last, you will see a single-use backup code. Take a screenshot, or note it down in notes or somewhere safe. If you misplace your phone number or can’t receive a code via SMS, you can use this to log in.
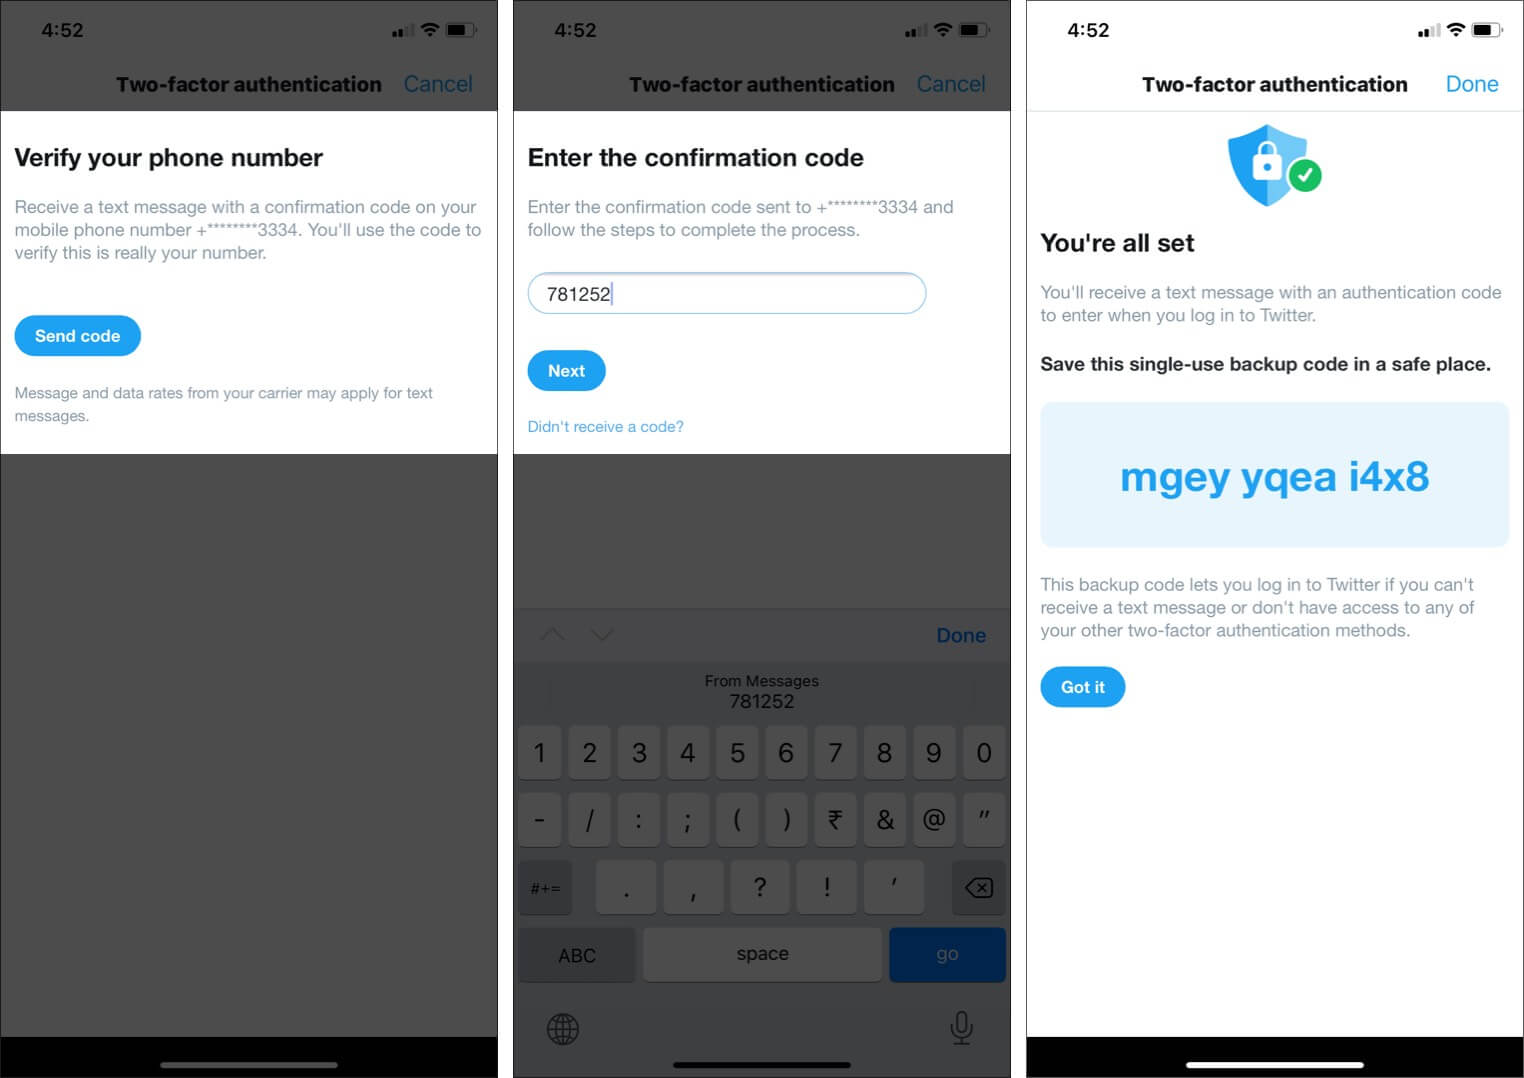
Aftermath: From now, you will receive a text message every time you wish to log in to Twitter. You need to enter the one-time verification code after filling in the correct password.
- Earlier it was: Username + Correct Twitter password = Login
- Now it will be: Username + Correct Twitter password + 2FA code = Login
Enable 2FA via an Authentication App
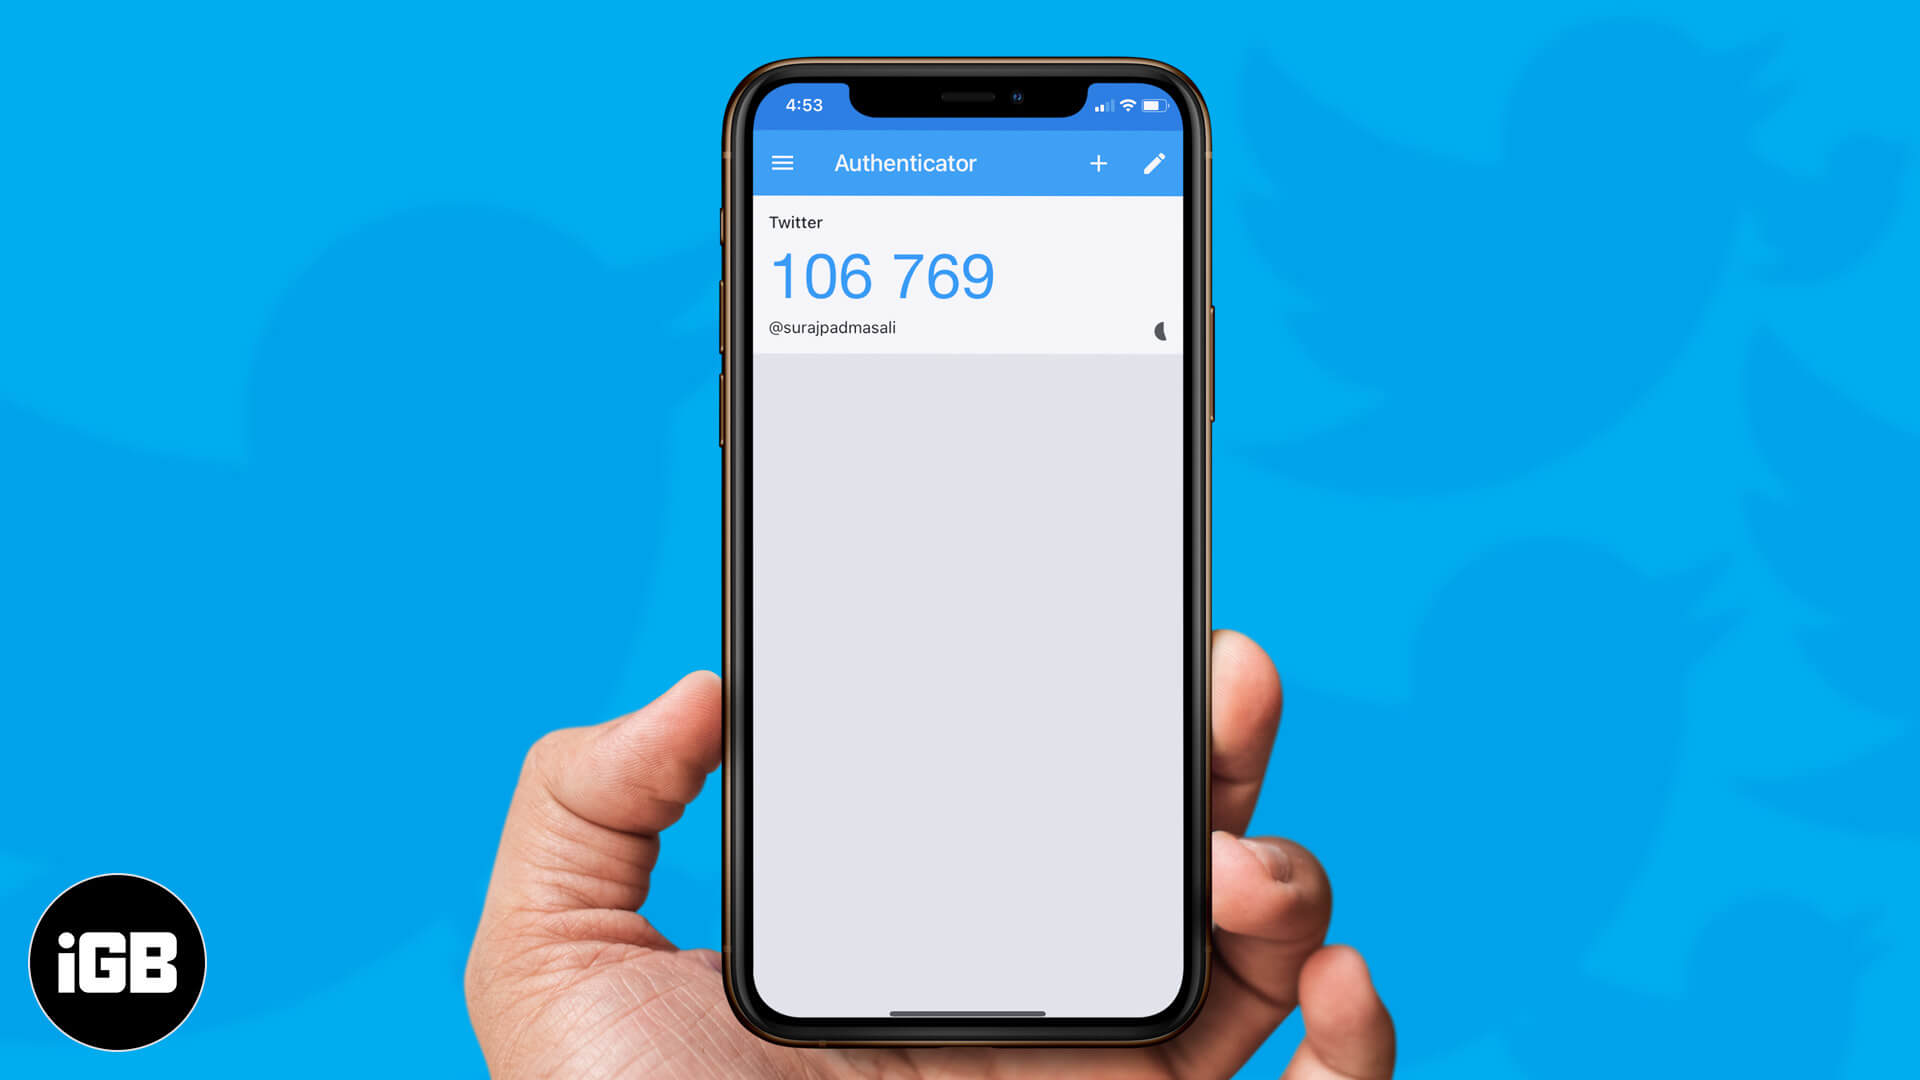
Besides text messages, you can also set any authenticator app to sign up 2FA for Twitter. The initial steps are the same as above.
Before You Begin: Please download an authenticator app from the App Store if you do not already have one. You can use Microsoft Authenticator, Google Authenticator, or any other similar app. In the steps below, I am using Google Authenticator.
- Open the Twitter app and tap on the Hamburger icon from the top-left.
- Next, tap on Settings and privacy → Account → Security → Two-factor authentication.
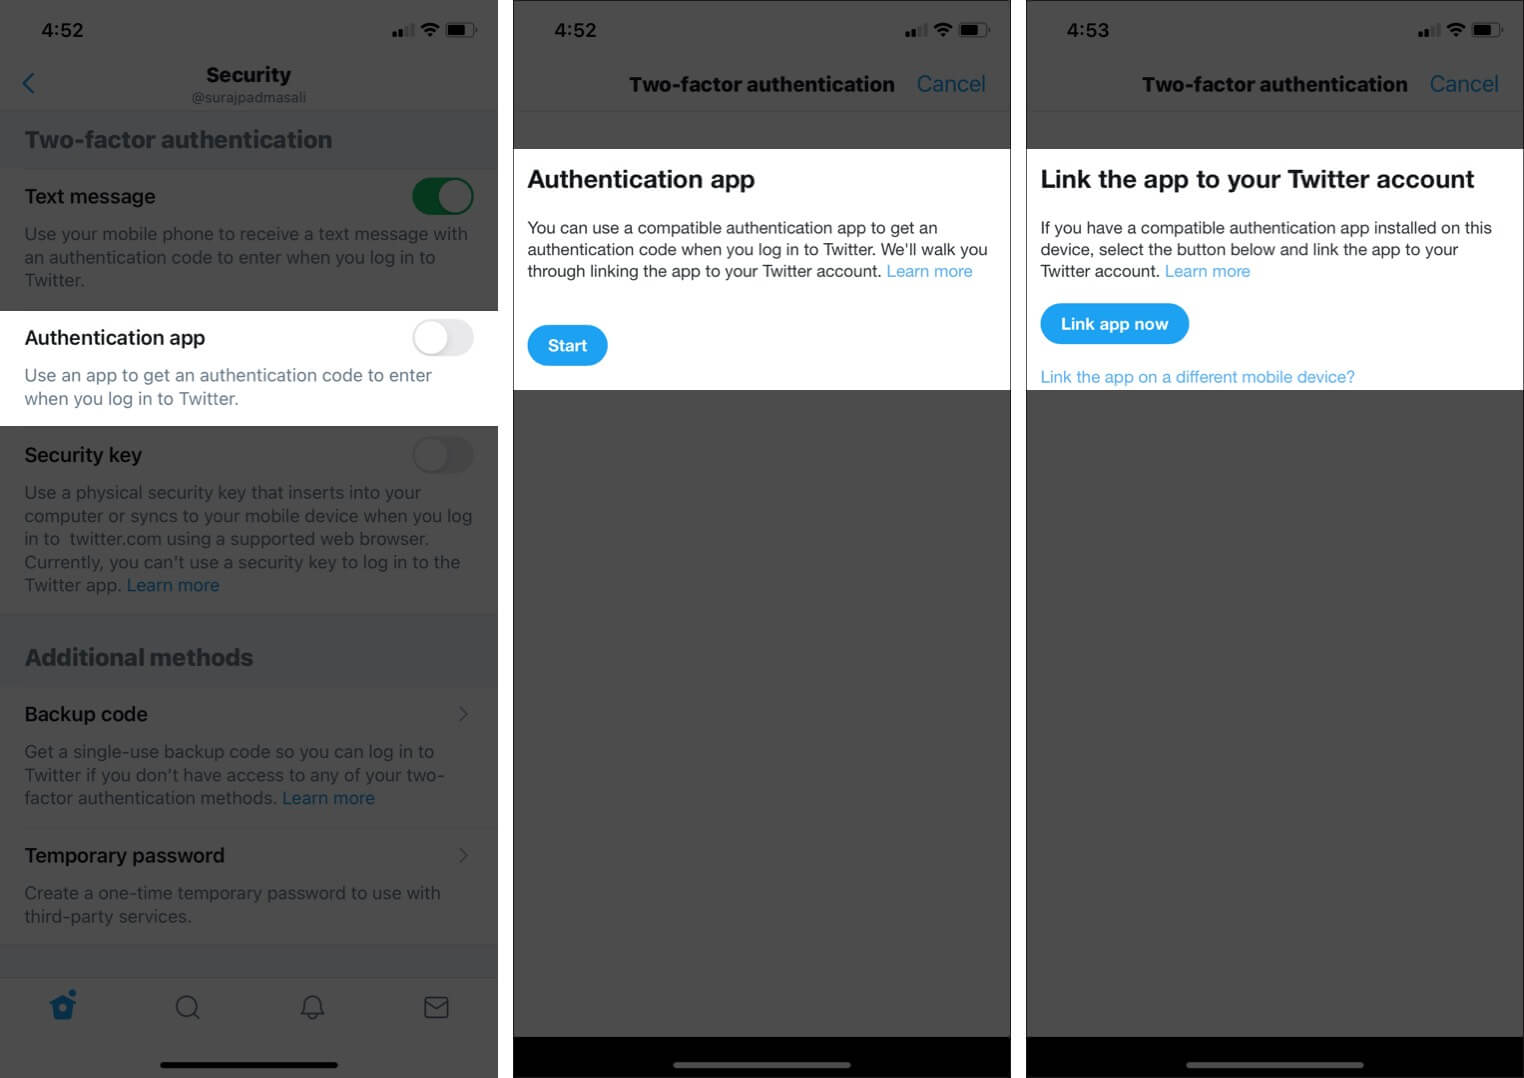
- Tap on the toggle for the Authentication app.
- Tap on Start → Link app now → Open → YES.
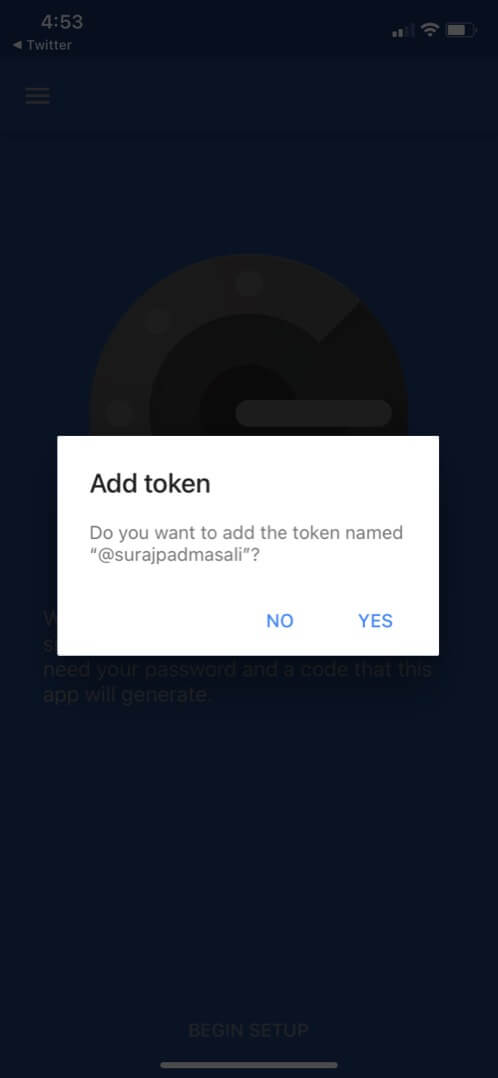
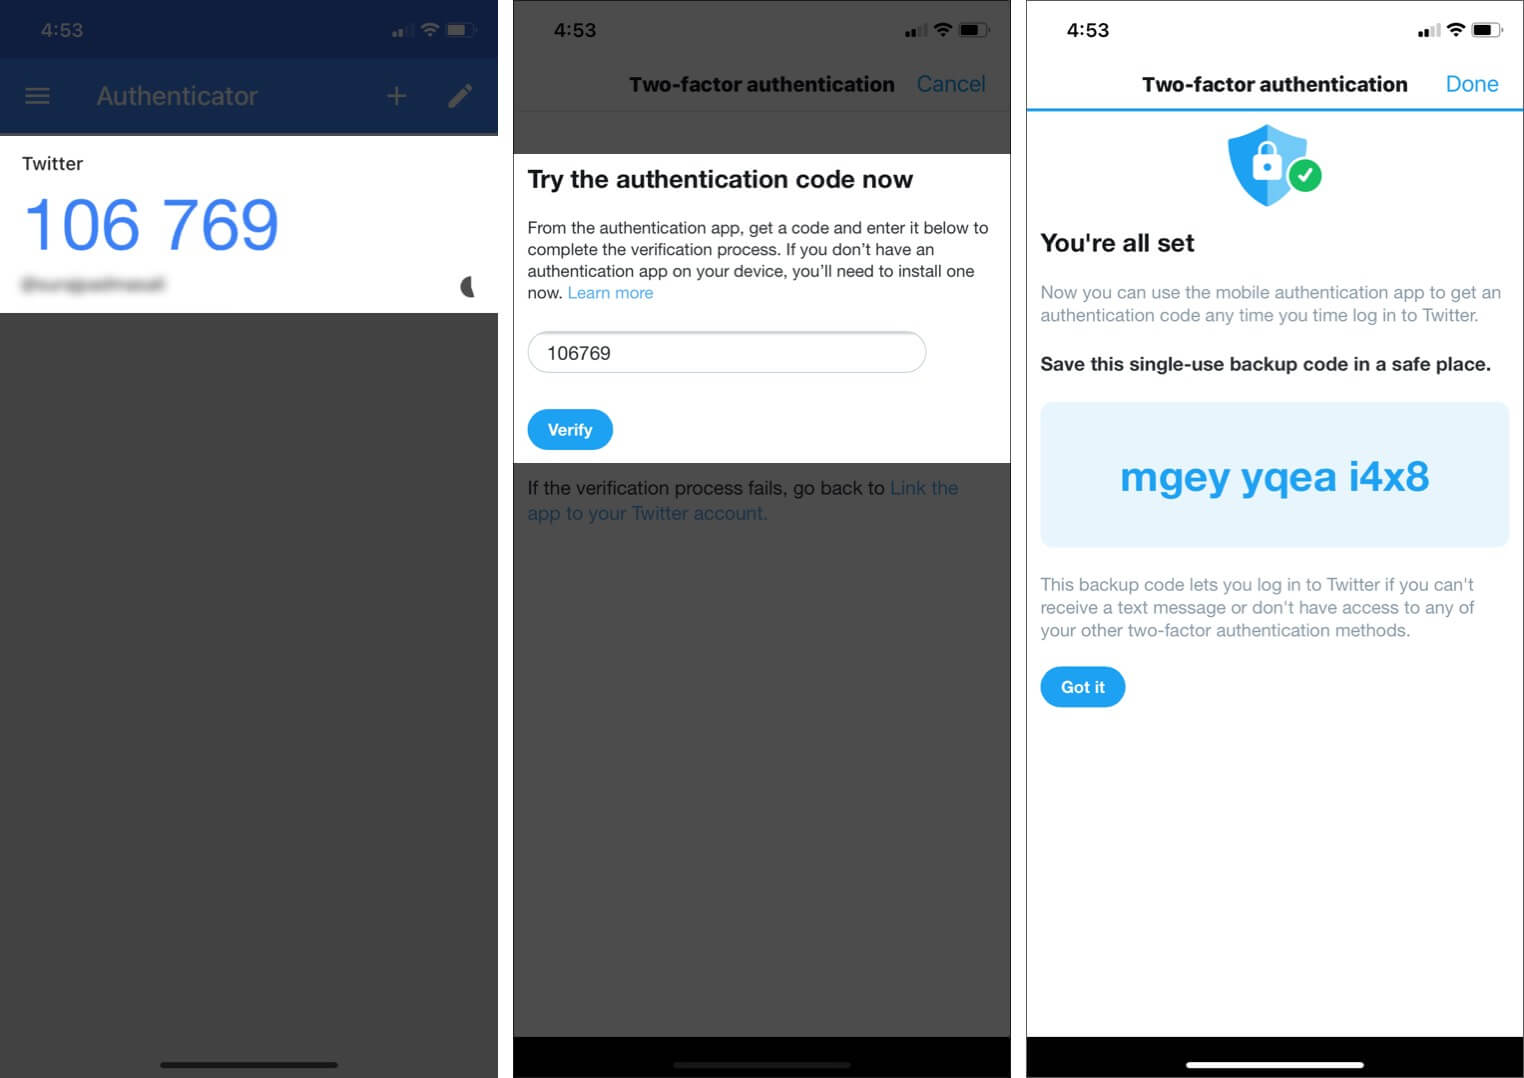
- Now, tap on the six-digit code inside the authenticator app to copy it. Go back to the Twitter app, paste the code there, and finally tap on Verify.
- Important: Take a note of your single-use backup code. Keep it safe.
Enable 2FA via Text Message for Twitter on Computer
Two-factor authentication activation is account oriented and not device-oriented. That means if you enable it on the phone, you will be asked for the 2FA code even when you log in via computer. Now, in case you are on a computer and wish to turn it on for your Twitter account, let me guide. Please note that the steps are similar to the mobile.
- Open Twitter in a desktop browser and click on More from the left side.
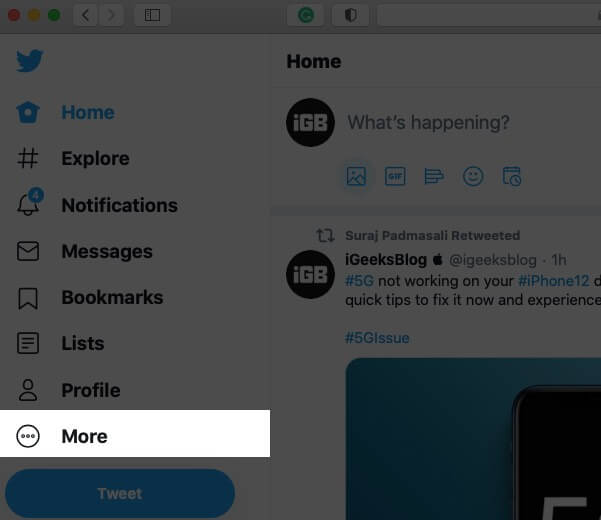
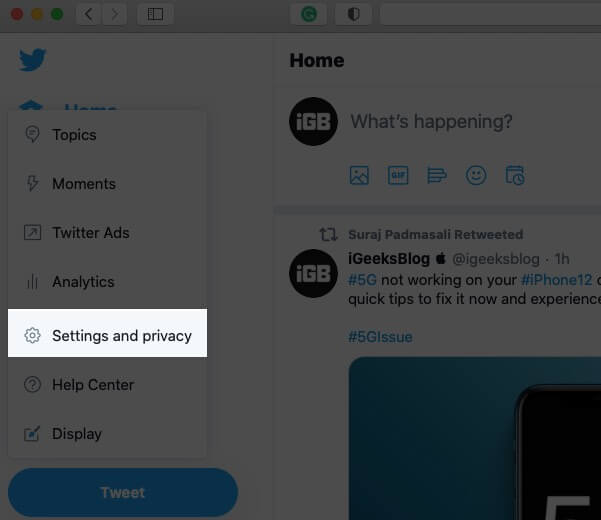
- Click on Settings and privacy → Security and account access → Security.
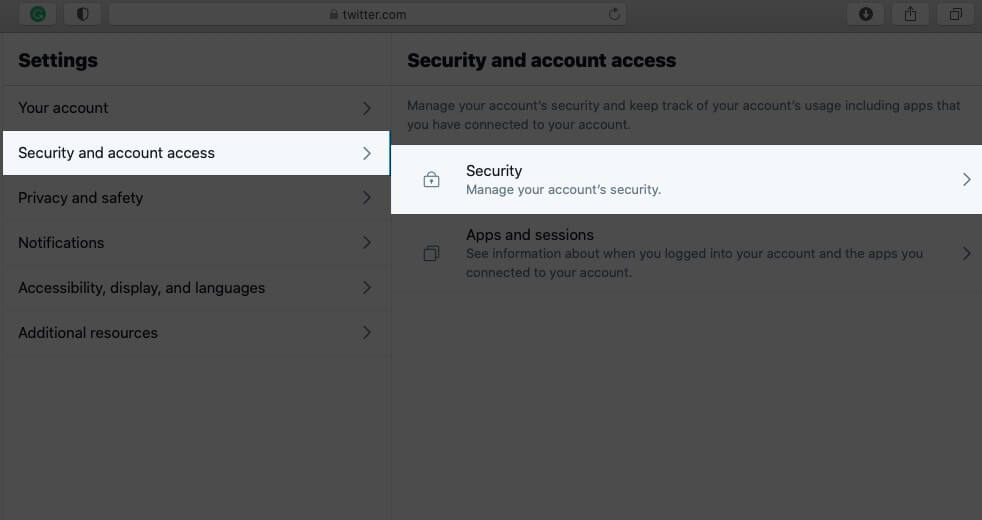
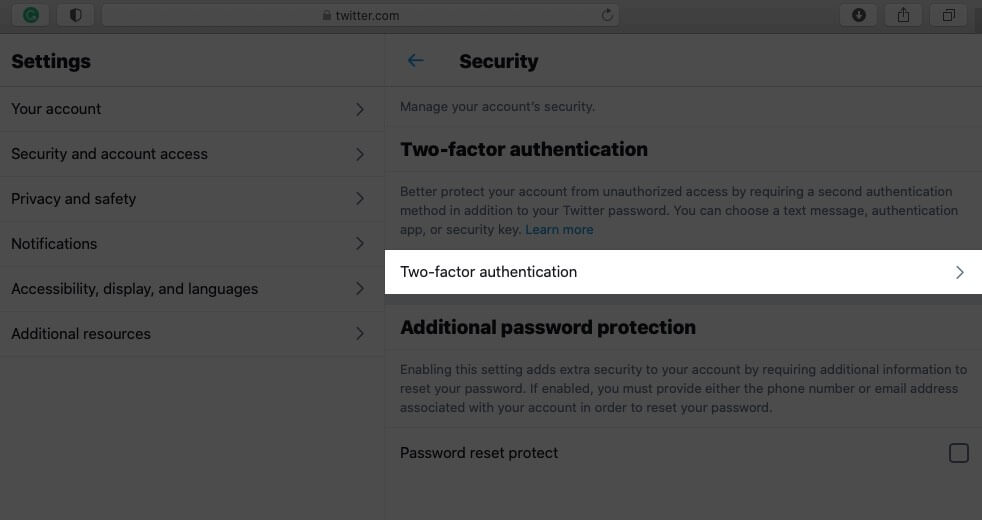
- Click on Two-factor authentication.
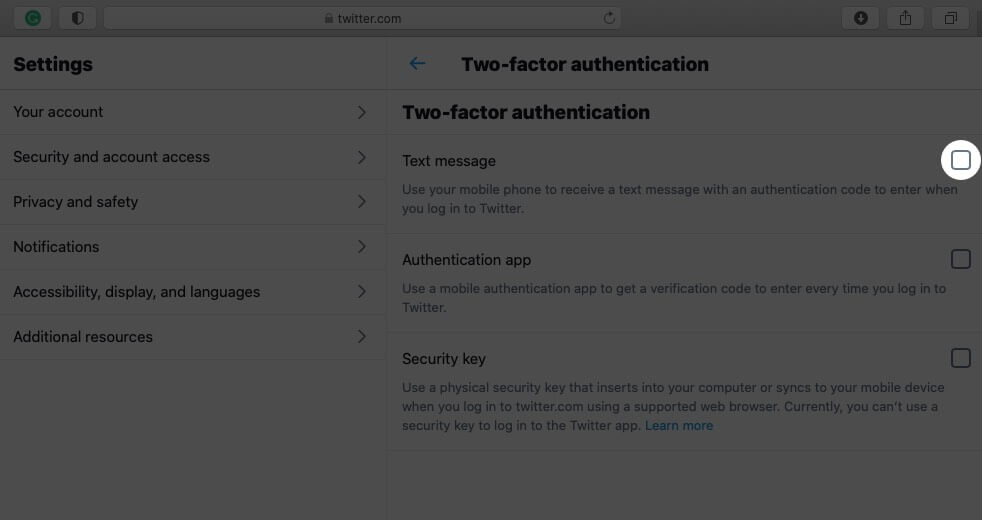
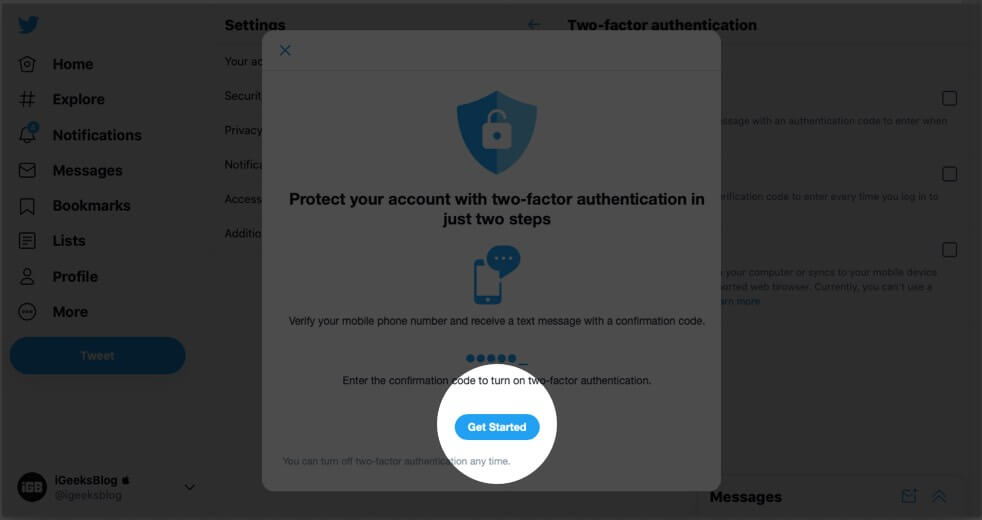
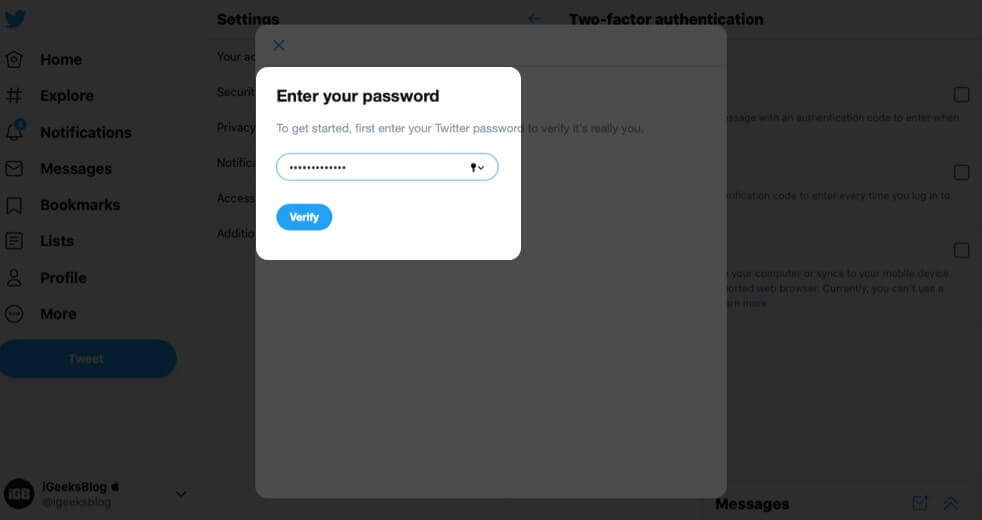
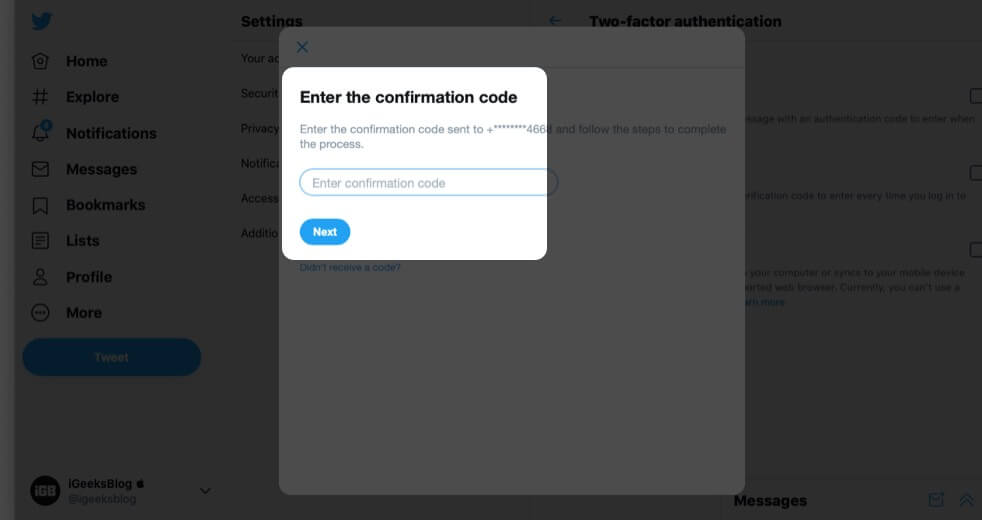
- Check the box for a Text message. Next, click on Get Started. Enter your password when asked.
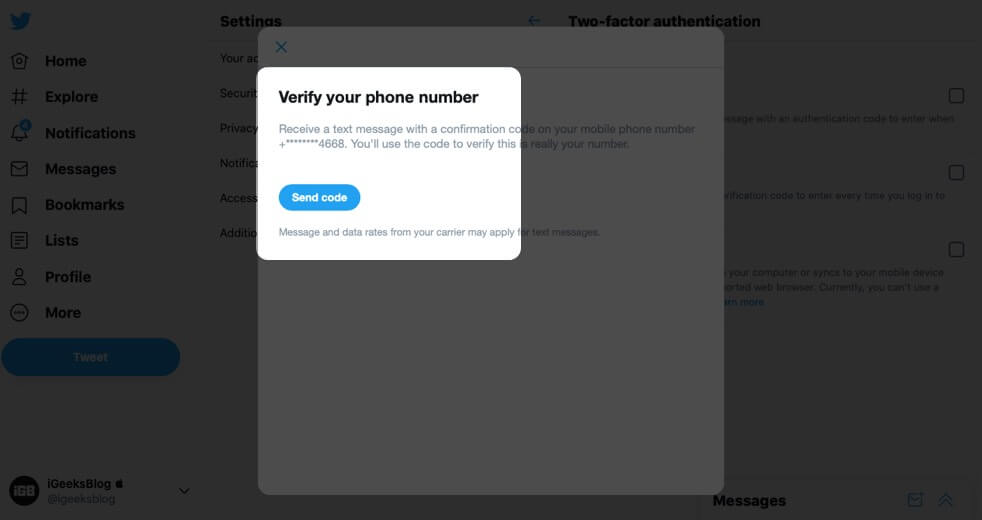
- If a mobile number is already added to your Twitter account, click on Send code. Or, enter your number to receive the text message. Fill in the received code to sign up 2FA. At last, safely note the single-use backup code.
How to Enable 2FA via an Authentication App for Twitter on Computer
The initial steps for this are the same as the above heading. Let me recap. Also, make sure you have an authenticator app on your smartphone, before proceeding.
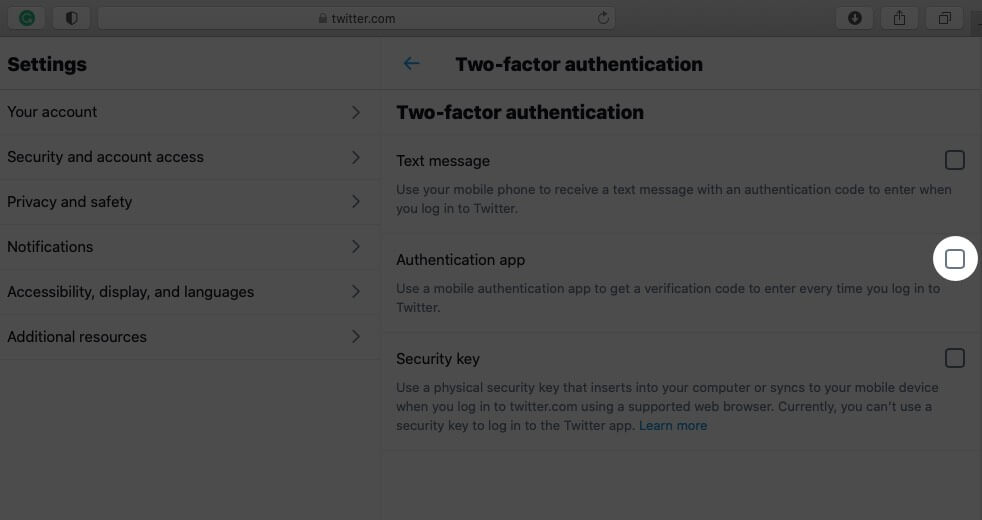
- From Twitter Home, click on More → Settings and privacy → Security and account access → Security → Two-factor authentication.
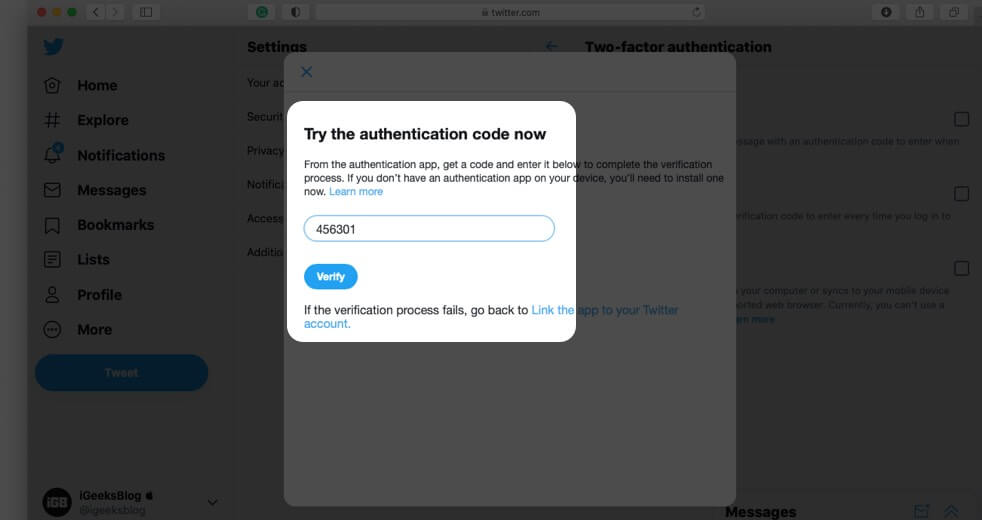
- Check the box for Authentication app. Click on Start, enter your Twitter password, and verify.
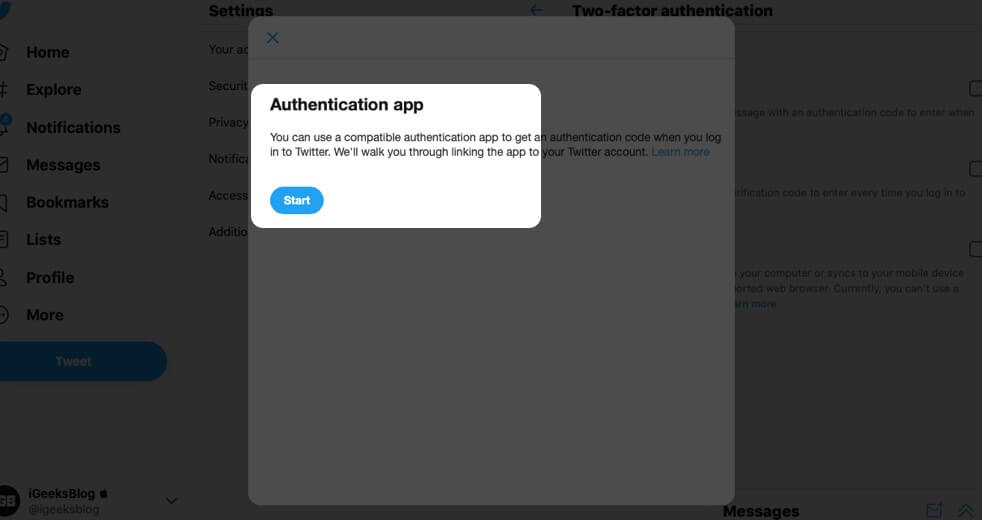
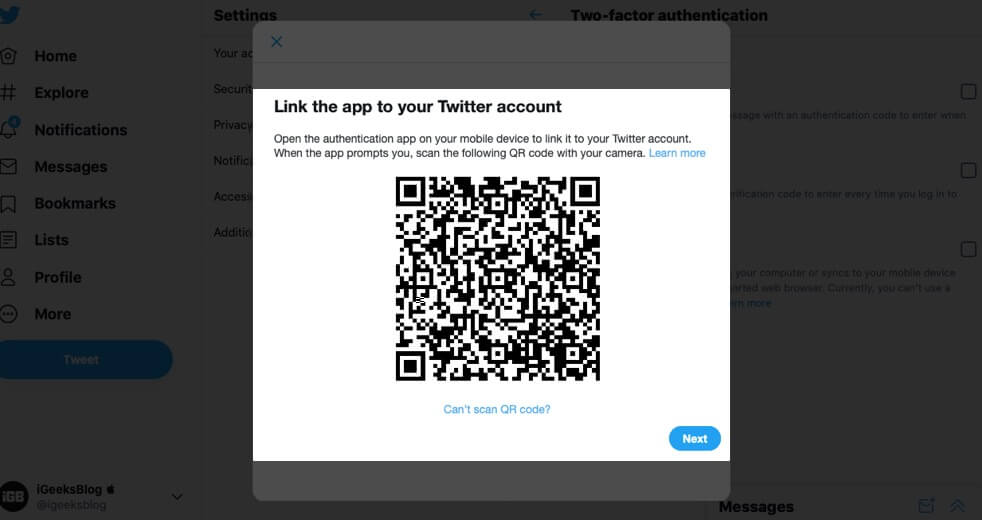
- You will see a QR code. Open any authenticator app on your iPhone or Android phone. Inside the app, you will most likely see a plus icon (+). Tap on it and choose Scan barcode. Now, point your phone to this QR code on the computer. The scan should hardly take a second, and then you will see a code in the authenticator app. Enter the code on your computer to confirm.
How to Enable 2FA via a Security Key for Twitter on Computer
Before You Begin:
- To use this method, you need to have a physical security key inserted into your PC while setting up Two-factor authentication.
- You must turn on two-factor authentication with text messages or an authenticator app before you can proceed with the physical key method.
- After following the same initial steps as the above methods, click on the Security Key option. After reading the instructions, click on Start.
- Connect the physical security key to your Mac or PC via the appropriate USB port. Next, touch it and follow the easy step-by-step instructions.
Generate a Temporary Password for Twitter on iPhone and iPad
- Tap on the Hamburger icon inside the Twitter app and choose Settings and privacy.

- Tap on Account → Security → Two-factor authentication.

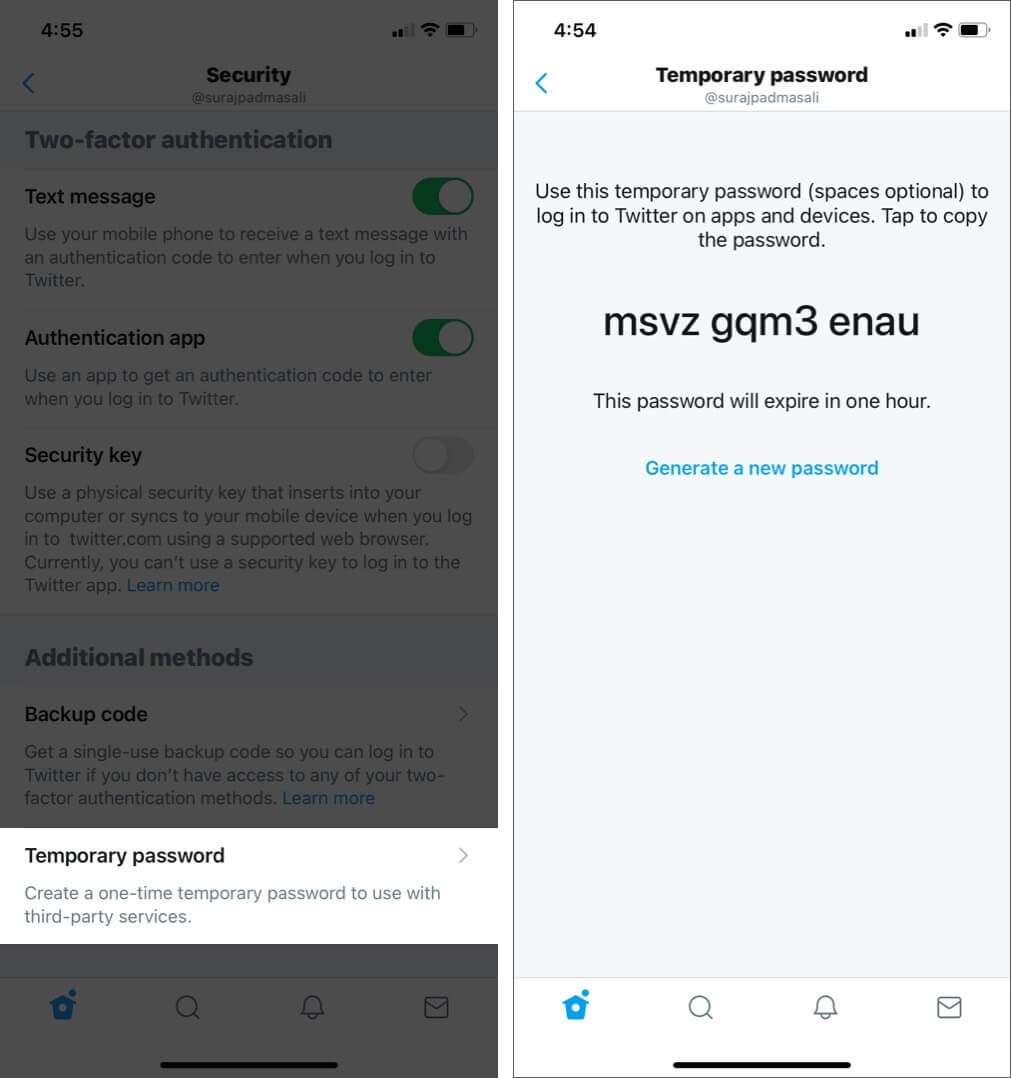
- Under ‘Additional methods,’ tap on Temporary password. You will see a 12 digit password on your screen that is valid for 1 hour only. The same can be used to log in to Twitter on apps and devices.
How to Turn Off Two-Factor Authentication for Twitter
It does not matter which device you used initially to set up 2FA. You can use the Twitter app or computer to disable two-factor authentication. The steps are similar. Here’s how.
- Launch the Twitter app and tap on the Hamburger icon.
- Tap on Settings and privacy → Account → Security → Two-factor authentication.
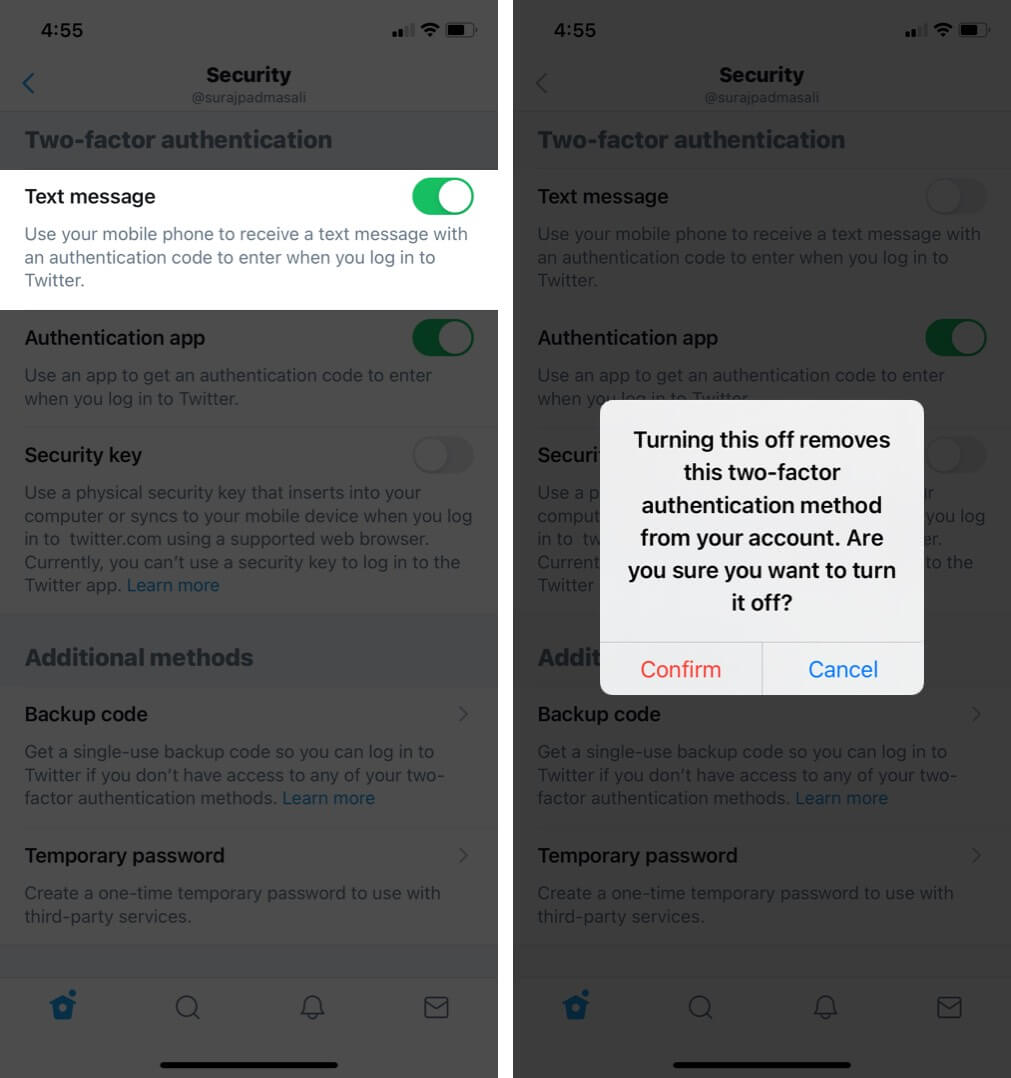
- Turn off the toggle for Text message, Authentication app, or Security key, and confirm.
Signing Off
Suppose someone stole your password or got it from a data breach. Still, they can not log in to your account successfully, as 2FA code is only sent to your phone, generated from the app, or authenticated via the physical key. So, as long as you keep your mobile locked and safe, two-factor authentication does a fantastic job of keeping your Twitter account safe and secured.
Have a few minutes? Take a moment to read about enabling 2FA for other accounts as well.
You may also like to read these:

