Have you heard rumblings about a new Apple feature for security updates on iPhone, iPad, and Mac? Called Rapid Security Response, this feature can keep your devices up to date when a defect is found in a recent system upgrade.
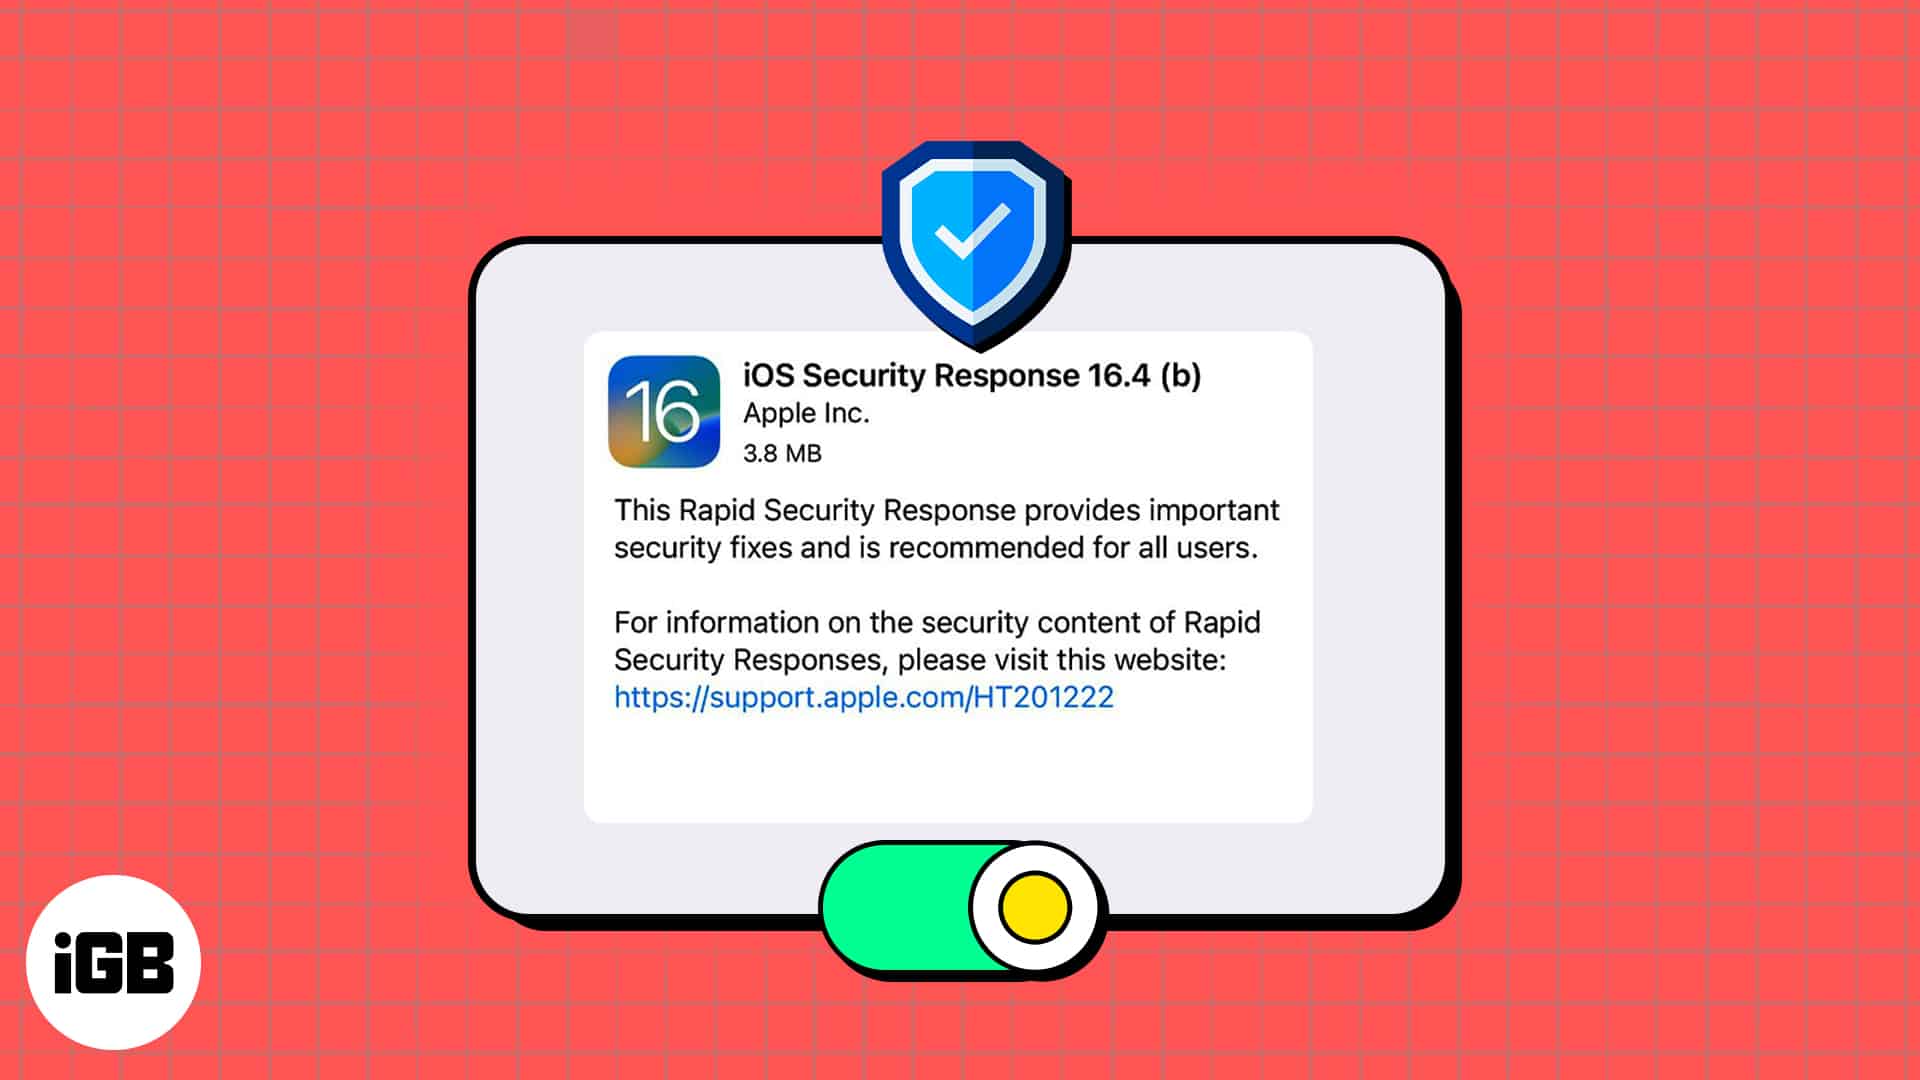
Let’s take a look at what Apple’s Rapid Security Response feature is and how to enable it to keep your devices more secure.
What is Apple Rapid Security Response update?
Rapid Security Response is a system that Apple uses to send frequent security fixes to device users. The feature was introduced with iOS 16.2, iPadOS 16.2, and macOS 13.2.
In some cases, you may not have to restart your device after these updates. However, if the fixes from the Rapid Security Response involve the operating system, your device may require a restart.
These security updates apply to the most recent operating system version. So, if the operating system upgrade is delayed, the security update will be as well.
Rapid Response Security versioning includes lowercase letters starting with “a”. For instance, you may see “iOS 16.4 (a)” as a version number. If there is more than one update, it’ll include more letters such as “a,” “b,” “c,” and so on.
Although this update feature may be enabled by default on your Apple device, here’s how to check and manually turn it on.
How to turn on or off Rapid Security Response updates
You can turn on the Rapid Security Response feature easily in iOS 16.2 or later and macOS 13.2 or later by following the steps below.
On iPhone or iPad
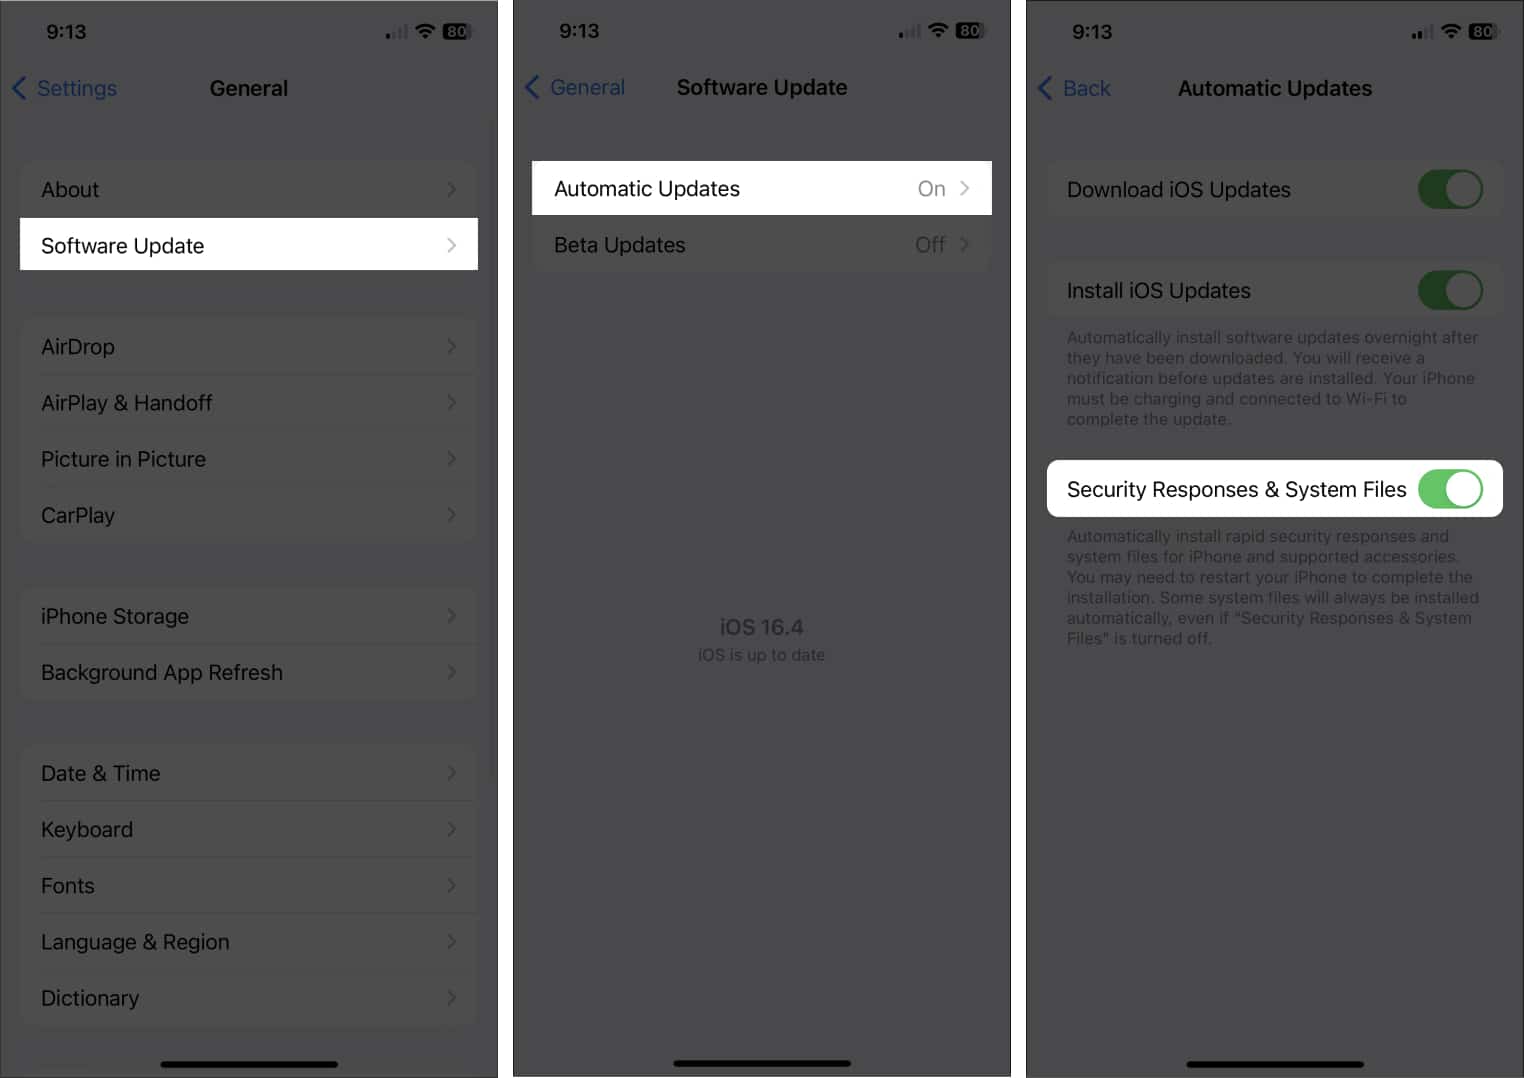
- Open the Settings app → tap General.
- Select Software Update → choose Automatic Updates.
- Toggle on Security Responses & System Files.
Note: You can have this feature enabled without the two options above it.
On Mac
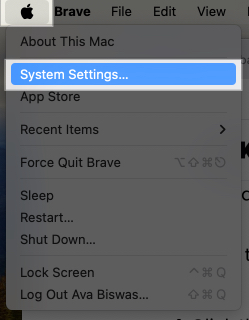
- Click the Apple logo on the menu bar → select System Settings.
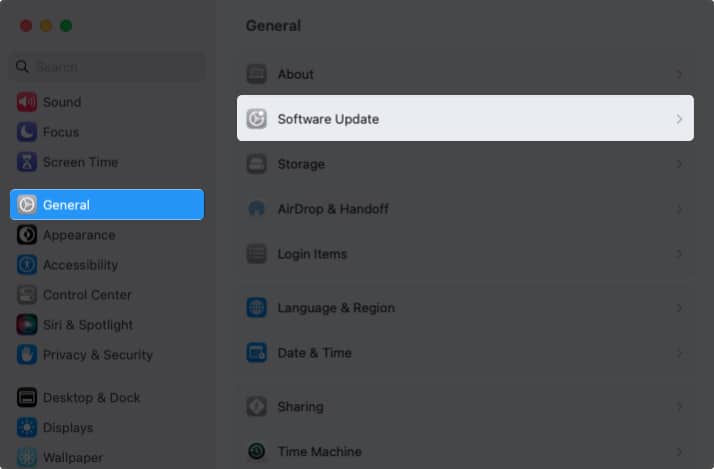
- Select General on the left side → choose Software Update on the right.
- Click the info icon (i) to the right of Automatic updates.
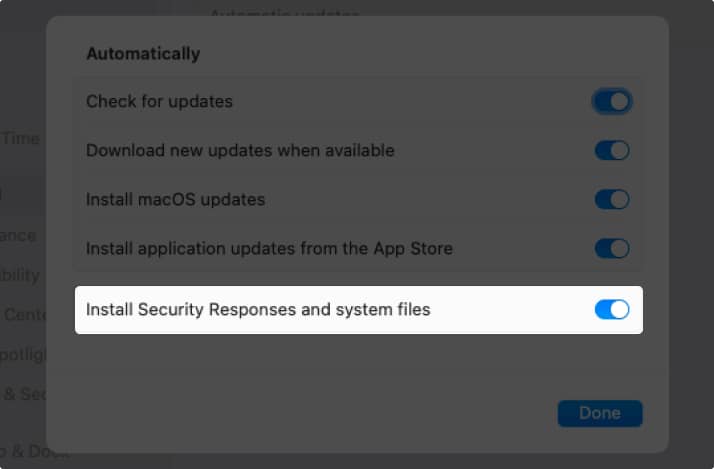
- Toggle on Install Security Responses and system files.
Note: You must enable the top toggle for Check for updates to use this feature on macOS. - Click Done to save the change.
How to remove Rapid Security Response updates
Although not recommended, if you have issues as a result of a Rapid Security Response update, you can remove it from your device.
On iPhone and iPad
- Open the Settings app → tap General.
- Select About.
- Tap the iOS Version or iPadOS Version near the top.
- You’ll see the update with an option to remove it. Remember to look for the Rapid Security Response indicator, as explained earlier.
- Select Remove Security Response to delete the update.
Tips: You might also look at how to delete a problematic software update on your iPhone or iPad.
On Mac
- Open System Settings on your Mac.
- Select General on the left side and About on the right.
- Click the Info icon to the right of your macOS version.
- Select Remove to delete the update.
Why you should use Apple’s Rapid Security Response feature!
Security updates are crucial to keeping your devices safe as well as the data stored on them. If a flaw is discovered in a recent system upgrade and Apple provides a Rapid Security Response update to fix it, you can now install it by enabling this automatic feature. And because you can remove an update if a problem arises, it’s worth it, wouldn’t you agree?
For more, look at these ways to secure your Apple ID on iPhone, iPad, and Mac.
Read more:


Great breakdown of Apple Rapid Security Response! I had no idea this feature existed until now. It sounds like a game changer for keeping our devices secure. I’ll definitely be enabling it ASAP. Thanks for the clear steps!
Thanks for this informative post! I had no idea about Apple Rapid Security Response until now. The step-by-step instructions on enabling it were super helpful. Keeping devices secure is so important these days!
Great post! I appreciate the clear explanation of Apple Rapid Security Response and how it works. It’s comforting to know that Apple is focused on security and has ways to address vulnerabilities quickly. I followed your steps to enable it on my devices, and it’s good to feel more secure. Thanks for sharing!