Private tab in Safari is useful for temporarily logging in to a different social account, preventing yourself from web trackers profiling you, or browsing the web privately. However, if you hand over your Mac to someone else, especially kids, at times, it becomes important to know what they do on the web. And even prevent them from accessing websites they wish you not find out. For such situations disabling Safari private browsing on your Mac is a great solution. It makes sure that the sites they visit are shown in the browsing history.
So, if you are looking to turn off private browsing in Safari on Mac, you’ve come to the right place.
How to close Safari private browsing window on Mac
Private browsing in Safari is handy when surfing the web without leaving any traces. But there might be times when you need to switch back to regular browsing mode.
- Head to Safari’s private browsing window.
- Open the tab you want to close.
- Click the x next to the tab’s name.
Else, press cmd (⌘) + W to close it.
In this manner, close all the incognito windows to exit private browsing mode on Safari. If you want to close all tabs, including your standard browsing windows, press cmd (⌘) + Q on your Mac keyboard.
How to turn off Safari private browsing on Mac using Screen Time
If you only exit incognito windows, anyone can open it again quickly. So, you must permanently disable private browsing in Safari so no one can access it on your Mac.
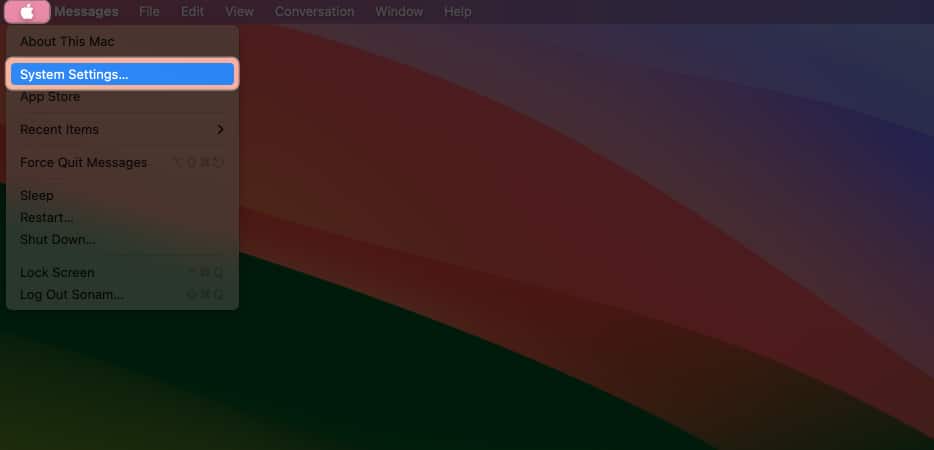
- Click the Apple logo () in the menu bar → Choose System Settings.
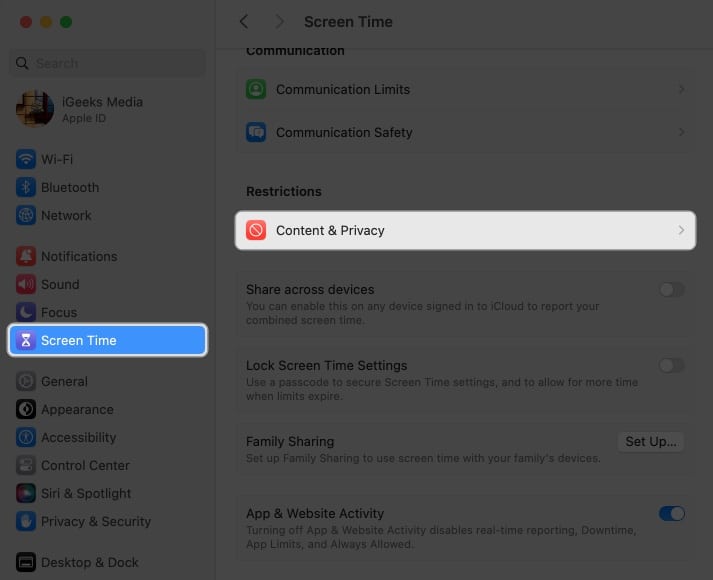
- Head to Screen Time → Select Content & Privacy.
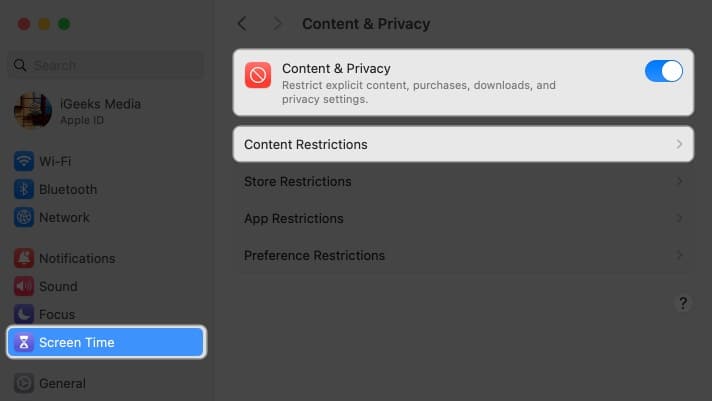
Ensure that you’ve enabled Screen time for your Mac. - Turn on Content & Privacy → Navigate to Content Restrictions.
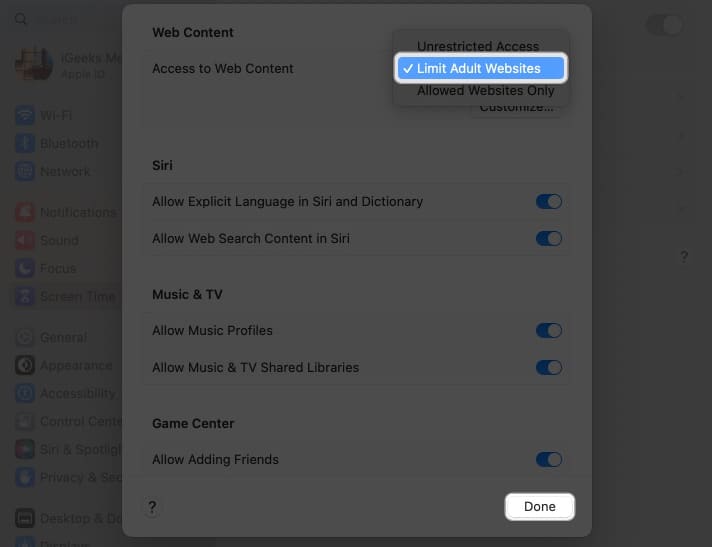
- Click the dropdown next to Access to Web Content → Select Limit Adult Websites → Done.
Now, launch Safari and click File from the menu bar. You will see the New Private Window option is grayed out. Also, the keyboard shortcut to open an incognito window won’t work. Besides, when you click History from the menu bar, you will see the Clear History option is also disabled.
Therefore, you can track all Safari browsing activities of anyone logged into your Mac user account.
To enable Safari Private Browsing back on Mac, follow the same steps and choose Unrestricted Access, which is just above Limit Adult Websites.
Safari Private Browsing Restrictions are synced to all your Apple devices that have the same Apple ID. So, if you enable Limit Adult Websites on your Mac, it is turned ON for your iPhone and iPad too. So, if you do not want this, Go to Screen Time → Toggle on Share across devices.
For further protection, you may remove private browsing mode in Safari on Mac for guest users.
How to disable Safari private browsing for Guest Users on Mac
- Navigate to the Apple logo () → Choose System Settings.
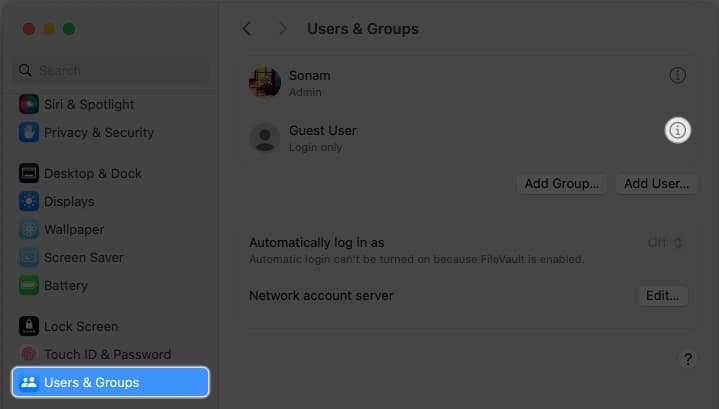
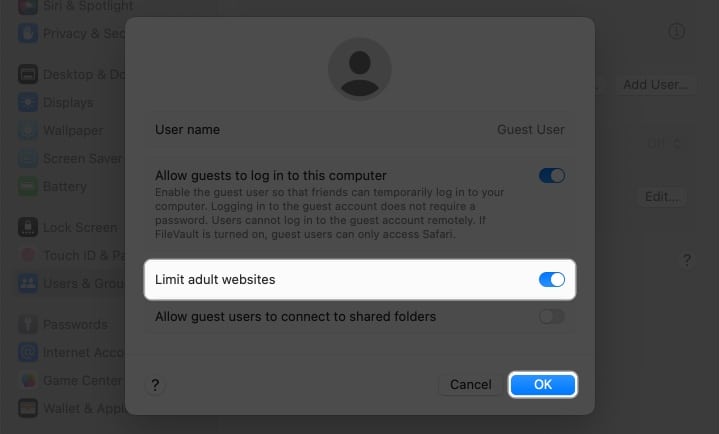
- Select Users & Groups → Click the info button next to Guest User.
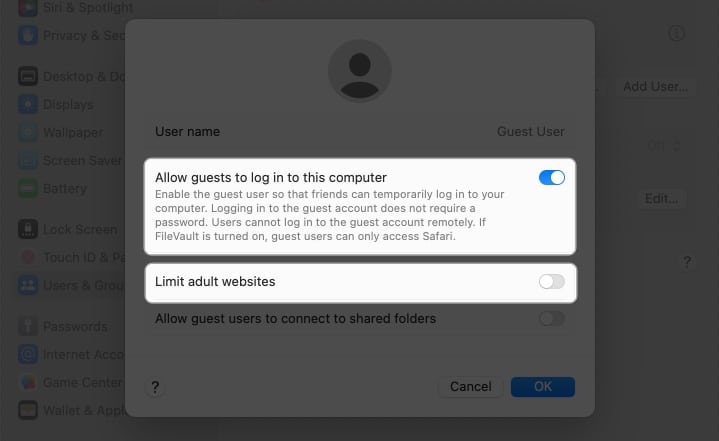
- Ensure that Guest Mode is active → Toggle on Limit adult websites.
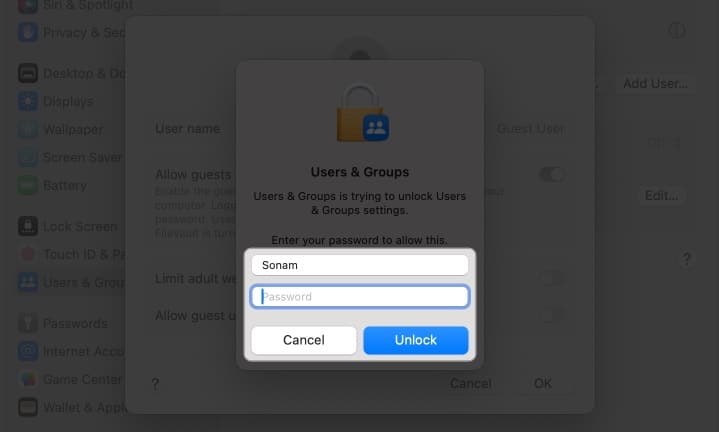
- Enter your Mac Password → Hit Unlock.
- Finally, click OK.
Get rid of Incognito Mode on Mac quickly!
I hope the above guide has helped disable Safari’s private browsing mode on Mac. However, remember that doing this won’t stop someone from using incognito mode or private browsing in other web browsers like Chrome, Firefox, and others on their Mac.
Read more:

