The Calendar app on the iPhone and iPad is a handy tool that lets you add, edit and delete events. It makes sure you do not miss birthdays, anniversaries, holidays, and special days. What’s even better is that once you add an event, say friend’s birthday, you can set it as a recurring event. It will remind you every year. All this is wonderful. But what if you add or have an event that you no longer need? Well, no problem. It is effortless to delete calendar events on the iPhone or iPad. Let us see how to do it:
How to delete Calendar Event from iPhone
- Launch Calendar app → Access the Date of the occurring event.
- Select the Event for the respective date.
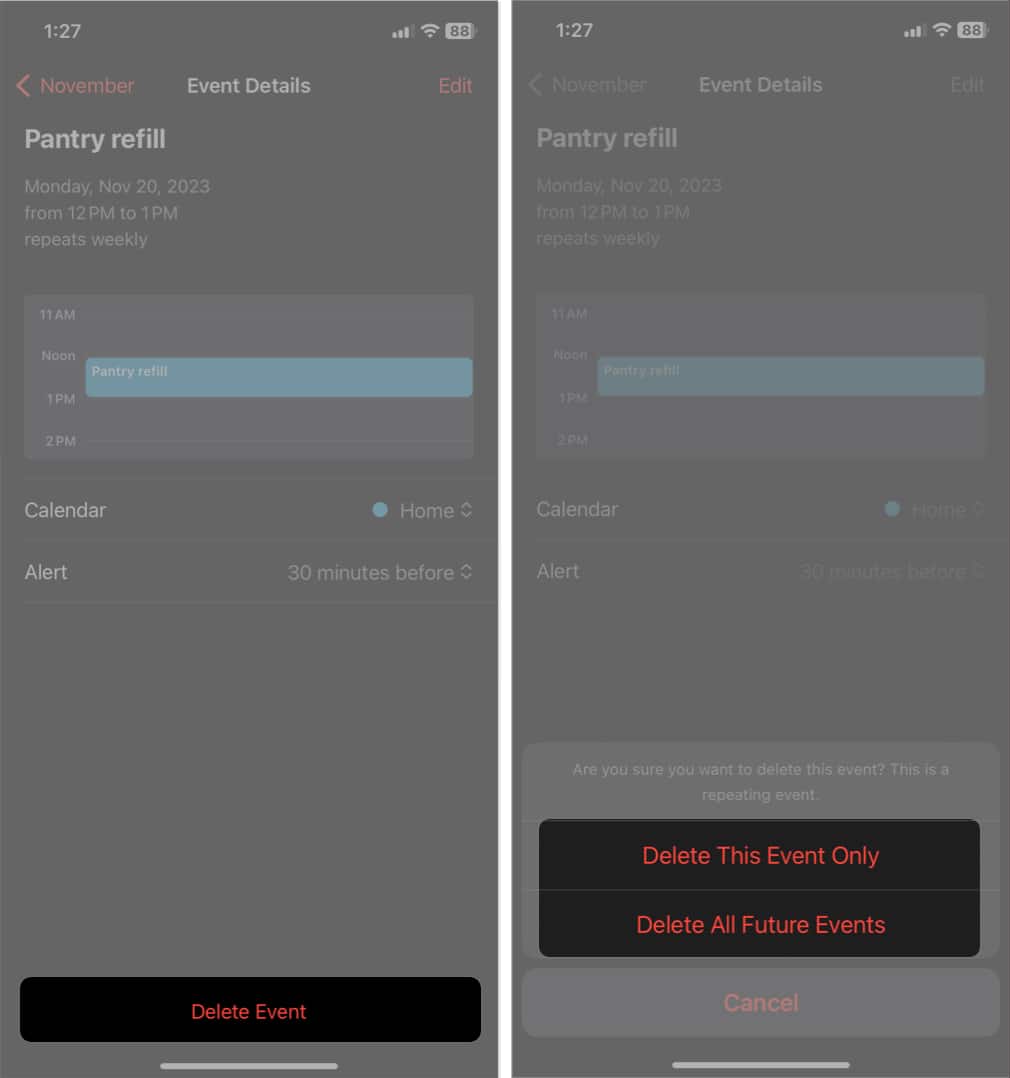
- Tap Delete Event → Delete Event when prompted.
Delete a repeated event in the iPhone Calendar
When it comes to deleting a recurring event in the iPhone Calendar, there are two ways to proceed:
- Follow the steps discussed above → Select one of the following:
- Delete This Event Only: This will only remove the particular event.
- Delete All Future Events: The action will delete the event for all recurring dates.
- Choose what suits your preference, and you’re good to go!
How to delete subscribed Calendar on iPhone
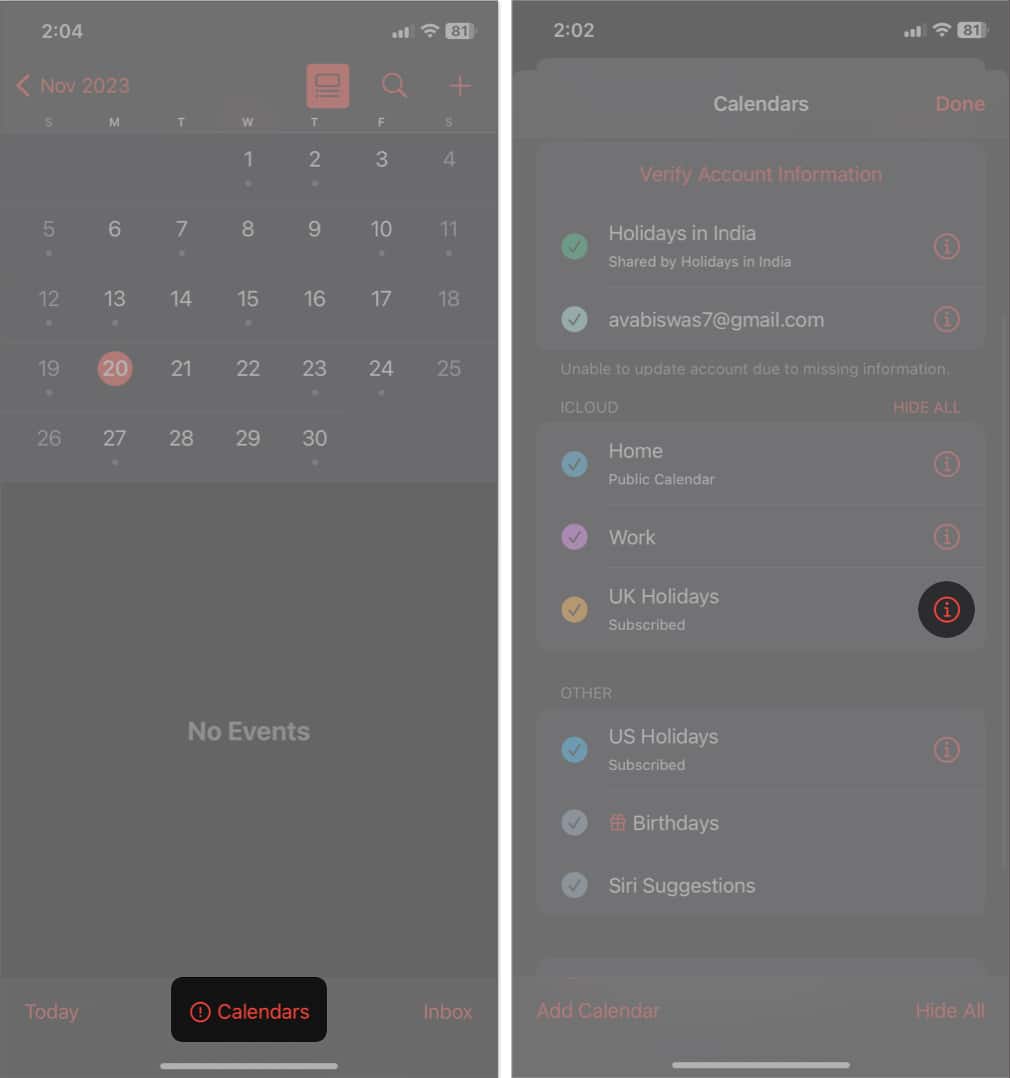
- Go to the Calendar app → Tap Calendars.
- Select the info button beside the subscribed calendar.
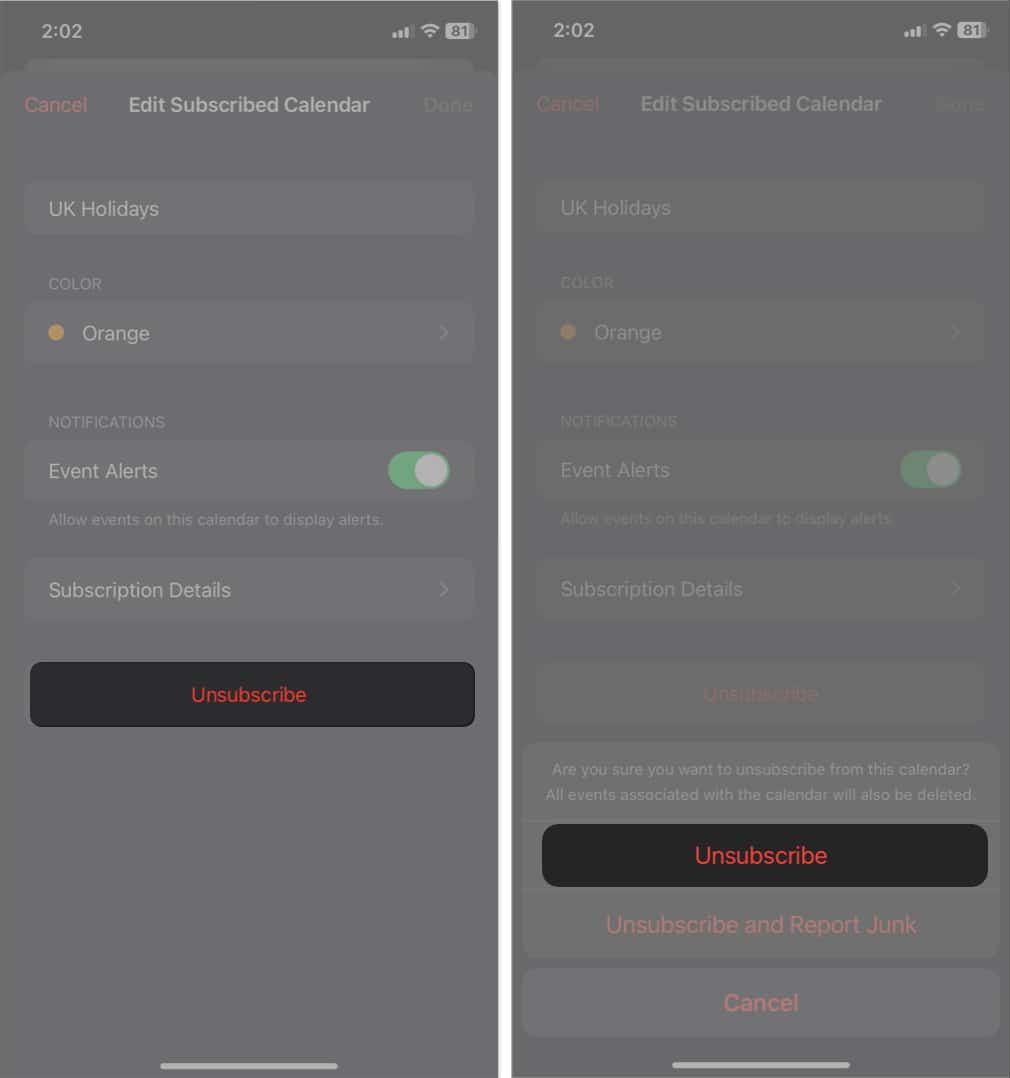
- Tap Unsubscribe → Select Unsubscribe to confirm.
That’s all. You’ll now receive no alerts from the respective calendar. If you don’t see the unsubscribe option, simply toggle off Event Alerts to stop receiving notifications.
How to delete an entire calendar on iPhone
If your Calendar is filled with too many reminders, maybe it’s time to tidy them up. To do so:
- Head over to the Calendar app on your iPhone.
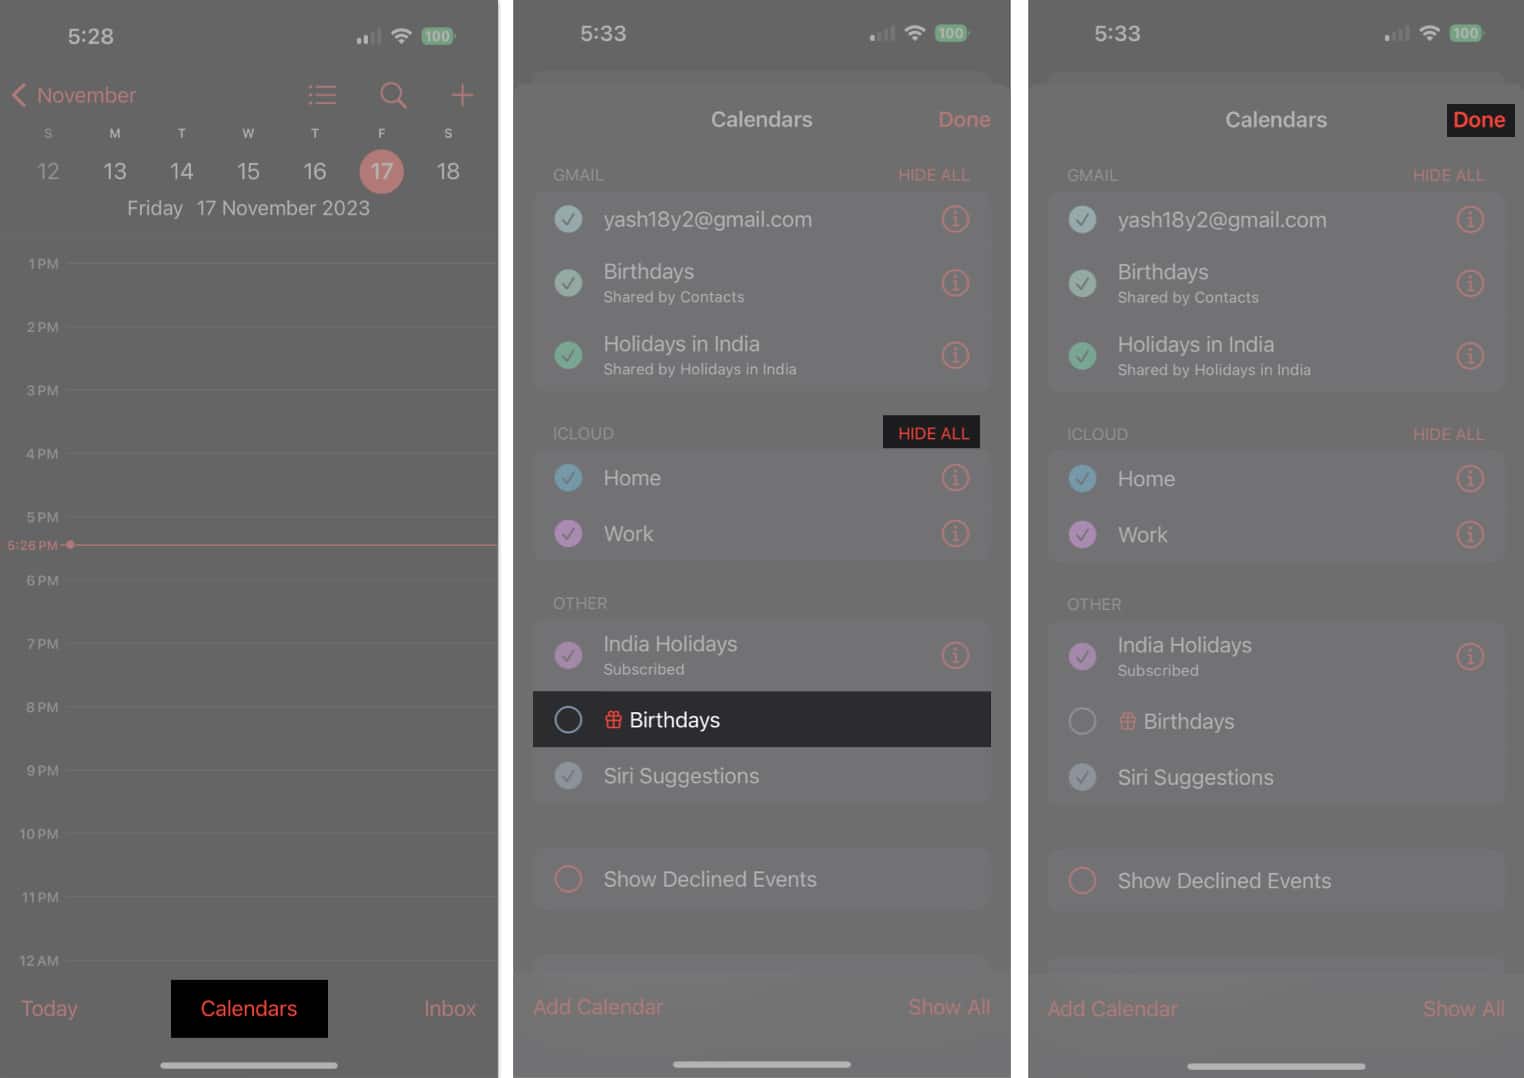
- Tap Calendars → Uncheck the calendar.
- You can even tap Hide All to silence reminders of an entire category.
- Tap Done to save your preferences.
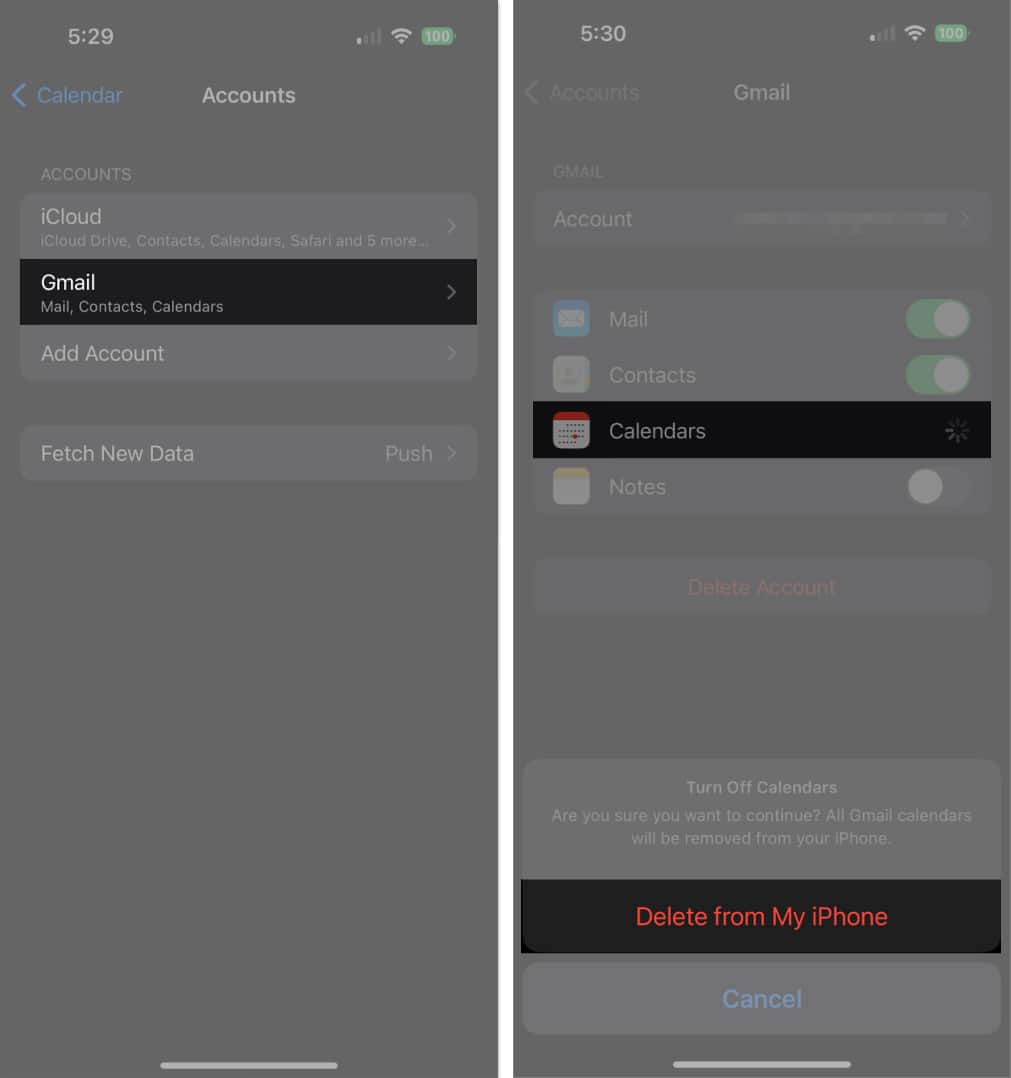
This allows you to avoid unnecessary pings from your Calendar app. However, if you wish to perform a full sweep, there is a discreet way of doing so - Navigate to Settings → Calendar → Accounts.
- Select the account you seek to delete the calendar event for.
- Toggle off Calendar.
- Hit Delete from my iPhone to remove the entire calendar.
How to delete a shared calendar event on iPhone
In the case of avoiding reminders from a shared calendar, it’s pretty much about accepting or rejecting an invite.
- Access the date on which you received a calendar invitation.
- Here, tap Decline to delete a shared calendar event.
Note: Though you remove the activity from your calendar, you can still retrieve it from your Inbox if you change your mind.
Master the art of organization!
Taming your calendar chaos on iOS is now a breeze. Deleting calendar events on your iPhone or iPad is a simple yet powerful skill that ensures your digital workspace stays sleek and efficient. Until next time, keep those calendars clean and your schedules even cleaner.
Thank you for reading. Please take a moment to leave your thoughts in the comment sections below.
FAQs
If you can’t delete an event, it might be a shared or subscribed calendar event. In such cases, you may need to ask the calendar owner to remove it or unsubscribe from the calendar.
Once an event is deleted, it cannot be recovered directly from the Calendar app. However, if you have a backup of your device, you may be able to restore the calendar data from that backup.
Read more:


